We’re delighted to review the talented Uyen Luu and her latest cookbook, Quick and Easy Vietnamese. Uyen is a Vietnamese-born, London-based food writer, cook, and photographer known for her vibrant approach to Vietnamese cuisine. Her latest cookbook, Quick and Easy Vietnamese, offers a fresh perspective on the flavours of Vietnam, presenting an array of simple yet authentic recipes that are perfect for busy home cooks!
The book is designed to make Vietnamese cooking accessible for everyone, with easy-to-follow instructions and a mindset of being resourceful with time and ingredients, maximising on flavour and never wasting a thing. There are so many simple yet delicious recipes to choose from that can all be whipped up with minimum fuss! From tasty Pork and Prawn Wontons to savoury Dill Fishcakes. If you’re craving something sweet, Uyen also shares dessert options such as Sweetcorn Rice Pudding! There is a collection of recipes that are perfect for any time of the week.
Today we’ve shared on our our favourites from the book, Char Siu Crispy Pork Belly.
Here is how to make Char Siu Crispy Pork Belly
Uyen loves Chinese char siu pork, but she loves the fatty, crispy belly even more, so this combines the two. It’s a winner at every dinner party or the perfect weekend dinner treat. Serve with Vermicelli Noodle Salad Bowlsor steamed rice and vegetables or with bánh hoi.
Bring a large saucepan of water to the boil, add the pork andsimmer for 10 minutes, then remove from the water. Rinse undercold water, then pat dry with paper towels. Stab and roughly scorethe meat side.
Combine the roast red pork seasoning mix, soy sauce and water in a small bowl, then spread the mixture evenly onto the surface of a tray (pan) or box that fits the meat. Put the pork belly on top, skin side up, and brush the marinade onto the sides of the meat. The seasoning mixture should cover the flesh side and leave the skin dry.
Rub the vinegar all over the skin and sprinkle with 1 table spoon of the salt. Marinate at room temperature, uncovered, for at least2 hours, or overnight in the refrigerator, covered, dabbing off any moisture from the skin every 30 minutes when you’re able and rubbing on the remaining salt.
When you’re ready to cook, preheat the oven to 220ÅãC fan(475ÅãF). Transfer the pork to a roasting tin lined with baking parchment. Pat the skin dry with paper towels, then roast in the oven for 1 hour 10 minutes. Remove from the oven and set aside to rest for at least 30 minutes. Slice when at room temperature.
Note:
If you can’t get hold of the roast red pork seasoning mix, use 1 teaspoon Chinese five spice, 2 tablespoons garlic powder, 2 tablespoons brown sugar, 2 tablespoons dark soy sauce, 2 tablespoons tomato ketchup and 1/4 teaspoon red food colouring.
In a blender or food processor, combine the chopped strawberries, sugar, fresh lime juice, rum, Maldon Chilli Sea Salt and water.
Blend the mixture until smooth and well combined.
Pour the strawberry mixture into a shallow, freezer-safe dish or container.
Place the dish in the freezer and let it freeze for about 2 hours, or until the mixture starts to firm up.
Using a fork, scrape the frozen mixture towards the centre to create flaky ice crystals, keep scraping until you have a mound of shaved strawberry granita.
Prepare the glasses to serve. Take a quarter of a lime and gently coat the edge of the glass with the juice. Place a generous amount of Maldon Chilli Sea Salt onto a plate along with the sugar and carefully dip the edge of the glass in it until you have an evenly coated rim.
Spoon the strawberry granita into each glass.
Garnish with fresh strawberry slices and mint.
Spicy cucumber salad is a quick and easy dish that bursts with flavour, making it the perfect addition to any summer feast. This vibrant dish features baby cucumbers, also known as Persian cucumbers, sliced Hasselback style into delightful spirals. We tossed them in a mouth-watering mix of sesame oil, soy sauce, rice vinegar, crispy chilli oil, and a touch of honey for sweetness achieving the perfect balance between sweet and spicy. A pinch of Maldon Chilli Sea Salt adds a fiery kick, while a sprinkle of sesame seeds provides a nutty crunch. Finished with a handful of fresh coriander, this vibrant salad is sure to impress.
Here is how to make a spicy cucumber salad
Start by cutting the cucumbers into spirals. In a similar method to Hasselback potatoes, place your cucumber between two chopsticks on your board, then use your knife to make small cuts all the way down in one direction. Next, turn the cucumber over and repeat the cuts again but in the other direction.
Alternatively, if you don’t want to spiralise the cucumbers like this, you can cut the cucumbers into a rough chucks.
Into a bowl, mix the sesame oil, soy sauce, rice vinegar, crispy chilli oil, honey, Maldon Chilli Sea Salt and toasted sesame seeds. Then toss the cucumbers throughout so they are evenly coated.
Set aside for them to absorb the flavours and oils for a minimum of 10 minutes before serving.
Scatter over the coriander leaves and serve.
The talented Rukmini Iyer is a celebrated author and culinary innovator, known as the queen of fuss-free flavour. In her latest cookbook, ‘The Green Cookbook’, Iyer continues her mission to simplify delicious home-cooked meals. This vibrant collection features 75 brand-new recipes designed to help you get a delectable dinner on the table every day of the week with minimum hassle and maximum flavour. Whether you’re a ‘seasoned’ vegan, a dedicated vegetarian, or simply looking to incorporate more plant-based meals into your diet, ‘The Green Cookbook’ offers a treasure trove of inspiration!
Here is how to make miso barley mushroom with coriander pesto…
This is one of Rukmini’s favourite recipes in the book. The combination of miso, barley and mushrooms is inspired by Niki Segnit’s Flavour Thesaurus: More Flavours, while the incredibly moreish coriander pesto is her version of Noor Murad’s from Ottolenghi Test Kitchen: Extra Good Things – a happy melange of inspiration where the pearl barley and mushrooms look after themselves in the oven, leaving you to just blitz the pesto (and bask in the admiration of your dinner guests when they take their first bite).
Preheat the oven to 180°C fan/200°C/gas 6. Put the pearl barley, boiling water, miso paste, onion, black pepper and diced shiitake mushrooms in a lidded casserole dish or medium roasting tin, then cover with the lid or foil and roast in the oven for 1 hour.
Put the mushrooms and red onion into another large roasting tin with the garlic, olive oil, haricot beans and a pinch of sea salt. Stir, then pop into the oven for 25–30 minutes until the mushrooms are cooked through.
Blitz the coriander leaves and stems, coriander seeds, pine nuts, olive oil, sea salt and lemon juice in a high-speed blender or small food process or until smooth. Taste and adjust the salt and lemon juice, then set aside.
Stir 2 tablespoons of the pesto through the hot pearl barley, then divide between four plates. Top with the mushrooms and remaining pesto and serve hot.
Buy ‘The Green Cookbook’ Today!
Whether you’re preparing a quick meal for yourself or entertaining guests, her innovative and accessible recipes are sure to become staples in your kitchen. From 15-minutes pasta dishes that are perfect for those hectic weeknights to budget-friendly batch cooking that ensures you have a hearty meal ready to go, Iyer’s recipes are crafted with real-life demands in mind. Buy a copy from here and embrace the simplicity and joy of fuss-free cooking!
Make sure you have your Maldon Salt ready for these recipes! If you are running out, please feel free to browse on our Where to Buy Page to find your nearest store in which stocks our beloved Maldon Salt.
Lastly, we LOVE seeing your creations – please tag us on Instagram using the #maldonsalt so we can share your own take on Rukmini’s recipes!
The talented Rukmini Iyer is a celebrated author and culinary innovator, known as the queen of fuss-free flavour. In her latest cookbook, ‘The Green Cookbook’, Iyer continues her mission to simplify delicious home-cooked meals. This vibrant collection features 75 brand-new recipes designed to help you get a delectable dinner on the table every day of the week with minimum hassle and maximum flavour. Whether you’re a ‘seasoned’ vegan, a dedicated vegetarian, or simply looking to incorporate more plant-based meals into your diet, ‘The Green Cookbook’ offers a treasure trove of inspiration!
Here is how to make spiced roasted carrots and hazelnuts with silky butterbean mash…
Rukmini could eat an entire bowl of this in front of the television, but it’s really too nice not to share with friends! The carrots roast beautifully with coriander seeds under foil, while the rich, silky butterbean mash takes just 10 minutes to put together. A substantial, flavour-packed dish which is, as her friend Alex Dorgan would say, incidentally vegan!
Preheat the oven to 180°C fan/200°C/gas 6.Lightly grind the coriander seeds and black peppercorns in a pestle and mortar, then add them to a medium roasting tin along with the carrots, olive oil, water and ½ teaspoon Maldon Sea Salt. Cover with foil, then roast in the oven for 40 minutes.
After 40 minutes, remove the foil, drizzle the carrots with the agave or maple syrup, then return to the oven for a further 15 minutes to reduce the liquid and get some colour on the carrots. Put the hazelnuts on a small baking tray and pop them into the oven at the same time to toast.
Meanwhile, put the olive oil, lemon zest, coriander seeds, spring onions and garlic into a small frying pan and warm through over a low heat for 5 minutes – you’re not aiming to get any colour on the garlic, so keep the heat down.
Put the butterbeans and the infused oil, spring onions, etc. into a high-speed blender or food processor and blitz until very smooth. Adda squeeze of lemon juice, then taste and adjust the Maldon Sea Salt if needed. Warm the mash and spoon into shallow bowls, topped with the roasted carrots. Scatter the carrots with a little Maldon Sea Salt, the toasted hazelnuts and flat-leaf parsley and serve warm.
Buy ‘The Green Cookbook’ Today!
Whether you’re preparing a quick meal for yourself or entertaining guests, her innovative and accessible recipes are sure to become staples in your kitchen. From 15-minutes pasta dishes that are perfect for those hectic weeknights to budget-friendly batch cooking that ensures you have a hearty meal ready to go, Iyer’s recipes are crafted with real-life demands in mind. Buy a copy from here and embrace the simplicity and joy of fuss-free cooking!
Make sure you have your Maldon Salt ready for these recipes! If you are running out, please feel free to browse on our Where to Buy Page to find your nearest store in which stocks our beloved Maldon Salt.
Lastly, we LOVE seeing your creations – please tag us on Instagram using the #maldonsalt so we can share your own take on Rukmini’s recipes!
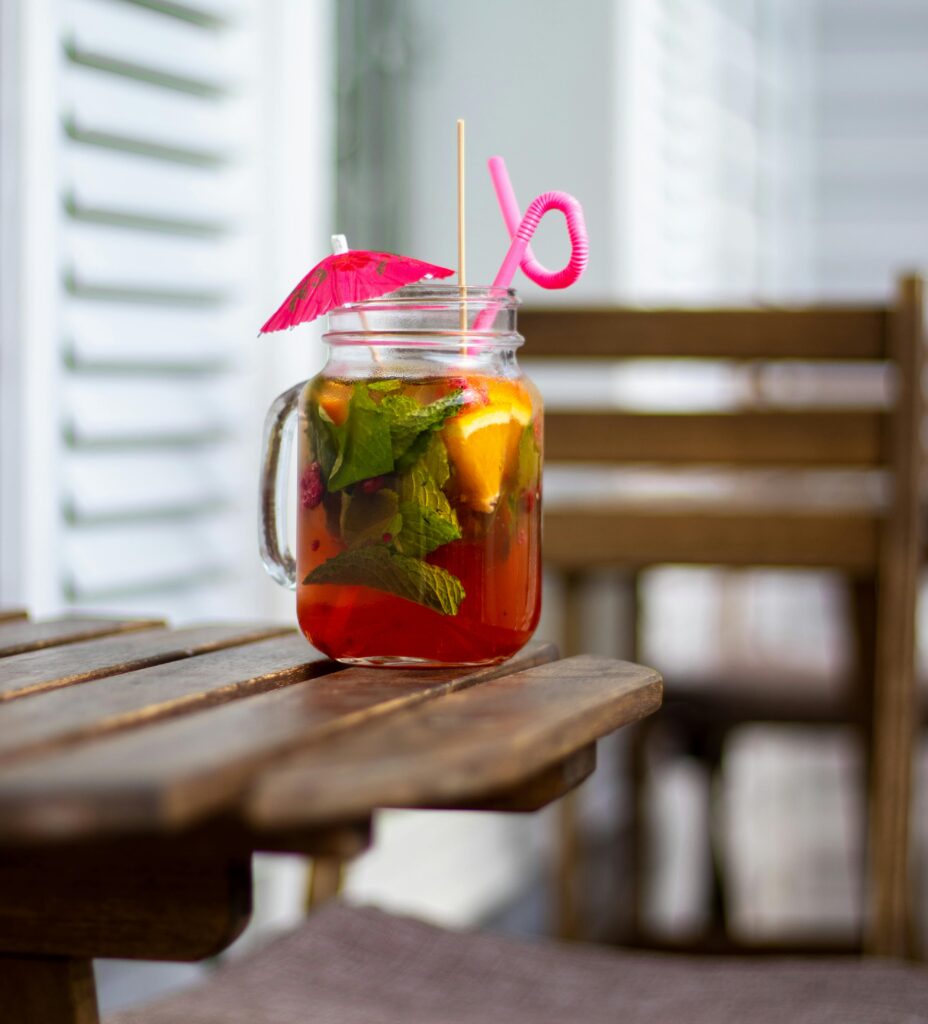
Elevate your cocktail hour with a refreshing grapefruit Paloma, perfectly complimented by a Himalayan Pink Salt rim, Selected by Maldon. This tequila cocktail combines equal parts blanco tequila, pink grapefruit juice, club soda for fizz and a touch of agave for sweetness, resulting in a harmonious blend of flavours. The finishing touch of the salt rim not only elevates the presentation, but also perfectly balances the citrusy tang and smooth tequila notes, making this Paloma cocktail and unforgettable tipple!
What is in a paloma cocktail?
A classic paloma cocktail consists of tequila, lime juice, grapefruit and soda with salt being added to the rim of the glass as an added option. Paloma translates to ‘dove’ in Spanish, with the cocktails true origins unknown, although it is believed to have dated back to the 1950s. The legend Don Javier Delgado Corona, who was the former bartender and owner of La Capilla in Tequila, Mexico, is known to be the Paloma’s original creator. He wanted to create a cocktail that’s both sweet and sour, a little bitter and salty with plenty of bubbles and ice. What’s not to love about a refreshing Paloma!
How to make a paloma cocktail
There are many paloma cocktail recipes that have their own ‘tasty‘ twist to the original. Our recipe includes club soda, fresh pink grapefruit juice, blanco tequila and lime juice. We also include a salt rim using Himalayan Pink Salt, Selected by Maldon. This pink coarse rock salt is selected by our seasoned experts, from the foothill of the Himalayas and has been prized for centuries. It’s perfect for rimming the glass of your paloma as the the salt with counteract the bitterness from tequila, and elevate the sweetness of the grapefruit and lime. Additionally, is also adds texture to the drink, building up a pleasurable experience as you take your first sip.
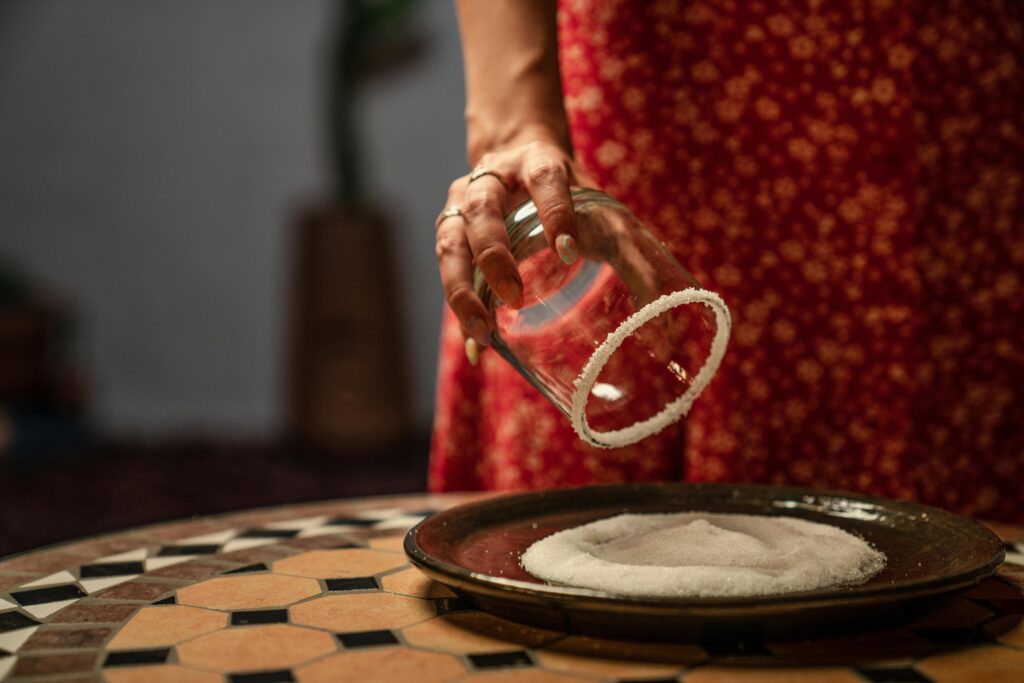
Start by rimming the glass with salt. Lightly crush the Himalayan Pink Salt, Selected by Maldon, then place onto a small plate.
Take the glass and rub a little lime juice, grapefruit juice or agave around the rim of the glass.
Then, invert it onto the plate and press the salt onto the rim firmly.
In a cocktail shaker, add the blanco tequila , fresh pink grapefruit juice, lime juice and agave.
Add a few ice cubes and then give it a shake until the outside feels cold.
Add some ice cubes to the prepared glass with the rim and begin pouring in the cocktail mixture.
Top up with club soda and then garnish with some pink grapefruit slices before serving.
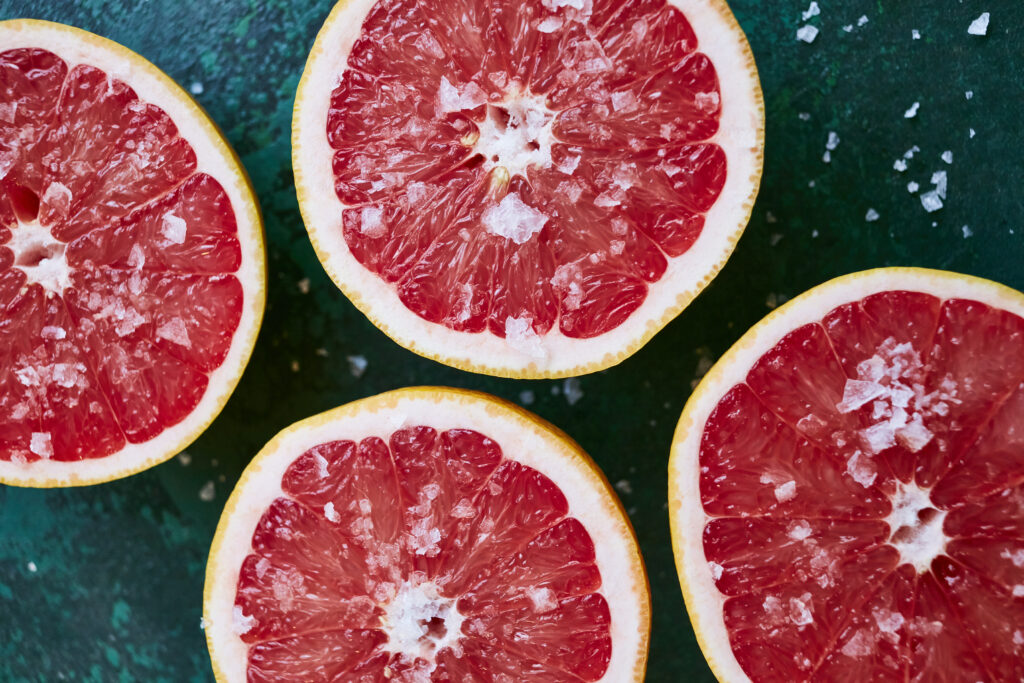
How to slice a grapefruit?
This is the fastest, simplest and mess-free way of slicing a grapefruit.
Place the grapefruit on a cutting board. Using a sharp chef’s knife, begin slicing off a half inch off the top and bottom of the fruit.
Stand the grapefruit upright so the flesh is exposed and begin to cut the skin off. Make sure you are following the contour of the grapefruit and the white pith.
Repeat the peeling technique.
Using a sharp paring knife, hold the grapefruit in your hand, and begin to cut downward between the membrane and the segment.
Once you have reached the centre of the grapefruit, stop and make a second angled cut. The segment should then pop out.
Repeat until all segments have been removed.
How to use a cocktail shaker?
We used a two-piece cocktail shaker to make our paloma cocktail. These are also known as Boston or French Shaker. They comprise of two flat-bottomed cones, one larger than the other. The large cone is made of stainless steel usually, while the smaller cone can be glass, stainless or plastic.
Start by combining your ingredients in the glass (the smaller cone).
Fill the large cone with ice and quickly up-end over the smaller cone, quickly to avoid spilling any ice! Gently tap the top of with your palm to create a secure seal between the two parts.
Begin lifting the shaker with one hand on the top and the other gripping the base.
Shake quickly and vigorously to ensure the mix is blended well.
After shaking for around 12 second, the large cone will start to feel cold to the touch. This is when you know it’s ready to serve. Hold the larger cone in one hand and break the seal by tapping the base with your palm.
Before you pour your cocktail, place a strainer over the top of the cone and strain the mixture into the glass, leaving the ice behind. The ice that we used for shaking should be removed.
What to use instead of a cocktail shaker?
Creating a cocktail shaker alternative is very easy and you only need a few objects that can be found in your home. If you have a mason jar, or any other glass with with secure lid, it will make an effective cocktail shaker.
Clean your mason jar thoroughly before using, ensuring it’s clean and safe to use.
Add your cocktail ingredients into the jar.
Add your ice cubes.
Close the lid, fastening it on securely.
Shake vigorously.
Take the lid off and pour cocktail mix into your glass.
How to rim a glass with salt?
If you’re wanting to make a classic salt rim for a cocktail such as a margarita, we recommend starting of with a lime.
Begin by cutting a lime in half, and then again until it forms a quarter or wedge.
Cut a notch in the lime wedge, making sure to not cut all the way through. Near enough in the centre will do.
Run the notch all around the glass until it’s the rim of the glass is completely wet from the lime juice.
Add some Himalayan Pink Salt into a small dish that’s bigger than the diameter of your glass.
Tip the glass over into the salt, almost like a cookie cutter going into the dough.
Hold the glass up and you will find a perfect salt rim around your glass.
Transform your summer barbecues with BBQ Corn Ribs, infused with the rich, smoky flavor of Maldon Smoked Sea Salt flakes. These corn ribs are grilled to perfection, delivering a delightful combination of sweetness and charred goodness.
Topped with a drizzle of spicy Sriracha mayo, they offer a tantalizing kick that complements the smokiness beautifully. Perfect as a side dish or a standout appetizer, these BBQ Corn Ribs are sure to be a hit at any summer gathering, adding a gourmet twist to your seasonal fare.
Here is how to make BBQ corn ribs with Sriracha mayo…
Start by carefully cutting each corn on cob into ribs. The safest way to do this is to place the flat bottom on the board so the corn is standing upright and then using a sharp knife, bash it down through the core – being careful of your hands and fingers!
Preheat the oven to 200c.
Once you have your 16 ribs, place them into a large baking tray. Then in a small bowl mix together the olive oil, smoked paprika, cumin, garlic powder, harissa paste and Maldon Smoked Sea Salt. Drizzle this all over the ribs and then use your hands to rub it in so each one is evenly coated. Place into the preheated oven and cook for 25 minutes, turning halfway. The ribs should curl as they cook. You can equally cook these in the air fryer or on a BBQ.
Mix the mayonnaise and the siracha and serve alongside the corn ribs for people to dip into. Scatter over some chopped coriander and some lime wedges for squeezing and they are ready to enjoy.
This summer, elevate your cookouts with vegan loaded hot dogs, perfectly seasoned with Maldon Sea Salt flakes. These plant-based delights are bursting with flavour, topped with vibrant mix of fresh vegetables, savoury sauces, and a touch of smoky goodness.
Each bite offers a satisfying crunch and a delightful blend of textures, making them the ultimate crowd-pleaser for any sunny day gathering. Whether you’re a seasoned vegan or simply exploring plant-based options, these loaded hot dogs promise to be a delicious highlight of your summer feasts.
Here is how to make loaded vegan hot dogs…
Start by making some pink pickled onions to serve with the hot dogs.
Place the finely sliced red onion into a small bowl and add the Maldon Sea Salt, then use your fingers to scrunch it in and help soften the onions. Next add the vinegar and the caster sugar and then stir to dissolve. Set the onions aside to pickle as you prepare the hot dogs.
Heat a griddle pan and add the vegan sausages, cooking on each side until charred and cooked through.
Slice open the hot dog buns and add the slice of smoked cheese, then the warm sausage – allowing the cheese to melt underneath. Then top the hot dogs however you like, we chose a drizzle of American mustard, sliced jalapenos, the pickled red onions, some crispy onions, and some finely chopped chives.
We like them crispy, EXTRA spicy and oh-so delicious!
Bake at 180C/350F for about 20 minutes until golden and crispy .
Season with an extra pinch of Maldon Chilli Sea Salt. Serve immediately.
Hake has a good sturdy texture that is great as a burger – think of these as giant fish fingers in a bun – but you could use any chunky white fish here. They are best cooked in a pan over the fire as you want a good amount of oil to get the all-important crispy bread crumbs. Genevieve Taylor loves membrillo, a tart sticky paste made from slow-cooked quinces. Normally served alongside cheese, here it adds a sweet and sour note to the chutney. It’s pretty easy to find these days, definitely online, or make friends with someone who has a quince tree, as they are likely to have a tonne of the stuff.
Here is how to make the hake burgers…
For the chutney, set a small saucepan on the hob over a medium heat and pour in the olive oil. Add the tomatoes, garlic and chilli flakes, if using, and cook for a few minutes until the tomatoes have collapsed. Add the membrillo and sherry vinegar and season with a little salt and pepper. Cook for another few minutes, stirring until the membrillo has dissolved, then remove from the heat, scoop into a bowl and set aside to cool.
When you are ready to cook, fire up the barbecue ready for direct grilling. Tip the breadcrumbs into a bowl and stir through the smoked paprika and a generous grind of salt and pepper. Crack the egg into another bowl and lightly beat with a fork. Add the flour to a third bowl. Toss the fillets about in the flour to coat all over, then dip into the egg until evenly covered. Add to the bowl of breadcrumbs and flip over a couple of times so each one is evenly coated in crumbs. Line up on a plate. If your hands get unbearably messy, stop, wash and begin again.
Drizzle a little olive oil over the aubergine slices and season with Maldon Sea Salt and pepper. Set on the grill bars over the fire and grill until lightly charred all over. Slide away from the fire so they keep warm and set a flameproof frying pan over the fire to heat up. Pour in a good amount of olive oil so it coats the pan by a couple of millimetres. Once the oil is hot, add the crumbed fish and fry for a couple of minutes on each side until crisp and golden. Use a temperature probe to test the fish for doneness – it should be 60°C (140°F)deep in the centre. Slide the pan off the heat a little if the crumbs are colouring too quickly so the fish can finish cooking. Once the fish is done, split the buns open and toast briefly on the cut side. To serve, add a little rocket to the base of each bun, then add the fish and a couple of slices of aubergine.
Finish with a dollop of the chutney, top with the bun lid and tuck in.
Purchase ‘SCORCHED’ by Genevieve Taylor
Live-fire expert Genevieve Taylor covers everything you’ll ever need to know about buying and cooking all kinds of fish in her third cookbook: Scorched. From cooking whole dish, fillets, shellfish to burgers and skewers, this is the ultimate guide to barbecuing fish!
You can purchase your very own copy here, where you can become inspired with over 85 recipes and gain insight on how to set up your barbecue, sourcing your fuel and lighting your fire.