In this cookbook, Romy shares over 70 recipes which are inspired by her beloved family, with flavours that define her childhood. From iconic dishes like Butter Chicken, which is a staple in every Indian home, to the delicious simplicity of a Masala Omelette, Romy invites cooks to savour the authentic tastes of India without a fuss! The instructions for each dish are easy to follow along with readily available ingredients. Every dish is designed with the home cook in mind, ensuring that your journey into Indian cuisine is as delightful as it is delicious!
Today we’re sharing Romy’s delicious Masala Crab, also known as Kekada Masala.
How to make masala crab
Simi, Romy’s childhood friend, and her share a bond rooted in the industrial New Town in Burnpur. Their common passions, particularly our love for culinary adventures, has bonded us forever. Countless college escapades involved outings to watch movies, then occasionally getting caught. The consequences were often chores piled up at home, but the shared laughter and memories made it worthwhile. It was during one of these movie escapades that she stumbled upon a scene portraying the joy of savouring crabs. Intrigued and captivated, the desire to taste the delicacy lingered in Romy’s mind. The opportunity finally presented itself when she had crab in England and then with Simi’s roots from Kerela she crafted the recipe infusing it with the flavours that complement the crab meat. This dish became the most loved starter in her restaurant. The creamy coconut milk, the pungent mustard seeds, the moreish curry leaves and the sourness of the tamarind elevates the dish.
Heat the oil in a pan over a high heat. Once the oil is hot, add the mustard seeds and curry leaves. As soon as the mustard seeds start to pop, add the garlic and cook for30 seconds, then add the onion and cook for 3–4 minutes.
Reduce the heat to medium then add the coconut and cook for 1 minute. Add the chilli powder, turmeric, ground coriander, Maldon Sea Salt, tamarind, sugar and coconut milk and cook, stirring, for a further 2 minutes.
Add the crab meat, mix well and cook for 3 minutes, then serve immediately. Romy enjoys it on crispy toasted sourdough bread, but you can also serve it with rice or any Indian flatbreads of your choice.
Where to buy Romy Gill’s India: Recipes From Home
You can find where to purchase Romy’s NEW cookbook here and start being creative with food and flavours in the comfort of your kitchen.
Make sure you have your Maldon Salt ready for these recipes! If you are running out, please feel free to browse on our Where to Buy Page to find your nearest store in which stocks our beloved Maldon Salt.
Lastly, we LOVE seeing your creations – please tag us on Instagram using the #maldonsalt so we can share your own take on Romy’s recipes!
In this cookbook, Romy shares over 70 recipes which are inspired by her beloved family, with flavours that define her childhood. From iconic dishes like Butter Chicken, which is a staple in every Indian home, to the delicious simplicity of a Masala Omelette, Romy invites cooks to savour the authentic tastes of India without a fuss! The instructions for each dish are easy to follow along with readily available ingredients. Every dish is designed with the home cook in mind, ensuring that your journey into Indian cuisine is as delightful as it is delicious!
Today, we’re sharing Romy’s delicious Butter Chicken, also known as Mung Makhani.
How to make butter chicken
There are so many different recipes for butter chicken. This is Romy’s take, because there is a lot of spark and dispute going on in India about butter chicken. Romy served so much butter chicken in her restaurant, so she went in search of the very best butter chicken recipe and researched how it all started. She found this gave me a better understanding of this best-loved dish. With its silky smooth, gently spiced tomato, cashew and cream gravy, it’s a comforting, warming dish that feels decadent. It was in 2013 when Romy started to take a closer look at butter chicken and its history. Her mentor, chef Manjit Gill, took her to the first ever Moti Mahal restaurant in Daryagang in Delhi. A restaurant co-founded by Kundan Lal Jaggi, Kundal Lal Gujral and Maggu (also known as Thakur Das) and it was where they created both butter chicken and dal makhani.
To make the marinade, mix all of the marinade ingredients together in a large bowl. Prick the chicken pieces with a fork to allow the marinade to penetrate the meat. Add the chicken to the bowl and stir well to coat thoroughly. Cover the bowl and set aside in the fridge to marinate for at least a couple of hours.
When ready to cook, preheat the oven to 180°Cfan/400°F/gas 6.
Spread the marinated chicken out on a baking tray and cook in the hot oven for 15 minutes.
While the chicken is cooking, make the sauce. If the chicken finishes cooking before you have finished making the sauce, switch the oven off after the15 minutes and leave the meat to rest in the oven. Blanch the tomatoes in a bowl of boiling water for a few minutes, then remove their skins. Cut into quarters and remove the seeds, then roughly chop and place in a food processor. Blitz to a smooth purée.
Heat the butter in a saucepan over a medium heat. Once the butter has melted, add the ginger and garlic and cook for 1 minute. Add the puréed fresh tomatoes as well as the tomato purée and cook for 8–10 minutes until the tomatoes are cooked through, stirring regularly to avoid them sticking and burning. Add all the spices, chilli powder, Maldon Sea Salt and sugar, mix well and cook for a further 2 minutes until emulsified.
Lower the heat, then add the ground cashew nuts and cream, and stir well. Add 500–600 ml (20–24 Fl oz/2 1/2 cups–scant 3 cups) water – the quantity you choose to add depends on how runny you want the sauce to be. Bring the mixture to a boil, and when it starts bubbling, add the chicken, lower the heat and cook for a further 8–10 minutes. Sprinkle over the cardamom seeds and dried fenugreek leaves. Stir and leave to rest for at least 10 minutes before serving with rice or any Indian flatbreads.
Where to buy Romy Gill’s India: Recipes From Home You can find where to purchase Romy’s NEW cookbook here and start being creative with food and flavours in the comfort of your kitchen. Make sure you have your Maldon Salt ready for these recipes! If you are running out, please feel free to browse on our Where to Buy Page to find your nearest store in which stocks our beloved Maldon Salt. Lastly, we LOVE seeing your creations – please tag us on Instagram using the #maldonsalt so we can share your own take on Romy’s recipes!
Transform your next meal with a delectable Potato Gratin recipe that promises creamy, flavourful potatoes in every bite. Infused with Maldon Garlic Sea Salt flakes, this dish takes the classic comfort food to new heights! Perfect as a side dish, these au gratin potatoes are made with King Edwards or Maris Pipers for the ideal balance of fluffiness and flavour. Whether you’re hosting a dinner party or enjoying a family meal, this gratin dish will leave everyone asking for seconds.
What is potato gratin?
Potatoes au Gratin, also known as Dauphinoise Potatoes, is a classic French dish. It was first served during a state dinner held by Charles-Henri in France 1788 and his companions. Consisting of potatoes, thinly sliced but thicker than a penny, it’s then cooked in a cream sauce in a shallow baking dish with butter and garlic.
In contrast, Scalloped Potatoes are made with roux consisting of flour, butter and milk, whereas Potatoes au Gratin are made with cream and butter and sometimes cheese. However, purists would argue that a gratin doesn’t have to include cheese. This is because the French word for ‘gratin’ translates to ‘crust’. This delicious crust can be achieved not only from cheese, but with breadcrumbs, egg or butter.
How to make potato gratin?
Begin by preheating the oven to 160Fan °C / 350°F / Gas Mark 4.
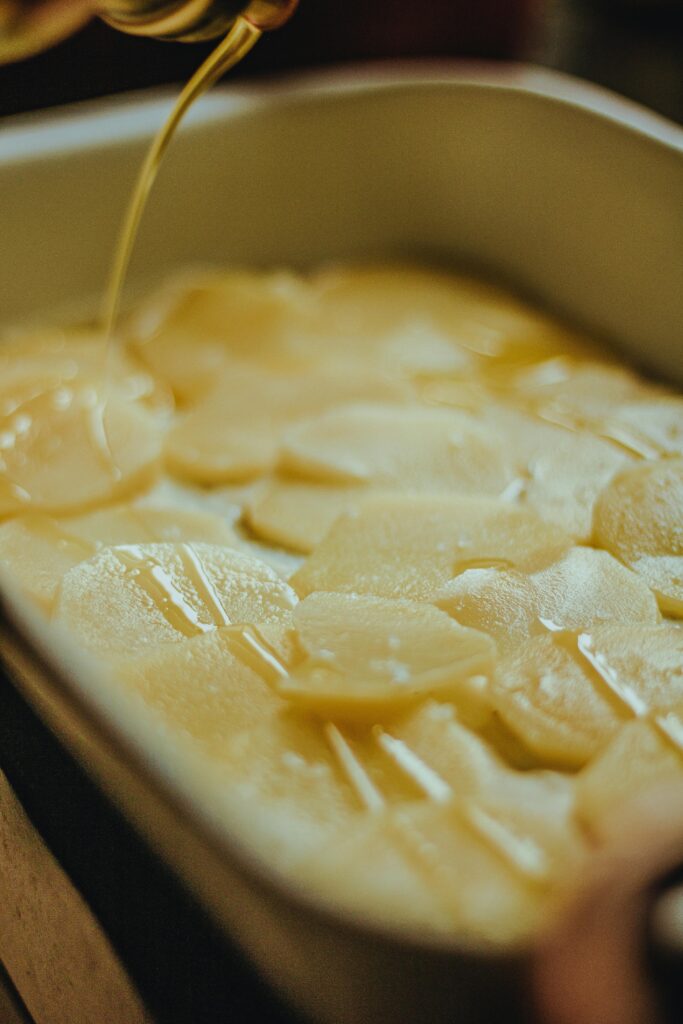
Take a large shallow cast iron dish, gratin dish or baking tray and rub it all over with some butter. Then prepare the potatoes by thinly slicing them, or using a mandolin. We have kept the skins on in this recipe, but you can peel the potatoes if you like.
Once you have thinly sliced potatoes, carefully lay them in a spiral shape in the pan or dish so they fan out in circles.
In a saucepan add the double cream, crushed garlic cloves, fresh thyme leaves, Maldon Garlic Sea Salt and cracked black pepper. Place this on a gently heat and then bring up to scalding point. Take off the heat and then carefully pour all over the potatoes. This will create a irresistibly creamy texture.
Finely grate a little parmesan over the top and cover with foil. Place into the preheated oven to bake for 1 hour 30 minutes until the potatoes are tender. Remove the foil and bake for additional 10 to 15 minutes to achieves a golden, bubbly top.
Serve immediately. This simple yet elegant dish dish pairs beautifully with any main course, offering a rich and comforting additional to your dinner party.
How to cook potato gratin in the air fryer?
If you’re looking for a quicker way to cook your potato gratin, then try cooking it in an air fryer! Usually in the oven it takes over an hour, but using a standard air fryer can take half the time!
Slice the potatoes into thin, 1/8 rounds using a sharp knife of mandolin.
Combine the cream, milk, garlic, thyme and pepper in a heat-proof mug. Microwave for 2 – 3 minutes, allowing the flavours to blend together.
Grease your baking dish with butter to avoid the creamy potatoes from sticking to the base.
Arrange the potatoes slices into the dish, creating layers.
Pour the cream mixture over the potatoes, ensuing they are evenly coated.
Transfer the baking dish into the air fryer basket, covering with foil. Air Fryer at 200C for 25-45 minutes, or until the potatoes are tender. You should be able to pass through the potatoes to the bottom when using a knife.
Add a sprinkling of parmesan cheese or breadcrumbs on top and cook for additional 4 to 5 minutes. This will create a beautiful, crunchy crust.
Once golden and bubbling at the top, remove the dish from the air fryer basket, cooling for at least 10 minutes before serving.
What to serve with potato gratin?
Now that you’ve made the deliciously creamy au gratin potatoes, you’re probably wondering what you can serve with them?
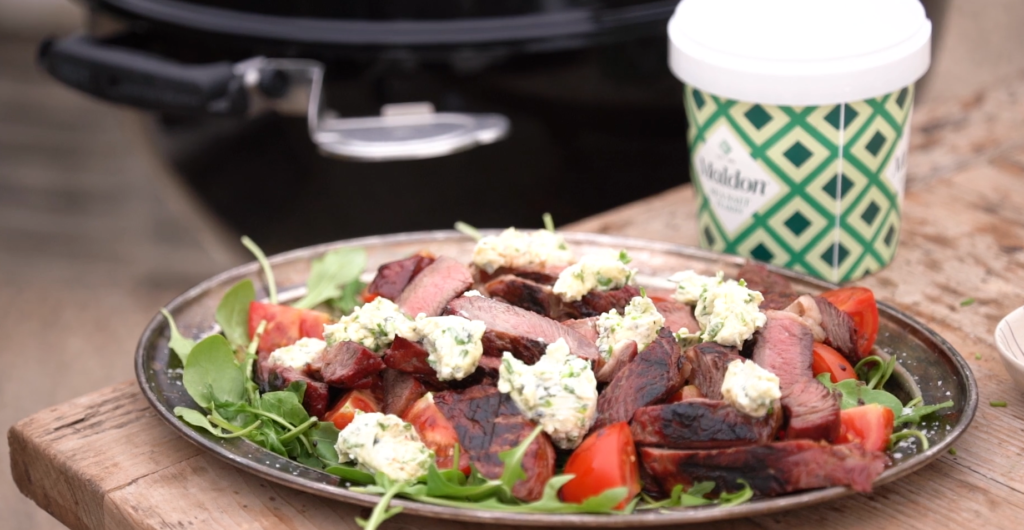
Meat and potatoes is a classic pairing. This is because the textures and flavours compliment each other so well. The fluffy texture of the potatoes combines beautifully with the meat’s chewy consistency. Potatoes also have a mildness to them which pairs well with the sweeter, bolder flavours of steak and it’s juices.
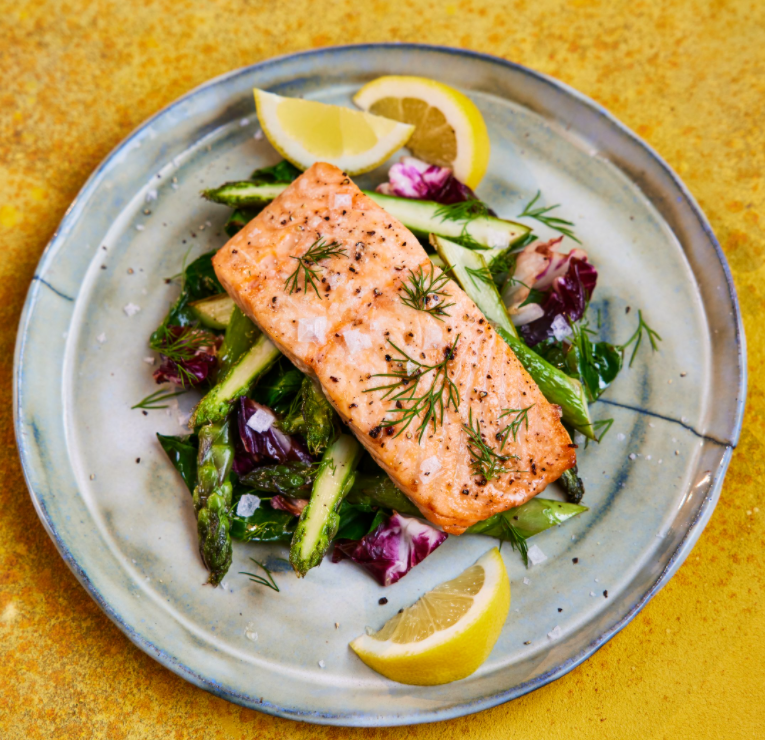
Grilled salmon is beautifully tender, complimenting the crispy exterior of gratin potatoes. We pair our salmon with fried greens and asparagus greens for a fresh, crips bite which harmonizes the creaminess of the potatoes.
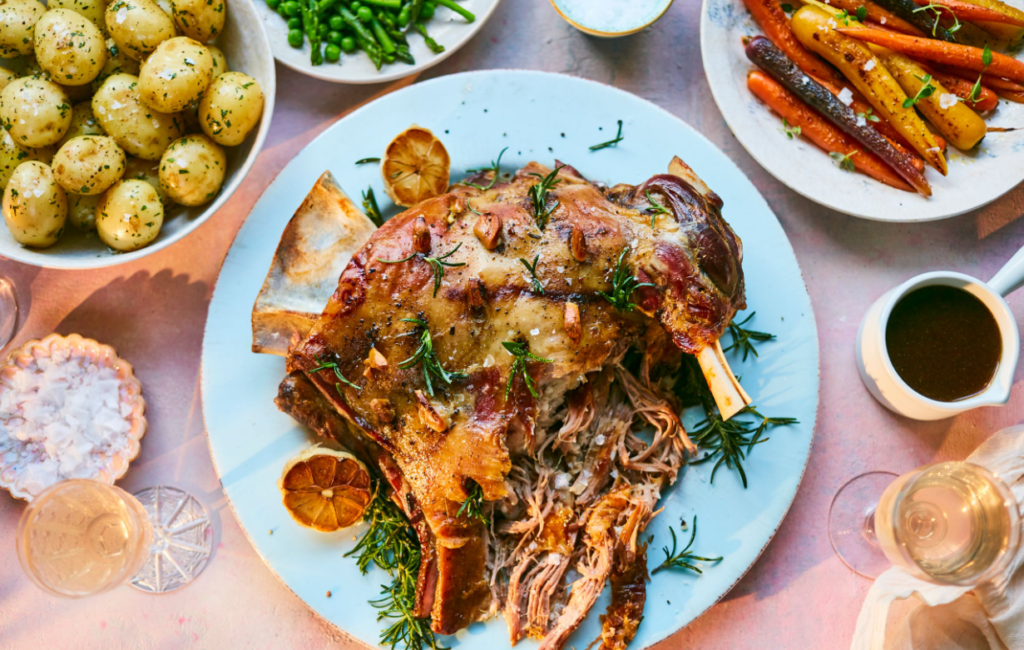
This is one of our favourite flavour combinations. The lamb roast has a rich, deep aroma that pairs perfectly with creamy potatoes. Because lamb also holds a gamey flavour, it brings out the natural earthiness of the potatoes, making it an indulgent feast.
Can you freeze potato gratin?
We wouldn’t recommend freezing gratin au potatoes, as it’s extremely rich in diary. Dairy products, such as milk and cheese, will separate during the freezing and thawing process, leaving you with a stodgy, very wet gratin.
However, you can store leftovers in the refrigerator for up to 3 days if kept in an airtight container. The oils from the cream and butter may separate once reheated but the taste will still be delicious.
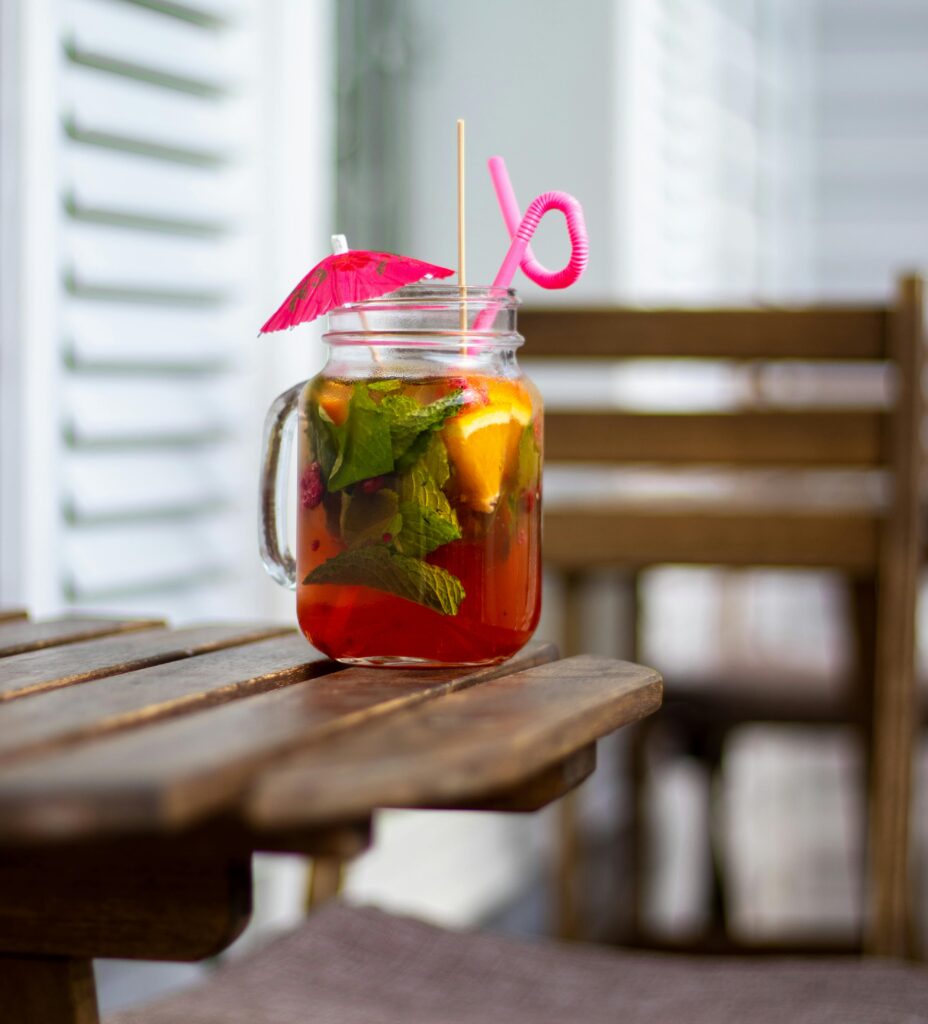
Elevate your cocktail hour with a refreshing grapefruit Paloma, perfectly complimented by a Himalayan Pink Salt rim, Selected by Maldon. This tequila cocktail combines equal parts blanco tequila, pink grapefruit juice, club soda for fizz and a touch of agave for sweetness, resulting in a harmonious blend of flavours. The finishing touch of the salt rim not only elevates the presentation, but also perfectly balances the citrusy tang and smooth tequila notes, making this Paloma cocktail and unforgettable tipple!
What is in a paloma cocktail?
A classic paloma cocktail consists of tequila, lime juice, grapefruit and soda with salt being added to the rim of the glass as an added option. Paloma translates to ‘dove’ in Spanish, with the cocktails true origins unknown, although it is believed to have dated back to the 1950s. The legend Don Javier Delgado Corona, who was the former bartender and owner of La Capilla in Tequila, Mexico, is known to be the Paloma’s original creator. He wanted to create a cocktail that’s both sweet and sour, a little bitter and salty with plenty of bubbles and ice. What’s not to love about a refreshing Paloma!
How to make a paloma cocktail
There are many paloma cocktail recipes that have their own ‘tasty‘ twist to the original. Our recipe includes club soda, fresh pink grapefruit juice, blanco tequila and lime juice. We also include a salt rim using Himalayan Pink Salt, Selected by Maldon. This pink coarse rock salt is selected by our seasoned experts, from the foothill of the Himalayas and has been prized for centuries. It’s perfect for rimming the glass of your paloma as the the salt with counteract the bitterness from tequila, and elevate the sweetness of the grapefruit and lime. Additionally, is also adds texture to the drink, building up a pleasurable experience as you take your first sip.
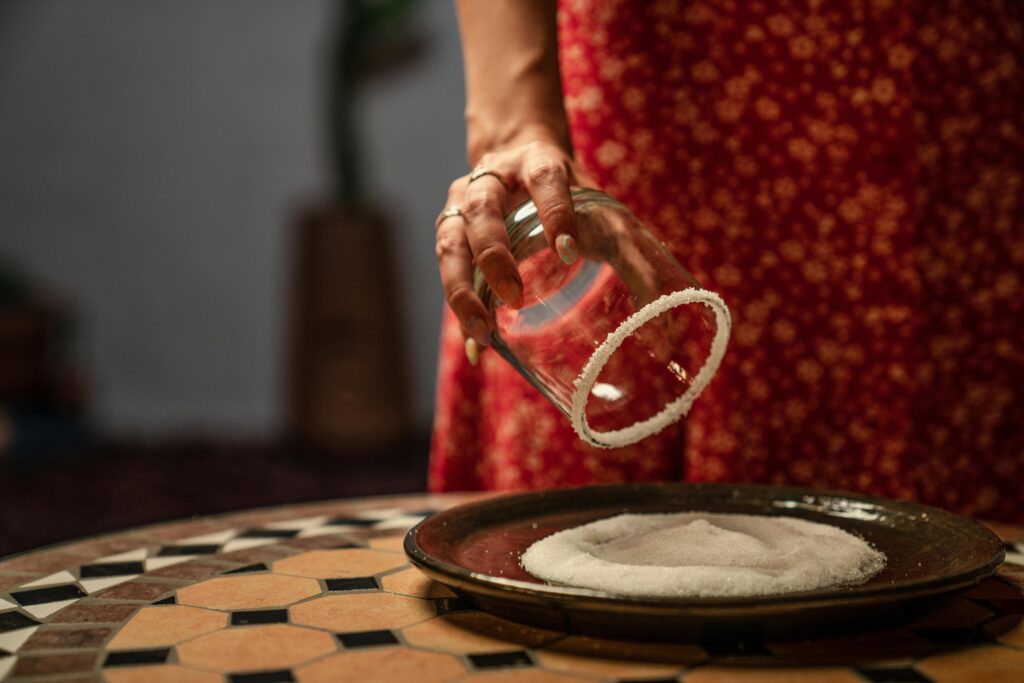
Start by rimming the glass with salt. Lightly crush the Himalayan Pink Salt, Selected by Maldon, then place onto a small plate.
Take the glass and rub a little lime juice, grapefruit juice or agave around the rim of the glass.
Then, invert it onto the plate and press the salt onto the rim firmly.
In a cocktail shaker, add the blanco tequila , fresh pink grapefruit juice, lime juice and agave.
Add a few ice cubes and then give it a shake until the outside feels cold.
Add some ice cubes to the prepared glass with the rim and begin pouring in the cocktail mixture.
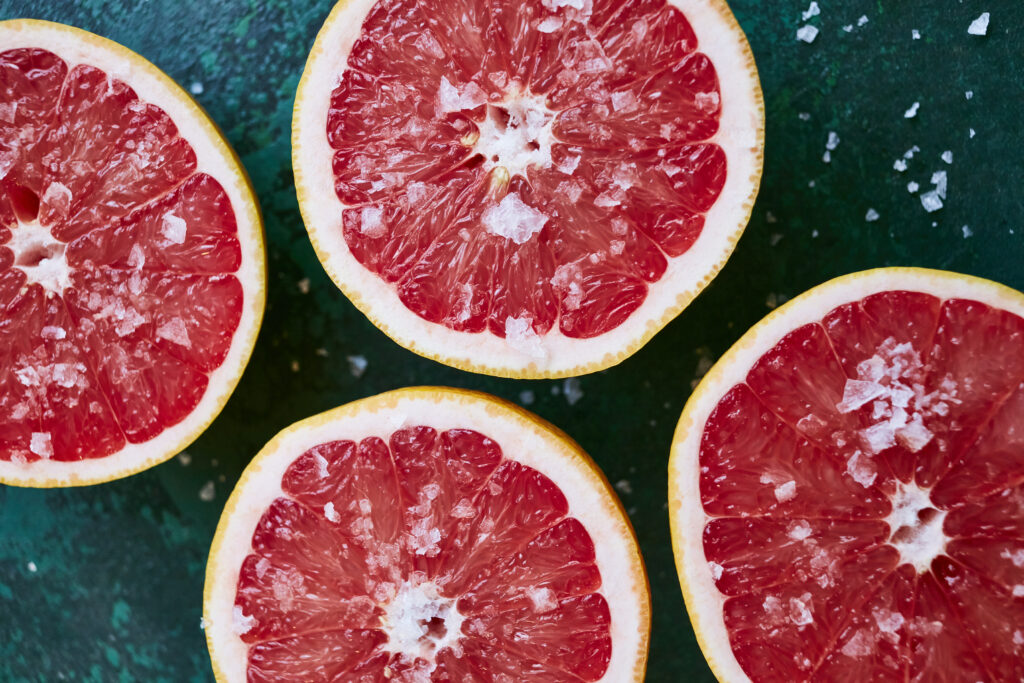
Top up with club soda and then garnish with some pink grapefruit slices before serving.
How to slice a grapefruit?
This is the fastest, simplest and mess-free way of slicing a grapefruit.
Place the grapefruit on a cutting board. Using a sharp chef’s knife, begin slicing off a half inch off the top and bottom of the fruit.
Stand the grapefruit upright so the flesh is exposed and begin to cut the skin off. Make sure you are following the contour of the grapefruit and the white pith.
Repeat the peeling technique.
Using a sharp paring knife, hold the grapefruit in your hand, and begin to cut downward between the membrane and the segment.
Once you have reached the centre of the grapefruit, stop and make a second angled cut. The segment should then pop out.
Repeat until all segments have been removed.
How to use a cocktail shaker?
We used a two-piece cocktail shaker to make our paloma cocktail. These are also known as Boston or French Shaker. They comprise of two flat-bottomed cones, one larger than the other. The large cone is made of stainless steel usually, while the smaller cone can be glass, stainless or plastic.
Start by combining your ingredients in the glass (the smaller cone).
Fill the large cone with ice and quickly up-end over the smaller cone, quickly to avoid spilling any ice! Gently tap the top of with your palm to create a secure seal between the two parts.
Begin lifting the shaker with one hand on the top and the other gripping the base.
Shake quickly and vigorously to ensure the mix is blended well.
After shaking for around 12 second, the large cone will start to feel cold to the touch. This is when you know it’s ready to serve. Hold the larger cone in one hand and break the seal by tapping the base with your palm.
Before you pour your cocktail, place a strainer over the top of the cone and strain the mixture into the glass, leaving the ice behind. The ice that we used for shaking should be removed.
What to use instead of a cocktail shaker?
Creating a cocktail shaker alternative is very easy and you only need a few objects that can be found in your home. If you have a mason jar, or any other glass with with secure lid, it will make an effective cocktail shaker.
Clean your mason jar thoroughly before using, ensuring it’s clean and safe to use.
Add your cocktail ingredients into the jar.
Add your ice cubes.
Close the lid, fastening it on securely.
Shake vigorously.
Take the lid off and pour cocktail mix into your glass.
How to rim a glass with salt?
If you’re wanting to make a classic salt rim for a cocktail such as a margarita, we recommend starting of with a lime.
Begin by cutting a lime in half, and then again until it forms a quarter or wedge.
Cut a notch in the lime wedge, making sure to not cut all the way through. Near enough in the centre will do.
Run the notch all around the glass until it’s the rim of the glass is completely wet from the lime juice.
Add some Himalayan Pink Salt into a small dish that’s bigger than the diameter of your glass.
Tip the glass over into the salt, almost like a cookie cutter going into the dough.
Hold the glass up and you will find a perfect salt rim around your glass.
This recipe is created by Nomadic Dinners, who run immersive woodland feats as an alternative way of dining.
One thing for certain is that when peaches are in season, they are delicious. At Nomadic Dinners, they use them as soon as they are ripe. This recipe is ridiculously simple and is humble enough to place the star ingredient centre stage.
Wash and halve the peaches removing the pits.
Dust your peach halves with equal parts of Maldon Sea Salt flakes and sugar.
Stick a skillet or small paella pan on the fire at a medium heat adding the stick of butter until it has melted completely. Don’t worry if the butter burns a bit.
Once the butter has fully melted, gently place the peach halves face down and cook for a few minutes until they have caramelised and there is an unmistakable ambrosial smell and colour.
Arrange the peach halves on serving plates. Add vanilla ice cream and a sprig of mint for colour
This dessert satisfies even the most discerning of taste buds. A perfect combination of sweet, salty and fruity.
Transform your summer barbecues with BBQ Corn Ribs, infused with the rich, smoky flavor of Maldon Smoked Sea Salt flakes. These corn ribs are grilled to perfection, delivering a delightful combination of sweetness and charred goodness.
Topped with a drizzle of spicy Sriracha mayo, they offer a tantalizing kick that complements the smokiness beautifully. Perfect as a side dish or a standout appetizer, these BBQ Corn Ribs are sure to be a hit at any summer gathering, adding a gourmet twist to your seasonal fare.
Here is how to make BBQ corn ribs with Sriracha mayo…
Start by carefully cutting each corn on cob into ribs. The safest way to do this is to place the flat bottom on the board so the corn is standing upright and then using a sharp knife, bash it down through the core – being careful of your hands and fingers!
Preheat the oven to 200c.
Once you have your 16 ribs, place them into a large baking tray. Then in a small bowl mix together the olive oil, smoked paprika, cumin, garlic powder, harissa paste and Maldon Smoked Sea Salt. Drizzle this all over the ribs and then use your hands to rub it in so each one is evenly coated. Place into the preheated oven and cook for 25 minutes, turning halfway. The ribs should curl as they cook. You can equally cook these in the air fryer or on a BBQ.
Mix the mayonnaise and the siracha and serve alongside the corn ribs for people to dip into. Scatter over some chopped coriander and some lime wedges for squeezing and they are ready to enjoy.
Much as Genevieve Taylor loves fish and meat proteins, she adores pulses and try to eat them several times a week. Cheap and cheerful, a bowlful of beans is an excellent way of making your fish go a little further. Fresh oregano is one of her favourite herbs, giving a slightly floral note to this pesto-style dressing.
Here is how to make the recipe
As is usual, a few hours before you want to cook, lay the mackerel fillets skin-side up on a rack over a tray and slide into the fridge to dry the skin and minimize sticking.
For the pesto, pour a good 4 tablespoons of the olive oil into a bowl and stir through the chopped oregano and garlic, the lemon zest and juice. Season to taste with Maldon Sea Salt and pepper and a good pinch of sugar. Spoon out a tablespoon or so into a separate small bowl ready to baste the fish, then set both bowls a side.
When you are ready to cook, fire up the barbecue ready for direct grilling but leaving an area coal-free so you have room to manoeuvre if things are getting hot. Set a grill tray or cage over the fire to heat up.
Once the fire has a little heat in it, start on the beans. Set a flame proof pan over the fire (it’s fine to rest the pan on the grill tray so you can heat two things at once!) and pour in the olive oil. Add the tomatoes and garlic and fry for a few minutes, just until the tomatoes are softening. Add the beans and cinnamon, then season to taste with the sugar and salt and pepper. Bring up to a simmer and cook for a few minutes. Take the pan off the heat and cover with a lid or foil to keep warm – they are more flavourful eaten warm rather than hot, so don’t worry too much about them cooling a little.
Remove the mackerel from the fridge and drizzle the remaining tablespoon of oil all over the skin side, spreading it out into a thin, even layer. Sprinkle generously with Maldon Sea Salt flakes and take to the grill along with the smaller bowl of pesto and a silicone brush.
Lay the fillets, skin-side down, on the hot grill tray and rest a lightly oiled weight on top to press the fillets flat, keeping the skin in maximum contact with the hot surface. After a couple of minutes, the weight will have done its job so remove it, then brush the oregano pesto over the flesh side of the fish. Cook for another couple of minutes until the skin is crisp. Use a fish slice to tease the fillets from the grill tray and rest on top of the beans. Drizzle over the rest of the pesto and tuck in.
Purchase ‘SCORCHED’ by Genevieve Taylor
Live-fire expert Genevieve Taylor covers everything you’ll ever need to know about buying and cooking all kinds of fish in her third cookbook: Scorched. From cooking whole dish, fillets, shellfish to burgers and skewers, this is the ultimate guide to barbecuing fish!
You can purchase your very own copy here, where you can become inspired with over 85 recipes and gain insight on how to set up your barbecue, sourcing your fuel and lighting your fire.
Kitty wrote this recipe a long time ago, and it comes out a lot for birthdays and dinners because it’s pretty foolproof. You can easily swap round the types of sugar and use more caster (superfine) sugar than light brown soft sugar if that’s what you have, or use all one type.
How to make flourless chocolate cake
Preheat the oven to 170°C fan (375°F). Grease and line a 23 cm (9 inch) cake tin (pan) with baking parchment.
Combine the chocolate and butter in a heatproof bowl set over a saucepan containing 4 cm (1½ inches) of barely simmering water. Make sure the bowl isn’t touching the water. Stir until just melted, then remove from the heat and allow to cool slightly.
Once cooled a little, whisk in the light brown soft sugar, then the egg yolks one at a time, followed by the ground almonds and salt. If the chocolate splits, don’t worry! Stir in 1 teaspoon boiling water at a time until you have a smooth, silky mixture.
Using a stand mixer or hand-held electric whisk, whisk the egg whites until they form stiff peaks, then gradually add the caster sugar, whisking until the egg whites form soft peaks, like a very light meringue.
Very carefully fold the meringue mixture into the chocolate, working delicately with a spatula or metal spoon until it’s all evenly combined.
Carefully pour the mixture into the prepared tin, making sure not to knock out the air. Sprinkle over a little more flaky salt, then bake in the oven for 20–25 minutes. The middle should be a little gooey and the surface a bit cracked.
For the tahini cream, lightly whisk the cream in a large bowl until you have very light peaks. Stir in the tahini and give a few more whisks. Set aside while the cake bakes.
Remove the cake from the oven and allow to cool. It’ll dip a little when it cools. Slice and serve with a dollop of the tahini cream and fresh berries, if using.
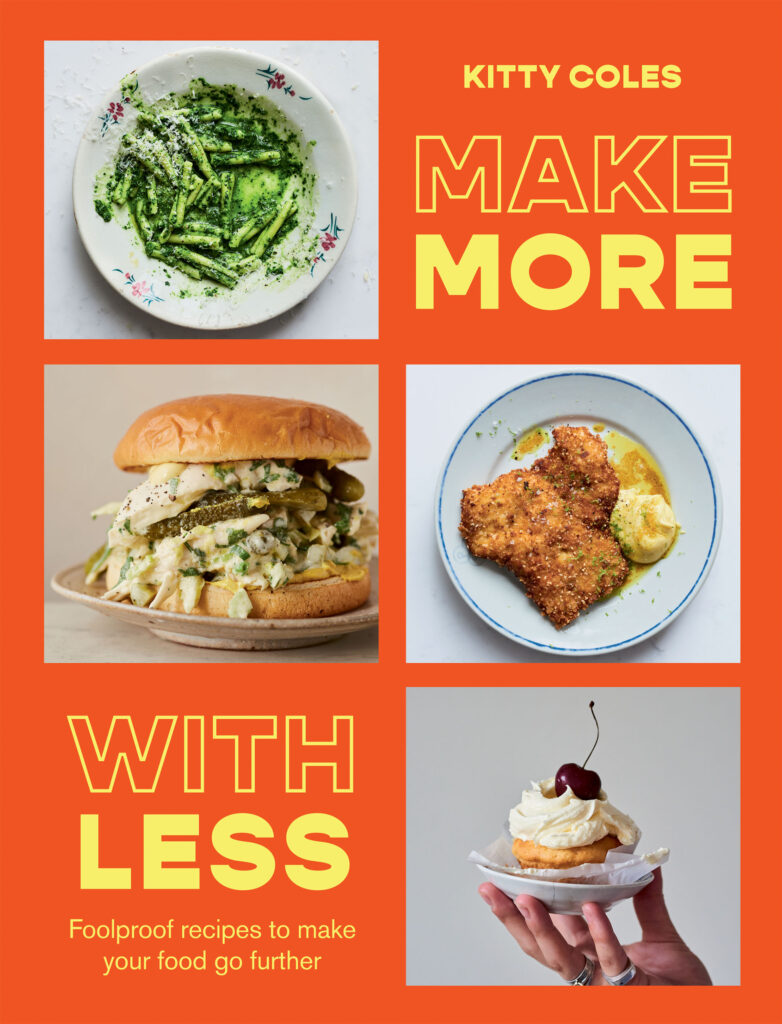
Purchase Make More With Less by Kitty Coles
Make More With Less by Kitty Coles (Hardie Grant, £22), Photography by Issy Croker.
Looking for fool proof recipes to make your food go further? Make More With Less by Kitty Coles takes core ingredients and transforms them into flavour-packed, simple dishes. From turning a few tins of beans into a comforting bean pasta to making leftover chicken tacos! the options are endless and the creativity never stops!
You can purchase your very own copy here, where you can flick through, raid your fridge and Kitchen cupboards and get started on creating low-waste, low-fuss and versatile recipes that you will make over and over again.
Kitty really loves saag aloo and often craves it, so she created this simple and delicious one-pan dinner inspired by those flavours. This is not at all like an authentic saag aloo, it’s Kitty’s own version. You can use any spices you have in the cupboard here. Kitty also made this with chicken thighs by frying them skin-side down for 5–10 minutes until golden and crisp, then roasting in the oven for 25–35 minutes until cooked through. Then continue as instructed.
Here is how to make roast chicken, spiced spinach and yogurt
Preheat the oven to 240°C fan (475°F).
Season the chicken all over with Maldon Sea Salt, then set aside to rest for 30 minutes.
Place the chicken into an ovenproof frying pan (skillet), low-sided casserole dish (Dutch oven) or cast-iron pan. Pour the oil over the chicken and massage it in with your hands. The oil will give the chicken a little kickstart in the oven, so give it some love and attention and get the oil into every nook and cranny to achieve maximum crispness.
Roast in the oven, legs at the back, for 30 minutes. After this time, reduce the heat to 180°C fan (400°F), then rotate the chicken and roast for a further 10–25 minutes until golden and crisp all over and the juices from the leg run clear. (If you have a meat thermometer, you’re aiming for 70°C/158°F at the base of the breast.)
Remove the pan from the oven, then lift out the chicken and set aside on a plate to rest.
Put the pan back over a medium heat and add the onions with a pinch of salt, tossing them in the chicken fat in the pan. Very slowly fry the onions for 10–15 minutes, stirring every so often until they are very, very soft and caramelised. If they start to fry too quickly, just turn down the heat and add a splash of water. Add the cumin, mustard seeds, turmeric, chilli flakes, ginger and garlic and fry for a further 5 minutes.
Add the spinach a handful at a time, mixing it into the onions as you go and letting it wilt with each batch. Let this cook down for a further 4–5 minutes until the spinach has soaked up all the flavours. Squeeze in the lemon juice and add a few grinds of black pepper, then taste.
Lay the chicken back on top of the spinach and serve to the table with the yoghurt and chilli.
Purchase Make More With Less by Kitty Coles
Make More With Less by Kitty Coles (Hardie Grant, £22), Photography by Issy Croker.
Looking for fool proof recipes to make your food go further? Make More With Less by Kitty Coles takes core ingredients and transforms them into flavour-packed, simple dishes. From turning a few tins of beans into a comforting bean pasta to making leftover chicken tacos! the options are endless and the creativity never stops!
You can purchase your very own copy here, where you can flick through, raid your fridge and Kitchen cupboards and get started on creating low-waste, low-fuss and versatile recipes that you will make over and over again.
Start by making the pickled radishes. In a small pan pour in the vinegar, caster sugar, Maldon, and spices. Place it onto the heat and gently warm so the sugar and salt dissolve. Put the chopped radishes into a bowl and when the vinegar mixture is ready, pour over them. Set these aside to pickle while you make the rest of the recipe.
Preheat the oven to 200c.
In an ovenproof tray add the chicken thigh pieces, skin up. Rub the skin with some olive oil and plenty of Maldon Sea Salt. Place into the preheated oven and roast the chicken for 30 minutes until the skin is golden brown and crispy, and the meat is cooked through.
While the chicken is cooking, start on the beans.
Place a large shallow pan on the heat and then add the white beans, along with the juices from the jars. Place a lid on the pan and gently warm the beans up, letting them simmer for 5 minutes.
In a food processor or high-powered blender, add the watercress, crème fraiche, Dijon mustard, lemon zest and juice, some Maldon Sea Salt and black pepper and a tbsp of olive oil. Blend together to make a smooth, bright green sauce.
Pour the sauce into the beans and stir through. Take off the heat.
Now you are ready to plate up. Spoon the beans into the middle of a serving platter or shallow bowl. Place the crispy chicken thighs into the middle of this. Then scatter over some of the beautiful, pink pickled radishes. Finally garnish with a drizzle of good quality olive oil, some extra Maldon Sea Salt, sprigs of dill and some lemon wedges for squeezing.