Cooking Time: Under an hour
Recipe create by Romy Gill
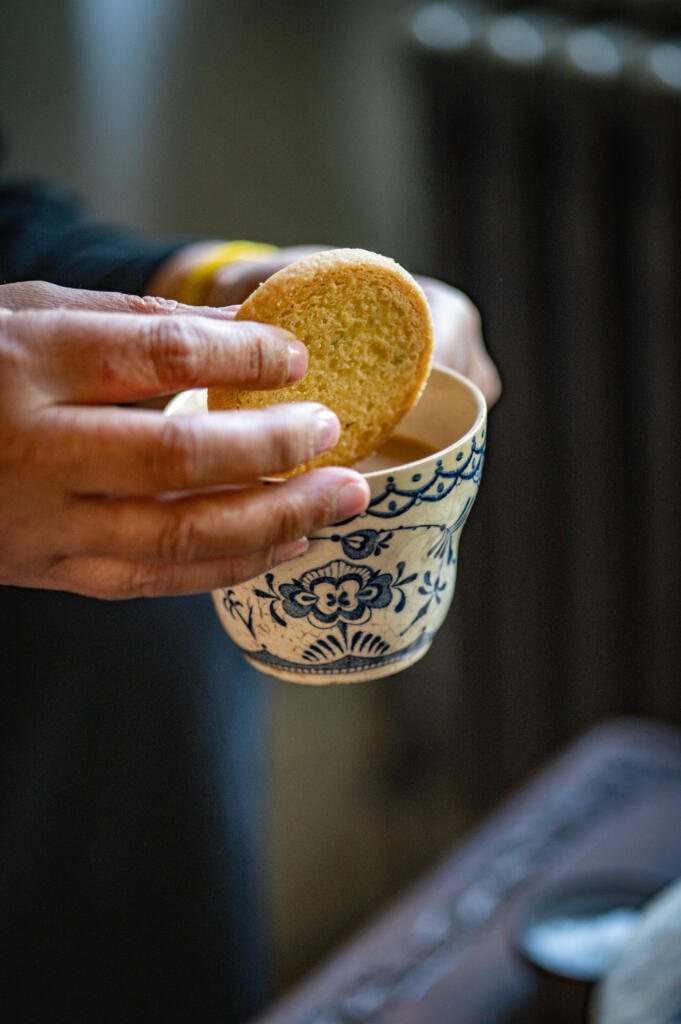
This Diwali, elevate your festive baking with a bold twist on tradition – Romy Gill’s savoury shortbreads infused with fragrant curry leaves and earthy nigella seeds. These buttery bites are delicately seasoned with a pinch of Maldon Sea Salt flakes, adding a clean finish that enhances every flavour.
Inspired by the vibrant spices of Indian kitchens and the warmth of celebration, Romy’s recipe brings together East and West in a beautifully balanced treat. Perfect for gifting, sharing, or simply savouring with a cup of chai as the diyas glow.
How To Make Shortbread with Curry Leaves and Nigella Seeds
- Heat oil in a pan, once hot add the curry leaves,. Once they crisp up, remove from the pan and keep aside.
- Beat the butter and the sugar together is mixing bowl until smooth.
- Stir in the flour, Maldon Sea Salt flakes, nigella seeds and the fried curry leaves mix well. Once everything has combined well, knead the dough just enough so that the mixture comes together into a smooth ball of dough.
- Sprinkle the flour on a clean surface, use a rolling pin to gently roll out. Once it is rolled out enough, cut into round circles and place onto a baking tray lined with the baking paper. Sprinkle with caster sugar and chill in the fridge for 15 minutes.
- Pre-heat the oven 170 degrees. Bake in the oven for 15 minutes, and then turn the tray and cook for another 10 minutes or until pale golden brown. Set aside to cool on a wire rack.
Ed Cudlipp, also known as ‘Cud Cooks’, transforms a simple cabbage into something spectacular with this smoky, umami-rich recipe. His Charred Hispi Cabbage with Miso Butter and Maldon Smoked Sea Salt is a masterclass in balance – sweet caramelised edges, buttery richness, bright lime, and a deep, savoury hit of smoke. A perfect side for grilled meat, or a vegetarian showstopper in its own right.
Step 1 – Char the Cabbage
Heat a large frying pan over high heat and add olive oil. Place the cabbage halves cut-side down and fry hard for 4-5 minutes until deep golden and charred.
Step 2 –Roast until Tender
Transfer to a baking tray, cut-side up, and roast at 200°C for 25-30 minutes until the leaves are tender and slightly crisped at the edges.
Step 3 – Make the Miso Butter
While the cabbage roasts, combine butter, miso paste, lime juice, lime zest, and a pinch of Maldon Smoked Sea Salt. Mix until smooth.
Step 4 –Baste and Finish
Return the cabbage to the frying pan over medium heat. Add a generous spoonful of the miso butter and baste for 1-2 minutes until coated and caramelised.
Step 5 –Serve
Transfer to a serving plate. Spoon over extra miso butter, a squeeze of lime juice, and finish with a final sprinkle of Maldon Smoked Sea Salt.
Smoky, buttery, and irresistibly moreish – a perfect showcase for Maldon’s Smoked Sea Salt.
How did you find this recipe?
Tag @cud_cooks on Instagram when you make it – he’d love to see your version. Comment below how this recipe went for you in the comment’s section below!
By Ed Cudlipp / @cud_cooks
Ed Cudlipp, also known as ‘Cud Cooks’, brings pure indulgence to the baking tin with his Maldon-Salted Chocolate Fudge Brownies – a rich, gooey recipe that celebrates chocolate in all its forms. Packed with generous chunks of dark chocolate and fudge , and finished with the unmistakable crunch of Maldon Sea Salt flakes, these brownies strike the perfect balance between sweet and savoury. It’s the kind of treat that turns a simple square into a decadent moment, ideal for sharing with friends or savouring all to yourself.
Here is how to make the brownies…
- Preheat the oven to 180 °C (160 °C fan).
- Line a 20cm square tin with parchment paper, leaving an overhang so the brownies can be lifted out easily.
- In a heatproof bowl, combine the butter and chocolate chips. Melt gently, either in short bursts in the microwaves or over a bain-marie, until smooth.
- Stir in the brown sugar into the melted chocolate and butter. Whisk in the eggs and vanilla until glossy and well combined.
- Sift together flour and cocoa powder.
- Fold gently unto the chocolate mixture until just combined.
- Add the chopped dark chocolate and fudge chunks, folded them through so they’re evenly distributed.
- Sprinkle a small pinch of Maldon Sea Salt flakes into the batter and fold gently.
- Pour the batter into the prepared tin, and smooth the surface.
- Bake for 30 minutes, until the top is set with a shiny crust and the centre is still soft.
- Leave the brownies to cool in the tin for 10 minutes, top with Maldon Sea Salt and lift out.
- Allow to cool for at least 20 minutes before slicing into squares.
- Serve and enjoy.
Tip:
These brownies are best enjoyed warm or at room temperature. Rich, gooey, and finished with that unmistakable Maldon crunch.
Pairing suggestions:
- Ice cream – The cold, creamy texture contrasts with the warm, gooey brownie.
- Granola – The warming, nutty flavour pairs well with the sweet chocolate, whilst also providing a nice crunch to the soft brownie.
- Fresh berries (raspberries, strawberries) – Their tartness cuts through the sweetness and adds brightness.
Tag @cud_cooks on Instagram when you make them – he’d love to see your creations.
- Preheat the oven to 180C fan.
- Toss the sausages, squash wedges, onion wedges, leek chunks, apples, oregano and olive oil in your largest roasting tray. Season with Maldon Sea Salt and lay the sausages on top of the vegetables.
- Roast for 25 minutes then remove from the oven and add the stock to the base of the tray. Return to the oven for a further 25 minutes until the sausages are well browned and cooked through.
- Meanwhile, for the mash, put the potatoes and parsnips in a large pot of cold salted water. Bring to the boil and cook for 10-15 minutes until the potatoes and parsnips fall off an inserted fork. Drain and leave to steam dry in the colander for a few minutes then return to the pot and mash with the butter. Once at your preferred consistency, stir in the sour cream and season to taste with Maldon Garlic Sea Salt and black pepper.
- Scatter the chives over the mash and serve the sausages and vegetables straight from the tray.
- Preheat the oven to 200C fan.
- Put the whole beetroots and thyme on a baking tray. Drizzle over 2 tbsp vinegar and 2 tbsp olive oil. Season with Maldon Sea Salt. Cover the tray with a layer of parchment paper, followed by a layer of foil. Tuck the foil round the edges of the tray to create a sealed environment for the beetroot to steam.
- Roast for 30-45 minutes, depending on the size of the beetroots, until tender (check by inserting a knife, it should go in easily).
- Once the beetroot is just cool enough to handle, cut into wedges and return to the tray with all the roasting juices. Add the remaining 2 tbsp olive oil and drizzle over the honey. Toss gently to coat and return to the oven for 20 minutes until caramelised.
- Drizzle over the remaining vinegar and extra honey to serve.
- Put the potatoes in a large pot of salted water, bring up to a boil then reduce to a lively simmer for 5 minutes. Drain and leave to steam dry in the colander.
- Preheat the air fryer/oven to 190C fan.
- If using the oven, drizzle the oil in your largest roasting tray and put it in the oven for 10 minutes for the oil to heat up. Once hot, carefully add the potatoes, gently toss and season with a good pinch of Maldon garlic salt. Roast for 20 minutes then then add the garlic and herbs to the tray, toss gently, and return to the oven for a further 10-15 minutes until golden and crisp.
- If using the air fryer, toss the potatoes with the oil and a good pinch of Maldon Garlic Sea Salt. Tip into the bottom of the air fryer and cook for 25 minutes before adding the garlic and herbs, tossing gently, and returning to the air fryer for a further 10-20 minutes until golden and crisp.
Recipe created by Helena and Vikki Moursellas
What is a dakos salad?
A dakos salad (also known as koukouvagia in Crete) is a traditional dish that’s made of barley rusk (a hard, dry bread that softens when topped with juicy tomatoes and olive oil), tomatoes (finely chopped or grated), a soft Greek cheese (either feta of mizithra), extra virgin olive oil, oregano and olives.
It’s often eaten as a light meal or appetiser, similar to bruschetta, but uniquely Cretan.
Barley rusks (paximadi) are a key component of this traditional salad from the island of Crete. The rusks are typically broken into smaller pieces to make them easier to enjoy, their dry, hard texture soaks up all those tomato juices nicely.
How to make a dakos salad
- Grate half the tomatoes and set aside.
- Roughly chop the remaining tomatoes and place in a large serving bowl with the
olives and capers.
- In a small bowl, whisk together the olive oil and vinegar. Season with Maldon Original Sea Salt flakes
and cracked pepper.
- Add the rusk pieces to the serving bowl and toss with the grated tomato and the
dressing. Allow the rusks to briefly soak up all the beautiful juices – about 5 minutes
should do.
- To serve, crumble the feta over the salad and scatter with the dried and
fresh oregano.
Can you prepare this beforehand?
This salad is best prepared fresh, as you don’t want the rusks to become too soggy.
What to serve with a dakos salad?
You should pair a dakos salad with chicken souvlaki and a handful of Greek-style fries. The dakos salad is light, tangy and refreshing from the tomato, olive oil and cheese. The chicken souvlaki brings savoury, smoky protein that compliments the freshness of the salad. Meanwhile, the Greek-style fries adds that comforting, crispy, herby element that you crave for dinner.
A crisp white wine pairs beautifully with the dish. The acidity helps cut through the richness of the cheese and fries.
Make weekend brunch special with brioche French toast piled high with lemony ricotta and juicy berries. Thick slices are briefly dried, soaked in a vanilla custard and pan‑fried in butter for golden edges and a fluffy centre. A final pinch of Maldon Original Sea Salt lifts the sweetness, while maple syrup brings everything together. This easy French toast recipe is quick to master and perfect for sharing.
How to Make French Toast with Ricotta and Berries
Step 1 – Dry the Bread
- Lightly toast slices for 1–2 minutes, or bake briefly in a low oven to dry. Day-old / stale brioche or challah works best.
- Aim to dehydrate so the bread absorbs custard; avoid taking on colour.
Step 2 – Make the Custard & Soak
- In a shallow dish, whisk eggs, milk, vanilla and a pinch of Maldon Original Sea Salt.
- Dip two slices at a time, turning to coat. Soak 20–30 seconds per side until evenly saturated but not collapsing.
Step 3 – Cook the French Toast
- Heat a large non‑stick frying pan over medium heat. Add half the butter.
- When foaming, add soaked slices. Cook ~3 minutes per side until golden with lightly crisp edges.
- Add more butter as needed and repeat with remaining slices.
- Texture cue: outside golden and lightly crisp; centre custardy and set.
Step 4 – Assemble & Serve
- Plate the French toast. Top each with a spoonful of ricotta.
- Grate lemon zest over ricotta and sprinkle a tiny pinch of Maldon Original Sea Salt.
- Add fresh berries and finish with maple syrup. Best served warm.
Tips & FAQs
Tips
- Use thick‑cut brioche/challah (2–3cm) for the best custardy interior.
- Drying the bread prevents sogginess and allows maximum custard absorption.
- Keep heat at medium; too hot scorches the exterior before the centre sets.
- Wipe the pan between batches if butter begins to brown.
- A small pinch of Maldon Original Sea Salt in the custard and on top heightens sweetness and flavour contrast.
FAQs:
- What’s the best bread for French toast?
- Rich, sturdy loaves like brioche or challah hold their shape and soak evenly.
- How do I stop French toast from going soggy?
- Dry the bread first, don’t oversoak, and cook over medium heat until the centre is set.
- Can I make French toast ahead of time?
- Cook slices, cool on a rack, then reheat in a 180°C (350°F) oven for 6–8 minutes. Assemble with ricotta and berries just before serving.
- Can I bake French toast for a crowd?
- Yes. Arrange soaked slices on a buttered tray and bake at 190°C (375°F) for 12–15 minutes, flipping once.
- Can I use frozen berries?
- Yes. Thaw and drain well, or gently warm with a little lemon zest and maple syrup.
Serving Suggestions
- Add a quick berry compote (berries + lemon zest + a splash of maple) for extra sauciness.
- Swap ricotta for whipped mascarpone or Greek yogurt.
- Finish with toasted almonds or pistachios for crunch.
- Pair with crispy bacon or sausages for a sweet‑salty brunch plate.
- For a citrus twist, add orange zest to the custard.
Storage & Reheating
- Store cooked slices (undressed) in an airtight container in the fridge up to 3 days.
- Reheat on a wire rack over a tray at 180°C (350°F) for 6–8 minutes, or in a toaster until warm and crisp.
- Freeze cooked slices between sheets of parchment for up to 2 months; reheat from frozen at 190°C (375°F) for 10–12 minutes.
- Store ricotta and berries separately; assemble to serve.
These griddled sweet potatoes deliver the best of both worlds: deep char from a hot cast‑iron griddle and a tender‑centre finish in the oven. Tossed with olive oil and seasoned with Maldon Original Sea Salt, the wedges pair perfectly with a zesty coriander‑mint mayo brightened with lime and a touch of chilli. An easy grilled sweet potato side for BBQs, weeknights and sharing platters.
How to Make Griddled Sweet Potatoes with Herby Mayo
Step 1 – Preheat & Prep
- Preheat oven to 180°C fan (200°C conventional / 400°F).
- Set a cast‑iron griddle pan over high heat (or preheat BBQ griddle).
- Toss sweet potato wedges with enough olive oil to coat and a generous pinch of Maldon Original Sea Salt. Tap the wedges dry before oiling for a better char result!
Step 2 – Griddle the Wedges
- Working in batches, place wedges cut‑side down on the hot griddle without overcrowding.
- Cook 5 minutes per side until well‑marked and lightly charred.
- Texture cue: pronounced grill lines; surface lightly crisping.
Step 3 – Finish in the Oven
- Transfer charred wedges to a baking tray.
- Bake 10–15 minutes until tender when pierced.
Step 4 – Make the Herby Mayo
- Mix mayonnaise, coriander, mint, chilli, lime zest and juice.
- Season to taste with Maldon Original Sea Salt.
Step 5 – Serve
- Pile wedges onto a platter, add lime wedges and a pinch more Maldon Original Sea Salt.
- Serve with herby mayo for dipping.
- Serving temperature: hot or warm.
Tips & FAQs
Tips
- Heat matters: preheat the griddle until smoking‑hot for defined char without sticking.
- Don’t overcrowd: cook in a single layer; steam prevents browning.
- Even wedges: aim for 2–3cm thick for consistent cooking.
- Short on time? Microwave wedges 3–4 minutes to jump‑start tenderness, then griddle briefly and finish in oven.
FAQs
- How long to grill sweet potato wedges?
- About 5 minutes per side on a very hot griddle, then 10–15 minutes in the oven until tender.
- Do I need to parboil sweet potatoes before grilling?
- No. High‑heat griddling plus oven‑finishing cooks them through. Par‑microwaving is a quick alternative.
- How do I stop sweet potatoes sticking to the griddle?
- Preheat thoroughly, oil the wedges (not the pan), and don’t move them for the first few minutes so a crust forms.
- Can I cook these on a BBQ?
- Yes. Grill over direct heat for colour, then move to indirect heat or a preheated tray with the lid down to finish.
- Can I make the herby mayo ahead?
- Yes, up to 2 days in the fridge. Stir and adjust lime/salt before serving.
Serving Suggestions:
- Add crumbled feta or toasted pumpkin seeds for extra contrast.
- Pair with grilled chicken, halloumi skewers, chimichurri steak or salmon.
- Make a platter with rocket, pickled red onions and extra lime.
- Turn into tacos: wedges + herby mayo + slaw + a sprinkle of Maldon.
Storage & Reheating
- tore wedges and mayo separately in airtight containers. Wedges: fridge up to 3 days; mayo: up to 2 days.
- Reheat wedges on a hot tray at 200°C (390–400°F) for 8–10 minutes or in an air fryer at 190°C (375°F) for 4–6 minutes, in a single layer.
- Refresh with a pinch of Maldon Original Sea Salt and a squeeze of lime.
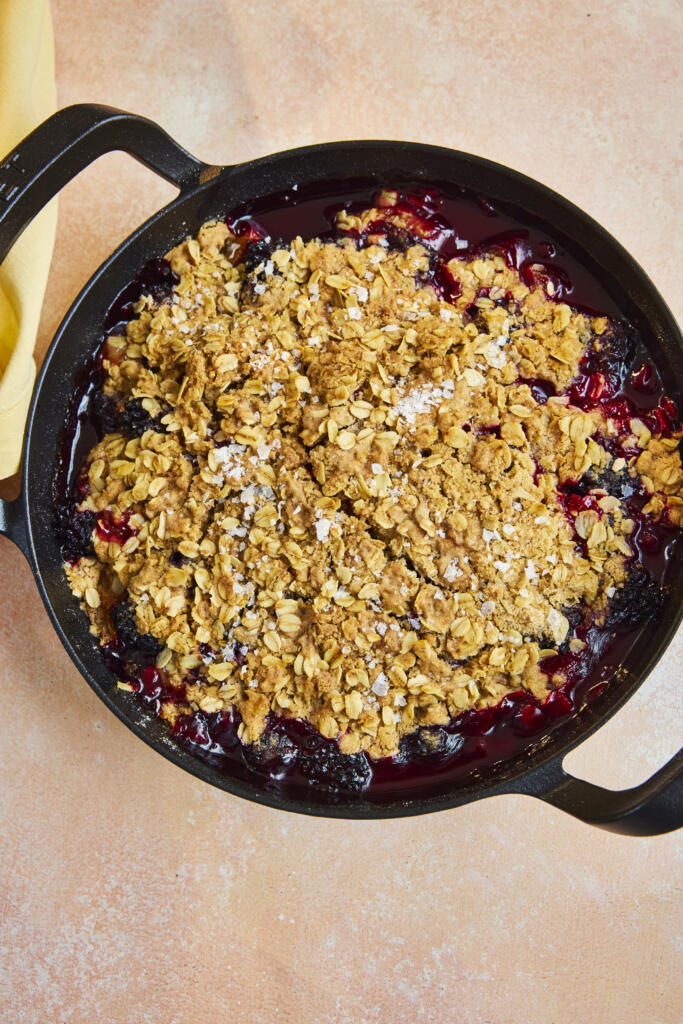
Celebrate late‑season fruit with this plum and blackberry crumble: juicy, tangy fruit baked beneath a buttery oat topping scented with cinnamon and a pinch of Maldon Original Sea Salt. The salt sharpens the fruit and adds balance to the sweet, crunchy crumbs. This easy fruit crumble comes together in minutes and bakes to a golden, bubbling finish — serve warm with ice cream, whipped cream or thick yogurt.
How To Make Blackberry and Plum Crumble (Quick Steps)
- Toss plums and blackberries with lemon and sugar to taste.
- Rub butter into flour, cinnamon and Maldon Sea Salt; add oats and Demerara.
- Scatter over fruit and bake at 180°C fan for 30 minutes until golden and bubbling.
- Rest briefly, then serve warm with ice cream or yogurt.
How To Make Blackberry & Plum Crumble (Detailed Version)
Step 1 – Heat the Oven & Prep Fruit
- Preheat oven to 180°C fan (200°C conventional / 400°F).
- Add plums and blackberries to a skillet or ovenproof dish.
- Taste the fruit; add a pinch of sugar only if needed. Squeeze over lemon juice and toss.
Step 2 – Make the Oat Crumble
- In a large bowl, mix flour, cinnamon and Maldon Original Sea Salt.
- Add butter cubes; toss to coat. Rub in with fingertips to fine breadcrumbs.
- Stir in oats and Demerara sugar. The texture should resemble a mix of fin crumbs and small clumps for crunch.
Step 3 – Assemble & Bake
- Scatter the crumble evenly over the fruit — don’t press down.
- Bake 30 minutes until the top is crisp and golden and the fruit is bubbling at the edges.
Step 4 – Serve
- Rest 5–10 minutes to let juices thicken slightly.
- Spoon into bowls and serve with ice cream, whipped cream or yogurt.
- Optional: finish with a tiny pinch of Maldon Sea Salt flakes for sweet‑salty contrast.
- Best served warm.
Tips & FAQs:
Tips
- Sweetness control: taste fruit first; late‑summer plums can be very sweet, so add sugar only as needed.
- Extra crunch: chill the crumble 10 minutes before baking to keep butter cold and crumbs craggy.
- Even browning: bake on the middle rack; rotate the dish after 20 minutes if browning unevenly.
- Juicy but set: letting the crumble stand for 10 minutes post‑bake helps juices thicken.
FAQs
- What’s the best fruit mix for a crumble?
- Tart blackberries balance sweet plums. You can swap in apples, pears or nectarines; aim for a tart‑sweet balance.
- Can I use frozen fruit?
- Yes. Bake from frozen but toss fruit with 1–2 tsp flour or cornflour to absorb extra juices and add 5–10 minutes to the bake.
- Can I make crumble ahead?
- Assemble fruit and topping separately up to 24 hours in the fridge. Top and bake just before serving. The raw crumble topping also freezes well.
- How do I keep the topping crunchy?
- Keep butter cold, don’t over‑mix, and avoid pressing the topping down. If needed, finish with 2–3 minutes under a hot grill/broiler.
- Can I make it dairy‑free or vegan?
- Use a plant‑based butter with similar fat content. Check that your sugar suits your dietary needs.
Serving Suggestions
- Classic: serve warm with a scoop of homemade ice cream..
- Lighter: thick Greek yogurt with a drizzle of honey.
- Extra texture: scatter toasted chopped pistachios or almonds before serving.
- Flavour twist: add orange zest to the fruit or swap cinnamon for mixed spice as we move into autumn.
Storage & Reheating
- Store leftovers covered in the fridge for up to 3 days.
- Reheat in a 170°C (340°F) oven for 12–15 minutes until hot and topping re‑crisped; or air fry at 170°C for 6–8 minutes.
- Freeze: cool completely, wrap tightly and freeze up to 2 months. Reheat from frozen at 170°C until piping hot (cover with foil if over‑browning).