Store-bought granola’s can be quite expensive these days – Why don’t you save your pennies and make your own!
This recipe is packed full of nutrients from the blends of toasted nuts and seeds. Swap your honey with agave syrup for this recipe to be completely vegan-friendly as well.
Preheat the oven to 180C.
Line a large baking tray with baking paper.
In a large bowl mix together the oats, nuts and seeds with the cinnamon and Maldon Salt. In a small pan melt together the coconut oil and agave syrup gently. Then pour this over the oats and mix well, making sure everything is evenly coated.
Spread it across the baking tray and place into the oven. Bake for 10 – 15 minutes until lightly toasted and golden brown.
Remove from the oven and allow to cool slightly before stirring through the coconut flakes.
Add on top of your breakfast porridge, yogurt or even on a salad to add a new level of texture with the delicious crunch of the nuts and seeds!
Join us in creating this quick and easy to follow beetroot hummus. It’s refreshing in flavour and makes a delicious dip or a healthy spread on top of your cracker! Adding a pinch of Maldon Salt and cumin adds a little more spice and richness to the appetizer. A generous drizzle of olive oil on top of the hummus also makes the texture of the smoother in consistency and luxurious in texture.
Place all the ingredients into a food processor and blitz until the elements break down and it becomes completely smooth.
Spoon into a serving bowl and top with a sprinkle of nigella seeds, caraway seeds, a drizzle of olive oil and a final pinch of Maldon Salt.
Serve with your favourite crudités, toasted bread or crackers.
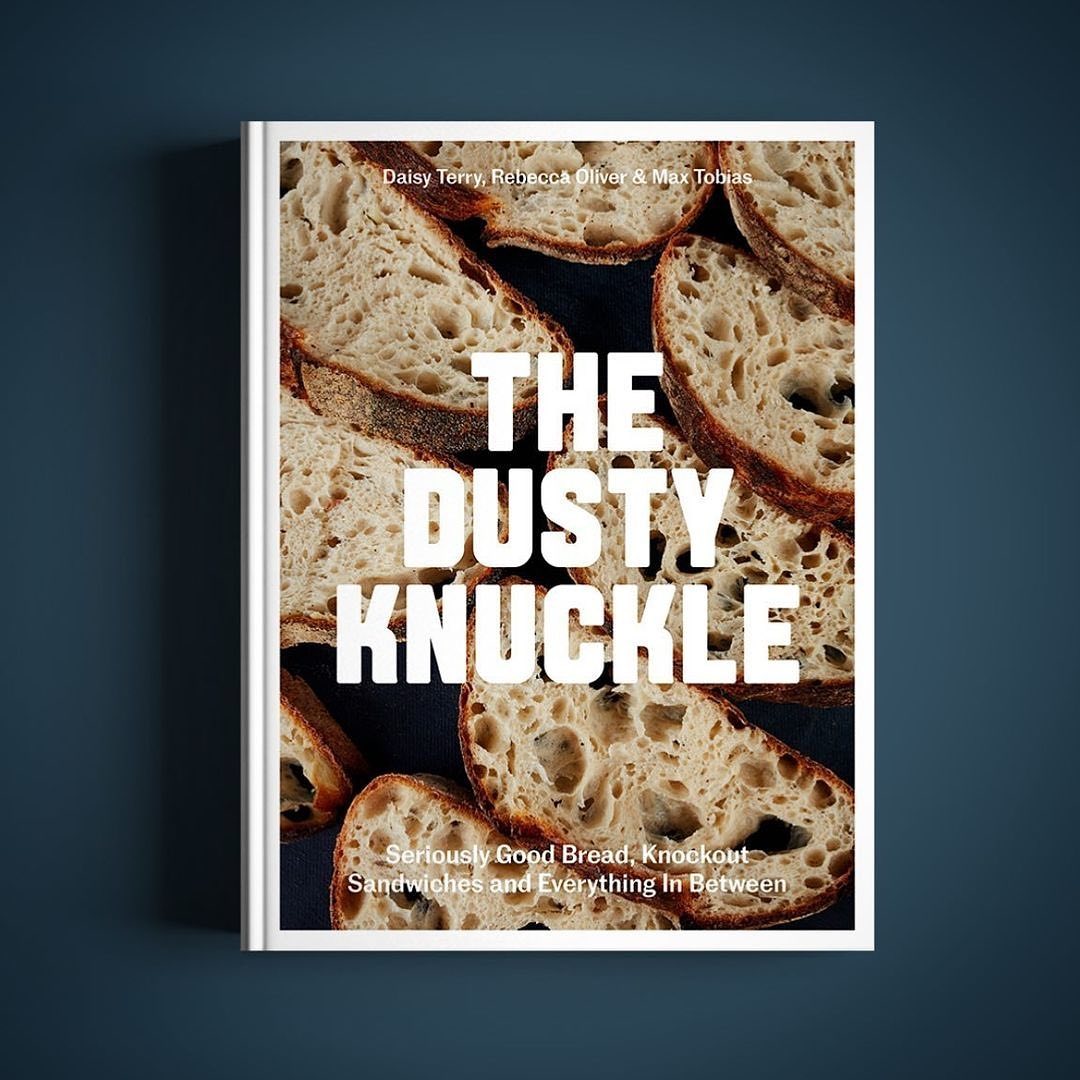
The Dusty Knuckle is East London’s favourite bakery and café with being experts in creating seriously good bread, knockout sandwiches and everything in between! Having two locations based in Dalston and Harringay, The Dusty Knuckle offer an abundance of baked goods, where you can wine & dine and even attend their baking classes during the weekend, learning how to make their ‘knock-out’ breads.
Sharing their baking secrets is at the heart of the bakery, where managers Max Tobias, Rebecca Oliver and Daisy Terry have shared it all with the release of their latest cook book, ‘The Dusty Knuckle’, whereby Maldon Salt is credited for being the bakery’s salt of choice!
Here we delve into one of the recipe’s in which The Dusty Knuckle have used Maldon Salt to enhance their dish…the infamous Focaccia!
For the poolish, add the water and yeast to a bowl, mix until your yeast is dissolved, then throw in the flour. Mix quickly with your hands; this will be wet and sloppy and you are only looking to mix it enough so that there are no wet bits and no dry clumps. Scrape your bowl down, cover it with a clean cloth or lid and leave somewhere warm to ferment. How long this takes depends on the heat of your home, your yeast, your flour, your hands. You are basically looking for it to have grown to almost triple in size and for the surface to be covered in little bubbles, roughly 2 hours. Use it before it begins to deflate and drop down the edges of the bowl.
Add the first water addition for the dough, and the yeast. It will separate and feel slimy; don’t worry, this is normal. Add your flours and mix thoroughly until everything is combined. If you are doing this by hand, it will take around 4 minutes, and if using a mixer with a dough hook, around 2 minutes on slow speed. Scrape your bowl down, cover and leave for an hour. This rest period (called autolysis) allows the flour to further absorb the water, which is important in this recipe as it uses nearly the same amount of water as flour. It should rise nicely and it may get a bit of a crusty top: don’t worry about this, it’ll all get mixed in.
Add the second water addition and Maldon Salt, and mix in with your hands (again, it will break up, but don’t worry, it’ll soon come back together). Once your dough is looking a bit more coherent, you will need to work it a bit. The easiest way to do this is to grab one side, stretching it upwards as far as it will allow you, then fold it back on itself, turn the bowl slightly and repeat, working your way around and around (keep the dough in the bowl; you will thank yourself when cleaning up later). The dough will start off shaggy and will tear easily, but will soon become elastic and silky. This will probably take you about 10 minutes, but don’t scrimp on the time here: you are building strength in the dough, which is the key to that chewy delicious bread. You can use a mixer – we do – for this, mixing for 2 minutes on slow speed, then 4 minutes on fast.
Check your dough for elasticity: does it stretch without tearing? If it’s still a bit weak and tears easily when you lift it, give it a couple more minutes.
Once mixed and silky and lovely and smooth and soft, take the dough out of the bowl, pour 2 generous glugs of olive oil into the bowl and replace the dough in the bowl. Cover and leave to rest for 1 hour, then fold and leave for another hour, before folding again and leaving for another hour (3 hours in total from mixing the final dough). To fold the dough, grab the edge of the dough with oily fingers and stretch it as high as it will let you, then fold it back over itself. Do this 4 times (north, south, east, west) to complete one fold.
After 3 hours your dough should be feeling pillowy, soft and silky, and bubbly. Turn it out onto a well-oiled standard-sized baking tray and fold it neatly into a square shape (don’t worry if this is much smaller than the tray as it will sprawl out and fill the tray) and leave somewhere nice and warm, and not too airy, for 1 hour. (If following the morning bake schedule, then this is when you would put it in the fridge – it can be in the fridge at this stage for up to 12 hours.)
Fold each side in to create a square and leave it for another hour, then do this one more time and leave for its final hour.
Give it a prod: if it feels like it will let you, gently slide oily hands right underneath and slowly stretch it out, pulling from the central underbelly. Be delicate here: it should feel like a wobbly, airy pillow (if it doesn’t leave it another hour). Ensure you do not tear the dough. It will relax and start to fill the tray. Heat your oven to its hottest setting.
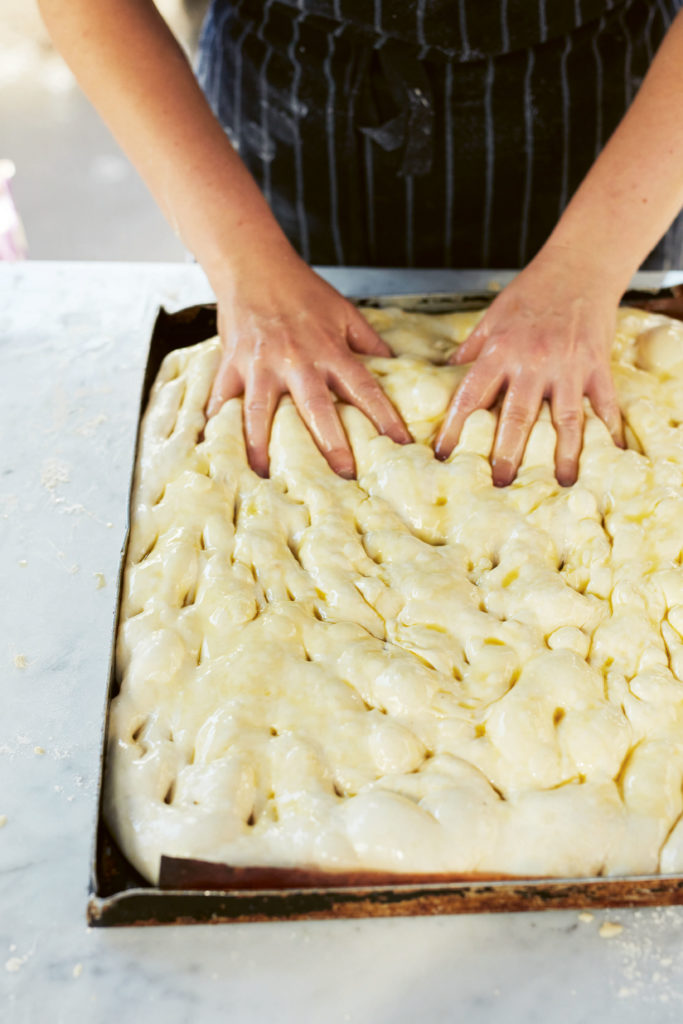
Whisk together 200ml (7fl oz/scant 1 cup) olive oil and 100ml (3 ½ fl oz/scant ½ cup) water until cloudy and immediately pour all over the top of the dough – be super-generous here. Dimple the top of the dough with your fingertips – sharp hard dimples are better than little soft ones so don’t worry if you go right through to the tray or even make a little hole; this will move the bubbles around inside and help get that chewy, open structure we are all looking for. Because it is so oily and bubbly, and nice to touch, it is tempting to over-dimple which can knock the air out, so just prod it enough so the surface is evenly dimpled. Sprinkle with Maldon Salt and bake for 15 minutes or until deep and golden brown. Be super-careful taking this out of the oven as the oil is hot and there will be excess on the tray.
Remove from the tray straight away and leave to cool on a wire rack.
Preheat the oven to 230c fan. Add the aubergines to a large bowl with the oil, achiote, maple, chilli paste and Maldon Salt and mix well. Spread out on a large, flat, parchment-lined baking tray.
Add all the mango sauce ingredients to a medium high sided tray.
Place the aubergines on the top shelf of the oven and the mango sauce tray on the bottom shelf. Roast for 25 minutes, then flip the aubergines and roast for another 10 minutes, or until golden-brown on both sides. At this point the onions in the mango sauce should be nicely browned around the edges and the sauces should be the consistency of maple syrup. Set aside to cool.
Mix all the ingredients for the yoghurt together in a medium bowl.
Toast the sesame seeds in a very hot pan until golden brown and fragrant. Add all the sesame salt ingredients to a mortar and roughly crush (not too much, you do not want the sesame seeds to become a powder).
Serve once the aubergine and sauce have cooled (they should be just above room temperature or they’ll melt the yogurt). Spoon the yogurt onto a platter, then top with the roasted aubergines and the sauce. Avoid the allspice berries and cinnamon.
Finish with the spring onions, sesame salt and serve with lime wedges.
There’s something truly special about baking cookies that feel both indulgent and nourishing – and these homemade oat cookies are just that. Packed with wholesome rolled oats, rich dark chocolate, chewy dried fruits and a medley of chopped nuts, they’re bound together with creamy cashew and almond butter for a decadent texture and taste. The magic touch? A pinch of Maldon Sea Sat flakes, which enhances every flavour and adds a subtle crunch.
Finished with decorative chocolate swirls on top, these cookies are perfect for cosy autumn gatherings, thoughtful homemade gifts, or simply treating yourself after a long day. Every bite is a celebration of comfort, craft and a little salty-sweet sophistication!
How to Make Oat Biscuits With Dried Fruits, Nuts and Chocolate
Preheat the oven to 180C and line two baking trays with parchment paper.
In a large bowl mix together the oats, Maldon Sea Salt, baking powder, chopped nuts and dried fruit. Set aside.
In a smaller bowl, mix together the cashew butter, almond butter, maple syrup and coconut sugar. Stir until well combined and the coconut sugar has dissolved.
Pour this wet mixture into the larger bowl with the dry ingredients and mix together until well distributed and combined.
Take a small amount of the mixture and roll together in your hands – roughly the size of a golf ball. Place onto the lined baking sheets with a 2inch gap in between and press down gently to flatten slightly. Place into the preheated oven and bake for 10 – 12 minutes until golden brown on top. Remove from the oven and allow to cool on the baking sheets.
Once cool, use the melted dark chocolate to drizzle across the tops of the cookies. Sprinkle with a final pinch of Maldon salt and then allow the chocolate to set before serving.
FAQ
Why add salt to biscuits?
Salt is great to add into cookies and baking recipes as the salt helps balance the flavours, especially when using sweet nut butters, syrups and chocolate.
Start your day with a vibrant burst of flavour and nourishment with a green smoothie. Blending fresh spinach, creamy avocado and a hint of ginger, it’s finishing touch of Maldon Sea Salt flakes elevates every sip. The clean saltiness brings out the natural sweetness of the fruit and the earthiness of the greens, making this smoothie a refreshing, energising drink to have with your breakfast.
How to make a green smoothie
Set up your blender on a cool, flat surface. Make sure it’s switched off whilst the plug is in.
Start filling the blender with your ingredients in this order: water, half an avocado, fresh ginger, cored apples, frozen spinach and a final pinch of Maldon Sea Salt flakes to elevate the sweetness of the smoothie and counteract the bitterness.
Place the lid securely onto the blender to prevent any spillage. Turn the switch/power button on.
Select the appropriate speed setting and begin blending. You will know when the ingredients have blended nicely together because the liquid will become vivid green with a medium-thick texture.
Pour the contents into a tall glass and drink immediately.
What are the benefits of a detox smoothie?
A detox smoothie helps detoxify your body, it can help with weight loss, it enhances immunity, improves digestion and is a great way of packing in extra vitamins and nutrients.
Are green smoothies good for you?
Medically reviewed by Dany P. Baby, green smoothies are nutrient-rich blends of fruits and vegetables which allow people to meet their recommended daily intake of vitamins and minerals all in one glass! Unlike juices, green smoothies retain beneficial fibre from whole foods that are blended together.
What to put in a green smoothie
Basic green smoothies contain leafy greens like spinach, kale and arugula. Alone, these greens blended can take quite bitter, however there are many combinations you can use to improve the flavour profile and add further nutritional value to the drink:
Fruits such as apple, avocado and banana add natural sweetness to a smoothie.
Vegetables such as carrots, cucumber and beetroot add texture.
Herbs and spices like ginger, turmeric and cinnamon give warmth.
Natural sweeteners like honey, dates and stevia are great if you like your smoothies ‘extra’ sweet!
Add creaminess with plant-based milks, yogurt or silken tofu.
Are green smoothies good for breakfast?
Green smoothies make a great breakfast option! You can make it quickly for a blender, it’s fresh tasting and it’s packed with nutrition from the amount of fruit and vegetables used. It contributes to your 5-a-day and is the ideal breakfast for when you are on the go.
Can you freeze green smoothies?
Yes. You can store your smoothie in the freezer for up to 3 months! It keeps the flavour, mouthfeel, colour and nutrition! Make sure you store your smoothie contents in BPA-free plastic, glass or bags designed for sub-zero temperatures so that you avoid cracking and freezer burn.
Can I make green smoothies the night before?
You can store your smoothie in the fridge for up to 1-2 days before drinking. However, we do recommend consuming the smoothie within 24 hours for optimal freshness. Make sure you container is covered with a tight-fitting lid
The Chilton is a cocktail originating from Texas. It is incredibly refreshing, especially on a hot day, and is so simple with just lemon, vodka and soda. The salty rim works brilliantly with the lemon and the addition of blueberries here brings some Summer fruitiness to the drink.
Begin by making the salt rim on the glass. Place the Maldon salt on a small, flat plate. Rub the rim of a tall highball glass with lemon and then turn the glass upside down into the salt and turn to stick the salt around the rim.
Carefully fill the glass with ice. Add the Ketel One vodka, lemon juice and top up with soda water. Stir gently and then garnish with fresh blueberries and some slices of lemon.
Did you know Havan, Cuba is where the the mojito cocktail originated from, with the main components of this refreshing cocktail being rum, or ‘aguardiente de caña’ which means burning water, with also the sweeter elements of lime, sugarcane juice and of course, mint!
We’ve taken on the classic and giving it our own refreshing twist with our alcohol-free mocktail which is bursting full of Summer flavours. The watermelon and basil is a fresh tasting alternative to the traditional lime and mint mojito, giving it a slightly sweeter flavour when a pinch of Maldon Salt is added to the sugar syrup mixture.
In a blender, add the watermelon and blitz until smooth – then pass this through a sieve to remove any pips.
In two tall highball glasses start with a handful of basil leaves in each, 1 tbsp of sugar syrup and a pinch of Maldon salt. Then muddle these together using a muddler (or similar) to break down the basil leaves and infuse the flavours.
Add the lime juice, fill the glass with ice and finally top up with the strained watermelon juice. Mix together.
To serve, garnish with a small triangle of watermelon, a slice of lime and some basil leaves.
What are the benefits of mocktails?
The main benefit of mocktails is that they hydrate you more than a regular, alcoholic cocktail would. This is because alcohol is a diuretic, meaning it causes significant water loss in the human body. On the other hand, mocktails are more hydrating, especially if they contain sparkling water or coconut water.
Additionally, mocktails on the menu means that everyone can drink them and not miss out on the delicious flavour profiles that they offer!
Do you have any more alcohol-free recipe?
We certainly do! We have a bundle to choose from over on our Recipes, Tips and Blog’s page, including our delicious pineapple amaretto sour, which has the perfect balance of sweet and sour. If you like the quirkier things in life, we also teamed up with Imogen Davis, who is the co-founder of Native restaurant who created the delicious mushroom milk punch!
Negroni Sbagliato Cocktail with Prosecco
Did you know ‘sbagliato’ in Italian means ‘mistaken’ or ‘bungled’. This is how the the delicious Negroni Sbagliato cocktail was invented…by mistake! A traditional Negroni is made from Campari, which is bitter tasting liqueur mixed with sweet vermouth and gin.
The Negroni Spagliato is a take on the classic, where Campai and sweet vermouth are added, however the gin is replaced with sparkling wine or prosecco. As a result, the use of prosecco will make it less alcoholic, with the bubbles adding an elegant flavour and gentle fizz as you take a sip.
As you would with a traditional Negroni, you can serve these in stem of flute glass, garnished with orange peel or grapefruit zest.
Why Add Salt To A Negroni Sbagliato?
Adding a pinch of Maldon Salt will counteract the bitter notes that a typical Negroni has, and intensifies the sweeter notes of the the Red Vermouth and Prosecco to come through.
Ahead of preparation, keep your Campari and Red Vermouth chilled in the fridges before use.
Add the measurements of Campari and Red Vermouth in to a champagne flute or stem glass. Add a small pinch of Maldon Salt.
Mix well with a bar spoon until the salt has completely dissolved into the spirits.
Top the glass with chilled prosecco.
To serve, garnish with orange peel or grapefruit zest over ice.
What food pairs well with a Negroni Sbagliato?
As the classic Negroni is an Italian cocktail, it makes sense that the foods in which pair well with the drink would be a tasty cheese board or antipasto. This is because the cocktail itself has a slight bitterness due to the Campari, therefore flavoured, salty foods and cheeses are required to balance this combination.
Why is Negroni Sbagliato Trending?
You may have already heard about this cocktail through the House of Dragon’s actor Emma D’arcy. This short interview went viral at the end of 2022, where Emma shared what her favourite drink of choice was – you guessed it – a Negroni Sbagliato with Prosecco in it!
Fresh blackberries with a savoury kick from the sprigs of thyme – a combination of flavours that work perfect together! This cocktail is sweet, refreshing and surprisingly easy to make.
It’s important to call out the use of thyme in this cocktail, as although subtle, it is a worthy addition. The thyme will help bring out the tequila’s spicy notes, whilst adding gentle, herbal notes to the drink.
Although you might think the Maldon Salt rim is just for decoration, it actually serves a purpose! The flaky sea salt adds balance to the drink due to counteracting the bitterness from the tequila and enhancing the sweetness from the blackberry. The rim also provides texture, stimulating your receptor cells.
Here is how to make our Blackberry & Thyme Margarita…
Mix together the Maldon Salt and the picked thyme leaves on a small plate. Set side.
Rub the rim of a lowball glass or short tumbler with the wedge of lime so it is wet. Then, turn the glass upside down into the salt and thyme mix and press, turning it so that t there is a good even coating of salt around the rim of each glass.
In a cocktail shaker add the 6 blackberries and 3 thyme sprigs. Muddle these well by pressing the the blackberries so that they burst and break down.
In the same shaker add the tequila, agave and lime juice.
Fill the shaker half full of ice, then pop the lid on and shake well for a minute until the shaker is cold to touch.
Add some ice cubes into your salt rimmed glasses.
Pour the margarita through a fine strainer into each glass.
Garnish with the remaining blackberries and a sprig of thyme in each glass.
Serve immediately and enjoy!
How to make this virgin / alcohol-free?
You can easily make this recipe virgin / alcohol-free by replacing the tequila and using a combination of ingredients:
Lime and lemon juice to bring citrus.
Tonic or Sparkling water to add bubbles.
Simple syrup / agave syrup to balance out the tartness.
What to serve with this cocktail?
As Mexico is the homeland for a classic margarita, it makes sense to pair a delicious Mexican dish with this drink! Serve our tacos to experience a perfect balance in flavours from the fiery zest of the pulled pork with the sweet and slightly bitterness of the blackberry and thyme.
We find that tequila also pairs beautifully well with grilled seafood, such as squid or prawns. Serve our BBQ prawns, tossed in a chilli and garlic marinade to give you a gentle kick of spice whilst you take a sip of your sweet, soothing margarita.
What other herbs would work instead of thyme?
If you are not a fan of thyme, blackberries pair well with mint and basil. Additionally, rosemary and sage work well with blackberry, but please do add sparingly as tend to be very strong in both taste and aroma.