Aubergine is one of the most underrated vegetables in the kitchen. Often overlooked in favour of more familiar seasonal ingredients, it can sometimes be dismissed as ‘bland’ or ‘difficult to cook’. Yet when prepared properly, aubergine transforms into something truly special, with a silky-soft centre, crisp golden exterior and an incredible ability to absorb bold flavours.
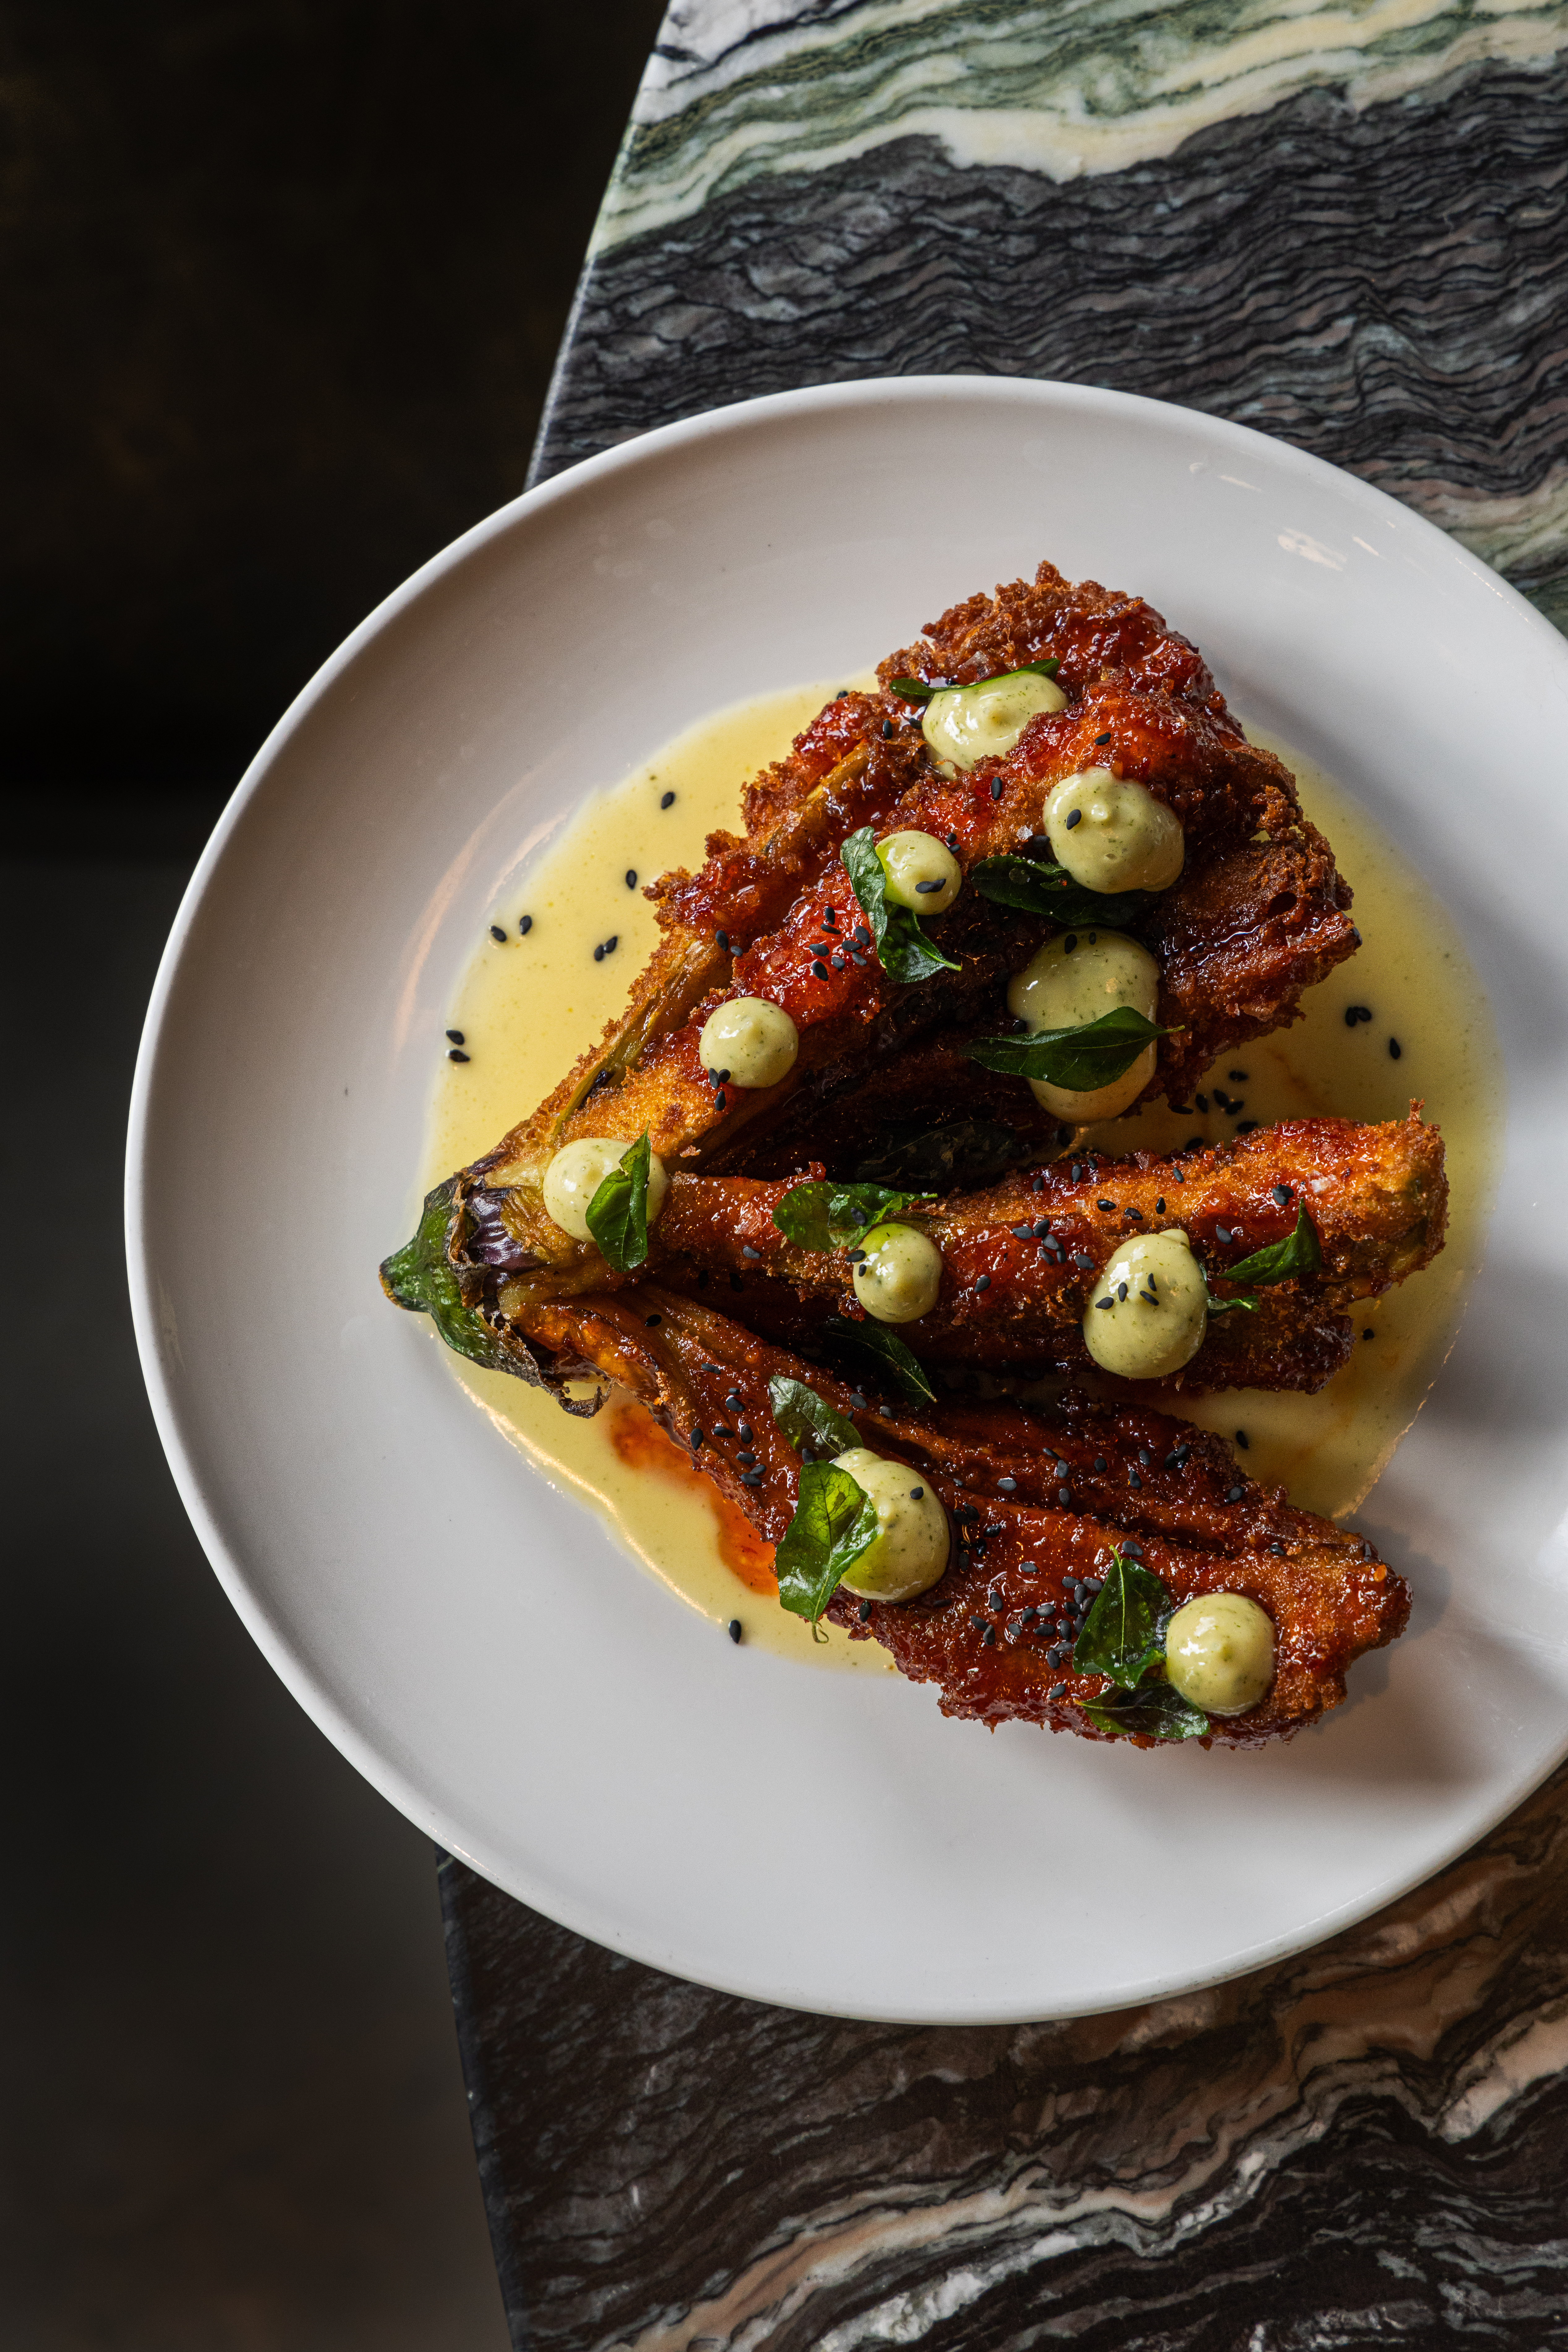
In this exclusive collaboration with Fallow Chefs, we’ve taken aubergine to new heights. Inspired by Fallow’s innovative approach to flavour, this striking Blooming Aubergine combines the delicate seasoning power of Sicilian Fine Sea Salt, Selected by Maldon, the signature crunch of Maldon Original Sea Salt Flakes, and the sweet heat of Fallow Chefs Sriracha Hot Honey. The result is a showstopping dish that’s crispy, vibrant and packed with layers of umami, spice and texture.
Perfect as a starter, side dish or centrepiece for entertaining, this recipe proves that aubergine deserved a place firmly in the spotlight.
About Fallow Chefs
Fallow Chefs Maldon 50 2026
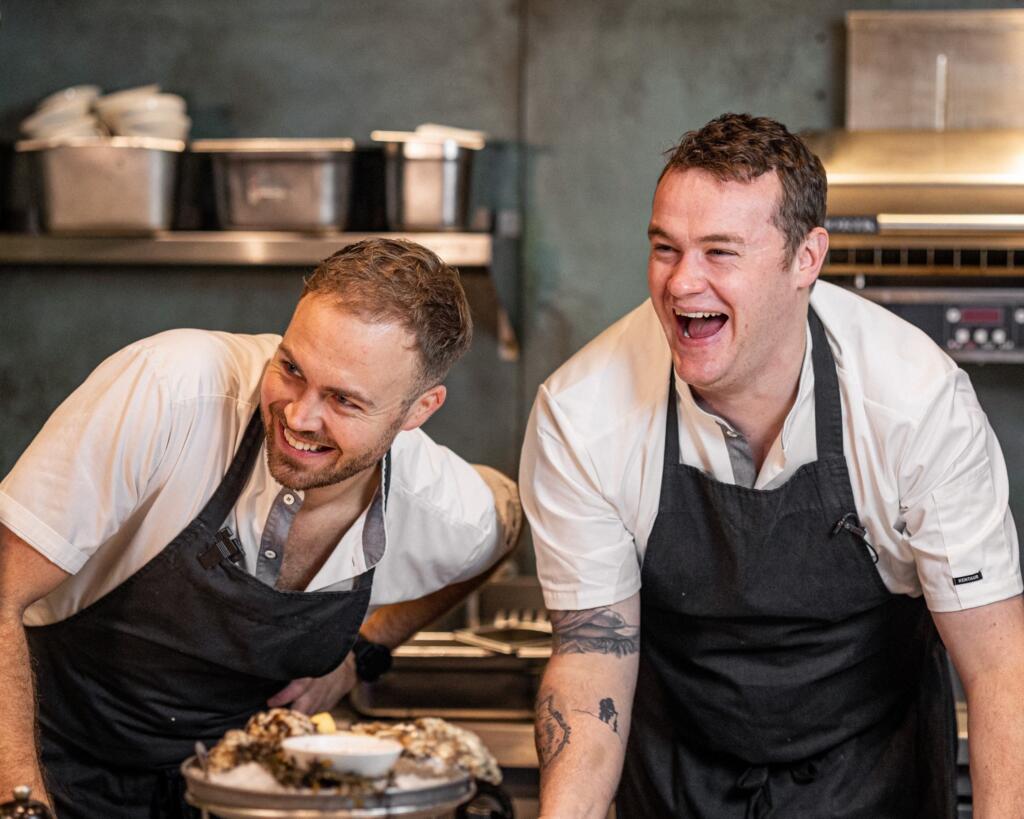
Founded by acclaimed chefs Jack Croft and Will Murray, Fallow has become one of London’s most celebrated restaurants, earning a loyal following for its innovative approach to modern British cooking, bold flavours and commitment to sustainability. Known for transforming humble ingredients into unforgettable dishes, Fallow has built a reputation for creativity both in the restaurant and across its hugely popular social media channels.
How to Make a Blooming Aubergine with Fallow Chefs Sriracha Hot Honey
Fallow Chefs x Maldon Salt Blooming Aubergine Recipe
Prepare the Aubergine
Keeping the stem intact, peel the aubergine.
Slice lengthways through the aubergine four times to create eight equal baton, still attached at the top.
Sprinkling generously all over with Sicilian Fine Sea Salt, Selected by Maldon and leave on a tray for 30 minutes to dry brine.
Make the Miso Buttermilk Dressing
Combine the white miso, mirin, soy sauce, rice wine vinegar, garlic, ginger, lime juice and zest.
Blend until smooth and fully combined.
Add the buttermilk, whisk together and set aside.
Make the Black Pepper Ranch
Combine all ranch ingredients in a bowl.
Whisk until smooth and well incorporated.
Coat and Fry the Aubergine
Squeeze out as much moisture as possible from the aubergine and pat dry.
Dust thoroughly with flour, ensuring the inside of each baton is evenly coated.
Whisk the eggs in a bowl.
Dip the aubergine into the egg, then coast generously with panko breadcrumbs.
Heat neutral oil to 180°C.
Carefully lower the aubergine into the oil and dry for around 3 minutes until crisp and golden brown. Drain on kitchen paper.
Make the Crispy Curry Leaves
Fry the curry leaves into the hot oil for 30 seconds.
Remove with a slotted spoon and drain on kitchen paper.
Finish and Serve
Drizzle the fried aubergine generously with Fallow Chefs Sriracha Hot Honey.
Sprinkle with Maldon Original Sea Salt Flakes and black sesame seeds.
Spoon 4-5 tablespoons of the miso dressing onto the centre of a serving plate.
Place the blooming aubergine on top.
Dot the black pepper ranch over the aubergine.
Scatter over the crispy curry leaves and finish with an extra drizzle of hot honey and a final pinch of Maldon Original Sea Salt Flakes.
Why You’ll Love This Recipe
This dish is a celebration of texture and flavour. The dry brining process with Sicilian Fine Sea Salt helps draw out excess moisture, resulting in an aubergine that’s beautifully tender inside while achieving a crisp, golden coating. Layered with rich miso dressing, peppery ranch, aromatic curry leaves and the sweet-spicy kick of Fallow Chefs Sriracha Hot Honey, every bite delivers something unexpected.
Whether you’re already an aubergine enthusiast or looking to give this often-overlooked vegetable another chance, this recipe is guaranteed to chance your mind.
Want to see it come together? Watch the full recipe from Maldon Salt and Fallow Chefs on Instagram here.
We’ve teamed up with Annie Mae Herring (also known as The Culinary Bee) to bring back an absolute British icon that is the Butterscotch Tart.
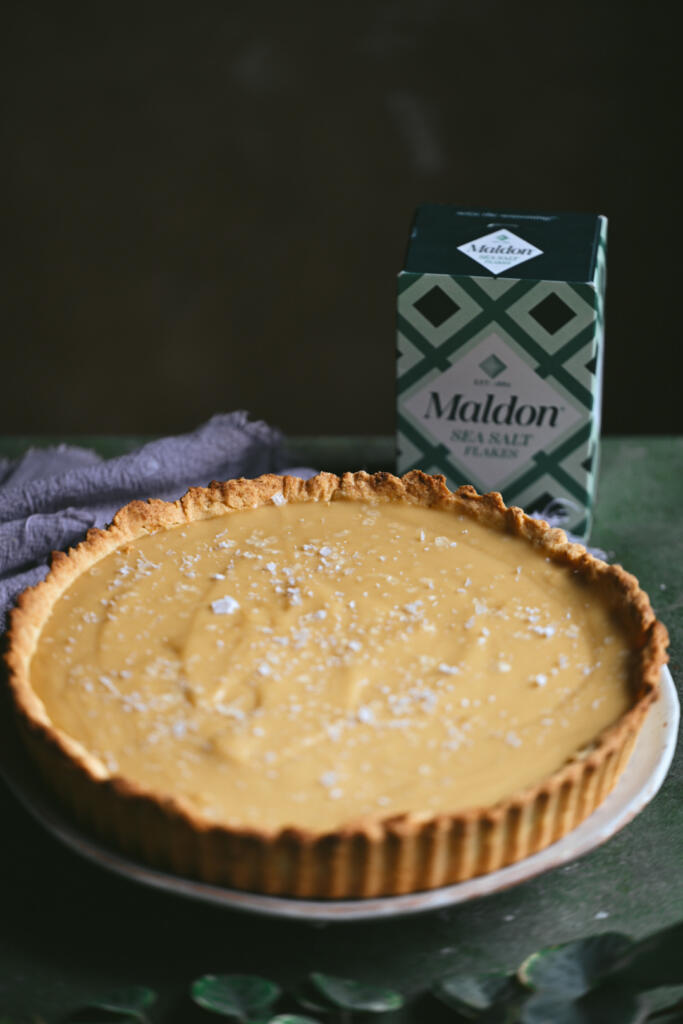
A gloriously wobbly, ridiculously nostalgic school pudding with buttery pastry and a thick, silky butterscotch filling. And for this one, we’ve seasoned it with Maldon Original Sea Salt Flakes because you need to season your desserts.
Why? A butterscotch tart is rich and sweet whereby Maldon Sea Salt is crushed directly into the butterscotch filling to balance the brown sugar and caramel richness, then finished on top of the tart to give tiny pops of salinity that make the butterscotch elevated.
How To Make Butterscotch Tart
Butterscotch tart with Annie Mae Herring and Maldon Salt
Heat the oven to 180°C fan.
Rub the butter into the flour and icing sugar until it resembles breadcrumbs. Add the egg yolk and enough cold water to bring everything together. Wrap and chill for 30 minutes.
Roll out the pastry and line a 23cm tart tin. Chill for another 15 minutes, prick the base, then line with baking paper and baking beans. Blind bake for 15 minutes. Remove the paper and beans and bake for another 8 to 10 minutes until lightly golden. Leave to cool completely.
For the filling, melt the butter in a saucepan over a medium heat. Add the dark brown sugar and stir until dissolved.
Whisk in the flour and cook for 1 minute. Gradually pour in the milk, whisking continuously, followed by the double cream. Add the vanilla and crushed Maldon Original Sea Salt Flakes.
Cook gently for 6 to 8 minutes, whisking regularly, until you have a thick, glossy butterscotch that coats the back of a spoon.
Pour into the cooled pastry case and smooth the top. Allow to cool, then refrigerate for at least 4 hours, or preferably overnight, until completely set.
Just before serving, finish with a final pinch of Maldon Original Sea Salt Flakes.
Created in collaboration with Margie Nomura of Desert Island Dishes, this angel hair pasta recipe is a brilliant example of how simple ingredients can come together to create something truly special. As a professional chef with more than a decade of experience, Margie is known for developing easy, reliable recipes that deliver maximum flavour with minimal fuss, making them perfect for busy home cooks.
Inspired by Ina Garten’s classic no-cook tomato pasta, this dish allows sweet cherry tomatoes, garlic, fresh basil and olive oil to marinate together, creating a light and vibrant sauce while you get on with your day. Once tossed with hot angel hair pasta and plenty of Parmesan, the result is a fresh, summery meal that’s bursting with Mediterranean flavours and ready in minutes. Whether you’re looking for a quick weeknight dinner or an effortless recipe for entertaining, this simple pasta is sure to become a favourite.
How to Make Summer Garden Pasta
In a large bowl, combine the tomatoes, olive oil, garlic, basil, chilli flakes, Maldon Original Sea Salt flakes and black pepper.
Cover and leave at room temperature for at least 2 hours
Drain well, reserving a splash of the pasta water if needed.
Add the hot pasta straight to the tomatoes and toss thoroughly.
Stir through the Parmesan until it melts into the tomato juices to create a light sauce.
Finish with extra basil, Parmesan and a drizzle of olive oil.
An Italian Classic Reimagined
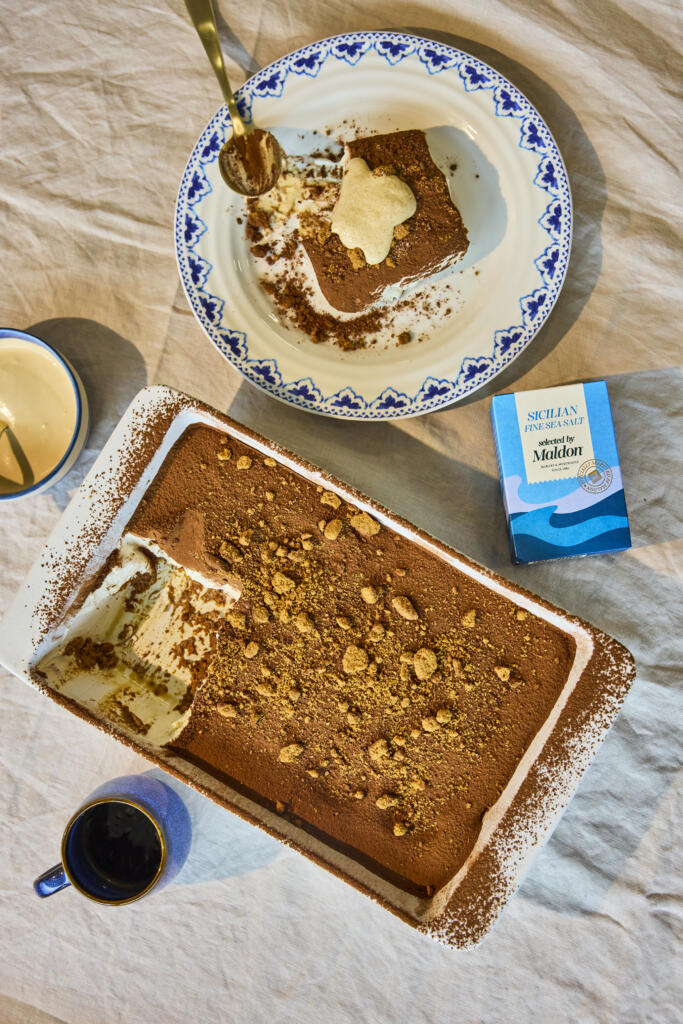
To celebrate the launch of Sicilian Fine Sea Salt, Selected by Maldon, Maldon Salt has partnered with award-winning Italian cook Giuseppe Federici (@sepps) to showcase recipes inspired by the flavours, traditions and family food culture that define Italian cooking. This indulgent Vegan Tiramisu combines rich espresso, creamy Biscoff filling and a subtle salted coffee cream, creating a delicious twist on one of Italy’s most iconic dessert.
Welcoming Giuseppe Federici
Giuseppe Federici (@sepps) is a second-generation British Italian who comes from a long line of passionate food lovers, with Italian home cooking at the heart of everything he creates.
Today, Giuseppe shares authentic Italian recipe videos, family traditions and cooking inspirations with his hugely engaged audience. His beloved videos cooking alongside his Nonna have captured the hearts of millions and inspired his cookbook – Cooking with Nonna – a collection of treasured family recipes and stories based down through generations with a plant-based twist.
Introducing Sicilian Fine Sea Salt, Selected by Maldon
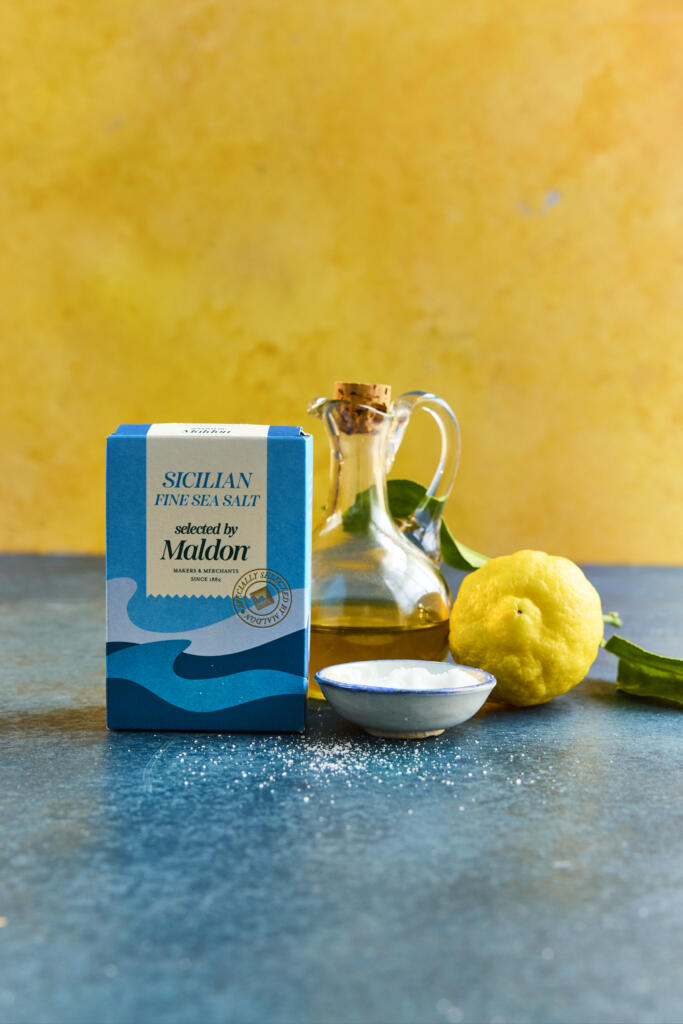
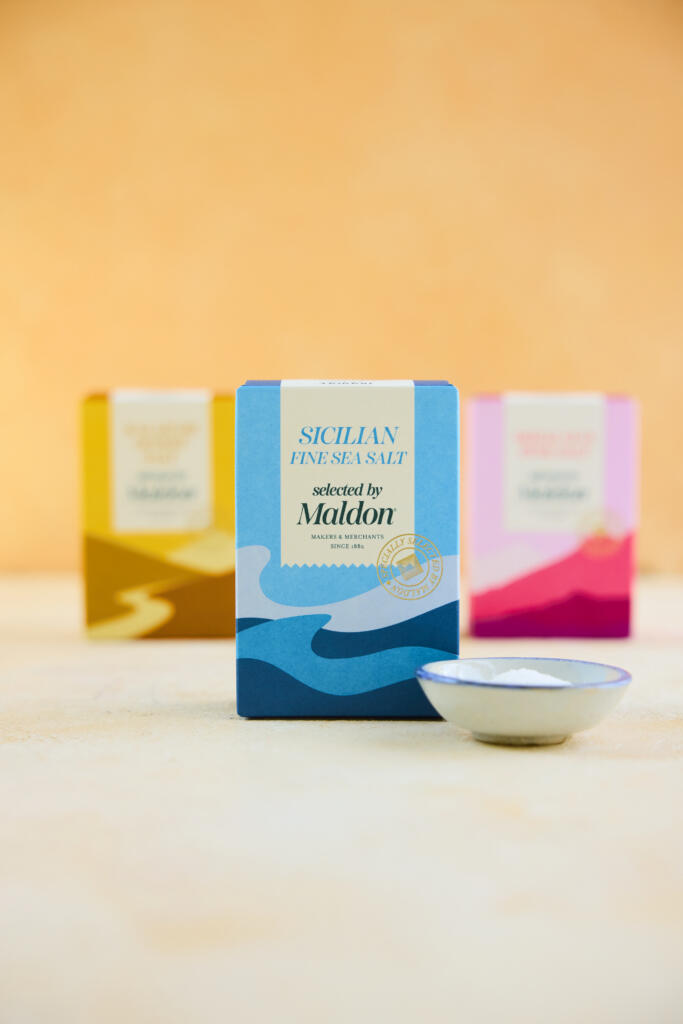
Harvested from the historic salt pans of Trapani on Sicily’s western coast, Sicilian Fine Sea Salt, Selected by Maldon is celebrated for its balanced flavour and delicate texture. Naturally dried in the Mediterranean breeze and selected by Maldon’s Master Salt Merchants, this versatile fine sea salt dissolves easily and seasons evenly throughout cooking and baking.
In desserts, a touch of fine sea salt helps enhance sweetness, balance richness and enhances complex flavours such as coffee, chocolate and caramel.
How to Make Vegan Tiramisu with Biscoff
This irresistible vegan tiramisu layers espresso-soaked Biscoff biscuits with a silky cream made from vegan cream cheese, plant-based cream and Biscoff spread. Finished with cocoa powder, crunchy Biscoff crumbs and a luxurious salted coffee cream, it’s a crowd-pleasing dessert that’s perfect for entertaining and special occasions.
A small amount of Sicilian Fine Sea Salt, Selected by Maldon in the coffee cream enhances the roasted coffee notes while perfectly balancing the sweetness of the dessert.
For the Tiramisu
Ensure the espresso is completely cooled before starting.
We used the brand-new KitchenAid Artisan Plus Stand Mixer in Wild Blueberry for mixing. Mix the vegan cream cheese and Biscoff spread until smooth. In a separate bowl, whip the plant-based cream to soft, pourable peaks, then whisk in the vanilla and sugar.
Gently fold the cream cheese mixture into the whipped cream until fully combined.
Arrange a layer of Biscoff biscuits in a serving dish and lightly drizzle with the cooled espresso. Repeat with a second layer.
Spoon over a layer of the cream mixture, then repeat the layers of biscuits, coffee and cream until the dish is filled, finishing with cream on top.
Chill for at least 2 hours, or overnight for best results.
Before serving, dust with cocoa powder, sprinkle over the Biscoff crumbs and finish with a spoonful of salted coffee cream.
For the Salted Coffee Cream
Place the plant cream, vanilla extract, cacao butter, sugar, Sicilian Fine Sea Salt, vanilla essence, espresso and instant coffee into a saucepan.
Heat gently, stirring frequently, until the mixture is smooth and fully combined. Do not boil.
Remove from the heat and allow to cool completely before serving or storing.
Bring Italian Dolce to Your Table
Whether served as as the grand finale to an Italian feast or prepared for effortless entertaining, this Vegan Tiramisu delivers layers of coffee-soaked indulgence and creamy sweetness in every spoonful.
Sicilian Fine Sea Salt, Selected by Maldon is available now from Tesco, Sainsbury’s, and Ocado. For more authentic Italian recipes and family favourites, explore Giuseppe Federici’s cookbook, celebrating the dishes, traditions and stories.
A Taste of Sicily Meets Everyday Italian Cooking
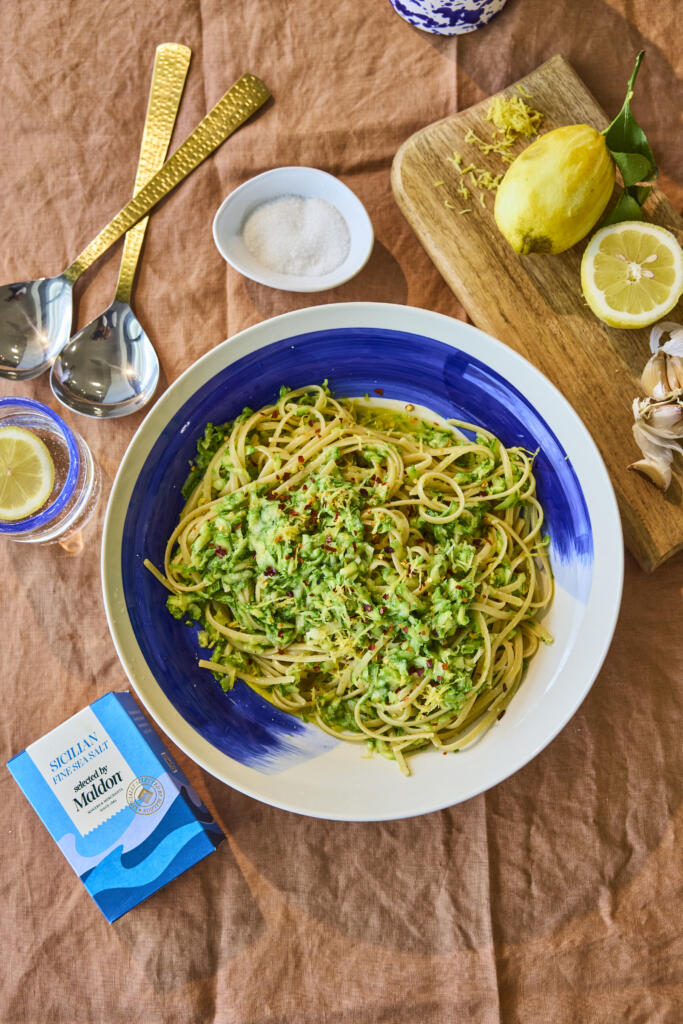
To celebrate the launch of Sicilian Fine Sea Salt, Selected by Maldon, Maldon Salt has partnered with award-winning Italian cook and content creator Giuseppe Federici (@sepps). Known for his simple, flavour-focused recipes inspired by family traditions, Sepps brings authentic Italian cooking to home kitchens through dishes that showcase the beauty of quality ingredients. This bright and refreshing Lemon Courgette Pasta is a perfect example, combining sweet courgettes, fragrant basil and zesty lemon with the balanced flavour of Sicilian Fine Sea Salt.
Welcoming Giuseppe Federici
Giuseppe Federici (@sepps) is a second-generation British Italian from a family of passionate food lovers, where Italian home cooking has always been at the centre of family life.
Today, he shares authentic Italian recipes and family food traditions with a hugely engaged audience, sharing authentic Italian recipe videos, family stories and a genuine love for home cooking. Most loved of all are the heart-warming cooking videos he creates alongside his Nonna, which have captivated millions of viewers and inspired his first cookbook — Cooking with Nonna – a collection of cherished family recipes celebrating Italian cooking across generations with a plant-based twist.
Introducing Sicilian Fine Sea Salt, Selected by Maldon
Harvested from the historic salt pans of Trapani on Sicily’s western coast, Sicilian Fine Sea Salt, Selected by Maldon, brings exceptional quality and versatility to everyday cooking. Carefully selected by Maldon’s Master Salt Merchants, it is prized for its balanced flavour, delicate texture and ability to dissolve evenly throughout cooking. Naturally dried in the Mediterranean breeze, it enhances everything from pasta water and vegetable dishes to breads, sauces and desserts.
How to Make Lemon Courgette Pasta
Fresh, vibrant and packed with flavour, this Lemon Courgette Pasta is a simple Italian-inspired recipe perfect for weeknight dinners and summer dining alike. Sweet grated courgette is gently cooked with garlic, chilli and olive oil before being tossed with linguine, fresh herbs and zesty lemon. Finished with vegan parmesan, it’s a light yet satisfying pasta dish that celebrates seasonal ingredients and effortless Italian cooking.
The fine texture of Sicilian Fine Sea Salt, Selected by Maldon helps season the pasta water, draw moisture from the courgettes and evenly distributes flavours throughout the dish, allowing every ingredient to shine.
Coarsely grate the courgettes into a large bowl. Sprinkle with a pinch of Sicilian Fine Sea Salt and leave to sit for a few minutes, this helps draw out excess moisture. Squeeze out as much liquid as you can with your hands or a clean tea towel, then set aside.
Bring a large pot of water to the boil and season generously with Sicilian Fine Sea Salt, it should taste like the sea. Cook the linguine for 1 minute less than the packet instructions so it’s just shy of al dente. Before draining, scoop out 1 cup of the starchy pasta water and set it aside.
While the pasta is cooking, heat a generous glug of olive oil in a large frying pan over a medium heat. Add the garlic and chilli flakes and fry gently for 2 minutes, stirring frequently, until the garlic is golden and fragrant, keep an eye on it so it doesn’t burn.
Add the drained courgette to the pan and toss to coat in the garlicky oil. Season well with Sicilian Fine Sea Salt and black pepper, then add the lemon zest and juice. Stir everything together and cook for another 2–3 minutes until the courgette is tender.
Add the drained pasta straight into the pan along with the reserved pasta water. Toss vigorously over the heat for 1–2 minutes so the pasta finishes cooking and absorbs all the flavours. Tear in the rocket and basil and toss through.
Divide between bowls and finish with a generous grating of vegan parmesan, a drizzle of olive oil and a final crack of black pepper.
Bring Italian Flavours to Your Table
Whether you’re looking for a quick weeknight pasta or a light Mediterranean-inspired meal, this Lemon Courgette Pasta is a delicious way to enjoy seasonal ingredients and authentic Italian flavours.
Sicilian Fine Sea Salt, Selected by Maldon is available now from Tesco, Sainsbury’s and Ocado.
For more Italian-inspired recipes, discover Giuseppe Federici’s cookbook, featuring the beloved family dishes, traditions and stories.
A Taste of Sicily: Maldon Salt and Giuseppe Federici
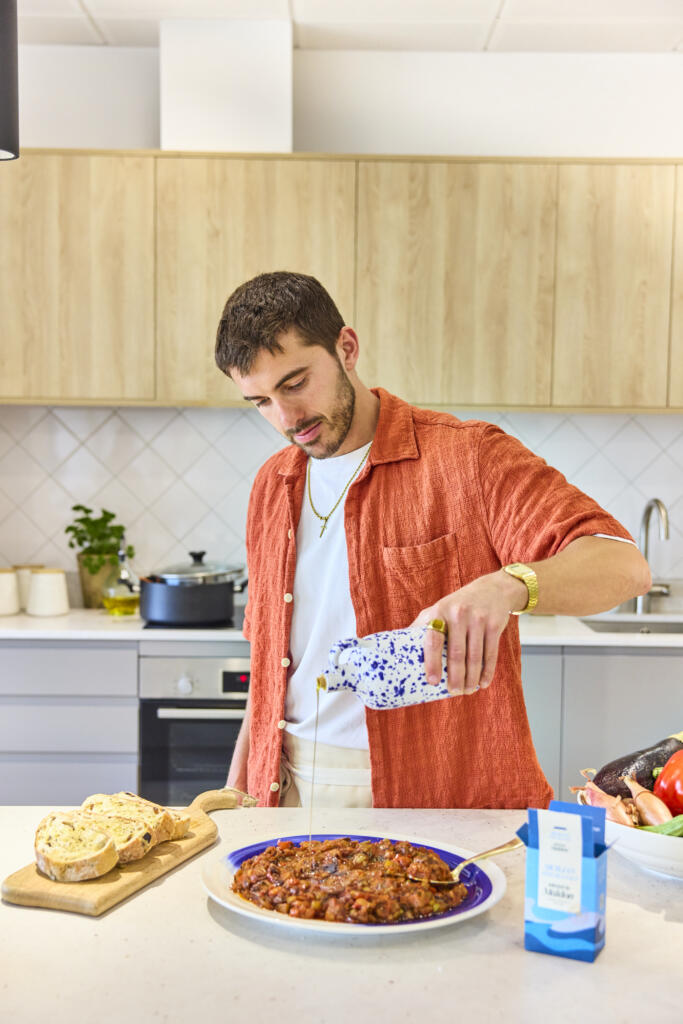
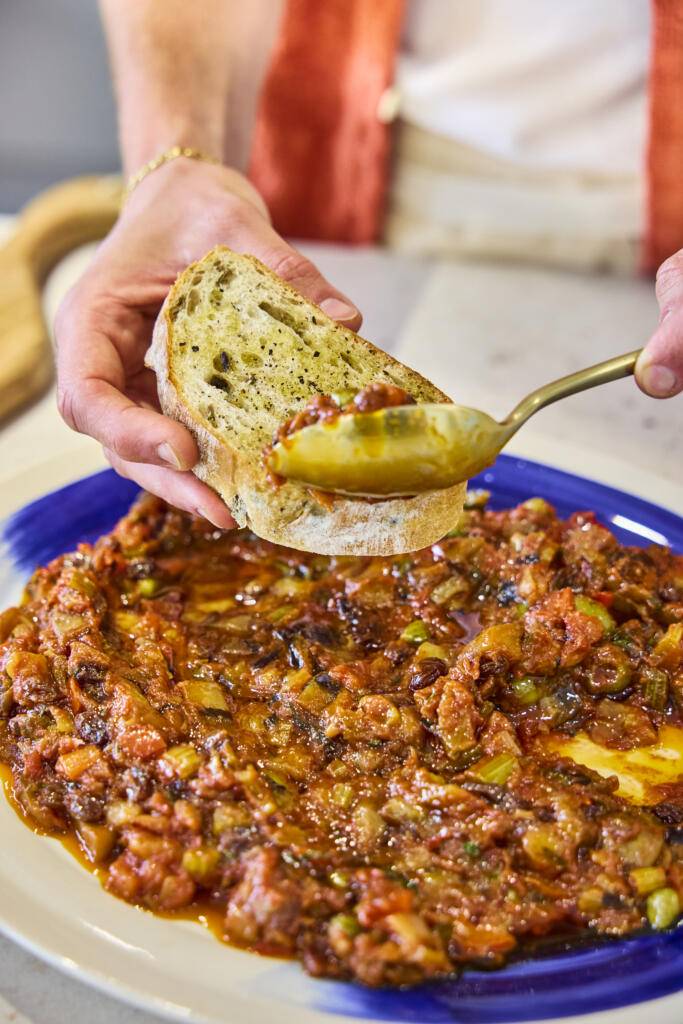
Maldon Salt has partnered with Sicilian home cook, recipe creator and bestselling author Giuseppe Federici (@sepps) to celebrate the launch of Sicilian Fine Sea Salt, Selected by Maldon. Inspired by the flavours, traditions and ingredients of Sicily, this Aubergine Caponata recipe showcases how a high-quality fine sea salt can elevate everyday cooking. Rich, vibrant and packed with Mediterranean flavour, this classic dish highlights the versatility and balanced taste of Maldon’s newest addition to the Merchants Range.
Welcoming Giuseppe Federici
Giuseppe Federici (@sepps) is a second-generation British Italian who comes from a long line of passionate food lovers, with Italian home cooking firmly at the heat of everything he does.
Today, Giuseppe has built one of the UK’s most engaged Italian food communities, sharing authentic Italian recipes, family stories and a genuine love for home cooking. Most loved of all the heart warming cooking videos he creates alongside his Nonna, which have captivated millions of viewers and inspired his first cookbook – Cooking with Nonna – a collection of of treasured Italian recipes with a plant-based twist.
Discover Sicilian Fine Sea Salt, Selected by Maldon
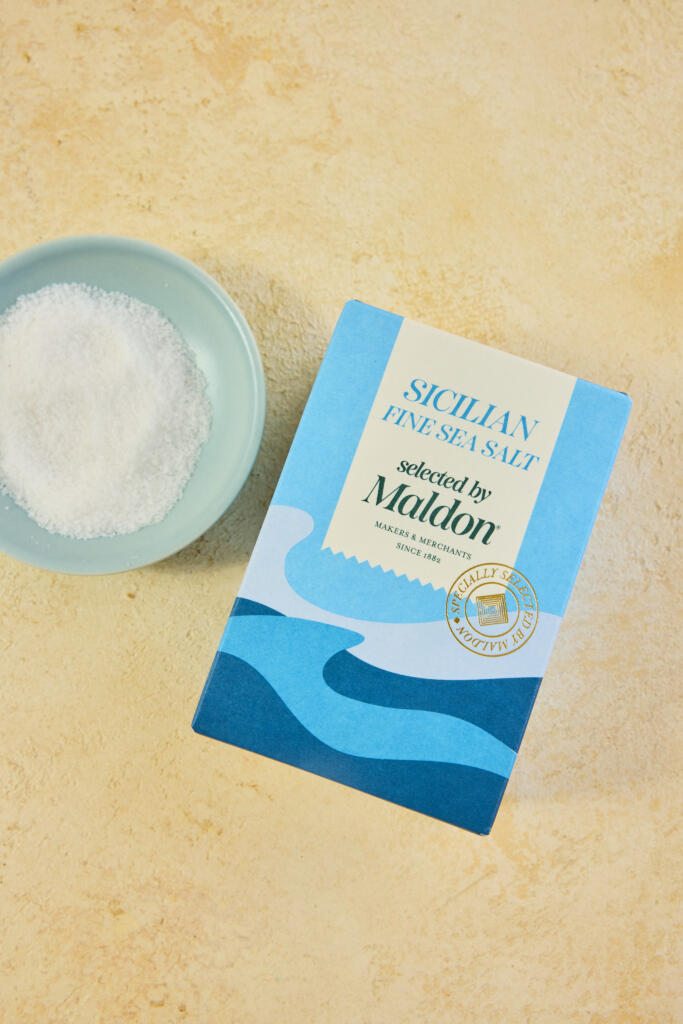
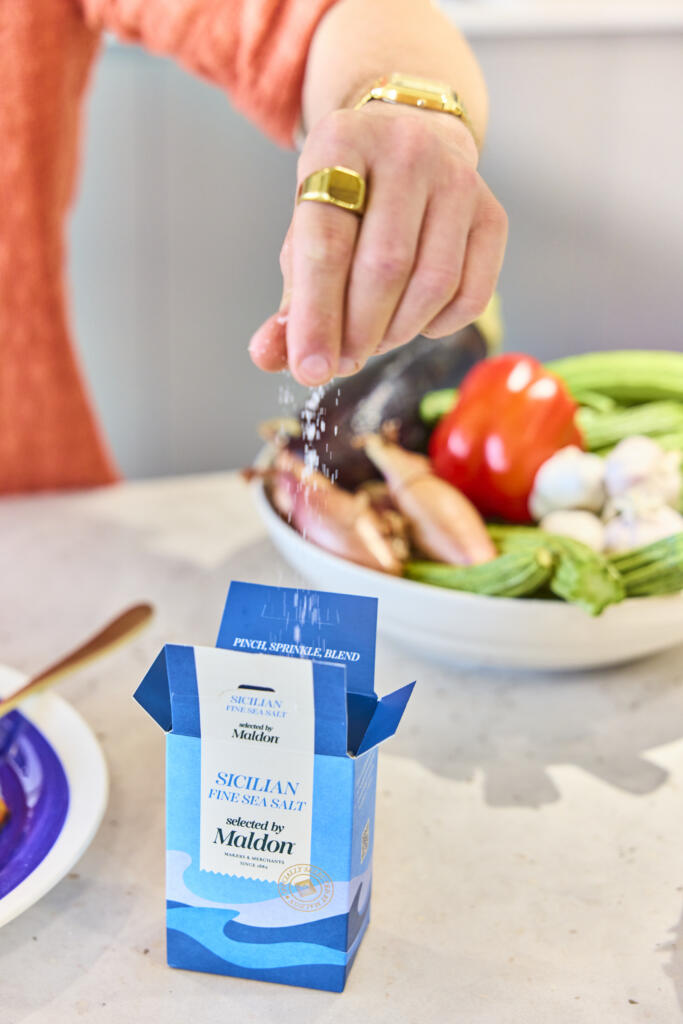
Sicilian Fine Sea Salt, Selected by Maldon. 250g pack.
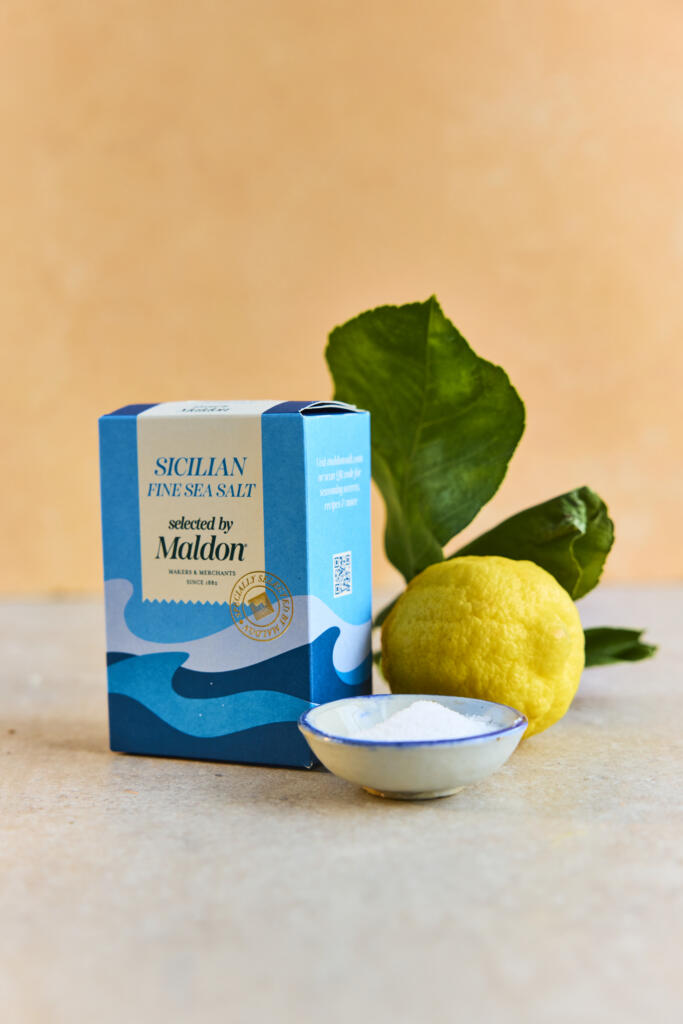
Harvested from the historic salt pans of Trapani on Sicily’s western coast, Sicilian Fine Sea Salt, Selected by Maldon is the latest addition to the Merchants Range. Carefully chosen by Maldon’s Master Salt Merchants, it is prized for its balanced flavour, exceptional versatility and delicate texture. Naturally dried in the Mediterranean coastal breeze, its fine crystals dissolve quickly and evenly, making it ideal for seasoning throughout the cooking process. Whether enriching sauces, seasoning vegetables, baking bread or salting pasta water, this premium fine sea salt delivers consistent flavour in every dish.
Nonna’s Aubergine Caponata Recipe
A much-loved staple of Sicilian cuisine, Caponata is a rich sweet-and-sour aubergine dish that celebrates the island’s vibrant flavours. Combining tender aubergines, briny olives and capers, sweet raisins and a tangy tomato base, this traditional recipe has been passed down through generations. In this version, Giuseppe draws inspiration from his Nonna’s cooking, creating a comforting dish that embodies the spirit of Sicilian home cooking.
The delicate texture of Sicilian Fine Sea Salt, Selected by Maldon plays an important role throughout the recipe – drawing excess moisture from the aubergines, seasoning the vegetables evenly and enhancing the balance of sweet, savoury and acidic flavours that makes Caponata so iconic.
How to Make Aubergine Caponata
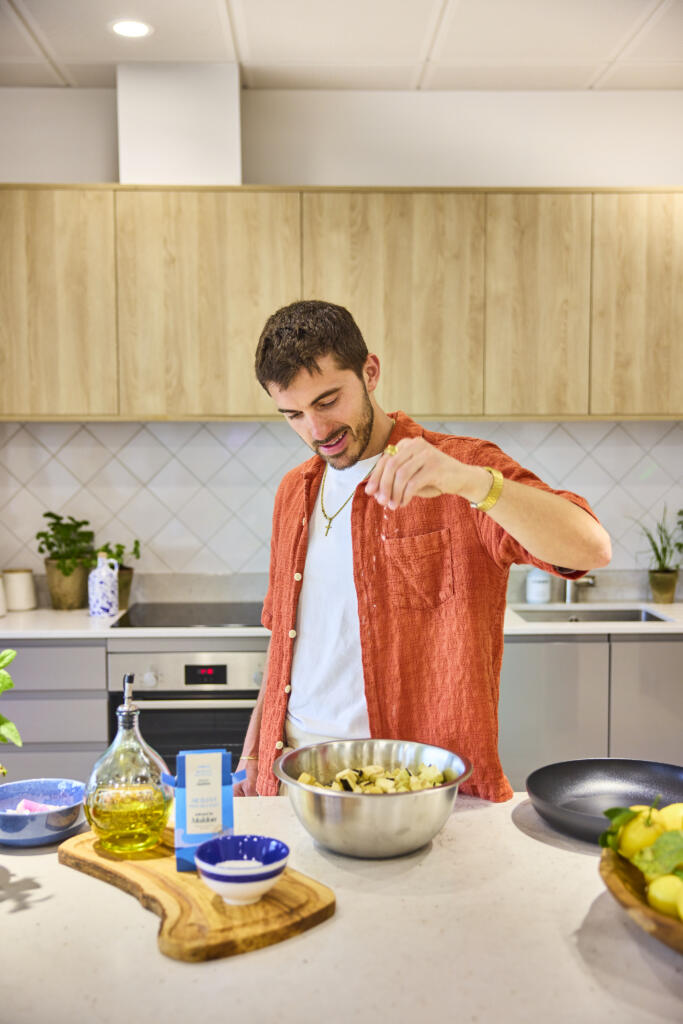
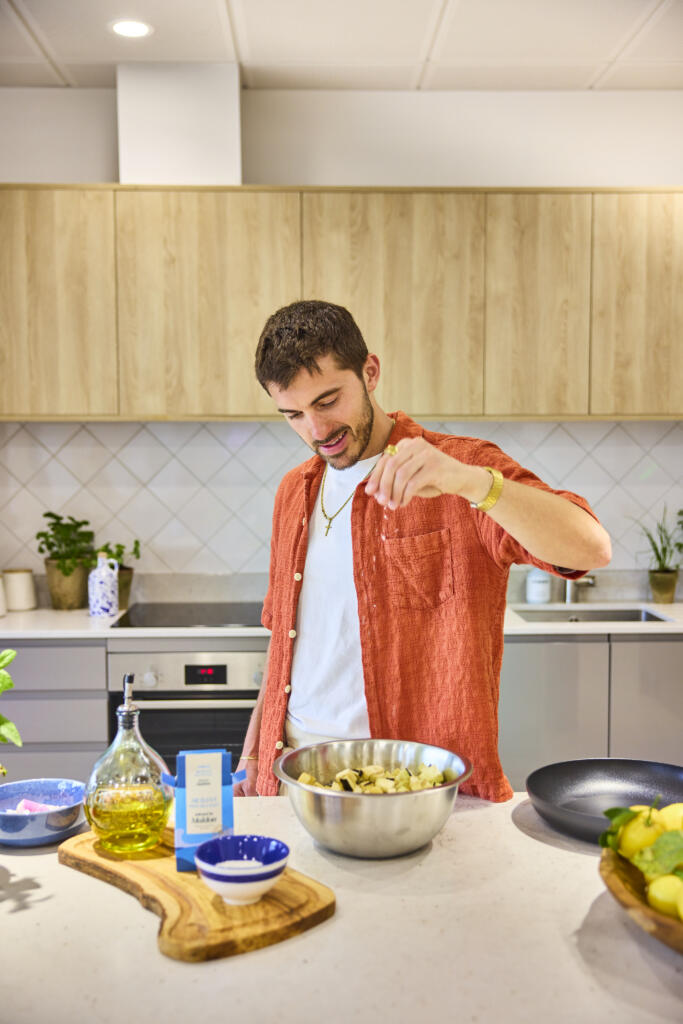
Cut the aubergines into 2–3cm cubes. Place them in a large bowl, generously coat with Sicilian Fine Sea Salt, and set aside for at least 10 minutes to draw out excess moisture.
Dice the celery (slice each stalk down the middle first, then cut into 1–2cm pieces), the onion, and the red pepper.
Drain any liquid from the aubergines and pat dry. Heat a generous glug of olive oil in a large frying pan over medium heat. Fry the aubergines in batches until nicely coloured and soft, about 10 minutes. You want them soft but not mushy. Transfer to a large casserole dish.
Return the pan to the heat with 1 tbsp of olive oil. Add the celery and fry for 8–10 minutes until softened. Transfer to the casserole dish.
Add the onions and peppers to the pan and fry for about 5 minutes, until the onions have softened and the peppers are starting to char. Reduce the heat to low, add the red wine vinegar, and let it simmer for 1 minute so the vinegar reduces and coats the vegetables. Transfer everything to the casserole dish and season with Sicilian Fine Sea Salt, black pepper and a pinch of chilli flakes.
Top Tip: Like many traditional Italian dishes, Caponata tastes even better the next day, once the flavours have had time to fully develop.
Bring the Flavours of Sicily Home
Inspired to recreate Giuseppe’s family recipe? Sicilian Fine Sea Salt, Selected by Maldon is available now from Tesco, Sainsbury’s and Ocado. Harvested on Sicily’s western coast and selected for its balanced flavour and exceptional versatility, it’s the perfect pantry staple for everyday cooking.
For more authentic Italian recipes, explore Giuseppe Federici’s cookbook, featuring the beloved dishes, family traditions and heart-warming stories. From comforting pasta dishes to regional Italian classics, it’s your invitation to bring a little more Italy into your kitchen.
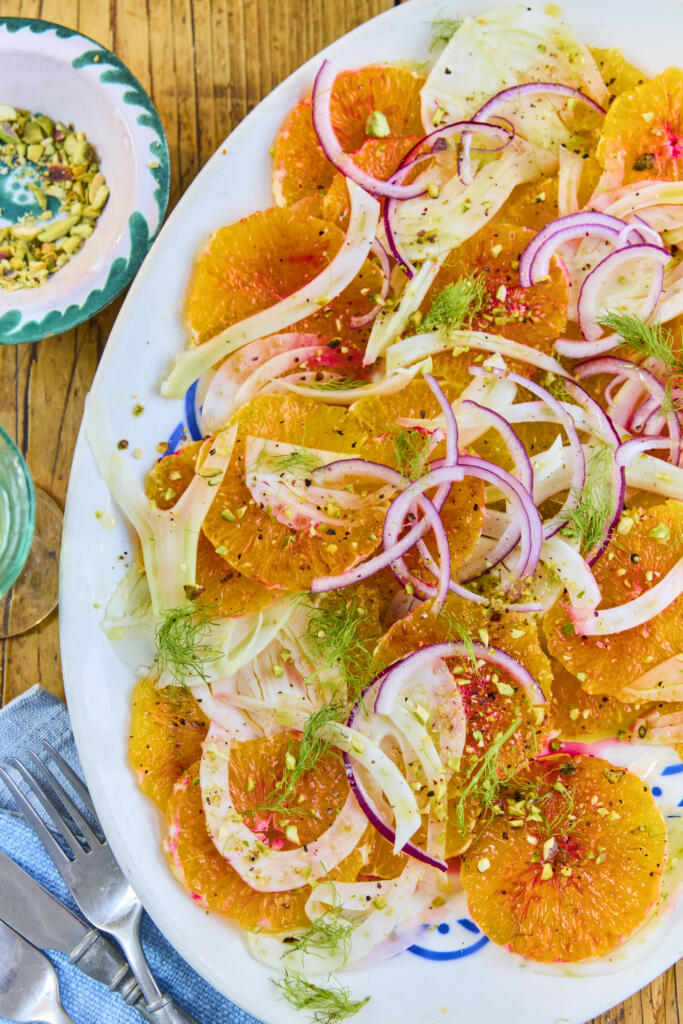
Bright, fresh and ready in minutes, this blood orange, fennel and pistachio salad is Sicilian sunshine on a plate. Juicy citrus rounds and paper-thin shaved fennel are dressed in a honey-sherry vinaigrette and finished with crunchy pistachios and a pinch of Sicilian Fine Sea Salt, Selected by Maldon. It’s an elegant no-cook starter or side that comes together with almost no effort.
Why You’ll Love This Blood Orange & Fennel Salad
No-Cook & Elegant: A genuinely impressive starter that needs nothing more than slicing, shaving and a quick whisk of dressing.
Fresh & Vibrant: Sweet citrus, aniseed fennel and earthy pistachios balance beautifully, lifted by a flake of Sicilian sea salt.
Naturally Good for You: Light, colourful and packed with fresh produce – perfect alongside richer Sicilian dishes.
How to Make Blood Orange & Fennel Salad
Prepare the blood oranges: Using a sharp knife, peel each orange so all the pith is removed and you’re left with just the juicy flesh. Slice into 1cm rounds and arrange on a platter, tipping any juices from the board into a small bowl.
Shave the fennel: Cut the top off the fennel bulb, reserving the fronds. Use a mandolin or sharp knife to shave the fennel very thinly, then arrange it across the platter with the orange slices.
Whisk the dressing: To the bowl of reserved orange juice, add the olive oil, sherry vinegar, honey, Sicilian Fine Sea Salt, Selected by Maldon and a little cracked black pepper. Whisk together into a dressing.
Dress and garnish: Drizzle the dressing all over the orange and fennel, then garnish with the finely chopped pistachios and reserved fennel fronds. Serve straight away.
Tips for the Perfect Blood Orange & Fennel Salad
Shave it paper-thin: A mandolin gives the finest, most delicate fennel slices – the thinner the better for this salad.
Save every drop of juice: Tip the juices from your chopping board into the dressing for extra citrus flavour.
Finish with the flakes: A pinch of Sicilian Fine Sea Salt, Selected by Maldon right before serving makes the sweet citrus sing.
What to Serve with Blood Orange & Fennel Salad
This salad is a fresh, palate-cleansing partner for richer Sicilian plates. Serve it alongside grilled swordfish steaks or Sicilian arancini, with sesame semolina bread to mop up the dressing. It also slots nearly into an antipasto spread. Out of blood orange season, regular oranges or a mix of citrus works just as well.
Frequently Asked Questions
Can I use regular oranges?
Yes. Blood oranges give a striking colour and a slightly berried sweetness, but regular oranges, navel or a mix of citrus work just as well when they’re out of season.
Can I make it ahead?
Slice the oranges and shave the fennel a few hours ahead and keep chilled, but dress the salad and add the pistachios just before serving so everything stays crisp and fresh.
How do I stop the fennel browning?
Toss the shaved fennel in a little of the orange juice or lemon juice if prepping ahead – the acid keeps it pale and fresh.
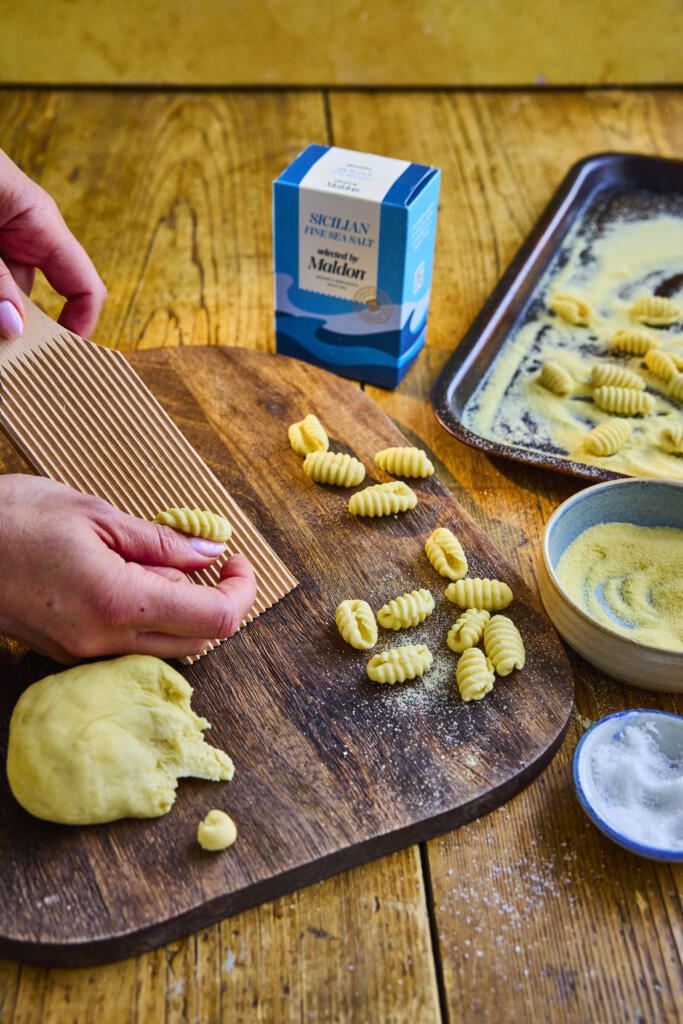
There’s nothing quite like pasta made from scratch, and cavatelli is one of the most satisfying shapes to shape by hand. Made from just semolina and water, these little grooved shells are tossed through a jammy roasted cherry tomato and aubergine sauce sweetened with whole roasted garlic, and seasoned with Sicilian Fine Sea Salt, Selected by Maldon. It’s rustic Sicilian cooking at its very best.
Why You’ll Love This Cavatelli
Pasta From Scratch: Just semolina flour and water make a beautiful eggless dough you shape by hand – no machine required.
A Jammy Roasted Sauce: Roasting the tomatoes, aubergine and garlic together does all the work, creating a deep, sweet sauce.
Naturally Vegetarian: A hearty, satisfying meat-free main that celebrates simple Sicilian produce.
How to Make Cavatelli (Step-by-Step)
Make the dough: Preheat the oven to 180°C. Mix the semolina flour with the water and olive oil in a large bowl, bring together into a ball, then knead on the worktop for 10 minutes until smooth and cohesive. Cover with a clean bowl and rest for 15 minutes.
Roast the veg: Add the diced aubergine and whole cherry tomatoes to a large roasting tray and toss with the olive oil. Nestle in the whole garlic bulb and roast for 20 minutes.
Shape the cavatelli: Pull small, gnocchi-sized pieces from the rested dough and press each one down a cavatelli shaper (a butter paddle) to create grooves and a little cavity. Place on a semolina-dusted tray to stop them sticking, and repeat until all the dough is used.
Make the sauce: Tip the soft aubergine and jammy tomatoes into a shallow sauté pan and squeeze in the roasted garlic from its skins. Season with Sicilian Fine Sea Salt, Selected by Maldon and cracked black pepper, and keep warm on a low heat. Bring a large pan of well-salted water to the boil.
Cook and combine: Drop the cavatelli into the boiling water and cook for 3–6 minutes, until just al dente. Lift them straight into the sauce with a slotted spoon, add a splash of pasta water and toss well to bind.
Serve: Spoon the pasta into bowls and finish with grated parmesan and plenty of fresh basil leaves.
Tips for the Perfect Cavatelli
Knead until smooth: A well-kneaded, smooth dough is easier to shape and gives the cavatelli their lovely chew.
Dust with semolina: Keep the shaped cavatelli on a semolina-dusted tray so they don’t stick together before cooking.
Save the pasta water: A splash of starchy pasta water binds the sauce around the cavatelli for a glossy finish.
What to Serve with Cavatelli
This is a generous main in its own right, but it’s lovely as part of a Sicilian spread with sesame semolina bread to soak up the sauce and a blood orange and fennel salad alongside. Finish the meal with Sicilian cannoli. A little extra parmesan and a drizzle of good olive oil never go amiss.
Frequently Asked Questions
What If I don’t have a cavatelli shaper?
No problem – roll small pieces of dough under your thumb or down the back of a fork to create the grooves and cavity. It takes a little practice but works beautifully.
Can I make the cavatelli ahead?
Yes. Shape them and keep on a semolina-dusted tray, then freeze on the tray before transferring to a bag. Cook from frozen, adding a minute or two to the boiling time.
Can I use a different flour?
Durum wheat semolina is key here – it gives cavatelli their signature bite and holds the shape. Plain or 00 flour won’t give the same texture.
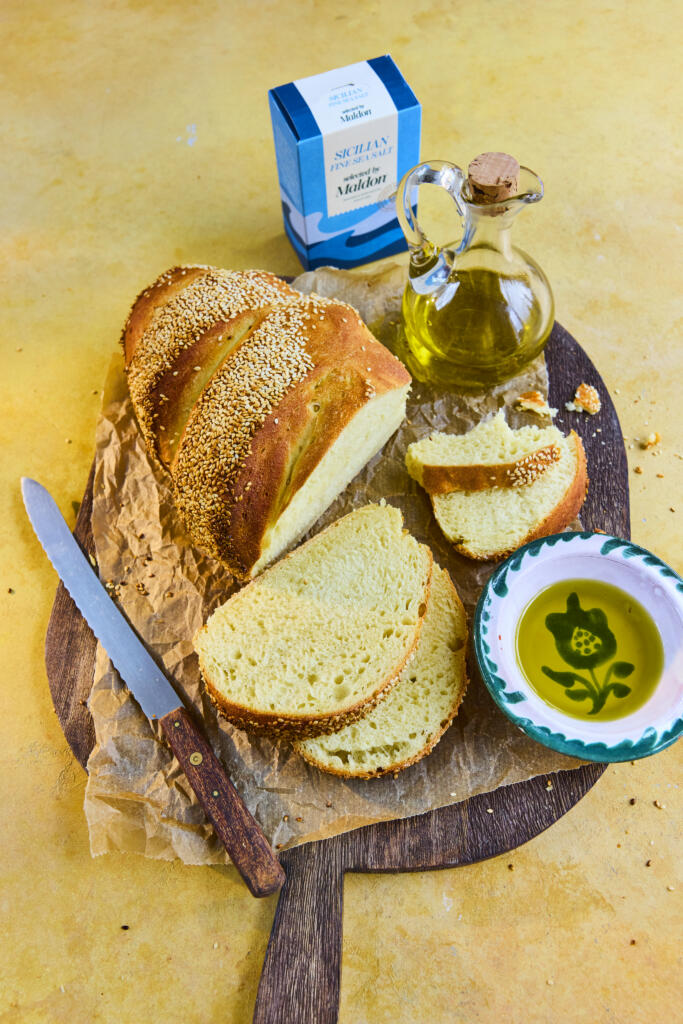
Golden, sesame-crusted and made with nutty durum wheat semolina, this Sicilian-style loaf is far simpler than it looks. Just semolina, water, yeast and Sicilian Fine Sea Salt, Selected by Maldon come together into a soft dough, rolled in sesame seeds and baked until the crust crackles. It’s the perfect bread for mopping up sauces or building an antipasto spread.
Why You’ll Love This Sesame Semolina Bread
A Golden Sesame Crust: Rolling the loaf in sesame seeds gives a nutty, crunchy crust and a beautiful finish.
Just a Few Ingredients: Semolina, water, yeast, sesame and a good sea salt are all you need for a proper Sicilian loaf.
Soft, Open Crumb: A long, slow prove rewards you with a light, springy crumb under that crisp crust.
How to Make Sesame Semolina Bread (Step-by-Step)
Start the dough: Place the semolina flour in a stand mixer and add the 250ml of warm water. Mix and knead for 5–10 minutes until there are no dry patches of flour. Cover the bowl with cling film and rest for 1 hour.
Add the yeast and salt: Mix the 50ml of water with the yeast and add it to the dough along with the Sicilian Fine Sea Salt, Selected by Maldon. Knead with the dough hook for 10–15 minutes until smooth and coming away from the sides of the bowl.
First prove: Cover the bowl again with cling film and leave to prove for 2–3 hours, or until the dough has tripled in size.
Shape and coat in sesame: Tip onto a lightly floured surface and shape into a long oval loaf (or a round loaf or buns). Scatter the sesame seeds on a tray, wet the top of the loaf lightly with water, then roll the top in the seeds to coat well. Set on a lined tray and score the top a few times with a sharp knife.
Second prove: Cover loosely with a plastic bag or cling film, raising the edges so it doesn’t stick to the dough, and prove for a second time for 45 minutes–1 hour.
Bake: Preheat the oven to 200°C. Remove the covering and bake for 15–20 minutes until golden brown – it should sound hollow when tapped on the base. Cool for at least 10 minutes before slicing and serving.
Tips for the Perfect Sesame Semolina Bread
Don’t rush the prove: The long, slow first prove is what gives the loaf its flavour and light, open crumb.
Wet before seeding: Lightly wetting the top of the loaf helps the sesame seeds stick for an even, golden crust.
Tap to test: A properly baked loaf sounds hollow when you tap the base – if not, give it a few more minutes.
What to Serve with Sesame Semolina Bread
This loaf is endlessly useful across a Sicilian table. Serve it warm with olive oil and a pinch of sea salt, alongside homemade cavatelli or grilled swordfish to mop up the juices, or as the base of an antipasto with burrata and tomatoes. It also makes excellent toast for the days after baking.
Frequently Asked Questions
Can I make rolls instead of a loaf?
Yes – shape the dough into small buns rather than one loaf, coat them in sesame and reduce the baking time, checking from around 12 minutes.
Do I need a stand mixer?
No. You can knead the dough by hand, though it will take a little longer to reach a smooth, elastic texture – around 12–15 minutes.
Why didn’t my bread rise?
The most common causes are yeast that’s past its best or a proving spot that’s too cold. Use fresh fast-action yeast and prove somewhere warm and draught-free.
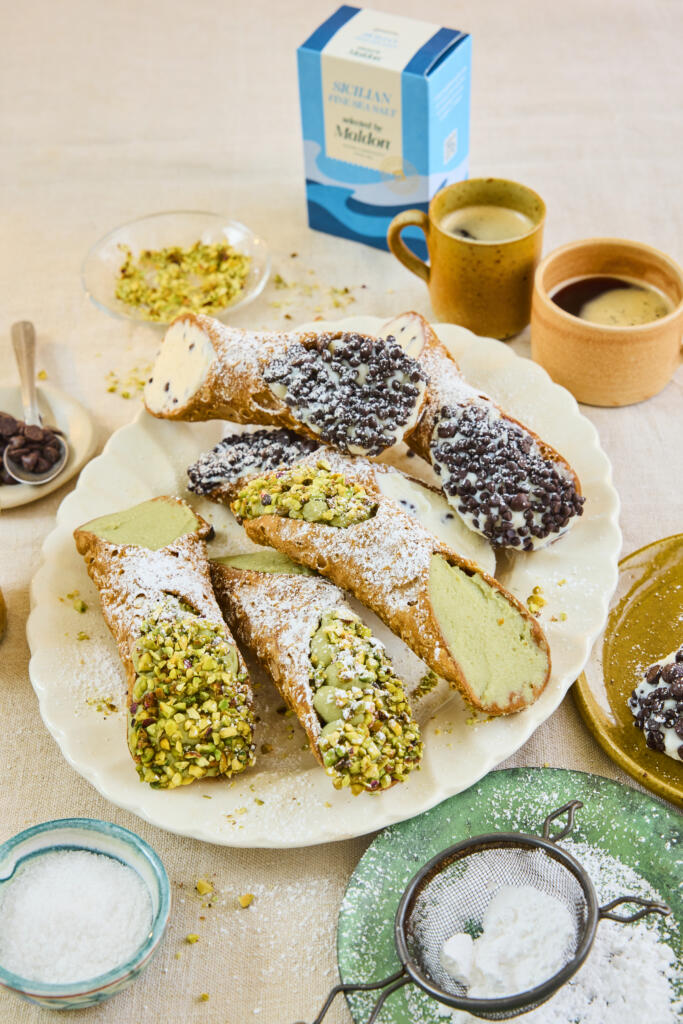
Crisp, blistered shells and a cool, creamy ricotta filling – these Sicilian cannoli are the island’s most famous sweet, made at home. The Marsala-spiked dough fries up golden and bubbly, while a pinch of Sicilian Fine Sea Salt, Selected by Maldon sharpens the sweetness. This recipe makes two classic fillings in one batch: pistachio, and chocolate and ricotta.
Why You’ll Love These Sicilian Cannoli
Two Fillings, One Batch: Make both the pistachio and the chocolate-and-ricotta cannoli at once for a proper Sicilian dessert platter.
Crisp, Bubbly Shells: A splash of Marsala in the dough gives the shells their signature blistered, shatteringly crisp texture.
A True Sicilian Classic: Few desserts feel as special as a freshly piped cannolo dusted with icing sugar.
How to Make Sicilian Cannoli (Step-by-Step)
Drain the ricotta: Place the ricotta for the fillings in a muslin cloth set in a sieve and squeeze out any excess liquid. Set aside – this keeps the fillings thick and the shells crisp.
Make the dough: In a large bowl, mix the plain flour, caster sugar, Sicilian Fine Sea Salt, Selected by Maldon and bicarbonate of soda. Rub in the cubed butter with your fingers until it resembles fine breadcrumbs.
Bring it together: Add the beaten egg and Marsala wine and mix. Tip onto a lightly floured surface and knead until you have a smooth dough.
Roll and shape: Roll the dough as thinly as possible with a rolling pin or pasta machine, then cut out 15cm circles. Wrap each tightly around a cannoli mould, sealing the join with a little beaten egg.
Fry the shells: Heat the vegetable oil to 180°C, deep enough to submerge the cannoli. Fry the wrapped moulds for around 30 seconds at a time, turning with tongs, until golden and bubbly. Drain on kitchen paper and carefully slide the shells off the moulds once cool. Repeat for all 6.
Make the fillings: Whisk the drained ricotta with the rest of each filling’s ingredients, holding back the chocolate chips and chopped pistachios. Stir the chocolate chips into the chocolate filling, then transfer each filling to its own piping bag.
Fill and finish: Snip the ends of the bags and pipe the fillings into the shells – 3 of each flavour. Dip the ends of the pistachio cannoli into the chopped pistachios, dust everything with icing sugar and serve.
Tips for the Perfect Sicilian Cannoli
Drain the ricotta well: Squeezing out excess liquid is the difference between a thick, luscious filling and a soggy shell.
Fill just before serving: Pipe the filling in at the last minute so the shells stay crisp rather than softening.
Roll it thin: The thinner you roll the dough, the more delicate and blistered the fried shells will be.
What to Serve with Sicilian Cannoli
Cannoli are the perfect finale to a Sicilian feast – serve them after Sicilian arancini or homemade cavatelli, with strong espresso to cut the sweetness. They also make a beautiful centrepiece for a dessert grazing board alongside fresh fruit and the blood orange and fennel salad to start the meal.
Frequently Asked Questions
What if I don’t have cannoli moulds?
You can improvise with metal cannoli tubes, or wrap the dough around clean, foil-covered wooden dowels. Just make sure whatever you use is oven- and oil-safe.
Can I make cannoli ahead?
Fry the shells and make the fillings up to a day ahead, storing them separately. Pipe the filling in only when you’re ready to serve so the shells stay crisp.
What is pistachio paste and can I substitute it?
Pistachio paste is finely ground pistachios, sometimes lightly sweetened. If you can’t find it, blitz shelled pistachios to a smooth butter, or use a good-quality pistachio butter.