The Dusty Knuckle is East London’s favourite bakery and café with being experts in creating seriously good bread, knockout sandwiches and everything in between! Having two locations based in Dalston and Harringay, The Dusty Knuckle offer an abundance of baked goods, where you can wine & dine and even attend their baking classes during the weekend, learning how to make their ‘knock-out’ breads.
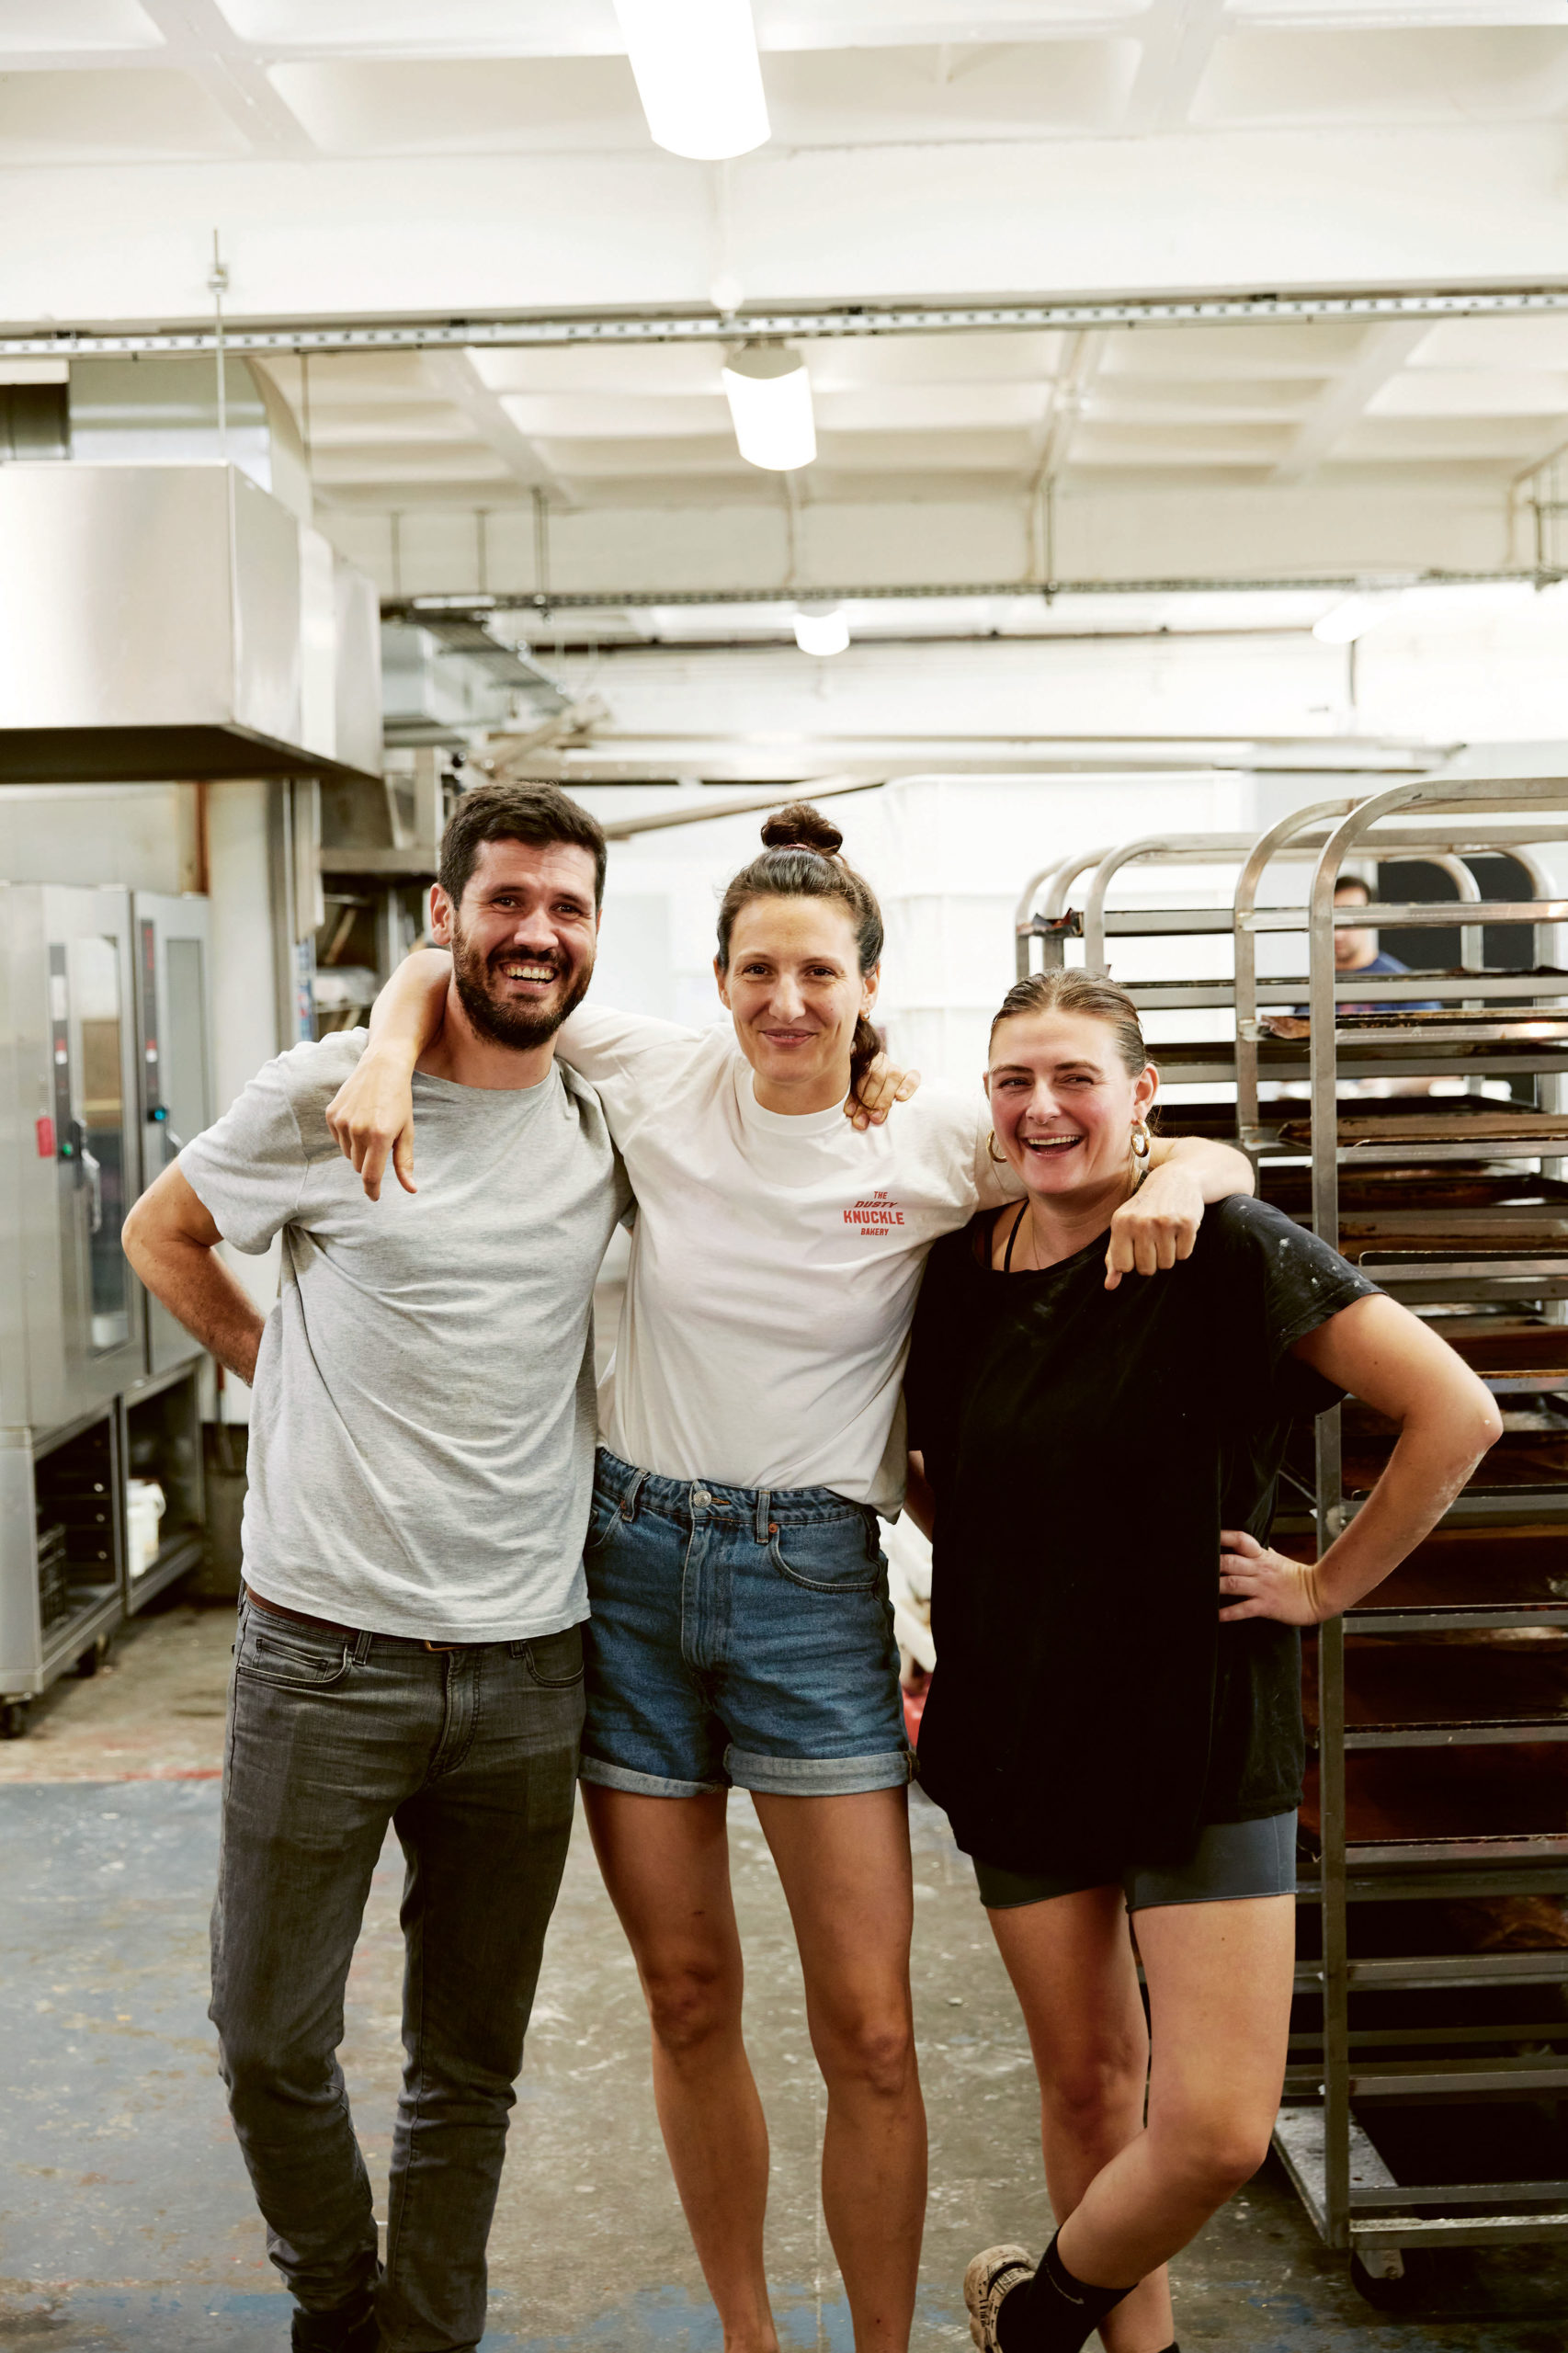
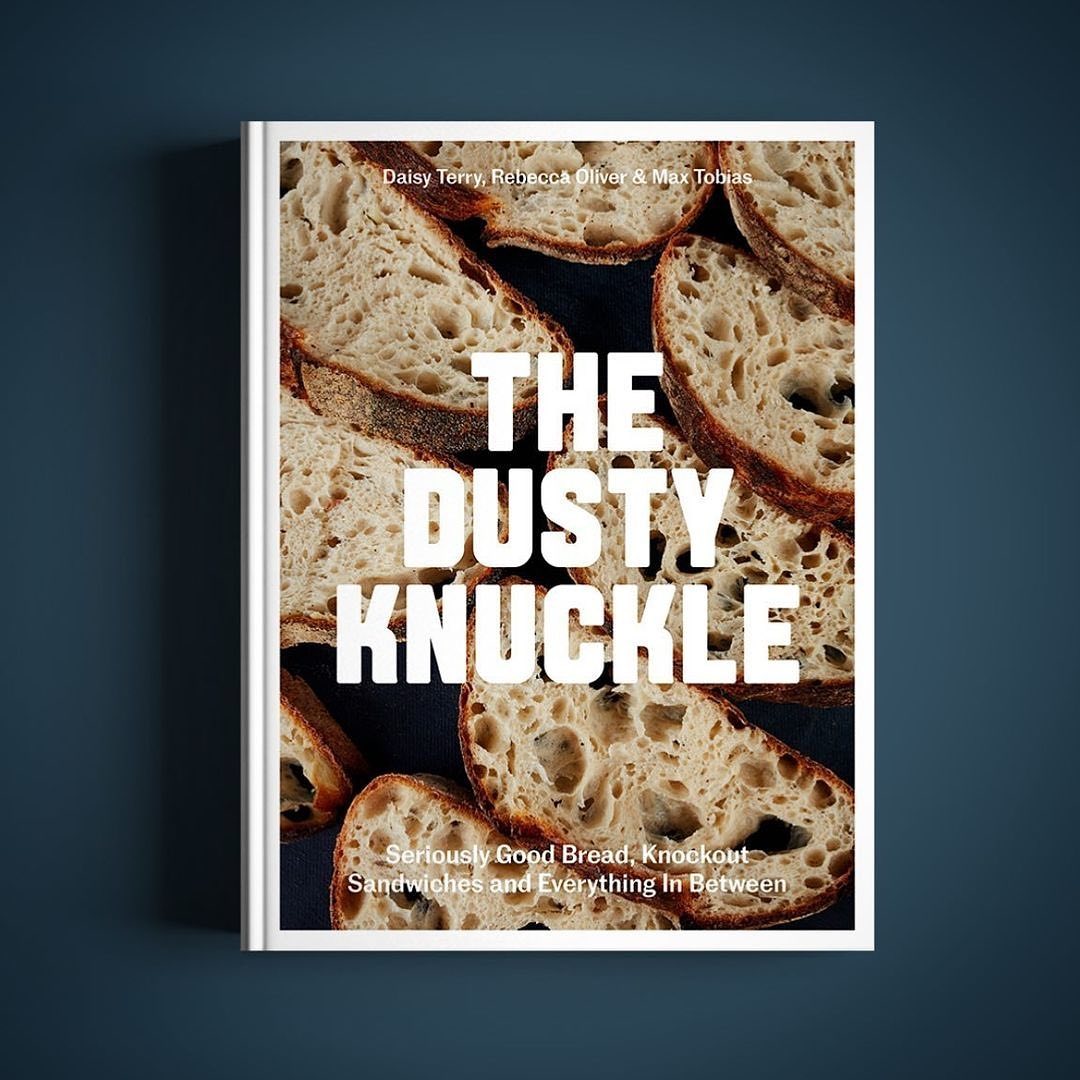
Sharing their baking secrets is at the heart of the bakery, where managers Max Tobias, Rebecca Oliver and Daisy Terry have shared it all with the release of their latest cook book, ‘The Dusty Knuckle’, whereby Maldon Salt is credited for being the bakery’s salt of choice!
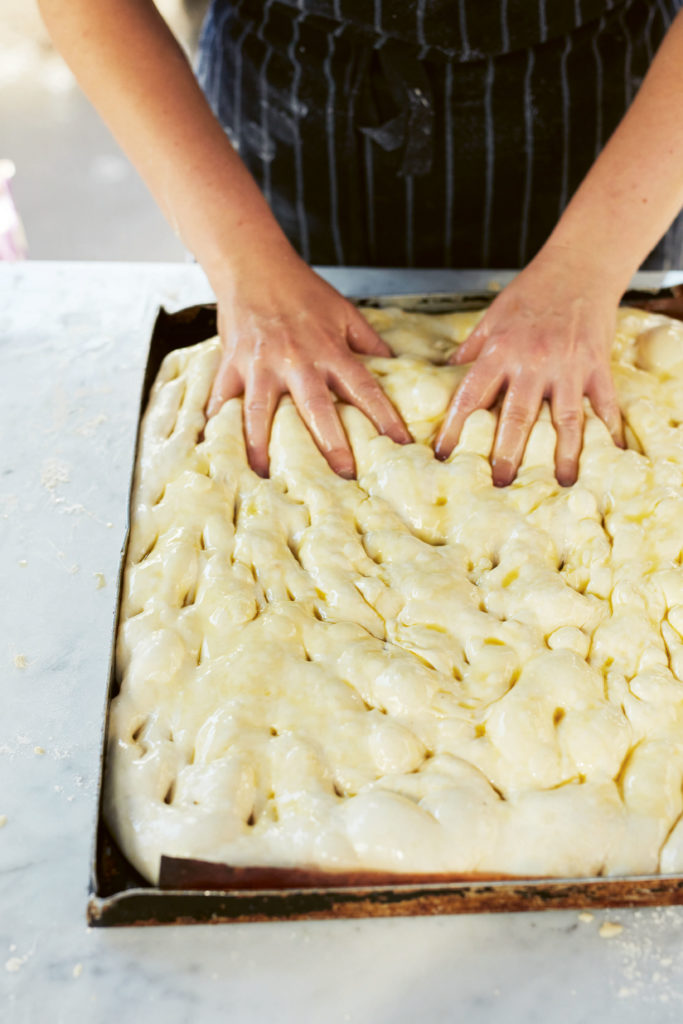
Here we delve into one of the recipe’s in which The Dusty Knuckle have used Maldon Salt to enhance their dish…the infamous Focaccia!
FOCACCIA RECIPE:
Servings: makes 1 Loaf
For the poolish:
- Water 250g | 1 cup
- Dried yeast 2g | 1/14 oz
- ‘00’ Flour 250g | 8 ¾ oz/ 1 ¾ cups plus 2 tbsp
For the dough:
- Water 165g | ¾ cup minus 2 tsp
- Water, second addition 40g | 2 tbsp plus 2 tsp
- Dried yeast 2g | 1⁄14 oz
- Strong white bread flour 140g | 5oz/1 cup
- ‘00’ Flour 140g | 5oz/1 cup plus 1 tbsp
- Maldon Salt 12g | ½ oz
To rest and finish
- Top-quality olive oil
- Maldon Salt
- For the poolish, add the water and yeast to a bowl, mix until your yeast is dissolved, then throw in the flour. Mix quickly with your hands; this will be wet and sloppy and you are only looking to mix it enough so that there are no wet bits and no dry clumps. Scrape your bowl down, cover it with a clean cloth or lid and leave somewhere warm to ferment. How long this takes depends on the heat of your home, your yeast, your flour, your hands. You are basically looking for it to have grown to almost triple in size and for the surface to be covered in little bubbles, roughly 2 hours. Use it before it begins to deflate and drop down the edges of the bowl.
- Add the first water addition for the dough, and the yeast. It will separate and feel slimy; don’t worry, this is normal. Add your flours and mix thoroughly until everything is combined. If you are doing this by hand, it will take around 4 minutes, and if using a mixer with a dough hook, around 2 minutes on slow speed. Scrape your bowl down, cover and leave for an hour. This rest period (called autolysis) allows the flour to further absorb the water, which is important in this recipe as it uses nearly the same amount of water as flour. It should rise nicely and it may get a bit of a crusty top: don’t worry about this, it’ll all get mixed in.
- Add the second water addition and Maldon Salt, and mix in with your hands (again, it will break up, but don’t worry, it’ll soon come back together). Once your dough is looking a bit more coherent, you will need to work it a bit. The easiest way to do this is to grab one side, stretching it upwards as far as it will allow you, then fold it back on itself, turn the bowl slightly and repeat, working your way around and around (keep the dough in the bowl; you will thank yourself when cleaning up later). The dough will start off shaggy and will tear easily, but will soon become elastic and silky. This will probably take you about 10 minutes, but don’t scrimp on the time here: you are building strength in the dough, which is the key to that chewy delicious bread. You can use a mixer – we do – for this, mixing for 2 minutes on slow speed, then 4 minutes on fast.
- Check your dough for elasticity: does it stretch without tearing? If it’s still a bit weak and tears easily when you lift it, give it a couple more minutes.
- Once mixed and silky and lovely and smooth and soft, take the dough out of the bowl, pour 2 generous glugs of olive oil into the bowl and replace the dough in the bowl. Cover and leave to rest for 1 hour, then fold and leave for another hour, before folding again and leaving for another hour (3 hours in total from mixing the final dough). To fold the dough, grab the edge of the dough with oily fingers and stretch it as high as it will let you, then fold it back over itself. Do this 4 times (north, south, east, west) to complete one fold.
- After 3 hours your dough should be feeling pillowy, soft and silky, and bubbly. Turn it out onto a well-oiled standard-sized baking tray and fold it neatly into a square shape (don’t worry if this is much smaller than the tray as it will sprawl out and fill the tray) and leave somewhere nice and warm, and not too airy, for 1 hour. (If following the morning bake schedule, then this is when you would put it in the fridge – it can be in the fridge at this stage for up to 12 hours.)
- Fold each side in to create a square and leave it for another hour, then do this one more time and leave for its final hour.
- Give it a prod: if it feels like it will let you, gently slide oily hands right underneath and slowly stretch it out, pulling from the central underbelly. Be delicate here: it should feel like a wobbly, airy pillow (if it doesn’t leave it another hour). Ensure you do not tear the dough. It will relax and start to fill the tray. Heat your oven to its hottest setting.
- Whisk together 200ml (7fl oz/scant 1 cup) olive oil and 100ml (3 ½ fl oz/scant ½ cup) water until cloudy and immediately pour all over the top of the dough – be super-generous here. Dimple the top of the dough with your fingertips – sharp hard dimples are better than little soft ones so don’t worry if you go right through to the tray or even make a little hole; this will move the bubbles around inside and help get that chewy, open structure we are all looking for. Because it is so oily and bubbly, and nice to touch, it is tempting to over-dimple which can knock the air out, so just prod it enough so the surface is evenly dimpled. Sprinkle with Maldon Salt and bake for 15 minutes or until deep and golden brown. Be super-careful taking this out of the oven as the oil is hot and there will be excess on the tray.
- Remove from the tray straight away and leave to cool on a wire rack.
