The talented Rukmini Iyer is a celebrated author and culinary innovator, known as the queen of fuss-free flavour. In her latest cookbook, ‘The Green Cookbook’, Iyer continues her mission to simplify delicious home-cooked meals. This vibrant collection features 75 brand-new recipes designed to help you get a delectable dinner on the table every day of the week with minimum hassle and maximum flavour. Whether you’re a ‘seasoned’ vegan, a dedicated vegetarian, or simply looking to incorporate more plant-based meals into your diet, ‘The Green Cookbook’ offers a treasure trove of inspiration!
Here is how to make miso barley mushroom with coriander pesto…
This is one of Rukmini’s favourite recipes in the book. The combination of miso, barley and mushrooms is inspired by Niki Segnit’s Flavour Thesaurus: More Flavours, while the incredibly moreish coriander pesto is her version of Noor Murad’s from Ottolenghi Test Kitchen: Extra Good Things – a happy melange of inspiration where the pearl barley and mushrooms look after themselves in the oven, leaving you to just blitz the pesto (and bask in the admiration of your dinner guests when they take their first bite).
Preheat the oven to 180°C fan/200°C/gas 6. Put the pearl barley, boiling water, miso paste, onion, black pepper and diced shiitake mushrooms in a lidded casserole dish or medium roasting tin, then cover with the lid or foil and roast in the oven for 1 hour.
Put the mushrooms and red onion into another large roasting tin with the garlic, olive oil, haricot beans and a pinch of sea salt. Stir, then pop into the oven for 25–30 minutes until the mushrooms are cooked through.
Blitz the coriander leaves and stems, coriander seeds, pine nuts, olive oil, sea salt and lemon juice in a high-speed blender or small food process or until smooth. Taste and adjust the salt and lemon juice, then set aside.
Stir 2 tablespoons of the pesto through the hot pearl barley, then divide between four plates. Top with the mushrooms and remaining pesto and serve hot.
Buy ‘The Green Cookbook’ Today!
Whether you’re preparing a quick meal for yourself or entertaining guests, her innovative and accessible recipes are sure to become staples in your kitchen. From 15-minutes pasta dishes that are perfect for those hectic weeknights to budget-friendly batch cooking that ensures you have a hearty meal ready to go, Iyer’s recipes are crafted with real-life demands in mind. Buy a copy from here and embrace the simplicity and joy of fuss-free cooking!
Make sure you have your Maldon Salt ready for these recipes! If you are running out, please feel free to browse on our Where to Buy Page to find your nearest store in which stocks our beloved Maldon Salt.
Lastly, we LOVE seeing your creations – please tag us on Instagram using the #maldonsalt so we can share your own take on Rukmini’s recipes!
The talented Rukmini Iyer is a celebrated author and culinary innovator, known as the queen of fuss-free flavour. In her latest cookbook, ‘The Green Cookbook’, Iyer continues her mission to simplify delicious home-cooked meals. This vibrant collection features 75 brand-new recipes designed to help you get a delectable dinner on the table every day of the week with minimum hassle and maximum flavour. Whether you’re a ‘seasoned’ vegan, a dedicated vegetarian, or simply looking to incorporate more plant-based meals into your diet, ‘The Green Cookbook’ offers a treasure trove of inspiration!
Here is how to make spiced roasted carrots and hazelnuts with silky butterbean mash…
Rukmini could eat an entire bowl of this in front of the television, but it’s really too nice not to share with friends! The carrots roast beautifully with coriander seeds under foil, while the rich, silky butterbean mash takes just 10 minutes to put together. A substantial, flavour-packed dish which is, as her friend Alex Dorgan would say, incidentally vegan!
Preheat the oven to 180°C fan/200°C/gas 6.Lightly grind the coriander seeds and black peppercorns in a pestle and mortar, then add them to a medium roasting tin along with the carrots, olive oil, water and ½ teaspoon Maldon Sea Salt. Cover with foil, then roast in the oven for 40 minutes.
After 40 minutes, remove the foil, drizzle the carrots with the agave or maple syrup, then return to the oven for a further 15 minutes to reduce the liquid and get some colour on the carrots. Put the hazelnuts on a small baking tray and pop them into the oven at the same time to toast.
Meanwhile, put the olive oil, lemon zest, coriander seeds, spring onions and garlic into a small frying pan and warm through over a low heat for 5 minutes – you’re not aiming to get any colour on the garlic, so keep the heat down.
Put the butterbeans and the infused oil, spring onions, etc. into a high-speed blender or food processor and blitz until very smooth. Adda squeeze of lemon juice, then taste and adjust the Maldon Sea Salt if needed. Warm the mash and spoon into shallow bowls, topped with the roasted carrots. Scatter the carrots with a little Maldon Sea Salt, the toasted hazelnuts and flat-leaf parsley and serve warm.
Buy ‘The Green Cookbook’ Today!
Whether you’re preparing a quick meal for yourself or entertaining guests, her innovative and accessible recipes are sure to become staples in your kitchen. From 15-minutes pasta dishes that are perfect for those hectic weeknights to budget-friendly batch cooking that ensures you have a hearty meal ready to go, Iyer’s recipes are crafted with real-life demands in mind. Buy a copy from here and embrace the simplicity and joy of fuss-free cooking!
Make sure you have your Maldon Salt ready for these recipes! If you are running out, please feel free to browse on our Where to Buy Page to find your nearest store in which stocks our beloved Maldon Salt.
Lastly, we LOVE seeing your creations – please tag us on Instagram using the #maldonsalt so we can share your own take on Rukmini’s recipes!
Photo by alleksana: https://www.pexels.com/photo/scrabble-tiles-on-a-white-table-6758327/
Why do we celebrate Pancake Day?
Did you know Pancake Day is also referred to as Shrove Tuesday? It’s a traditional Christian festival that is celebrated all around the world! Every year, Shrove Tuesday falls on a Tuesday before the beginning of Lent (on Ash Wednesday). Across the UK, Ireland, Australia and Canada, many people will say ‘Pancake Day’ as traditionally during Lent, Christians would give up rich, tasting foods that included: butter, eggs, sugar and fat. As a result, Shrove Tuesday was an opportunity for families to use up all of these delicacies before their Lenten fast…and pancakes are the perfect way to use up all of these ingredients in one!
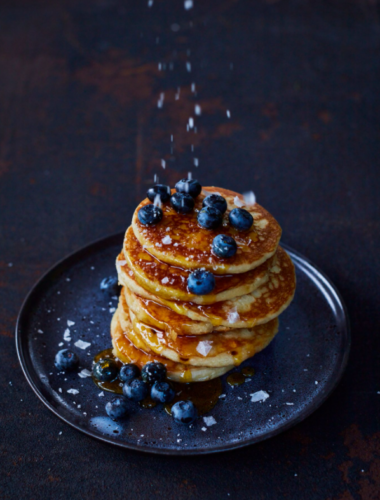
Blueberry Pancake with Maldon Salt
What is a pancake?
A traditional English pancake is a thin, flat cake made up of batter and fried in a frying pan. The simple batter mixture contains the following ingredients: all-purpose flour, milk, egg and sugar. In contrast, North American pancakes contain a raising agent, typically baking powder or whipped egg white. This creates their pancakes to be very thick and fluffy in texture.
Many people top their pancakes with lemon juice and sugar for a burst of citrus and sweetness. However, over the years people have got creative with their toppings, from a generous spread of Nutella, fruit or ice cream, to savoury picks of bacon, cheese and even poached eggs! Try our delicious blueberry pancakes recipe, where we add juicy blueberries to the pancake mixture for a pop of sweetness.
What’s the difference between a pancake and a crepe?
Photo by Hakim Santoso: https://www.pexels.com/photo/cooked-crepe-2613471/
Crepes are also thin pancakes which have become a breakfast staple, tracing back to 13th-century France! The main difference between a pancake and a crepe is that a pancake tends to be smaller and slightly thicker in texture, whereas a crepe is much wider and ultra thin. It’s much thinner than a pancake due to having a higher volume of milk or water to it’s batter mix.
How to make American style pancakes
Start by mixing the batter for the pancakes.
In a large bowl add the flour, baking powder and caster sugar and give it a whisk so it is well incorporated.
In a jug mix together the eggs, whole milk and vanilla extract. Make a well in the middle of the flour mixture and then slowly pour in the milk mixture whisk as you go, until you have a smooth batter.
Heat a knob of butter in a non-stick frying pan and then when foaming, begin to ladle in your pancake batter to the size you want. Allow them to cook for a couple of minutes, until you see small holes and bubbles appear in the batter, then flip them and cook on the other side until golden and cooked through. You will need to do this in batches, but you can keep the cooked ones on a tray in a low oven to stay warm.
While you are making the pancakes, get a second pan on a low heat and add another knob of butter. Allow this to melt and then add the apple slices. Cook them on each side for roughly 4 minutes until they are caramelized and softened. Keep turning them in the pan until they have cooked through, are starting to collapse but still holding their shape. Then remove them from the pan and set aside while you make salted caramel sauce.
How to make salted caramel sauce
In a saucepan add the 100g butter, soft brown sugar, and double cream.
Turn the heat on low and allow the mixture to slowly melt, using a wooden spoon to gently encourage it.
Once all the sugar has dissolved and the mixture is smooth, take off the heat and stir through a generous pinch of Maldon sea salt.
Set aside to cool slightly.
How to serve your pancakes:
When all your pancakes are ready, take the cooked apple slices and stir them through the salted caramel sauce.
Serve a stack of the pancakes with a generous spoonful of the apples and salted caramel sauce.
Eat immediately.
How to flip a pancake:
Photo by Elina Fairytale: https://www.pexels.com/photo/mother-and-child-preparing-crepes-3807331/
Although the pancake has been around for over 5,000 years, people still find it hard to flip them without making a mess and leaving splatters!
Here is how to flip a pancake perfectly:
Wait until the edges of the pancake will begin to brown and the top begins to bubble.
Carefully lift the edge of the pancake to see if the underside is turning golden brown.
Once golden brown underneath, slide the spatula under the pancake until it is in the centre.
Flick 180 degrees to one side so that the pancake flips over.
You can absolutely make pancakes in an air fryer! We recommend using American-style pancakes as you need to make sure sure your pancake mix is relatively thick to avoid sticking or tearing from the baking paper.
All you need to do it pull out your air fryer’s draw and line up with baking paper.
After that, carefully add a dollop of your pancake mixture on top, and then place another piece of baking paper on top, repeating the process until you have a nice stack of pancakes!
Turn on your air fryer to 165 degrees for roughly 7-8 minutes.
Take out once golden and crispy round the edges.
Currys released a fantastic tutorial on how to air fry your pancakes on TikTok, you can watch the viral video here!
Can you freeze pancake batter?
Photo by Eva Bronzini: https://www.pexels.com/photo/preparing-batter-for-pancakes-6810886/
You can freeze raw pancake batter. This is because eggs are whisked and mixed into the batter, making it safe to freeze. Once stored in the freezer, it can last up to 3 months!
How to freeze pancake batter:
Once the pancake batter is mixed, pour carefully into freeze-safe zip bags.
Lay a baking sheet inside the freezer draw and place the zip bag containing the mixture on it.
Freeze.
How to defrost pancake batter using water:
Fill up the sink with cold water and place the zip-bag of frozen pancake batter into the water.
Wait 30 minutes until the mixture has become liquefied in the bag.
How to defrost pancake batter using the fridge:
Remove the zip-bag of frozen pancake better from your freezer.
Lay a tea towel on one of the shelves of your fridge.
Place the zip-bag containing the batter on top of the towel.
Wait overnight until the mixture has completely thawed.
Elevate your mornings with a slice of homemade breakfast loaf!
This high-fibre breakfast loaf is loaded with succulent figs, sweet dates and a hint of black tea to give a delicious malty flavour. We sprinkle in a few warming spices and a pinch of Maldon Sea Salt flakes to complete the symphony of flavours and textures before baking it in the oven.
Pair the loaf with a good dollop of Greek yogurt for extra protein and a few crisp apple slices – because breakfast should be a celebration of delicious nourishment!
Mix together flour, oats, baking powder, nuts and seeds. Add soaked fruit and tea into the mix. Add in the egg and give it one last good mix.
Bake in the oven for an hour 20 minutes. At 30 minutes, cover with baking parchment or tin foil so it doesn’t brown too quickly.
Leave to cool for a couple of hours (or overnight).
Slice and serve with Greek yoghurt, apple and cinnamon. Sprinkle with Maldon Sea Salt.
Lobster, prawns and crayfish are often considered delicacies for a special occasion, so this BBQ recipe with smoky siracha mayonnaise and herbed butter is perfect for a showstopping Christmas feast.
Begin by mixing together the herb butter for your seafood. In a small bowl mix together the softened butter with Maldon Garlic Sea Salt, cracked black pepper, the chopped parsley and coriander. Set aside.
The perfect way to cook your seafood is on a hot BBQ, however if you don’t have one then a griddle pan will work too. Make sure it has reached a medium to high temperate, and start by grilling your lobster halves. Cook flesh side down on the griddle until the meat has turned pink and has some lovely charring on it. The shells will turn orangey pink too, and this is when you know your lobster are cooked. Do the same with the king prawns and crayfish, although these will take less time to cook.
While your seafood is cooking, it is also nice to griddle some lemon to serve alongside. Simply add your lemon halves cut side down onto the grill and allow them to cook and char for 3 minutes.
Once your seafood is all cooked, pile onto a large serving platter and using a pastry brush, brush all across the flesh with your delicious herb butter – letting it melt in. Place your griddled lemon onto the serving platter too.
In a small bowl mix together the mayonnaise and siracha. Serve this alongside the platter of BBQ seafood and allow everyone to tuck in!
This is is brunch-time classic!
Deliciously creamy avocado, smothered on toasted sourdough and topped with a oozing poached egg. To really make these flavours sing, we add a pinch of Maldon Chilli Sea Salt to the dish to give a spicy, aromatic kick.
Here is how to make avocado on toast with poached egg and chilli salt…
Place a pan of water on the hob and bring up to a simmering boil.
Prepare your avocado toast first. Cut the avocado in half and then take the skin off each half and remove the stone. Place the cut side of each avocado half flat on your board and use your knife to cut thin slices, then gently press the avocado out to fan it out. Squeeze over some of the lemon juice (this will help stop the avocado from turning brown).
Lift each fan of avocado onto your slice of toast.
Next poach your eggs. Turn the heat down on the water so it is just a simmering heat. Crack each egg into a small ramekin. Use the stick end of a wooden spoon and swirl it around in the water to create a whirlpool, then quickly drop your egg from the ramekin into the middle. The ‘whirlpool’ will help keep the egg in a neat shape. Poach for 2 minutes until the white is just set but the yolk is still runny.
When cooked, lift the egg out with a slotted spoon and blot off any excess water on some kitchen towel. Then place each egg onto the avocado toast.
Garnish each toast with some Maldon Chilli Sea Salt, cracked black pepper, fresh chilli slices and some coriander.
Serve with the remaining lemon cut into wedges.
Joe Woodhouse; talented Food & Drink Photographer and Cookbook author of ‘More Daily Veg‘ brings us the comforting dish of whole baked baby squash – perfect with a cold, damp autumn day.
When Joe visited Wilding Cider in Chew Magna, North Somerset, run by Beccy and Sam Leach, Sam made this vegetarian dish for their supper. The pair used to run the restaurant Birch in Bristol before setting their sights on cider making.
This simple but warming dish is a perfect foil to coming in from a cold and drizzly day in an orchard. They sat in the barn, swapping ciders and wines for everyone to taste with a roasting fire going in the wood burner.
Joe added a green sauce to cut the richness a bit, but if you get a good-quality sharp Cheddar, it doesn’t need it!
Here is how to make the whole baked baby squash…
Preheat the oven to 200C (400F), Gas Mark 6. With a small knife, cut the tops off the squash in a circular motion to form caps. Scoop out and compost the seeds.
Mix together the cheese, crème fraiche and oats, and add a good couple of pinches of Maldon Salt and a healthy few grinds of black pepper.
Fill the squash with the oat mixture. Replace their lids. Rub each all over with a tablespoon of oil, place on a tray and bake for 25–35 minutes until a knife pierces the flesh easily.
Meanwhile, blend all the sauce ingredients together with salt and pepper. For a coarser sauce, hand chop everything and mix with the oil, which is equally as good, if not better.
Serve the squash with a salad, maybe a few potatoes to make it into a main. Add the sauce on the side and a good bottle of cider, from Wilding preferably!
Creamy, crunchy, spicy and caramalized.
Food & Drink Photographer and Cookbook author, Joe Woodhouse created a sensational dish which holds the perfect balance of textures and flavours to elevate the humble Brussels sprouts.
All elements can be prepped ahead and then assembled when you are ready to serve. The Brussels take no time to cook. Joe loves to roast the vegetable to create a lovely crispy and caramelized outer, with soft, steamed centres. You can undercook the onion and chilli in the chutney so it retains a crunch and a freshness, cooked through but not fully softened.
Here is how to make the roast brussels sprouts…
Preheat the oven to 200.C (400.F), Gas Mark 6.Toss the bread in 2–3 tablespoons of oil. Add to a baking tray and toast in the oven for 10–12 minutes until golden. Blitz to crumbs in a blender, or leave whole or hand cut if you prefer.
Meanwhile, add 2 tablespoons of oil to a medium pan over a medium heat. Add the onion, celery and chillies with a pinch of Maldon Salt and cook for 5–7 minutes. Add the tomatoes. Half-fill the can with water and add to the pan. Bring to a simmer and bubble away for 15minutes until thickened. It still wants to be loose but not watery. Add the honey and check if it needs more Maldon Salt. Set aside.
Increase the oven temperature to 220.C (425.F),Gas Mark 7. Using the same tray as the croutons, brushout any remaining crumbs and add the Brussels with 3 tablespoons of oil and a good pinch of salt. Roast for 12 minutes. You want to roast them quickly, getting colour on the outside and cooking through without going overly soft in the middle. If they need a bit more, keep them in a minute or two longer. Feel free to give the tray a shake once or twice to aid them in cooking evenly.
Meanwhile, mix the lemon juice with the tahini and trickle in a few tablespoons of cold water. Keep working it with a whisk and adding water until you get a smooth consistency which holds its shape. If it gets too loose, just add a spoon or two of tahini and combine it to help firm up the mix.
Spoon the tahini mixture onto plates or a serving dish, followed by the Brussels sprouts. Then dot around the tomato chutney. You made not need it all, see how you go. Finish with the crouton crumbs and a drizzle of oil.
What could be more warming than a humble slice of apple crumble?
This recipe is made by @mushypeaz, where a generous glug of Graza “Sizzle” Extra Virgin Olive Oil is used to incorporate the dry ingredients and create that crumble-like texture that we all know and love. Plus, a good EVOO like “Sizzle” adds a wonderful, nuanced flavour to the baked dish, keeping the ‘crumb’ deliciously moist and not dry.
For a little extra crunch and flavour, add a pinch of Maldon Salt. The sea salt flakes gives balance to the dish, elevating the sweetness and counteracting the bitter tones.
When looking for a final topping, add a swirl of Graza “Drizzle” Extra Virgin Olive Oil to your ice cream scope. The EVOO not only allows the ice cream to hold a perfect silky and smooth texture, but also adds depth to the dish, creating a complex flavour profile.
Here is how to make the Olive Oil Apple Crumble…
Peel 1½ pound apples and slice thinly.
Preheat your oven to 350 F.
In a large bowl, mix apples, ¼ cup brown sugar, 1 tbsp flour, 1 tsp vanilla extract, a pinch of cinnamon, and a pinch of salt until well combined.
Add the apple mix to a 2 quart baking dish.
To make the crumble, thoroughly mix 1¼ cup flour, ⅔ cup brown sugar, ¼ cup pecans or walnuts, 1¼ tsp baking powder, and 1 tsp kosher salt in a medium bowl.
Squeeze in ½ cup of Sizzle and mix gently until dry ingredients are just incorporated. Make sure not to over-mix to maintain big clumps of crumble!
Evenly distribute crumble mixture over apples and dust with a tbsp or so of granulated or turbinado sugar.
Bake for 50-60 minutes until crumble is golden brown and filling is bubbling. Let cool before serving if you can!
Enjoy à la mode with a scoop of ice cream, a big swirl of Drizzle, and a pinch of Maldon Salt.
Where Can You Buy Graza “Sizzle” and “Drizzle” Extra Virgin Olive Oil?
You can purchase Graza’s “Sizzle” and “Drizzle” EVOO directly from their website. You have the option to buy as a one-time purchase, or subscribe & save to have a frequent delivery of EVOO at a lower price – what more could you want!
“Sizzle” is 100% Extra Virgin cooking oil. It’s made from peak season olives that yield a more mellow flavour. Use it every day, in every way.
“Drizzle” is 100% Extra Virgin finishing oil. It’s made from olives that are picked early, when flavour is bold and antioxidants are highest.
Paccheri is a type of pasta that is commonly shaped of a very large tube, with origins of this pasta being traced back from Campania, Italy.
We’ve taken this classic pasta dish and given it a culinary twist with the use of butternut squash and chorizo for a comforting warmth of flavours. Remember to add Maldon Salt to your water when boiling the pasta as the salt will add an extra layer of flavour to the water, in which is then absorbed by the pasta when cooking.
Preheat the oven to 180C.
Peel and dice the butternut squash into rough chunks. Place onto a baking tray with the onion wedges and the garlic gloves still in their skins. Drizzle with 1 tbsp of olive oil, some Maldon salt, cracked black pepper and the chilli flakes. Toss them all together and then roast for 15 minutes until the squash is tender.
Cook the pasta according to the pasta instructions in a large pan of salted water.
In a large frying pan add the chorizo and fry until crispy. Once the butternut squash is cooked, remove from the oven, and add it to a blender with the onion and the garlic squished from their skins. Ladle in some of the pasta water and then blitz until smooth.
Tip the butternut squash sauce into the frying pan with the chorizo, then lift the cooked pasta into the sauce, adding some more pasta water if needed so it coats the pasta and turns into a glossy consistency.
In a small frying pan heat 2 tbsp of olive oil, then fry the sage leaves until crispy.
Spoon the pasta into bowls and top with the sage leaves, a drizzle of oil, some cracked black pepper and a good grating of parmesan.