Make the Caesar dressing by mixing the mayonnaise, Dijon mustard, lemon juice, Worcestershire sauce, mashed anchovies, grated garlic, and Parmesan in a bowl. Stir until smooth and season with Maldon Garlic Sea Salt and black pepper to taste. Set aside.
Butterfly the chicken breasts and flatten to about 1cm thick.
Coat each chicken breast by first dredging in Maldon Garlic Sea Salt, seasoned flour, then dipping in beaten egg, and finally pressing into the panko breadcrumbs until fully coated.
Prepare the salad base by combining the heritage and bitter leaves in a large bowl. Add the chopped anchovies but leave undressed until ready to serve.
Add the olive oil and butter to the hot griddle. Once melted, add the halved garlic bulb and thyme sprigs. Let them infuse the oil for about 20 seconds.
Place the breaded chicken onto the griddle and cook for 5–6 minutes on each side until golden, crisp, and cooked through.
Remove the chicken and let it rest for 2 minutes. Meanwhile, toss the salad leaves and anchovies with the Caesar dressing. Taste and adjust seasoning with Maldon Garlic Sea Salt.
To serve, lay each schnitzel on a plate, top with a mound of dressed salad, and finish with plenty of shaved Parmesan and a final pinch of Maldon Garlic Sea Salt.
Discover a charred broccoli salad with caramelised edges, creamy feta and fresh mint, all tossed in a zesty lemon‑garlic dressing. Roasted at high heat for maximum flavour and tender‑crisp bite, this easy broccoli salad is a vibrant side for weeknights and a standout on festive tables. Finished with a pinch of Maldon Garlic Sea Salt for clean, bright seasoning.
How to char broccoli?
Toss florets with oil and salt, spread on a hot tray in a single layer. Roast at 240°C fan for 15–20 minutes until edges are deeply browned and stems are tender‑crisp. Finish with Maldon Garlic Sea Salt flakes.
How to Make Charred Broccoli Salad with Feta, Almonds & Mint
Step 1 Roast the Broccoli
Preheat oven to 240°C fan (465–480°F) or its highest setting. Preheat the tray for extra char on the broccoli; make sure to rotate the pan halway.
Toss florets with 3 tbsp olive oil and a good pinch of Maldon Original Sea Salt.
Spread in a single layer on your largest baking tray (use two if needed so broccoli browns, not steams).
Roast 15–20 minutes until tender with deeply charred edges. Texture cue: tender‑crisp with caramelised tips.
Step 2 – Make the Lemon-Garlic Dressing
Whisk lemon zest and juice, 5 tbsp olive oil, honey, grated garlic and chilli flakes.
Season with a pinch of Maldon Garlic Sea Salt to taste.
Step 3 – Assemble and Serve
Pile warm broccoli onto a large platter.
Top with crumbled feta, toasted almonds and mint leaves.
Drizzle over half the dressing; serve the rest alongside so guests can add more. You can serve at either warm or room remperature.
Tips & FAQs:
Tips:
Dry broccoli well and cut similar‑sized florets for even charring.
Don’t overcrowd the tray—space equals char.
For extra smoky notes, finish under a hot grill/broiler for 1–2 minutes or on a BBQ.
Finish with a final pinch of Maldon Original Sea Salt at the table for crunch and clean salinity.
FAQs:
How do you char broccoli without burning it?
Use very hot oven, large tray, and oil lightly. Roast until edges caramelise (15–20 mins), then check every 2 minutes.
Can I make charred broccoli salad ahead?
Roast broccoli and make dressing up to 2 days ahead. Dress just before serving; add mint and feta last for freshness.
Can I use frozen broccoli?
Yes. Roast from frozen on a preheated tray at high heat; expect a couple of extra minutes and slightly softer texture.
How do I make it vegan or nut‑free?
Swap feta for a vegan alternative (or omit), honey for maple syrup; replace almonds with toasted seeds (pumpkin/sunflower).
Can I grill instead of roast?
Toss florets with oil and salt, thread onto skewers or use a grill basket. High heat, 8–10 minutes, turning for even char.
If using wooden skewers, soak in water for at least 30 minutes before you plan to BBQ/griddle.
Mix the marinade ingredients in a large bowl.
Cut each halloumi block into 8 large chunks. Thinly slice the courgettes lengthways to about 3mm thick, ideally with a mandolin (go carefully!) or with a sharp knife. Halve and de-stone the nectarines then cut each half into 4 chunks.
Toss the halloumi chunks, courgette strips and nectarine chunks in the marinade. Thread everything onto the skewers, alternating between chunks of halloumi, pieces of nectarine and courgette slices (thread these on in squiggly S shapes). Set aside on a tray or plate as you preheat the BBQ or griddle pan.
Cook on the BBQ or griddle pan until nicely charred on both sides of the halloumi chunks. Transfer to a platter, scatter with mint leaves and drizzle with honey. Serve with lemon wedges.
Celebrate Easter with a vibrant Spring Vegetable Quiche, bursting with fresh, seasonal flavors. A buttery, flaky crust holds a creamy, savory filling packed with tender asparagus, sweet peas, baby spinach, and colorful bell peppers. Light, wholesome, and perfect for brunch, this quiche is a delightful centrepiece that captures the essence of spring in every bite. Serve warm or chilled for an easy, elegant Easter dish.
Here is how to make a vegetable quiche
Start by making the pastry. Place the flour and Maldon Sea Salt into a large bowl and mix together. Then add the cold, cubed butter and use your fingers to rub the butter into the flour until it resembles fine breadcrumbs and there are no large lumps of butter left. Alternatively, you can do this by pulsing it a few times in a food processor. Then add the cold water (start with 3 tbsp and see if you need more) and mix together until it starts to clump and there are no floury or dry patches. Tip onto the work surface and gently knead until it comes together as a smooth pastry.
Then lightly flour the work surface and roll the pastry out with a rolling pin until it is £1 in thickness. Carefully lift it and line a 23cm fluted tart tin, pressing gently into the sides, but leaving some pastry to overhang. Use a cutlery fork to prick some holes onto the base and then place the lined tin into the fridge to chill for 30 minutes.
Preheat the oven to 180c.
After 30 minutes, take the pastry case out of the fridge and put onto a flat baking sheet. Scrunch up some baking paper and put this onto the pastry then fill with baking beans. Blind bake the pastry for 15 mins, then remove the baking beans and paper and return for another 5 – 7 mins, until the pastry is very lightly golden and feels chalky to the touch.
Remove from oven and set aside to allow to cool slightly. Then take a sharp serrated knife and carefully trim off the excess pastry overhangs so it has a nice, neat edge.
Heat a frying pan on a medium heat and add the knob of butter and 1 tbsp of olive oil. Then add the sliced leek and sauté gently until soft and starting to caramelize. Place a pan of water on to boil, and then add the asparagus and frozen peas – you just want to blanch them quickly for 2 minutes, then remove from the pan and place into a bowl with iced water to stop them cooking any further.
In a jug, whisk together the eggs, cream, milk and chives and season well with Maldon Sea Salt and cracked black pepper.
Spoon the veg into the pastry case and crumble over the goat’s cheese. Then pour over the egg mixture and bake in the oven for 30 mins until the filling is set and the top is golden.
Remove from the oven and allow to cool slightly then serve with a green salad.
Looking for a hearty and satisfying meal to warm up those cold evenings? This comforting chorizo and butter bean stew is the perfect solution, brimming with bold flavours and velvety texture. Whether you’re embracing Veganuary or simply craving a wholesome plant-based dish, this easy butterbean stew recipe is sure to become a family favourite. Infused with the smoky warmth of smoked paprika, tender butter beans and a hint of Maldon Sea Salt flakes, this stew pairs beautifully with a slice of crusty bread for the ultimate cosy dinning experience.
Here’s how to make a chorizo and butterbean stew
This butter bean stew is a delicious and hearty dish that’s perfect for any time of year. Packed with vibrant flavours from rosemary, garlic, and chorizo, it’s both comforting and nourishing.
Step 1:
Start by taking a large shallow pan and placing on a medium heat.
Step 2:
Melt the olive oil before adding the sliced onions and a pinch of Maldon Sea Salt flakes. Cook these gently for 2-3 minutes until softened.
Step 3:
Add the sliced garlic, rosemary, smoked paprika and chorizo and fry for another 5 minutes until the garlic smells fragrant and the chorizo begins to crisp.
Step 4:
Add the tinned tomatoes, followed by the butterbeans. (We used Bold Beans butter beans, but you can use lima beans or white beans if preferred). Stir well and allow the mix to bubble and thicken for 5 minutes. You should have a rich tomato base to create the perfect balance of flavours.
Step 5:
Stir the spinach and allow it to wilt into the sauce. Zest the lemon into the pan and season with more Maldon Sea Salt flakes and cracked black pepper.
Step 6:
Serve the stew sprinkled with parsley, crumbled feta (or vegan alternative ), and some toasted sourdough for dunking and soaking up the last of the juices!
How long can you keep the chorizo and butter bean stew in the fridge?
Once your stew is cooked, you can store it in the fridge for up to three to four days. You need to make sure that the stew is packed in a secure, airtight container before refrigerating it within two hours of cooking.
Please note that stews made with fish or shellfish should only be refrigerated for no more than a day.
Can you freeze cooked chorizo and butter bean stew?
You can freeze the chorizo and butter bean stew for up to three months once cooked. We recommend not eating it after three months because although it would still be safe to eat, it might not taste as good!
Make sure to store the stew in a secure, airtight container. When you are ready to eat the stew, place the frozen stew in the refrigerator to thaw slightly for at least 24 hours but no more than 2 days before reheating. You can reheat the stew by placing it in a saucepan on the stovetop over low heat, stirring occasionally until heated through.
Alternatively, you can reheat it in the oven at a low temperature, ensuring you stir periodically to prevent burning and ensure even heating throughout.
If you want to reheat the stew in a microwave, you need to make sure that the stew is covered with a microwave-safe lid or plastic wrap. This will trap steam and keep the stew nice and moist. Microwave on high for 1-2 minutes, or until the stew is warmed through.
Easy, butter bean recipes
If you’re looking for more easy butter bean recipes to make during the week, why not try a few of our favourites from our friends at Maldon Salt.
This is Rukimini Iyer’s butterbean recipe from ‘The Green Cookbook’. She roasts carrots with coriander seeds under foil, while the rich, silky butter bean mash takes just 10 minutes to put together. This recipe is a substantial, flavour-packed dish which is incidentally vegan!
Scorched by Genevieve Taylor (6th-7th September 2023)
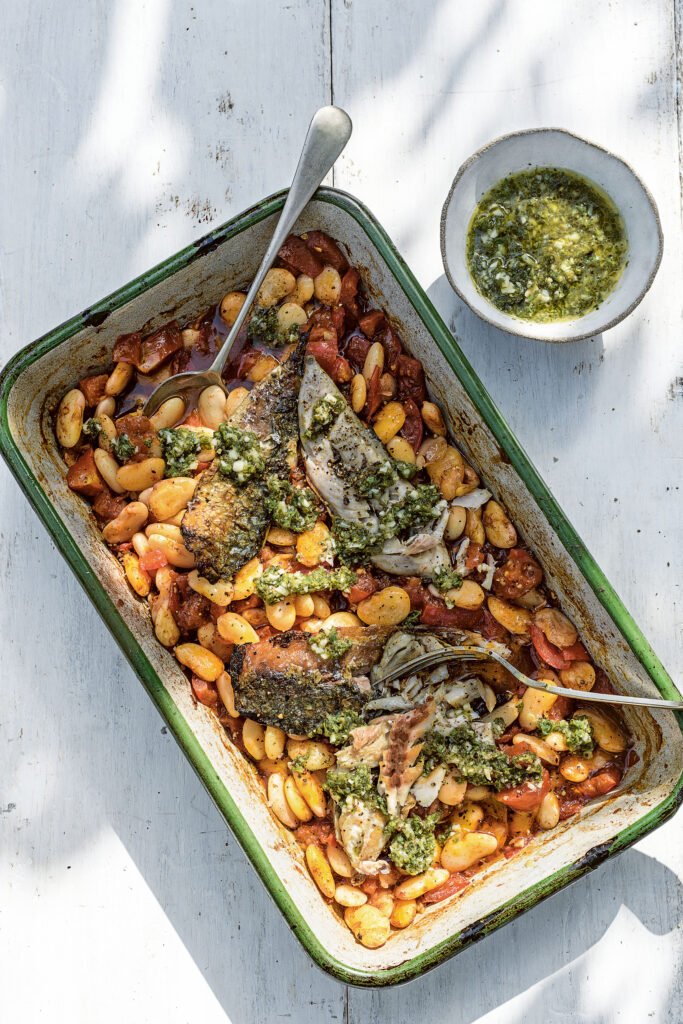
Genevieve Taylor loves fish and meat proteins, but she also adores pulses and tries to eat them several times a week! Cheap and cheerful, a bowlful of beans is an excellent way of making your mackerel go a little further. Fresh oregano is one of Gen’s favourite herbs, giving a slightly floral note to the pesto-style dressing.
Although white beans are not the same as butter beans, they are both types of white beans. White beans have a creamy, mild taste and can often be used interchangeably in recipes. This recipe, we used Bold Bean & Co’s Organic White Beans (haricot beans), which are perfect to use for this dish as their bean’s are slow-cooked which allows them to hold their shape when simmering in a stew, creating the perfect, buttery and smooth flavour.
Indulge in the perfect autumn dish with our air fryer pumpkin gnocchi, served with a rich, creamy sauce. Roasted pumpkin, caramelised onions, and soft gnocchi come together, topped with crispy sage, toasted walnuts, and a sprinkle of parmesan. This comforting homemade meal is easy to prepare and bursting with seasonal flavours, offering a flavour-packed experience. This air fryer pumpkin gnocchi recipe will transform pillowy gnocchi into a golden, slightly crisp delight, enhanced by a luscious pumpkin-infused sauce!
Whether you’re a fan of a classic potato gnocchi or a lover of seasonal pumpkin puree, this dish brings together the earthy richness and the aromatic crunch of fried sage, and the creamy decadence of parmesan cheese. Ready in no time, this dish is a celebration of simplicity and flavour, perfect for weeknights or impressing dinner guests.
Here’s how to make the pumpkin gnocchi and crispy sage recipe…
Step 1
Start by preparing the pumpkin by peeling and deseeding it, then cutting it into small 2cm pieces. Then preheat your air fryer to the desired setting – we did ours at 180c. Place the diced pumpkin into the basket along with the onion wedges and drizzle with olive oil then season with Maldon Garlic Sea Salt and cracked black pepper.
Step 2
Cut the garlic bulb into half so the cloves are exposed and then wrap each half in kitchen foil. Place these wrapped bulbs into the basket with the pumpkin and onions. Place the basket into the air fryer and roast for 15 – 20 minutes until the pumpkin is tender and the onions have softened and charred, remove from the basket and set aside. Once cool enough to handle, unwrap the foiled garlic bulbs and the garlic should be golden and soft inside – if they need a little simply wrap them again and place back in the air fryer for 5 minutes more.
Step 3
In a small frying pan add some oil and heat to a medium heat, then add the sage leaves and allow then to fry for a minute or so until crisp then remove and set aside. Place the walnuts into the air fryer and toast for 5 minutes. Then remove and roughly chop.
Step 4
Place a large pan of salted water on to boil and season well with Maldon Sea Salt. Then cook the gnocchi according to the packet instructions, then drain them but make sure to reserve a large mug of the cooking water. Place the drained gnocchi into a large frying pan.
Step 5
Put the roasted pumpkin and onion into a blender. Squeeze the garlic out of the paper skins and add to the blender too. Then add the grated parmesan, some Maldon Garlic Sea Salt and cracked black pepper to the blender along with 50ml of pasta water. Blend until smooth, adding a little more pasta water if required.
Step 6
Tip the smooth sauce into the pan with the cooked gnocchi and gently heat through, tossing well. Again, you can add a splash more of the pasta water here if it’s looking a little thick – you want a nice glossy sauce.
Step 7
Serve the gnocchi in bowls and then top with the toasted walnuts, crispy sage leaves and some extra grated parmesan.
Alternative sauces you can use for your gnocchi
Here are three delicious sauces to try instead of pumpkin for your gnocchi recipe:
Pesto Sauce
Brighten your gnocchi with a vibrant basil pesto. Blend fresh basil leaves, garlic, pine nuts, parmesan cheese, olive oil and a pinch of Maldon Sea Salt until you get a smooth sauce. Toss in your cooked gnocchi for a fresh, herbaceous twist. This sauce is perfect for those looking for a light yet flavourful option!
Creamy Parmesan Alfredo Sauce
For a rich and indulgent option, whisk together cream, butter, and freshly grated parmesan cheese over medium heat until smooth and velvety. The creamy Alfredo sauce coats the gnocchi beautifully, creating a luxurious dish for a cosy dinner. Add a touch of nutmeg for extra depth.
Tomato Butter Sauce
A simple yet irresistible choice, this sauce combined the tanginess of tomatoes with the richness of butter. Simmer crushed tomatoes with a generous amount of butter, garlic and a pinch of Maldon Sea Salt until thickened. Toss the gnocchi in the sauce and finish with fresh basil and parmesan for a comforting, hearty meal.
Each of these sauces offers a unique flavour profile, ensuring there’s something for evert palate. However, one of our favourites is a classic brown butter sauce. This is made by cooking unsalted butter in a pan until the milk solids turn slightly brown, giving a nutty, toasty flavour. The French name for brown butter is ‘beurre noisette’ which translates to ‘hazelnut butter’.
How to make brown butter sauce
If you’re looking to elevate your classic potato gnocchi recipe, brown butter sauce is a game-changer. Brown butter’s nutty caramelised richness perfectly compliments the light, pillowy texture of potato gnocchi, creating a luxurious yet simple dish. To make this alternative sauce, melt 150g unsalted butter in a pan over medium heart, stirring until it turns golden brown and develops a warm, toasty aroma. Add crispy sage leaves for an earthy kick and a pinch of Maldon Sea Salt and cracked black pepper to elevate the flavours. The brown butter sauce clings to each gnocchi, creating a dish that’s indulgent, aromatic, and incredibly satisfying. Top with freshly grated parmesan for a final touch of decadence.
How to make gnocchi without using potatoes
Here are three creative ways to make gnocchi without using potatoes:
Replace traditional potatoes with pumpkin puree or mashed sweet potato for a flavourful twist. These ingredients add a hint of natural sweetness and vibrant colour to the gnocchi. Mix the puree with flour, egg, Maldon Sea Salt and a pinch of nutmeg or cinnamon for an autumn-inspired version that pairs beautifully with brown butter or cream sauces.
Cauliflower Gnocchi
For a low-carb and gluten-free option, use cauliflower! Steam or boil cauliflower florets until tender, then blend them into a smooth puree. Combine the puree with almond flour, an egg and Maldon Sea Salt to form a dough. This version is healthy and still satisfying, with a slightly nutty taste.
Ricotta Gnocchi
Craving indulgence? Swap the potatoes for creamy ricotta cheese to create light and tender gnocchi bites. Ricotta gnocchi, also known as ‘gnocchi di ricotta’ originates from Italy, and is similar to ‘Gnudi’ which is gnocchi-like dumplings filled with ricotta cheese and semolina.
Simply mix ricotta with flour, parmesan cheese and a pinch of Maldon Sea Salt. The dough comes together quickly and requires less kneading, resulting in soft, melt-in-your-mouth gnocchi with a subtle cheesy flavour.
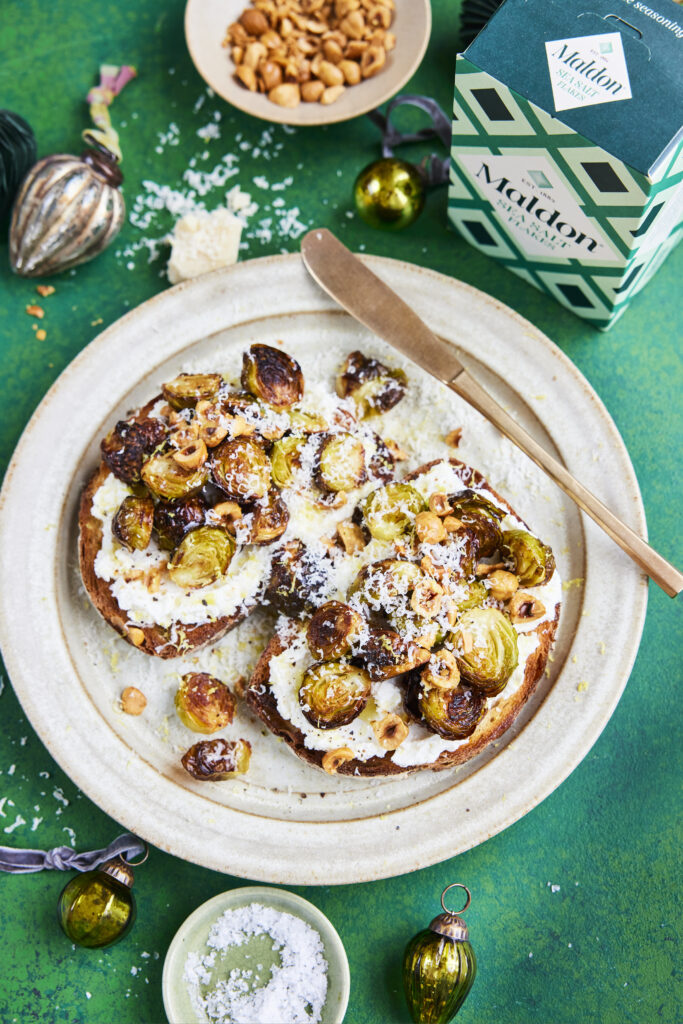
If you’re looking for a snack that’s both simple and sophisticated, charred Brussels sprouts on toast with ricotta and parmesan is your go-to festive treat! This delightful combination of crispy, oven-roasted Brussels sprouts, creamy ricotta, and tangy parmesan creates a mouth-watering appetizer, perfect for holiday gatherings. Nestled atop toasted sourdough, and finished with a sprinkle of Maldon Sea Salt, cracked black pepper, and a hint of lemon zest, this dish is packed with vibrant flavours and textures. For an added crunch, hazelnuts round out the recipe, making it a memorable dish that highlight seasonal product while keeping things easy and delicious!
Brussels sprouts, when charred to perfection, bring out their natural sweetness with a smoky edge that pairs beautifully with the creamy ricotta base. Tossed in olive oil, roasted to a golden crispy, and layered on slices of freshly toasted sourdough, these sprouts create an irresistible contrast between the crunch of the bread and their tender interior. The parmesan adds a sharp, salty bite, while the bright lemon zest and crunchy hazelnuts elevate the snack into something truly special.
Ideal as a light starter, festive canape, or even a creative side dish, this easy Brussels sprouts recipe is a delicious way to celebrate the season with wholesome, bold flavours.
Best Way to Roast Brussel Sprouts
Roasting Brussel sprouts to perfection involves coating them evenly with olive oil and seasoning them generously with Maldon Sea Salt and cracked black pepper. Spread them out on a large baking tray to ensure they roast evenly without steaming, making sure to check them halfway through roasting.
Making Charred Brussel Sprouts on Toast with Ricotta and Parmesan
Prepare the Ingredients:
Preheat your oven to 180°C. Halve the Brussel sprouts and place them on a large baking tray. Drizzle with olive oil and season with a pinch of Maldon Sea Salt and cracked black pepper.
Roast the Brussel Sprouts:
Place the tray in the oven and roast for 15-20 minutes until the Brussel sprouts are tender and charred in places, giving them a deep, roasted flavour.
Prepare the Toast and Ricotta Spread:
Toast the two slices of sourdough bread to your preference. In a small bowl, mix together the ricotta with the zest of half a lemon, adding a pinch of Maldon Sea Salt and black pepper to taste. Spread this ricotta mixture onto each piece of toast.
Assemble the Toast:
Roughly chop the toasted hazelnuts and have the finely grated parmesan ready. Top each slice of toast with the charred Brussel sprouts, followed by a scattering of toasted hazelnuts and a generous amount of grated parmesan. Serve immediately for a delightful crunch and creamy texture.
How to Make Charred Brussel Sprouts on Toast with Ricotta and Parmesan
Preheat the oven to 180c.
Place the Brussel sprouts onto a large baking tray and drizzle with the olive oil, then season with Maldon Sea Salt and black pepper. Place into the oven and roast for 15 – 20 minutes until charred in places.
Toast the two pieces of sourdough bread. In a small bowl mix together the ricotta and lemon zest along with some Maldon Sea Salt and black pepper. Then spread the ricotta mixture on top of each toast. Roughly chop the toasted hazelnuts.
Top each toast with the charred Brussel sprouts, a scattering of toasted hazelnuts and some grated parmesan cheese. Serve immediately.
Can You Freeze Roasted Brussel Sprouts?
Yes, you can freeze roasted Brussel sprouts. Once cooled, place them in a single layer on a baking tray to freeze. Once frozen, transfer to an airtight container or freezer bag. They can be stored in the freezer for up to 3 months. Reheat in the oven to maintain their crispiness.
Healthy Brussel Sprouts Recipe
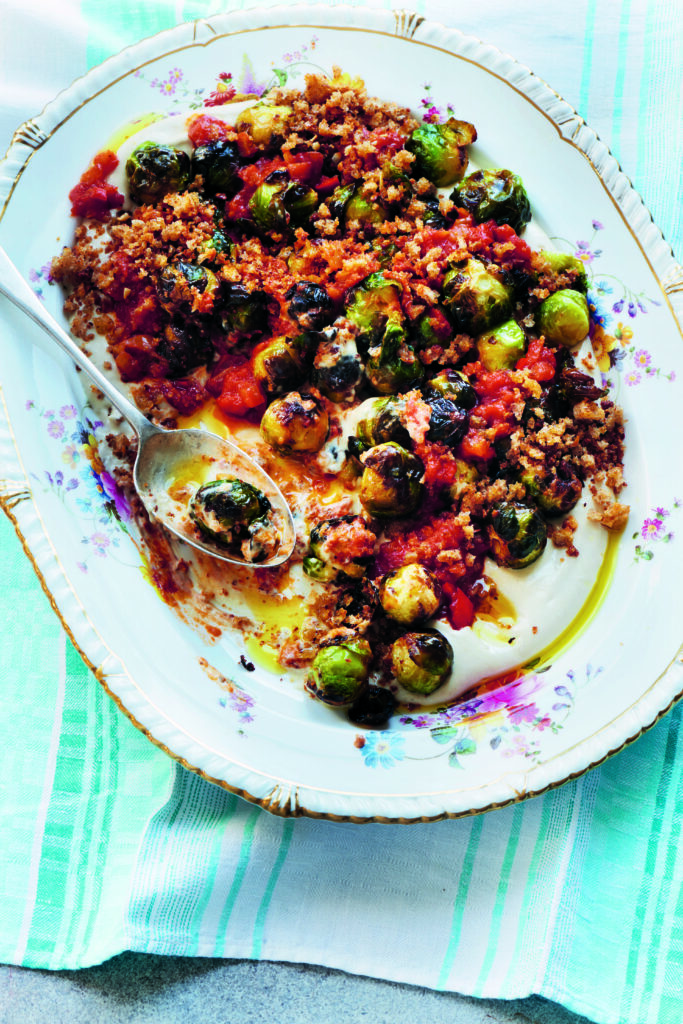
This recipe features healthy Brussel sprouts roasted to perfection, paired with creamy ricotta, crunchy hazelnuts, and tangy parmesan on sourdough toast. This dish is not only delicious but also packed with nutrients, making it an ideal vegetarian option for any meal. If you are craving something a little different, why not try Joe Woodhouse’s delicious roast Brussels sprouts with whipped tahini, paid with a spicy tomato chutney and a gorgeous crouton crumb.
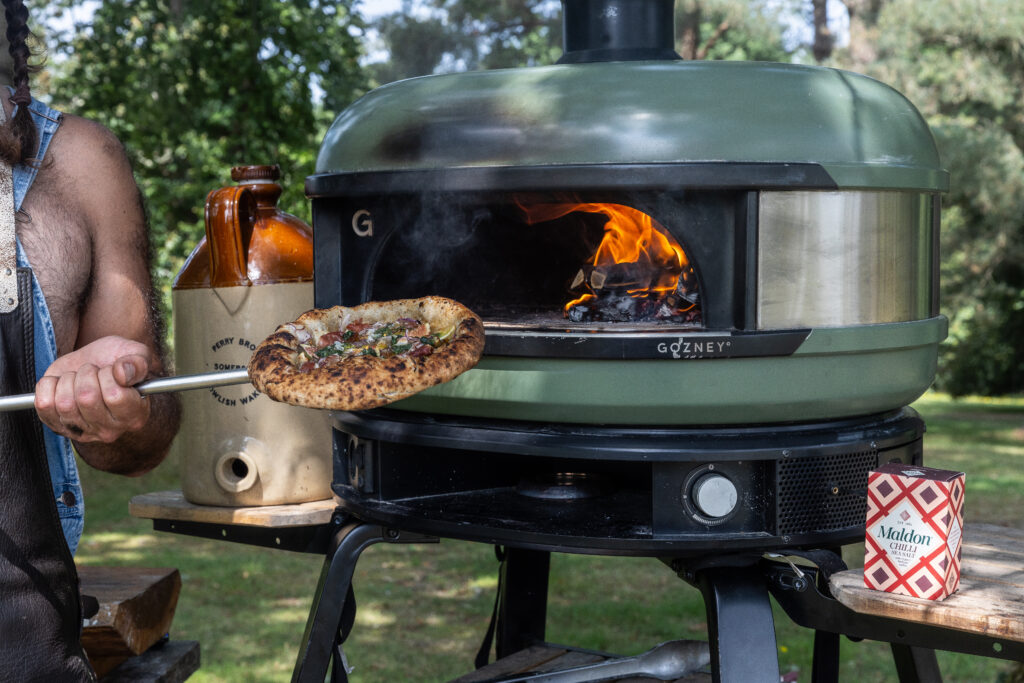
This pizza uses my aromatic nettle sourdough pizza dough and is best cooked in a Gozney Dome. There are few things as delicious as a woodfired pizza. This recipe was born in the dusty Valencian hills, I was walking with my wife, Sophie and our best friends when we came across a beautiful little village and sat down to eat at a weather beaten family restaurant. As the evening sun nestled in the surrounding trees we ate the most delicious honey, figs and goats cheese – accented with a mouth watering hit of chilli. Whenever I make this pizza I’m fixated by the bubbling brown butter and vibrant colours. Every bite takes me back to that little Spanish paradise.
It’s best to start the dough the day before for the best flavour but you can make it early in the morning if you run out of time. You will need a ripe sourdough starter but you could swap out with 3g of dried yeast if needed.
You will need your Gozney oven clean, enough fuel to keep her hot and the appropriate pizza peels – one for loading and one for turning. If you need some instruction on the basics then Gozney has a great YouTube channel that will help you.
Here is how to make the pizza…
The day before, mix your dough. Mix the water, starter and oil by hand in a large bowl until combined. Add in the flour and mix again, leave covered for 15 minutes to fully hydrate then add in the salt and knead by hand for about 10 minutes until the dough becomes smooth. Add in the sieved nettles and knead until combined. Place into an oiled bowl, cover with a cloth and leave on the worktop. After 20 mins fold the dough and leave again for another 20 mins, repeat this two more times. Shape into four balls by dividing the dough and folding each piece in on itself. Place into an oiled tray, cover with cling film and place in the fridge overnight. Make sure the fridge is running at about 5C.
Now for your spicy pizza party day! Heat up your Gozney dome with a small wood fire, move the fire to the right hand side, loosely wrap the garlic bulb in foil and roast off until soft and smokey, this should take about 20 minutes on the far left hand side of the oven. Remove and once cool, squeeze out the pulp and mix into the soft butter with a teaspoon of the Maldon Chilli Sea Salt. Taste and set aside at room temperature.
Get the topping ready and laid out and run up your pizza oven to over 450C, making sure the base is at least 350C (I use an infrared thermometer to check). Remove the dough balls from the fridge for an hour, still covered.
Clean off a smooth work surface and dust with the semolina flour. Dust the pizza balls with a little semolina, pick up a dough ball and place on the worktop with a good dusting of semolina. Gently and evenly push the dough out to a circle. Using both hands, stretch the dough out to a dinner plate size. Add two spoons of the chilli butter and evenly spread around the pizza. Top with the goats cheese, figs, Iberico ham and drizzle over with honey. Slide a pizza peel underneath the pizza and confidently slide into the oven, making sure there is a rolling flame from the wood fire. After about 30 seconds turn the pizza to give it an evenly cooked crust. Remove the pizza and place onto a cooling rack to harden up. Sprinkle over a little more Maldon Chilli Sea Salt and cut into 6 wedges.
Best eaten with an ice cold glass of spanish beer in the Valencian hills, but then again – what isn’t?
Wash and dry the tomatoes, using a serrated knife, remove a little less than 1/3 of each tomato horizontally.
Drain the tomatoes, taking care not to break them, chop the flesh, place in a bowl, season with salt and pepper and dress with half the oil.
Drain and dice the mozzarella, mix with the pulp. Wash and dry the basil well, season the tomatoes with salt and pepper, fill them with half of the mixture in the bowl.
Spread the rest of the mixture on four plates, place a tomato on each plate, decorate with basil leaves, drizzle with the rest of the oil and finish seasoning with a pinch of pepper and Maldon Sea Salt flakes on each tomato.
We’ve teamed up with Tom Jackson to make a delicious Pizza Fritta Pasta Salad paired with artichokes, ricotta, mint and a cooked tomato dressing.
Tom’s first pizza fritta happened a couple of summers ago in Naples. Volcanically hot tomato sauce, marbled with ricotta, funky guanciale (cured pig cheek) and basil, all encased in a huge half-moon of charred, chewy Neapolitan dough. Unsurprisingly, Tom’s second (and third, fourth, etc.) pizza fritta also happened on that trip. The one Tom had with artichokes and olives was his favourite, and it kindly led him here. To keep things vegetarian, switch the ’nduja for harissa or chilli crisp (or, indeed, a plant-based ’nduja). To make it vegan, switch the ricotta for a plant-based variety or a spoonful or two of moutabal. This recipe makes more dressing than you’ll need, but you’ll be glad of it later!
Here is how to make a pizza fritta pasta salad
Start by making the dressing. Off the heat, place the chunk of ’nduja, the basil sprig and the onion wedge in a medium-sized saucepan then tip the crushed tomatoes on top. Place over a high heat, then, once simmering, reduce the heat to low–medium. Cook for 20-30 minutes, stirring occasionally, by which time the tomatoes and ‘nduja should have broken down. Remove from the heat and leave to cool to room temperature, discarding the basil and onion. Transfer the sauce to a bowl and stir through the datterini tomatoes. Add the vinegar, olive oil and a good pinch of Maldon Chilli Sea Salt. Check for balance, then set aside to marinate. This ‘dressing’ keeps well for up to 3 days in the fridge and is great with lots of other things (just bring back up to room temperature before use).
Cook the pasta in plenty of salty boiling water until al dente (2 minutes less than the total packet instructions), then drain. Rinse briefly, until the pasta is just warm, then drain again.
Gently toss the pasta with roughly 200g (7oz) of your tomato dressing, then add the artichokes, olives, pine nuts and tear in the mint leaves. Toss again, then add the ricotta and gently marble through the dressed pasta (don’t overmix). If you like, finish with more ricotta, a pinch of Maldon Chilli Sea Salt and a drizzle of olive oil.