Aubergine is one of the most underrated vegetables in the kitchen. Often overlooked in favour of more familiar seasonal ingredients, it can sometimes be dismissed as ‘bland’ or ‘difficult to cook’. Yet when prepared properly, aubergine transforms into something truly special, with a silky-soft centre, crisp golden exterior and an incredible ability to absorb bold flavours.
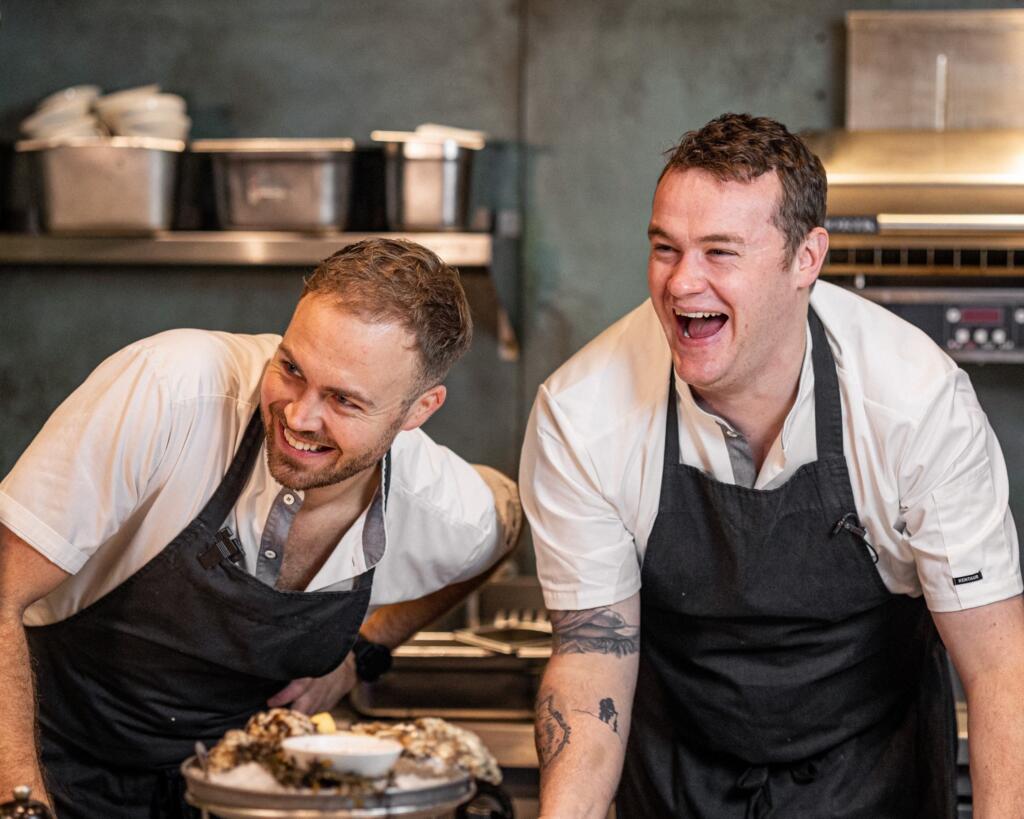
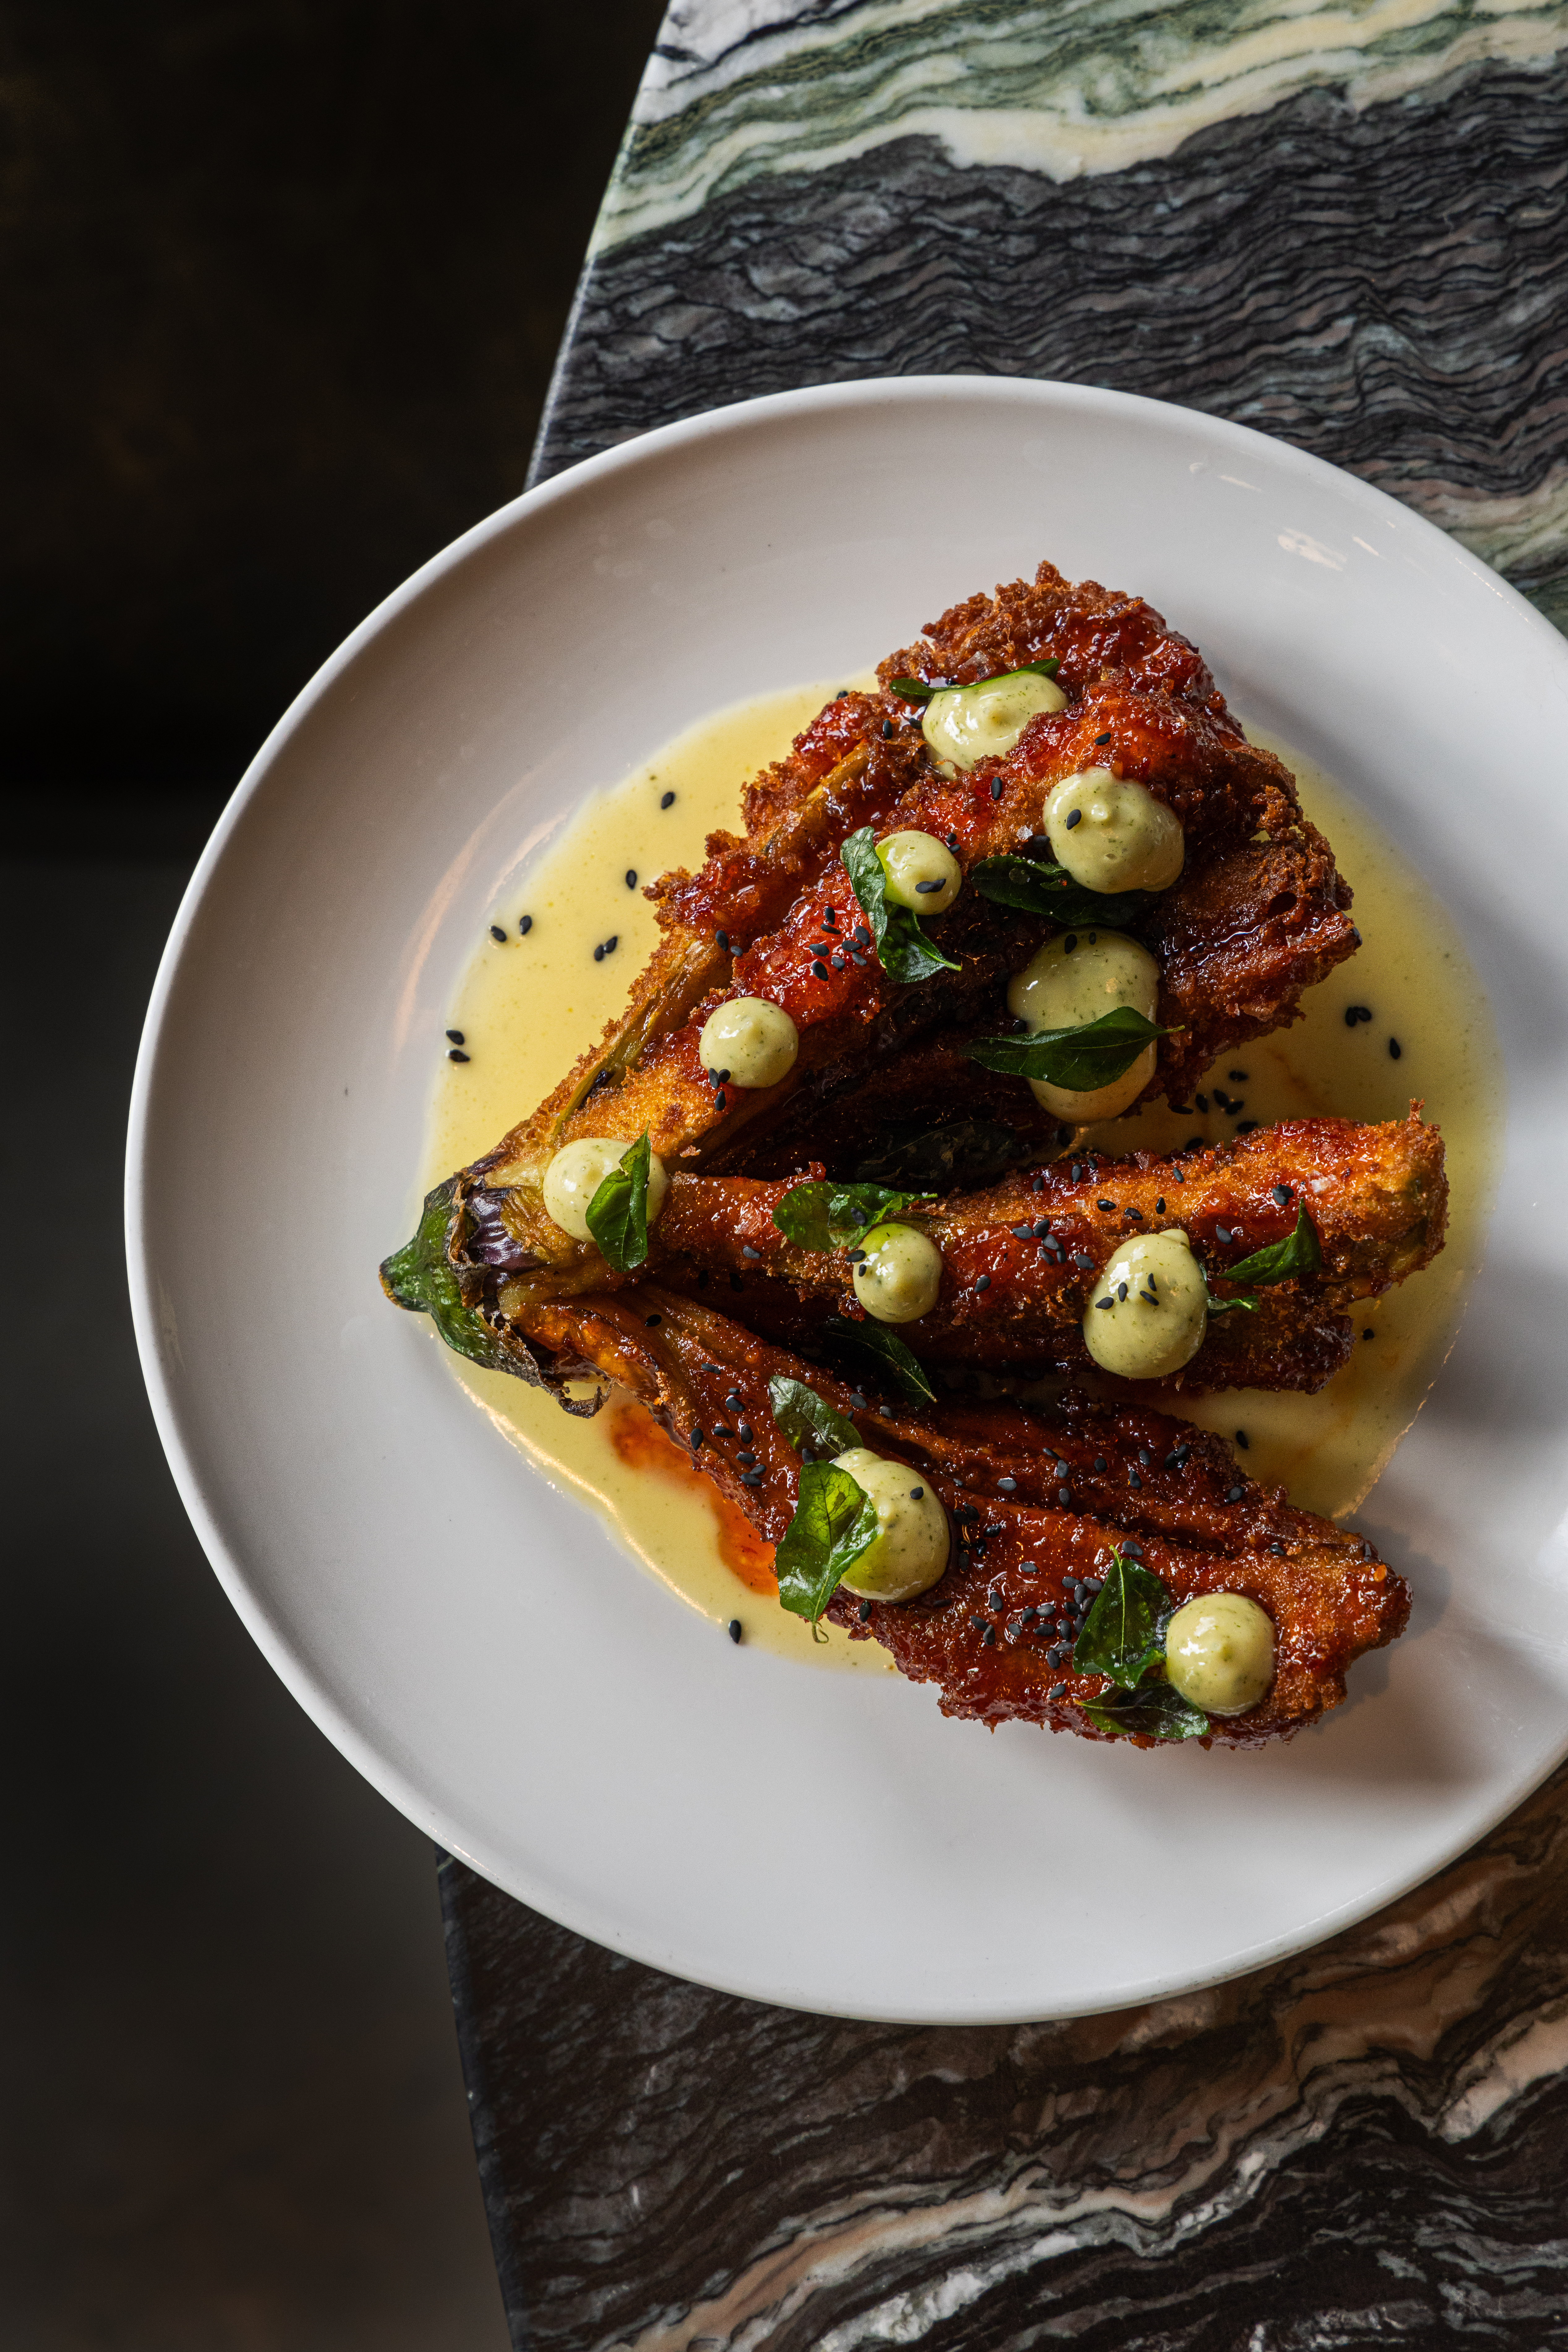
In this exclusive collaboration with Fallow Chefs, we’ve taken aubergine to new heights. Inspired by Fallow’s innovative approach to flavour, this striking Blooming Aubergine combines the delicate seasoning power of Sicilian Fine Sea Salt, Selected by Maldon, the signature crunch of Maldon Original Sea Salt Flakes, and the sweet heat of Fallow Chefs Sriracha Hot Honey. The result is a showstopping dish that’s crispy, vibrant and packed with layers of umami, spice and texture.
Perfect as a starter, side dish or centrepiece for entertaining, this recipe proves that aubergine deserved a place firmly in the spotlight.
About Fallow Chefs
Fallow Chefs Maldon 50 2026
Founded by acclaimed chefs Jack Croft and Will Murray, Fallow has become one of London’s most celebrated restaurants, earning a loyal following for its innovative approach to modern British cooking, bold flavours and commitment to sustainability. Known for transforming humble ingredients into unforgettable dishes, Fallow has built a reputation for creativity both in the restaurant and across its hugely popular social media channels.
How to Make a Blooming Aubergine with Fallow Chefs Sriracha Hot Honey
Fallow Chefs x Maldon Salt Blooming Aubergine Recipe
Prepare the Aubergine
Keeping the stem intact, peel the aubergine.
Slice lengthways through the aubergine four times to create eight equal baton, still attached at the top.
Sprinkling generously all over with Sicilian Fine Sea Salt, Selected by Maldon and leave on a tray for 30 minutes to dry brine.
Make the Miso Buttermilk Dressing
Combine the white miso, mirin, soy sauce, rice wine vinegar, garlic, ginger, lime juice and zest.
Blend until smooth and fully combined.
Add the buttermilk, whisk together and set aside.
Make the Black Pepper Ranch
Combine all ranch ingredients in a bowl.
Whisk until smooth and well incorporated.
Coat and Fry the Aubergine
Squeeze out as much moisture as possible from the aubergine and pat dry.
Dust thoroughly with flour, ensuring the inside of each baton is evenly coated.
Whisk the eggs in a bowl.
Dip the aubergine into the egg, then coast generously with panko breadcrumbs.
Heat neutral oil to 180°C.
Carefully lower the aubergine into the oil and dry for around 3 minutes until crisp and golden brown. Drain on kitchen paper.
Make the Crispy Curry Leaves
Fry the curry leaves into the hot oil for 30 seconds.
Remove with a slotted spoon and drain on kitchen paper.
Finish and Serve
Drizzle the fried aubergine generously with Fallow Chefs Sriracha Hot Honey.
Sprinkle with Maldon Original Sea Salt Flakes and black sesame seeds.
Spoon 4-5 tablespoons of the miso dressing onto the centre of a serving plate.
Place the blooming aubergine on top.
Dot the black pepper ranch over the aubergine.
Scatter over the crispy curry leaves and finish with an extra drizzle of hot honey and a final pinch of Maldon Original Sea Salt Flakes.
Why You’ll Love This Recipe
This dish is a celebration of texture and flavour. The dry brining process with Sicilian Fine Sea Salt helps draw out excess moisture, resulting in an aubergine that’s beautifully tender inside while achieving a crisp, golden coating. Layered with rich miso dressing, peppery ranch, aromatic curry leaves and the sweet-spicy kick of Fallow Chefs Sriracha Hot Honey, every bite delivers something unexpected.
Whether you’re already an aubergine enthusiast or looking to give this often-overlooked vegetable another chance, this recipe is guaranteed to chance your mind.
Want to see it come together? Watch the full recipe from Maldon Salt and Fallow Chefs on Instagram here.
Created in collaboration with Margie Nomura of Desert Island Dishes, this angel hair pasta recipe is a brilliant example of how simple ingredients can come together to create something truly special. As a professional chef with more than a decade of experience, Margie is known for developing easy, reliable recipes that deliver maximum flavour with minimal fuss, making them perfect for busy home cooks.
Inspired by Ina Garten’s classic no-cook tomato pasta, this dish allows sweet cherry tomatoes, garlic, fresh basil and olive oil to marinate together, creating a light and vibrant sauce while you get on with your day. Once tossed with hot angel hair pasta and plenty of Parmesan, the result is a fresh, summery meal that’s bursting with Mediterranean flavours and ready in minutes. Whether you’re looking for a quick weeknight dinner or an effortless recipe for entertaining, this simple pasta is sure to become a favourite.
How to Make Summer Garden Pasta
In a large bowl, combine the tomatoes, olive oil, garlic, basil, chilli flakes, Maldon Original Sea Salt flakes and black pepper.
Cover and leave at room temperature for at least 2 hours
Drain well, reserving a splash of the pasta water if needed.
Add the hot pasta straight to the tomatoes and toss thoroughly.
Stir through the Parmesan until it melts into the tomato juices to create a light sauce.
Finish with extra basil, Parmesan and a drizzle of olive oil.
A Taste of Sicily Meets Everyday Italian Cooking
To celebrate the launch of Sicilian Fine Sea Salt, Selected by Maldon, Maldon Salt has partnered with award-winning Italian cook and content creator Giuseppe Federici (@sepps). Known for his simple, flavour-focused recipes inspired by family traditions, Sepps brings authentic Italian cooking to home kitchens through dishes that showcase the beauty of quality ingredients. This bright and refreshing Lemon Courgette Pasta is a perfect example, combining sweet courgettes, fragrant basil and zesty lemon with the balanced flavour of Sicilian Fine Sea Salt.
Welcoming Giuseppe Federici
Giuseppe Federici (@sepps) is a second-generation British Italian from a family of passionate food lovers, where Italian home cooking has always been at the centre of family life.
Today, he shares authentic Italian recipes and family food traditions with a hugely engaged audience, sharing authentic Italian recipe videos, family stories and a genuine love for home cooking. Most loved of all are the heart-warming cooking videos he creates alongside his Nonna, which have captivated millions of viewers and inspired his first cookbook — Cooking with Nonna – a collection of cherished family recipes celebrating Italian cooking across generations with a plant-based twist.
Introducing Sicilian Fine Sea Salt, Selected by Maldon
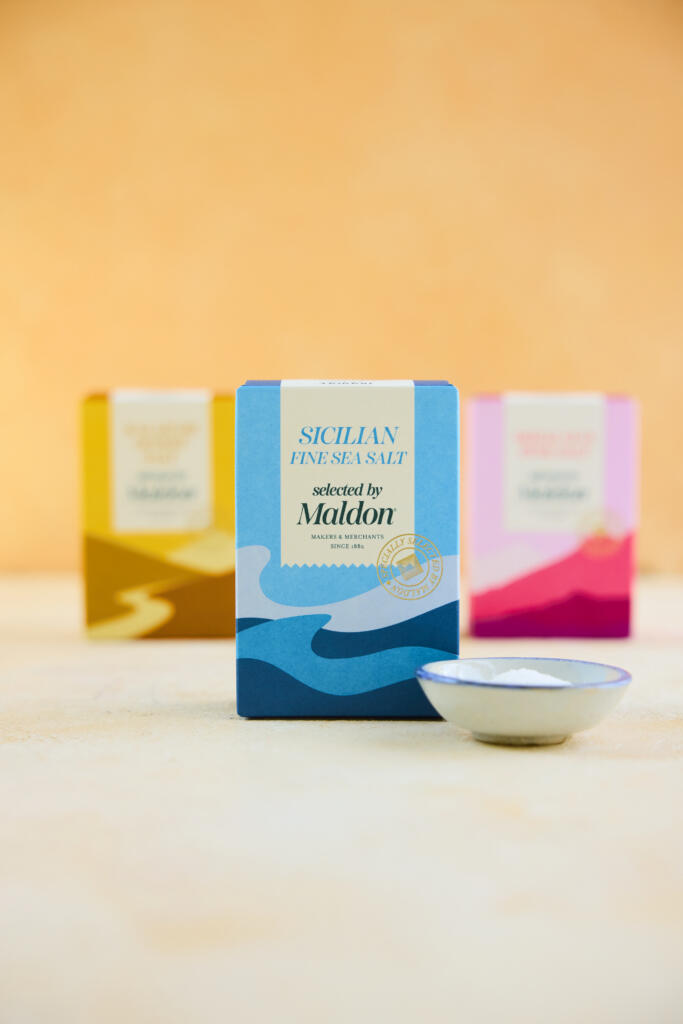
Harvested from the historic salt pans of Trapani on Sicily’s western coast, Sicilian Fine Sea Salt, Selected by Maldon, brings exceptional quality and versatility to everyday cooking. Carefully selected by Maldon’s Master Salt Merchants, it is prized for its balanced flavour, delicate texture and ability to dissolve evenly throughout cooking. Naturally dried in the Mediterranean breeze, it enhances everything from pasta water and vegetable dishes to breads, sauces and desserts.
How to Make Lemon Courgette Pasta
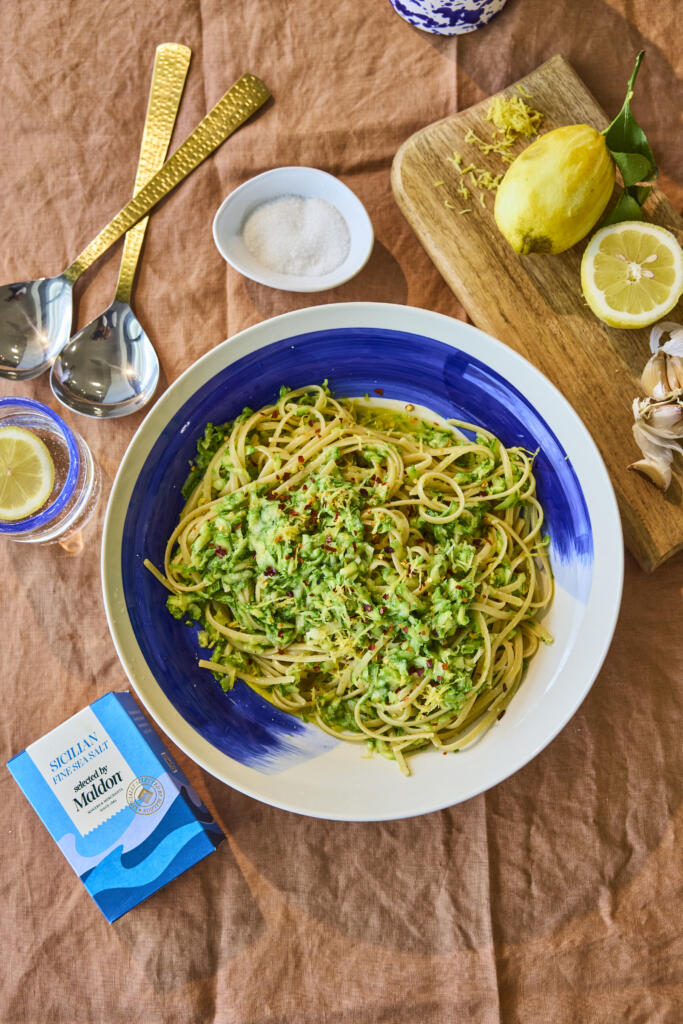
Fresh, vibrant and packed with flavour, this Lemon Courgette Pasta is a simple Italian-inspired recipe perfect for weeknight dinners and summer dining alike. Sweet grated courgette is gently cooked with garlic, chilli and olive oil before being tossed with linguine, fresh herbs and zesty lemon. Finished with vegan parmesan, it’s a light yet satisfying pasta dish that celebrates seasonal ingredients and effortless Italian cooking.
The fine texture of Sicilian Fine Sea Salt, Selected by Maldon helps season the pasta water, draw moisture from the courgettes and evenly distributes flavours throughout the dish, allowing every ingredient to shine.
Coarsely grate the courgettes into a large bowl. Sprinkle with a pinch of Sicilian Fine Sea Salt and leave to sit for a few minutes, this helps draw out excess moisture. Squeeze out as much liquid as you can with your hands or a clean tea towel, then set aside.
Bring a large pot of water to the boil and season generously with Sicilian Fine Sea Salt, it should taste like the sea. Cook the linguine for 1 minute less than the packet instructions so it’s just shy of al dente. Before draining, scoop out 1 cup of the starchy pasta water and set it aside.
While the pasta is cooking, heat a generous glug of olive oil in a large frying pan over a medium heat. Add the garlic and chilli flakes and fry gently for 2 minutes, stirring frequently, until the garlic is golden and fragrant, keep an eye on it so it doesn’t burn.
Add the drained courgette to the pan and toss to coat in the garlicky oil. Season well with Sicilian Fine Sea Salt and black pepper, then add the lemon zest and juice. Stir everything together and cook for another 2–3 minutes until the courgette is tender.
Add the drained pasta straight into the pan along with the reserved pasta water. Toss vigorously over the heat for 1–2 minutes so the pasta finishes cooking and absorbs all the flavours. Tear in the rocket and basil and toss through.
Divide between bowls and finish with a generous grating of vegan parmesan, a drizzle of olive oil and a final crack of black pepper.
Bring Italian Flavours to Your Table
Whether you’re looking for a quick weeknight pasta or a light Mediterranean-inspired meal, this Lemon Courgette Pasta is a delicious way to enjoy seasonal ingredients and authentic Italian flavours.
Sicilian Fine Sea Salt, Selected by Maldon is available now from Tesco, Sainsbury’s and Ocado.
For more Italian-inspired recipes, discover Giuseppe Federici’s cookbook, featuring the beloved family dishes, traditions and stories.
A Taste of Sicily: Maldon Salt and Giuseppe Federici
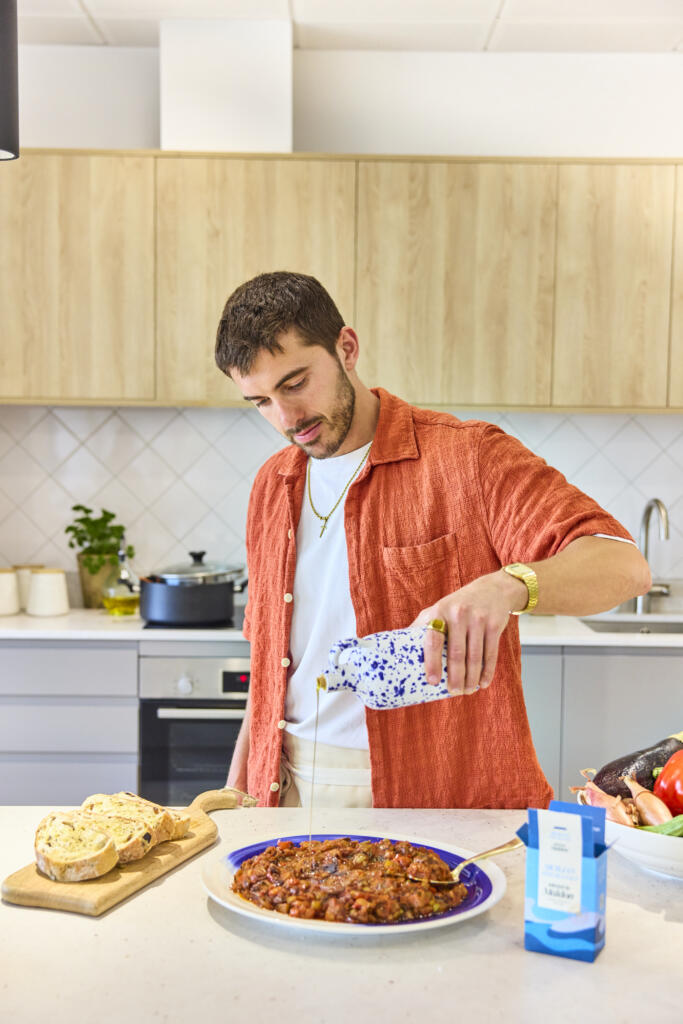
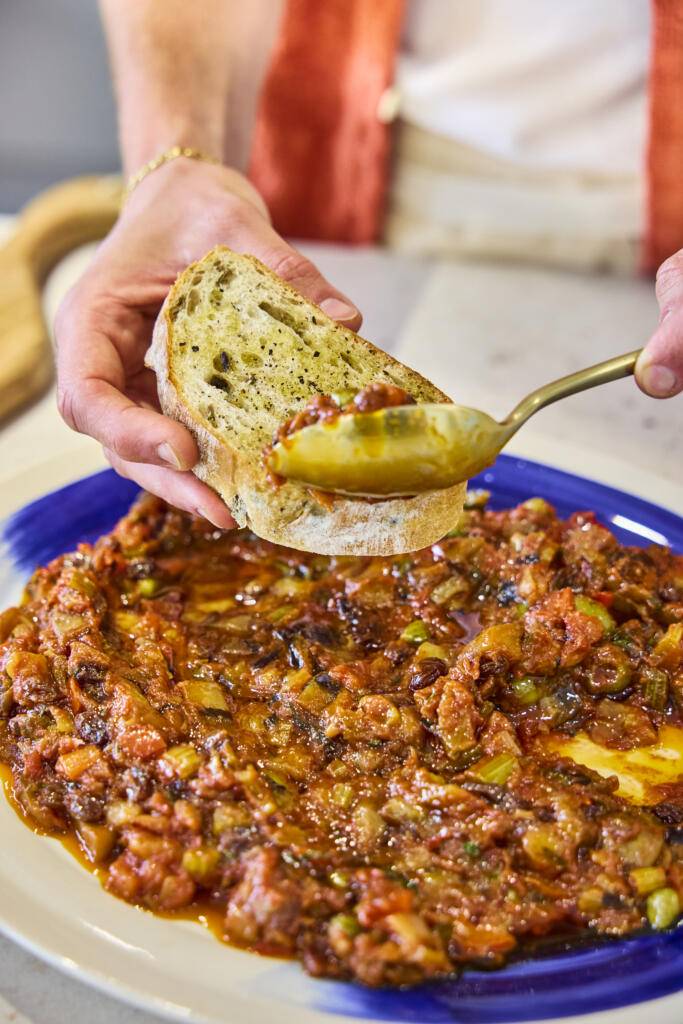
Maldon Salt has partnered with Sicilian home cook, recipe creator and bestselling author Giuseppe Federici (@sepps) to celebrate the launch of Sicilian Fine Sea Salt, Selected by Maldon. Inspired by the flavours, traditions and ingredients of Sicily, this Aubergine Caponata recipe showcases how a high-quality fine sea salt can elevate everyday cooking. Rich, vibrant and packed with Mediterranean flavour, this classic dish highlights the versatility and balanced taste of Maldon’s newest addition to the Merchants Range.
Welcoming Giuseppe Federici
Giuseppe Federici (@sepps) is a second-generation British Italian who comes from a long line of passionate food lovers, with Italian home cooking firmly at the heat of everything he does.
Today, Giuseppe has built one of the UK’s most engaged Italian food communities, sharing authentic Italian recipes, family stories and a genuine love for home cooking. Most loved of all the heart warming cooking videos he creates alongside his Nonna, which have captivated millions of viewers and inspired his first cookbook – Cooking with Nonna – a collection of of treasured Italian recipes with a plant-based twist.
Discover Sicilian Fine Sea Salt, Selected by Maldon
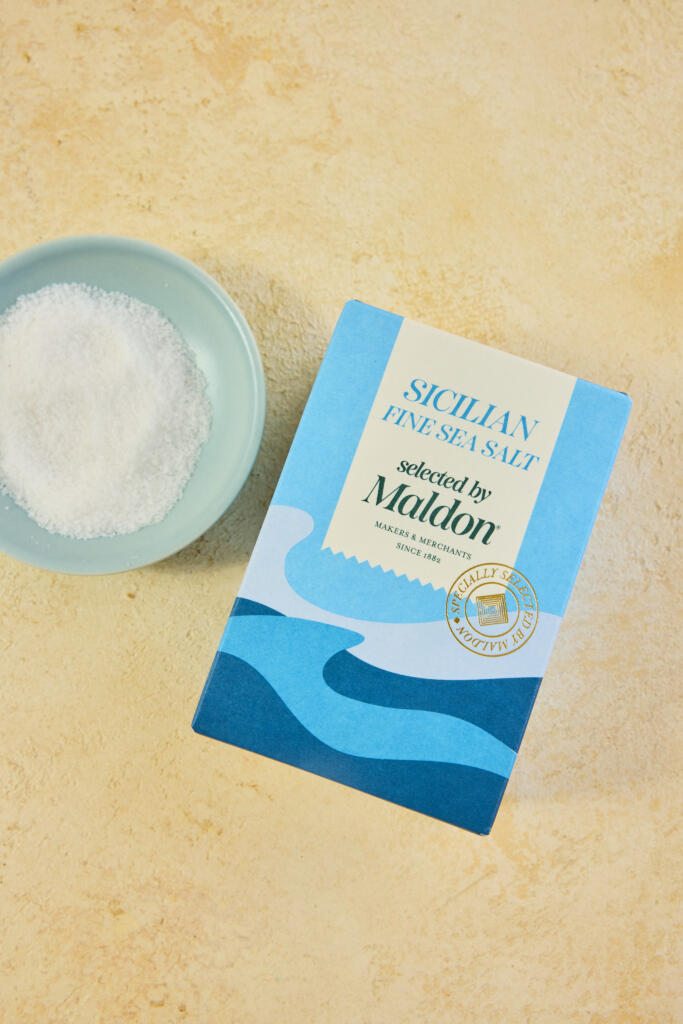
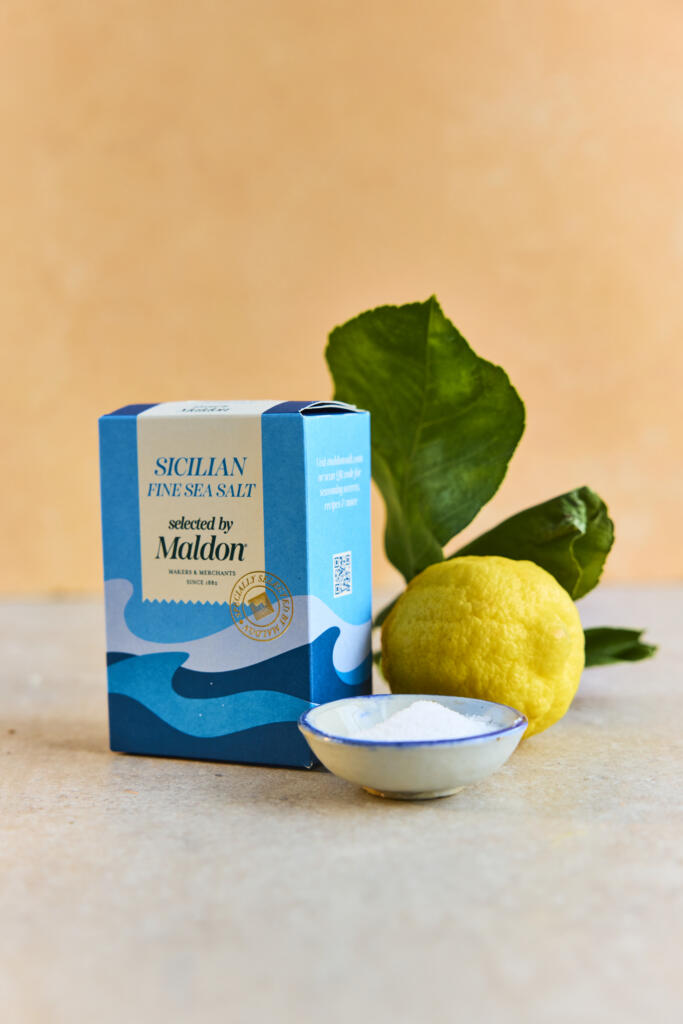
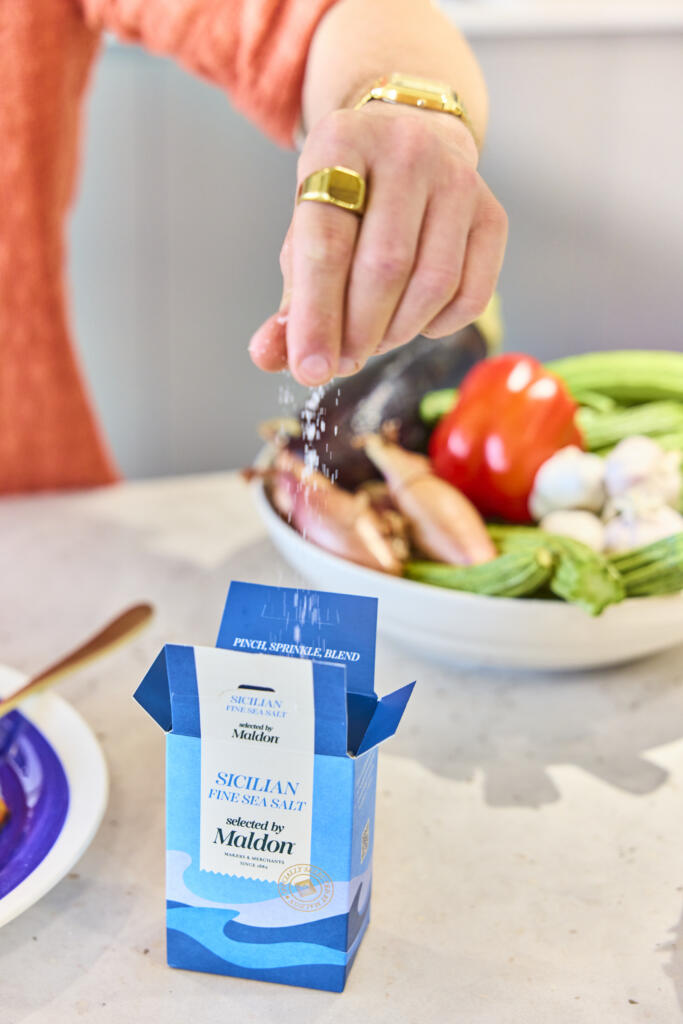
Sicilian Fine Sea Salt, Selected by Maldon. 250g pack.
Harvested from the historic salt pans of Trapani on Sicily’s western coast, Sicilian Fine Sea Salt, Selected by Maldon is the latest addition to the Merchants Range. Carefully chosen by Maldon’s Master Salt Merchants, it is prized for its balanced flavour, exceptional versatility and delicate texture. Naturally dried in the Mediterranean coastal breeze, its fine crystals dissolve quickly and evenly, making it ideal for seasoning throughout the cooking process. Whether enriching sauces, seasoning vegetables, baking bread or salting pasta water, this premium fine sea salt delivers consistent flavour in every dish.
Nonna’s Aubergine Caponata Recipe
A much-loved staple of Sicilian cuisine, Caponata is a rich sweet-and-sour aubergine dish that celebrates the island’s vibrant flavours. Combining tender aubergines, briny olives and capers, sweet raisins and a tangy tomato base, this traditional recipe has been passed down through generations. In this version, Giuseppe draws inspiration from his Nonna’s cooking, creating a comforting dish that embodies the spirit of Sicilian home cooking.
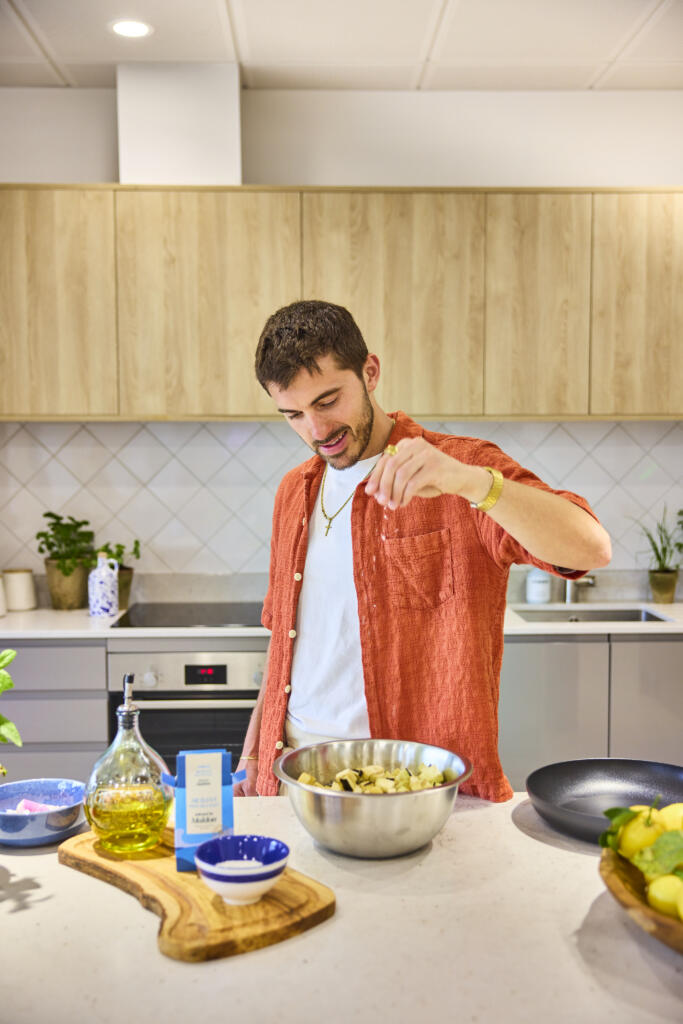
The delicate texture of Sicilian Fine Sea Salt, Selected by Maldon plays an important role throughout the recipe – drawing excess moisture from the aubergines, seasoning the vegetables evenly and enhancing the balance of sweet, savoury and acidic flavours that makes Caponata so iconic.
How to Make Aubergine Caponata
Cut the aubergines into 2–3cm cubes. Place them in a large bowl, generously coat with Sicilian Fine Sea Salt, and set aside for at least 10 minutes to draw out excess moisture.
Dice the celery (slice each stalk down the middle first, then cut into 1–2cm pieces), the onion, and the red pepper.
Drain any liquid from the aubergines and pat dry. Heat a generous glug of olive oil in a large frying pan over medium heat. Fry the aubergines in batches until nicely coloured and soft, about 10 minutes. You want them soft but not mushy. Transfer to a large casserole dish.
Return the pan to the heat with 1 tbsp of olive oil. Add the celery and fry for 8–10 minutes until softened. Transfer to the casserole dish.
Add the onions and peppers to the pan and fry for about 5 minutes, until the onions have softened and the peppers are starting to char. Reduce the heat to low, add the red wine vinegar, and let it simmer for 1 minute so the vinegar reduces and coats the vegetables. Transfer everything to the casserole dish and season with Sicilian Fine Sea Salt, black pepper and a pinch of chilli flakes.
Top Tip: Like many traditional Italian dishes, Caponata tastes even better the next day, once the flavours have had time to fully develop.
Bring the Flavours of Sicily Home
Inspired to recreate Giuseppe’s family recipe? Sicilian Fine Sea Salt, Selected by Maldon is available now from Tesco, Sainsbury’s and Ocado. Harvested on Sicily’s western coast and selected for its balanced flavour and exceptional versatility, it’s the perfect pantry staple for everyday cooking.
For more authentic Italian recipes, explore Giuseppe Federici’s cookbook, featuring the beloved dishes, family traditions and heart-warming stories. From comforting pasta dishes to regional Italian classics, it’s your invitation to bring a little more Italy into your kitchen.
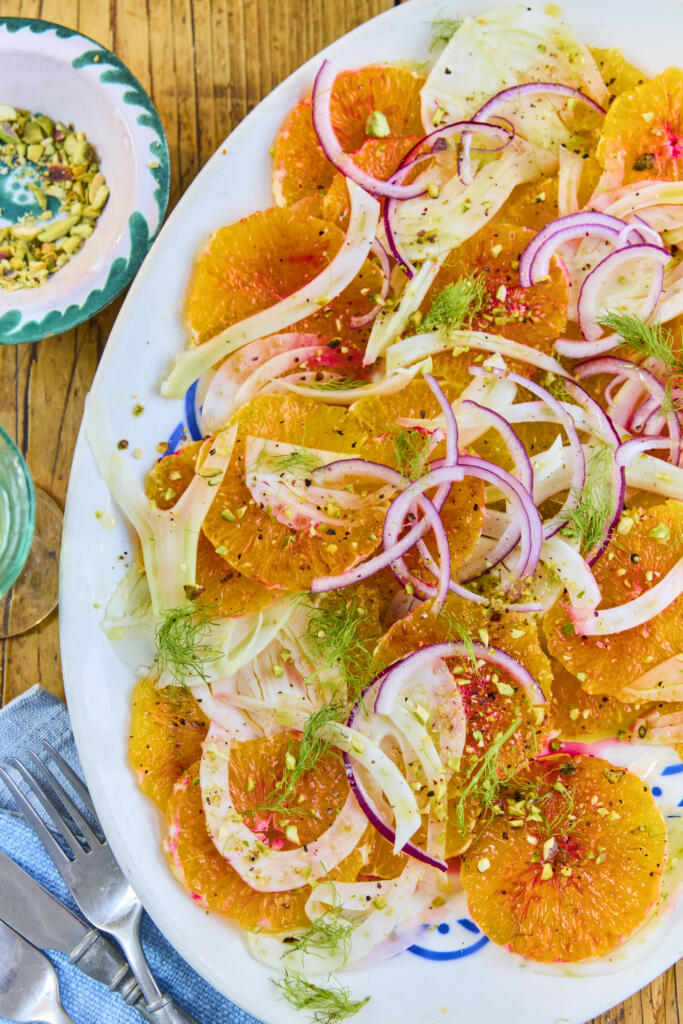
Bright, fresh and ready in minutes, this blood orange, fennel and pistachio salad is Sicilian sunshine on a plate. Juicy citrus rounds and paper-thin shaved fennel are dressed in a honey-sherry vinaigrette and finished with crunchy pistachios and a pinch of Sicilian Fine Sea Salt, Selected by Maldon. It’s an elegant no-cook starter or side that comes together with almost no effort.
Why You’ll Love This Blood Orange & Fennel Salad
No-Cook & Elegant: A genuinely impressive starter that needs nothing more than slicing, shaving and a quick whisk of dressing.
Fresh & Vibrant: Sweet citrus, aniseed fennel and earthy pistachios balance beautifully, lifted by a flake of Sicilian sea salt.
Naturally Good for You: Light, colourful and packed with fresh produce – perfect alongside richer Sicilian dishes.
How to Make Blood Orange & Fennel Salad
Prepare the blood oranges: Using a sharp knife, peel each orange so all the pith is removed and you’re left with just the juicy flesh. Slice into 1cm rounds and arrange on a platter, tipping any juices from the board into a small bowl.
Shave the fennel: Cut the top off the fennel bulb, reserving the fronds. Use a mandolin or sharp knife to shave the fennel very thinly, then arrange it across the platter with the orange slices.
Whisk the dressing: To the bowl of reserved orange juice, add the olive oil, sherry vinegar, honey, Sicilian Fine Sea Salt, Selected by Maldon and a little cracked black pepper. Whisk together into a dressing.
Dress and garnish: Drizzle the dressing all over the orange and fennel, then garnish with the finely chopped pistachios and reserved fennel fronds. Serve straight away.
Tips for the Perfect Blood Orange & Fennel Salad
Shave it paper-thin: A mandolin gives the finest, most delicate fennel slices – the thinner the better for this salad.
Save every drop of juice: Tip the juices from your chopping board into the dressing for extra citrus flavour.
Finish with the flakes: A pinch of Sicilian Fine Sea Salt, Selected by Maldon right before serving makes the sweet citrus sing.
What to Serve with Blood Orange & Fennel Salad
This salad is a fresh, palate-cleansing partner for richer Sicilian plates. Serve it alongside grilled swordfish steaks or Sicilian arancini, with sesame semolina bread to mop up the dressing. It also slots nearly into an antipasto spread. Out of blood orange season, regular oranges or a mix of citrus works just as well.
Frequently Asked Questions
Can I use regular oranges?
Yes. Blood oranges give a striking colour and a slightly berried sweetness, but regular oranges, navel or a mix of citrus work just as well when they’re out of season.
Can I make it ahead?
Slice the oranges and shave the fennel a few hours ahead and keep chilled, but dress the salad and add the pistachios just before serving so everything stays crisp and fresh.
How do I stop the fennel browning?
Toss the shaved fennel in a little of the orange juice or lemon juice if prepping ahead – the acid keeps it pale and fresh.
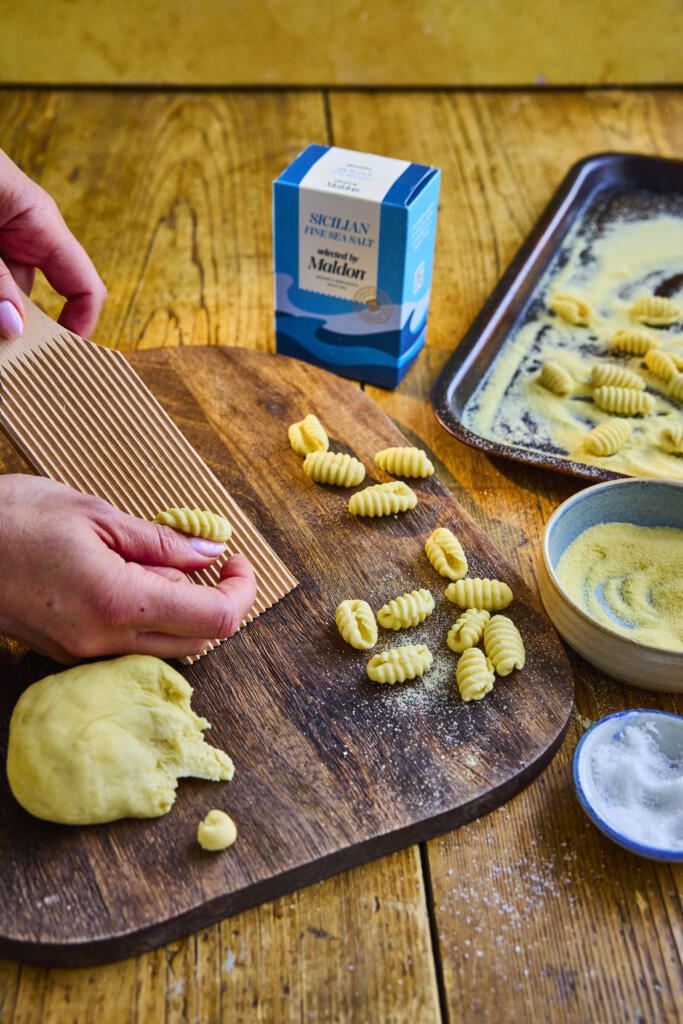
There’s nothing quite like pasta made from scratch, and cavatelli is one of the most satisfying shapes to shape by hand. Made from just semolina and water, these little grooved shells are tossed through a jammy roasted cherry tomato and aubergine sauce sweetened with whole roasted garlic, and seasoned with Sicilian Fine Sea Salt, Selected by Maldon. It’s rustic Sicilian cooking at its very best.
Why You’ll Love This Cavatelli
Pasta From Scratch: Just semolina flour and water make a beautiful eggless dough you shape by hand – no machine required.
A Jammy Roasted Sauce: Roasting the tomatoes, aubergine and garlic together does all the work, creating a deep, sweet sauce.
Naturally Vegetarian: A hearty, satisfying meat-free main that celebrates simple Sicilian produce.
How to Make Cavatelli (Step-by-Step)
Make the dough: Preheat the oven to 180°C. Mix the semolina flour with the water and olive oil in a large bowl, bring together into a ball, then knead on the worktop for 10 minutes until smooth and cohesive. Cover with a clean bowl and rest for 15 minutes.
Roast the veg: Add the diced aubergine and whole cherry tomatoes to a large roasting tray and toss with the olive oil. Nestle in the whole garlic bulb and roast for 20 minutes.
Shape the cavatelli: Pull small, gnocchi-sized pieces from the rested dough and press each one down a cavatelli shaper (a butter paddle) to create grooves and a little cavity. Place on a semolina-dusted tray to stop them sticking, and repeat until all the dough is used.
Make the sauce: Tip the soft aubergine and jammy tomatoes into a shallow sauté pan and squeeze in the roasted garlic from its skins. Season with Sicilian Fine Sea Salt, Selected by Maldon and cracked black pepper, and keep warm on a low heat. Bring a large pan of well-salted water to the boil.
Cook and combine: Drop the cavatelli into the boiling water and cook for 3–6 minutes, until just al dente. Lift them straight into the sauce with a slotted spoon, add a splash of pasta water and toss well to bind.
Serve: Spoon the pasta into bowls and finish with grated parmesan and plenty of fresh basil leaves.
Tips for the Perfect Cavatelli
Knead until smooth: A well-kneaded, smooth dough is easier to shape and gives the cavatelli their lovely chew.
Dust with semolina: Keep the shaped cavatelli on a semolina-dusted tray so they don’t stick together before cooking.
Save the pasta water: A splash of starchy pasta water binds the sauce around the cavatelli for a glossy finish.
What to Serve with Cavatelli
This is a generous main in its own right, but it’s lovely as part of a Sicilian spread with sesame semolina bread to soak up the sauce and a blood orange and fennel salad alongside. Finish the meal with Sicilian cannoli. A little extra parmesan and a drizzle of good olive oil never go amiss.
Frequently Asked Questions
What If I don’t have a cavatelli shaper?
No problem – roll small pieces of dough under your thumb or down the back of a fork to create the grooves and cavity. It takes a little practice but works beautifully.
Can I make the cavatelli ahead?
Yes. Shape them and keep on a semolina-dusted tray, then freeze on the tray before transferring to a bag. Cook from frozen, adding a minute or two to the boiling time.
Can I use a different flour?
Durum wheat semolina is key here – it gives cavatelli their signature bite and holds the shape. Plain or 00 flour won’t give the same texture.
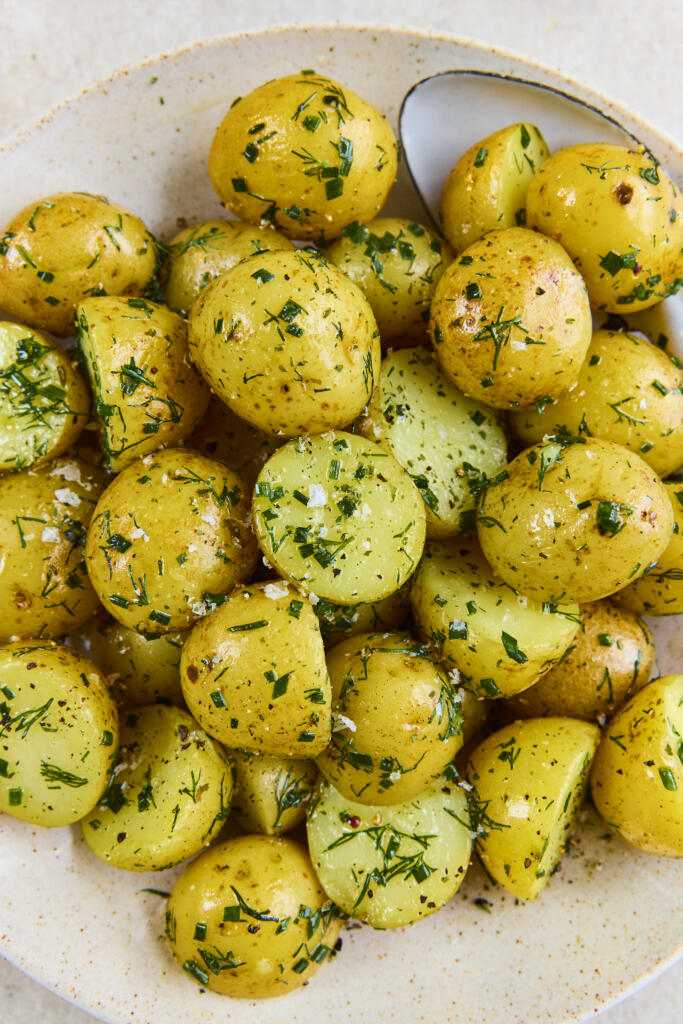
Garlic Butter New Potatoes with Fresh Herbs & Maldon Garlic Sea Salt
This garlic and herb new potatoes recipe are simple yet flavourful side dish, perfect for roasts, barbecues, or weeknight meals. Tender baby potatoes ae tossed in rich garlic butter, fresh herbs, and finished with Maldon Garlic Sea Salt flakes for a deliciously savoury depth and delicate crunch.
How to Make Garlic and Herb New Potatoes with Maldon Garlic Sea Salt
Cut any larger potatoes in half so they are a uniform size, leaving smaller ones whole.
Place the potatoes in a pan of water, bring to the boil, and simmer for 10–12 minutes until tender.
Drain and allow the potatoes to steam dry in a colander.
Melt the butter in a small saucepan over medium heat until bubbling.
Add the crushed garlic and let it gently infuse, then remove from heat.
Transfer the potatoes to a large bowl.
Pour over the garlic butter, olive oil, herbs, Maldon Garlic Sea Salt flakes, and cracked black pepper.
Toss well to coat evenly and serve immediately.
Tips for Perfect Garlic New Potatoes
Use evenly sized potatoes to ensure consistent cooking.
Let potatoes steam dry after draining for better flavour absorption.
Add garlic to butter gently to avoid burning and bitterness.
Finish with Maldon Garlic Sea Salt flakes for a balanced garlic seasoning and light crunch.
What is Maldon Garlic Sea Salt Flakes?
Maldon Garlic Sea Salt Flakes combine the brand’s signature pyramid-shaped sea salt flakes with wild and roasted garlic, creating a convenient seasoning that adds both saltiness and aromatic garlic flavour with a delicate texture.
Can I use Maldon Garlic Sea Salt instead of fresh garlic?
It can enhance the dish, but using both fresh garlic and Maldon Garlic Sea Salt flakes (as in this recipe) creates a deeper, layered flavour. It also adds layered texture with the iconic pyramid-shaped flakes.
What herbs go best with new potatoes?
Chives, dill, parsley, and rosemary all pair beautifully with new potatoes, adding freshness and aroma.
How do you keep boiled potatoes from going watery?
After draining, allow them to steam dry in a colander. This removes excess moisture and improves texture.
Can I make garlic new potatoes ahead of time?
Yes, you can boil the potatoes in advance and reheat them in garlic butter before serving.
Are garlic butter potatoes healthy?
They’re a comforting side dish with natural nutrients from potatoes, but contain butter and should be enjoyed in moderation.
Can I roast instead of boil the potatoes?
Yes, roasting adds a crispy texture. Toss the the same ingredients and roast in the oven at 200°C until golden.
What dishes go well with garlic herb potatoes?
They pair well with roast chicken, grilled meats, fish, or vegetarian mains.
Serving Suggestions
Serve the garlic and herb new potatoes with Maldon Garlic Sea Salt flakes alongside:
Vegetarian mains like grilled vegetables or salads.
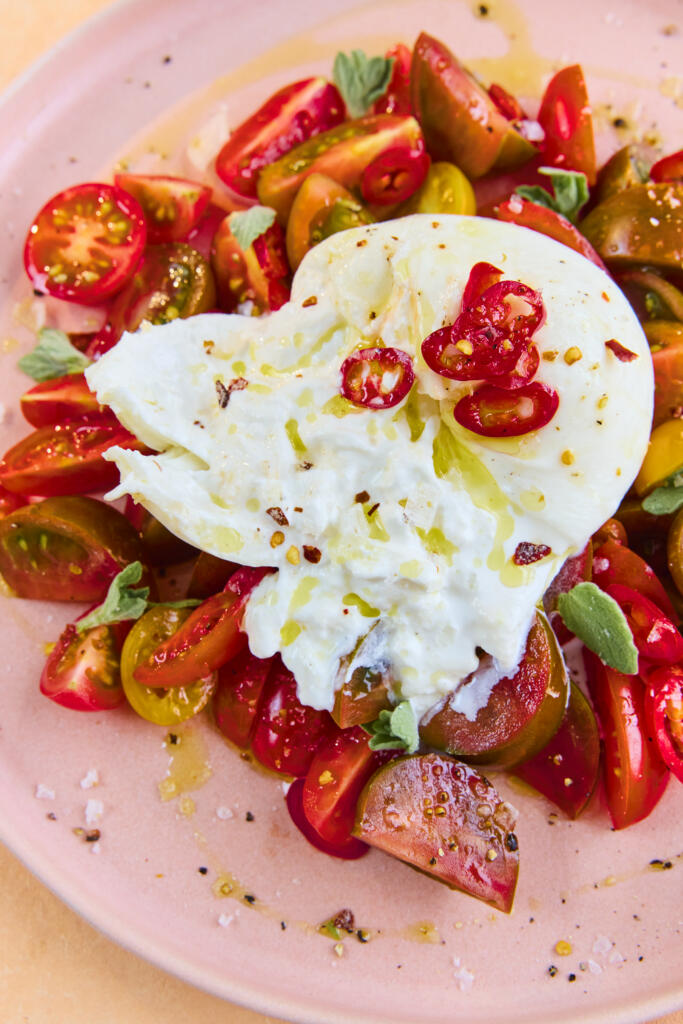
Fresh Burrata with Tomatoes and Maldon Chilli Sea Salt
This simple burrata with tomatoes recipe is a fresh, no-cook dish perfect for summer. Creamy burrata pairs beautifully with sweet heritage tomatoes, a kick of fresh chilli, and the distinctive heat of Maldon Chilli Sea Salt. Finished with olive oil and balsamic vinegar, it’s an elegant starter or light lunch ready in minutes.
How To Make Burrata and Tomatoes Salad with Chilli Sea Salt
Pace the chopped tomatoes in a bowl and toss gently with a splash of balsamic vinegar and extra virgin olive oil.
Arrange the tomatoes on a serving plate.
Place the burrata in the centre. If vegan or diary free, we recommend using Julienne Bruno’s Burrella.
Drizzle with additional olive oil.
Garnish with oregano leaves and sliced chilli.
Finished generously with Maldon Chilli Sea Salt and cracked black pepper.
Slice into the burrata and allow the creamy centre to spill over the tomato. Servce immediatley.
Bring burrata to room temperature before serving to ensure maximum creaminess.
Add crusty bread to mop up any of the juices, or to make the dish more filling in general.
Don’t skip the Maldon Chilli Sea Salt – it adds layered heat with the Aleppo pepper and bird’s eye chilli and texture.
What Makes Maldon Chilli Sea Salt different from regular salt?
Maldon Chilli Sea Salt combines the brand’s signature pyramid-shaped sea salt flakes with Aleppo pepper and bird’s eye chilli, adding both a delicate texture and a gentle heat, ideal for finishing dishes like burrata.
Can I use Maldon Chilli Sea Salt in salads?
Yes, Maldon Chilli Sea Salt is perfect for salads. It enhances flavour while adding a subtle kick, especially in fresh dishes like tomatoes and burrata.
What goes well with burrata and tomatoes?
Burrata and tomatoes pairs well with:
Fresh herbs like oregano or basil
Olive oil and balsamic vinegar
Cracked black pepper for depth
Crusty bread or sourdough for mopping up the fresh juices
Is This Burrata Recipe Healthy?
This dish is relatively healthy, packed with fresh tomatoes and healthy fats from olive oil, though burrata is rich and best enjoyed in moderation.
Can I Make Burrata and Tomato Salad in Advance?
It’s best served immediately, but you can prepare the tomatoes ahead and assemble just before serving.
How Spicy Is Maldon Chilli Sea Salt?
It provides a mild to moderate heat, designed to enhance ingredients rather than overpowering them.
What Type of Tomatoes Are Best For Burrata?
Heritage or heirloom tomatoes are ideal as they offer varied sweetness, acidity and colour.
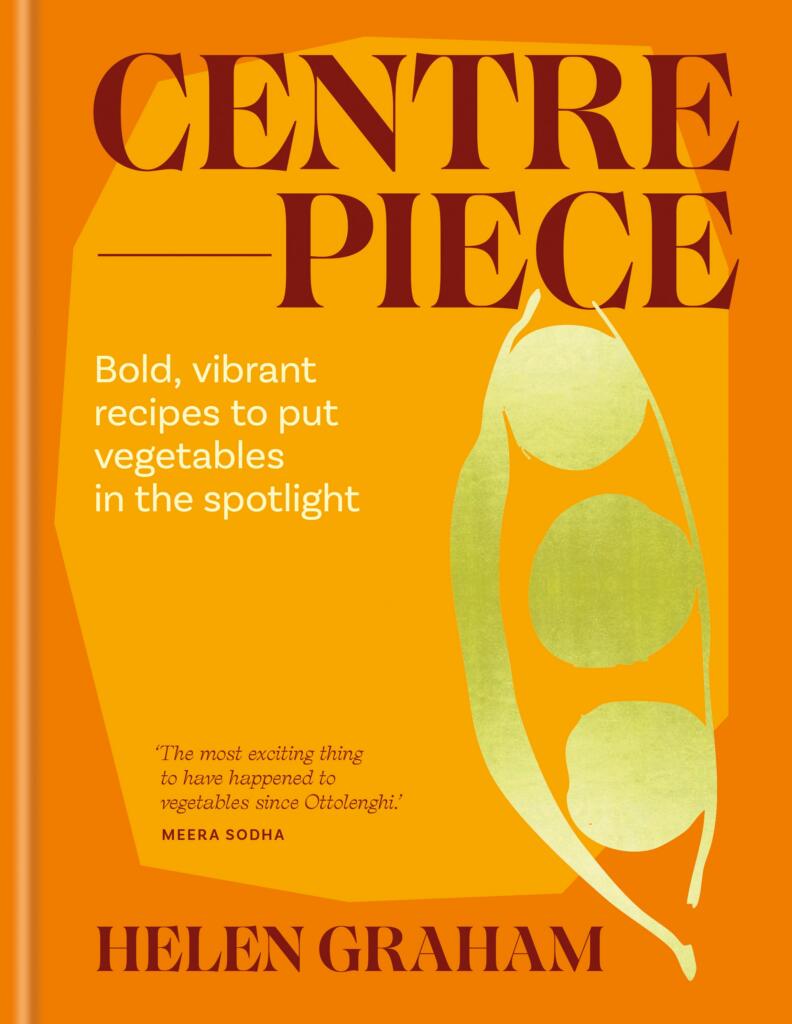
Vegetables take their well-deserved moment in the spotlight in Centrepiece, the beautiful debut cookbook from chef and food writer Helen Graham. Known for her bold, generous flavours and deeply considered approach to plant-forward cooking, Graham celebrates vegetables not as an afterthought, but as the heart of the table. Drawing inspiration from the Middle East, North Africa, and her Ashkenazi Jewish heritage, Centrepiece is a vibrant collection of recipes designed to be cooked, shared and lingered over – dishes that feel just as fitting for a dinner party as a relaxed weekend meal at home.
In this feature, we’re diving into one of the book’s standout recipes: Pilpil-style Roast Cabbage with Shiitake and Preserved Lemon. It’s a dish that perfectly captures the spirit of Centrepiece. – humble ingredients transformed through thoughtful technique and fearless seasoning. Roasted until deeply caramelised, the cabbage is paired with savoury mushrooms, sharp preserved lemon and a spicy pilpil-inspired oil that brings warmth and depth to every bite. It’s a simple yet striking, and a brilliant example of how Graham elevates everyday vegetables into something truly special.
Why Maldon Salt is important in pilpil-style dishes
Pilpil-style cooking (inspired by Basque methods) is all about emulsification, heat and purity of ingredients. Maldon Sea Salt isn’t just seasoning here – it’s structure.
Draws out moisture – Maldon Sea Salt helps pull excess water from the cabbage and mushrooms as they roast. This encourages deep caramelised, intensifying sweetness in the cabbage and umami in the shiitake rather than steaming them.
Balances bold elements – Preserved lemon is intensely salty and citrusy; chilli oil brings heat. A good pinch of Maldon Sea Salt lets you season precisely, so those assertive flavours stay bright and balanced, not muddled or flat.
Supports emulsification – In pilpil-style oils, Maldon Sea Salt helps stabilise the emulsion between oil, vegetable juices, and aromatics – giving you that glossy, clinging finish instead of a split or greasy sauce.
How to make Pilpil-style Roast Cabbage with Shiitake & Preserved Lemon
The word pilpil actually refers to a Basque sauce for fish in which oil and garlic come together with the cooking juices, emulsifying into a thick sauce. The sauce is named pilpil after the way it sputters in the pan. This is my homage to that sauce, with the addition of persevered lemon.
Preheat the oven to 180c, Gas Mark 6.
Line a baking tray with nonstock baking paper.
Place all the ingredients for the shiitake marinade in a bowl and whisk until thoroughly combined; it will form a stiff paste.
Cut the cabbages in half through the cores and place on the lined tray. Spoon one-quarter of the marinade on the cut side of each cabbage and use the back of the spoon to press it into all the crevices, ensuring the cut side is evenly covered. If any areas look a little dry, give them a drizzle of olive oil. Toast for 30-35 minutes until the marinade is starting to look caramelised and you can slide a knife easily through the cores.
Meanwhile, for the sauce, place all the ingredients except the oil in a jug and use a stick blender to blitz it into a fine, paste. With the blender still on, slowly add the olive oil, a trickle at a time, until it’s all combined and you have a thickened, pale yellow sauce.
Make the spiced parsley by stirring all the ingredients together in a small bowl.
Smooth the pilpil sauce on to a serving dish, top with the warm cabbage halves sprinkled over the spiced parsley to serve.
Have You Tried it?
Centrepiece, debut cookbook by Helen Graham
If you try this recipe at home, we’d love to see it – tag us in your creations so we can share your wonderful cooking with our community. And if you’re feeling inspired to whip up delicious recipes in your kitchen, you can purchase Centrepiece by Helen Graham here.
A Maldon Salt, Meliz Berg & AEG Collaboration
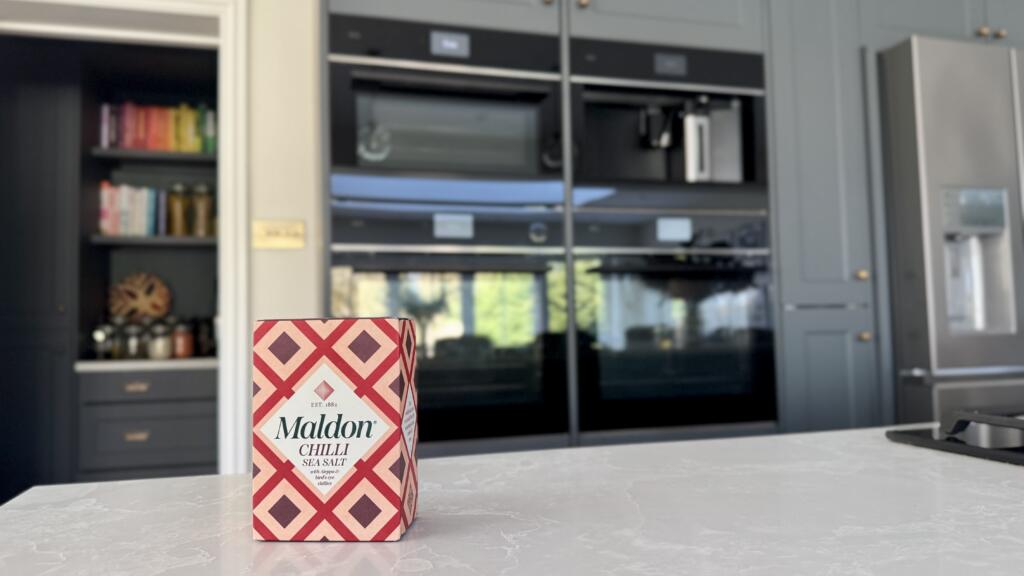
Maldon Chilli Sea Salt with AEG Kitchen Appliances
If there’s one thing that unites us all, it’s the joy of a proper ‘fakeaway’ – big flavour, minimal fuss, and the kind of pread that makes everyone crowd around the table. In collaboration with Maldon Salt, celebrated food writer Meliz Berg, and AEG Kitchen Appliances, this Ultimate Mixed Grill Platter brings together bold marinades, perfectly cooked meats and vegetables, and a pinch of Maldon Chilli Sea Salt to finish.
Why Maldon Chilli Sea Salt Makes the Difference
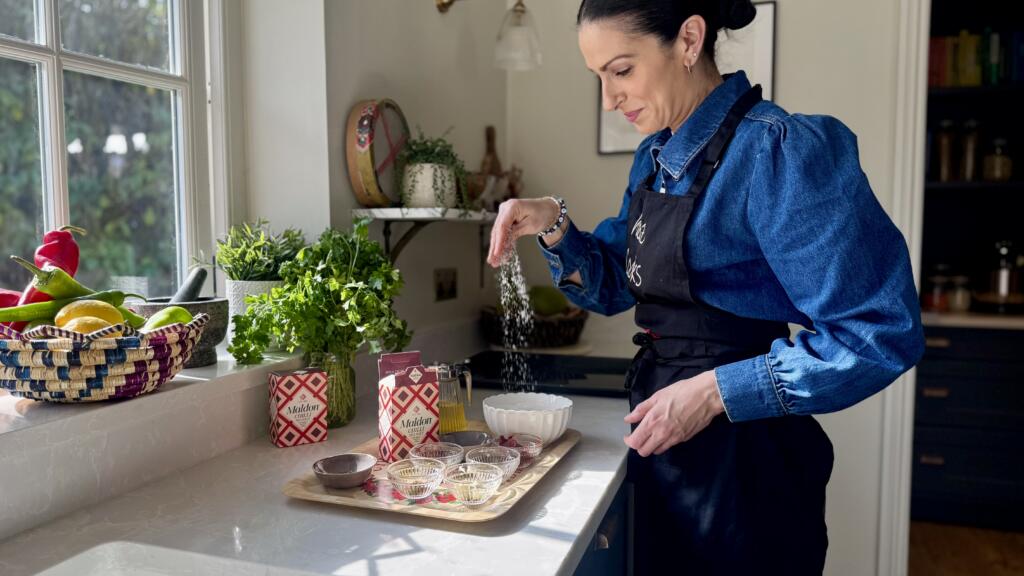
Meliz Berg seasoning with Maldon Chilli Sea Salt
A finishing salt matters – and Maldon Chilli Sea Salt delivers more than heat alone. With it’s signature pyramid flakes and gentle chilli warmth (from the infused Aleppo pepper and bird’s eye chilli), it lifts marinades, enhances caramelisation and adds crunch at the final moment, allowing each ingredient to shine without overwhelming it. Sprinkle just before cooking, it seasons with precision and personality.
About AEG: Designed for Taste
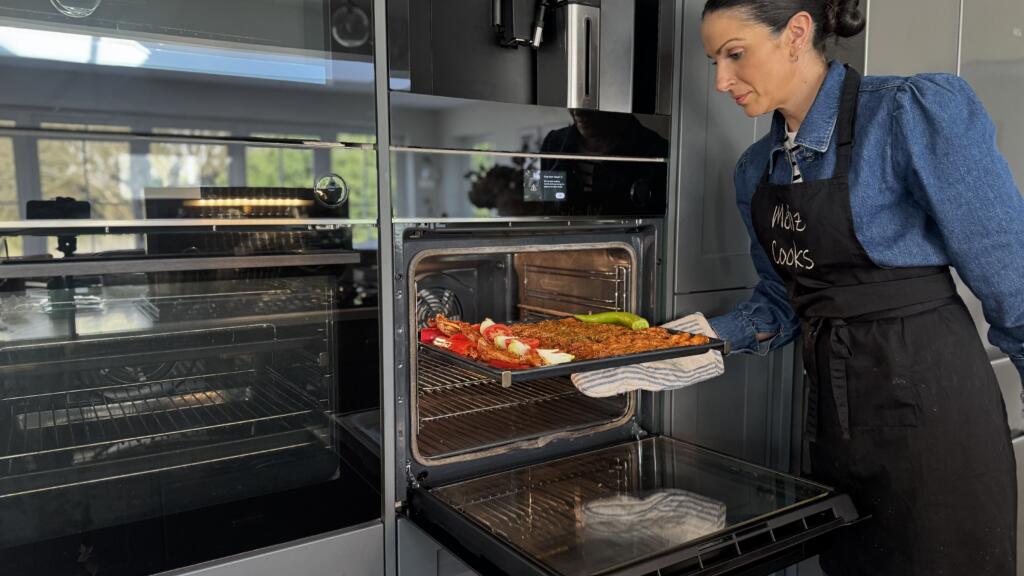
Meliz Berg with AEG Oven Setup
For oven a century, AEG has been the forefront of kitchen innovation, designing appliances that empower people to cooking with confidence. Rooted in German engineering and driven by passion for taste, AEG focuses on intelligent technology that supporting creativity rather than complicating it – from ovens that enhance flavour and texture to intuitive controls that give you precision without stress.
Cooking with Confidence: AEG in the Kitchen
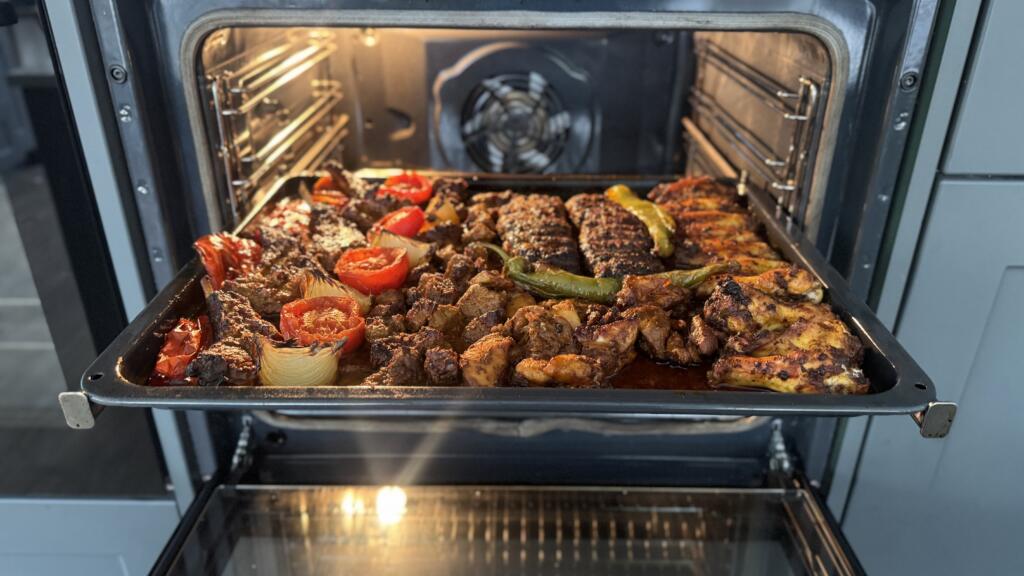
Mixed Grill Platter, cooked by AEG Oven Setup
To bring every element of this recipe to life, Meliz cooked using premium AEG Kitchen Appliances, including the AEG 7000 MealAssist Oven with SteamCrisp, featured throughout the cooking videos.
This innovative oven uses a combination of 25% steam and 75% heat for perfectly even cooking – ideal for slow-roasting vegetables with crisp, caramelised edges while keeping meats tender and juicy. With its CookSmart Touch Display, telescopic runners and pyrolytic self-cleaning, it offers precision, ease and outstanding performance.
Designed for entertaining, batch-cooking or freezing ahead, this platter used one versatile base marinade that adapts beautifully across chicken wings, lamb cutlets, kofte and chicken shish – all cooked together at the same temperature for ease and consistency. It’s modern Middle Eastern-inspired cooking as its most generous, unfussy and flavour-forward.
Step 1 – Prepare the Base Marinade
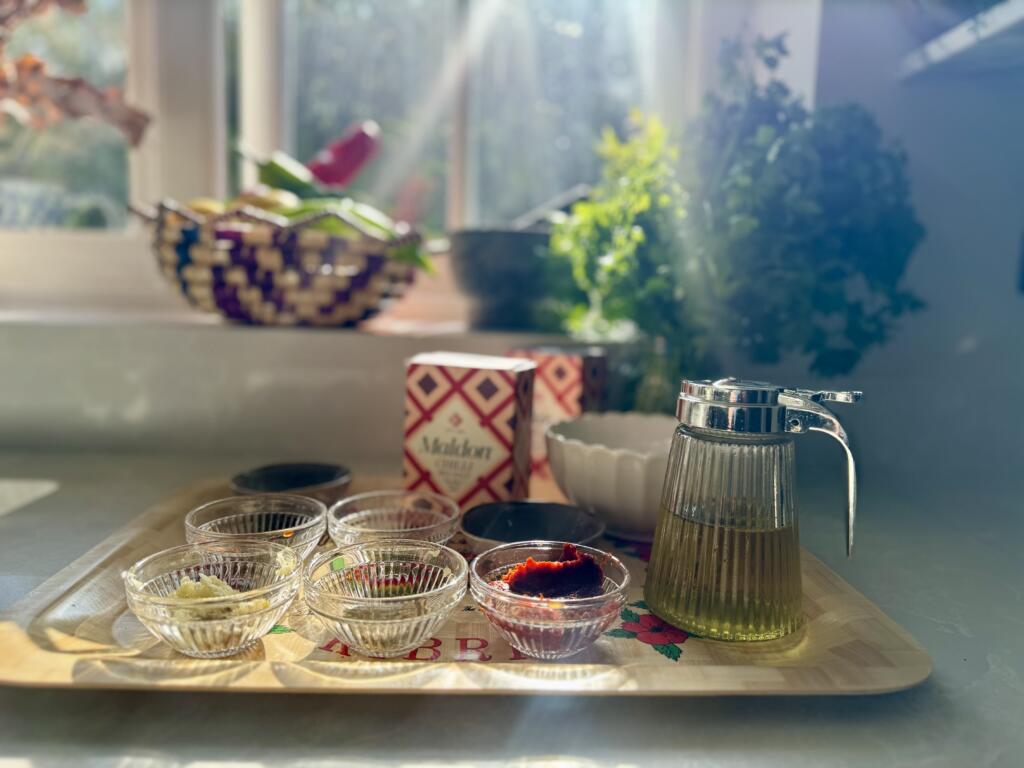
Ingredients (listed left) for the Base Marinade
Start by making the base minade – this is the backbone of the entire platter.
Mixed together the garlic, red pepper paste, olive oil, spices and oregano until you have a thick, aromatic paste. This single marinade adapts beautifully across chicken, lamb and mince, giving you flexibility without extra work.
Step 2 – Make the Chicken Wings
Add the chicken wings to the marinade and stir well. Cover and refrigerate for at least 4 hours, no longer than 24.
Preheat oven to 200c Fan.
Grease a large baking tray with the olive oil.
Take the chicken wings out of the fridge 30 minutes before cooking.
Place the oiled tray in the preheated oven to heat up for 15 minutes.
Season the marinated chicken wings with the Maldon Chilli Sea Salt, stir well, then carefully lay all the chicken wings flat on the hot, oiled baking tray.
Bake in the oven on the middle shelf for 30-35 minutes until beautifully tender and charred around the edges.
Step 3 – Make the Lamb Cutlets or Lamb Shish
Add the milk to the marinade recipe and stir well until smooth. Add the lamb to the marinade and stir well. Cover and refrigerate for at least 4 hours, no longer than 24 hours.
Preheat oven to 200c Fan.
Grease a large baking tray with the olive oil.
Take the lamb out of the fridge 30 minutes before cooking.
Place the oiled tray in the preheated oven to heat up for 15 minutes.
Season the marinated lamb with the Maldon Chilli Sea Salt, stir well, then carefully lay the lamb on the hot, oiled baking tray along with the vegetables.
Bake in the oven on the middle shelf for 30-35 minutes until beautifully tender and charred around the edges.
Step 4 – Make the Lamb or Chicken Kofte
Add the onions and peppers to a clean muslin cloth and squeeze out all the juice (keep the juice to add to the chicken shish marinade if making).
Add the drained onions, peppers to the rest of the ingredients and stir well. Cover and pop in the fridge for at least an hour but preferably overnight for all the flavours to come together.
Preheat oven to 200c Fan.
Grease a large baking tray with the olive oil.
Take the mixture out of the fridge 30 minutes before cooking.
Place the oiled tray in the preheated oven to heat up for 15 minutes.
Shape the mixture into two extra large long köfte (you can shape them into smaller sized köfte, but please note the cooking time will reduce by at least 10 minutes to ensure the smaller köfte stay as tender as possible), making ridges at 1cm intervals along the left of the köfte using a skewer dipped in water (to prevent it from sticking to the mixture).
Carefully lay the köfte on the hot, oiled baking tray along with the vegetables.
Bake in the oven on the middle shelf for 30-35 minutes until beautifully tender and charred around the edges.
Step 5 – Make the Chicken Shish
Add the yoghurt, pomegranate molasses and honey (and the reserved onion and red pepper juices, if you have them) to the marinade, and stir well until smooth.
Add the chicken to the marinade and stir well. Cover and refrigerate for at least 4 hours, no longer than 24.
Preheat oven to 200c Fan.
Grease a large shallow baking tray with the olive oil.
Take the chicken out of the fridge 30 minutes before cooking.
Place the oiled tray in the preheated oven to heat up for 15 minutes.
Season the marinated chicken with the Maldon Chilli Sea Salt, stir well, then carefully lay the chicken on the hot, oiled baking tray along with the vegetables.
Bake in the oven on the middle shelf for 30-35 minutes until beautifully tender and charred around the edges.
Have You Tried It?
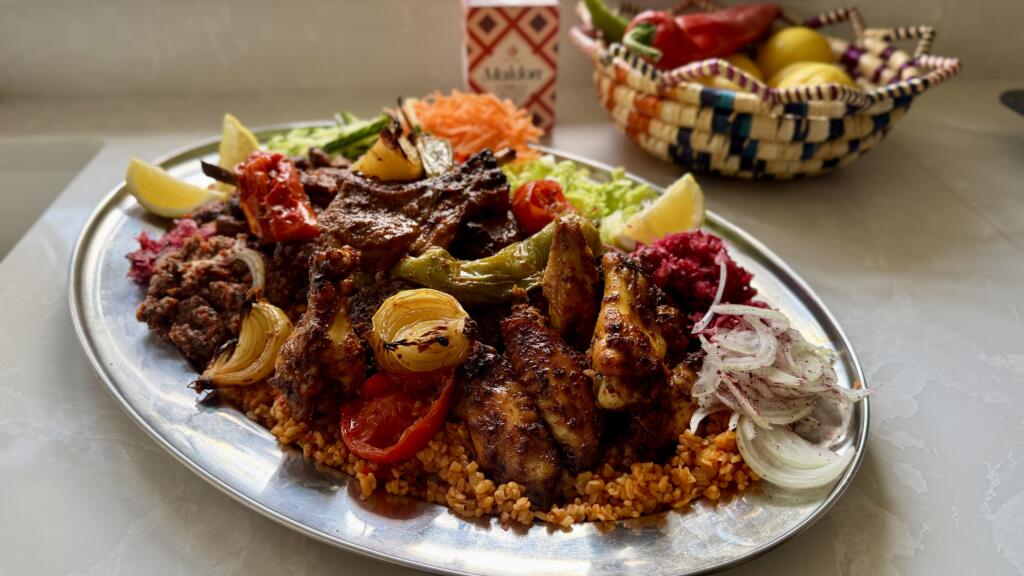
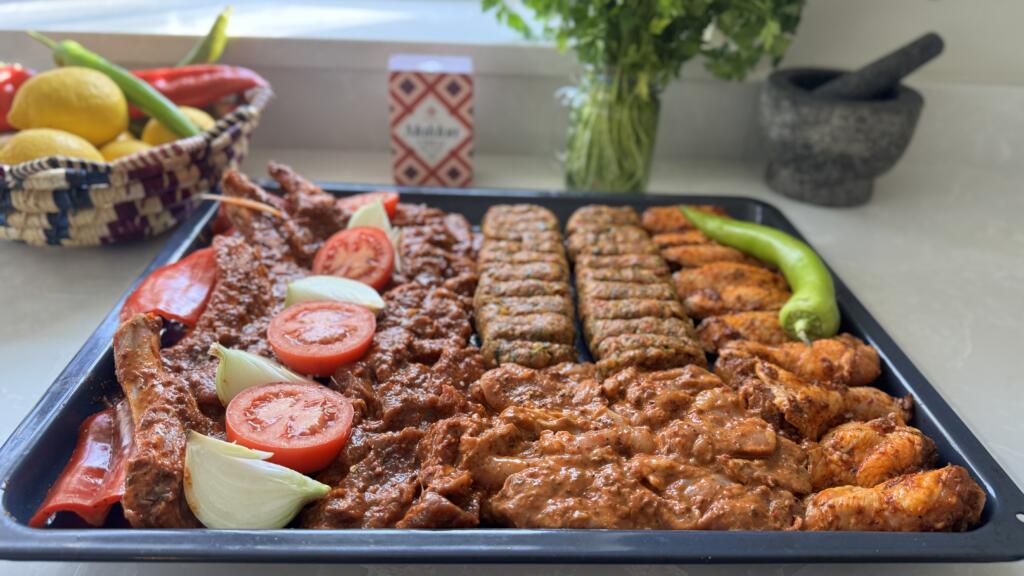
Ready to be Roasted: Complete Mixed Grill Platter in Base Marinade with Maldon Chilli Sea Salt
This is the kind of food that invites people to linger – platters placed at the centre of the table, hands reaching in, conversations getting louder and the dishes empty. Guided by Meliz Berg’s bold, generous flavours, brought to life with AEG’s precision cooking, and finished with the unmistakable crunch of Maldon Chilli Sea Salt, this mixed grill is about more than what’s on the tray.
If you try this recipe at home, we’d love to see it – tag us in your creations so we can share your wonderful cooking with our community. And if you’re feeling inspired to upgrade your kitchen, you can explore more AEG appliances here, and discover how their innovative technology can transform your everyday cooking.