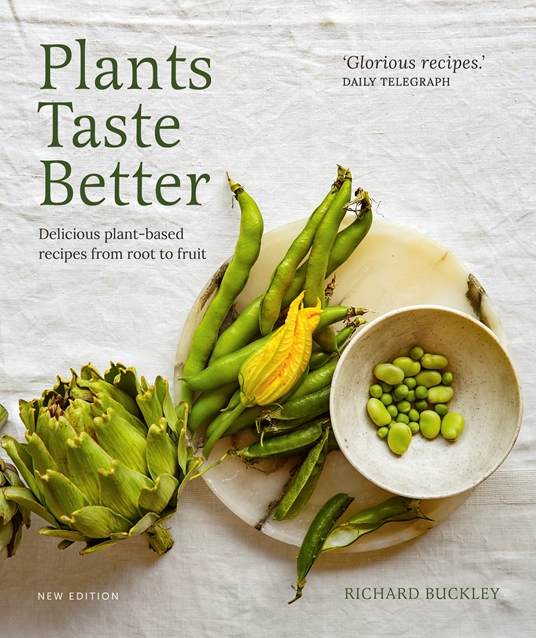
As we celebrate ‘Healthy January’, we are delighted to team up with renowned Chef Richard Buckley and share one of our favourite vegetarian-based recipes from his cookbook.
Richard Buckley is an award-winning chef and owner of The Oak in Bath (UK), a Michelin Green Star recipient.
Buckley was raised a vegetarian and, after graduating with a degree in English Literature, he set about studying vegetable cookery whilst working in a series of top vegetarian restaurants. This culminated in his five-year role as head chef for Demuth’s Restaurant where he developed and refined his plant-centric cooking style. He has a passion for sharing the knowledge and techniques that he has learnt and developed in order to increase the general standard of vegan cookery across the country.
With over 15 years spent studying plants and working at top vegetarian restaurants, Richard released his cookbook: ‘Plants Taste Better’.
Plants Taste Better is a plant-based recipe book, where plants take centre stage on the dinner plate. With over 70 mouth-watering recipes, ranging from the simple to the stand-out, Plants Taste Better will guide and inspire you to get creative with vegan cookery.
This book balances the traditional with modernity to show readers how to make even the simplest ingredients shine. With delicious, thoughtful recipes and stunning images, you will be amazed what you can accomplish in your kitchen when you combine vegetables alongside a deeper understanding of the techniques requested.
Recipes include flavoursome snacks of Fritters and Squash & Hazelnut Pate, to showstopping mains of Carrot, Pea & Cardamom Tagine and Beetroot and Mushroom Casserole. If you have a sweet tooth, try getting your hands stuck into a decadent Chocolate Salted Caramel Taste, or Burnt Peaches.
On the topic of food, let’s share one of our favourite recipes from the cookbook!
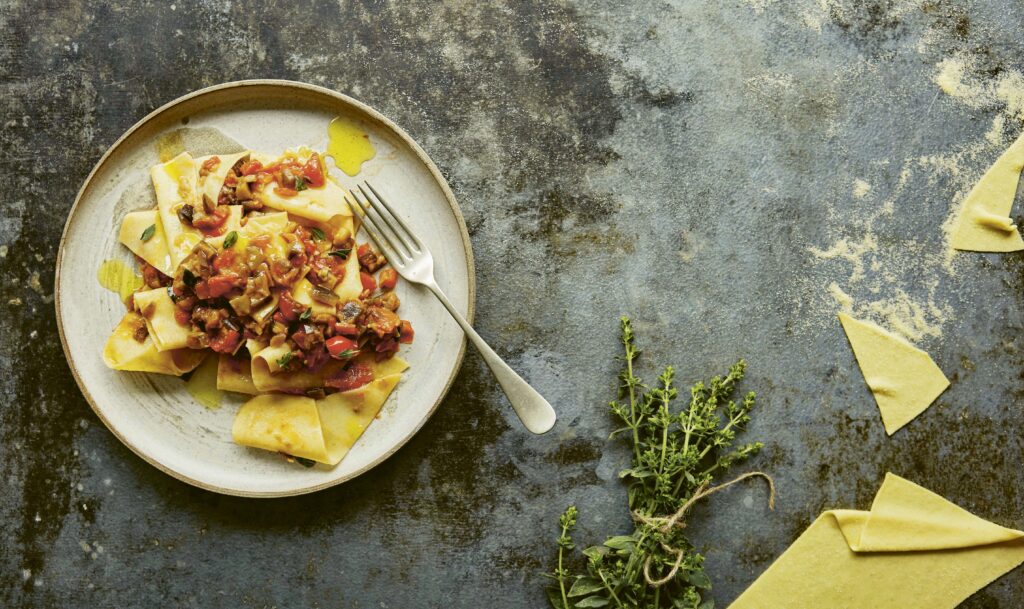
Aubergine (Eggplant) Ragu with Pangrattato and Maltagliati
This dish is a great way of making use of a couple of leftovers: the pangrattato is fried breadcrumbs from a stale loaf – a fantastic thing to have on hand to sprinkle on almost everything that needs a bit of texture – and the maltagliati is essentially pasta offcuts. When you are making a lot of pasta you get left with lots of bits that weren’t quite the right fit; let them dry out and keep them in a pile and you have a quick, easy, free lunch. Obviously, if you aren’t making a lot of pasta then you can just roll out a batch of your favourite pasta and cut it into raggedy shape or alternatively just use your favourite store-bought dried pasta or break up some dried lasagne sheets.
Serves: 4 people
Ingredients:
FOR THE PANGRATTATO:
250g (9oz) stale bread
4 cloves of garlic
extra virgin olive oil
FOR THE SEMOLINA PASTA:
400g (14oz/21/3 cups) fine semolina
235g (81/3oz) warm water
FOR THE RAGU:
75ml (2¾fl oz/1/3 cup) extra virgin
olive oil, plus a little extra if needed
2 aubergines (eggplants), cut into 1cm (1/2-inch) dice
500g (2¼lb) plum tomatoes
1 medium onion, diced
2 cloves of garlic
½ red chilli
2g marjoram leaves
Maldon Sea Salt flakes
freshly ground black pepper
Method:
To make the pangrattato, blitz your stale bread in a food processor or blender to make breadcrumbs – the bigger the crumb the more crunch you get, just remember there is a line somewhere between breadcrumb and crouton. Purée the garlic, add it to the breadcrumbs and rub it in until all the crumbs are coated. Heat a couple of tablespoons of oil in a frying pan (skillet), add the breadcrumbs and fry gently until golden and crispy. Turn onto a baking tray (sheet) to cool and store in an airtight container until needed.
To make the pasta, put the semolina in a pile on a clean work surface. Make a well in the middle and carefully pour in the water, being sure not to let any spill out. Using a fork, whisk the water around, allowing the semolina to fall into the middle slowly. When it reaches the thickness of pancake batter, swap the fork for a dough scraper and chop in the remaining semolina to form a rough dough. Using your hand, bring it together into a rough ball and knead it a couple of times until homogenous but still dimpled and not smooth. Cover with a bowl and leave for 30 minutes to rest.
Knead again; it should become very smooth and silky very quickly. Form it back into a ball, wrap in cling film (plastic wrap), and leave to rest at room temperature for at least 2 hours before using. You can keep it in the fridge overnight, but it will become sticky and harder to work.
When ready to use, either roll the dough by hand using a rolling pin on a lightly floured surface, until it is just a little thinner than a credit card, or roll through a pasta machine following the instructions on page 124. Cut it into rough pieces and leave scattered on the work surface to dry until you need them.
To make the ragu, heat the olive oil in a large saucepan over a medium heat, add the aubergine (eggplant) and cook for up to around 45 minutes until it is broken down to a mush, catching on the pan, browning and existing in the space between dice and purée: be patient, it’s the key to the flavour of this sauce. Remove the aubergine (eggplant) from the pan and set to one side in a bowl. Put the tomatoes in a food processor or blender and blitz to a rough paste. Cook the onion in the same pan as the aubergine until soft, adding a little oil if needed.
Mince the garlic and chilli together, add to the onion in the pan and cook for 30 seconds. Add the tomatoes and cook gently for about 15 minutes until the mixture is thickened and rich. Add the aubergine back in, along with the marjoram, and cook for 5 minutes to bring the flavours together. Season to taste with salt and pepper.
To serve, bring a large saucepan of water to the boil and season as for pasta water (see page 125). Heat the ragu gently in a pan next to it. Add the maltagliati to the boiling water and stir to prevent them sticking. As soon as they float to the surface, lift one out and check its doneness – we are looking for a crisp, al dente texture. If your pasta is freshly rolled this could be as fast as 20 seconds. Using a spider, quickly lift the pasta out into the ragu and stir it through. Using a ladle, add a little of the pasta cooking water to the ragu to create a glossy, creamy texture.
Lay out 4 warmed, rimmed plates or pasta bowls and split the ragu and maltagliati among them. Sprinkle generously with the pangrattato and any leftover herbs.
Purchase ‘Plants Taste Better’ Today
Move aside meat, it’s time to give plants the spotlight in the kitchen! You can purchase your very own copy through Quarto Books today. The perfect gift for your fellow veggie friend…or yourself!
Make sure you have your Maldon Salt ready for these recipes! If you are running out, please feel free to browse on our Where to Buy Page to find your nearest store in which stocks our beloved Maldon Salt.
Lastly, we LOVE seeing your creations – please tag us on Instagram using the #maldonsalt so we can share your own take on Richard’s recipes!
Creamy, tender and full of flavour…New potatoes are the ultimate comfort food.
This recipe only contains four ingredients, with Maldon Garlic Sea Salt being the star of the show for this dish. The delicious blend of sea salt flakes with wild and roasted garlic elevates the humble potato to new heights, giving a fragrant taste that compliments the new potatoes.
What are new potatoes?
A new potato is basically an immature potato that is dug up before it reaches full size. As a result, the tend to have a sweeter taste and loose skins which can be gently rubbed off before being boiled or cooked. The flex is waxier than other potatoes, which is why many use new potatoes in salads when cold, and paired with butter when warmed up.
The best variety of new potatoes are ‘charlottes’. They offer a great resistance to blight and are generally resistant to scabbing.
Place your new potatoes in a large pan of water so they are submerged. Put this onto the heat and bring to the boil. Allow the potatoes to cook for 5 – 8 minutes in the water, until they are just tender and you can insert a knife easily.
Drain the potatoes and allow to steam dry for a couple of minutes.
Tip into your favourite serving bowl and toss with the olive oil, Maldon Garlic Sea Salt and cracked black pepper.
Serve whilst still warm.
Joe Woodhouse; talented Food & Drink Photographer and Cookbook author of ‘More Daily Veg‘ brings us the comforting dish of whole baked baby squash – perfect with a cold, damp autumn day.
When Joe visited Wilding Cider in Chew Magna, North Somerset, run by Beccy and Sam Leach, Sam made this vegetarian dish for their supper. The pair used to run the restaurant Birch in Bristol before setting their sights on cider making.
This simple but warming dish is a perfect foil to coming in from a cold and drizzly day in an orchard. They sat in the barn, swapping ciders and wines for everyone to taste with a roasting fire going in the wood burner.
Joe added a green sauce to cut the richness a bit, but if you get a good-quality sharp Cheddar, it doesn’t need it!
Here is how to make the whole baked baby squash…
Preheat the oven to 200C (400F), Gas Mark 6. With a small knife, cut the tops off the squash in a circular motion to form caps. Scoop out and compost the seeds.
Mix together the cheese, crème fraiche and oats, and add a good couple of pinches of Maldon Salt and a healthy few grinds of black pepper.
Fill the squash with the oat mixture. Replace their lids. Rub each all over with a tablespoon of oil, place on a tray and bake for 25–35 minutes until a knife pierces the flesh easily.
Meanwhile, blend all the sauce ingredients together with salt and pepper. For a coarser sauce, hand chop everything and mix with the oil, which is equally as good, if not better.
Serve the squash with a salad, maybe a few potatoes to make it into a main. Add the sauce on the side and a good bottle of cider, from Wilding preferably!
Creamy, crunchy, spicy and caramalized.
Food & Drink Photographer and Cookbook author, Joe Woodhouse created a sensational dish which holds the perfect balance of textures and flavours to elevate the humble Brussels sprouts.
All elements can be prepped ahead and then assembled when you are ready to serve. The Brussels take no time to cook. Joe loves to roast the vegetable to create a lovely crispy and caramelized outer, with soft, steamed centres. You can undercook the onion and chilli in the chutney so it retains a crunch and a freshness, cooked through but not fully softened.
Here is how to make the roast brussels sprouts…
Preheat the oven to 200.C (400.F), Gas Mark 6.Toss the bread in 2–3 tablespoons of oil. Add to a baking tray and toast in the oven for 10–12 minutes until golden. Blitz to crumbs in a blender, or leave whole or hand cut if you prefer.
Meanwhile, add 2 tablespoons of oil to a medium pan over a medium heat. Add the onion, celery and chillies with a pinch of Maldon Salt and cook for 5–7 minutes. Add the tomatoes. Half-fill the can with water and add to the pan. Bring to a simmer and bubble away for 15minutes until thickened. It still wants to be loose but not watery. Add the honey and check if it needs more Maldon Salt. Set aside.
Increase the oven temperature to 220.C (425.F),Gas Mark 7. Using the same tray as the croutons, brushout any remaining crumbs and add the Brussels with 3 tablespoons of oil and a good pinch of salt. Roast for 12 minutes. You want to roast them quickly, getting colour on the outside and cooking through without going overly soft in the middle. If they need a bit more, keep them in a minute or two longer. Feel free to give the tray a shake once or twice to aid them in cooking evenly.
Meanwhile, mix the lemon juice with the tahini and trickle in a few tablespoons of cold water. Keep working it with a whisk and adding water until you get a smooth consistency which holds its shape. If it gets too loose, just add a spoon or two of tahini and combine it to help firm up the mix.
Spoon the tahini mixture onto plates or a serving dish, followed by the Brussels sprouts. Then dot around the tomato chutney. You made not need it all, see how you go. Finish with the crouton crumbs and a drizzle of oil.
Joe Woodhouse could happily eat this pie dish every week!
This recipes takes inspiration from spanakopita, which is classic, savoury Greek pie dish made from filo pastry and filled with spinach and creamy feta cheese. It’s the perfect dish that the whole family is happy to eat at any time of the year.
Joe adds sesame seeds to the dough to create an irresistible crunch, but you can also include toasted nuts to the filling, such as pine nuts or pistachios.
Here is how to make the spinach pie…
Heat the oil in a pan over a medium heat. Add the onions with a pinch of salt and cook for 10–12 minutes until soft and starting to colour. They still want to have texture but be at that stage when they go sweet and soft. Add to a large mixing bowl with the rest of the filling ingredients except the spinach.
In the same pan if it is big enough, add the spinach a couple of handfuls at a time and stir to wilt. Repeat until all the spinach is wilted. Remove to a sieve over a bowl and press out as much liquid as you can. Removing and draining in batches is also fine –whatever makes it most manageable.
Preheat the oven to 180C (350F), Gas Mark 4.
Roughly chop through the spinach and add to the rest of the filling. Mix well, taste for seasoning and add more Maldon Salt and black pepper as needed.
Brush your baking tin with butter. Add a sheet of filo and brush with butter. Repeat this for four more sheets. Then add the filling. Fold the overhanging filo sheets over the filling. Then brush the final two sheets with butter and lay on top of each other. Trim these fit the tin exactly. Put the trimmings in the middle of the tin to cover any exposed filling. Lay the final sheets on top. Score the top into six sections. Add the sesame seeds in an even layer. Bake for 45–55minutes. Remove from the oven and allow to sit for 10 –15 minutes before serving.
You only need a handful of ingredients to make our beautifully soft and creamy potato salad, the perfect side dish for your summer BBQ’s this year!
It’s fair to say, a good potato salad always starts with using the right variety of potatoes. The best potato to use for your salads are named ‘waxy potatoes’. These are low in starch yet hold a high sugar and water content. As a result, they tend to hold their shape more when they are cooking, and are notable less grainy than more starchier potatoes, like russets or Idaho’s. Therefore, we opt in using red potatoes for our salad, as they are best for boiling and maintain their soft, fluffy centre which is ideal for making a creamy potato salad.
When boiling your potatoes, make sure to add a pinch of Maldon Salt to the water. This is vital for a well-seasoned potato salad because when the starch in the potatoes begins to warm up from boiling, they will begin to open and absorb water, causing them to loose shape. Salting the water will allow the starch cells to close off, preventing the potatoes from becoming too soft and allowing them to maintain shape with a fluffy centre.
We recommend serving your potato salad with BBQ classics, including juicy burgers, delicious smoky chicken or perhaps as a topper to ‘bulk’ up a beautiful British Salad.
Here’s how to make our creamy potato salad…
Start by placing the red skinned potatoes in a large pan and filling it with water, lightly salt it and place it on the hob.
Bring to the boil and allow the potatoes to simmer for around 5 minutes until just tender but still holding their shape.
Drain the potatoes and allow to cool.
Once the potatoes are cool, cut them into quarters or halves depending on size. Place into a large bowl and mix together with the mayonnaise, capers, chives, dill, Maldon Salt and black pepper and lemon zest. Make sure everything is well coated but try not to break up the potatoes.
Transfer the potato salad onto a serving platter and garnish with some final sprinkling of herbs and a pinch of Maldon Salt.
This can be served straight away or kept in the fridge until serving. It can stay in the fridge for up to 5-days, if stored properly and securely.
Simple yet refreshing. Our cucumber salad recipe is quick and easy to make within a matter of minutes…perfect for the summer!
When choosing your cucumber, we recommend using a seedless variety. English cucumbers are great for this as they are long, slim and hardly have any seeds. You can also opt for Persian cucumbers, however they are notably shorter in comparison to English cucumbers.
Pair this salad with summertime classics, including juicy burgers and chargrilled chicken on the BBQ for that perfect cool contrast from the warm meats.
Finely slice the cucumber. In a bowl, toss the cucumber slices with Maldon Salt and a small pinch of sugar. Let this stand for roughly 5 minutes.
Add the cucumber to a large bowl with the red onion, white wine vinegar, Maldon Salt and cracked black pepper.
Transfer onto a serving plate and garnish with dill sprigs and Maldon Salt before serving.
This quick and easy edamame recipe is perfect as an appetizer for your dinner party. Seasoned generously with Maldon Salt, these beans are crunchy and seriously addicting to eat, especially if you have a side of soy sauce and lemon wedges to add a hit of citrus to the dish.
You can serve edamame beans with many other dishes, including a delicious prawn pad thai. The edamame bean has a faint pea almost buttery taste with a hint of sweet nuttiness to it, which compliments the sweet-savour fusion of the pad thai.
Here is how to make our salted edamame beans…
Place a large pan of water on to boil.
When simmering, add the frozen edamame beans and blanch for 5 minutes until bright green and cooked through.
Drain the beans from the water and place in a large serving bowl, sprinkle generously with Maldon Salt.
Serve immediately with soy sauce for dipping and lemon wedges.
Embrace the joy of home cooking with our delicious classic chip recipe. There is something special in making chips from scratch, from the glorious aroma to the satisfying crunch!
We season our homemade chips with a generous pinch of Maldon Salt, garlic and a few sprigs of rosemary to elevate the flavour to new heights. Whether you are a seasoned pro or a novice in the kitchen, this easy-to-follow recipe will allow you to dish up golden, crispy chips…the perfect alternative to any store-bought counterpart.
We recommend baking these chips with a juicy burger, ideal for the warm, summer evenings. Additionally, you can also have a go in making chips from another vegetable, perhaps our delicious baked turnip chips, which can be enjoyed on their own with a dipping sauce or paired with a succulent lamb shoulder.
Preheat the oven to 180C.
Start by cutting the potatoes into chips, keeping the skin on (you can make these as thin or chunky as you like).
Place a large pan of lightly salted water on the hob and add the chips. Bring the water to the boil and let them simmer for 3 – 5 minutes until they are still holding their shape, but a sharp knife can be inserted.
Drain the chips and allow them to steam for a few minutes in the colander – give the colander a little shake to gently rough up the edges too.
While the chips are steaming, pour the vegetable oil into a large baking tray and place into the preheated oven to heat up the oil.
After 5 mins, remove the tray from the oven and tip the chips into the hot oil – be very careful as the hot oil will spit. Flip and coat the chips in the oil. Add the bashed garlic cloves and a few sprigs of the rosemary. Season well with Maldon Salt and cracked black pepper and place the chips back in the oven.
Roast the chips for 15 minutes, then take them out and flip and rotate the chips using a spatula. Place them back in the oven for another 15 – 20 mins depending on the size of your chips. You want them golden brown and crispy all over.
Remove from the oven and sprinkle with a final pinch of Maldon Salt.
We’ve created a vibrant vegetable tart packed full of spring goodness, including radishes, asparagus and garden peas. With a generous helping of ricotta cheese to coat the base of the tart, you are met with a deliciously creamy flavour as you take your first bite.
This recipe is special as it represents the changing of seasons from the dark, cold Winter months to the bright, colourful Spring. It truly does encapsulate the springtime cooking with all it’s good, green and glory! Not to forget how quick and easy this dish is to prepare and enjoy amongst friend’s and family across a (hopefully) sunny weekend.
Preheat the oven to 180C.
Gently roll the puff pastry sheet onto a baking paper lined with paper. Use a sharp knife to carefully score a 1cm boarder all the way around the edges of the pastry, cutting most of the way through but not all the way. The brush the edges with the beaten egg and place into the preheated oven for 10 minutes until golden brown and puffed up.
Remove the pastry from the oven and gently press down the puffed-up pastry in the centre so you are left with just the boarder raised. Set aside to cool slightly.
In a bowl mix together the ricotta, lemon zest, chopped dill and parsley. Then season well with Maldon Salt and cracked black pepper. Set aside.
Put a pan of water on to boil. Once simmering, add the asparagus spears, broad beans, and peas. Blanch them for 2 minutes until just cooked and then remove from the pan with a slotted spoon and immediately place into a bowl of iced water – this will help the vegetables retain their green colour and some of the crunch. Once cold again, drain and set aside.
Add the julienned spring onion strips into another small bowl with iced water and submerge. This cold water will encourage the spring onion to coil up and create pretty curls.
To assemble the tart, spoon the ricotta mix onto the base of the pastry and spread evenly to the edges of the middle, leaving the boarders. Next arrange the asparagus spears, broad beans, and peas across the top. Finally top with the radishes, spring onion curls and pea shoots.
Drizzle over a little good quality olive oil and a final sprinkle of Maldon Salt and some cracked black pepper.