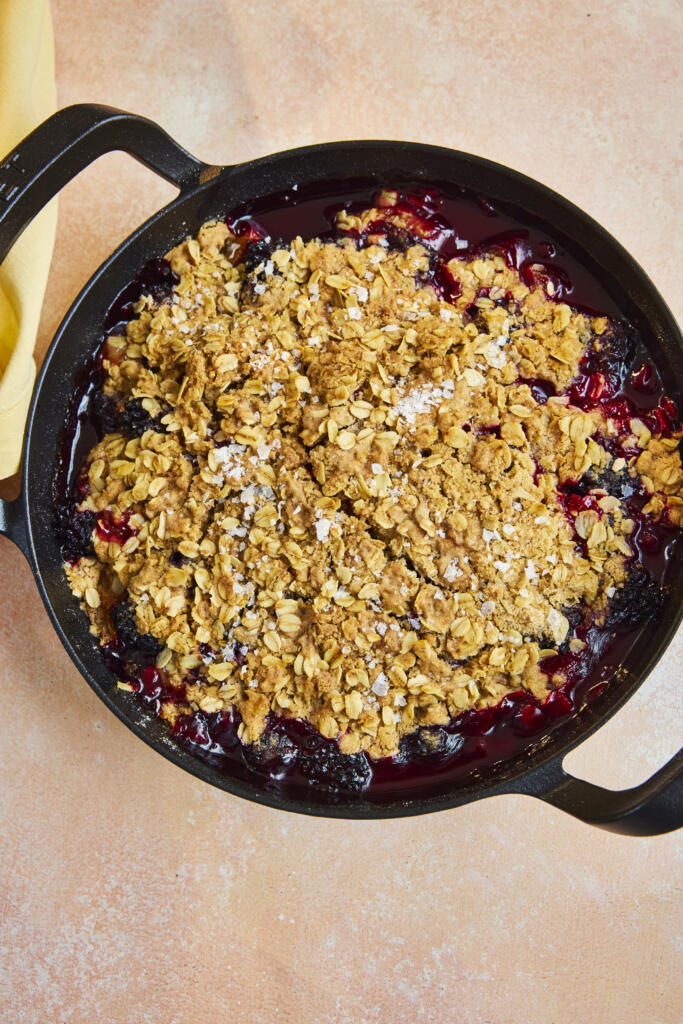
Celebrate late‑season fruit with this plum and blackberry crumble: juicy, tangy fruit baked beneath a buttery oat topping scented with cinnamon and a pinch of Maldon Original Sea Salt. The salt sharpens the fruit and adds balance to the sweet, crunchy crumbs. This easy fruit crumble comes together in minutes and bakes to a golden, bubbling finish — serve warm with ice cream, whipped cream or thick yogurt.
How To Make Blackberry and Plum Crumble (Quick Steps)
Toss plums and blackberries with lemon and sugar to taste.
Rub butter into flour, cinnamon and Maldon Sea Salt; add oats and Demerara.
Scatter over fruit and bake at 180°C fan for 30 minutes until golden and bubbling.
Rest briefly, then serve warm with ice cream or yogurt.
How To Make Blackberry & Plum Crumble (Detailed Version)
Step 1 – Heat the Oven & Prep Fruit
Preheat oven to 180°C fan (200°C conventional / 400°F).
Add plums and blackberries to a skillet or ovenproof dish.
Taste the fruit; add a pinch of sugar only if needed. Squeeze over lemon juice and toss.
Step 2 – Make the Oat Crumble
In a large bowl, mix flour, cinnamon and Maldon Original Sea Salt.
Add butter cubes; toss to coat. Rub in with fingertips to fine breadcrumbs.
Stir in oats and Demerara sugar. The texture should resemble a mix of fin crumbs and small clumps for crunch.
Step 3 – Assemble & Bake
Scatter the crumble evenly over the fruit — don’t press down.
Bake 30 minutes until the top is crisp and golden and the fruit is bubbling at the edges.
Step 4 – Serve
Rest 5–10 minutes to let juices thicken slightly.
Spoon into bowls and serve with ice cream, whipped cream or yogurt.
Optional: finish with a tiny pinch of Maldon Sea Salt flakes for sweet‑salty contrast.
Best served warm.
Tips & FAQs:
Tips
Sweetness control: taste fruit first; late‑summer plums can be very sweet, so add sugar only as needed.
Extra crunch: chill the crumble 10 minutes before baking to keep butter cold and crumbs craggy.
Even browning: bake on the middle rack; rotate the dish after 20 minutes if browning unevenly.
Juicy but set: letting the crumble stand for 10 minutes post‑bake helps juices thicken.
FAQs
What’s the best fruit mix for a crumble?
Tart blackberries balance sweet plums. You can swap in apples, pears or nectarines; aim for a tart‑sweet balance.
Can I use frozen fruit?
Yes. Bake from frozen but toss fruit with 1–2 tsp flour or cornflour to absorb extra juices and add 5–10 minutes to the bake.
Can I make crumble ahead?
Assemble fruit and topping separately up to 24 hours in the fridge. Top and bake just before serving. The raw crumble topping also freezes well.
How do I keep the topping crunchy?
Keep butter cold, don’t over‑mix, and avoid pressing the topping down. If needed, finish with 2–3 minutes under a hot grill/broiler.
Can I make it dairy‑free or vegan?
Use a plant‑based butter with similar fat content. Check that your sugar suits your dietary needs.
Flavour twist: add orange zest to the fruit or swap cinnamon for mixed spice as we move into autumn.
Storage & Reheating
Store leftovers covered in the fridge for up to 3 days.
Reheat in a 170°C (340°F) oven for 12–15 minutes until hot and topping re‑crisped; or air fry at 170°C for 6–8 minutes.
Freeze: cool completely, wrap tightly and freeze up to 2 months. Reheat from frozen at 170°C until piping hot (cover with foil if over‑browning).
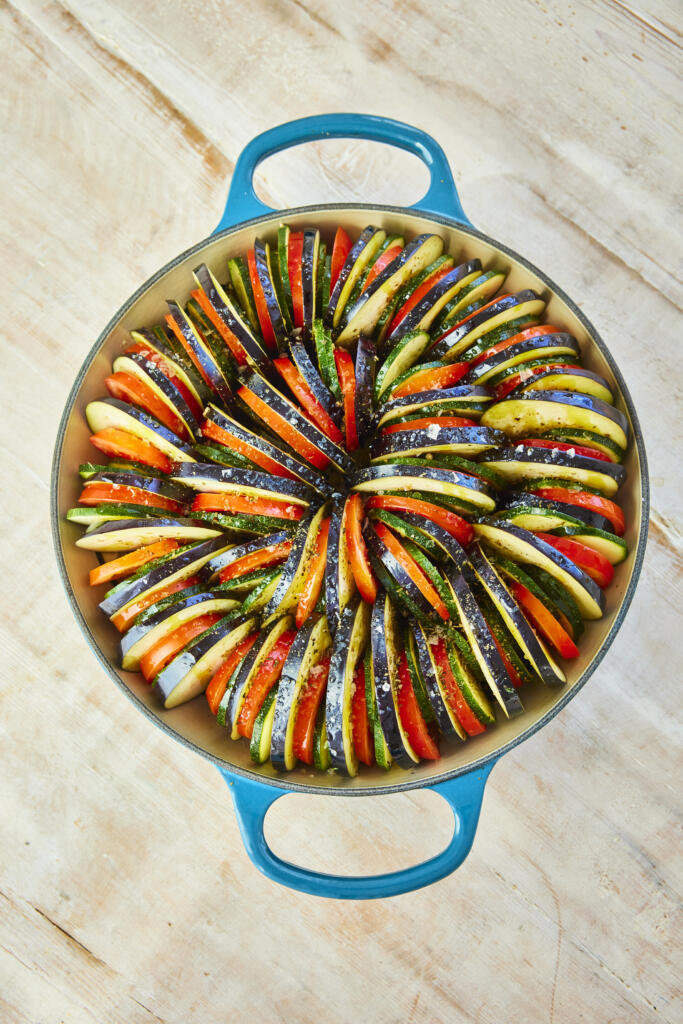
This oven‑baked ratatouille layers thin slices of aubergine, courgette and tomato in neat concentric circles for maximum flavour and a beautiful finish. Seasoned with Maldon Original Sea Salt, oregano and olive oil, the vegetables bake until tender with lightly caramelised edges. It’s an easy ratatouille recipe that celebrates peak‑summer produce, delicious warm or at room temperature and perfect as a vegetarian side or light main with crusty bread.
How to Make Oven-Baked Ratatouille?
Slice aubergine, courgette and tomato to 3 mm; season with Maldon Sea Salt.
Arrange in concentric circles; add oregano and olive oil.
Bake at 180°C fan for 30 minutes until tender and caramelised; finish with basil.
How to Make Oven-Baked Ratatouille (Detailed Version)
Step 1 – Heat the Oven & Slice Evenly
Preheat oven to 180°C fan (200°C conventional / 400°F).
Thinly slice aubergines, courgettes and tomatoes to pound‑coin thickness (~3 mm) using a mandolin or sharp knife for even cooking. Make sure you pat the wet tomatoes slices dry before arranging to avoid pooling which can cause the dish to become soggy!
Sprinkle the slices with Maldon Original Sea Salt to season and draw out a little moisture.
Step 2 – Arrange the Vegetables
In a round baking dish, lay slices in concentric circles, alternating aubergine, courgette and tomato.
Sprinkle over dried oregano and drizzle generously with olive oil.
Step 3 – Bake to Tender & Caramelise
Bake for about 30 minutes until the top is lightly caramelised and vegetables are tender when pierced. The edges of the dish should be lightly browned, centres soft but holding their shape.
Rest 5 minutes; scatter basil leaves and finish with a final pinch of Maldon.
Tips & FAQs
Tips
Even thickness is key: 3 mm slices cook at the same rate and layer neatly.
Season in layers: a light pre‑salt plus a finishing sprinkle of Maldon brightens flavours.
For extra colour, switch to grill/broiler for 1–2 minutes at the end.
If your dish is deep, cover loosely with foil for the first 15 minutes, then uncover to caramelise.
FAQs
What’s the difference between this and classic stewed ratatouille?
This is a sliced, baked version (often called confit byaldi style) with neat layers; classic ratatouille is a chopped, stovetop stew.
Can I add peppers or onions?
Yes—very thinly sliced red pepper or onion can be tucked between layers without changing timing much.
Do I need to salt and drain the aubergine?
Not essential with thin slices and modern aubergines; a light pre‑salt is sufficient.
How thick should I slice the vegetables?
About 3 mm (pound‑coin thickness). Thicker slices may need 5–10 extra minutes.
Can I make ratatouille ahead?
Bake, cool and refrigerate up to 2 days. Reheat covered at 170°C (340°F) for 12–15 minutes or enjoy at room temperature.
Serving Suggestions
Serve as a side with roast chicken, grilled fish, steak or lamb.
Make it a main: add torn mozzarella or crumbled goat’s cheese after baking; serve with crusty bread, couscous or soft polenta.
Finish with a drizzle of good olive oil, extra basil, or a splash of balsamic.
Storage & Reheating
Refrigerate leftovers in an airtight container for up to 3 days.
Reheat at 170°C (340°F) until hot (10–15 minutes) or enjoy room‑temperature.
Not ideal for freezing (tomatoes can become watery), but can be frozen for up to 1 month if needed; reheat from thawed and finish under the grill to re‑caramelise.
Heat 3 tbsp olive oil in a large, heavy based pot. Once hot, add the minced beef and season with Maldon Original Sea Salt and pepper. Fry over a medium-high for about 10 minutes, breaking up the meat with your wooden spoon until well browned. You don’t want the pot to be too crowded otherwise the meat will steam rather than brown, so work in two batches if needed.
Scoop the meat out of the pot into a bowl and set aside. Add another 3 tbsp olive oil to the pot, along with the onions, peppers and garlic. Season with Maldon salt and pepper and cook gently over a medium low heat for about 15 minutes, stirring every so often, until soft.
Add the meat back into the pot, along with the tomatoes. Fill each tin halfway with water, swill it around to get every last bit of tomato, then add the liquid to the pot. Bring up to a simmer then leave to blip away for 45 minutes, stirring every so often to ensure it’s not sticking on the bottom of the pot, until thickened and reduced. Stir through the oregano and basil, then taste for seasoning.
Bring a large pot of salted water to the boil and cook the lasagne sheets in a few batches for just 2 minutes until no longer rigid but still very al dente, then transfer to an oiled baking tray. Drizzle the sheets with a little olive oil so they don’t stick to one another.
Preheat the oven to 180C fan.
To assemble the lasagne, spoon a couple of ladles of the meat sauce into a large, rectangular baking dish (about 30cm by 20cm). Cover with lasagne sheets then add a single layer of courgette slices. Season the courgettes with a small pinch of Maldon Original Sea Salt and pepper. Dot with roughly a third of the torn mozzarella, grate over roughly a third of the parmesan, and drizzle over roughly a third of the double cream. Repeat this layering process (meat sauce, lasagne sheets, courgette slices, seasoning, cheeses and cream) twice more. Drizzle the top with a little olive oil and cover the dish with foil. Put the dish on a baking tray (this will catch any spill over while baking).
Bake for 20 minutes then remove the foil and bake a further 20 minutes until golden and bubbling. Leave to stand for 20-30 minutes before serving (this allows the layers to settle and makes it easier to slice).
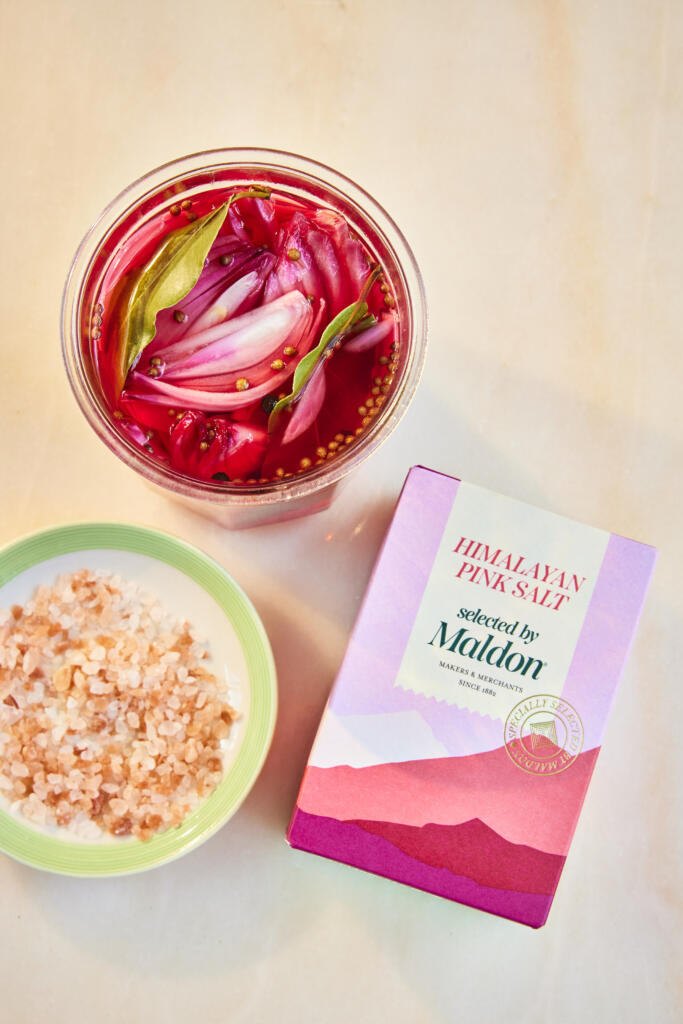
These quick pickled red onions are the easiest way to add tangy crunch and colour to everything from tacos to salads. A hot brine of apple cider vinegar, warm spices and honey is poured over thinly sliced onions, then finished with Himalayan Pink Salt, Selected by Maldon for clean, bright seasoning. They turn vivid pink in just a few hours and keep well in the fridge — an effortless, make‑ahead topping you’ll use all week.
How to Make Quick Pickled Red Onions?
Pack sliced onions in a sterilised jar.
Simmer vinegar, honey, spices and Himalayan Pink Salt, Selected by Maldon; pour over onions.
Seal, cool and refrigerate until bright pink (2–12 hours).
Keep refrigerated; use within 2 weeks.
How to Make Quick Pickled Red Onions (Detailed Version)
Step 1 – Prep the Jar & Onions
Thinly slice red onions (a mandolin helps).
Pack into a large, sterilised heatproof jar. To sterilise quickly, wash, then heat the jar in a 160°C (320°F) oven for 10 minutes; air-dry lids.
Step 2 – Make the Hot Brine
Add vinegar, honey (or sugar), coriander seeds, peppercorns, bay leaves and Himalayan Pink Salt, Selected by Sea Salt to a small pan.
Bring to a gentle simmer, stirring to dissolve, then remove from heat.
Step 3 – Pour & Seal
Immediately pour hot brine over onions to fully submerge.
Seal, cool to room temperature, then refrigerate.
Step 4 – Chill & Serve
Leave to pickle a few hours until bright pink (flavour deepens overnight).
Serve cold; keep onions submerged in brine.
Tips & FAQs
Tips
Slice evenly (1–2 mm) for fast, even pickling.
Pack tightly and submerge fully; top up with a splash more vinegar if needed.
For softer bite, blanch slices in boiling water for 10 seconds; drain before jarring.
Use caster sugar or maple syrup to make the recipe vegan.
FAQs:
How long do pickled red onions last?
Up to 2 weeks refrigerated in a clean, sealed jar. Always use clean utensils and keep onions submerged.
Can I use different vinegar?
Yes. White wine or red wine vinegar work; avoid malt vinegar for this style (overly strong).
Do I need to sterilise the jar?
Recommended for best quality. This is a refrigerator pickle (not canned); always store in the fridge.
Can I reduce the sweetness?
Yes. Adjust honey/sugar to taste; salt and acid provide the primary preservation.
When are they ready to eat?
After 1–2 hours for a quick pickle; best flavour and colour after 12–24 hours.
Can I add other flavours?
Try chilli flakes, fennel seeds, citrus peel, or garlic. Keep the basic acid‑salt ratio.
Serving Suggestions
Tacos, burritos and quesadillas
Burgers, hot dogs and pulled pork sandwiches
Grain bowls, salads and slaws
Avocado toast, fried eggs or shakshuka
Cheese and charcuterie boards (drain lightly, sprinkle Maldon flakes)
Storage & Safety
Refrigerate immediately after cooling; keep onions submerged.
Use within 14 days. Discard if cloudy, fizzy, mouldy or off‑smelling.
Always use clean utensils to avoid contamination.
Do not shelf‑store; this is not a canned product.
Tip the flour in the bowl of a stand mixer. Put the yeast on one side of the bowl and the Maldon Sea Salt on the other (this separation prevents the salt from killing the yeast). Put the mixer on low to evenly distribute the dry ingredients.
With the motor running, pour in 3 tbsp olive oil, followed by 350-370ml water. Add the water gradually until you have a slightly sticky dough (you may not need the full 370ml).
Leave the mixer running on a medium speed to knead the dough for 7-10 minutes until the dough is coming away from the sides of the bowl and feels stretchy when pulled. Transfer the dough to a clean bowl, cover with a tea towel and leave to prove for an hour or so until doubled in volume.
Grease a rectangular, shallow tin (about 25cm x 20cm) with olive oil. Gently tip the dough into the tin and use your fingertips to stretch the dough towards the edges of the tin. Cover with the tea towel and leave to prove for another 30-45 minutes.
Preheat the oven to 200C fan. Press your fingers into the dough to make dimples, scatter with rosemary leaves and drizzle with 3 tbsp olive oil. Bake for 35-40 minutes until golden. As soon as the focaccia comes out of the oven, drizzle with a final 2-3 tbsp olive oil. Sprinkle with Maldon Sea Salt and cut into squares.
There are few things as deeply comforting as a well-made doughnut. Golden, light, and just the right side of sweet, they carry with them the scent of warm kitchens and childhood indulgences. These doughnuts, a true homage to Essex and its finest ingredients, bring together two of the county’s most beloved names: Maldon Salt and Tiptree Jam.
The jam-filled variety—Tiptree Raspberry Seedless Conserve, of course—is a nod to those glossy, sugar-dusted bakery counter treats. The ‘holeless’ doughnut, drenched in a rich Maldon Smoked Salt caramel, takes things to a new level—sweet, buttery, with just enough savoury edge to make you go back for another bite.
These are doughnuts that demand to be eaten with fingers, warm from the fryer, still soft at their core.
How to make homemade smoked salt caramel
Heat sugar and water in a pan over medium heat until dissolved. Stop stirring and let it bubble until deep amber.
Remove from heat, stir in butter, then slowly add cream.
Stir in Maldon Smoked Sea Salt flakes
Cool slightly, then jar. Store in the fridge.
Warm the milk gently until just warm to the touch. Stir in the yeast and let it sit for a few minutes.
How to make homemade doughnuts
In a large mixing bowl, combine the flour, sugar, salt, nutmeg, and mace. Rub in the butter and vegetable shortening until the mixture resembles fine crumbs.
Make a well in the centre and pour in the eggs, vanilla, and yeast-milk mixture. Stir to bring it together into a soft, slightly sticky dough.
Knead on a lightly floured surface for about 8–10 minutes until smooth and elastic.
Place the dough in a greased bowl, cover, and leave to rise in a warm place until doubled in size (about 1–1.5 hours).
Knock back the dough and roll out to about 2cm thick. Cut into rounds for filled doughnuts or rings if preferred. Place on a lined tray and let rise again for 30–40 minutes.
Heat oil in a deep pan to 170°C. Fry the doughnuts in batches, turning until golden brown on both sides. Drain on kitchen paper and coat in sugar while still warm.
How to fill doughnuts
For the jam-filled doughnuts, use a piping bag to fill with Tiptree seedless raspberry jam.
For the caramel doughnuts, drizzle with Maldon Smoked Salt caramel just before serving.
Eat while still warm, preferably with fingers sticky from caramel or jam, the way all good doughnuts should be.
There’s nothing quite like a plate of perfectly cooked lemon sole and golden, crispy chips to celebrate the flavours of Essex. Sourced straight from the county’s shores, lemon sole is a delicate, buttery fish that deserves to be treated with the best seasoning. That’s why we’re using Maldon Garlic Sea Salt, enhancing it’s natural sweetness with a subtle garlicky depth. We wrapped our lemon sole in a copy of theEssex Chronical for that final, ‘Essex’ touch.
And what’s a fish supper without chips? Thick-cut, triple-cooked chips, also dusted with the same flavourful sea salt, brings the perfect balance of crunch and fluff. This dish is a true homage to Essex – a simple yet indulgent nod to it’s rich coastal heritage.
Here is how to make lemon sole and chips
Recipe created by Annie-Mae Herring – https://www.instagram.com/theculinarybee/
Prepare the chips – Peel the potatoes and cut them into thick batons. Rinse under cold water, then simmer in salted water for 8–10 minutes until just tender. Drain and let them steam dry.
First fry – Heat oil to 140°C. Fry the chips in batches for 5 minutes, just until they form a light crust. Drain on a rack and cool completely (this can be done ahead).
Roast the fish – Preheat the oven to 200°C. Lay the lemon sole on a lined tray, drizzle with olive oil, and season with Maldon Garlic Sea Salt and Original Sea Salt. Scatter over chopped herbs and arrange lemon slices on top. Roast for 12–15 minutes, until the flesh is just opaque and flakes easily.
Make the tartare sauce – Mix mayo, mustard, gherkins, capers, and tarragon. Squeeze in a little lemon juice and stir. It should be thick, ‘spoonable’, and packed with flavour.
Final fry – Heat oil to 180°C. Fry the chips again for 5–6 minutes, until deep golden and crispy. Drain on paper towels and toss with more Maldon Garlic Sea Salt while hot.
Serve – Pile everything onto a sheet of Essex newspaper. Fish, chips, a generous dollop of tartare. A cold cider or bitter on the side. Best eaten outdoors, fingers greasy, with a bit of salt still clinging to your lips.
Grease and line 3x 20cm round springform baking tins with baking paper and then set aside. Preheat the oven to 180c.
In the bowl of a stand mixer add the softened butter and caster sugar and then beat together for 5 minutes until soft, pale and fluffy. Then add the eggs, one at a time, beating each one in until all of them have been incorporated. Next add the ground almonds, plain flour, baking powder and spices and mix until incorporated (but ensure not to overmix).
Remove the bowl from the stand mixer and add the grated carrot, parsnip and chopped walnuts. Fold these through the mixture. Then divide the cake batter equally between the 3 lined baking tins and smooth over the top.
Place into the preheated oven and bake for 30 minutes until well risen and golden on top. You can check the cakes are cooked through by inserting a skewer or cocktail stick into the centre and making sure it comes out clean.
Remove the baked cakes from the oven and place onto a wire rack to cool completely.
While the cakes are cooling make the caramel. Place the granulated sugar into a pan and place onto a low heat. Gently melt the sugar, ensuring not to stir it but you can swirl it around the pan to encourage it. You want the sugar granules to melt completely and then turn to a deep golden caramel colour. At this moment, immediately take the pan off the heat and add the butter, stirring it through until it comes together. Then add the double cream and allow this to bubble before stirring through again until you have a smooth caramel. Then add the Maldon Sea Salt before setting aside to allow the caramel to cool, it will thicken as it cools also.
Now make the icing.
Add the softened butter to the bowl of your stand mixer and beat until its very soft and whipped. Then, with the motor running, add the icing sugar bit by bit until it is all incorporated.
Then remove the bowl from the stand mixer and add the cream cheese and vanilla, mix this in gently with a wooden spoon or spatula until just incorporated but make sure not to overmix. Place this into the fridge while you get your cakes ready to ice.
Take each cooled sponge and remove it from its tin. Then use a serrated knife to trim off the tops if they have domed when baking to ensure that each layer is even.
Spread a little icing onto the bottom of your cake plate or stand and then put the first sponge onto this. Spread some more icing on top and then add your second sponge, pressing down lightly. Then repeat with the third. Now ice the top and sides of your cake. It is easiest to do this with a palate knife and then smooth around the edges with a cake scraping tool.
Once you are happy with icing of the cake you can either pop it in the fridge until you are ready to serve or serve right away. To do the salted caramel drips simply add the cooled caramel into a small squeezy bottle and squeeze some drips and differing lengths around the cake – alternatively you can use a teaspoon if you don’t have a squeezy bottle.
Finally garnish the top with some finely chopped walnuts and serve.
Dan Dan Noodles are a beloved Sichuan classic, famous for their bold, spicy and savoury flavours. This dish combines tender noodles with a rich, aromatic sauce, creating a comforting bowl that excites the taste buds. While traditionally complex, this recipe simplifies the process without sacrificing flavour. It features a luscious sauce made with sesame paste (or tahini), soy sauce, Chinese black vinegar (or white rice vinegar), sugar, sesame oil, chilli oil, ground Sichuan pepper and a pinch of Maldon Chilli Sea Salt. The pork topping is made with ground pork blended with fragrant peanut oil, minced ginger, and the vibrant heat of Maldon Chilli Sea Salt. The result is a perfect balance of spice, saltiness, and umami that coats every strand of noodle.
For the noodles, thin wheat noodles are ideal for absorbing the sauce, creating a silky and satisfying texture. A handful of choy sum (or bak choy) adds a pop of colour and a hint of freshness, complementing the rich flavours. Garnish with sliced spring onions, crushed peanuts for a nutty crunch, and an extra pinch of Maldon Chilli Sea Salt for a burst of spice to finish. This quick and easy recipe ensures you can enjoy a bowl of spicy Dan Dan noodles at home, perfect for busy weeknights or a satisfying treat anytime.
Prepare the sauce:
In a bowl, whisk together sesame paste, soy sauce, dark soy sauce, black vinegar, sugar, sesame oil, chili oil, and ground Sichuan pepper. Adjust seasoning if necessary.
Set aside.
Cook the pork:
Heat peanut oil in a wok or pan over medium heat. Add minced ginger and stir-fry until fragrant.
Add the ground pork and cook until browned, breaking it into small pieces.
Stir in the sui mi ya cai, Shaoxing wine, soy sauce, and Maldon Chilli Sea Salt. Cook for another 2–3 minutes until well combined and aromatic.
Set aside.
Cook the noodles and blanch the choy sum:
Bring a pot of water to boil.
Cook noodles according to package instructions. Blanch the choy sum for about 30 seconds until vibrant and tender.
Assemble the bowls:
Add the sauce to the bottom of the bowl. Add the cooked noodles and toss to coat them in the sauce thoroughly.
Top with the cooked pork mixture and blanched choy sum.
Sprinkle with crushed peanuts, spring onions, and a light dusting of Maldon Chilli Sea Salt for an extra kick. Add more chili oil if desired.
Serve immediately
Mix everything together in the bowl before eating for the best flavour and enjoy!
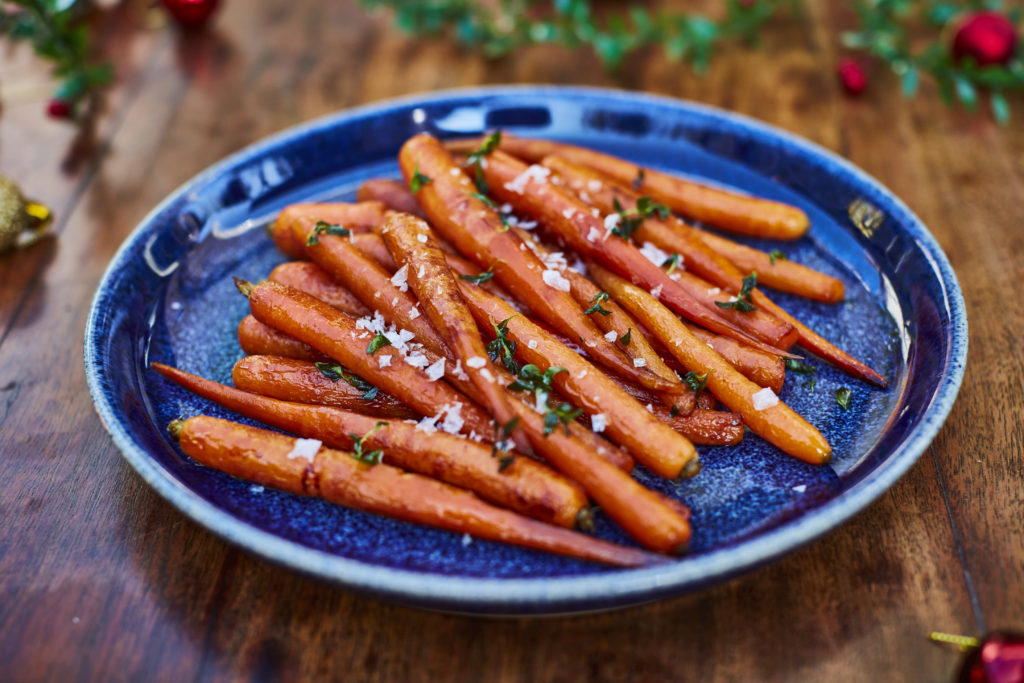
For a quick and delicious side dish, these caramelised air fryer carrots are a game-changer. Lightly crisp on the outside, tender on the inside, and packed with natural sweetness, they’re elevated by the signature crunch of Maldon Sea Salt flakes. This effortless recipe takes 15 minutes at 200°C, making it the perfect addition to weeknight meals or special occasions.
Pair these sweet and savoury carrots with roast meats for a classic combination, or toss them into warm salads for a burst of flavour and texture. The air fryer ensures perfectly caramelised edges with minimal effort, letting the natural flavours shine with just a hint of seasoning. Simple, quick, and incredibly satisfying!
How to air-fry carrots perfectly
Make sure the carrots are scrubbed clean and preheat the air fryer to 200c. There is a no need to peel the carrots or remove the tops.
Place the carrots into the basket and drizzle with the olive oil and honey, then place into the air fryer for 15 minutes until they are tender and starting to caramelize on the outside.
Remove from the air fryer and transfer onto a serving platter. Season with Maldon Sea Salt and cracked black pepper to taste and then scatter over a few thyme leaves before serving.
Recipes to make with carrots
Here are a few delicious carrot recipes to try out during the week. Each recipe brings out the natural sweetness of carrots, beautifully balance by the clean, crisp finish of Maldon Sea Salt flakes.
Transform your ordinary carrots with a beautiful lemon and honey glaze. When roasted, carrots give a delicious, sweet and earthy taste. When paired with lemon, it adds a tasty citrusy kick, whilst a generous smothering of honey enhances the natural sweetness of the carrots.
This recipe was created by Rukmini Iyer, a celebrated author and culinary innovator, known as the queen of fuss-free flavour. The dish focuses on roasting carrots with coriander seeds under foil whilst making a rich, silky butter bean mash to pair with the carrots and soak up any leftover juices.
This versatile chickpea salad is perfect as a min dish, a side, or even for meal prep. Combining the creaminess of chickpeas with the vibrant pomegranate seeds, butternut squash and crunchy baby carrots, this dish is a flavour-packed powerhouse! A generous pinch of Maldon Garlic Sea Salt flakes elevates the flavours, making it the perfect plant-based option for any day of the week.