


- Start by placing the pistachios into a food processor and blitzing until they are very finely ground. Tip these into a shallow bowl and set aside. Wipe out the excess from the food processor, but there is no need to clean it.
- Then add the walnuts to the food processor and pulse these until finely ground. Then add the medjool dates, flaxseed, chia seeds, Maldon Smoked Sea Salt, cocoa powder and orange zest and juice. Blitz this until everything is well ground and mixed to a thick paste.
- With slightly damp hands, roll out small golf ball sized balls of the mixture. Then roll each ball in the ground pistachios from earlier. Set these onto a tray and into the fridge for 15 minutes to firm up.
- Remove from the fridge when you are ready to enjoy them.
Topic: Desserts
Nothing says festive comfort quite like a Christmas Sticky Toffee Pudding – rich, indulgent, and full of seasonal flavour. This show-stopping dessert combines Medjool dates, Bramley apple, and a warming blend of mixed spice and nutmeg for a pudding that’s as aromatic as it is delicious. Sweetened with golden syrup and lifted by a hint of orange zest and brand, this recipe delivers a gooey centre, moist crumb, and that all-important skewer test perfection!
Perfect for your holiday table or Boxing Day feast, this pudding is a make-ahead marvel – simply reheat gently before serving. Whether you’re a seasoned bake or trying something new, this recipe guarantees festive magic with every spoonful.
How to Make Christmas Sticky Toffee Pudding with Salted Caramel Sauce
Step 1 – Prep the Basin and Oven
- Butter and line the base of a 1.5‑litre pudding basin with greaseproof paper.
- Heat oven to 140°C fan (160°C conventional / 320°F). Place the basin on a tray.
- Tip: Lining helps the sponge release cleanly.
Step 2 – Combine Dry Ingredients
- In a large bowl, whisk flour, mixed spice, grated nutmeg and 1 tsp Maldon Original Sea Salt.
Step 3 – Cream Butter and Sugar, Add Egg
- In a stand mixer or with electric whisks, beat butter and light brown sugar until soft and fluffy.
- Beat in eggs one at a time, mixing well after each.
- Tip: If the mixture looks split, beat in 1 tbsp of the flour.
Step 4 – Fold in Fruit and Flavourings
- Fold in dates, walnuts, grated Bramley apple, orange zest, then the golden syrup and brandy.
Step 5 – Add Dry Ingredients
- Gently fold in the dry ingredients until just combined. Do not overmix.
Step 6 – Bake
- Spoon mixture into the prepared basin, level the top.
- Bake 1 hr 20 min–1 hr 30 min, until a skewer inserted into the centre comes out with just a few moist crumbs.
- Cue: Top should be risen and springy; edges pull slightly from the sides.
Step 7 – Make the Salted Caramel Sauce
- Add sugar, butter, double cream and 1 tsp Maldon Original Sea Salt to a medium pan.
- Warm over low heat, stirring until the sugar dissolves.
- Increase heat and bubble 2–3 minutes until syrupy and golden.
Tip: For a silkier finish, don’t stir once boiling; swirl the pan.
Step 8 – Serve
- Turn out the pudding, pour over warm salted caramel sauce and finish with a pinch of Maldon flakes for sparkle.
Tips & FAQs
Tips
- For extra moisture, don’t overbake—use the skewer cue (few crumbs).
- Medjool dates give a plush texture; if using drier dates, briefly soak in hot water, then drain.
- Alcohol‑free: swap brandy for orange juice or apple juice.
- Nut‑free: omit walnuts and add 50g extra dates.
- Make‑ahead: bake a day ahead, cool, cover and reheat; keep sauce separate until serving.
FAQs
- How long to cook sticky toffee pudding?
- At 140°C fan (160°C conventional / 320°F), bake for 1 hr 20–30 min until a skewer comes out with a few moist crumbs.
- Can you make sticky toffee pudding ahead of time?
- Yes. Bake, cool, and refrigerate for up to 3 days. Reheat slices at 160°C for 10–15 min or microwave 30–45 sec; warm the sauce gently.
- Can you freeze sticky toffee pudding?
- Freeze the baked pudding (without sauce) well‑wrapped for up to 3 months. Thaw overnight in the fridge, reheat as above, and add freshly warmed sauce.
- Why is my caramel sauce grainy?
- Ensure sugar fully dissolves before boiling. Once bubbling, avoid stirring; swirl the pan and remove from heat as soon as it’s glossy and thickened.
Storage & Reheating
- Fridge: Pudding up to 3 days; sauce in a sealed jar up to 5 days.
- Reheat: Oven 160°C for 10–15 min (cover loosely); microwave individual slices 30–45 sec. Warm sauce gently; if too thick, loosen with a splash of cream.
Nothing says Christmas quite like a tray of Spiced Orange Mince Pies, their buttery shortcrust pastry baked to flaky, crisp edges and dusted with a whisper of icing sugar. These festive treats combine sweet citrus and warm spice with a hint of grated apple for extra juiciness, all tucked beneath star lids or elegant diamond lids for that classic holiday look. A pinch of Maldon Smoked Sea Salt flakes creates a subtle depth that balances the sweetness beautifully.
You can serve these warm with brandy butter or brandy cream. These pies are a make-ahead marvel – they freeze and reheat like a dream, making them ideal for stress-free entertaining. Glossy, spiced and utterly irresistible, they’re the ultimate festive treat.
How to Make Spiced Orange Mince Pies
Step 1 – Make and Chill the Pastry
- In a processor, pulse flour, icing sugar and Maldon Original Sea Salt to combine.
- Add butter; pulse to fine breadcrumbs.
- Add egg and ice water; pulse just until the dough clumps.
- Shape into a disc, wrap and chill 1 hour.
- By hand: rub butter into dry ingredients, then “cut in” egg and water with a knife; bring together gently and chill.
Step 2 – Prepare Cases and Lids
- Roll pastry on a lightly floured surface to pound‑coin thickness (≈3 mm).
- Cut 12 rounds slightly larger than the bun‑tin holes; press in gently.
- Cut lids (smaller rounds, stars, or a Maldon diamond).
Step 3 – Mix the Filling
In a bowl, combine mincemeat, grated apple, orange zest and Maldon Smoked Sea Salt.
Step 4 – Fill and Seal
- Spoon a heaped teaspoon of filling into each case.
- Brush lid undersides with egg; position and press edges to seal. Chill 30 minutes.
Step 5 – Bake
- Heat oven to 170°C fan (190°C conventional / 375°F).
- Brush tops with egg, sprinkle with demerara; bake 25–30 minutes until golden brown and crisp.
Step 6 – Cool and Serve
- Cool 10 minutes in the tin, then transfer to a rack. Serve warm with brandy butter or brandy cream; dust with icing sugar if you like.
Tips & FAQs
Tips
- Keep everything cold for flaky pastry; chill twice to prevent shrinkage.
- Don’t overfill—leave a small headspace to avoid leaks.
- For extra citrus, add 1–2 tsp orange juice to the filling; if mincemeat is very wet, stir in 1–2 tsp fine breadcrumbs.
- Prevent sticking by lightly greasing or using a non‑stick bun tin.
FAQs
- How long to bake mince pies?
- 25–30 minutes at 170°C fan (190°C / 375°F) until the pastry is golden and crisp.
- Can you freeze mince pies?
- Yes. Freeze unbaked, assembled pies on a tray, then bag for up to 3 months; bake from frozen at the same temperature for 28–32 minutes. Or freeze baked pies and reheat 8–10 minutes.
- Can I make mince pies ahead?
- Make pastry up to 2 days ahead; store chilled. Assembled pies can be chilled 24 hours before baking. Baked pies keep 3–4 days in an airtight tin.
- Are mince pies vegetarian?
- Use vegetarian mincemeat (made with vegetable suet) and serve with your preferred cream or dairy‑free alternative.
Serving Suggestions
- Serve warm with brandy butter, brandy cream, clotted cream or vanilla ice cream.
- Finish with a light dusting of icing sugar and a pinch of Maldon Smoked Sea Salt flakes for a sweet‑salty contrast.
- Add to festive dessert boards with clementines and chocolate truffles.
Storage & Reheating
- Room temperature: Store baked pies in an airtight tin up to 3–4 days.
- Fridge: Up to 5 days if you prefer; rewarm before serving.
- Reheat: 160°C fan (180°C / 350°F) for 6–8 minutes until just warm and crisp.
- Freeze: See FAQs; always reheat from chilled/frozen until piping hot.
Baked These Already?
Rate the recipe and share your tips in the comments. For more Christmas baking ideas, browse our festive collection.
Recipe create by Romy Gill
This Diwali, elevate your festive baking with a bold twist on tradition – Romy Gill’s savoury shortbreads infused with fragrant curry leaves and earthy nigella seeds. These buttery bites are delicately seasoned with a pinch of Maldon Sea Salt flakes, adding a clean finish that enhances every flavour.
Inspired by the vibrant spices of Indian kitchens and the warmth of celebration, Romy’s recipe brings together East and West in a beautifully balanced treat. Perfect for gifting, sharing, or simply savouring with a cup of chai as the diyas glow.
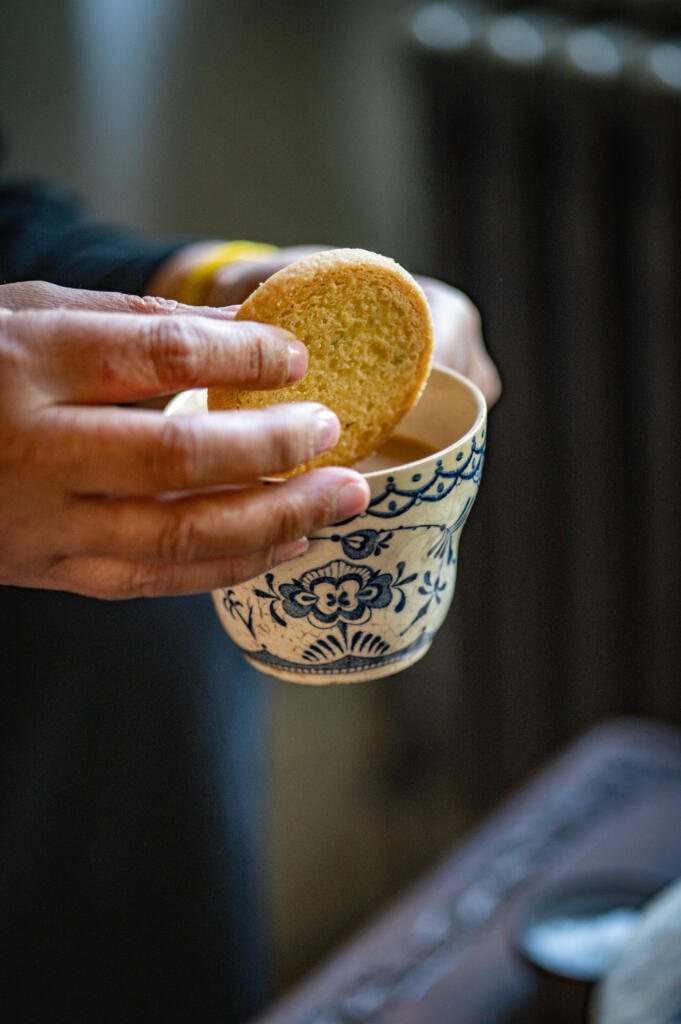
How To Make Shortbread with Curry Leaves and Nigella Seeds
- Heat oil in a pan, once hot add the curry leaves,. Once they crisp up, remove from the pan and keep aside.
- Beat the butter and the sugar together is mixing bowl until smooth.
- Stir in the flour, Maldon Sea Salt flakes, nigella seeds and the fried curry leaves mix well. Once everything has combined well, knead the dough just enough so that the mixture comes together into a smooth ball of dough.
- Sprinkle the flour on a clean surface, use a rolling pin to gently roll out. Once it is rolled out enough, cut into round circles and place onto a baking tray lined with the baking paper. Sprinkle with caster sugar and chill in the fridge for 15 minutes.
- Pre-heat the oven 170 degrees. Bake in the oven for 15 minutes, and then turn the tray and cook for another 10 minutes or until pale golden brown. Set aside to cool on a wire rack.
Ed Cudlipp, also known as ‘Cud Cooks’, brings pure indulgence to the baking tin with his Maldon-Salted Chocolate Fudge Brownies – a rich, gooey recipe that celebrates chocolate in all its forms. Packed with generous chunks of dark chocolate and fudge , and finished with the unmistakable crunch of Maldon Sea Salt flakes, these brownies strike the perfect balance between sweet and savoury. It’s the kind of treat that turns a simple square into a decadent moment, ideal for sharing with friends or savouring all to yourself.
Here is how to make the brownies…
- Preheat the oven to 180 °C (160 °C fan).
- Line a 20cm square tin with parchment paper, leaving an overhang so the brownies can be lifted out easily.
- In a heatproof bowl, combine the butter and chocolate chips. Melt gently, either in short bursts in the microwaves or over a bain-marie, until smooth.
- Stir in the brown sugar into the melted chocolate and butter. Whisk in the eggs and vanilla until glossy and well combined.
- Sift together flour and cocoa powder.
- Fold gently unto the chocolate mixture until just combined.
- Add the chopped dark chocolate and fudge chunks, folded them through so they’re evenly distributed.
- Sprinkle a small pinch of Maldon Sea Salt flakes into the batter and fold gently.
- Pour the batter into the prepared tin, and smooth the surface.
- Bake for 30 minutes, until the top is set with a shiny crust and the centre is still soft.
- Leave the brownies to cool in the tin for 10 minutes, top with Maldon Sea Salt and lift out.
- Allow to cool for at least 20 minutes before slicing into squares.
- Serve and enjoy.
Tip:
These brownies are best enjoyed warm or at room temperature. Rich, gooey, and finished with that unmistakable Maldon crunch.
Pairing suggestions:
- Ice cream – The cold, creamy texture contrasts with the warm, gooey brownie.
- Granola – The warming, nutty flavour pairs well with the sweet chocolate, whilst also providing a nice crunch to the soft brownie.
- Fresh berries (raspberries, strawberries) – Their tartness cuts through the sweetness and adds brightness.
Tag @cud_cooks on Instagram when you make them – he’d love to see your creations.
- Preheat the oven to 170C fan.
- Roll the pastry to the thickness of a pound coin and drape into a 23cm fluted tart tin. Gently prick the base all over with a fork. Cover the pastry with parchment paper and fill the tin with baking beans. Place the tin on a baking tray (this will make getting the tin in and out of the oven easier).
- Bake for 20 minutes then remove the baking beans and parchment paper and return to the oven for 10 minutes until the pastry is dry to the touch and very lightly golden.
- For the filling, mix the pumpkin puree, sugar, spices and Maldon Smoked Sea Salt. Add the eggs and whisk until incorporated then whisk in the cream.
- Pour the filling into the blind baked pastry and bake for 35-40 minutes until the filling is set. Leave to cool completely at room temperature then chill until ready to serve.
- Serve with softly whipped cream and an extra sprinkle of Maldon Smoked Sea Salt.
This isn’t just a brownie. It’s a love letter to chocolate.
There are brownies – and then there are Caitlin Carrick-Varty brownies…Known to her loyal followers as @cake.onmyface, Caitlin doesn’t just bake; she creates flavour sensations. Her Chocolate Brownies with Maldon Sea Salt are a masterclass in contrasts: they look like the picture of classic fudgy indulgence, they smell like pure cocoa bliss, yet the moment they touch your tongue, they melt in your mouth – like a decadent chocolate mousse.
Making them is as delicious as eating them: silky pools of melted chocolate folding into sugar, eggs and butter in slow, glossy swirls; batter pouring into the tin; a final, confident sprinkling of Maldon Sea Salt flakes over the top. The sea salt flakes strikes first – bright and sharp against the rich bitterness – before melting into a sweetness that lingers. Caitlin likes hers dark, leaning into that bittersweet edge, but if your heart beats for milder chocolate, you can swap 80g of the dark chocolate for milk. Whatever you do, don’t skip the Maldon Sea Salt flakes. It’s the soul of this brownie.
How to make Chocolate Brownies with Maldon Sea Salt
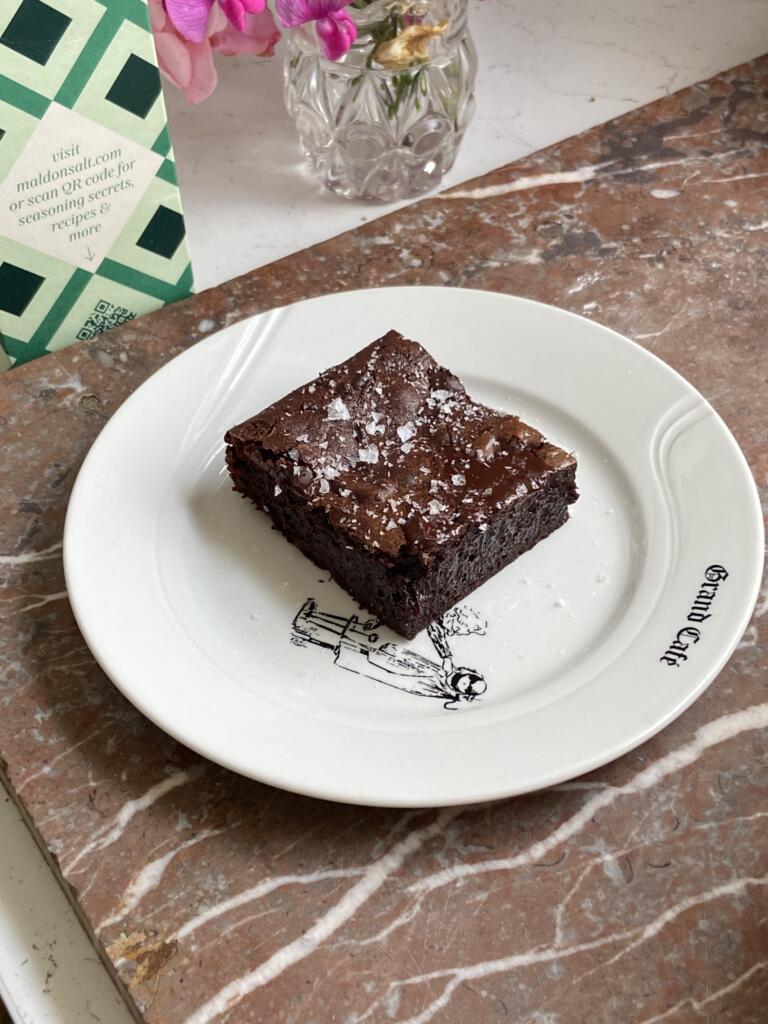
- Grease and line a 19cm / 7.5-inch square tin. Preheat the oven to 180/160 fan.
- Roughly chop the extra 20g dark chocolate, if you are using, then set aside.
- Chop the (180g) chocolate and butter roughly into chunks, then place in a large glass or metal bowl. Fill a small saucepan with a little water. Set the bowl of chocolate over the saucepan, making sure the bottom of the bowl does not come into direct contact with the water when it rests over the pan. Heat the pan on low/medium, stirring the chocolate mixture occasionally, to help it melt.
- Meanwhile, whisk the sugar, eggs, Maldon Sea Salt flakes, and vanilla in a large bowl. When the egg mixture is a bit frothy and lighter in colour, pour in the melted chocolate and butter – whisk just until you feel the glossy mixture become thicker.
- Now sift the flour and cocoa powder into the eggs and chocolate. Whisk until you feel the batter become thicker again, then immediately pour the batter into the prepared tin. Top with the reserved chopped chocolate and a generous pinch of Maldon Sea Salt flakes. Bake for 20 minutes, or until the top of the brownies are set but there is a wobble underneath.
- Allow to cool in the fridge before slicing. If you can wait, these brownies do well left in the fridge covered tightly with clingfilm overnight.
Make weekend brunch special with brioche French toast piled high with lemony ricotta and juicy berries. Thick slices are briefly dried, soaked in a vanilla custard and pan‑fried in butter for golden edges and a fluffy centre. A final pinch of Maldon Original Sea Salt lifts the sweetness, while maple syrup brings everything together. This easy French toast recipe is quick to master and perfect for sharing.
How to Make French Toast with Ricotta and Berries
Step 1 – Dry the Bread
- Lightly toast slices for 1–2 minutes, or bake briefly in a low oven to dry. Day-old / stale brioche or challah works best.
- Aim to dehydrate so the bread absorbs custard; avoid taking on colour.
Step 2 – Make the Custard & Soak
- In a shallow dish, whisk eggs, milk, vanilla and a pinch of Maldon Original Sea Salt.
- Dip two slices at a time, turning to coat. Soak 20–30 seconds per side until evenly saturated but not collapsing.
Step 3 – Cook the French Toast
- Heat a large non‑stick frying pan over medium heat. Add half the butter.
- When foaming, add soaked slices. Cook ~3 minutes per side until golden with lightly crisp edges.
- Add more butter as needed and repeat with remaining slices.
- Texture cue: outside golden and lightly crisp; centre custardy and set.
Step 4 – Assemble & Serve
- Plate the French toast. Top each with a spoonful of ricotta.
- Grate lemon zest over ricotta and sprinkle a tiny pinch of Maldon Original Sea Salt.
- Add fresh berries and finish with maple syrup. Best served warm.
Tips & FAQs
Tips
- Use thick‑cut brioche/challah (2–3cm) for the best custardy interior.
- Drying the bread prevents sogginess and allows maximum custard absorption.
- Keep heat at medium; too hot scorches the exterior before the centre sets.
- Wipe the pan between batches if butter begins to brown.
- A small pinch of Maldon Original Sea Salt in the custard and on top heightens sweetness and flavour contrast.
FAQs:
- What’s the best bread for French toast?
- Rich, sturdy loaves like brioche or challah hold their shape and soak evenly.
- How do I stop French toast from going soggy?
- Dry the bread first, don’t oversoak, and cook over medium heat until the centre is set.
- Can I make French toast ahead of time?
- Cook slices, cool on a rack, then reheat in a 180°C (350°F) oven for 6–8 minutes. Assemble with ricotta and berries just before serving.
- Can I bake French toast for a crowd?
- Yes. Arrange soaked slices on a buttered tray and bake at 190°C (375°F) for 12–15 minutes, flipping once.
- Can I use frozen berries?
- Yes. Thaw and drain well, or gently warm with a little lemon zest and maple syrup.
Serving Suggestions
- Add a quick berry compote (berries + lemon zest + a splash of maple) for extra sauciness.
- Swap ricotta for whipped mascarpone or Greek yogurt.
- Finish with toasted almonds or pistachios for crunch.
- Pair with crispy bacon or sausages for a sweet‑salty brunch plate.
- For a citrus twist, add orange zest to the custard.
Storage & Reheating
- Store cooked slices (undressed) in an airtight container in the fridge up to 3 days.
- Reheat on a wire rack over a tray at 180°C (350°F) for 6–8 minutes, or in a toaster until warm and crisp.
- Freeze cooked slices between sheets of parchment for up to 2 months; reheat from frozen at 190°C (375°F) for 10–12 minutes.
- Store ricotta and berries separately; assemble to serve.
Recipe by Lacey Ostermann
A Sweet-Savoury Twist!

When it comes to reimagining classics, Lacey is the master of this. Her Peach Crumble Focaccia is a perfect example – where the rustic soul of Italian bread meets the delicate sweetness of summer peaches, all brought into a bold balance with a finishing touch of Maldon Sea Salt flakes. This isn’t just a dessert or bread – it’s a conversation starter, a seasonal centrepiece, and a love letter to texture and contrast.
Mix:
- Whisk together warm water, olive oil, honey (or sugar) and yeast. Every bread flour absorbs a different amount of water, so start with 390ml water and reserve the rest for later.
- Stir in bread flour and salt until well combined. Add in remaining water gradually to achieve a dough consistency similar to that shown in the video. Cover and rest at room temperature for 15 minutes.
Stretch & Fold and First Proof:
- Stretch & fold the dough. First, wet your hand (so the dough doesn’t stick) and then grab the dough at the 12 o’clock position in the bowl. Pull the dough upwards and then fold it down to the 6 o’clock position. Repeat this motion about 8-10 times around the bowl. The dough should tighten up a bit after performing the stretch & folds. Cover and rest at room temp for 15 minutes.
- Repeat the series of stretch & folds once more, cover and proof at room temperature for 1-1.5 hours or until the dough has nearly doubled in size.
Prepare the Cinnamon Filling / Topping:
- First, brown the butter. Melt the butter in a medium frying pan over a medium high heat and then turn it to a simmer, stirring every 30 seconds or so to ensure the butter isn’t burning on the base of the pan. You’ll hear the bubbles from the butter sizzle as the water evaporates off of it but the sizzling will stop as the butter starts to foam up. Once this happens, look at the colour of the foam…you’ll start to notice lightly browned specks in the butter. Give the butter another good stir and remove from the heat. The butter should be a lovely golden brown (not dark brown – be careful as it can burn quickly!).
- Once the butter is browned, stir in the brown sugar, cinnamon, a pinch of Maldon Sea Salt and vanilla until well combined.
Transfer to Tray and Second Proof:
- Prepare a metal baking tray (see dimensions above in equipment list) with non stick parchment paper and 2 tablespoons of melted butter. I put a tiny bit of oil underneath the paper so it stays in place on the tray.
- Tip the dough into the prepared tray and gently stretch the dough into an even layer so it reaches the edges of the tray. Spread half of the cinnamon filling all over the dough in an even layer and then fold one side of the dough towards the middle. Repeat with the other side, folding it over the top as if you are folding a piece of paper into thirds (it will look like a large burrito).Rotate the dough so its long side aligns with the long side of the tray, then flip it over so the seams from the folding are at the bottom and the top is smooth.
- Cover the dough with a piece of oiled parchment paper and leave it to proof at room temperature for 1-1.5 hours.
Prepare the Peaches and Crumble

- Cube 2/3 of the peaches and cut the remaining peach into attractive slices. Set aside.
- Mix together the flour and both types of sugar and slowly drizzle in the melted butter. Stir with a spoon until all of the flour/sugar has absorbed the butter. It will be a crumbly consistency. Store in the fridge until ready to use.
Dimple and Bake

- Preheat oven to 220C/430F and move the baking rack to the lowest position.
- Just before dimpling the dough, coat the chopped peaches with the remaining cinnamon filling in the frying pan. If the butter has solidified, you may need to reheat it briefly to make coating the peaches easier. Spread the cinnamon coated peaches evenly over the dough and dimple them in. Sprinkle the crumble topping evenly over the dough. Coat the peach slices in any
extra cinnamon filling that remains in the pan and then push them into the dough. Finish with a sprinkle of Maldon Sea Salt Flakes – the perfect delicate hit of salt to balance all the sweet! - Bake on the lowest rack of the oven for 22-26 minutes or until the crumble is golden brown and the peaches are starting to caramelise. Remove from baking tray and transfer to a cooling rack.
- Best enjoyed the day of baking but can be stored in a large plastic freezer bag or in an airtight container for up to two days. To bring back to life, wrap a portion in foil and bake at 220C/400Ffor 15 minutes or until heated through. Peel back the foil on top for the last few minutes to crisp up the crumble topping. Enjoy!
Celebrate late‑season fruit with this plum and blackberry crumble: juicy, tangy fruit baked beneath a buttery oat topping scented with cinnamon and a pinch of Maldon Original Sea Salt. The salt sharpens the fruit and adds balance to the sweet, crunchy crumbs. This easy fruit crumble comes together in minutes and bakes to a golden, bubbling finish — serve warm with ice cream, whipped cream or thick yogurt.
How To Make Blackberry and Plum Crumble (Quick Steps)
- Toss plums and blackberries with lemon and sugar to taste.
- Rub butter into flour, cinnamon and Maldon Sea Salt; add oats and Demerara.
- Scatter over fruit and bake at 180°C fan for 30 minutes until golden and bubbling.
- Rest briefly, then serve warm with ice cream or yogurt.
How To Make Blackberry & Plum Crumble (Detailed Version)
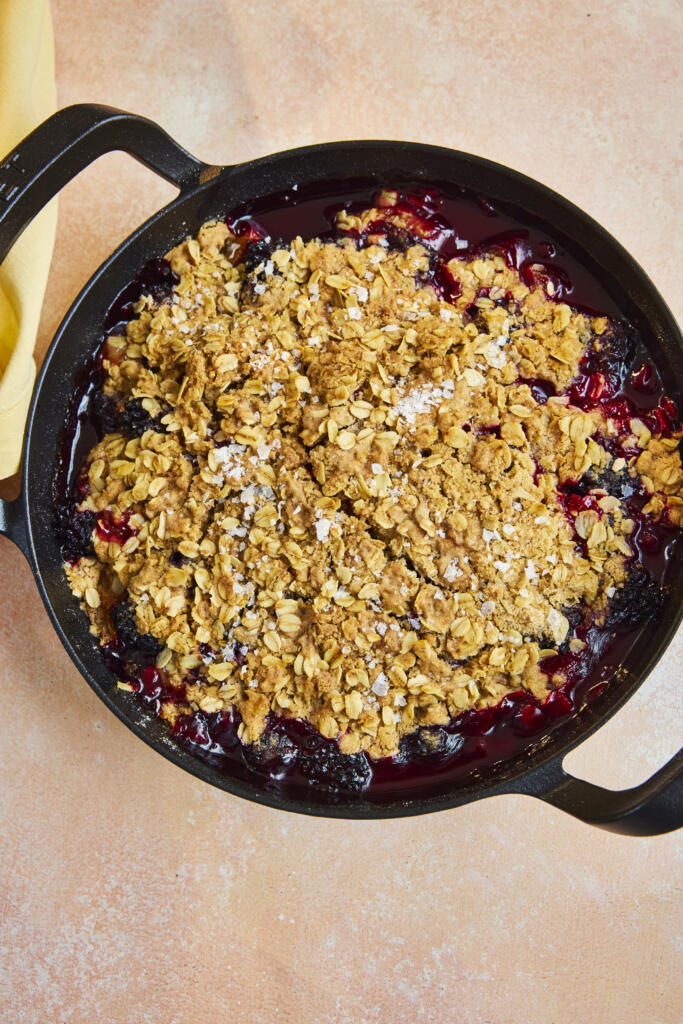
Step 1 – Heat the Oven & Prep Fruit
- Preheat oven to 180°C fan (200°C conventional / 400°F).
- Add plums and blackberries to a skillet or ovenproof dish.
- Taste the fruit; add a pinch of sugar only if needed. Squeeze over lemon juice and toss.
Step 2 – Make the Oat Crumble
- In a large bowl, mix flour, cinnamon and Maldon Original Sea Salt.
- Add butter cubes; toss to coat. Rub in with fingertips to fine breadcrumbs.
- Stir in oats and Demerara sugar. The texture should resemble a mix of fin crumbs and small clumps for crunch.
Step 3 – Assemble & Bake
- Scatter the crumble evenly over the fruit — don’t press down.
- Bake 30 minutes until the top is crisp and golden and the fruit is bubbling at the edges.
Step 4 – Serve
- Rest 5–10 minutes to let juices thicken slightly.
- Spoon into bowls and serve with ice cream, whipped cream or yogurt.
- Optional: finish with a tiny pinch of Maldon Sea Salt flakes for sweet‑salty contrast.
- Best served warm.
Tips & FAQs:
Tips
- Sweetness control: taste fruit first; late‑summer plums can be very sweet, so add sugar only as needed.
- Extra crunch: chill the crumble 10 minutes before baking to keep butter cold and crumbs craggy.
- Even browning: bake on the middle rack; rotate the dish after 20 minutes if browning unevenly.
- Juicy but set: letting the crumble stand for 10 minutes post‑bake helps juices thicken.
FAQs
- What’s the best fruit mix for a crumble?
- Tart blackberries balance sweet plums. You can swap in apples, pears or nectarines; aim for a tart‑sweet balance.
- Can I use frozen fruit?
- Yes. Bake from frozen but toss fruit with 1–2 tsp flour or cornflour to absorb extra juices and add 5–10 minutes to the bake.
- Can I make crumble ahead?
- Assemble fruit and topping separately up to 24 hours in the fridge. Top and bake just before serving. The raw crumble topping also freezes well.
- How do I keep the topping crunchy?
- Keep butter cold, don’t over‑mix, and avoid pressing the topping down. If needed, finish with 2–3 minutes under a hot grill/broiler.
- Can I make it dairy‑free or vegan?
- Use a plant‑based butter with similar fat content. Check that your sugar suits your dietary needs.
Serving Suggestions
- Classic: serve warm with a scoop of homemade ice cream..
- Lighter: thick Greek yogurt with a drizzle of honey.
- Extra texture: scatter toasted chopped pistachios or almonds before serving.
- Flavour twist: add orange zest to the fruit or swap cinnamon for mixed spice as we move into autumn.
Storage & Reheating
- Store leftovers covered in the fridge for up to 3 days.
- Reheat in a 170°C (340°F) oven for 12–15 minutes until hot and topping re‑crisped; or air fry at 170°C for 6–8 minutes.
- Freeze: cool completely, wrap tightly and freeze up to 2 months. Reheat from frozen at 170°C until piping hot (cover with foil if over‑browning).