- With a brush, begin ‘painting’ the wine glass on the side with sugar syrup. Sprinkle Maldon Sea Salt over the sugar syrup.
- Fill wine glass with cubed ice.
- Build drink in order of ingredients.
- Briefly stir to mix ingredients.
- Sip slowly and enjoy!
Article Type: Recipe
We’ve teamed up with Chef Romy Gill MBE to share some of our favourite recipes from her latest cookbook, Romy Gill’s India.
In this cookbook, Romy shares over 70 recipes which are inspired by her beloved family, with flavours that define her childhood. From iconic dishes like Butter Chicken, which is a staple in every Indian home, to the delicious simplicity of a Masala Omelette, Romy invites cooks to savour the authentic tastes of India without a fuss! The instructions for each dish are easy to follow along with readily available ingredients. Every dish is designed with the home cook in mind, ensuring that your journey into Indian cuisine is as delightful as it is delicious!
Today we’re sharing Romy’s delicious beetroot croquettes, also known as chaap!
How to make beetroot croquettes
These beetroot croquettes (or chaap), are succulent and flavourful. They have the perfect balance of colour, texture and taste. The distinctive earth flavour of the beetroot combines beautifully with the potato, carrots and spices. It can be enjoyed as an appetiser or as a side dish.
- Place the potato in a saucepan (there is no need to peel it), cover with hot water and bring to a boil. Cook the potato until the flesh is soft, then remove from the heat and leave to cool.
- When the potato is cool enough to handle, remove the skin. Grate (shred) the potato into a bowl. Grate the beetroot (wear rubber gloves to prevent staining your hands) into a separate bowl, then grate the carrots into a third bowl and set aside.
- Place all the whole spices in a frying pan (skillet) over a low heat and toast them until they start to release their aromas. Remove from the heat and leave the spices to cool before grinding them to a powder with a pestle and mortar.
- Heat the mustard oil in a pan over a medium heat. Once the oil is hot, add the peanuts and cook for1 minute. Add the ginger and chillies, cook for 1minute, then add the grated beetroot and carrot and mix. Cover the pan with a lid and cook for 5 minutes. Add the potatoes, all the toasted spices and the Maldon Sea Salt, mix well, then cook for a further few minutes. Remove from the heat and leave the mixture to cool before rolling it into 10 equal-sized cylindrical shapes.
- Whisk together the cornflour and plain flour with30 ml (1 Fl oz/2 tablespoons) water in a bowl. Place the breadcrumbs in a shallow dish. Heat the frying oil in a deep pan to 170°C/340°F. Drop in a tiny bit of batter; if it floats, the oil is hot enough. Dip one of the cylinders into the batter, then roll it in the breadcrumbs to coat it on all sides. Deep fry until golden and crispy. Repeat with all of the cylinders, then serve with your favourite chutney.
Where to buy Romy Gill’s India: Recipes from Home

You can find where to purchase Romy’s NEW cookbook here and start being creative with food and flavours in the comfort of your kitchen.
Make sure you have your Maldon Salt ready for these recipes! If you are running out, please feel free to browse on our Where to Buy Page to find your nearest store in which stocks our beloved Maldon Salt.
Lastly, we LOVE seeing your creations – please tag us on Instagram using the #maldonsalt so we can share your own take on Romy’s recipes!
We’ve teamed up with Chef Romy Gill MBE to share some of our favourite recipes from her latest cookbook, Romy Gill’s India.
In this cookbook, Romy shares over 70 recipes which are inspired by her beloved family, with flavours that define her childhood. From iconic dishes like Butter Chicken, which is a staple in every Indian home, to the delicious simplicity of a Masala Omelette, Romy invites cooks to savour the authentic tastes of India without a fuss! The instructions for each dish are easy to follow along with readily available ingredients. Every dish is designed with the home cook in mind, ensuring that your journey into Indian cuisine is as delightful as it is delicious!
Today we’re sharing Romy’s delicious Masala Crab, also known as Kekada Masala.
How to make masala crab
Simi, Romy’s childhood friend, and her share a bond rooted in the industrial New Town in Burnpur. Their common passions, particularly our love for culinary adventures, has bonded us forever. Countless college escapades involved outings to watch movies, then occasionally getting caught. The consequences were often chores piled up at home, but the shared laughter and memories made it worthwhile. It was during one of these movie escapades that she stumbled upon a scene portraying the joy of savouring crabs. Intrigued and captivated, the desire to taste the delicacy lingered in Romy’s mind. The opportunity finally presented itself when she had crab in England and then with Simi’s roots from Kerela she crafted the recipe infusing it with the flavours that complement the crab meat. This dish became the most loved starter in her restaurant. The creamy coconut milk, the pungent mustard seeds, the moreish curry leaves and the sourness of the tamarind elevates the dish.
- Heat the oil in a pan over a high heat. Once the oil is hot, add the mustard seeds and curry leaves. As soon as the mustard seeds start to pop, add the garlic and cook for30 seconds, then add the onion and cook for 3–4 minutes.
- Reduce the heat to medium then add the coconut and cook for 1 minute. Add the chilli powder, turmeric, ground coriander, Maldon Sea Salt, tamarind, sugar and coconut milk and cook, stirring, for a further 2 minutes.
- Add the crab meat, mix well and cook for 3 minutes, then serve immediately. Romy enjoys it on crispy toasted sourdough bread, but you can also serve it with rice or any Indian flatbreads of your choice.
Where to buy Romy Gill’s India: Recipes From Home
You can find where to purchase Romy’s NEW cookbook here and start being creative with food and flavours in the comfort of your kitchen.
Make sure you have your Maldon Salt ready for these recipes! If you are running out, please feel free to browse on our Where to Buy Page to find your nearest store in which stocks our beloved Maldon Salt.
Lastly, we LOVE seeing your creations – please tag us on Instagram using the #maldonsalt so we can share your own take on Romy’s recipes!
This pizza uses my aromatic nettle sourdough pizza dough and is best cooked in a Gozney Dome. There are few things as delicious as a woodfired pizza. This recipe was born in the dusty Valencian hills, I was walking with my wife, Sophie and our best friends when we came across a beautiful little village and sat down to eat at a weather beaten family restaurant. As the evening sun nestled in the surrounding trees we ate the most delicious honey, figs and goats cheese – accented with a mouth watering hit of chilli. Whenever I make this pizza I’m fixated by the bubbling brown butter and vibrant colours. Every bite takes me back to that little Spanish paradise.

It’s best to start the dough the day before for the best flavour but you can make it early in the morning if you run out of time. You will need a ripe sourdough starter but you could swap out with 3g of dried yeast if needed.
You will need your Gozney oven clean, enough fuel to keep her hot and the appropriate pizza peels – one for loading and one for turning. If you need some instruction on the basics then Gozney has a great YouTube channel that will help you.

Here is how to make the pizza…
- The day before, mix your dough. Mix the water, starter and oil by hand in a large bowl until combined. Add in the flour and mix again, leave covered for 15 minutes to fully hydrate then add in the salt and knead by hand for about 10 minutes until the dough becomes smooth. Add in the sieved nettles and knead until combined. Place into an oiled bowl, cover with a cloth and leave on the worktop. After 20 mins fold the dough and leave again for another 20 mins, repeat this two more times. Shape into four balls by dividing the dough and folding each piece in on itself. Place into an oiled tray, cover with cling film and place in the fridge overnight. Make sure the fridge is running at about 5C.
- Now for your spicy pizza party day! Heat up your Gozney dome with a small wood fire, move the fire to the right hand side, loosely wrap the garlic bulb in foil and roast off until soft and smokey, this should take about 20 minutes on the far left hand side of the oven. Remove and once cool, squeeze out the pulp and mix into the soft butter with a teaspoon of the Maldon Chilli Sea Salt. Taste and set aside at room temperature.
- Get the topping ready and laid out and run up your pizza oven to over 450C, making sure the base is at least 350C (I use an infrared thermometer to check). Remove the dough balls from the fridge for an hour, still covered.
- Clean off a smooth work surface and dust with the semolina flour. Dust the pizza balls with a little semolina, pick up a dough ball and place on the worktop with a good dusting of semolina. Gently and evenly push the dough out to a circle. Using both hands, stretch the dough out to a dinner plate size. Add two spoons of the chilli butter and evenly spread around the pizza. Top with the goats cheese, figs, Iberico ham and drizzle over with honey. Slide a pizza peel underneath the pizza and confidently slide into the oven, making sure there is a rolling flame from the wood fire. After about 30 seconds turn the pizza to give it an evenly cooked crust. Remove the pizza and place onto a cooling rack to harden up. Sprinkle over a little more Maldon Chilli Sea Salt and cut into 6 wedges.
- Best eaten with an ice cold glass of spanish beer in the Valencian hills, but then again – what isn’t?
- In a blender or food processor, combine the chopped strawberries, sugar, fresh lime juice, rum, Maldon Chilli Sea Salt and water.
- Blend the mixture until smooth and well combined.
- Pour the strawberry mixture into a shallow, freezer-safe dish or container.
- Place the dish in the freezer and let it freeze for about 2 hours, or until the mixture starts to firm up.
- Using a fork, scrape the frozen mixture towards the centre to create flaky ice crystals, keep scraping until you have a mound of shaved strawberry granita.
- Prepare the glasses to serve. Take a quarter of a lime and gently coat the edge of the glass with the juice. Place a generous amount of Maldon Chilli Sea Salt onto a plate along with the sugar and carefully dip the edge of the glass in it until you have an evenly coated rim.
- Spoon the strawberry granita into each glass.
- Garnish with fresh strawberry slices and mint.
We’ve teamed up with Tom Jackson to make a delicious Pizza Fritta Pasta Salad paired with artichokes, ricotta, mint and a cooked tomato dressing.
Tom’s first pizza fritta happened a couple of summers ago in Naples. Volcanically hot tomato sauce, marbled with ricotta, funky guanciale (cured pig cheek) and basil, all encased in a huge half-moon of charred, chewy Neapolitan dough. Unsurprisingly, Tom’s second (and third, fourth, etc.) pizza fritta also happened on that trip. The one Tom had with artichokes and olives was his favourite, and it kindly led him here. To keep things vegetarian, switch the ’nduja for harissa or chilli crisp (or, indeed, a plant-based ’nduja). To make it vegan, switch the ricotta for a plant-based variety or a spoonful or two of moutabal. This recipe makes more dressing than you’ll need, but you’ll be glad of it later!
Here is how to make a pizza fritta pasta salad
- Start by making the dressing. Off the heat, place the chunk of ’nduja, the basil sprig and the onion wedge in a medium-sized saucepan then tip the crushed tomatoes on top. Place over a high heat, then, once simmering, reduce the heat to low–medium. Cook for 20-30 minutes, stirring occasionally, by which time the tomatoes and ‘nduja should have broken down. Remove from the heat and leave to cool to room temperature, discarding the basil and onion. Transfer the sauce to a bowl and stir through the datterini tomatoes. Add the vinegar, olive oil and a good pinch of Maldon Chilli Sea Salt. Check for balance, then set aside to marinate. This ‘dressing’ keeps well for up to 3 days in the fridge and is great with lots of other things (just bring back up to room temperature before use).
- Cook the pasta in plenty of salty boiling water until al dente (2 minutes less than the total packet instructions), then drain. Rinse briefly, until the pasta is just warm, then drain again.
- Gently toss the pasta with roughly 200g (7oz) of your tomato dressing, then add the artichokes, olives, pine nuts and tear in the mint leaves. Toss again, then add the ricotta and gently marble through the dressed pasta (don’t overmix). If you like, finish with more ricotta, a pinch of Maldon Chilli Sea Salt and a drizzle of olive oil.
This recipe was created by Caitlin Carrick-Varty (@cake.onmyface), who is an artist, baker and storyteller. She wrote a blog, Cake On My face, of baking recipes in letters to her brother from 2018-2024. Now, she is writing about what she is baking in her kitchen on her substack.
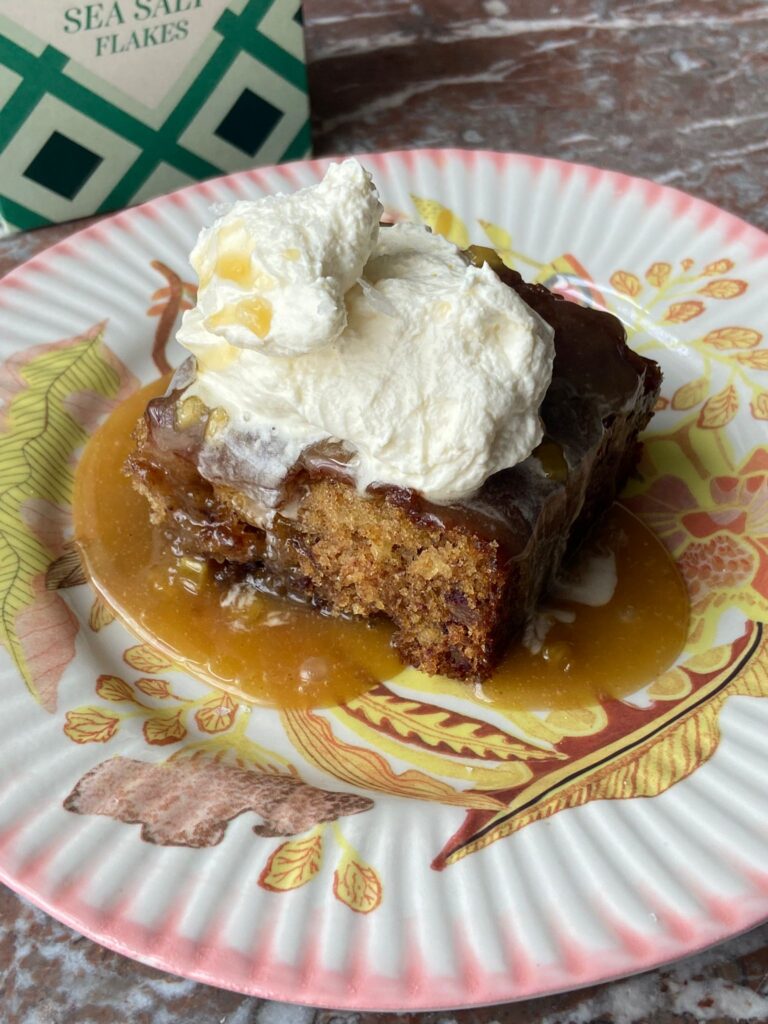
We’ve teamed up with Caitlin to make a delicious salted date cake, paired with a delicious ginger toffee sauce.
This cake is a meeting of salted caramel, sticky toffee pudding, and the fluffy, damp kind of ginger cake from English lineage. There is nothing – actually nothing – more joyful than toffee sauce and warm, dark cake. Sea salt is key in this, amongst all that sweetness, and helps the small amount of cardamom sing through. Caitlin adds ginger too, for a little heat under the salted and caramelised sauce – she’s got a tub of the stuff in her fridge and knowing that, makes her feel slightly more prepared for life!
Here is how to make her salted date cake with ginger toffee sauce
- Preheat the oven to 180 / 160 fan.
- Add the dates, water, and bicarb to a bowl and stir once or twice, cover with a plate and set aside.
- Grease and line, with baking paper, a 9-inch square baking tin. You can use a slightly different size tin, just keep an eye on the baking time.
- In a large bowl, cream the butter, sugar and vanilla extract until the mix is lighter and fluffed up around the sides of the bowl. A wooden spoon will work, electric beaters will be quicker. Beat in one egg until fully combined, then the other.
- Take the bowl of dates and use a fork to mash them up a bit in the water. Pour the whole lot into the butter mixer, along with the flour, baking powder, Maldon salt, and cardamom. Mix until a liquid batter forms.
- Pour into the prepared tin and bake for 30 mins, or until a skewer inserted into the cake comes out with just a few crumbs attached.
- When the cake is out of the oven you can whip up the sauce, it’s quick-quick. Melt all the sauce ingredients, except the cream and ground ginger, in a saucepan over medium heat. Stir with a spatula to help it on its way. Allow to simmer for 2 mins, this is to cook the ginger and get a darker colour to the sauce. Take the pan off the heat, stir in the cream and ground ginger, and put back on the heat to bubble for a further minute or so.
- Prick the cake all over with a toothpick or skewer, and pour over about a third of the hot sauce. If you can wait, allow the cake to sit like this, in the tin, for 15 mins.
- Slice into big wedges and serve with double cream if you want, whipped or poured straight out the tub, and some of the extra sauce for good measure.
Notes – You can make the sauce in advance and heat up as and when you need it (what a sentence). Cool completely at room temp before storing in an airtight container in the fridge for up to 3 days.
Indulge in the irresistible allure of homemade tomato and pesto focaccia, a bread that not only delights the senses but also brings people together. This recipe elevates the classic focaccia with the exquisite touch of Kalahari Desert Salt, Selected by Maldon, known for its pure, delicate flavour. Ideal for tearing and sharing, this focaccia will make any gathering memorable, as its perfectly balanced taste and delightful texture invite guests to savour every bite.
The magic of this focaccia lies in the Kalahari Desert Salt, which is carefully integrated into the dough mixture. This exceptional salt enhances the natural flavours of the ingredients, creating a robust and well-rounded taste profile. The fresh pesto, made from vibrant basil leaves, toasted pine nuts, finely grated parmesan cheese, high-quality olive oil, zesty lemon, and aromatic garlic cloves, is further enriched by a pinch of Kalahari Desert Salt. This combination ensures that every piece of focaccia is bursting with flavor, making it the perfect centerpiece for any occasion.
How to a tomato and pesto focaccia
- In a large bowl, combine lukewarm water, olive oil, honey, and yeast. Whisk these together until well blended.
- Add the bread flour and mix using a large spoon until the mixture is thoroughly combined and hydrated. Then, incorporate the ground Kalahari Desert Salt, Selected by Maldon. Scrape down the sides of the bowl, cover, and let it rest for 30 minutes – 1 hr until doubled in size.
- Perform stretch and fold technique with wet hands every 30 minutes, repeating this process three times.
- After the final fold, leave the dough to proof for 1 hour at room temperature, or in the fridge overnight.
- Transfer the dough to an oiled baking tray, give it a final fold and allow it to proof for an additional 1 – 2 hours until doubled in size. If you proved it in the fridge overnight this may take an extra hour.
- Preheat the oven to 220°C (390°F).
- Using oiled fingers, create dimples in the dough, press in the cherry tomato halves, and drizzle the entire surface with olive oil. Sprinkle with the Kalahari Desert Salt, Selected by Maldon.
- Bake for 20-25 minutes or until the bread is beautifully golden brown.
- While the bread bakes, prepare the pesto. In a food processor, blend together fresh basil leaves, toasted pine nuts, Parmesan cheese, olive oil, lemon zest and juice, garlic cloves, and a pinch of Kalahari Desert Salt until smooth and well combined.
- Drizzle the freshly baked bread with the fragrant homemade pesto.
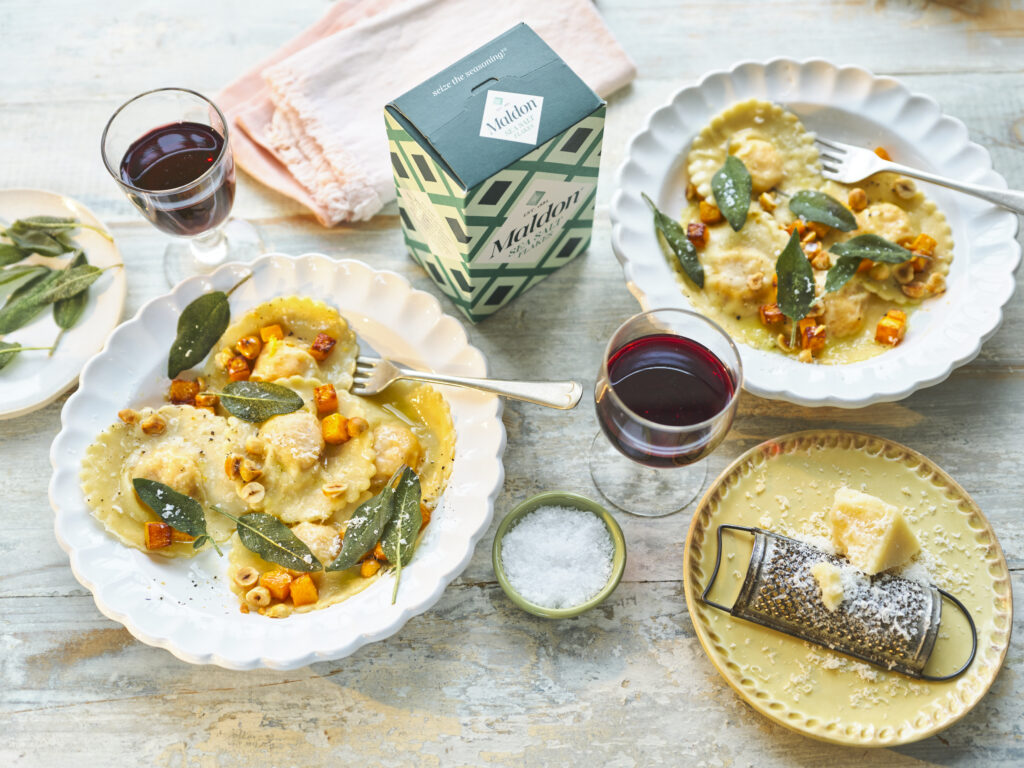
Introducing a delightful homemade butternut squash ravioli recipe that marries the sweet, nutty flavours of butternut squash with the rich, flaky goodness of Maldon Sea Salt flakes. This exquisite dish is elevated by a luscious brown butter sage sauce that compliments the creamy filling perfectly. The butternut squash filling, seasoned with salt and pepper, creates a smooth and and flavourful centre for the ravioli. We used a potato masher to puree the ingredients, but you can also use a food processor for a faster result!
Here are a few points that you need to remember when making a homemade butternut squash ravioli…
- When roasting your squash, make sure to drizzle generously with olive oil and cook until beautifully tender. You then blend with a selection of creamy cheeses, a pinch of Maldon Sea Salt, pepper and a generous helping of nutmeg.
- When rolling out the pasta dough using a machine, always start at the widest setting and gradually making it thinner. Lay the dough on a flat surface, placing spoonful’s of the delicious filling evenly apart, and cover with another sheet of dough. Use a ravioli cutter to assemble the ravioli, ensuring each piece is well-sealed to prevent leakage during cooking. If you don’t have a ravioli cutter, you can use a glass instead to cut out equal-sized circles. Take your filling and place into the centre of each cut-out circle, making sure there is space around the edge to close the ravioli by crimping. To save time, you can prepare the dough and filling in advance, storing them in plastic wrap in the refrigerator.
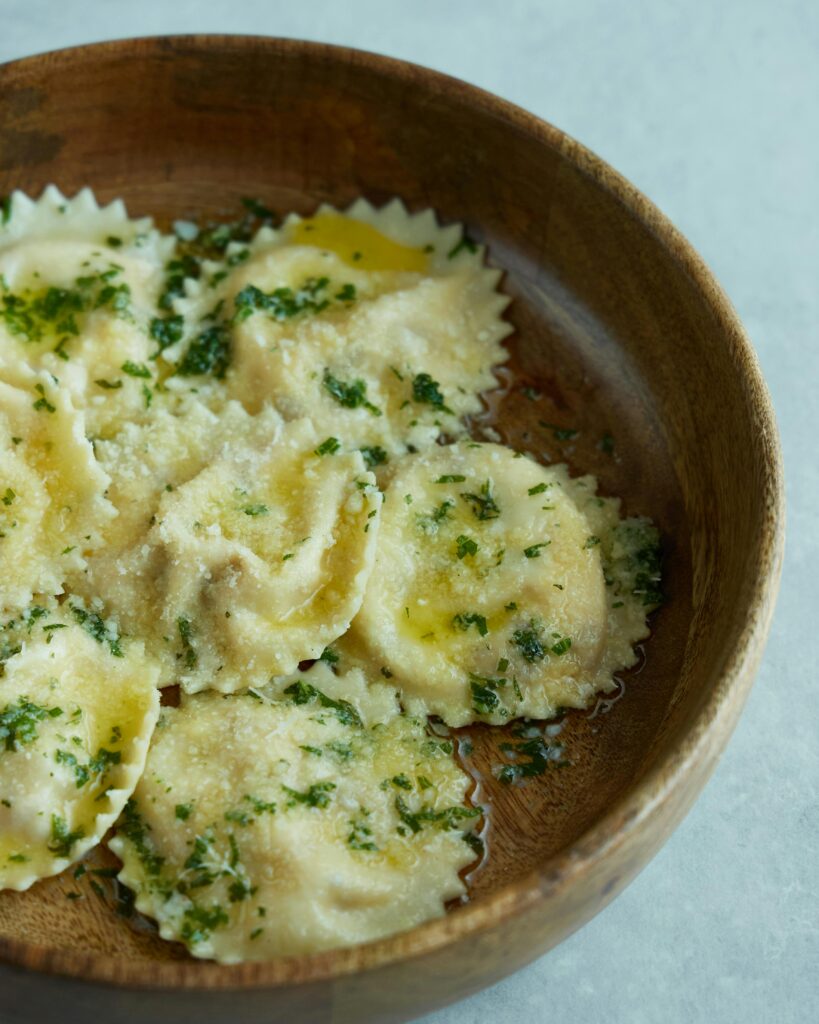
- Cooking the ravioli is a breeze and takes around 3-4 minutes in boiling water, or until they float to the top. The addition of a brown butter sage sauce elevates the pasta dish further! Made up of melted butter and fresh sage leaves, cook until the butter turns a golden brown colour, emitting a nutty aroma. Transfer the ravioli tot he brown butter sauce, soaking up the rich flavours.
- This homemade butternut squash ravioli recipe, infused with the distinctive taste of Maldon Sea Salt, is sure to impress with its balance of textures and flavours, making it a perfect choice for a special dinner or a cosy night in.
How to make butternut squash?
- Begin by roasting the butternut squash.
- Preheat the oven to 180c then place the peeled and roughly chopped butternut squash onto a roasting tray or baking sheets.
- Drizzle with a little oil, cover with tin foil and then roast for 30 minutes until soft and tender, and a knife can be inserted easily. Set aside to cool.
- Once the butternut squash is cooled, place it into a bowl and use a potato masher or ricer to puree it.
- Then to the pureed squash add the ricotta, parmesan, a pinch of Maldon Sea Salt, cracked black pepper and a grating of nutmeg. Set aside.
How to make ravioli pasta?
- While the butternut squash is roasting, make your pasta. Tip the OO pasta flour onto a clean work surface and form a circle with it.
- Then in the middle make a clear well so you are left with a ring of flour. Crack the 3 eggs into the middle. Then use a fork to break the yolks and gently whisk the eggs together so they are beaten.
- Once beaten, use the fork to slowly flick in little bits of flour onto the eggs, and continue to whisk them in. Keep doing this while it thickens, and when it becomes too thick discard the fork and use your hands to knead the flour and eggs. Continue to knead for 5 minutes until you have a smooth dough.
- Wrap it in clingfilm and then rest it in the fridge for 30 minutes.
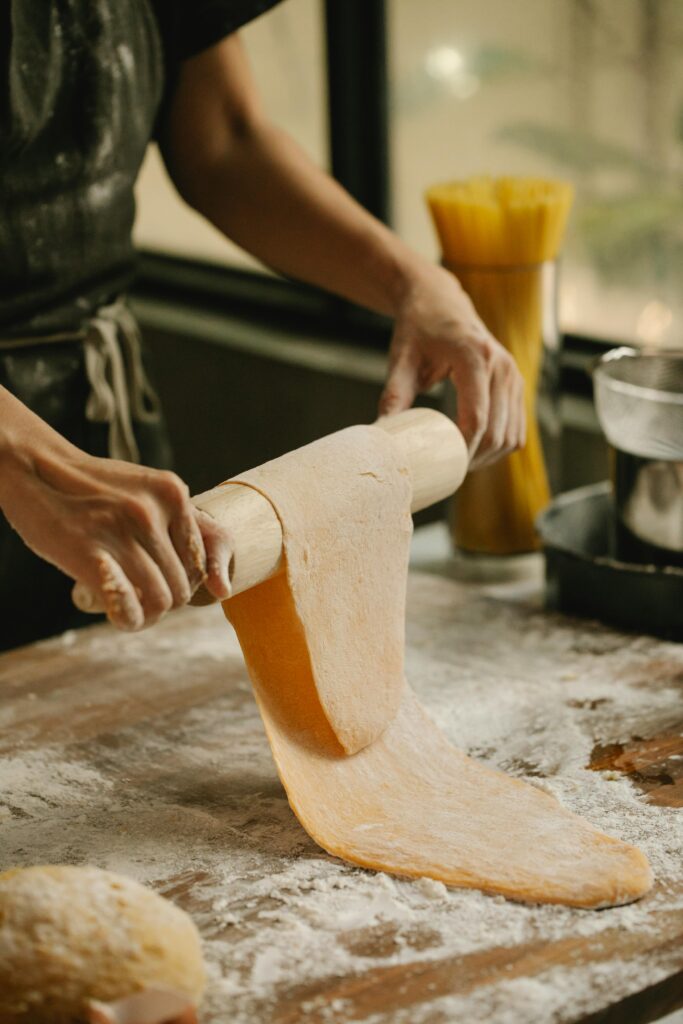
- Once the dough has rested it is time to roll and shape the ravioli. Start with a smaller piece of pasta dough and flatten it out, then roll it through the widest setting of the pasta machine. Go through the widest setting again, and then continue to go down the settings until you have the thinnest pasta sheets – you should be able to see your hand through it when held to the light! Dust a tray with a little semolina and lay your pasta sheets on here to stop then sticking, whilst you continue with the rest.
- When you have all your pasta sheets ready, you can shape the ravioli. Place one sheet of pasta on the work surface and use a teaspoon amount of the butternut squash filling to dot along the sheet, keeping a 3cm gap between each. Wet your finger in a small bowl of water and run this around the edge of the filling, then place a second sheet of pasta over the top and gently seal the two together – making sure there aren’t any large air pockets. Then use a cutter to stamp each ravioli out and set aside on a semolina lined tray while you do the remaining.
How to make pasta without a machine?
If you don’t have a pasta maker or machine, you can you use a rolling pin and a chef’s knife!
- Lightly dust your surface with flour.
- Once your dough has been in the fridge for 30 minutes, cut the dough in half.
- Roll out one half the dough with a rolling pin into a rectangle around 16 inches and 8 inches wide. Make sure to continue to roll and stretch gently with your hands until the dough is as thin as you can make it.
- Repeat the process for the second half of the dough.
- Choose one sheet from the two, and begin spooning the butternut squash filling onto the pasta sheet, leaving around 1 inch between each ball of filling.
- With a brush, gently brush water between the balls of fillings and around the outside of the sheet so that the other sheet of pasta will stick to it.
- Lay the second sheet of pasta on top, pressing down gently between the filling mounds to seal the sheets together and remove any air pockets.
- Cut the ravioli into rectangles using a ravioli cutter or sharp knife. Make sure to press any edges down again to ensure they’re sealed.
How to cook ravioli?
- Place a large pan of salted water on to boil.
- Place the ravioli in to boil, they should only take a couple of minutes. You know they are ready when they float to the surface.
How to serve butternut squash ravioli?
- In a large sauté pan, add the butter and allow it to melt, when foaming add the sage leaves and let them bubble in the butter. Then add the hazelnuts and swirl them in.
- As soon as your ravioli are cooked, lift them from the pan with a slotted spoon or spider and place them directly into the butter pan.
- Toss them through the butter and serve immediately, with a good grating of parmesan cheese.
What goes well with butternut squash ravioli?
Butternut squash ravioli pairs wonderfully with a variety of side dishes and accompaniments that compliment it’s sweet and savoury flavours.
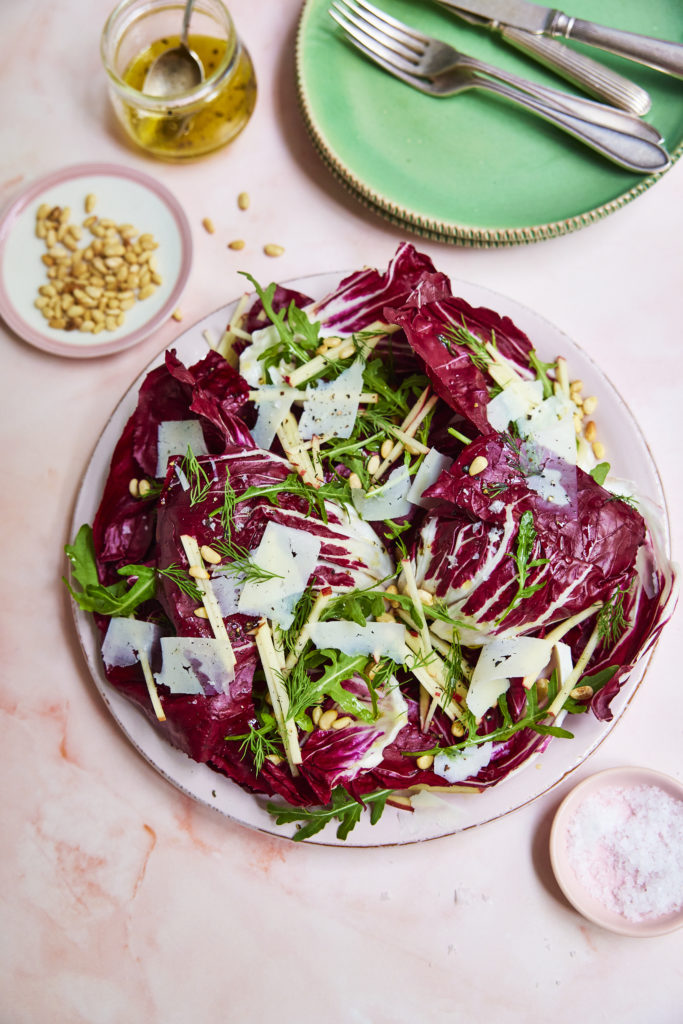
Salad
A fresh, crispy salad can balance the richness of the ravioli. Consider a delicious radicchio salad with shaved parmesan and toasted pine nuts. The peppery radicchio and the acidity of the dressing provides a delicious contrast to the sweet squash filling.
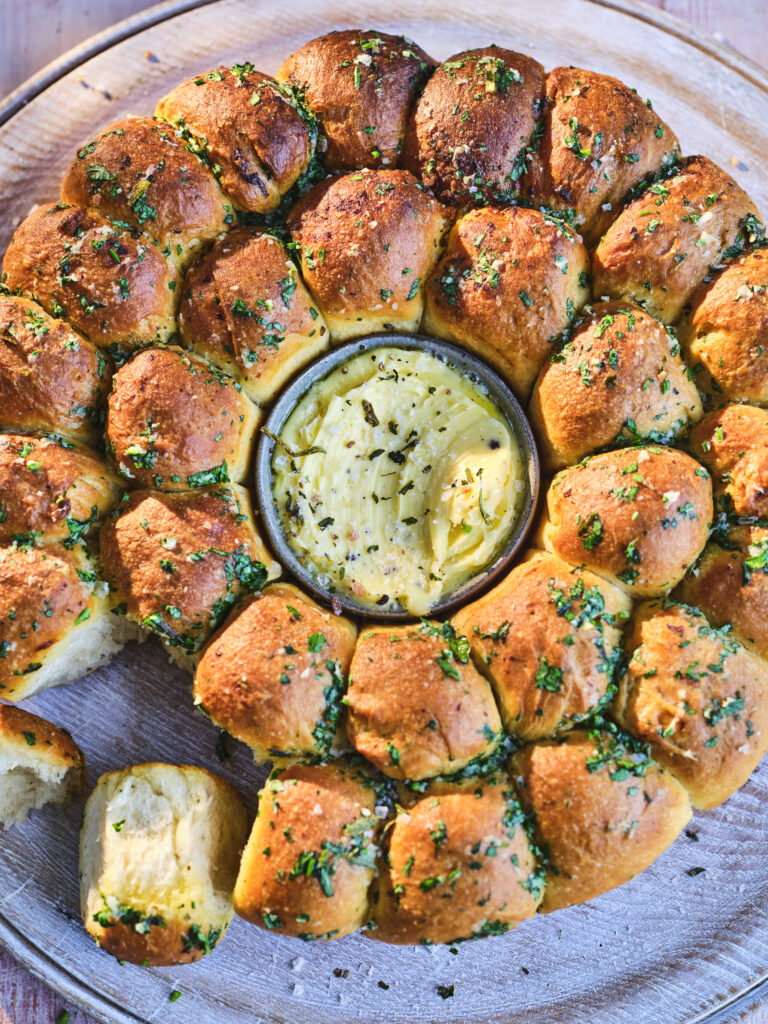
Bread
A warm, crust bread can be perfect for sopping up any leftover brown butter sage sauce. garlic bread or focaccia with rosemary and sea salt can also be a flavourful addition.
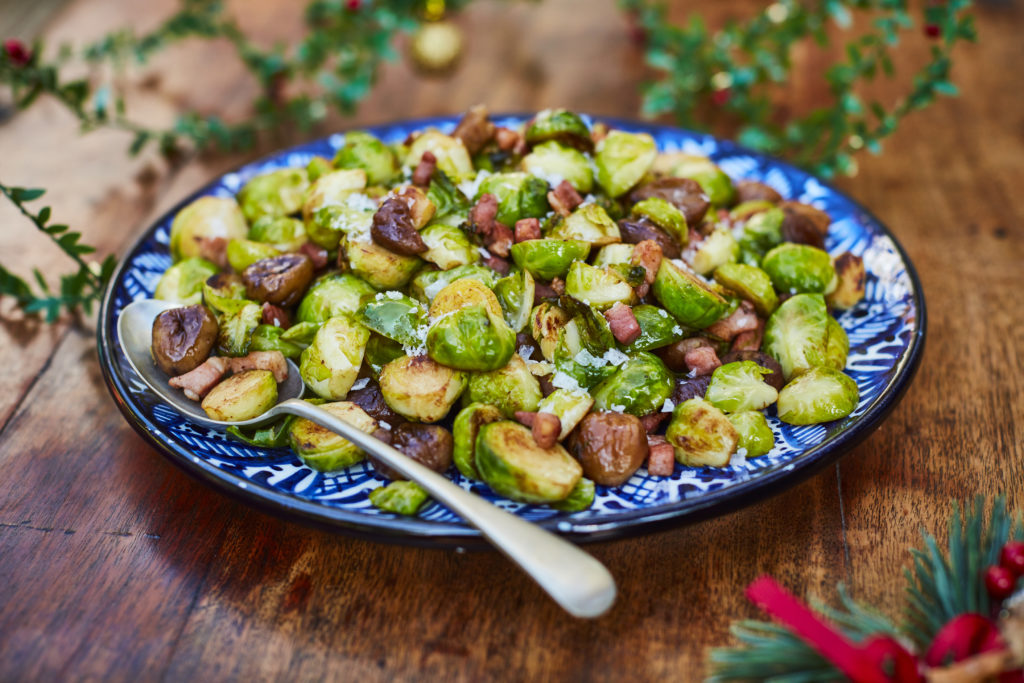
Vegetables
Roasted or sauteed vegetables make a great side dish. Brussels sprouts, asparagus, or green beans with a touch of olive oil and Maldon Sea Salt can add a delightful crunch and vibrancy to your meal.
These pairings can enhance the flavours of your butternut squash ravioli, creating a well-rounded and satisfying dining experience.
Can you freeze fresh pasta?
Yes, you can freeze fresh pasta, and it’s a great way to preserve it for later use! Here’s a detailed guide on how to freeze freshly cooked pasta effectively.
- Cook the pasta al dente, as it will continue to cook slightly when reheated. Drain the pasta and let it cool completely.
- Toss the cooled pasta with a small amount of olive oil to prevent sticking.
- Divide the pasta into portions and place them in airtight containers or freezer bags. Remove as much air as possible from the bags.
- Label the containers or bags with the date and freeze up to 2 months.
- Reheat the pasta by dropping the frozen pasta directly into boiling water for 1-2 minutes.
Freezing fresh pasta is an excellent way to save time and reduce waste, ensuring you always have a quick and delicious meal option on hand!
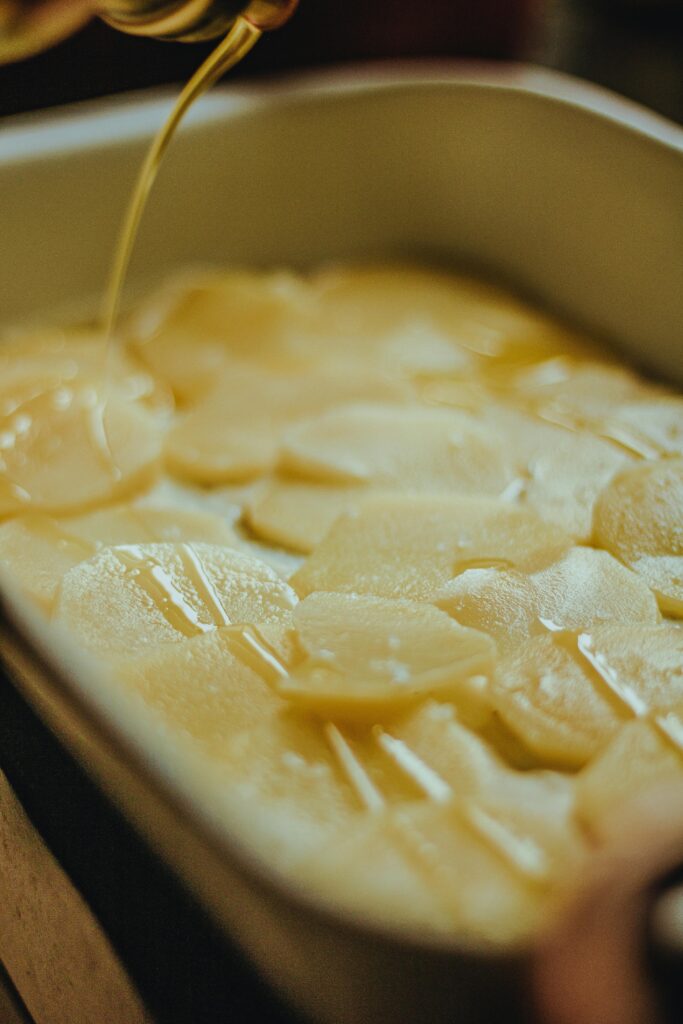
Transform your next meal with a delectable Potato Gratin recipe that promises creamy, flavourful potatoes in every bite. Infused with Maldon Garlic Sea Salt flakes, this dish takes the classic comfort food to new heights! Perfect as a side dish, these au gratin potatoes are made with King Edwards or Maris Pipers for the ideal balance of fluffiness and flavour. Whether you’re hosting a dinner party or enjoying a family meal, this gratin dish will leave everyone asking for seconds.
What is potato gratin?
Potatoes au Gratin, also known as Dauphinoise Potatoes, is a classic French dish. It was first served during a state dinner held by Charles-Henri in France 1788 and his companions. Consisting of potatoes, thinly sliced but thicker than a penny, it’s then cooked in a cream sauce in a shallow baking dish with butter and garlic.
In contrast, Scalloped Potatoes are made with roux consisting of flour, butter and milk, whereas Potatoes au Gratin are made with cream and butter and sometimes cheese. However, purists would argue that a gratin doesn’t have to include cheese. This is because the French word for ‘gratin’ translates to ‘crust’. This delicious crust can be achieved not only from cheese, but with breadcrumbs, egg or butter.
How to make potato gratin?
- Begin by preheating the oven to 160Fan °C / 350°F / Gas Mark 4.
- Take a large shallow cast iron dish, gratin dish or baking tray and rub it all over with some butter. Then prepare the potatoes by thinly slicing them, or using a mandolin. We have kept the skins on in this recipe, but you can peel the potatoes if you like.
- Once you have thinly sliced potatoes, carefully lay them in a spiral shape in the pan or dish so they fan out in circles.
- In a saucepan add the double cream, crushed garlic cloves, fresh thyme leaves, Maldon Garlic Sea Salt and cracked black pepper. Place this on a gently heat and then bring up to scalding point. Take off the heat and then carefully pour all over the potatoes. This will create a irresistibly creamy texture.
- Finely grate a little parmesan over the top and cover with foil. Place into the preheated oven to bake for 1 hour 30 minutes until the potatoes are tender. Remove the foil and bake for additional 10 to 15 minutes to achieves a golden, bubbly top.
- Serve immediately. This simple yet elegant dish dish pairs beautifully with any main course, offering a rich and comforting additional to your dinner party.
How to cook potato gratin in the air fryer?
If you’re looking for a quicker way to cook your potato gratin, then try cooking it in an air fryer! Usually in the oven it takes over an hour, but using a standard air fryer can take half the time!
- Slice the potatoes into thin, 1/8 rounds using a sharp knife of mandolin.
- Combine the cream, milk, garlic, thyme and pepper in a heat-proof mug. Microwave for 2 – 3 minutes, allowing the flavours to blend together.
- Grease your baking dish with butter to avoid the creamy potatoes from sticking to the base.
- Arrange the potatoes slices into the dish, creating layers.
- Pour the cream mixture over the potatoes, ensuing they are evenly coated.
- Transfer the baking dish into the air fryer basket, covering with foil. Air Fryer at 200C for 25-45 minutes, or until the potatoes are tender. You should be able to pass through the potatoes to the bottom when using a knife.
- Add a sprinkling of parmesan cheese or breadcrumbs on top and cook for additional 4 to 5 minutes. This will create a beautiful, crunchy crust.
- Once golden and bubbling at the top, remove the dish from the air fryer basket, cooling for at least 10 minutes before serving.
What to serve with potato gratin?
Now that you’ve made the deliciously creamy au gratin potatoes, you’re probably wondering what you can serve with them?
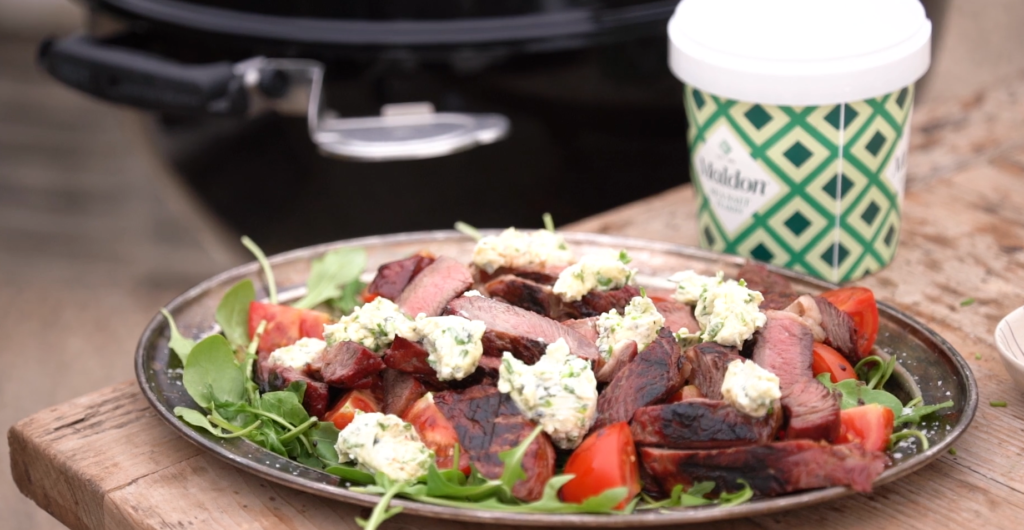
Steak
Meat and potatoes is a classic pairing. This is because the textures and flavours compliment each other so well. The fluffy texture of the potatoes combines beautifully with the meat’s chewy consistency. Potatoes also have a mildness to them which pairs well with the sweeter, bolder flavours of steak and it’s juices.
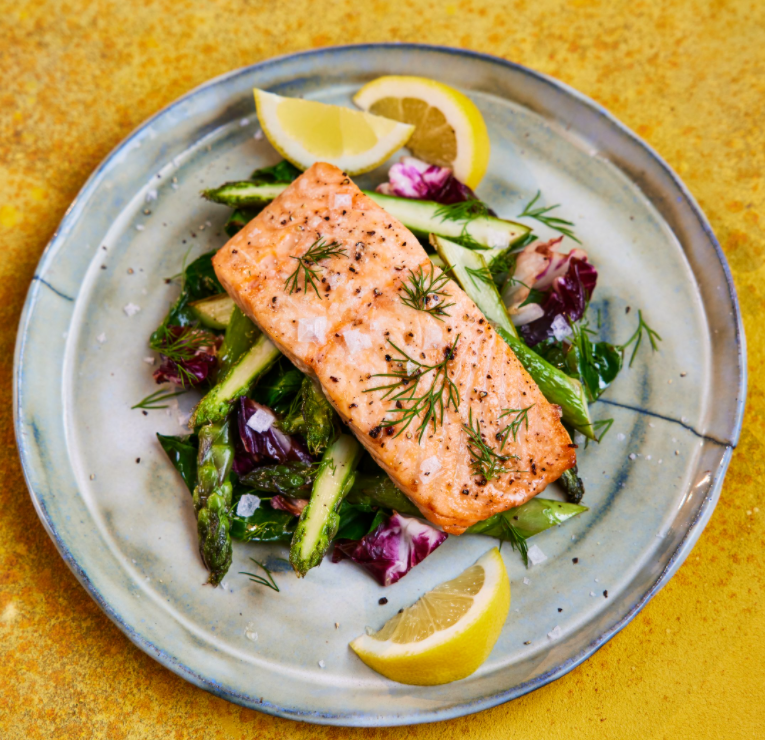
Baked Salmon
Grilled salmon is beautifully tender, complimenting the crispy exterior of gratin potatoes. We pair our salmon with fried greens and asparagus greens for a fresh, crips bite which harmonizes the creaminess of the potatoes.
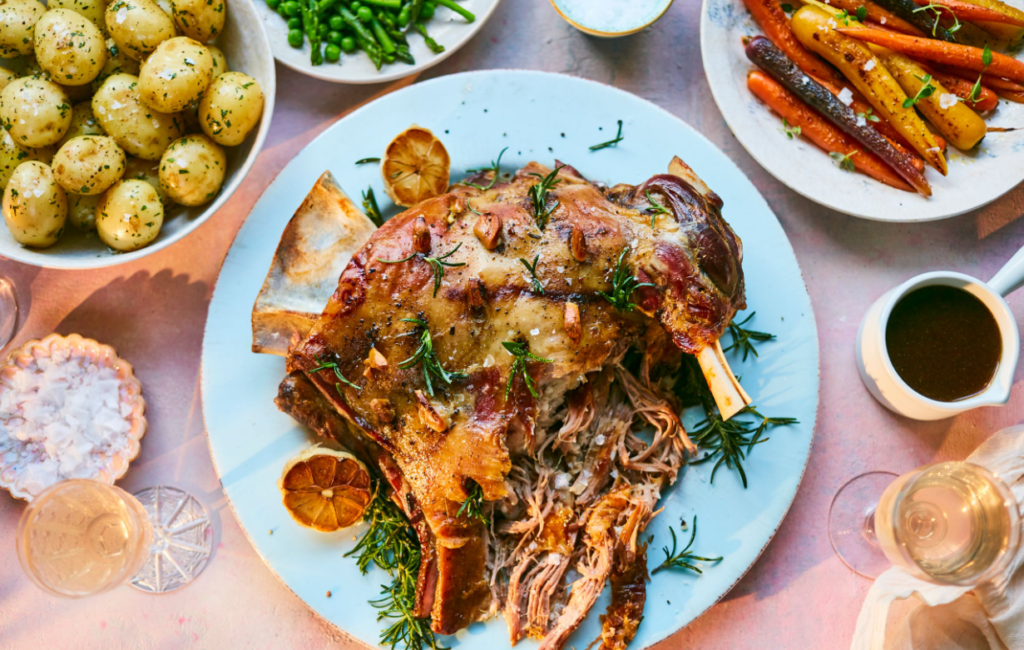
Lamb Shoulder
This is one of our favourite flavour combinations. The lamb roast has a rich, deep aroma that pairs perfectly with creamy potatoes. Because lamb also holds a gamey flavour, it brings out the natural earthiness of the potatoes, making it an indulgent feast.
Can you freeze potato gratin?
We wouldn’t recommend freezing gratin au potatoes, as it’s extremely rich in diary. Dairy products, such as milk and cheese, will separate during the freezing and thawing process, leaving you with a stodgy, very wet gratin.
However, you can store leftovers in the refrigerator for up to 3 days if kept in an airtight container. The oils from the cream and butter may separate once reheated but the taste will still be delicious.