Bright, fresh and busting with vibrant flavours, this Garlicky Green Medley is a simple yet elegant side dish that pairs beautifully with roast meats or fish. A crisp combination of green beans, sugar snap peas and broad beans is tossed with crunchy blanched hazelnuts and fragrant fresh meat, creating a delightful contrast of textures and flavours. The magic touch? A generous pinch of Maldon Garlic Sea Salt flakes, enhancing every bite with a subtle garlicky depth that ties the dish together. Light, flavourful and effortlessly impressive, this medley is a must-try for any occasion.
Why this Green Medley works
The Garlicky Green Medley works well as a dish because it strikes the perfect balance of flavours, textures and freshness. Here’s why:
Vibrant Greens & Crisp Texture – The combination of green beans, sugar snap peas and broad beans offer a satisfying crunch and a burst of natural sweetness, making the dish both refreshing and hearty!
Nutty Depth – Blanched hazelnuts introduce a toasty richness that compliments the greens, adding both texture and a subtle buttery flavour.
Umami & Garlick Kick – Maldon Garlic Sea Salt flakes bring a delicate garlicky warmth that enhances the natural flavours of the vegetables without overpowering them, creating a well-rounded, savoury depth.
Altogether, this dish is a perfect mix of crunch, freshness and subtle seasoning, making it a standout side for any occasion!
How to make this Garlicky Greens Medley
Place a large pan of water on to boil. When it is simmering, add the green beans and sugar snap peas. Let them blanch for just 2 minutes then remove with a slotted spoon or tongs onto a large plate with some kitchen paper. Then add the frozen peas and broad beans to the pan of water and do the same, after 2 minutes drain them into a sieve.
Place a large frying pan onto a medium heat and add the olive oil, once warm add the sliced garlic and let them gently fry for 1 minute. Then add the beans and sugar snap peas to the pan. Sauté them so they start to pop and char in places. If the garlic looks like its catching, then simply add a splash of water. Finally add the peas and broad beans to the pan, and sauté just until they warm back through.
Tip all the veg onto a large serving platter and season well with Maldon Garlic Sea Salt and some cracked black pepper. Then garnish with orange zest, chopped toasted hazelnuts and some mint leaves before serving.
Variations of a Garlicky Green Medley:
Citrus Zing – Add a squeeze of fresh lemon for a bright, tangy lift that pairs beautifully with the garlic and greens.
Cheesy Indulgence – Crumble a few cubes of feta, parmesan shavings, or goat cheese over the medley for a creamy, salty contrast.
Spicy Kick – toss in a pinch of Maldon Chilli Sea Salt flakes for a subtle heat that compliments the garlic flavour perfectly.
Extra Crunch – swap the blanched hazelnuts for toasted almonds, walnuts or pine nuts for a different nutty dimension.
Earthy Twist – Stir in sautéed mushrooms or roasted artichokes for a deeper, more umami-rich version.
Serving suggestions for a Garlicky Green Medley:
With Roasted Meats – A perfect side for roast lamb, chicken, beef or pork, balancing the richness with fresh, crisp flavours.
Alongside Fish – Compliments grilled salmon, sea bass, or cod, enhancing the dish with it’s garlicky and herbaceous notes.
Tossed in a Salad – Serve at room temperature with quinoa, couscous, or farro for a more substantial dish, turning it from a side to a main!
As a Pasta Addition – Mix gently with cooked pasta, olive oil, and parmesan for a light yet flavourful-packed meal.
With Poached Eggs – Top the medley with a runny poached egg for a simple but delicious brunch/lunch option.
Creamy, flavourful and effortlessly quick, these Creamy Garlic Butter Beans with Spinach are a game changer for busy weeknight or anyone looking for a quick and easy vegan dish! Elevated by the rich, aromatic Maldon Garlic Sea Salt, this recipe transforms humble ingredients into a dish bursting with savoury goodness. Whether you’re embracing Veganuary or simply seeking a nourishing, plant-based meal, this is the perfect go-to option. Plus, it’s air-fryer friendly, making clean-up a breeze!
Ready in just 25 minutes, this recipe requires minimal effort, yet delivers maximum flavour. The butter beans become velvety and indulgent, while fresh baby spinach wilts beautifully, creating a perfect balance of texture and taste. The air fryer works it’s magic, infusing the dish with the deep, garlicky notes of Maldon Garlic Sea Salt as you stir every five minutes for even cooking. Pure comfort in a bowl, made easy by your air fryer.
How to cook creamy garlic butter beans with spinach using an air fryer
Start by removing the crisper tray from the air fryer drawer.
Place the olive oil and rosemary into the drawer and air fry for 5 minutes at 200ºC.
Once the 5 minutes is up, pour the butter beans (including the liquid) into the air fryer drawer, along with the red wine vinegar, a generous pinch of Maldon Garlic Sea Salt and a little pepper. Mix everything together (at this point, if the rosemary leaves have come away from the stalk you can remove the stalks).
Air fry for 15 minutes at 200ºC, stirring every 5 minutes.
Meanwhile, prepare your tomatoes and sourdough. I like to cook the tomatoes in the air fryer for 5-6 minutes on 190ºC, until soft and heated through and the sourdough takes around 4-5 minutes to turn into perfectly crisp toast.
Once the beans have finished cooking, stir in the spinach and pop back in the air fryer for a final 4 minutes at 190ºC.
To plate up, place your sourdough on a plate, top with the butter beans mixture, followed by the tomatoes and tuck in!
If you like to have a bit of meat with your meals – a bit of crunchy streaky bacon goes perfectly with this dish! (air fry the bacon for 8 minutes at 190ºC).
Enjoy!
What is an old fashioned
The Old Fashioned cocktail is a timeless classic that embodies the essence of simplicity and elegance in mixology. Traditionally served in a lowball or rocks glass, this whiskey cocktail is a staple in any bartender’s repertoire!
Classic Old Fashioned cocktail
The perfect Old Fashioned consists of stirring together two ounces of bourbon, whiskey or rye, a rich simple syrup, and Angostura bitters. A handful of ice cubes is added, before the drink is gently stirred to chill and dilute to perfections. The final touch is an orange twist, or orange peel, and a cocktail cherry (Maraschino cherries), which not only adds visual appeal, but also enhances the drink’s complex flavours, adding sweetness to the bitter cocktail.
The beauty of the Old Fashioned lies in it’s versatility and balance. While rye whiskey is the traditional choice, bourbon is also popular choices for those who prefer a slightly sweeter profile. Modern variations may also use simple syrup or even maple syrup in place of the more traditional sugar cube, offering a different dimension of sweetness. Whether enjoyed a pre-dinner aperitif or a nightcap, the Old Fashioned remains a quintessential whiskey cocktail that has stood the test of time.
What is the origin of the Old Fashion?
According to Nio Cocktails, the Old Fashioned was first created in the 1800s in America. It was then known simply as the ‘Whiskey Cocktail’ which included a spirit, sugar, water and bitters. It was a standard, quick and easy cocktail to make which was enjoyed by many, and often enjoyed in the morning as a hangover cure!
However, Difford’s Guide proclaims that although the cocktail was popularised in America, the origins of a cocktail that comprise of a spirit, sweetener and bitters are English, followed by the creation of the first aromatic bitters by London apothecary, Richard Stoughton in 1690.
Why is it called an Old Fashioned?
By the 1870-1880s, bartenders began adding their on ‘twists’ to the Whiskey Cocktail, such as adding more sweeteners, garnishes and even changing the spirit from rye whiskey to bourbon. Customers began to rebel against the innovated cocktail, preferring the traditional version instead. As a result, customers would order the ‘old-fashioned whiskey cocktail’ at the bar. Eventually the name was shortened to the title we know today, ‘Old Fashioned’.
Here’s how to make and serve an old fashioned
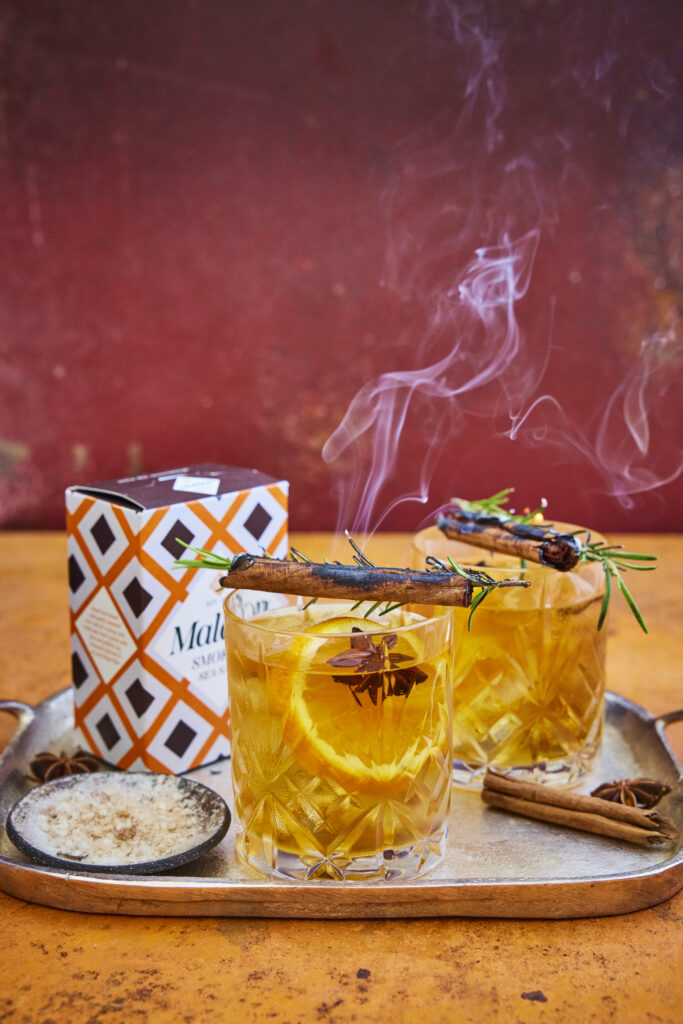
Start by soaking the rosemary and cinnamon stick in some high proof spirit for a few minutes – this will be the flaming part of the cocktail.
Take a tumbler and add the sugar, bitters and Maldon Smoked Sea Salt, stirring together. Then fill the glass with ice and add the whiskey or bourbon and stir again. Add a splash of soda water if you like and a slice of orange.
Then take the soaked rosemary and cinnamon stick and carefully balance on the rim of the drink. Use a lighter or matches to ignite them – they should flame and smoke. The smell of the smoked rosemary and cinnamon add Christmassy notes to your cocktail.
How to spice up and old fashioned
Although adding an orange twist to your classic Old Fashioned adds sweetness, it’s pretty simple! We’ve shared some of our favourite ways to elevate your Old Fashioned, with new and exciting twists to try!
Brown Butter Old Fashioned
If you’ve never tried a brown-butter Old Fashioned, then you’re missing out!
This recipe was shared by Liquor.com, where they highlight how the flavours of bourbon compliments the rich nuttiness of brown butter. Simply heat unsalted butter in a saucepan until it lightly browns and has a nutty aroma. Then, gently combine the browned butter with a bottle of bourbon. Pour the blend into a highball glass with ice, adding brown-sugar syrup and Angostura bitters before finishing with a maraschino cherry.
Honey Old Fashioned
If you have a sweet tooth, the The Glenlivet shared a delicious Honey Old Fashioned recipe. Rich, runny honey is incorporated with the bold flavours of the classic Old Fashioned mix, creating an smooth drink that’ll go down a treat with your guests.
Pumpkin Spice Old Fashioned
If are wanting something more ‘cosy’ in flavour, Liquor.com recommends the ever-so-popular pumpkin spice flavour with an Old Fashioned. You can achieve this by making a homemade syrup, adding pumpkin puree, pumpkin pie spice, brown sugar, and vanilla extract. Combine the pumpkin pie liquid mix with your bourbon and orange bitters and you will taste the delightful automanual flavours.
Old Fashioned vs. Manhattan
The Old Fashioned and The Manhattan are two of the most popular whiskey cocktails. Although the two cocktails have many similarities, the have different flavours.
What is a Manhattan?
This is a classic cocktail, comprising of whiskey (usually rye), sweet vermouth, and bitters. It’s served in a stemmed glass, and garnished with a cherry.
What is the difference between an Old Fashioned and a Manhattan?
The main difference between the Old Fashioned and Manhattan is the sweeteners used in each. The Old Fashioned traditionally uses sugar, either as a cube or in simple syrup form. In contrast, the Manhattan uses sweet vermouth, which is a type of fortified wine. The vermouth adds a earthier, spicier notes in comparison to the Old Fashioned, which is sweet yet bitter. As a result, many would say the flavour profile of the Manhattan is more in-depth and complex, whereas the Old Fashioned is more simple.
In a cocktail shaker combine all ingredients and stir the mixture thoroughly to ensure all ingredients are well-blended.
Transfer the mix into a soda stream bottle, filling it only one-third full to avoid excessive pressure build-up
Ensure the liquid is very cold before carbonating (refrigerate for several hours or use an ice bath).
Use the soda stream to carbonate the mixture, as per your machine’s instructions.
Pour 125 ml of the carbonated Pyramid Paloma mix into a coupe glass.
Float a fresh basil leaf on top of the drink.
Sprinkle Maldon Garlic Sea Salt onto the basil leaf for a salty and aromatic garnish.
To prepare the verdita: In a blender, mix fresh pineapple juice, ginger juice, simple syrup, and Bittermens Xocolatl Mole, and blend until smooth.
Add mint leaves and coriander, then blend.
Strain to remove any pulp.
Take a rocks glass and run a lime wedge along the rim.
Dip the rim into Maldon Chilli Sea Salt and coat it evenly.
In a cocktail shaker, add 50 ml of gin, 50 ml verdita, 25 ml fresh lime juice and a dash of chili bitters (optional).
Add ice cubes and shake vigorously.
Strain the mixture into the prepared rocks glass filled with cubed ice.
In this cookbook, Romy shares over 70 recipes which are inspired by her beloved family, with flavours that define her childhood. From iconic dishes like Butter Chicken, which is a staple in every Indian home, to the delicious simplicity of a Masala Omelette, Romy invites cooks to savour the authentic tastes of India without a fuss! The instructions for each dish are easy to follow along with readily available ingredients. Every dish is designed with the home cook in mind, ensuring that your journey into Indian cuisine is as delightful as it is delicious!
Today we’re sharing Romy’s delicious beetroot croquettes, also known as chaap!
How to make beetroot croquettes
These beetroot croquettes (or chaap), are succulent and flavourful. They have the perfect balance of colour, texture and taste. The distinctive earth flavour of the beetroot combines beautifully with the potato, carrots and spices. It can be enjoyed as an appetiser or as a side dish.
Place the potato in a saucepan (there is no need to peel it), cover with hot water and bring to a boil. Cook the potato until the flesh is soft, then remove from the heat and leave to cool.
When the potato is cool enough to handle, remove the skin. Grate (shred) the potato into a bowl. Grate the beetroot (wear rubber gloves to prevent staining your hands) into a separate bowl, then grate the carrots into a third bowl and set aside.
Place all the whole spices in a frying pan (skillet) over a low heat and toast them until they start to release their aromas. Remove from the heat and leave the spices to cool before grinding them to a powder with a pestle and mortar.
Heat the mustard oil in a pan over a medium heat. Once the oil is hot, add the peanuts and cook for1 minute. Add the ginger and chillies, cook for 1minute, then add the grated beetroot and carrot and mix. Cover the pan with a lid and cook for 5 minutes. Add the potatoes, all the toasted spices and the Maldon Sea Salt, mix well, then cook for a further few minutes. Remove from the heat and leave the mixture to cool before rolling it into 10 equal-sized cylindrical shapes.
Whisk together the cornflour and plain flour with30 ml (1 Fl oz/2 tablespoons) water in a bowl. Place the breadcrumbs in a shallow dish. Heat the frying oil in a deep pan to 170°C/340°F. Drop in a tiny bit of batter; if it floats, the oil is hot enough. Dip one of the cylinders into the batter, then roll it in the breadcrumbs to coat it on all sides. Deep fry until golden and crispy. Repeat with all of the cylinders, then serve with your favourite chutney.
Where to buy Romy Gill’s India: Recipes from Home
You can find where to purchase Romy’s NEW cookbook here and start being creative with food and flavours in the comfort of your kitchen.
Make sure you have your Maldon Salt ready for these recipes! If you are running out, please feel free to browse on our Where to Buy Page to find your nearest store in which stocks our beloved Maldon Salt.
Lastly, we LOVE seeing your creations – please tag us on Instagram using the #maldonsalt so we can share your own take on Romy’s recipes!
Elevate your cocktail hour with a refreshing grapefruit Paloma, perfectly complimented by a Himalayan Pink Salt rim, Selected by Maldon. This tequila cocktail combines equal parts blanco tequila, pink grapefruit juice, club soda for fizz and a touch of agave for sweetness, resulting in a harmonious blend of flavours. The finishing touch of the salt rim not only elevates the presentation, but also perfectly balances the citrusy tang and smooth tequila notes, making this Paloma cocktail and unforgettable tipple!
What is in a paloma cocktail?
A classic paloma cocktail consists of tequila, lime juice, grapefruit and soda with salt being added to the rim of the glass as an added option. Paloma translates to ‘dove’ in Spanish, with the cocktails true origins unknown, although it is believed to have dated back to the 1950s. The legend Don Javier Delgado Corona, who was the former bartender and owner of La Capilla in Tequila, Mexico, is known to be the Paloma’s original creator. He wanted to create a cocktail that’s both sweet and sour, a little bitter and salty with plenty of bubbles and ice. What’s not to love about a refreshing Paloma!
How to make a paloma cocktail
There are many paloma cocktail recipes that have their own ‘tasty‘ twist to the original. Our recipe includes club soda, fresh pink grapefruit juice, blanco tequila and lime juice. We also include a salt rim using Himalayan Pink Salt, Selected by Maldon. This pink coarse rock salt is selected by our seasoned experts, from the foothill of the Himalayas and has been prized for centuries. It’s perfect for rimming the glass of your paloma as the the salt with counteract the bitterness from tequila, and elevate the sweetness of the grapefruit and lime. Additionally, is also adds texture to the drink, building up a pleasurable experience as you take your first sip.
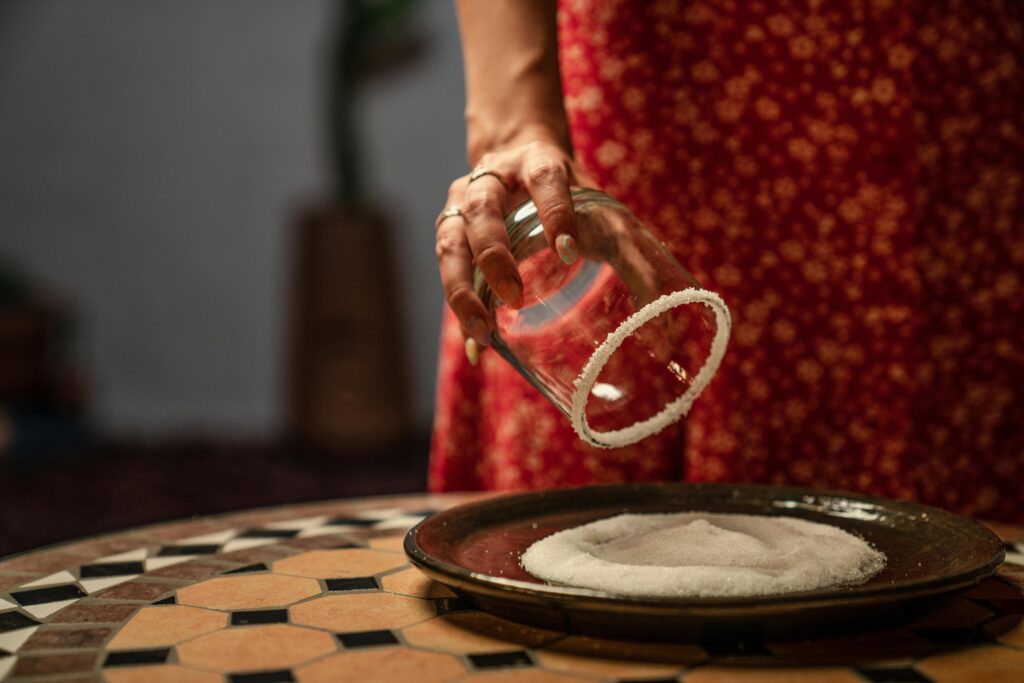
Start by rimming the glass with salt. Lightly crush the Himalayan Pink Salt, Selected by Maldon, then place onto a small plate.
Take the glass and rub a little lime juice, grapefruit juice or agave around the rim of the glass.
Then, invert it onto the plate and press the salt onto the rim firmly.
In a cocktail shaker, add the blanco tequila , fresh pink grapefruit juice, lime juice and agave.
Add a few ice cubes and then give it a shake until the outside feels cold.
Add some ice cubes to the prepared glass with the rim and begin pouring in the cocktail mixture.
Top up with club soda and then garnish with some pink grapefruit slices before serving.
How to slice a grapefruit?
This is the fastest, simplest and mess-free way of slicing a grapefruit.
Place the grapefruit on a cutting board. Using a sharp chef’s knife, begin slicing off a half inch off the top and bottom of the fruit.
Stand the grapefruit upright so the flesh is exposed and begin to cut the skin off. Make sure you are following the contour of the grapefruit and the white pith.
Repeat the peeling technique.
Using a sharp paring knife, hold the grapefruit in your hand, and begin to cut downward between the membrane and the segment.
Once you have reached the centre of the grapefruit, stop and make a second angled cut. The segment should then pop out.
Repeat until all segments have been removed.
How to use a cocktail shaker?
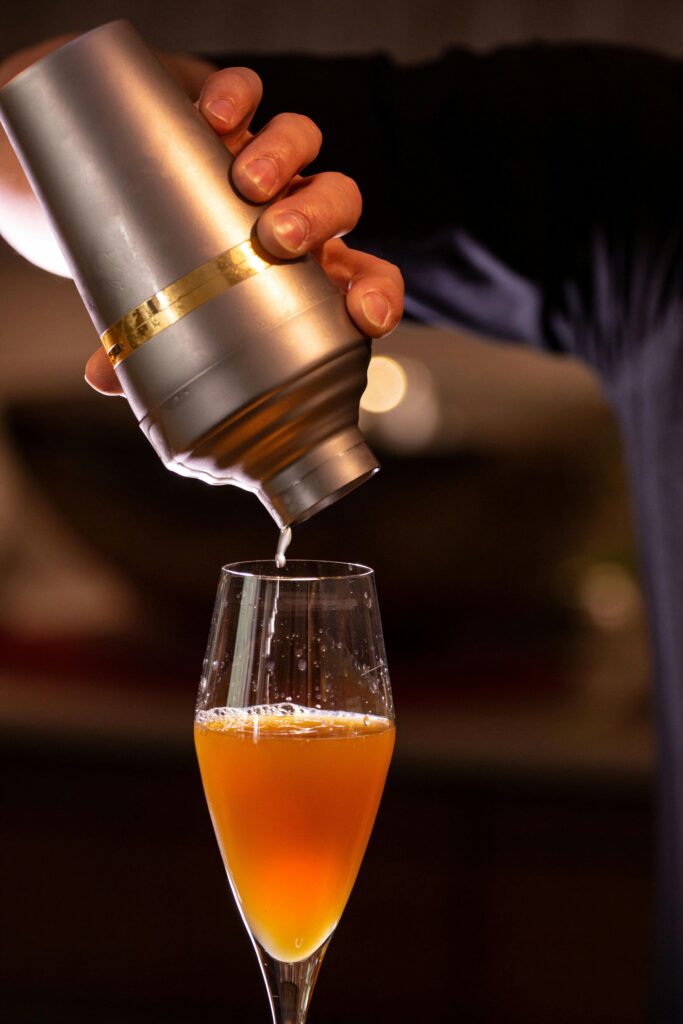
We used a two-piece cocktail shaker to make our paloma cocktail. These are also known as Boston or French Shaker. They comprise of two flat-bottomed cones, one larger than the other. The large cone is made of stainless steel usually, while the smaller cone can be glass, stainless or plastic.
Start by combining your ingredients in the glass (the smaller cone).
Fill the large cone with ice and quickly up-end over the smaller cone, quickly to avoid spilling any ice! Gently tap the top of with your palm to create a secure seal between the two parts.
Begin lifting the shaker with one hand on the top and the other gripping the base.
Shake quickly and vigorously to ensure the mix is blended well.
After shaking for around 12 second, the large cone will start to feel cold to the touch. This is when you know it’s ready to serve. Hold the larger cone in one hand and break the seal by tapping the base with your palm.
Before you pour your cocktail, place a strainer over the top of the cone and strain the mixture into the glass, leaving the ice behind. The ice that we used for shaking should be removed.
What to use instead of a cocktail shaker?
Creating a cocktail shaker alternative is very easy and you only need a few objects that can be found in your home. If you have a mason jar, or any other glass with with secure lid, it will make an effective cocktail shaker.
Clean your mason jar thoroughly before using, ensuring it’s clean and safe to use.
Add your cocktail ingredients into the jar.
Add your ice cubes.
Close the lid, fastening it on securely.
Shake vigorously.
Take the lid off and pour cocktail mix into your glass.
How to rim a glass with salt?
If you’re wanting to make a classic salt rim for a cocktail such as a margarita, we recommend starting of with a lime.
Begin by cutting a lime in half, and then again until it forms a quarter or wedge.
Cut a notch in the lime wedge, making sure to not cut all the way through. Near enough in the centre will do.
Run the notch all around the glass until it’s the rim of the glass is completely wet from the lime juice.
Add some Himalayan Pink Salt into a small dish that’s bigger than the diameter of your glass.
Tip the glass over into the salt, almost like a cookie cutter going into the dough.
Hold the glass up and you will find a perfect salt rim around your glass.
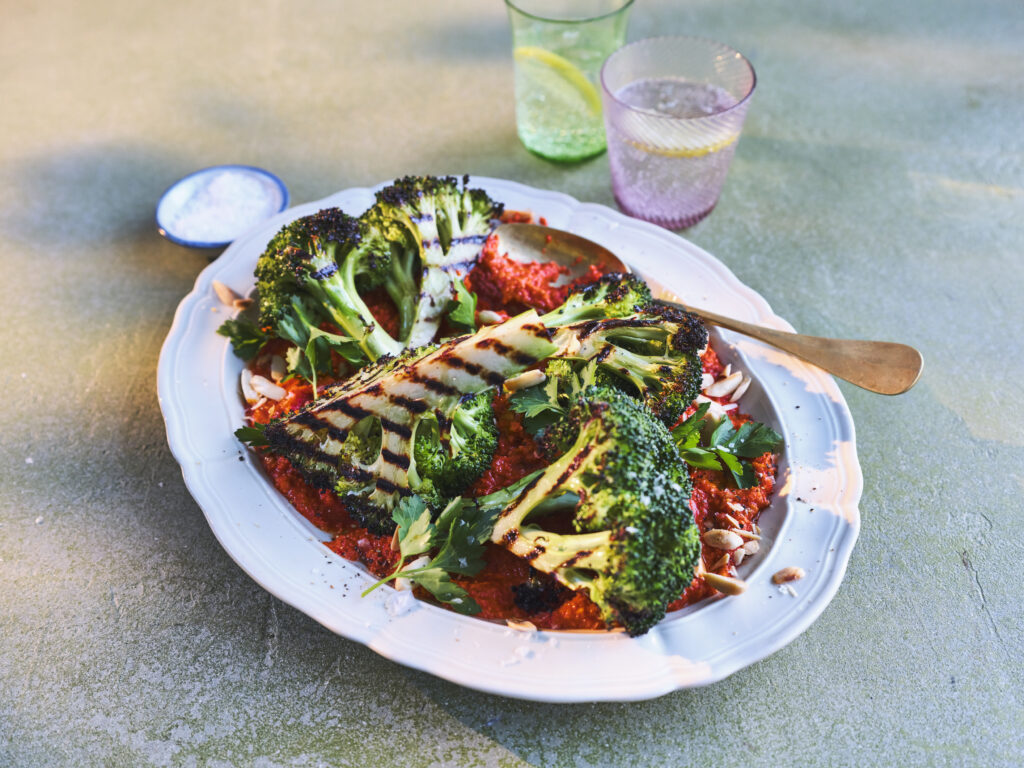
Lightly griddled broccoli wedges with a delicious Romesco sauce is the perfect side dish for your springtime banquet. The combination of sweet and slightly acidic with the smoky red pepper Romesco sauce pairs beautifully with the charred broccoli, a flavour profile that will certainly impress your dinner guests.
Broccoli contains compounds that some people may consider bitter. However, gently griddling your broccoli will allow a delicious earthy, almost sweet taste to rise. It also brings out many nutrients, including a wide array of vitamins, minerals and fibre.
Image by <a href=”https://pixabay.com/users/catkin-127770/?utm_source=link-attribution&utm_medium=referral&utm_campaign=image&utm_content=482403″>Catkin</a> from <a href=”https://pixabay.com//?utm_source=link-attribution&utm_medium=referral&utm_campaign=image&utm_content=482403″>Pixabay</a>
What is Romesco sauce?
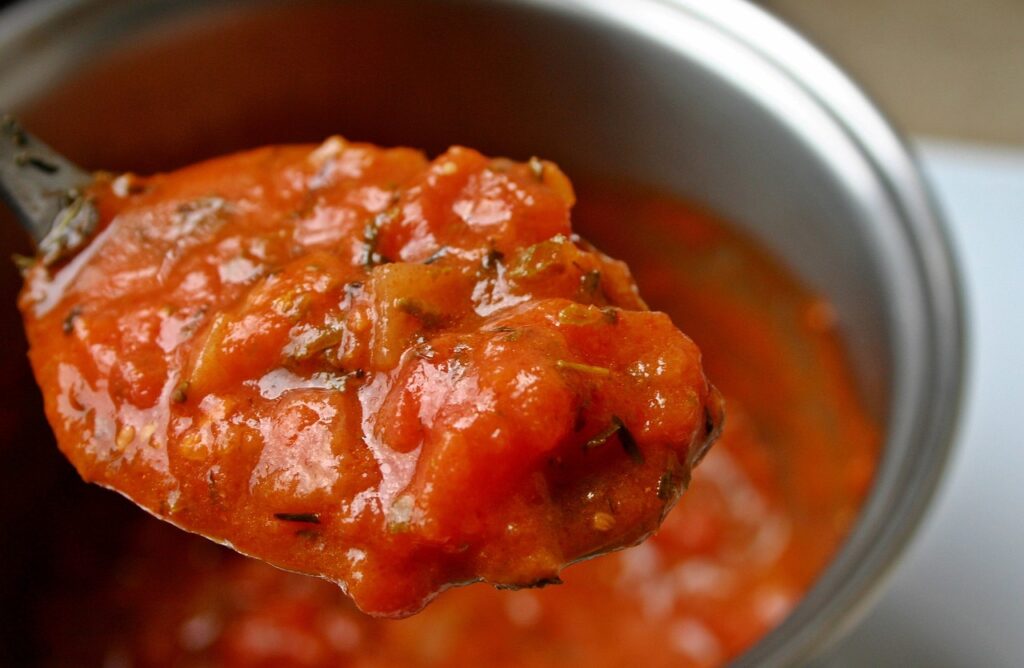
Romesco sauce is a rich Spanish sauce comprising of roasted red peppers, which are pureed and thickened with toasted almonds and sometimes pieces of bread.
The origin of the sauce dates back to the 18th century, where fishermen were believed to have made the sauce to eat with their rather bland meals, whilst catching their fish off the coast of Catalonia, Northwest Spain.
The taste of Romesco sauce is lightly sweet and tangy in flavour, with a delicious hint of garlic and smoky flavours and a touch of spice. As the sauce is a classic Mediterranean condiment, it’s the perfect accompaniment to fish, grilled vegetables and roasted chicken.
Is Romesco sauce served hot or cold?
Romesco sauce is very adaptable and can be served either hot or cold depending on the dish that you’re making.
Romesco sauce can freeze and last for up to 3 months in the freezer. We do not recommend storing the sauce longer than 3 months as the flavour can start to degrade and the colour becomes dull.
You can freeze Romesco sauce easily by using an ice cub tray:
Portion the sauce into the ice cube tray. You can use spoons to make it easier to pour into each ice cube square.
Wrap the ice cub tray with a layer of clingfilm to prevent spillages and also limit the chance of any odours in your freezer.
Put the tray in the freeze carefully, keeping it as flat as possible.
Once frozen solid, you can pop the cubes out of the ice cube tray into a freezer bag, making sure it is sealed up.
Label the bag with the contents and the date it was made, before placing it back in the freezer.
The best way to defrost Romesco sauce is by taking a cube out of the freezer and popping it into the dish, allowing it to thaw whilst the dish continues to cook.
Image by <a href=”https://pixabay.com/users/jeshoots-com-264599/?utm_source=link-attribution&utm_medium=referral&utm_campaign=image&utm_content=569070″>Jan Vašek</a> from <a href=”https://pixabay.com//?utm_source=link-attribution&utm_medium=referral&utm_campaign=image&utm_content=569070″>Pixabay</a>
How to make Romesco sauce?
Start by making the romesco sauce.
In a large frying pan, add the blanched almonds and toast them until they turn colour and start to char in places, turning them over so they evenly toast. Then tip them out the pan and allow to cool slightly.
In a food processor add the roasted red peppers, toasted almonds, handful of parsley and the garlic cloves. Pulse this until everything has broken down to a chunky paste. Then add the sherry vinegar, lemon juice and olive oil and pulse again to your desired texture – you don’t want it to be completely smooth.
Tip the mixture from the food processor to a bowl and stir through the paprika and Aleppo pepper. Taste the sauce and then add some Maldon Sea Salt flakes and cracked black pepper.
How to make griddled broccoli?
Prepare the broccoli. Heat a griddle pan onto a high heat. Slice the broccoli heads into wedges by cutting each one in half lengthways through the stalk, then cut each half again into quarters.
Rub each wedge with olive oil, and then place onto the griddle pan. Let each side cook for 5 minutes until prominently char lines appear on the stalk before turning and doing the other side. This can be done in batches; the broccoli will char but also steam as it cooks.
Image by <a href=”https://pixabay.com/users/zichrini-3417353/?utm_source=link-attribution&utm_medium=referral&utm_campaign=image&utm_content=3267634″>Hanna</a> from <a href=”https://pixabay.com//?utm_source=link-attribution&utm_medium=referral&utm_campaign=image&utm_content=3267634″>Pixabay</a>
Do you have to boil broccoli before frying?
You do not need to boil broccoli before frying in the pan if you implement a steaming method to it. This is where you trap hot air in the pan to help soften the broccoli. This allows the broccoli to be a little softer in texture when you bite into it, but still irresistibly crunchy.
You can blanch the florets before stir-frying to help soften the stems and stop the enzyme that leads to browning. We recommend adding a good pinch of Maldon Sea Salt flakes and a dash of olive oil to your blanching water to help the broccoli retain it’s crunchy texture and vibrant green colour.
How to serve griddled broccoli with Romesco sauce:
When you are ready to serve, spoon the romesco sauce across the base of a large serving platter.
Then arrange the charred broccoli wedges on top.
Finally scatter with some chopped smoked almonds, a drizzle of olive oil and a final sprinkle of Maldon Sea Salt flakes and Aleppo pepper.
Image by <a href=”https://pixabay.com/users/meszarcsekgergely-18097400/?utm_source=link-attribution&utm_medium=referral&utm_campaign=image&utm_content=7744338″>Meszárcsek Gergely</a> from <a href=”https://pixabay.com//?utm_source=link-attribution&utm_medium=referral&utm_campaign=image&utm_content=7744338″>Pixabay</a>
How long does it take to cook raw broccoli?
Broccoli can be easy to overcook, it should always retain it’s vivid bright green colour when cooked and should have a little ‘crunch‘ to it.
When you are boiling broccoli in a pan of boiling water, we recommend cooking the florets for 6-8 minutes.
If you aresteaming your broccoli, make sure to place a steamer over boiling water and cook for the same time, around 6-8 minutes.
You can stir-fry your broccoli for a delicious, crunchy texture. You need to separate into bite-sized florets, adding 1 tbsp of olive oil into the frying plan and adding the broccoli, cooking for around 4-5 minutes or until nice and tender.
When roasting broccoli, we recommend preheating your oven to 400 degrees F for 20 minutes to allow the vegetable to be perfectly roasted.
How long does broccoli keep in the fridge?
Fresh broccoli can last up to 3-5 days in the fridge when properly stored in an air-tight container. If it is cut-up broccoli, we recommend no more than 4 days stored in the fridge, otherwise the vegetable will start to decay in colour and texture and have a unpleasant odour.
If you are storing cooked broccoli in the fridge, make sure to store in a shallow, air-tight container or wrapped in foil. It can be stored for up to 3-5 days.
A twist on the classic cranberry sauce. Homemade cranberry sauce is so worth making, it’s unbelievably simple and tastes so much better than store bought. Orange and cranberry pair brilliantly, but the addition of Maldon Chilli Sea Salt adds a hum and warmth to the sauce which is unexpected. Add a splash of port because… well, Christmas!
Place the cranberries, orange zest and juice, caster sugar and cinnamon stick in a pan and simmer gently for 10 minutes until the cranberries have begun to break down and pop.
Add the port and Maldon Chilli Sea Salt and simmer for a further 5 minutes until thickened.
Check the seasoning and then allow to cool before serving with your Christmas meal or alongside pigs in blankets.
Want to impress your guests at your next party? Mix up a classic dirty martini, made using Graza “Drizzle” Extra Virgin Olive Oil. Whilst holding the usual ingredients for an ordinary martini, adding EVOO will allow the cocktail to become silkier and smooth in texture, resulting in a ‘delicious’ experience.
Make sure to add a salt rim using Maldon Sea salt flakes to help bring balance to cocktail’s flavour, whilst elevating the sweetness and reducing the bitterness from the olive brine.
Here is how to make Graza’s Dirty Marg-tini
Using a spare olive, wet and rim a cocktail glass with Maldon Salt and set aside in a freezer to chill.
Add tequila, brine, Drizzle, lime, and agave nectar to a shaker tin and shake vigorously over ice for 10-15 seconds or until chilled and aerated.
Using a Hawthorne and tea strainer, fine strain into your prepared cocktail glass.
Garnish with three Castelvetrano olives and enjoy.
Where Can You Buy Graza “Drizzle” Extra Virgin Olive Oil?
You can purchase Graza’s “Drizzle” directly from their website. You have the option to buy as a one-time purchase, or subscribe & save to have a frequent delivery of EVOO at a lower price – what more could you want!
“Drizzle” is 100% Extra Virgin finishing oil. It’s made from olives that are picked early, when flavour is bold and antioxidants are highest.