Step 1 – Make the Saffron Risotto Heat the olive oil in a large pan and fry the rice for 2 minutes. Add the vegetable stock and saffron, stirring continuously until the rice is tender and creamy. Stir through the butter, parmesan and Sicilian Fine Sea Salt, Selected by Maldon. Spread onto baking trays, cool completely, then chill until firm.
Step 2 – Prepare the Beef Ragu Filling Heat the olive oil in a large pan and gently cook the onion, carrot and celery for 15 minutes until softened. Add the beef mince and cook until browned. Stir in the tomato purée and chopped tomatoes, then simmer for 30–40 minutes until rich and thick. Season with oregano, Sicilian Fine Sea Salt, Selected by Maldon and black pepper. Leave to cool completely.
Step 3 – Shape the Arancini Place a handful of chilled risotto in your palm and create a well in the centre. Add a teaspoon of ragu, then seal with more rice and shape into a traditional cone. Repeat with the remaining mixture and chill for 15 minutes.
Step 4 – Coat the Arancini Place flour, beaten egg and breadcrumbs in three separate bowls. Coat each arancini in flour, then egg, then breadcrumbs until evenly covered.
Step 5 – Fry Until Golden and Crisp Heat the vegetable oil to 180°C in a deep, heavy-based pan. Fry the arancini in batches for 2–3 minutes until golden brown and crisp. Drain on kitchen paper.
Step 6 – Serve and Enjoy Serve warm with seasoned passata for dipping, finished with grated parmesan and fresh basil.
Bringing Together Flavour, Fire, and Caribbean Inspiration
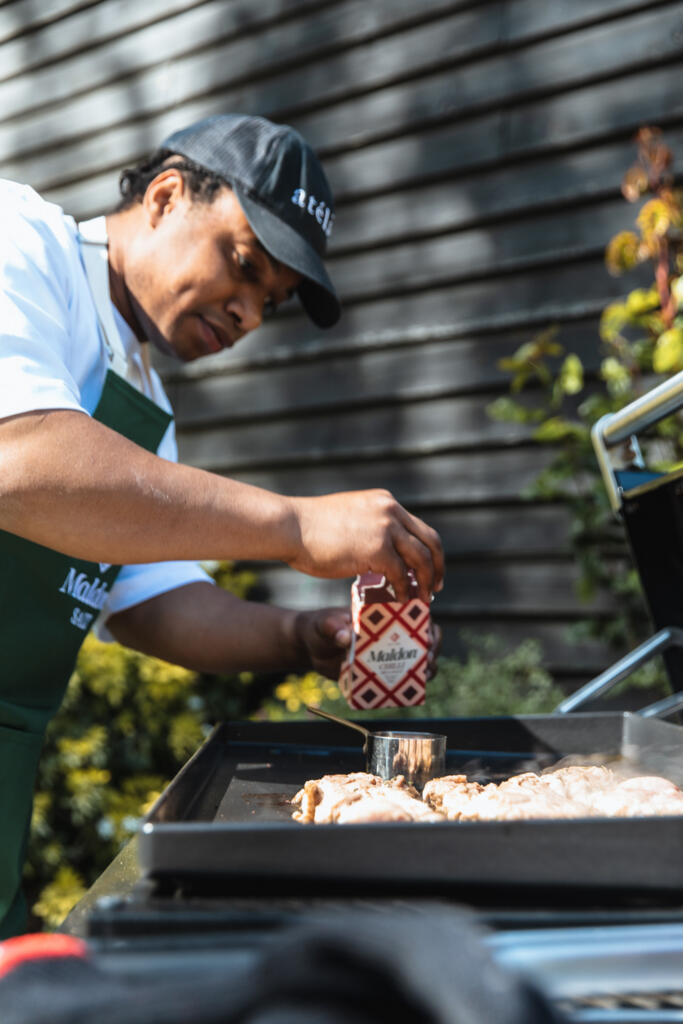
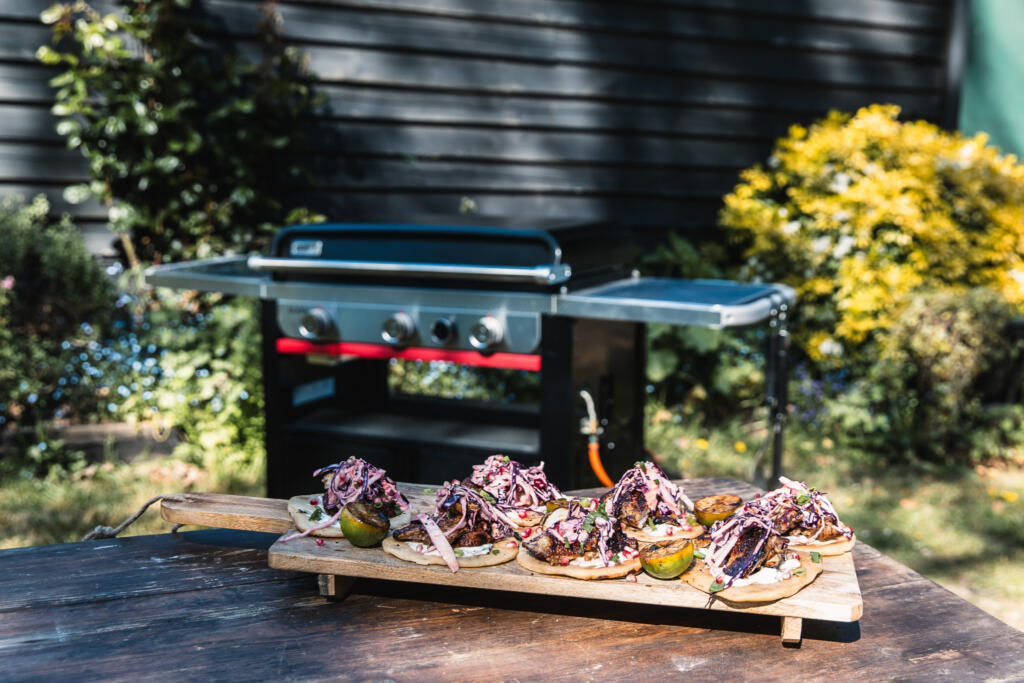
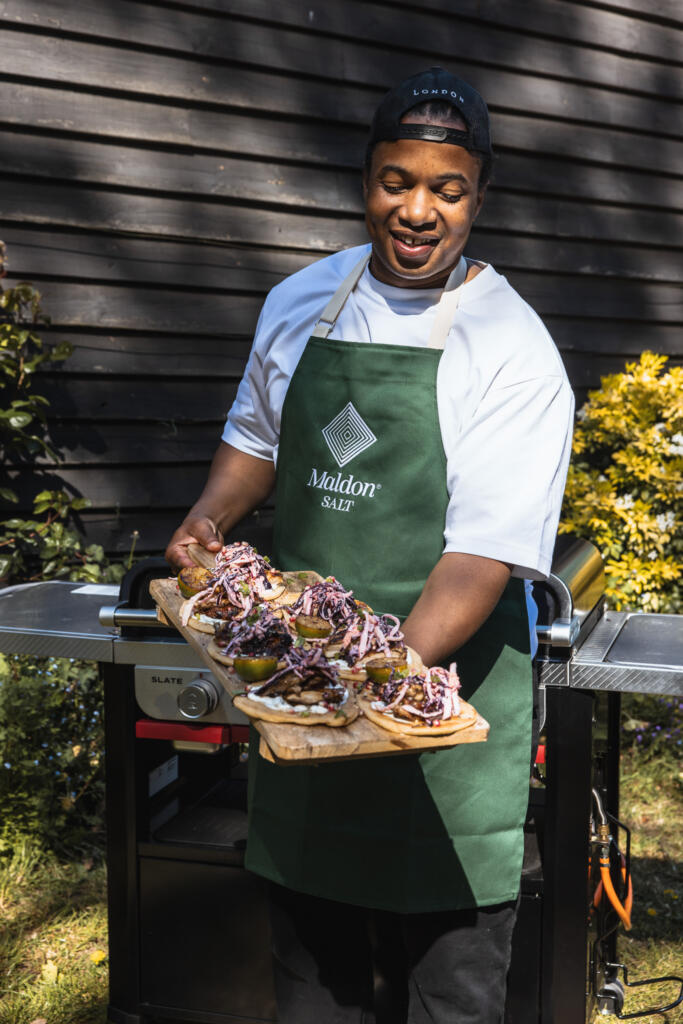
Combining authentic Caribbean-inspired flavours, premium outdoor cooking equipment, and the distinctive taste of Maldon Chilli Sea Salt, this recipe celebrates the joy of cooking outdoors and sharing great food with family and friends.
Why Cook on a Weber Slate Griddle?
For more than 70 years, Weber has been at the forefront of outdoor cooking, helping grill enthusiasts create unforgettable meals. The Weber Slate Griddle is designed for versatility, featuring a pre-seasoned carbon-steel cooking surface, even edge-to-edge heat distribution, and temperatures exceeding 500°F (260°C), making it ideal for everything from smash burgers and fajitas to perfectly charred jerk chicken.
The Weber Slate’s consistent heat control allows the jerk-marinated chicken to develop a beautiful caramelised crust while ensuring the homemade roti cooks evenly with the perfect balance of softness and char.
Meet the Chef: Alexander James (AJ), Founder of All in a Box
Alexander James, better known as AJ, is the Founder and Managing Director of All in a Box, an experience-led food and catering business that was born during lockdown from a simple idea: helping people create unforgettable food experiences at home. What started around AJ’s kitchen table in Buckinghamshire has grown into a thriving family-run business, delivering premium food experiences, corporate catering, events and nationwide gifting campaigns, while staying true to its roots of bold flavour, great comapny and memorable moments.
AJ’s food philosophy is heavily influenced by both Caribbean and British culinary traditions, bringing together vibrant spices, quality ingredients and outdoor cooking techniques. His pass for flavour is at the heart of every All in a Box menu, creating dishes that celebrate comfort food with a creative, modern twist. AJ has built a reputation for delivering food that connects people and creates lasting memories.
The Importance of Maldon Chilli Sea Salt In This Recipe
Greta seasoning is the foundation of exceptional food, and Maldon Chilli Sea Salt plays a crucial role in this recipe. The distinctive crunch of Maldon’s pyramid-shaped sea salt flakes combined with warming chilli create the perfect finishing touch for the sweet, spicy and smoky flavour profile.
Throughout the recipe, a range of Maldon Sea Salt flavours work together to build layers of flavour:
Maldon Chilli Sea Salt elevates the hot honey glaze and final presentation with a balanced chilli kick and signature flaky texture.
How to Make Jerk Hot Honey Chicken Roti
Blitz all the marinade ingredients in a blender until smooth — this is ‘Pearl’s‘ recipe and it gets better the longer it sits. Coat the chicken thoroughly and marinate overnight in the fridge, minimum 12 hours. Don’t shortcut this; the depth of flavour comes from the time.
For the roti, drain the soaked split peas and boil in fresh water for 15–20 minutes until just tender but still holding shape. Drain well and pulse in a food processor with cumin to a fine breadcrumb consistency — you want texture, not a puree. Spread on a tray and cool completely.
In a bowl, mix the flour, baking powder, butter and Maldon Original Sea Salt. Add the warm water and bring together into a soft dough. Knead for 5 minutes until smooth, then rest covered for 30 minutes.
Divide the dough into 4 balls. Flatten each, spoon 1 teaspoon of the split pea mix into the centre, pinch closed and roll out gently on a floured surface to a round about 20cm wide. Take your time — the filling wants to stay sealed in.
Mix the slaw ingredients in a bowl, scrunch with your hands and leave to soften for 30 minutes. Stir the garlic yoghurt together and chill.
Warm the honey, hot sauce and lime in a small pan until just loose. Season with Maldon Chilli Sea Salt and set aside.
Get the Weber Slate properly hot — you want a steady, even heat across the surface. Lay the chicken skin-side down and don’t move it for 4–5 minutes. Flip, baste with the hot honey, and cook for another 4–5 minutes until charred and cooked through. Rest for 5 minutes, then slice.
Brush the Slate with a little oil and griddle the roti for 1–2 minutes a side until puffed, golden and lightly charred. Keep warm under a clean tea towel.
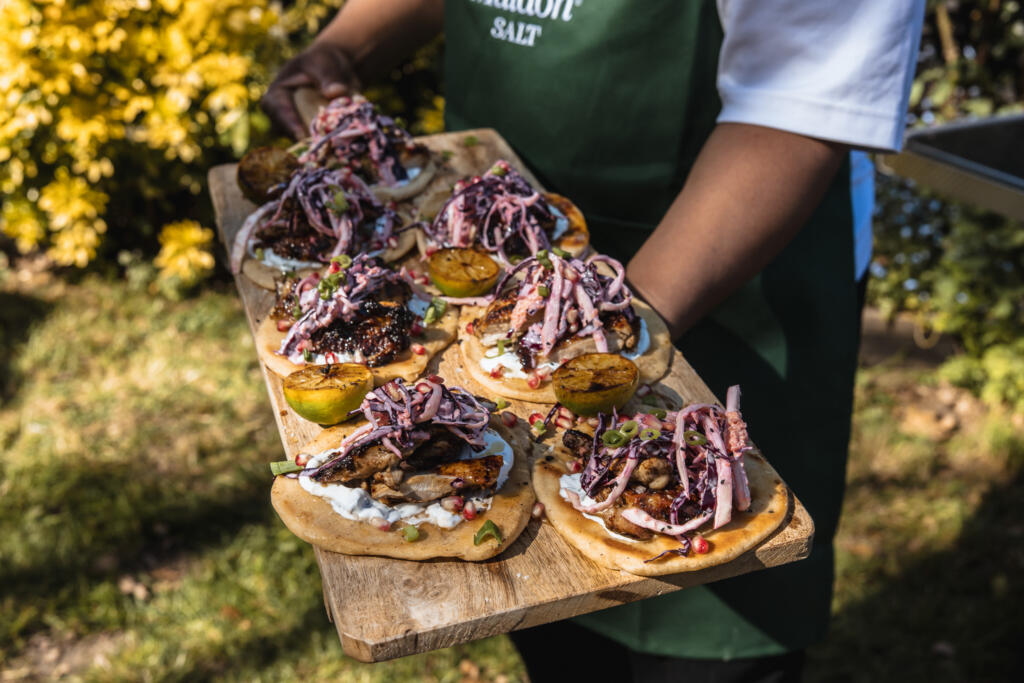
Build: roti base, smear of garlic yoghurt, sliced chicken, pile of slaw, extra drizzle of hot honey, pomegranate, coriander and parsley. Finish with a generous pinch of Maldon Chilli Sea Salt.
Discover More from Weber, Maldon Salt and All in a Box
To elevate your everyday cooking, discover the complete Maldon Salt collection.
For more creative recipes and inspiration, visit All in a Box.
A Maldon Salt, Meliz Berg & AEG Collaboration
Maldon Chilli Sea Salt with AEG Kitchen Appliances
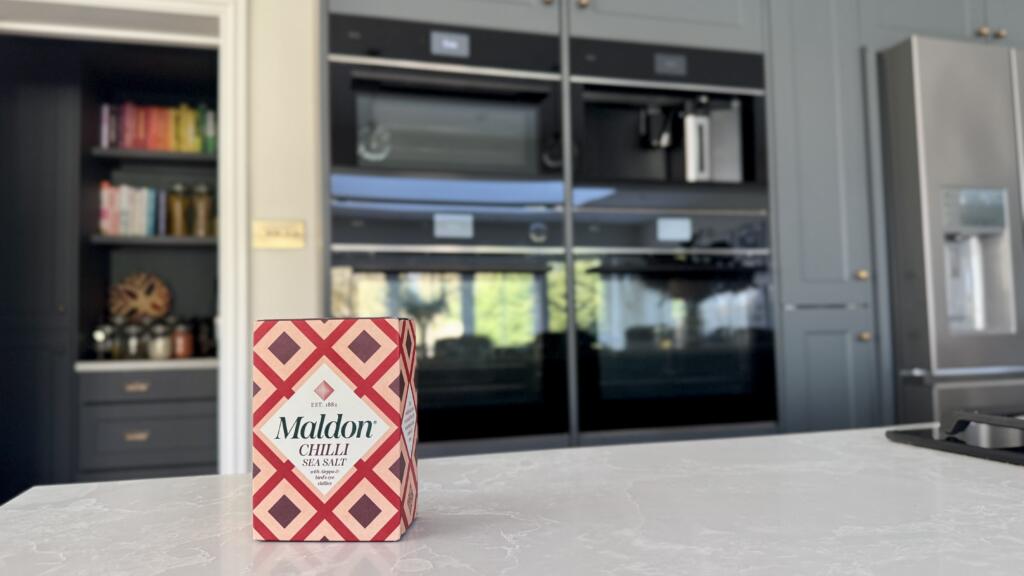
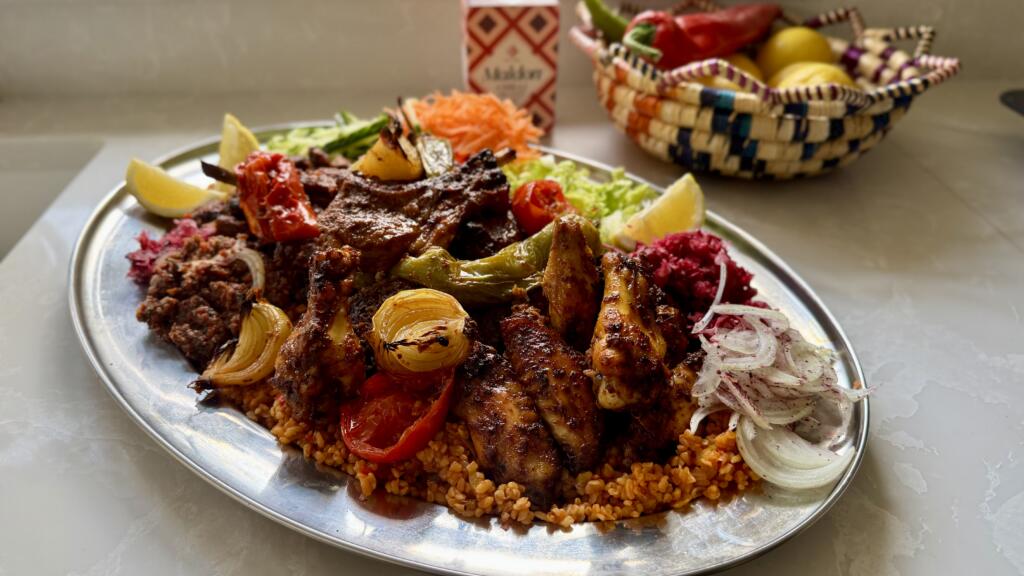
If there’s one thing that unites us all, it’s the joy of a proper ‘fakeaway’ – big flavour, minimal fuss, and the kind of pread that makes everyone crowd around the table. In collaboration with Maldon Salt, celebrated food writer Meliz Berg, and AEG Kitchen Appliances, this Ultimate Mixed Grill Platter brings together bold marinades, perfectly cooked meats and vegetables, and a pinch of Maldon Chilli Sea Salt to finish.
Why Maldon Chilli Sea Salt Makes the Difference
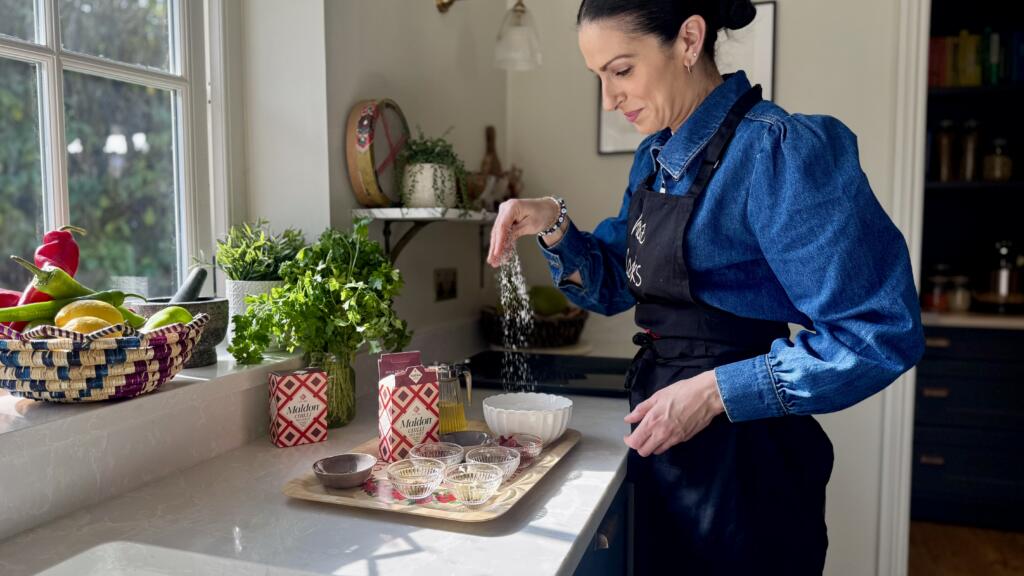
Meliz Berg seasoning with Maldon Chilli Sea Salt
A finishing salt matters – and Maldon Chilli Sea Salt delivers more than heat alone. With it’s signature pyramid flakes and gentle chilli warmth (from the infused Aleppo pepper and bird’s eye chilli), it lifts marinades, enhances caramelisation and adds crunch at the final moment, allowing each ingredient to shine without overwhelming it. Sprinkle just before cooking, it seasons with precision and personality.
About AEG: Designed for Taste
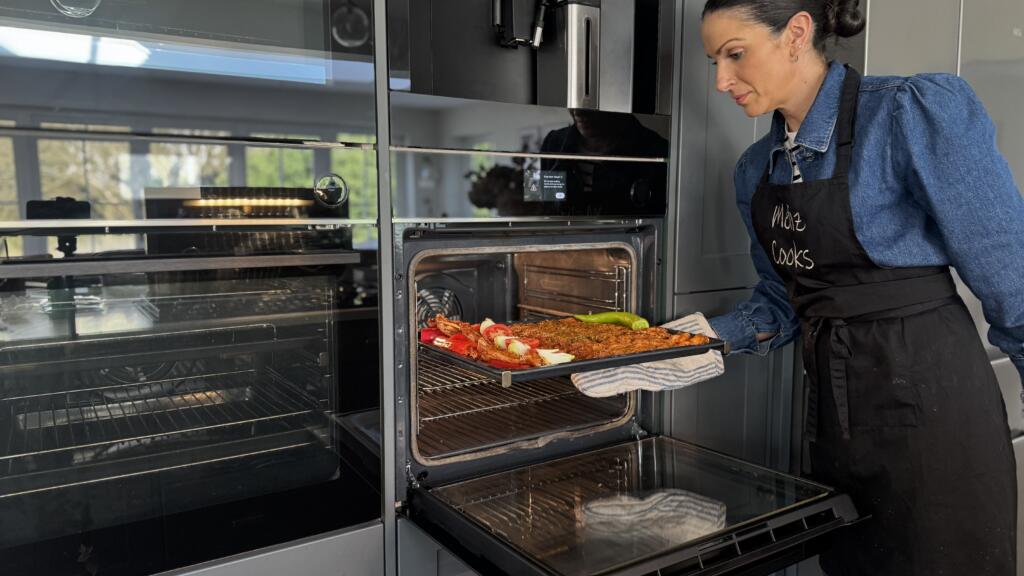
Meliz Berg with AEG Oven Setup
For oven a century, AEG has been the forefront of kitchen innovation, designing appliances that empower people to cooking with confidence. Rooted in German engineering and driven by passion for taste, AEG focuses on intelligent technology that supporting creativity rather than complicating it – from ovens that enhance flavour and texture to intuitive controls that give you precision without stress.
Cooking with Confidence: AEG in the Kitchen
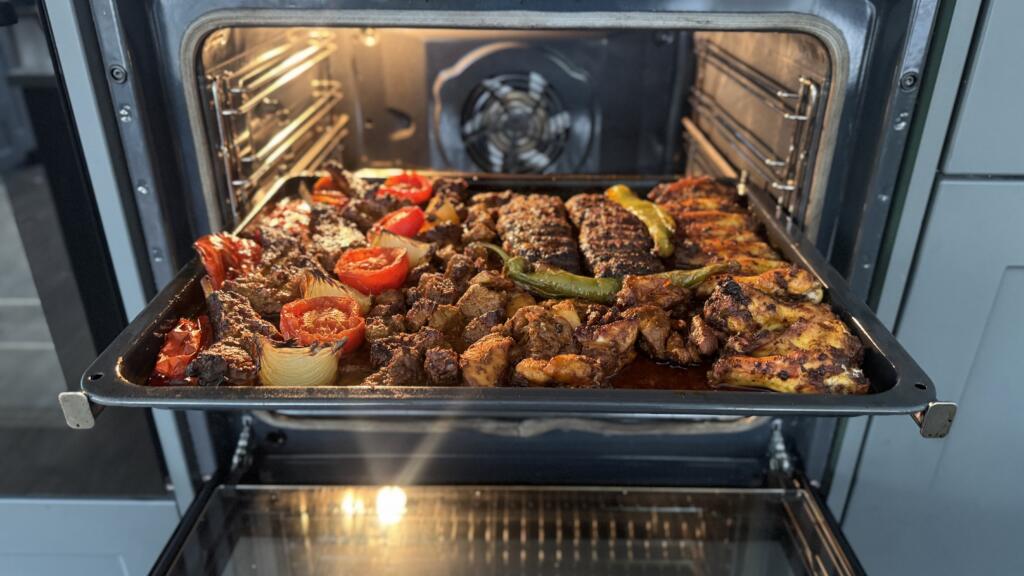
Mixed Grill Platter, cooked by AEG Oven Setup
To bring every element of this recipe to life, Meliz cooked using premium AEG Kitchen Appliances, including the AEG 7000 MealAssist Oven with SteamCrisp, featured throughout the cooking videos.
This innovative oven uses a combination of 25% steam and 75% heat for perfectly even cooking – ideal for slow-roasting vegetables with crisp, caramelised edges while keeping meats tender and juicy. With its CookSmart Touch Display, telescopic runners and pyrolytic self-cleaning, it offers precision, ease and outstanding performance.
Designed for entertaining, batch-cooking or freezing ahead, this platter used one versatile base marinade that adapts beautifully across chicken wings, lamb cutlets, kofte and chicken shish – all cooked together at the same temperature for ease and consistency. It’s modern Middle Eastern-inspired cooking as its most generous, unfussy and flavour-forward.
Step 1 – Prepare the Base Marinade
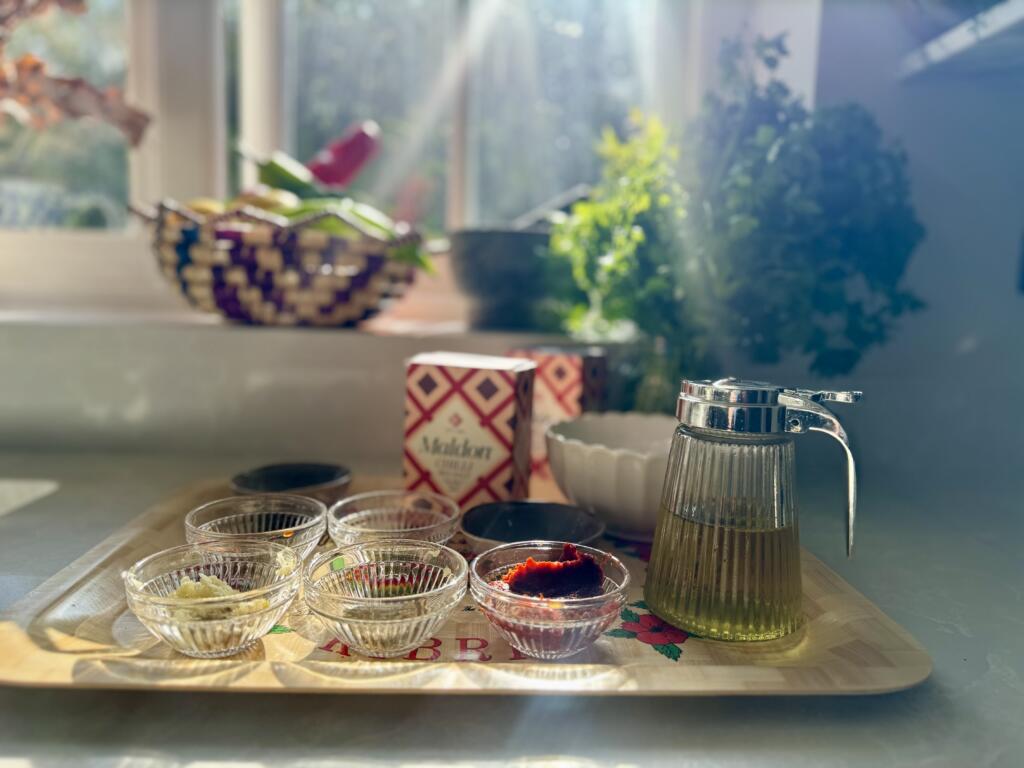
Ingredients (listed left) for the Base Marinade
Start by making the base minade – this is the backbone of the entire platter.
Mixed together the garlic, red pepper paste, olive oil, spices and oregano until you have a thick, aromatic paste. This single marinade adapts beautifully across chicken, lamb and mince, giving you flexibility without extra work.
Step 2 – Make the Chicken Wings
Add the chicken wings to the marinade and stir well. Cover and refrigerate for at least 4 hours, no longer than 24.
Preheat oven to 200c Fan.
Grease a large baking tray with the olive oil.
Take the chicken wings out of the fridge 30 minutes before cooking.
Place the oiled tray in the preheated oven to heat up for 15 minutes.
Season the marinated chicken wings with the Maldon Chilli Sea Salt, stir well, then carefully lay all the chicken wings flat on the hot, oiled baking tray.
Bake in the oven on the middle shelf for 30-35 minutes until beautifully tender and charred around the edges.
Step 3 – Make the Lamb Cutlets or Lamb Shish
Add the milk to the marinade recipe and stir well until smooth. Add the lamb to the marinade and stir well. Cover and refrigerate for at least 4 hours, no longer than 24 hours.
Preheat oven to 200c Fan.
Grease a large baking tray with the olive oil.
Take the lamb out of the fridge 30 minutes before cooking.
Place the oiled tray in the preheated oven to heat up for 15 minutes.
Season the marinated lamb with the Maldon Chilli Sea Salt, stir well, then carefully lay the lamb on the hot, oiled baking tray along with the vegetables.
Bake in the oven on the middle shelf for 30-35 minutes until beautifully tender and charred around the edges.
Step 4 – Make the Lamb or Chicken Kofte
Add the onions and peppers to a clean muslin cloth and squeeze out all the juice (keep the juice to add to the chicken shish marinade if making).
Add the drained onions, peppers to the rest of the ingredients and stir well. Cover and pop in the fridge for at least an hour but preferably overnight for all the flavours to come together.
Preheat oven to 200c Fan.
Grease a large baking tray with the olive oil.
Take the mixture out of the fridge 30 minutes before cooking.
Place the oiled tray in the preheated oven to heat up for 15 minutes.
Shape the mixture into two extra large long köfte (you can shape them into smaller sized köfte, but please note the cooking time will reduce by at least 10 minutes to ensure the smaller köfte stay as tender as possible), making ridges at 1cm intervals along the left of the köfte using a skewer dipped in water (to prevent it from sticking to the mixture).
Carefully lay the köfte on the hot, oiled baking tray along with the vegetables.
Bake in the oven on the middle shelf for 30-35 minutes until beautifully tender and charred around the edges.
Step 5 – Make the Chicken Shish
Add the yoghurt, pomegranate molasses and honey (and the reserved onion and red pepper juices, if you have them) to the marinade, and stir well until smooth.
Add the chicken to the marinade and stir well. Cover and refrigerate for at least 4 hours, no longer than 24.
Preheat oven to 200c Fan.
Grease a large shallow baking tray with the olive oil.
Take the chicken out of the fridge 30 minutes before cooking.
Place the oiled tray in the preheated oven to heat up for 15 minutes.
Season the marinated chicken with the Maldon Chilli Sea Salt, stir well, then carefully lay the chicken on the hot, oiled baking tray along with the vegetables.
Bake in the oven on the middle shelf for 30-35 minutes until beautifully tender and charred around the edges.
Have You Tried It?
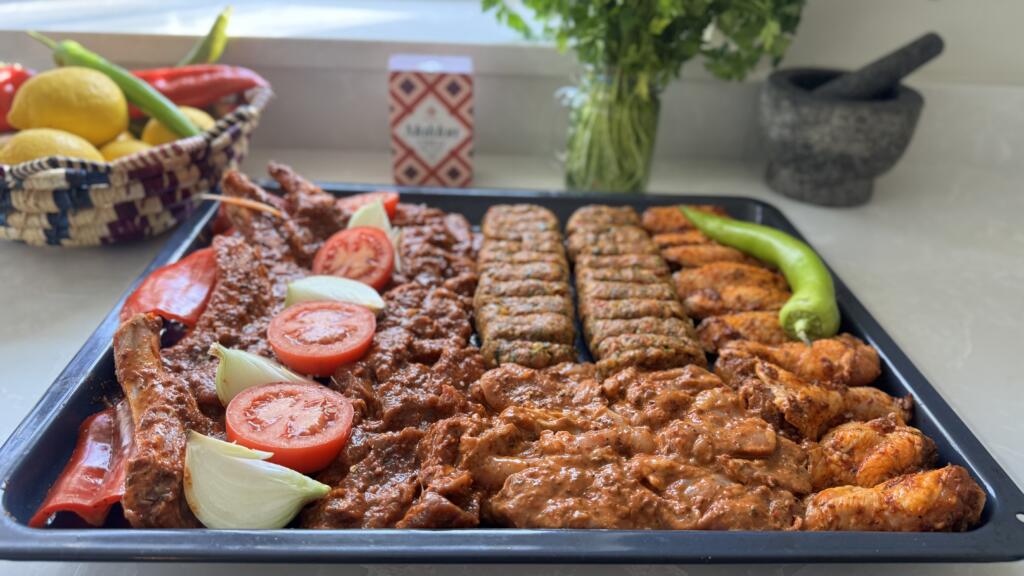
Ready to be Roasted: Complete Mixed Grill Platter in Base Marinade with Maldon Chilli Sea Salt
This is the kind of food that invites people to linger – platters placed at the centre of the table, hands reaching in, conversations getting louder and the dishes empty. Guided by Meliz Berg’s bold, generous flavours, brought to life with AEG’s precision cooking, and finished with the unmistakable crunch of Maldon Chilli Sea Salt, this mixed grill is about more than what’s on the tray.
If you try this recipe at home, we’d love to see it – tag us in your creations so we can share your wonderful cooking with our community. And if you’re feeling inspired to upgrade your kitchen, you can explore more AEG appliances here, and discover how their innovative technology can transform your everyday cooking.
Create a show-stopping classic beef Wellington with this simplified, step-by-step recipe, which serves up to 8 people. This easy beef Wellington features a beautifully seared beef fillet, which is brushed with Dijon mustard. wrapped in a rich mushroom duxelles made from chestnut mushrooms, layered with Parma ham (or prosciutto), then enclosed in all-butter pastry for a golden, flaky pastry finish. Careful chilling and resting of the beef Wellington ensures a medium-rare, perfectly pink centre on the beef.
Seasoned with Maldon Original Sea Salt and cracked black pepper, the beef Wellington with puff pastry pairs beautifully with creamy mashed potatoes, seasonal vegetable likes roasted carrots, and a rich red wine jus. This dish is ideal for any special occasion centrepiece; as a Easter alternative to lamb to a table show-stopper at Christmas time.
How to Make a Beef Wellington
Crafting a show-stopping beef Wellington by searing a tender beef fillet, wrapping it in mushroom duxelles and Parma ham, and baking it in golden, flaky puff pastry until perfectly pink at the centre.
Step 1 – Bring the Beef to Room Temperature
Remove the beef fillet from the fridge 1 hour before cooking so that the meat reached room temperature. This helps the meat cook more evenly, ensuring you achieve that signature pink centre without overcooking the outer layers.
Step 2 – Make the Mushroom Duxelles
Add unsalted butter and 1 tbsp olive oil to a large frying pan.
Soften the finely diced onion gently until translucent, then add the crushed garlic.
Pulse the chestnut mushrooms in a food processor until finely chopped, then cook them with the onions/garlic until all the liquid has evaporated (approx. 15 minutes). It is important to reduce the moisture from the mushroom duxelles because excess water can cause the pastry of the beef Wellington to become soggy.
Stir through thyme leaves and chopped parsley in the last 5 minutes.
Season with Maldon Original Sea Salt flakes and cracked black pepper, then cool completely, chilling in the fridge to firm up.
Step 3 – Sear the Beef Fillet
Generously season the beef fillet all over with Maldon Original Sea Salt flakes and cracked black pepper.
Heat a large frying pan over medium-high to high heat until very hot, then add 1 tbsp olive oil.
Sear the beef on all sides until well caramelised – no longer than 2 minutes total so the centre stays very rare.
Remove from the pan and rest for 30 minutes to cool slightly.
Step 4 – Wrap the Beef in Parma Ham and Duxelles
Lay out overlapping layers of clingfilm on a clean surface.
Arrange the Parma ham slices in an even layer that will fully wrap the beef.
Spread the chilled mushroom duxelles evenly over the Parma ham.
Brush the rested beef with Dijon mustard, place it on one edge, then use the clingfilm to roll everything up tightly into a firm “sausage” shape.
Twist the ends to secure and chill in the fridge for at least 1 hour (or overnight).
Step 5 – Encase in Puff Patry
Unroll the puff pastry on its parchment paper.
Remove the clingfilm from the beef log and place it in the centre of the pastry.
Wrap the pastry around the beef, sealing the edges well and ensuring the seam is on the underside.
Use beaten egg to brush and seal the pastry.
If needed, trim and use extra pastry to patch any gaps and decorate (e.g. thin strips for a lattice).
Transfer to a baking tray lined with baking paper and chill for a further hour to firm up.
Step 6 – Bake the Beef Wellington
Preheat the oven to 200°C (fan if appropriate – specify if recipe assumes fan or conventional).
Brush the Wellington all over with beaten egg for a glossy finish.
Bake for around 35 minutes, or until the pastry is deep golden brown.
You can mention indicative doneness (e.g. for medium-rare fillet, the centre should still feel slightly springy; optional note on using a thermometer if desired).
Remove from the oven and rest for 20 minutes before slicing.
Step 7 – Finish and Serve
Just before serving, sprinkle the pastry with Maldon Sea Salt flakes and a few extra thyme leaves. Seasoning your Wellington with Maldon Sea Salt flakes enhances flavour and texture by delivering clean, bright saltiness that lifts the beef, duxelles, and pastry while adding a delicate, crunchy finish.
Slice into 1-inch pieces with a sharp knife.
To Serve
A beef Wellington is ideal for Christmas, New Year’s, or any special occasion because it feels truly celebratory. It’s luxurious yet comforting, feeds a crowd with ease, and can be prepped ahead of time, making it perfect for busy kitchens. It’s classic flavour pair effortlessly with seasonal sides likes roasted carrots and red wine jus, making it just as fitting as a show-stopping alternative to lamb on Easter.
Here are a few sides that you can pair your beef Wellington:
Bring the beef fillet to room temperature for even cooking and a perfectly pink centre.
Sear the beef until golden to lock in flavour and prevent excess moisture.
Cook the mushroom duxelles thoroughly to remove moisture and avoid soggy pastry.
Wrap tightly with Parma ham (or prosciutto) to create a moisture barrier for the beef and mushroom duxelles.
Chill the beef Wellington before baking to help and pastry hold it’s shape.
Use all-butter puff pastry for the best golden, flaky finish.
Season generously with Maldon Sea Salt and cracked black pepper for an elevated flavour.
Rest the beef Wellington before slicing to keep the layers intact.
Doneness, Make-Ahead & Reheating Notes
How do I know when the beef will be done in a beef Wellington
Medium-rare is the classic level of doneness for beef Wellington. After 35 minutes at 200°C and resting, the 1lg fillet should be cooked and have a warm, perfectly pink centre with a tender texture.
Can I prepare beef Wellington in advance?
Yes, you can absolutely prepare beef Wellington in advance. You can assemble the Wellington (beef, mushroom duxelles, Parma ham, pastry), then wrap tightly in clingfilm and chill for up to 25 hours before baking.
Chilling helps the pastry stay crisp and golden and improves overall shape.
Brush with egg wash just before baking for the best finish.
Can I reheat beef Wellington?
Yes, you can reheat beef Wellington. Leftover slices can be reheated gently in the oven at 160°C (320°F) for 12-15 minutes until warmed. Make sure you use a wire rack to keep the pastry crisp.
You can also reheat in an air fryer. Set the air fryer to 150°C (300°F) and heat to 10-12 minutes, flipping halfway through for even cooking.
Avoid reheating in the microwave – it will make the pastry soggy and tough.
Please note – the beef will now stay medium-rare after reheating; it will cook further, but the flavour will remain delicious.
Celebrate winter flavours in style with this stunning vegetable pithivier, a French-inspired centrepiece that’s as beautiful as it is delicious. It’s essentially a doomed filling of sweet caramelised onions, earthy cooked chestnuts, and vibrant winter veg – think tender butternut squash slices, jewel-toned beetroot slices and wilted spinach with grated nutmeg. All encased in buttery puff pastry lid and base, baked until golden and crisp with flaky layers.
The recipe is all about low and slow, caramelising onions in a heavy-based pot, layering in vegetables for depth and colour. Season generously with Maldon Original Sea Salt flakes for a delicious crunch. Once assembled, you can score the pastry with a lattice or spiral pattern, crush with egg wash for that irresistible shine, and bake on a preheated tray in a fan oven until the pastry in bronzed nicely.
Serve warm with a dollop of horseradish crème fraiche and a sprinkle of fresh dill for brightness. Perfect for a festive table or an elegant vegetarian main.
How to Make a Vegetable Pithivier
Equipment needed:
Heavy‑based pot, 2 large roasting trays, large frying pan or wide pot with lid, pastry brush, sharp knife for scoring, baking sheet (preferably preheated), 30 cm and 25 cm guides/plates for cutting circles, parchment
Step 1 – Caramelise the Onions
Heat 2 tbsp olive oil in a heavy‑based pot over medium‑low.
Add onions and a generous pinch of Maldon Sea Salt; cook 40–50 minutes, stirring occasionally, until deeply caramelised.
Stir in butter, caraway seeds and chestnuts; cook 5 minutes until fragrant and lightly browned. Cool.
Step 2 – Roast the Root Vegetables
Heat oven to 200°C fan (220°C conventional / 425°F).
Arrange squash on one tray, beetroot on another. Drizzle with olive oil, season with Maldon Sea Salt, and roast 30–35 minutes until tender and golden. Cool.
Step 3 – Wild and Season the Spinach
In a large pan over medium heat, add washed spinach (with residual water). Cook until just wilted and bright.
Cool, squeeze out excess liquid thoroughly, then season with grated nutmeg, black pepper and Maldon Sea Salt.
Step 4 – Cut the Pastry
Roll pastry sheets to ~2 mm thick. Cut one 25 cm circle (base) and one 30 cm circle (lid).
Step 5 – Build the Dome
Place the 25 cm base on parchment. Spread onion‑chestnut mixture inside, leaving a 2 cm border.
Layer squash, then beetroot, then spinach, shaping into a compact dome.
Step 6 – Enclose, Score and Chill
Brush border with beaten egg. Drape the 30 cm lid over the filling, smoothing to encase with no air pockets.
Seal edges firmly; trim neatly.
Lightly score from top to edge in curved lines to create the classic spiral. Chill 20 minutes while you heat oven to 180°C fan (200°C conventional / 400°F).
Step 7 – Bake and Serve
Brush all over with egg wash. Bake 40–45 minutes until deep golden and crisp.
Mix horseradish, crème fraîche, dill and black pepper. Slice and serve with the dill horseradish crème.
Texture/Doneness cues: Pastry is richly golden with defined layers; base is crisp; filling hot throughout.
Tips & FAQs
Tips:
Keep fillings cool and relatively dry to avoid a soggy base—squeeze spinach well and cool onions/veg completely.
Build a stable dome: heavier veg (onion/chestnut, squash, beetroot) beneath, drier spinach on top.
For extra shine and lift, egg‑wash twice: once before chilling and again just before baking.
Bake on a preheated tray or baking steel for a crisp bottom.
FAQs:
What is a pithiver?
A pithivier is a round, enclosed pie made with puff pastry and filled with either sweet almond cream (frangipane) or savoury ingredients. It’s signature look comes from the domed shape and decorative scoring on top, which helps the pastry rise beautifully and give it that elegant, spiral finish.
What did the pithivier originate from?
The pithivier originates from France, specifically from the town of Pithiviers in the Loiret region. The pie was a way to showcase rich fillings and buttery pastry for special occasion, which is why it’s often associated with festive or celebratory meals.
What pastry is best for a pithivier?
All‑butter puff pastry gives superior lift and flavour. Roll to ~2 mm for clean layers without blow‑outs.
How do I prevent a soggy bottom?
Cool fillings fully, squeeze spinach dry, seal edges well, and bake on a preheated tray at 180°C fan.
Can I make this ahead?
Cook onions and roast veg up to 1 day ahead. Assemble and chill the unbaked pithivier for up to 24 hours, then bake fresh.
Can I freeze a pithivier?
Yes. Freeze assembled but unbaked on a tray, then wrap. Bake from frozen at 180°C fan, adding 10–15 minutes; tent with foil if over‑browning.
How long does it take to bake?
40–45 minutes at 180°C fan (200°C / 400°F), until deep golden and piping hot.
Pair with the dill horseradish crème or a light gravy.
Finish slices with a pinch of Maldon flakes for sparkle and seasoning at the table.
Storage & Reheating
Fridge: Cool, then refrigerate slices up to 3 days.
Reheat: 170°C fan (190°C / 375°F) 12–15 minutes on a tray until hot and crisp.
Freeze: See FAQ; reheat from frozen until pastry is crisp and centre is steaming.
Made This Already?
Rate the recipe and share your tips in the comments. For more festive vegetarian mains, browse our Christmas collection.
A Summer Staple!
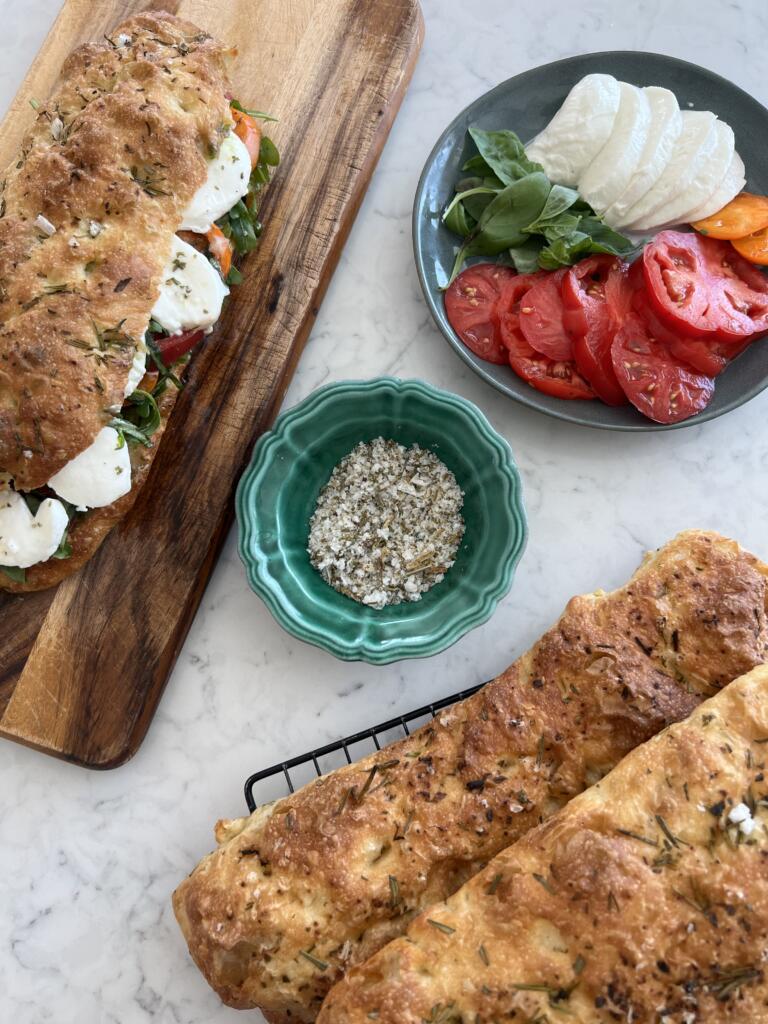
Lacey Ostermann has a way of turning simple ingredients into unforgettable experiences – and her Garlic Sea Salt and Rosemary Focaccia Sandwich Rolls are no exception. Infused with the deep, aromatic flavour of Maldon Garlic Sea Salt and fresh rosemary, these golden rolls are baked to perfection: crisp on the outside, pillowy within. Ideal for summer, they’re the perfect vessel for seasonal favourites like a caprese sandwich layered with pesto, peppery rocket, and juicy tomato slices. Whether for a picnic, lunch al fresco, or casual entertaining, these rolls are the ultimate upgrade to your summer sandwich game.
Mix
Whisk together warm water, olive oil, honey (or sugar) and yeast. Every bread flour absorbs a different amount of water, so start with 390ml water and reserve the rest for later.
Stir in bread flour and salt until well combined. Add in remaining water gradually to achieve a dough consistency similar to that shown in the video.
Cover and rest at room temperature for 15 minutes.
Stretch & Fold and First Proof
Stretch & fold the dough. First, wet your hand (so the dough doesn’t stick) and then grab the dough at the 12 o’clock position in the bowl.
Pull the dough upwards and then fold it down to the 6 o’clock position. Repeat this motion about 8-10 times around the bowl.
The dough should tighten up a bit after performing the stretch & folds.
Cover and rest at room temp for 15 minutes.
Repeat the series of stretch & folds once more, cover and proof at room temperature for 1-1.5 hours or until the dough has nearly doubled in size.
Transfer to Tray and Second Proof:
Prepare a large baking tray (see dimensions above in equipment list) with non-stick parchment paper and 3 tablespoons of extra virgin olive oil. I put a tiny bit of oil underneath the paper so it stays in place on the tray.
Tip the dough into the prepared tray. Rub a little oil from the tray onto your hands and fold one side of the dough towards the middle. Repeat with the other side, folding it over the top as if you are folding a piece of paper into thirds (it will look like a large burrito). Rotate the dough so its long side aligns with the long side of the tray, then flip it over so the seams from the folding are at the bottom and the top is smooth.
Cover the dough with a piece of oiled parchment paper and leave it to proof at room temperature for 1-1.5 hours.
Shape & Bake
Preheat the oven to 220C or 430F and move the baking rack to the lowest position.
Sprinkle the rosemary over the top of the dough and drizzle over about a tablespoon of extra virgin olive oil. Dimple the rosemary into the dough, taking care not spread the dough all the way to the edges of the tray – there should be some empty tray bordering the dough (use the video tutorial for visual guidance). Use your hands gently guide the edges of the dough into a rectangular shape to it’s easy to cut the dough into evenly sized rolls.
Use an oiled dough scraper or sharp knife to cut the rectangle in half. Cut each of those halves in half so you have four long roll shaped pieces of dough. Gently stretch the dough to the length of the tray (about 12-13 inches) and space them out evenly across the tray (see video). Sprinkle each roll generously with Maldon Garlic Sea Salt and bake on the lowest rack of the oven for 18-22 minutes or until the rolls are a deep golden brown. Baking on the bottom rack should help to crisp up the bottom of the bread.
Once baked, remove from tray and transfer to a cooling rack. They’re best enjoyed fresh but can be stored in large freezer bags for up to 3 days at room temperature or frozen for up to 2 months. To bring back to life, wrap in foil at bake at 200C/400F for 10-15 minutes. Peel back the foil for the last few minutes so they can crisp back up.
Fill the rolls with your favourite summer sandwich fillings. My go-to is a caprese sandwich with pesto, rocket, aged balsamic vinegar, basil, mozzarella and juicy heirloom tomato slices…seasoned with more Maldon Garlic Sea Salt, of course!
Tip the flour in the bowl of a stand mixer. Put the yeast on one side of the bowl and the Maldon Sea Salt on the other (this separation prevents the salt from killing the yeast). Put the mixer on low to evenly distribute the dry ingredients.
With the motor running, pour in 3 tbsp olive oil, followed by 350-370ml water. Add the water gradually until you have a slightly sticky dough (you may not need the full 370ml).
Leave the mixer running on a medium speed to knead the dough for 7-10 minutes until the dough is coming away from the sides of the bowl and feels stretchy when pulled. Transfer the dough to a clean bowl, cover with a tea towel and leave to prove for an hour or so until doubled in volume.
Grease a rectangular, shallow tin (about 25cm x 20cm) with olive oil. Gently tip the dough into the tin and use your fingertips to stretch the dough towards the edges of the tin. Cover with the tea towel and leave to prove for another 30-45 minutes.
Preheat the oven to 200C fan. Press your fingers into the dough to make dimples, scatter with rosemary leaves and drizzle with 3 tbsp olive oil. Bake for 35-40 minutes until golden. As soon as the focaccia comes out of the oven, drizzle with a final 2-3 tbsp olive oil. Sprinkle with Maldon Sea Salt and cut into squares.
There’s something about slow-cooked pork…its deep, smoky sweetness, the way it falls apart under the lightest touch. This one, kissed by Essex oak and cider, is worth the wait.
Annie-Mae Herring’s smoked Essex pork shoulder with a cider BBQ sauce is a true homage to Essex, celebrating it’s rich flavours and local ingredients. Seasoned with Maldon Chilli Sea Salt for a touch of heat and slow-smoked to perfection, this tender pork is finished with a tangy, cider-infused BBQ sauce made from the finest Essex cider. Perfect for gatherings, it’s best piled into soft buns for the ultimate BBQ feast!
Here is how to make smoked Essex pork shoulder
Photography by https://www.instagram.com/theculinarybee/
Rub the pork—massage in the Maldon Chilli Sea Salt, sugar, spices, a splash of oil. Let it sit while the barbecue comes to life.
Set for indirect cooking, low and slow, around 120°C. A tray of water beneath keeps things gentle.
Smoke for 6–8 hours, topping up the wood as needed. Mop with a little cider now and then.
Make the sauce—simmer everything until rich and glossy. Taste. Adjust.
When the pork pulls apart with ease, rest, shred, mix with sauce. Pile into buns, let it drip onto fingers, eat outside with the smell of wood smoke still clinging to your clothes. Essex on a plate.
Transform your weeknight dinners with air fryer spicy Peking duck, seasoned to perfection with Maldon Chilli Sea Salt. This quick and easy dish brings the irresistible flavours of a takeaway favourite right to your kitchen. Crispy skin, tender duck and a bold chilli kick make it a satisfying and hassle-free option for busy evenings. Why settle for a delivery when you can enjoy this flavourful ‘fakeaway’ in no time?
Perfect for celebrating Lunar New Year or elevating any weeknight, this spicy Peking duck pairs beautifully with steamed pancakes, fresh cucumber and spring onions. The Maldon Chilli Sea Salt adds a fiery twist, enhancing the classic flavours while keeping preparation simple and convenient. Serve it up and impress your family or guests with this effortless, restaurant-style feast.
What is Lunar New Year?
The Lunar New Year, also known as the Chinese New Year, is a 15-day festival which begins on the first day of the first lunar month in the calendar, ending with the ‘Lantern Festival’ on the 15th day. It’s full of celebration, centred around removing the bad and the old, and welcoming the new and the good. It’s a time where many worship ancestors, exorcise evil sprits and pray for good harvest. The date of the Lunar New Year changes every year. In 2024, this will occur on the 29th January. Across many countries, including China, South Korea, North Korea, Singapore and Cambodia, each year is associated with an animal from the zodiac. For 2025, this will be the Year of the Snake. The Snake represents wisdom, transformation and renewal.
Why do you eat duck during Lunar New Year
According to Reader’s Digest, duck is one of the most popular dishes at Lunar New Year dinner. This is because duck symbolises loyalty and is a great choice for good fortune because of it’s ‘reddish hue’ – the luckiest colour in Chinese culture.
Here is how to make Air Fryer Spicy Peking Duck
To a large pan, add the Shaoxing wine, soy sauce, soft brown sugar, spices, Maldon Chilli Sea Salt, spring onions, ginger, lemongrass, hoisin and chicken stock. Bring it up to a simmer and then add the duck legs and breast. Continue to simmer gently for 1 hour 30 minutes.
After this time, remove the duck from the pan and pat dry using kitchen paper. Preheat the air fryer to 200c. Then place the duck into the basket and cook for 10 – 15 mins so skin goes really crispy and caramelized.
While the duck is crisping up, mix together the rice vinegar, Maldon Sea Salt and caster sugar together in a small bowl and then add the julienned carrot. Toss it through and set aside to lightly pickle.
When the duck is cooked, remove it from the air fryer. Slice the duck breast and shred the duck leg meat, then place it onto a serving platter. Warm through the Chinese pancakes and then serve alongside the crispy duck, hoisin sauce and the julienned spring onions, cucumber and pickled carrots. Let everyone tuck in and make their own pancakes up!
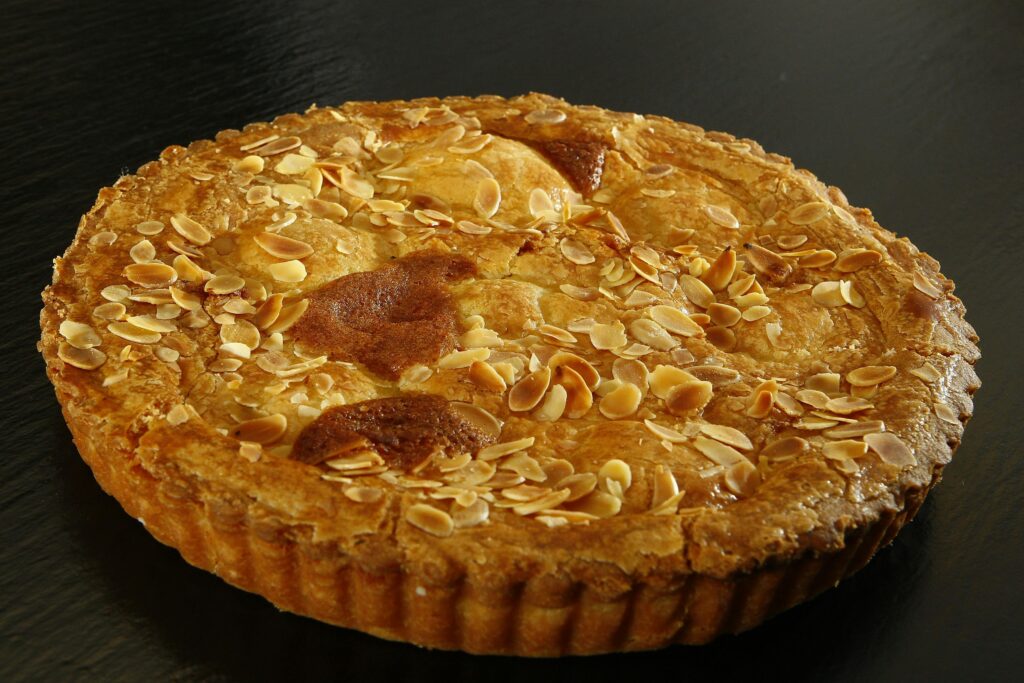
Indulge in the rich, comforting flavours of a spiced apple frangipane tart, where the warm, nutty essence of almond meal meets the crisp sweetness of Granny Smith apples. This elegant apple tart is elevated with the subtle smokiness of Maldon Smoked Sea Salt, adding a sophisticated twist to the classic dessert. Each bite of this tart reveals layers of flavour, from the buttery crust to the spiced apples on top, dusted with a delicate sprinkle of powdered sugar.
What is frangipane?
Frangipane is usually made as a filling for tarts, comprising of finely ground almonds, butter, sugar and eggs. You can also add a drop of almond extract in the mixture if you like a more intense almond flavour. Once you have made the frangipane, you can then spread it evenly across a blind-baked tart shell, creating a delicious, creamy mixture once baked.
Frangipane vs marzipan
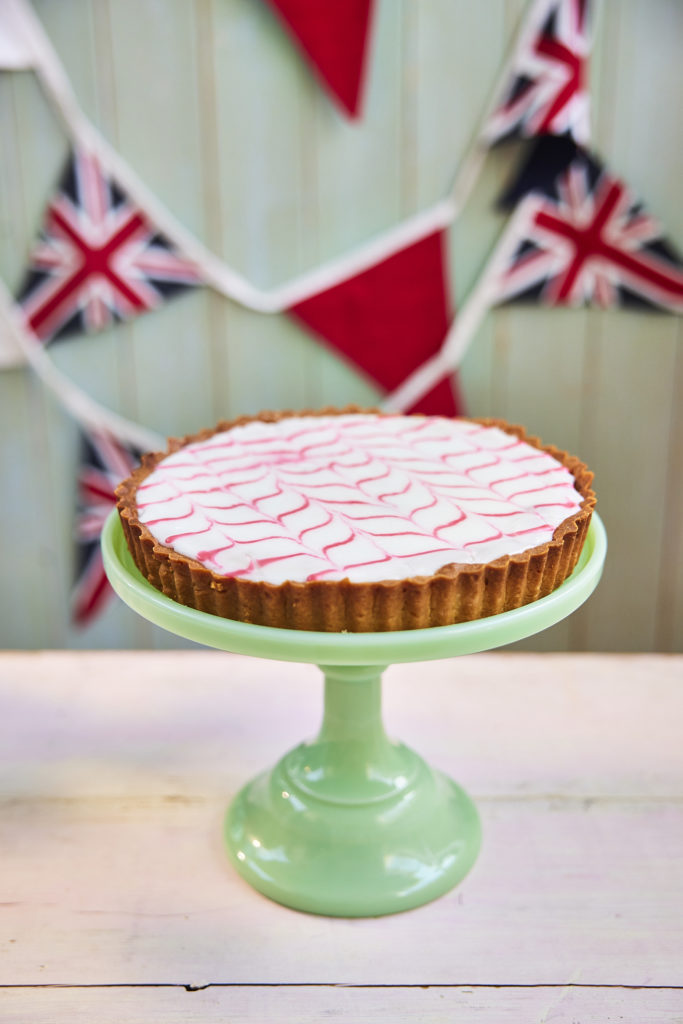
Although both frangipane and marzipan’s main ingredient is almond meal, marzipan does not include butter, whereas frangipane does! Because of this, the main difference between frangipane and marzipan is the texture. Frangipane is very rich and used as a cream-based filling for tarts. In contrast, marzipan is more of a thick paste, used for decorating cakes and cupcakes. Our delicious orange and pistachio Battenberg cake uses marzipan to protect the soft, fluffy interior of the cake.
As a result, you can’t substitute one from the other, as they consist of different components and have different purposes in baking. However, if you’re running out of time, bakers tend to use almond paste instead of marzipan for a quicker solution when decorating.
Frangipane tart recipe
To make a classic frangipane tart, start by preparing the frangipane filling. Cream together room-temperature butter and sugar until light and fluffy, then add an egg yolks and a touch of almond extract for extra flavour (optional). Gradually fold in the finely ground almonds or almond meal to create a smooth mixture. Pour the frangipane filling into a blind-baked tart shell, ensuring it spreads evenly across the base.
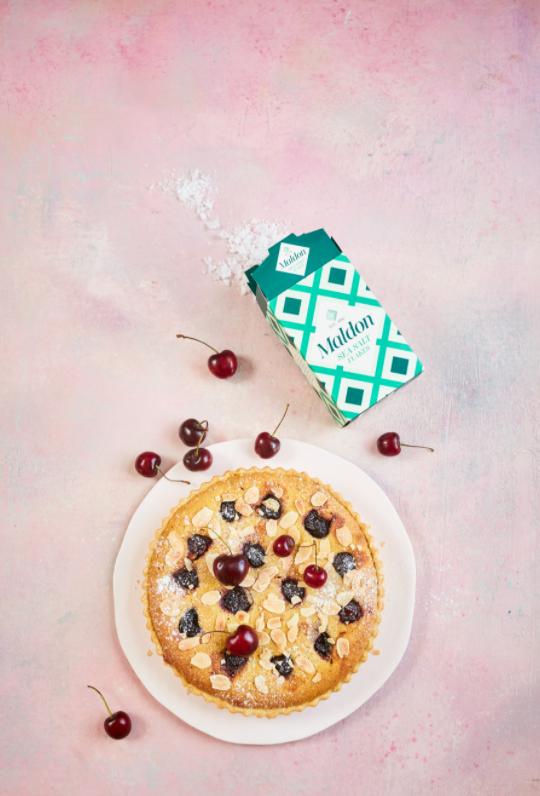
If you are wanting to add fruit to your tart, we recommend lemons, apples or cherries. If opting for apples, you need to make sure your chosen apples (preferably Granny Smiths), are thinly sliced. Arrange the apples slices in a decorative pattern on top of the frangipane . Bake the tart is a preheated oven at 350°F (180°C) for about 30-45 minutes, or until the filling is set and the apples are golden. Once cooled, dust the tart with powdered sugar for a final touch. You can serve warm or at room temperature to enjoy the perfect balance of sweet almond filling and tart apples.
How to make a spiced apple frangipane tart
Start by making the pastry. In a food processor add the plain flour and icing sugar. Then add the cold, cubed butter and pulse until it resembles fine breadcrumbs. Next add the egg yolk and cold water. Pulse again until the pastry starts to come together. If it looks a little dry, add a splash more water.
Bring the pastry together with your hands and tip out of the food processor. Knead very gently and then wrap in clingfilm in a flat disc shape and put into the fridge to chill for 30 mins.
After 30 mins, remove the pastry from the fridge and the roll it out on a lightly floured work surface. Roll a large circle around 2cm in thickness and the use your rolling pin to lift the pastry and drape over a 23cm fluted tart tin. Gently press in the corners and up the sides, leaving some overhang at the top. Use a fork to lightly prick the base of the tart. Then place this back into the fridge for another 30 mins.
Preheat the oven to 180c.
After 30 minutes, remove the chilled pastry case from the fridge. Scrunch up some baking paper and then line the pastry with this and some baking beans. Place into the preheated oven to blind bake. Bake it for 15 minutes, then remove the beans and paper and return to the oven for an additional 5 minutes until the pastry feels chalky and lightly golden in colour. Remove from the oven and allow to cool slightly
While the pastry is blind baking, make the frangipane. Using an electric hand whisk, place the softened butter, sugar and pinch of Maldon Smoked Sea Salt in a large bowl and whisk together for 2 – 3 minutes until pale and fluffy. Then add the eggs, yolks, and vanilla and whisk again. Finally add the cinnamon, nutmeg, ground almonds and flour and whisk until combined.
When the pastry case has cooled slightly, take a small, serrated knife and carefully trim off the excess pastry so you have a nice smooth line around the top. Dust off any pastry remains.
Spoon the frangipane filling into the pastry case and smooth out with a palette knife. Then arrange the apple slices on the top and lightly press into the filling.
Place the tart back into the oven for around 40 – 45 minutes until the apples are golden and the frangipane is puffed up and golden brown too.
Remove from the oven and allow to cool before dusting with icing sugar and serving.
Can you freeze frangipane?
Once you have made your frangipane, you can store in the fridge for up to 5 days, or frozen for up to 1 month in the freezer. Make sure you thaw the frangipane overnight in a fridge before using it in your bakes. When you are storing leftover frangipane, make sure it’s covered with clingfilm to prevent freezer burn.