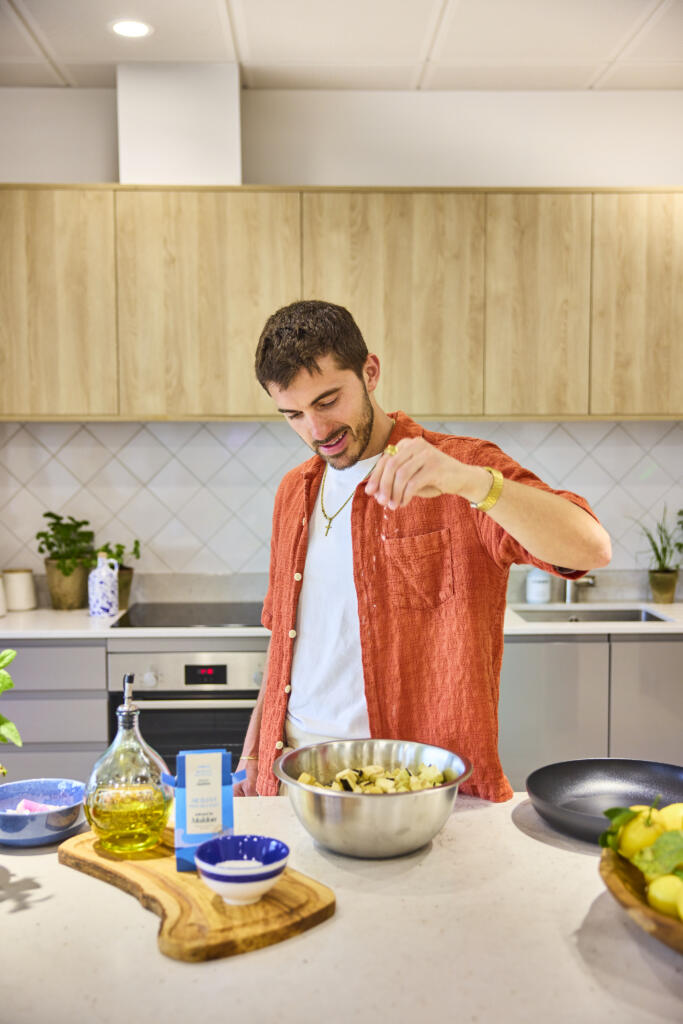
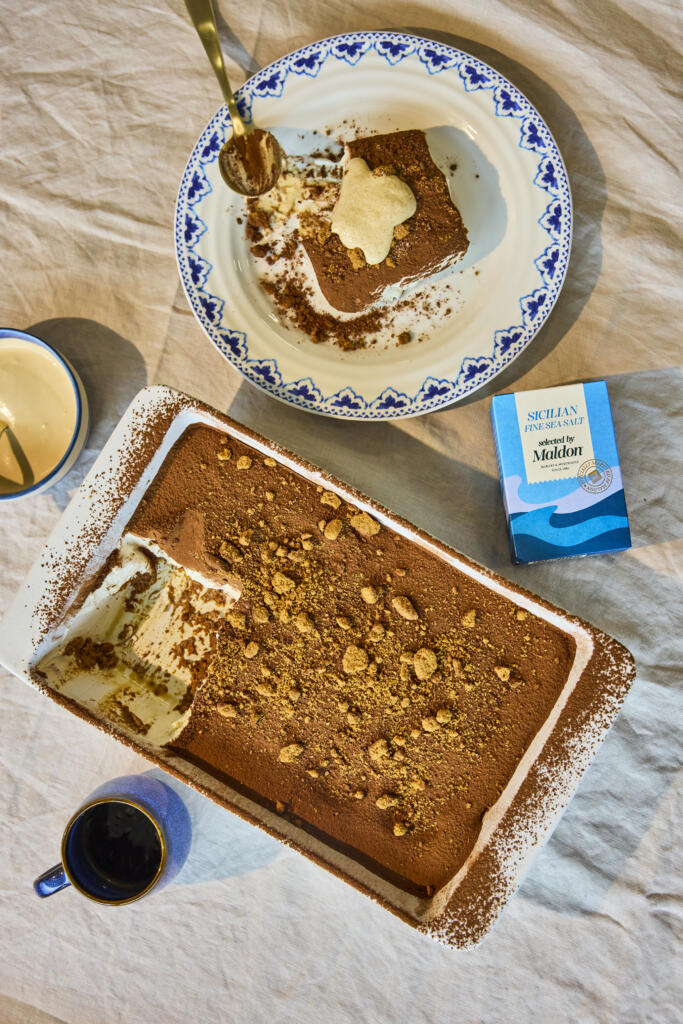
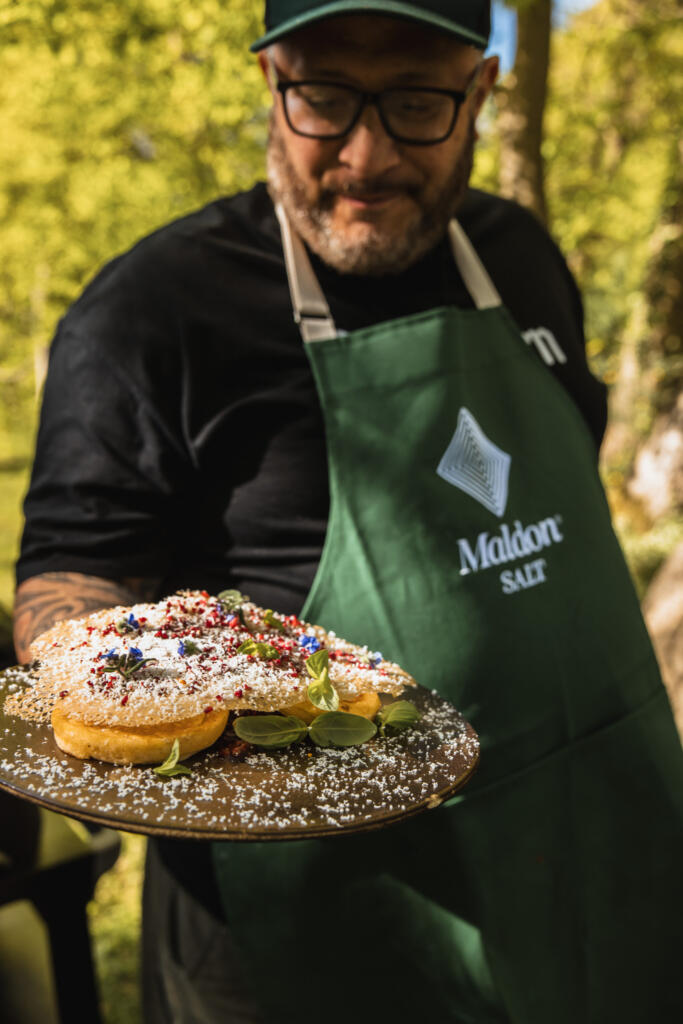
To celebrate the launch of Sicilian Fine Sea Salt, Selected by Maldon, Maldon Salt has partnered with award-winning Italian cook Giuseppe Federici (@sepps) to showcase recipes inspired by the flavours, traditions and family food culture that define Italian cooking. This indulgent Vegan Tiramisu combines rich espresso, creamy Biscoff filling and a subtle salted coffee cream, creating a delicious twist on one of Italy’s most iconic dessert.
Welcoming Giuseppe Federici
Giuseppe Federici (@sepps) is a second-generation British Italian who comes from a long line of passionate food lovers, with Italian home cooking at the heart of everything he creates.
Today, Giuseppe shares authentic Italian recipe videos, family traditions and cooking inspirations with his hugely engaged audience. His beloved videos cooking alongside his Nonna have captured the hearts of millions and inspired his cookbook – Cooking with Nonna – a collection of treasured family recipes and stories based down through generations with a plant-based twist.
Introducing Sicilian Fine Sea Salt, Selected by Maldon
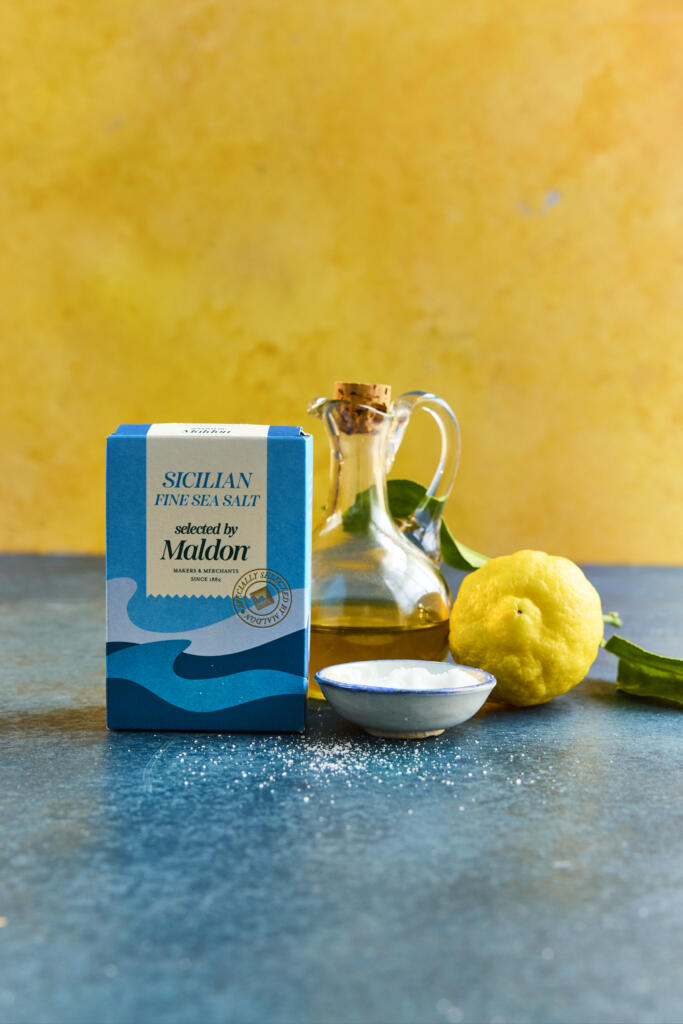
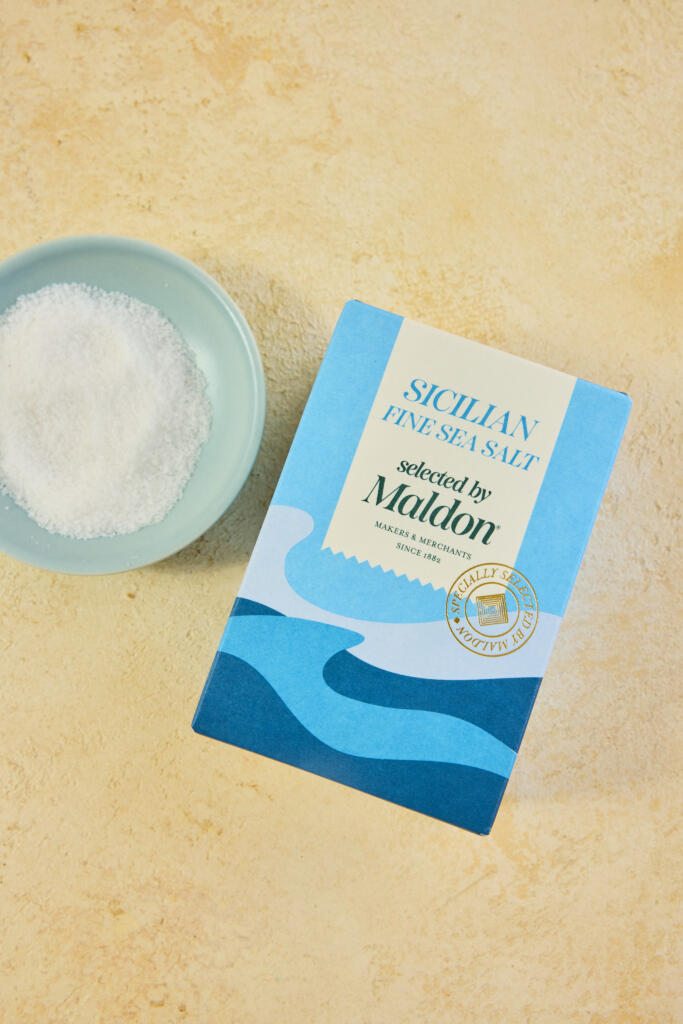
Harvested from the historic salt pans of Trapani on Sicily’s western coast, Sicilian Fine Sea Salt, Selected by Maldon is celebrated for its balanced flavour and delicate texture. Naturally dried in the Mediterranean breeze and selected by Maldon’s Master Salt Merchants, this versatile fine sea salt dissolves easily and seasons evenly throughout cooking and baking.
In desserts, a touch of fine sea salt helps enhance sweetness, balance richness and enhances complex flavours such as coffee, chocolate and caramel.
How to Make Vegan Tiramisu with Biscoff
This irresistible vegan tiramisu layers espresso-soaked Biscoff biscuits with a silky cream made from vegan cream cheese, plant-based cream and Biscoff spread. Finished with cocoa powder, crunchy Biscoff crumbs and a luxurious salted coffee cream, it’s a crowd-pleasing dessert that’s perfect for entertaining and special occasions.
A small amount of Sicilian Fine Sea Salt, Selected by Maldon in the coffee cream enhances the roasted coffee notes while perfectly balancing the sweetness of the dessert.
For the Tiramisu
Ensure the espresso is completely cooled before starting.
We used the brand-new KitchenAid Artisan Plus Stand Mixer in Wild Blueberry for mixing. Mix the vegan cream cheese and Biscoff spread until smooth. In a separate bowl, whip the plant-based cream to soft, pourable peaks, then whisk in the vanilla and sugar.
Gently fold the cream cheese mixture into the whipped cream until fully combined.
Arrange a layer of Biscoff biscuits in a serving dish and lightly drizzle with the cooled espresso. Repeat with a second layer.
Spoon over a layer of the cream mixture, then repeat the layers of biscuits, coffee and cream until the dish is filled, finishing with cream on top.
Chill for at least 2 hours, or overnight for best results.
Before serving, dust with cocoa powder, sprinkle over the Biscoff crumbs and finish with a spoonful of salted coffee cream.
For the Salted Coffee Cream
Place the plant cream, vanilla extract, cacao butter, sugar, Sicilian Fine Sea Salt, vanilla essence, espresso and instant coffee into a saucepan.
Heat gently, stirring frequently, until the mixture is smooth and fully combined. Do not boil.
Remove from the heat and allow to cool completely before serving or storing.
Bring Italian Dolce to Your Table
Whether served as as the grand finale to an Italian feast or prepared for effortless entertaining, this Vegan Tiramisu delivers layers of coffee-soaked indulgence and creamy sweetness in every spoonful.
Sicilian Fine Sea Salt, Selected by Maldon is available now from Tesco, Sainsbury’s, and Ocado. For more authentic Italian recipes and family favourites, explore Giuseppe Federici’s cookbook, celebrating the dishes, traditions and stories.
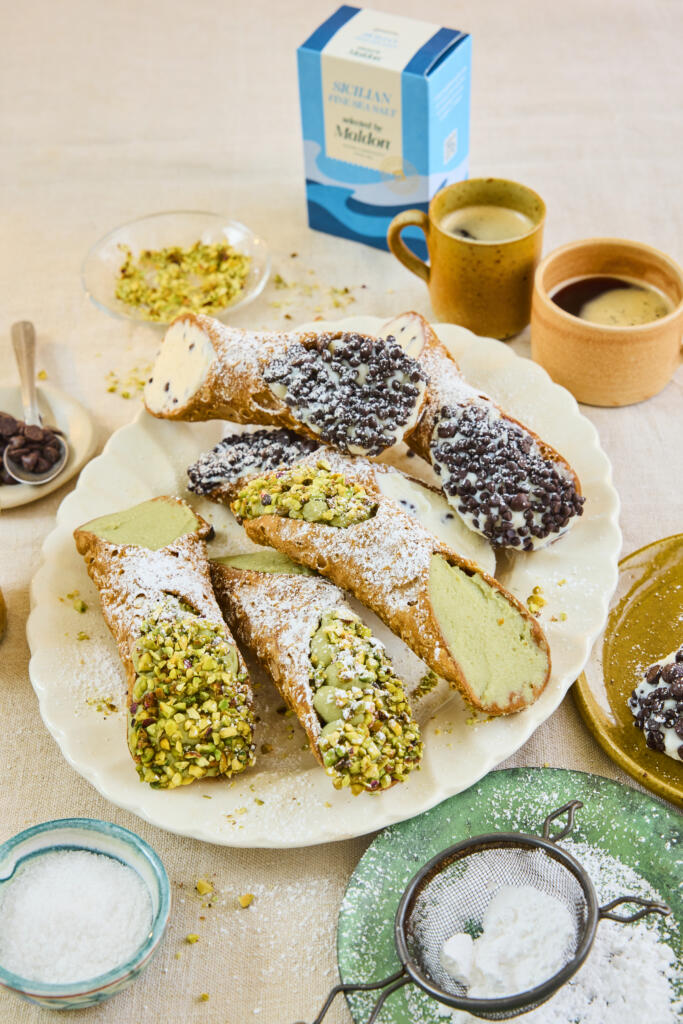
Crisp, blistered shells and a cool, creamy ricotta filling – these Sicilian cannoli are the island’s most famous sweet, made at home. The Marsala-spiked dough fries up golden and bubbly, while a pinch of Sicilian Fine Sea Salt, Selected by Maldon sharpens the sweetness. This recipe makes two classic fillings in one batch: pistachio, and chocolate and ricotta.
Why You’ll Love These Sicilian Cannoli
Two Fillings, One Batch: Make both the pistachio and the chocolate-and-ricotta cannoli at once for a proper Sicilian dessert platter.
Crisp, Bubbly Shells: A splash of Marsala in the dough gives the shells their signature blistered, shatteringly crisp texture.
A True Sicilian Classic: Few desserts feel as special as a freshly piped cannolo dusted with icing sugar.
How to Make Sicilian Cannoli (Step-by-Step)
Drain the ricotta: Place the ricotta for the fillings in a muslin cloth set in a sieve and squeeze out any excess liquid. Set aside – this keeps the fillings thick and the shells crisp.
Make the dough: In a large bowl, mix the plain flour, caster sugar, Sicilian Fine Sea Salt, Selected by Maldon and bicarbonate of soda. Rub in the cubed butter with your fingers until it resembles fine breadcrumbs.
Bring it together: Add the beaten egg and Marsala wine and mix. Tip onto a lightly floured surface and knead until you have a smooth dough.
Roll and shape: Roll the dough as thinly as possible with a rolling pin or pasta machine, then cut out 15cm circles. Wrap each tightly around a cannoli mould, sealing the join with a little beaten egg.
Fry the shells: Heat the vegetable oil to 180°C, deep enough to submerge the cannoli. Fry the wrapped moulds for around 30 seconds at a time, turning with tongs, until golden and bubbly. Drain on kitchen paper and carefully slide the shells off the moulds once cool. Repeat for all 6.
Make the fillings: Whisk the drained ricotta with the rest of each filling’s ingredients, holding back the chocolate chips and chopped pistachios. Stir the chocolate chips into the chocolate filling, then transfer each filling to its own piping bag.
Fill and finish: Snip the ends of the bags and pipe the fillings into the shells – 3 of each flavour. Dip the ends of the pistachio cannoli into the chopped pistachios, dust everything with icing sugar and serve.
Tips for the Perfect Sicilian Cannoli
Drain the ricotta well: Squeezing out excess liquid is the difference between a thick, luscious filling and a soggy shell.
Fill just before serving: Pipe the filling in at the last minute so the shells stay crisp rather than softening.
Roll it thin: The thinner you roll the dough, the more delicate and blistered the fried shells will be.
What to Serve with Sicilian Cannoli
Cannoli are the perfect finale to a Sicilian feast – serve them after Sicilian arancini or homemade cavatelli, with strong espresso to cut the sweetness. They also make a beautiful centrepiece for a dessert grazing board alongside fresh fruit and the blood orange and fennel salad to start the meal.
Frequently Asked Questions
What if I don’t have cannoli moulds?
You can improvise with metal cannoli tubes, or wrap the dough around clean, foil-covered wooden dowels. Just make sure whatever you use is oven- and oil-safe.
Can I make cannoli ahead?
Fry the shells and make the fillings up to a day ahead, storing them separately. Pipe the filling in only when you’re ready to serve so the shells stay crisp.
What is pistachio paste and can I substitute it?
Pistachio paste is finely ground pistachios, sometimes lightly sweetened. If you can’t find it, blitz shelled pistachios to a smooth butter, or use a good-quality pistachio butter.
A Fire-Cooked Dessert Collaboration Between Maldon Salt, Weber Grills and Chef Matt Burgess
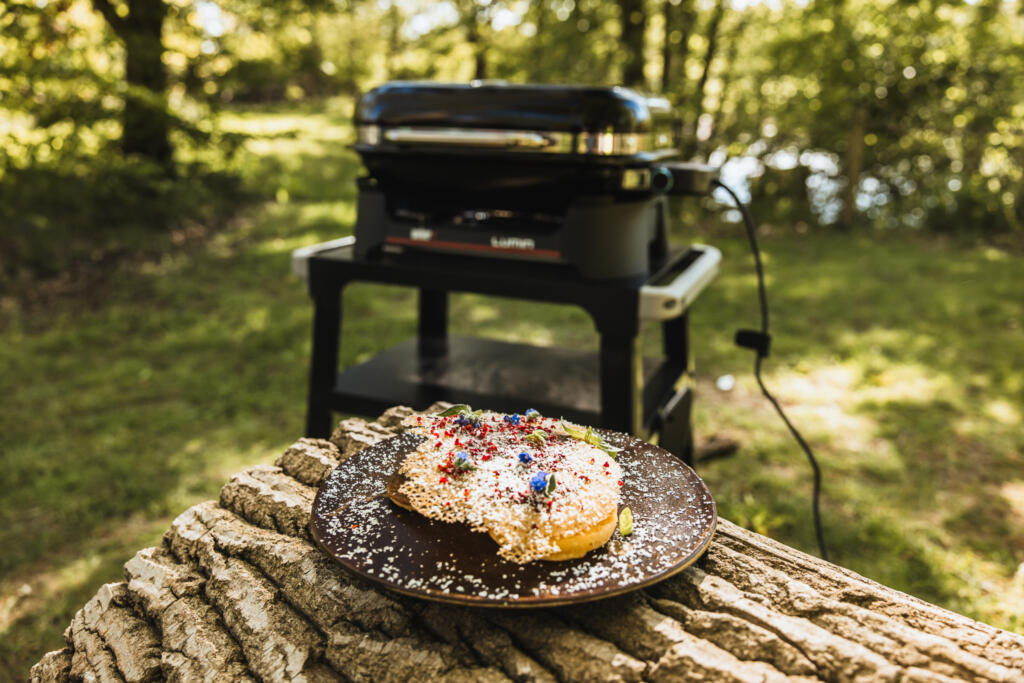
When live-fire cooking meets modern outdoor grilling, desserts become something truly unforgettable. This Cloud Cake recipe by Chef Matt Burgess, also known as @matblak, is a bold collaboration celebrating texture, flavour and innovation – combining the versatility of the Weber Lumin electric grill with the delicate finishing power of Maldon Chilli Sea Salt.
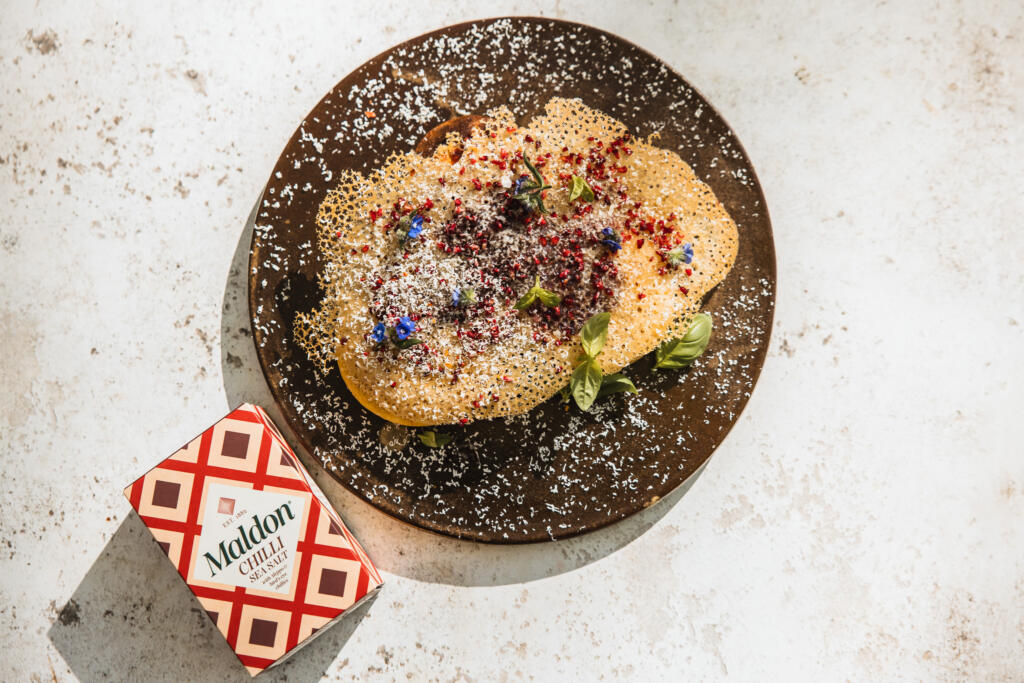
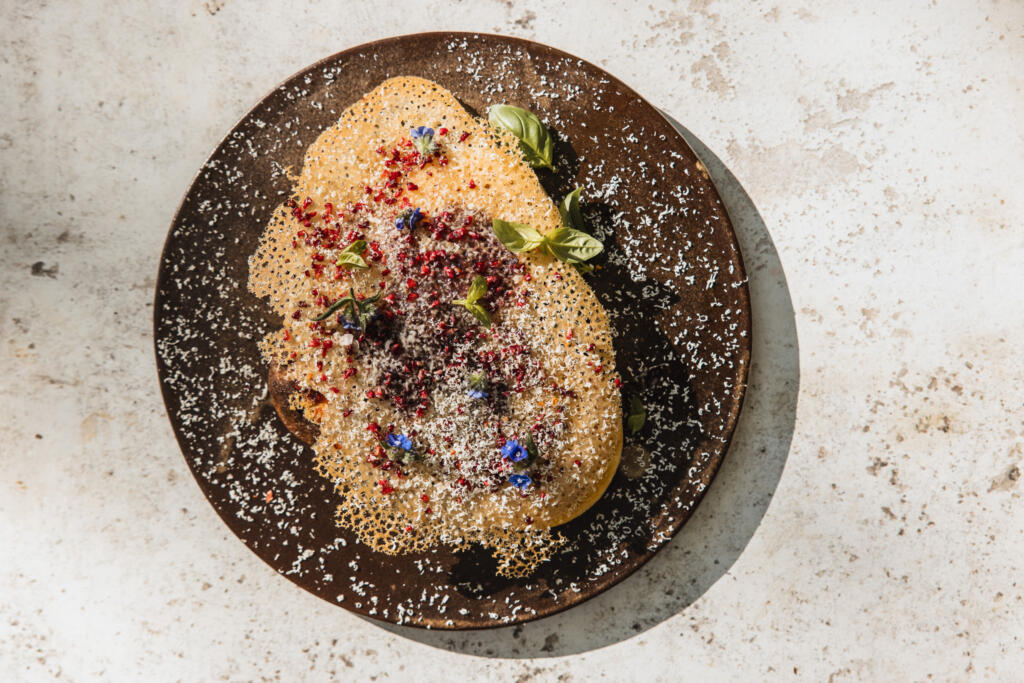
Soft, airy, and lightly steamed under the lid of the Weber Lumin, this raspberry cloud cake is balanced with bright fruit acidity, crisp raspberry coral, white chocolate and a subtle hit of chilli salt. It is restaurant-quality outdoor cooking designed to show that barbecue cooking goes far beyond meat and flame.
Whether you are cooking on a balcony, terrace or garden setup, this recipe highlights how electric grilling, live-fire inspiration and premium ingredients can create a memorable summer dessert.
Who are Weber Grills?
Weber Grills are globally recognised as one of the leading names in barbecue and outdoor cooking innovation. Known for combining performance, reliability and design, Weber has become synonymous with modern grilling culture worldwide.
The Weber Lumin electric barbecue reaches temperatures over 315°C while also offering steaming, smoking, searing and warming functions. This versatility makes it ideal for dishes like cloud cake, where controlled heat and trapped steam are essential for creating this signature soufflé-like texture.
Unlike traditional desserts cooked indoors, this recipe users the Weber Lumin pancha and lid system to gently steam and lift the batter, producing an airy cake with a caramelised outer edge and soft centre.
For urban grillers, food lovers and chefs experimenting with outdoor desserts, the Weber Lumin proves that barbecue cooking can be sophisticated, technical and creative.
Chef Matt Burgess, widely recognised as @matblak, is a New Zealand Māori chef, live-fire specialist and founder of Kaiwhenua – Kai by Matblak. His cooking philosophy is built around fire, flavour, culture and connection.
After beginning his culinary career in Wellington, New Zealand, Matt went on to work with some of London’s most respected hospitality brands, including Soho House, Bluebird Chelsea, Gordon Ramsay’s Maze Grill, and Jamie Oliver’s Threadneedle street.
Today, through Kaiwhenua – meaning “food from the land” in Māori – Matt develops recipes, host supper clubs and creates premium condiments inspired by live-fire cooking and layered flavour. His work blends refined restaurant technique with open-fire cooking, making him one of the UK’s most exciting modern barbecue chefs.
Matt’s approach to dessert reflects the same philosophy throughout his cooking: balance, smoke, texture and restraint.
Explore Kaiwhenua and Kai by Matblak here: https://www.kaiwhenua.co.uk/
Why Maldon Chilli Sea Salt Matters in This Dish
Salt is often overlooked in desserts, but in this recipe Maldon Chilli Sea Salt plays a crucial role.
The delicate crunch of Maldon Sea Salt flakes enhances sweetness, sharpens raspberry acidity and balances the richness of white chocolate. The added chilli gives subtle warmth that lingers gently on the palate, elevating the flavour profile without overpowering the dessert.
In the cloud cake batter, the chilli salt helps heighten the fresh raspberry flavour. As a finishing touch, it creates contrast against the soft sponge, crisp coral and creamy chocolate.
This sweet-and-heat combination is what transforms the dish from a simple grilled sponge cake into a refined barbecue dessert.
What is a Cloud Cake?
A cloud cake is an ultra-light, souffle-style cake known for its airy texture and delicate rise. Inspired by Japanese souffle pancakes and steamed sponge techniques, cloud cakes rely heavily on whipped egg whites to create lift and softness.
Unlike dense sponge cakes, cloud cakes are designed to feel light, almost mousse-like in the centre, while maintaining a lightly caramelised exterior.
In this version, the Weber Lumin lid traps heat and steam during cooking, helping the cake rise gently while staying soft and moist inside.
How to Make Cloud Cake, Raspberry Coral with Chilli Sea Salt
Preheat the Weber Lumin with plancha to medium–low heat. You want gentle, even heat.
Whisk egg yolks with milk and vanilla. Add flour and baking powder. Mix smooth.
Whip egg whites with a pinch of Maldon Chilli Sea Slat to soft peaks. Add sugar gradually. Take to medium peaks.
Fold one third into the yolk mix to loosen. Fold the rest gently. Keep the air.
Fold in raspberries last.
Lightly butter the plancha. Spoon thick rounds, 2–3 cm high.
Cook undisturbed until the base sets. Close the lid to trap heat and allow the cake to rise and steam.
Flip carefully. Cook until just set. Centre stays soft. Remove and rest.
For the dressing, crush raspberries with lemon zest, juice and icing sugar. Keep it loose.
For the coral, mix all ingredients until smooth.
Pour a thin layer onto a hot section of the plancha.
Let it bubble and separate. Do not touch it.
Once dry and lightly coloured, lift carefully and cool. It will crisp as it cools.
Plate the cake. Spoon over dressing.
Add coral, micro planed white chocolate and basil.
Finish with a light pinch of Maldon Chilli Sea Salt.
Weber Lumin Cooking Tips
Always use the lid — trapped heat is essential for the signature cloud cake rise.
If the base colours too quickly, reduce the heat slightly.
Coral needs a dry, hot surface to crisp correctly.
Avoid overmixing the batter or the texture will become dense.
Cook in batches and avoid overcrowding the plancha
Explore More
Buy Weber Grills – Discover the Weber Lumin electric barbecue range and outdoor cooking accessories: https://www.weber.com/GB/en/home/
Discover Kai by Matblak – explore Matt Burgess’ recipes, sauces, live-fire cooking and flavour philosophy.
Shop Maldon Salt – Explore Maldon Sea Salt flakes and flavoured blends: https://maldonsalt.com/our-salt/
There are few desserts as universally loved and visually impressive as a molten chocolate fondant. Slicing through the delicate, baked sponge exterior to reveal a rich, flowing river of warm chocolate is the ultimate dinner party party trick. While they have a reputation for being difficult to master, this dark chocolate fondant recipe is surprisingly simple, requiring just 15 minutes of prep time. To cut through the richness of the dark chocolate and elevate the dessert to restaurant quality, we fold a generous pinch of Maldon Original Sea Salt flakes directly into the batter and finish the plated pudding with a final salty sprinkle.
Why You’ll Love This Dark Chocolate Fondant
The Perfect Molten Centre: Our precise baking time and temperature ensure that the outside sets into a light sponge while the inside remains delightfully gooey and liquid.
Sweet & Salty Balance: Dark chocolate and sea salt are a match made in heaven. The clean, bright salinity of Maldon Salt perfectly counteracts the bitterness of the cocoa and enhances the deep chocolate flavor.
Quick & Impressive: Despite looking incredibly complex, this molten chocolate fondant recipe comes together in under 30 minutes from start to finish.
How to Make Molten Chocolate Fondants (Step-by-Step)
Step 1 – Preheat and prepare
Preheat your oven to 200°C and place an empty baking tray onto the middle shelf to heat up. Take 2 ramekins (or dariole moulds) and grease the insides thoroughly with butter. Add the cocoa powder to one mould and tap it around to completely coat the buttery sides. Tip the excess cocoa powder into the second mould and repeat the process. Tip out any final excess cocoa powder, then set the prepared moulds aside.
Step 2 – Melt the chocolate
Place the unsalted butter and broken dark chocolate pieces into a heatproof bowl. Set the bowl over a pan of gently simmering water (a bain-marie), ensuring the base of the bowl does not touch the water. Stir continuously until the butter and chocolate have melted together into a smooth, glossy liquid. Remove the bowl from the heat and set aside to cool slightly.
Step 3 – Whisk the eggs
In a separate large bowl, add the whole egg, the 2 egg yolks, the caster sugar, and a generous pinch of Maldon Original Sea Salt flakes. Whisk the mixture vigorously until it becomes pale, thick, and fluffy.
Step 4 – Fold the batter
Pour the cooled, melted chocolate mixture into the fluffy egg mixture. Sift in the plain flour, then use a spatula to carefully fold everything together until just combined, ensuring you don’t knock the air out of the eggs.
Step 5 – Bake the fondants
Pour the fondant dark chocolate batter evenly into the prepared moulds, making sure to leave a 2cm gap at the top so they have room to rise. Carefully place the moulds onto the preheated tray in the oven and bake for exactly 10 minutes, until the tops have formed a crust and the edges are set.
Step 6 – Invest and serve
Remove the fondants from the oven and allow them to rest in their moulds for 30 seconds. Place a small dessert plate upside down on top of a mould, quickly flip it over, and carefully pull the mould away to invert the fondant. Serve immediately with a dusting of extra cocoa powder, a final sprinkle of Maldon Original Sea Salt flakes, and a scoop of vanilla ice cream.
Tips for the Perfect Gooey Centre
Do Not Skip the Cocoa Dusting: Greasing your moulds with butter and dusting them with cocoa powder is the secret to ensuring your fondants easily slip out of their ramekins without tearing and spilling their liquid centers.
Watch the Clock: Timing is everything with a molten chocolate fondant. Ovens vary, but 10 minutes at 200°C is usually the sweet spot. If you leave them in too long, they will bake all the way through and become standard chocolate cakes.
Use Quality Chocolate: Because chocolate is the star of the show here, ensure you are using a high-quality dark chocolate (ideally 70% cocoa solids or higher) for the richest, most decadent flavour.
Frequently Asked Questions
Can I prepare chocolate fondants in advance?
Yes, this is a fantastic make-ahead dessert! You can prepare the batter, pour it into the greased and dusted moulds, and keep them in the fridge for up to 24 hours. When you are ready for dessert, simply bake them straight from the fridge (you may need to add 1-2 extra minutes to the baking time since the batter is chilled).
Why didn’t my fondant melt in the middle?
If your chocolate fondant is cooked solidly all the way through, it was left in the oven for too long. Fondants continue to cook slightly from residual heat once removed from the oven, so it’s vital to pull them out as soon as the outer edges look set but the very centre still has a slight jiggle to it.
Why add sea salt to a chocolate dessert?
Salt is a natural flavour enhancer. Adding a pinch of Maldon Original Sea Salt to a rich chocolate dessert like this does not make it taste “salty.” Instead, the salt counteracts the bitterness of the cocoa, balances out the sugar, and makes the dark chocolate taste even more intense and complex.
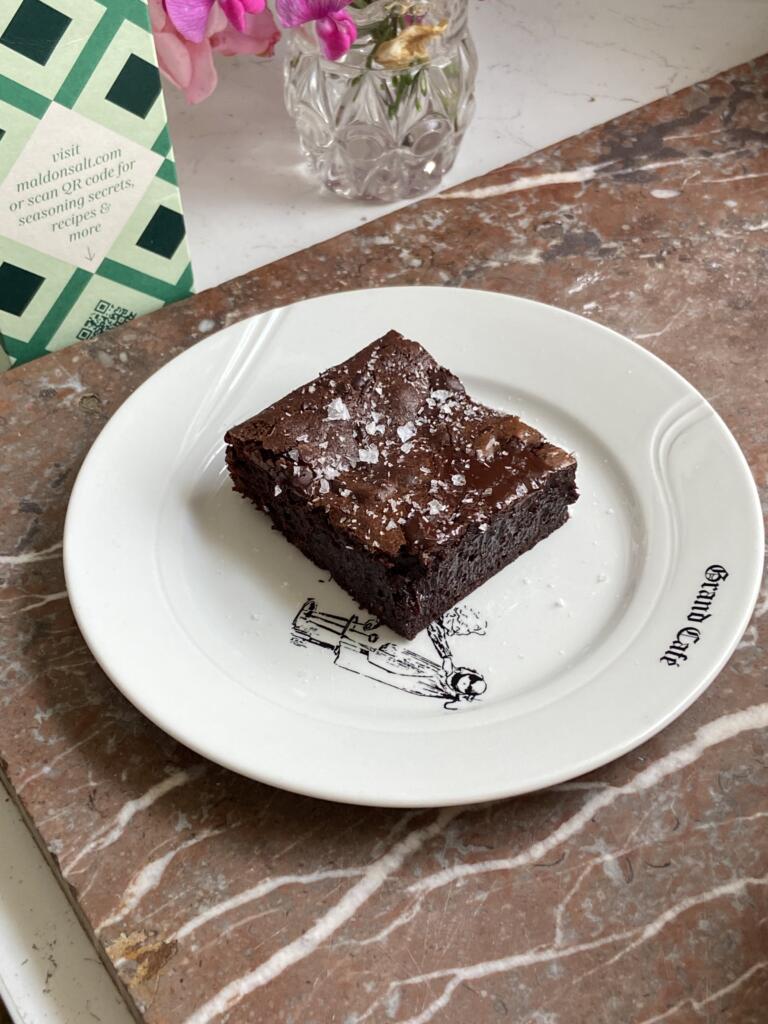
Ed Cudlipp, also known as ‘Cud Cooks’, brings pure indulgence to the baking tin with his Maldon-Salted Chocolate Fudge Brownies – a rich, gooey recipe that celebrates chocolate in all its forms. Packed with generous chunks of dark chocolate and fudge , and finished with the unmistakable crunch of Maldon Sea Salt flakes, these brownies strike the perfect balance between sweet and savoury. It’s the kind of treat that turns a simple square into a decadent moment, ideal for sharing with friends or savouring all to yourself.
Here is how to make the brownies…
Preheat the oven to 180 °C (160 °C fan).
Line a 20cm square tin with parchment paper, leaving an overhang so the brownies can be lifted out easily.
In a heatproof bowl, combine the butter and chocolate chips. Melt gently, either in short bursts in the microwaves or over a bain-marie, until smooth.
Stir in the brown sugar into the melted chocolate and butter. Whisk in the eggs and vanilla until glossy and well combined.
Sift together flour and cocoa powder.
Fold gently unto the chocolate mixture until just combined.
Add the chopped dark chocolate and fudge chunks, folded them through so they’re evenly distributed.
Sprinkle a small pinch of Maldon Sea Salt flakes into the batter and fold gently.
Pour the batter into the prepared tin, and smooth the surface.
Bake for 30 minutes, until the top is set with a shiny crust and the centre is still soft.
Leave the brownies to cool in the tin for 10 minutes, top with Maldon Sea Salt and lift out.
Allow to cool for at least 20 minutes before slicing into squares.
Serve and enjoy.
Tip:
These brownies are best enjoyed warm or at room temperature. Rich, gooey, and finished with that unmistakable Maldon crunch.
Pairing suggestions:
Ice cream – The cold, creamy texture contrasts with the warm, gooey brownie.
Granola – The warming, nutty flavour pairs well with the sweet chocolate, whilst also providing a nice crunch to the soft brownie.
Fresh berries (raspberries, strawberries) – Their tartness cuts through the sweetness and adds brightness.
Tag @cud_cooks on Instagram when you make them – he’d love to see your creations.
This isn’t just a brownie. It’s a love letter to chocolate.
There are brownies – and then there are Caitlin Carrick-Varty brownies…Known to her loyal followers as @cake.onmyface, Caitlin doesn’t just bake; she creates flavour sensations. Her Chocolate Brownies with Maldon Sea Salt are a masterclass in contrasts: they look like the picture of classic fudgy indulgence, they smell like pure cocoa bliss, yet the moment they touch your tongue, they melt in your mouth – like a decadent chocolate mousse.
Making them is as delicious as eating them: silky pools of melted chocolate folding into sugar, eggs and butter in slow, glossy swirls; batter pouring into the tin; a final, confident sprinkling of Maldon Sea Salt flakes over the top. The sea salt flakes strikes first – bright and sharp against the rich bitterness – before melting into a sweetness that lingers. Caitlin likes hers dark, leaning into that bittersweet edge, but if your heart beats for milder chocolate, you can swap 80g of the dark chocolate for milk. Whatever you do, don’t skip the Maldon Sea Salt flakes. It’s the soul of this brownie.
How to make Chocolate Brownies with Maldon Sea Salt
Caitlin Carrick-Varty, @cake.onmyface
Grease and line a 19cm / 7.5-inch square tin. Preheat the oven to 180/160 fan.
Roughly chop the extra 20g dark chocolate, if you are using, then set aside.
Chop the (180g) chocolate and butter roughly into chunks, then place in a large glass or metal bowl. Fill a small saucepan with a little water. Set the bowl of chocolate over the saucepan, making sure the bottom of the bowl does not come into direct contact with the water when it rests over the pan. Heat the pan on low/medium, stirring the chocolate mixture occasionally, to help it melt.
Meanwhile, whisk the sugar, eggs, Maldon Sea Salt flakes, and vanilla in a large bowl. When the egg mixture is a bit frothy and lighter in colour, pour in the melted chocolate and butter – whisk just until you feel the glossy mixture become thicker.
Now sift the flour and cocoa powder into the eggs and chocolate. Whisk until you feel the batter become thicker again, then immediately pour the batter into the prepared tin. Top with the reserved chopped chocolate and a generous pinch of Maldon Sea Salt flakes. Bake for 20 minutes, or until the top of the brownies are set but there is a wobble underneath.
Allow to cool in the fridge before slicing. If you can wait, these brownies do well left in the fridge covered tightly with clingfilm overnight.
A rich, fudgy brownie cookie with a hint of espresso and a perfect finish of Maldon Sea Salt. The flaky sea salt enhances the chocolate, making every bite even more indulgent.
A little sweet, a little salty, just right for Valentine’s Day.
Here’s how to make the chocolate espresso brownie cookie
1. Preheat the oven to 175°C and line a large baking sheet with parchment paper. Set aside.
2. Place dark chocolate chips and unsalted butter into a heat-proof bowl. Melt in the microwave by heating in 15-second intervals (stirring between) or by using a double boiler. (Make sure you don’t overheat the chocolate, or it can seize up and become chunky). Heat and stir until the chocolate is fully melted and the mixture is smooth. Set aside to cool.
3. In a separate bowl, vigorously whisk together granulated sugar, egg, instant espresso, and a sprinkle of Maldon Sea Salt. Whisk for 5 minutes to incorporate air into the mixture till light in colour.
4. Pour the slightly cooled chocolate/butter mixture into the egg mixture. Whisk together until combined.
5. Sift all-purpose flour, cornstarch, and baking soda into the chocolate egg mixture. Mix until the batter is smooth and the dry ingredients are fully incorporated.
6. Let the dough cool for a couple of minutes, or until it runs off your whisk in thick ribbons when lifted. Then add in the chocolate chips.
8. Use a cookie scoop to make 6 uniformly sized cookie dough balls on the prepared baking sheet. These cookies spread as they bake, so place them at least 3 inches apart.
9. Bake for 12-13 minutes and rotate the pans halfway through to make sure the cookies bake evenly. Garnish with a sprinkle of Maldon Sea Salt.
10. Let the cookies cool on the pan for 10 minutes, then move them to a wire rack to finish cooling.
Transform your festive leftovers into a decadent treat!
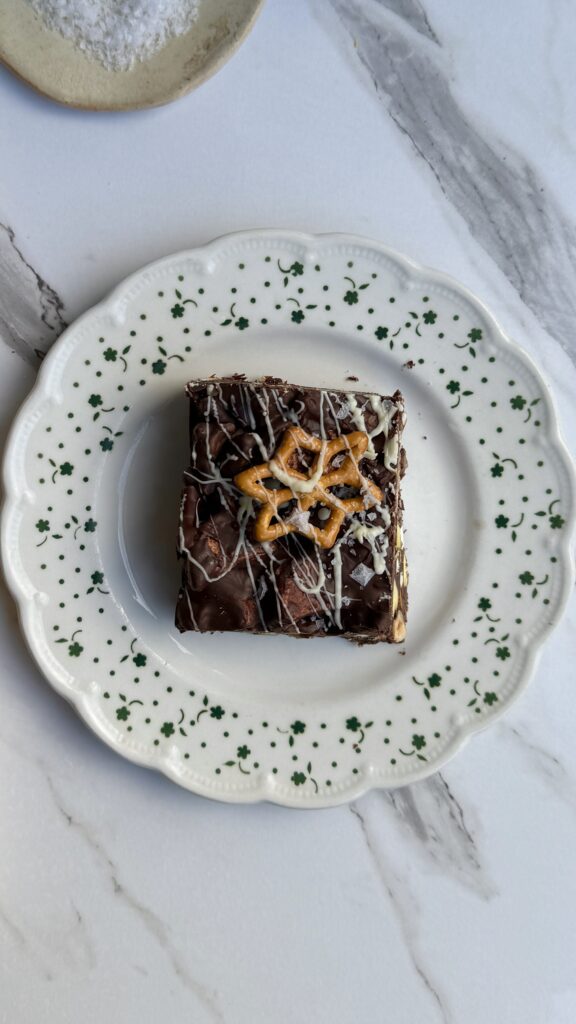
Don’t let your Christmas chocolate go to waste! Elevate your leftovers with a recipe that’s as indulgent as it is simple: Festive Rocky Road, featuring the perfect balance of sweetness and Maldon Sea Salt’s signature flaky finish. This no-bake delight combines rich layers of dark, milk and Christmas chocolate for a holiday-inspired twist, creating a treat that’s ideal for sharing – or keeping all to yourself!
This Rocky Road is packed with festive charm. Crunchy pretzels bring a satisfying texture, while gooey marshmallows and sweet glace cherries add pops of softness and colour. A mix of nuts – think pistachios, almonds, hazelnuts or pecans – offer warm and depth, enhanced by zest of orange for a hint of citrusy brightness. Drizzle with white chocolate and finish with a pinch of Maldon Sea Salt flakes to create a show-stopping treat that’s perfectly balanced: sweet, salty, and oh-so-delicious!
Here is how to make the Festive Rocky Road
Line a 9×9-inch (or similar) square baking tin with parchment paper.
In a heatproof bowl, combine the dark chocolate, milk chocolate, butter, and golden syrup. Melt the mixture over a pot of simmering water, stirring occasionally until smooth. Remove from heat.
To the melted chocolate mixture, add crushed pretzels, marshmallows, leftover Christmas chocolate, glacé cherries, mixed nuts, and orange zest. Stir until all ingredients are well coated with the chocolate mixture.
Pour the mixture into the prepared tin, spreading it evenly with a spatula. Press it down lightly to ensure all ingredients are packed in well.
Drizzle the melted white chocolate over the rocky road mixture, using a spoon or fork for a decorative effect. Place a few extra pretzels on top and finish with a good sprinkle of Maldon Sea Salt.
Place the tin in the fridge for at least 2 hours, or until the rocky road is set.
Once firm, remove from the tin and cut into squares or bars. Serve immediately, or store in an airtight container in the fridge for up to a week.
Enjoy your festive treat!
Kitty wrote this recipe a long time ago, and it comes out a lot for birthdays and dinners because it’s pretty foolproof. You can easily swap round the types of sugar and use more caster (superfine) sugar than light brown soft sugar if that’s what you have, or use all one type.
How to make flourless chocolate cake
Preheat the oven to 170°C fan (375°F). Grease and line a 23 cm (9 inch) cake tin (pan) with baking parchment.
Combine the chocolate and butter in a heatproof bowl set over a saucepan containing 4 cm (1½ inches) of barely simmering water. Make sure the bowl isn’t touching the water. Stir until just melted, then remove from the heat and allow to cool slightly.
Once cooled a little, whisk in the light brown soft sugar, then the egg yolks one at a time, followed by the ground almonds and salt. If the chocolate splits, don’t worry! Stir in 1 teaspoon boiling water at a time until you have a smooth, silky mixture.
Using a stand mixer or hand-held electric whisk, whisk the egg whites until they form stiff peaks, then gradually add the caster sugar, whisking until the egg whites form soft peaks, like a very light meringue.
Very carefully fold the meringue mixture into the chocolate, working delicately with a spatula or metal spoon until it’s all evenly combined.
Carefully pour the mixture into the prepared tin, making sure not to knock out the air. Sprinkle over a little more flaky salt, then bake in the oven for 20–25 minutes. The middle should be a little gooey and the surface a bit cracked.
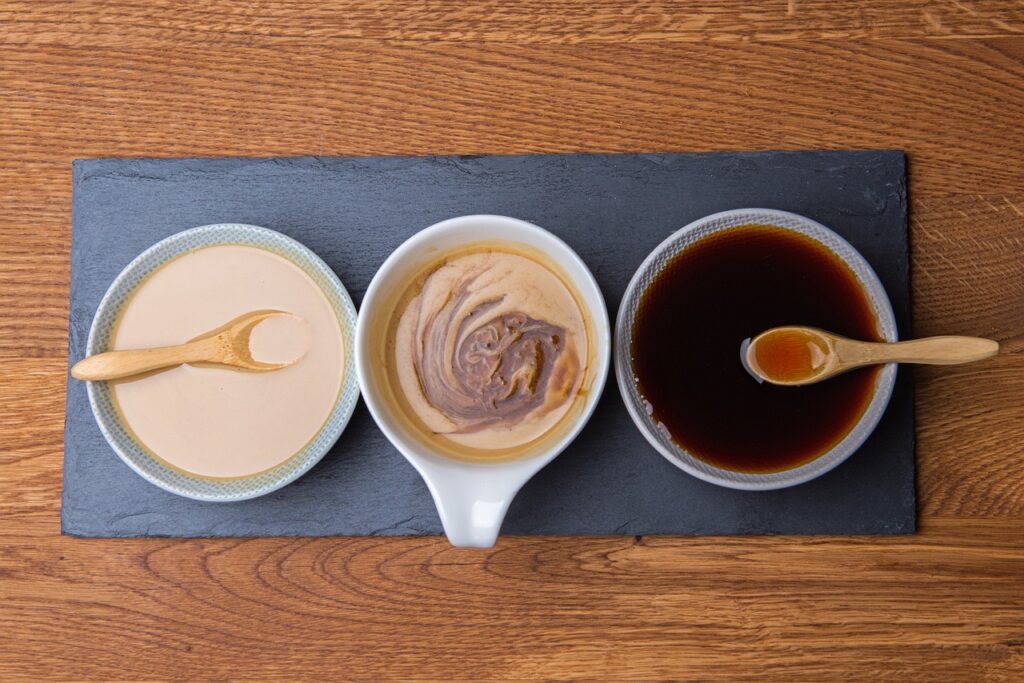
For the tahini cream, lightly whisk the cream in a large bowl until you have very light peaks. Stir in the tahini and give a few more whisks. Set aside while the cake bakes.
Remove the cake from the oven and allow to cool. It’ll dip a little when it cools. Slice and serve with a dollop of the tahini cream and fresh berries, if using.
Purchase Make More With Less by Kitty Coles
Make More With Less by Kitty Coles (Hardie Grant, £22), Photography by Issy Croker.
Looking for fool proof recipes to make your food go further? Make More With Less by Kitty Coles takes core ingredients and transforms them into flavour-packed, simple dishes. From turning a few tins of beans into a comforting bean pasta to making leftover chicken tacos! the options are endless and the creativity never stops!
You can purchase your very own copy here, where you can flick through, raid your fridge and Kitchen cupboards and get started on creating low-waste, low-fuss and versatile recipes that you will make over and over again.
Let’s be honest, how many times have you seen a blog that claims to have the ‘best’ chocolate cake recipe? We’ve seen dozens upon dozens, and although we have tried (and eaten) many throughout the years, yet none have itched that truly rich, decadent, chocolaty scratch that we all crave deep down.
That is until we got our aprons on and got busy in the kitchen, where upon test after test, we eventually itched that scratch…the ULTIMATE chocolate cake was created!
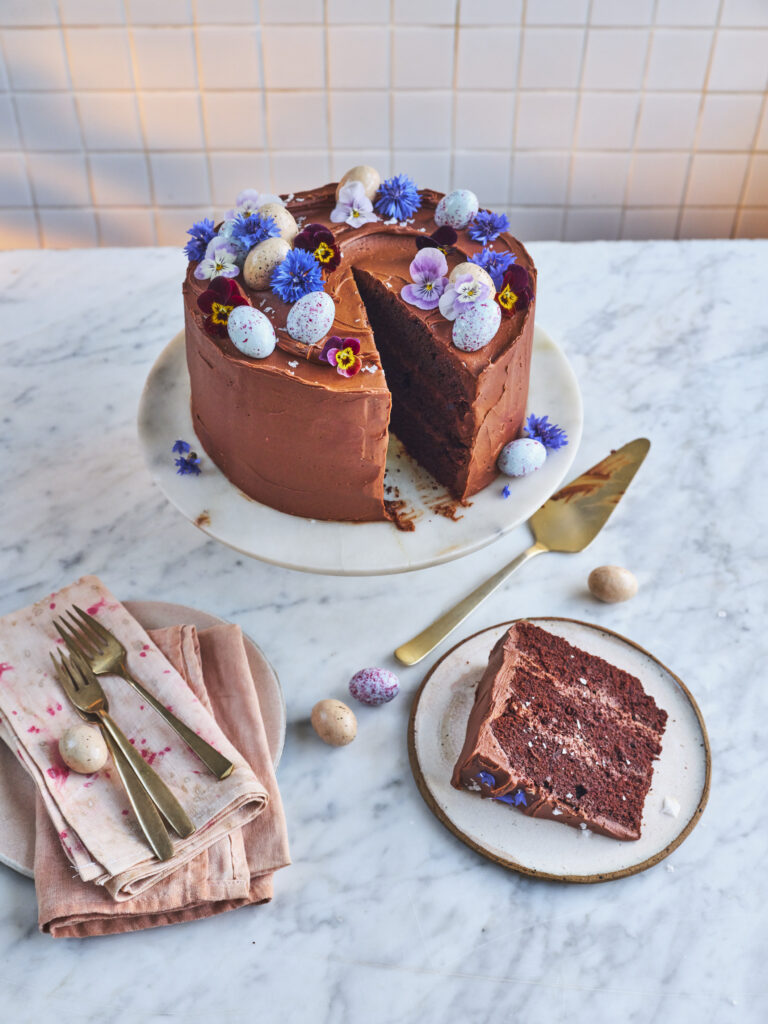
Our chocolate tahini cake is dangerously delicious, with moist chocolate buttercream layers in between tall, fluffy and soft chocolate sponge cake. It’s then coated in the remaining buttercream to pack everything together, sealing in the rich, decadent goodness of every chocolate lover’s dream.
Including tahini within the mixture causes the cake to have a beautiful, nutty, sweet and sesame like taste to it, allowing the texture to be fudgy, smooth and buttery.
When was chocolate cake invented?
Speaking of chocolate, have you ever wondered where chocolate cake came from? Between 1764 – 1765, John Hannon and Dr. James Baker worked together to make cocoa powder from grinding cocoa beans between two massive circular millstones. From this, chocolate candy was invented and then shortly afterwards milk chocolate arrived in 1876. It wasn’t until 1886 when American cooks began adding cocoa powder to cake batter, making the first chocolate cakes!
What is Tahini?
If you haven’t tried tahini, it’s a thick paste made from ground sesame seeds, commonly used in Middle Eastern dishes like hummus! Tahini is what gives dishes like hummus that beautiful nutty flavour, causing the texture to be creamy.
Why should you use tahini in baking?
Tahini paste is a great addition when baking as it balances out the sweetness – just like sea salt does! It pairs beautifully with chocolate and coffee aromas too! Because of it’s creamy texture and healthy fat content, it binds easily with the other ingredients, making the overall texture fudgy and rich.
Because tahini mixes better with ingredients that have similar textures and fat contents, it works perfect in a buttercream, made with softened butter and cream cheese! Adding tahini in your buttercream will result in a delicious smooth frosting, with added depth to the overall flavour.
How do you make chocolate tahini sponge cake
Grease and line 3x 20cm baking tins with greaseproof paper.
Preheat the oven to 180c.
In a large mixing bowl sift in the plain flour. Next add the golden caster sugar, soft brown sugar, cocoa powder, baking powder, bicarbonate of soda and Maldon sea salt. Mix the dry ingredients together, and then make a well in the middle.
In a separate bowl mix your wet ingredients – the eggs, buttermilk, tahini, vegetable oil and vanilla extract. Whisk this together, and when it is fully incorporated pour it into the well in the middle of the dry ingredients.
Use the KitchenAid Stand Mixer to combine altogether, until you have a smooth batter (but be careful not to overmix). Then pour the mixture evenly between the 3x cake tins. Place them on a shelf in the middle of the preheated oven and bake for 30 minutes. Check they are fully cooked through by inserting a skewer or cocktail stick in the middle of the sponge and ensuring it comes out clean.
Set the cakes on a wire rack and allow them to cool completely.
How to make chocolate buttercream
While the cakes are cooling you can make the chocolate buttercream. In the stand mixer bowl, beat the butter until it is fully softened and smooth. In a separate bowl sift the icing sugar and the cocoa powder. Slowly add the icing sugar and cocoa powder to the butter mixture in spoonful’s, beating each addition in before adding the next (so you don’t create a sugar dust cloud!).
Continue until you have added all the icing sugar and cocoa powder, and the mixture is thick and smooth. Finally add the melted and cooled chocolate, along with the whole milk, and beat this through to create a silky smooth and chocolatey buttercream.
Once the sponge layers have fully cooled you can assemble your cake. Spread a little buttercream onto the base of the cake stand or board in the centre, then place the first sponge on top of this. The buttercream will help it stick in place. Spread some of the buttercream all over the top of this cake, and then sandwich the second sponge on top, pressing down gently. Repeat this with the final sponge. Now you want to use the remaining buttercream to smooth all around the sides of the cake and on the top. Using a palette knife or cake scraper can help you achieve a smooth finish.
How to decorate a chocolate cake
When decorating the chocolate cake, we chose some edible flowers and coloured Easter chocolate eggs – but you can decorate however you wish! Don’t forget to do a final sprinkle of Maldon Sea Salt flakes on top – it works perfectly with the rich chocolate as it elevates the sweetness and counteracts the bitterness from the cocoa.
What is a good substitute for tahini?
There are many substitute options for tahini if you are struggling to find it in the local grocery shop! Because tahini is a sesame seed paste, try using a nut butter instead. We recommend an almond butter as it’s very similar in both texture, flavour and colour! Other nut butters you could use instead could be: cashew or macadamia nut butter. Both have the same creamy richness and nutty flavour that you get from tahini.
Alternatively, some people may use Greek yogurt instead of tahini as it lends itself a creamy, but thinner consistency. Because of it’s slightly thinner texture, you may need to adjust the ratio to the other ingredients.
Can you freeze chocolate cake?
Once the cakes have completely cooled, wrap it in clingfilm tightly. The tighter the better, as it seals in the freshness of the cakes and avoids it from getting freezer burn. Wrap the cake in a layer of aluminium foil for extra protection.
For best taste and texture, you shouldn’t freeze cakes for longer than 3 months, but the sooner you can serve it, the fresher it taste!
When thawing cakes, transfer the wrapped cakes to the refrigerator one day before decorating or serving. The cakes take at least 8 hours to thaw completely in the refrigerator. You can thaw them in toom temperature, but the flavour and texture is best one thawed slowly in the refrigerator.