What is a picnic pie?
As we head into Spring, many people turn to the outdoors to have a picnic. This is where you pack a meal to be enjoyed in the open air, usually in the countryside, beach or garden. It’s a brilliant way to enjoy the sunshine, socialise with friends and family, and tuck into some delicious tasting foods.
Classic picnic foods include great British bakes of sandwiches, scotch eggs, and sausage rolls, but one of the main centrepieces for a picnic is a ‘picnic pie’. The name is self explanatory, this is a decadent pie that is to be enjoyed at a picnic. It’s a classic pie dish, usually having a shortcrust pasty base due to it’s solid structure, avoiding any crumbling/wreckage whilst travelling to your desired picnic location!
The filling options for your picnic pie are endless! From classic chicken and leek; steak and ale, and coronation chicken, to vegetarian options of spinach, dark greens and even Pilau! It’s important to note that many picnic pies have distinctive layers in between fillings.
How do you make layers in a picnic pie?
The construction of layers requires the most attention when making your picnic pie. We recommend having all the layers ready and cool enough to assemble inside the pastry case. Try using a loose-bottomed spring form cake tin, as the pastry won’t stick to the tin and you can easily lift of the pie to serve without wrecking the pastry!
Your first layer should be the strongest of the layers, preferably one that has a low water content, such as potatoes, beef and peppers. You can then start adding your ‘lighter’ ingredients, such as spinach, cheese or mushroom. You can then repeat the process until you have nice, visible layers. Try using colourful ingredients to make the layers really stand out and impress your guests!
How to make a layered vegetable picnic pie
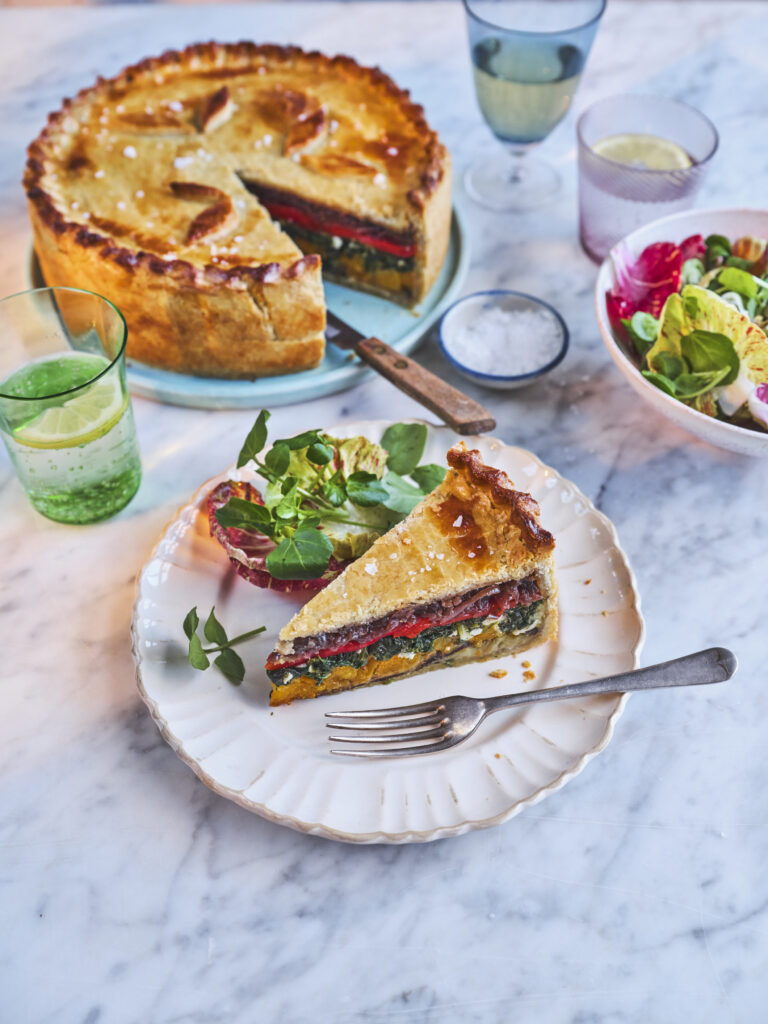
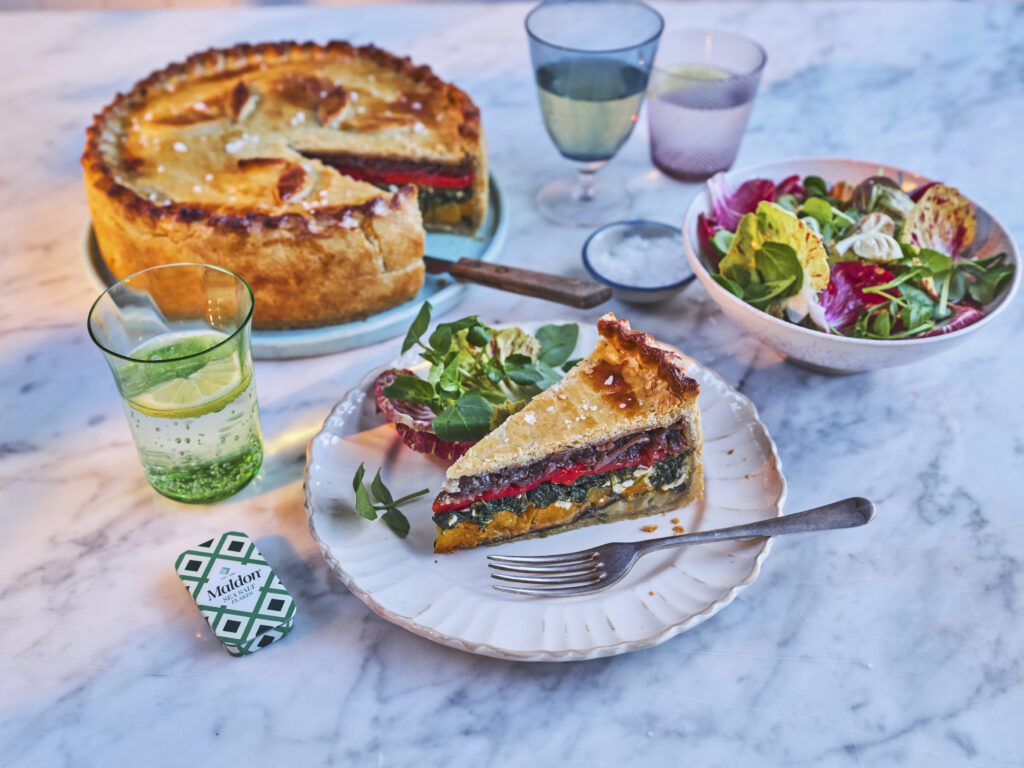
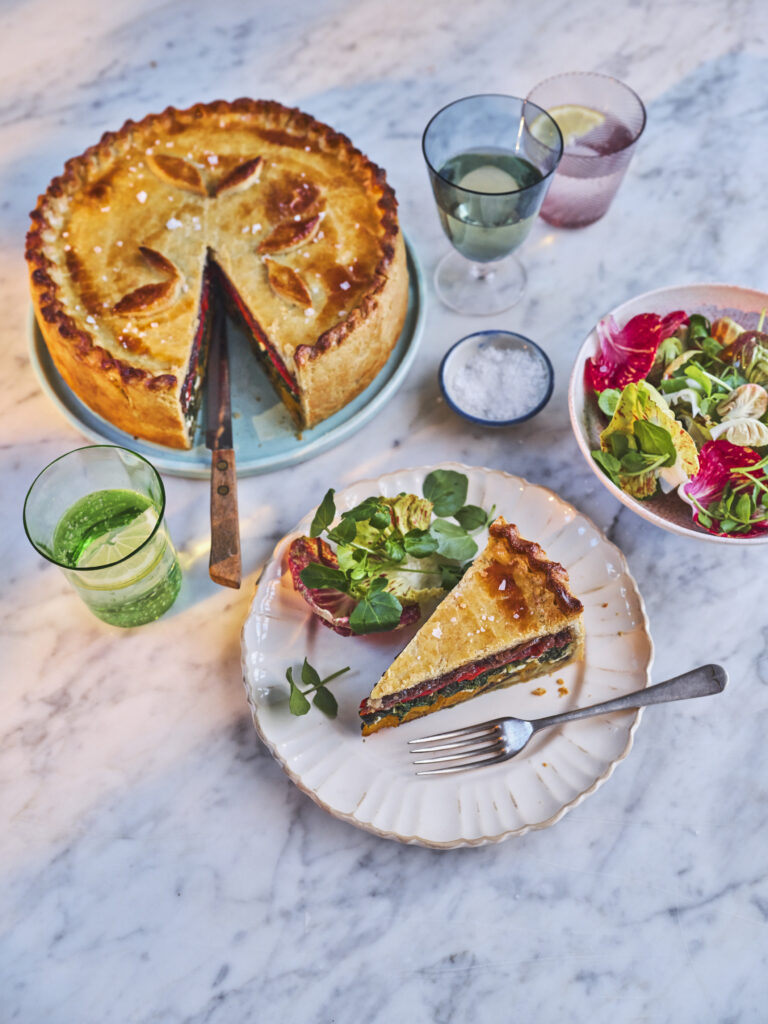
We made a showstopping layered vegetable pie, perfect for a picnic! The layers consist of butternut squash, aubergine, onions, red peppers, spinach and crumbly feta. Once compressed and assembled together, the layers are incredibly vivid – representing the beautiful colours of Springtime.
Making shortcrust pastry:
- You can either do this by hand or with a food processor.
- By hand, simply measure out the plain flour into a large bowl and add a generous pinch of salt. Then add the cold, cubed butter and use your fingertips to rub the butter into the flour. Keep doing this until no large lumps of butter remain and the mixture resembles fine breadcrumbs.
- Add 1 beaten egg to the mix and use a metal knife to cut this through, then use your hands to gently bind the pastry together.
- When it has come together as a ball simply tip onto your surface and knead very briefly so the pastry is smooth.
- Flatten the ball into a disc shape and then cover in clingfilm and rest in the fridge (for at least 30 minutes) while you make the fillings.
Making the fillings for your pie:
- Preheat the oven to 180c.
- Peel the butternut squash and then cut into small cubes. Arrange them on a single layer in a baking tray and drizzle with olive oil, cumin seeds and a good pinch of Maldon Sea Salt flakes and some cracked black pepper. Place the butternut squash into the oven and roast for 20 – 30 minutes until the squash is soft and starting to caramelize. Remove from the oven and set aside to cool.
- While the butternut squash is cooking you can also prepare the aubergine. Thinly slice both aubergine and lay them across a couple of baking trays in single layers. Drizzle with olive oil, Maldon Sea Salt flakes and then place into the oven for roughly 10 minutes on each side until they are collapsed and slightly charred on each side. Remove from the oven and set aside to cool.
- For the caramelised red onions, finely slice all three onions. Heat a large frying pan on a medium low heat and drizzle in a generous amount of olive oil. Add the sliced red onions and fry gently for 10 minutes until softened. Add the crushed garlic and continue to fry for 5 minutes until everything has become soft, jammy, and caramelised. Remove the pan from the heat and allow the onions to cool.
- This would be a good stage to line the cake tin with your pastry.
Lining a cake tin for your pastry crust:
- Take out the chilled pastry and cut it into 2 pieces, one 2/3 and the other 1/3.
- Lightly flour your work surface and then roll out the bigger piece of the pastry first, into a large circle approximately 1cm thick.
- Take a 23cm cake tin and carefully lift the large pastry circle and drape into the cake tin. Then press into the base and up the sides, leaving an overhang of pastry over the edges of the cake tin. If your pastry tears or rips at any stage don’t worry, just use your fingers to carefully press the pastry hole together again. Set this in the fridge.
- Next roll out the smaller 1/3 of pastry to a circle that is the same 23cm diameter as this will form the top of the pie. Place this onto a lined baking tray and pop into the fridge to chill also.
Making the layers for your pie:
- Now you start preparing the fillings. We started with spinach. Place a large pan of water onto boil. Add the spinach to the water and allow it to wilt for a minute only, before immediately draining in a large colander. Run some cold water over the spinach to cool it down quickly and then use your hands to press as much liquid out as possible. Once all the liquid has been removed, tip the wilted spinach into a large bowl and crumble in the feta, the lemon zest and some Maldon Sea Salt flakes and cracked black pepper. Mix to combine and set aside.
- Now let’s make the roasted red pepper layer. Simply remove four roasted red peppers from the jar and drain on some kitchen paper to remove the excess oil. Slice them open and set aside.
- Remove the lined pastry tin from the fridge and start adding your vegetable layers.
- We started with the roasted aubergine at the bottom of the pie.
- Then added a layer of the roasted red peppers, followed by the spinach and feta mix. Next add the roasted butternut squash (pressing down gently on each layer so it is well compacted and even) and finished with a layer of the caramelised red onion.
Concealing with a pie lid:
- Now take the pastry pie lid from the fridge and cut it to the correct size. Place this on top of the pie to enclose the fillings.
- Use the second beaten egg as the egg wash and then fold the pastry overhang to tuck into the lid – use your fingers to create a crimping pattern around the edges to ensure that everything is tightly sealed.
- Any extra pastry can be cut off and used to make patterns such as leaves for the top. Use the remaining egg wash to brush all over the pie top.
Cooking the layered picnic pie:
- Place it into the oven in the middle shelf for 40 – 45 minutes until golden brown all over.
- Remove from the oven and let it stand for 10 minutes before removing from the cake tin.
- This can be cooled completely or served warm alongside fresh green salad.
Can you freeze picnic pie?
Once cooked, you can freeze the pie whole or pre-portioned up to 3 months. Make sure that the pie, or individually slices are wrapped well to avoid freezer burn.
What is freeze burn?
Freeze burn is when foods are exposed to cold air, dehydrating the outer layer as moisture is lost. This can make your foods have dry spots once defrosted. You can tell if your frozen foods have freeze burn as ice crystals will appear.