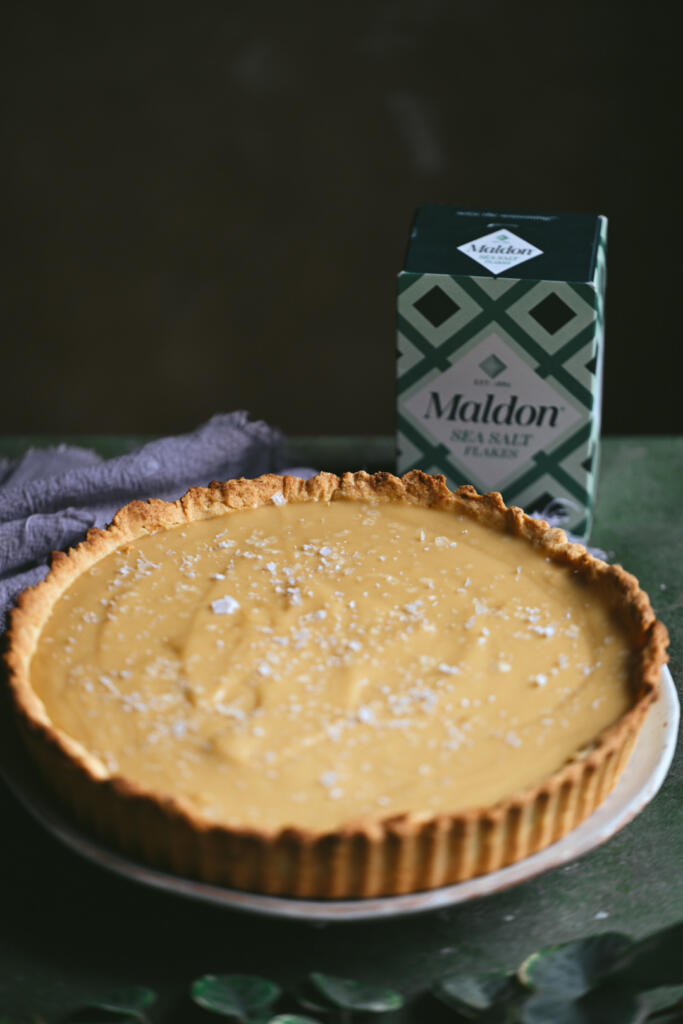
We’ve teamed up with Annie Mae Herring (also known as The Culinary Bee) to bring back an absolute British icon that is the Butterscotch Tart.
A gloriously wobbly, ridiculously nostalgic school pudding with buttery pastry and a thick, silky butterscotch filling. And for this one, we’ve seasoned it with Maldon Original Sea Salt Flakes because you need to season your desserts.
Why? A butterscotch tart is rich and sweet whereby Maldon Sea Salt is crushed directly into the butterscotch filling to balance the brown sugar and caramel richness, then finished on top of the tart to give tiny pops of salinity that make the butterscotch elevated.
How To Make Butterscotch Tart
Butterscotch tart with Annie Mae Herring and Maldon Salt
Heat the oven to 180°C fan.
Rub the butter into the flour and icing sugar until it resembles breadcrumbs. Add the egg yolk and enough cold water to bring everything together. Wrap and chill for 30 minutes.
Roll out the pastry and line a 23cm tart tin. Chill for another 15 minutes, prick the base, then line with baking paper and baking beans. Blind bake for 15 minutes. Remove the paper and beans and bake for another 8 to 10 minutes until lightly golden. Leave to cool completely.
For the filling, melt the butter in a saucepan over a medium heat. Add the dark brown sugar and stir until dissolved.
Whisk in the flour and cook for 1 minute. Gradually pour in the milk, whisking continuously, followed by the double cream. Add the vanilla and crushed Maldon Original Sea Salt Flakes.
Cook gently for 6 to 8 minutes, whisking regularly, until you have a thick, glossy butterscotch that coats the back of a spoon.
Pour into the cooled pastry case and smooth the top. Allow to cool, then refrigerate for at least 4 hours, or preferably overnight, until completely set.
Just before serving, finish with a final pinch of Maldon Original Sea Salt Flakes.
An Italian Classic Reimagined
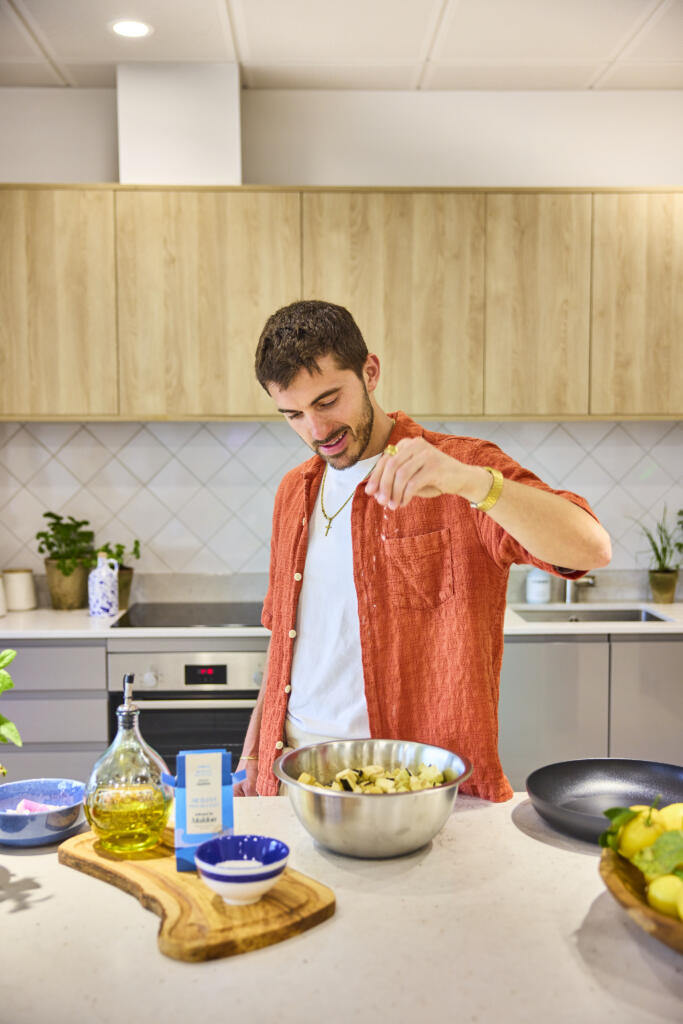
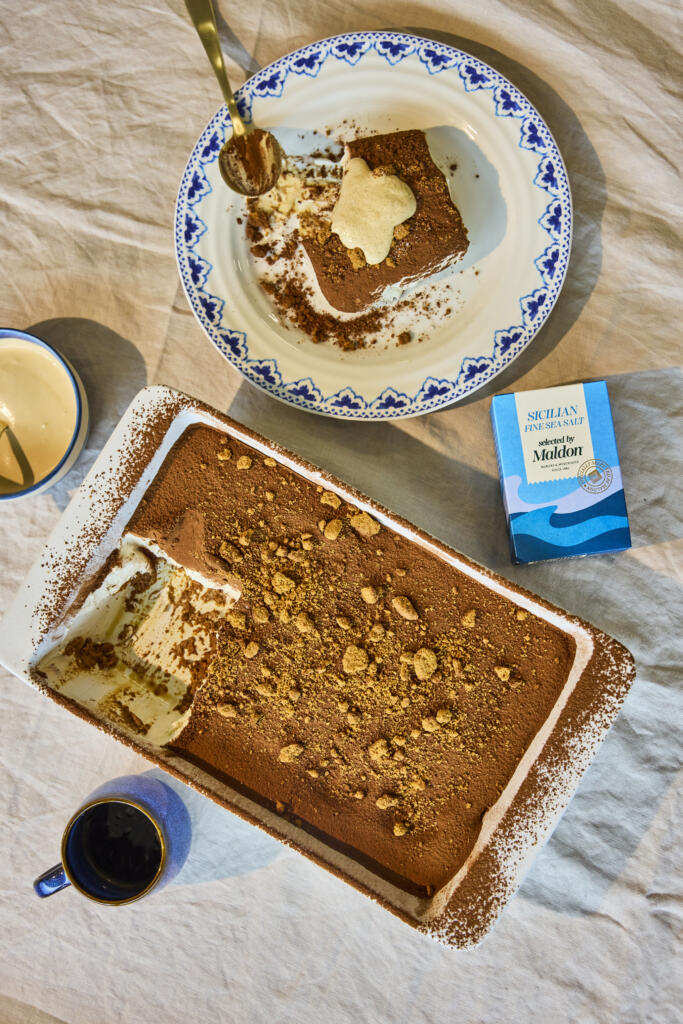
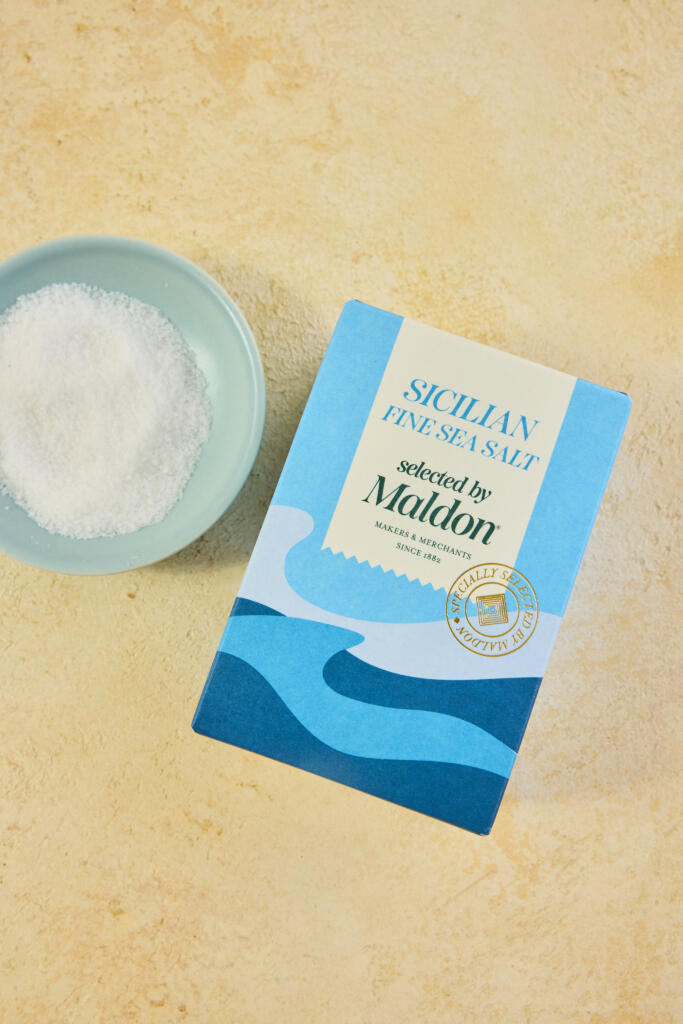
To celebrate the launch of Sicilian Fine Sea Salt, Selected by Maldon, Maldon Salt has partnered with award-winning Italian cook Giuseppe Federici (@sepps) to showcase recipes inspired by the flavours, traditions and family food culture that define Italian cooking. This indulgent Vegan Tiramisu combines rich espresso, creamy Biscoff filling and a subtle salted coffee cream, creating a delicious twist on one of Italy’s most iconic dessert.
Welcoming Giuseppe Federici
Giuseppe Federici (@sepps) is a second-generation British Italian who comes from a long line of passionate food lovers, with Italian home cooking at the heart of everything he creates.
Today, Giuseppe shares authentic Italian recipe videos, family traditions and cooking inspirations with his hugely engaged audience. His beloved videos cooking alongside his Nonna have captured the hearts of millions and inspired his cookbook – Cooking with Nonna – a collection of treasured family recipes and stories based down through generations with a plant-based twist.
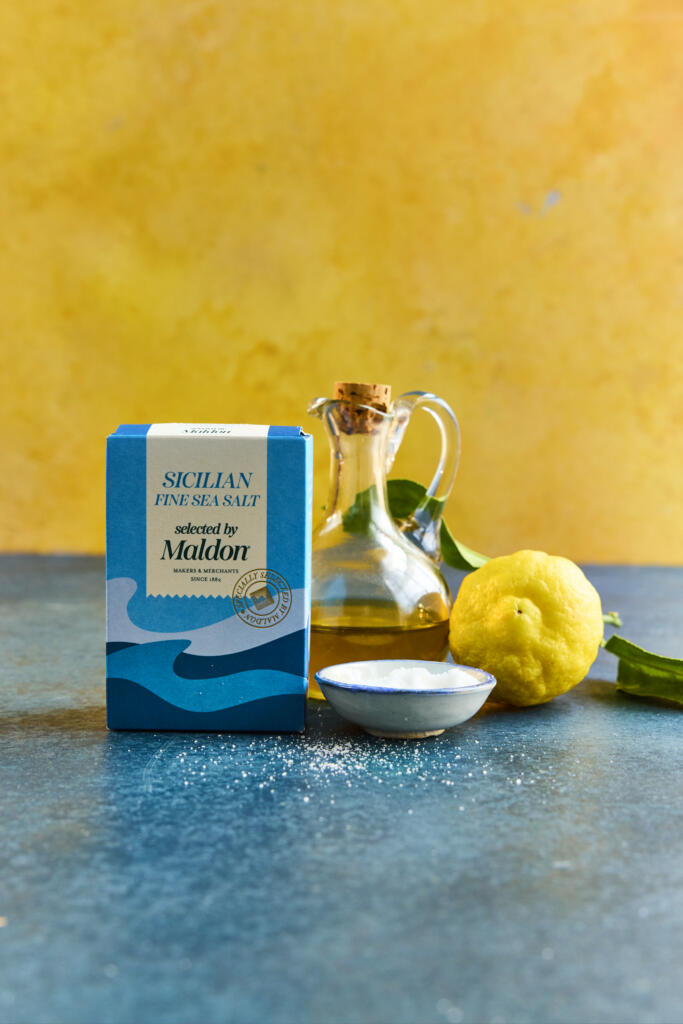
Introducing Sicilian Fine Sea Salt, Selected by Maldon
Harvested from the historic salt pans of Trapani on Sicily’s western coast, Sicilian Fine Sea Salt, Selected by Maldon is celebrated for its balanced flavour and delicate texture. Naturally dried in the Mediterranean breeze and selected by Maldon’s Master Salt Merchants, this versatile fine sea salt dissolves easily and seasons evenly throughout cooking and baking.
In desserts, a touch of fine sea salt helps enhance sweetness, balance richness and enhances complex flavours such as coffee, chocolate and caramel.
How to Make Vegan Tiramisu with Biscoff
This irresistible vegan tiramisu layers espresso-soaked Biscoff biscuits with a silky cream made from vegan cream cheese, plant-based cream and Biscoff spread. Finished with cocoa powder, crunchy Biscoff crumbs and a luxurious salted coffee cream, it’s a crowd-pleasing dessert that’s perfect for entertaining and special occasions.
A small amount of Sicilian Fine Sea Salt, Selected by Maldon in the coffee cream enhances the roasted coffee notes while perfectly balancing the sweetness of the dessert.
For the Tiramisu
Ensure the espresso is completely cooled before starting.
We used the brand-new KitchenAid Artisan Plus Stand Mixer in Wild Blueberry for mixing. Mix the vegan cream cheese and Biscoff spread until smooth. In a separate bowl, whip the plant-based cream to soft, pourable peaks, then whisk in the vanilla and sugar.
Gently fold the cream cheese mixture into the whipped cream until fully combined.
Arrange a layer of Biscoff biscuits in a serving dish and lightly drizzle with the cooled espresso. Repeat with a second layer.
Spoon over a layer of the cream mixture, then repeat the layers of biscuits, coffee and cream until the dish is filled, finishing with cream on top.
Chill for at least 2 hours, or overnight for best results.
Before serving, dust with cocoa powder, sprinkle over the Biscoff crumbs and finish with a spoonful of salted coffee cream.
For the Salted Coffee Cream
Place the plant cream, vanilla extract, cacao butter, sugar, Sicilian Fine Sea Salt, vanilla essence, espresso and instant coffee into a saucepan.
Heat gently, stirring frequently, until the mixture is smooth and fully combined. Do not boil.
Remove from the heat and allow to cool completely before serving or storing.
Bring Italian Dolce to Your Table
Whether served as as the grand finale to an Italian feast or prepared for effortless entertaining, this Vegan Tiramisu delivers layers of coffee-soaked indulgence and creamy sweetness in every spoonful.
Sicilian Fine Sea Salt, Selected by Maldon is available now from Tesco, Sainsbury’s, and Ocado. For more authentic Italian recipes and family favourites, explore Giuseppe Federici’s cookbook, celebrating the dishes, traditions and stories.
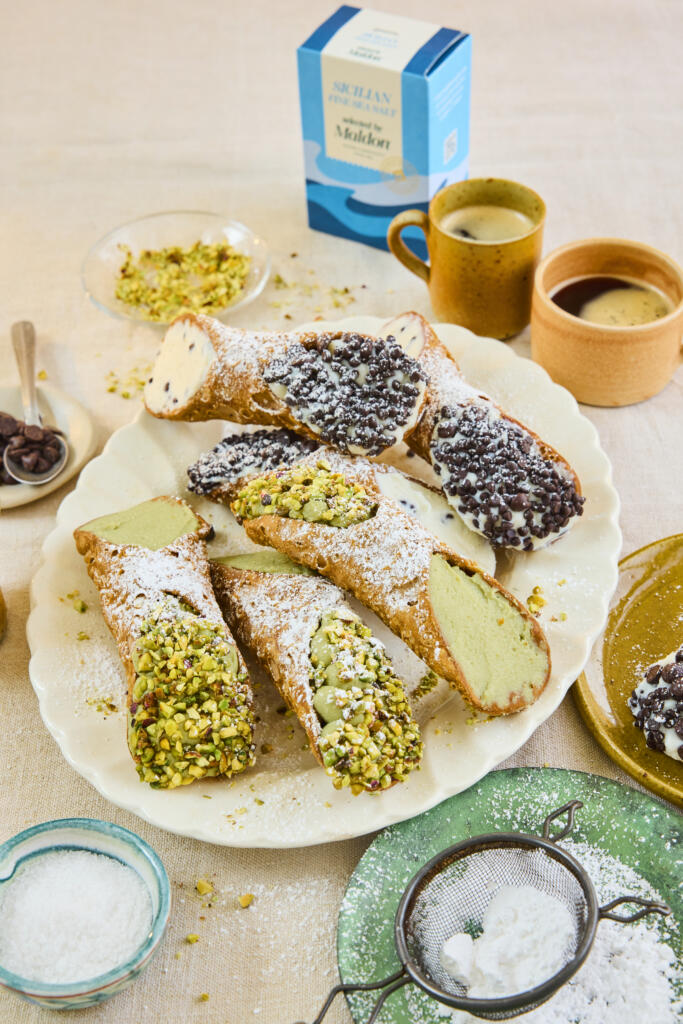
Crisp, blistered shells and a cool, creamy ricotta filling – these Sicilian cannoli are the island’s most famous sweet, made at home. The Marsala-spiked dough fries up golden and bubbly, while a pinch of Sicilian Fine Sea Salt, Selected by Maldon sharpens the sweetness. This recipe makes two classic fillings in one batch: pistachio, and chocolate and ricotta.
Why You’ll Love These Sicilian Cannoli
Two Fillings, One Batch: Make both the pistachio and the chocolate-and-ricotta cannoli at once for a proper Sicilian dessert platter.
Crisp, Bubbly Shells: A splash of Marsala in the dough gives the shells their signature blistered, shatteringly crisp texture.
A True Sicilian Classic: Few desserts feel as special as a freshly piped cannolo dusted with icing sugar.
How to Make Sicilian Cannoli (Step-by-Step)
Drain the ricotta: Place the ricotta for the fillings in a muslin cloth set in a sieve and squeeze out any excess liquid. Set aside – this keeps the fillings thick and the shells crisp.
Make the dough: In a large bowl, mix the plain flour, caster sugar, Sicilian Fine Sea Salt, Selected by Maldon and bicarbonate of soda. Rub in the cubed butter with your fingers until it resembles fine breadcrumbs.
Bring it together: Add the beaten egg and Marsala wine and mix. Tip onto a lightly floured surface and knead until you have a smooth dough.
Roll and shape: Roll the dough as thinly as possible with a rolling pin or pasta machine, then cut out 15cm circles. Wrap each tightly around a cannoli mould, sealing the join with a little beaten egg.
Fry the shells: Heat the vegetable oil to 180°C, deep enough to submerge the cannoli. Fry the wrapped moulds for around 30 seconds at a time, turning with tongs, until golden and bubbly. Drain on kitchen paper and carefully slide the shells off the moulds once cool. Repeat for all 6.
Make the fillings: Whisk the drained ricotta with the rest of each filling’s ingredients, holding back the chocolate chips and chopped pistachios. Stir the chocolate chips into the chocolate filling, then transfer each filling to its own piping bag.
Fill and finish: Snip the ends of the bags and pipe the fillings into the shells – 3 of each flavour. Dip the ends of the pistachio cannoli into the chopped pistachios, dust everything with icing sugar and serve.
Tips for the Perfect Sicilian Cannoli
Drain the ricotta well: Squeezing out excess liquid is the difference between a thick, luscious filling and a soggy shell.
Fill just before serving: Pipe the filling in at the last minute so the shells stay crisp rather than softening.
Roll it thin: The thinner you roll the dough, the more delicate and blistered the fried shells will be.
What to Serve with Sicilian Cannoli
Cannoli are the perfect finale to a Sicilian feast – serve them after Sicilian arancini or homemade cavatelli, with strong espresso to cut the sweetness. They also make a beautiful centrepiece for a dessert grazing board alongside fresh fruit and the blood orange and fennel salad to start the meal.
Frequently Asked Questions
What if I don’t have cannoli moulds?
You can improvise with metal cannoli tubes, or wrap the dough around clean, foil-covered wooden dowels. Just make sure whatever you use is oven- and oil-safe.
Can I make cannoli ahead?
Fry the shells and make the fillings up to a day ahead, storing them separately. Pipe the filling in only when you’re ready to serve so the shells stay crisp.
What is pistachio paste and can I substitute it?
Pistachio paste is finely ground pistachios, sometimes lightly sweetened. If you can’t find it, blitz shelled pistachios to a smooth butter, or use a good-quality pistachio butter.
A No-Churn Summer Dessert by Margie Nomura
Looking for the ultimate make-ahead summer dessert? This Salted Caramel Ice Cream is rich, creamy, wonderfully indulgent and surprisingly easy to make. Created in collaboration with Maldon Salt and chef Margie Nomura, this no-churn recipe combines velvety homemade caramel with the distinctive crunch and flavour of Maldon’s iconic flaky sea salt.
For an extra touch of fun, we’re serving it in an iconic Maldon Original Sea Salt 570g Tub. Once cleaned and repurposed, the tub makes the perfect freezer-safe container for homemade ice cream, giving food lovers a creative way to reuse a kitchen staple while creating a showstopping dessert.
Whether you’re hosting a summer barbecue, planning a family gathering, or simply looking for an easy frozen treat on hand, this salted caramel ice cream is guaranteed to be a crowd-pleased.
Meet Margie Nomura
Source: KITRI Spotlight: Margie Nomura
Margie Nomura is the chef, food writer and creator behind Desert Island Dishes, a hugely popular recipe platform dedicated to simple, delicious home cooking. With more than a decade of experience as a professional chef, Margie trained at the renowned Ballymaloe Cookery School and has cooked professionally around the world. She is passionate about creating recipes that deliver maximum flavour with minimal effort, helping home cooks feels confident in the kitchen.
Through Desert Island Dishes, Margie shares accessible recipes, practical cooking tips and inspiration for everyday meals, desserts and entertaining.
This Salted Caramel Ice Cream perfectly captures her cooking philosophy: simple ingredients, straightforward techniques and incredible results.
How to Make Salted Caramel Ice Cream
Rich, creamy no-churn ice cream with ribbons of homemade salted caramel running through it. The perfect make-ahead dessert.
Make the salted caramel sauce – Place the light brown sugar and butter into a saucepan over a medium heat. Stir until the butter has melted and the sugar has dissolved. Pour in the double cream and whisk until smooth. Bring to a gentle simmer and cook for 3–4 minutes until slightly thickened. Remove from the heat and stir through the Maldon Original Sea Salt flakes and vanilla extract, if using. Leave to cool completely.
Prepare the ice cream base – Whip the double cream until soft peaks form. Gently fold in the condensed milk until fully combined and smooth.
Create the caramel ripple – Fold approximately half of the cooled caramel sauce through the ice cream mixture. Avoid overmixing to keep beautiful ribbons of caramel running throughout.
Freeze – Spoon the mixture into a cleaned Maldon Original Sea Salt 570g Tub or another freezer-proof container. Swirl through a little extra caramel sauce for an even more dramatic ripple effect. Freeze for at least 6 hours, or until firm.
Serve – Scoop generously into bowls or cones, drizzle with the remaining salted caramel sauce and finish with a pinch of Maldon flaky sea salt for the ultimate sweet-and-salty finish.
Recipe Tips
Allow the ice cream to sit at room temperature for 5–10 minutes before scooping.
For extra texture, add chopped honeycomb, roasted pecans or chocolate shards before freezing.
The Maldon Sea Salt flakes provide a clean, delicate crunch that enhances the sweetness of the caramel without overpowering it.
Using a repurposed Maldon Original Sea Salt 570g Tub makes this recipe ideal for transporting to picnics, garden parties and family gatherings.
Storage
The caramel sauce will keep in an airtight container in the fridge for up to 2 weeks. Gently warm before serving if it becomes too firm. The ice cream can be stored in the freezer for up to 1 month.
The Perfect Summer Treat
Creamy, sweet, salty and irresistibly scoopable, this Salted Caramel Ice Cream is everything a summer dessert should be. Made with pantry staples, elevated by the unmistakable flavour of Maldon Sea Salt, and inspired by the effortless cooking style of Margie Nomura, it’s the kind of recipe you’ll return to all season long.
So grab your Maldon Salt tub, gather your favourite people and enjoy a homemade frozen dessert that’s guaranteed to disappear fast. One scoop is never enough.
A Fire-Cooked Dessert Collaboration Between Maldon Salt, Weber Grills and Chef Matt Burgess
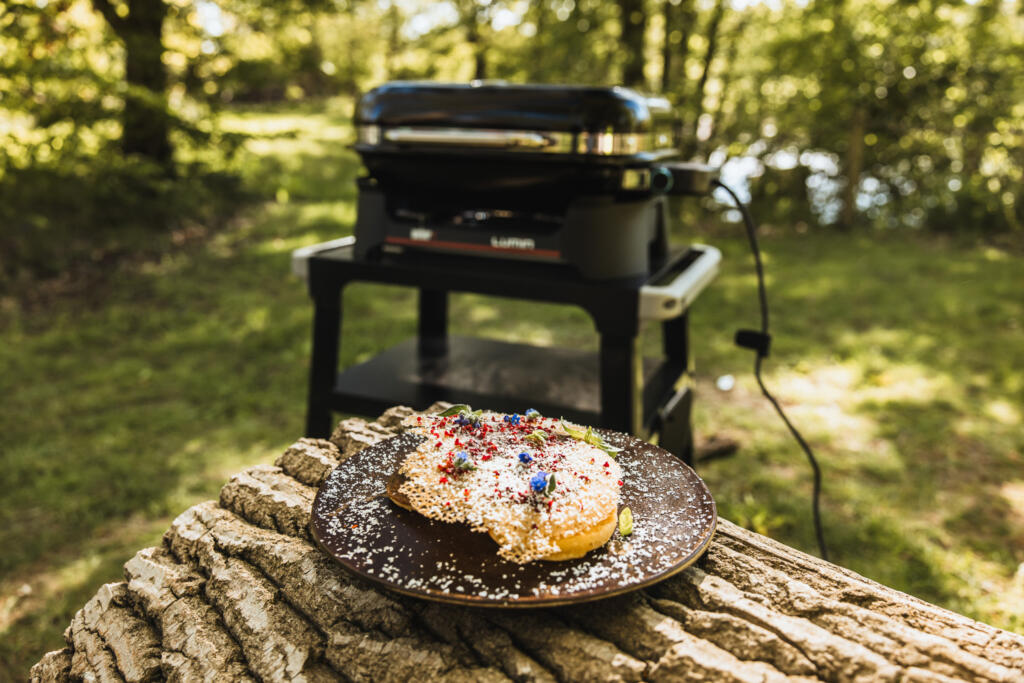
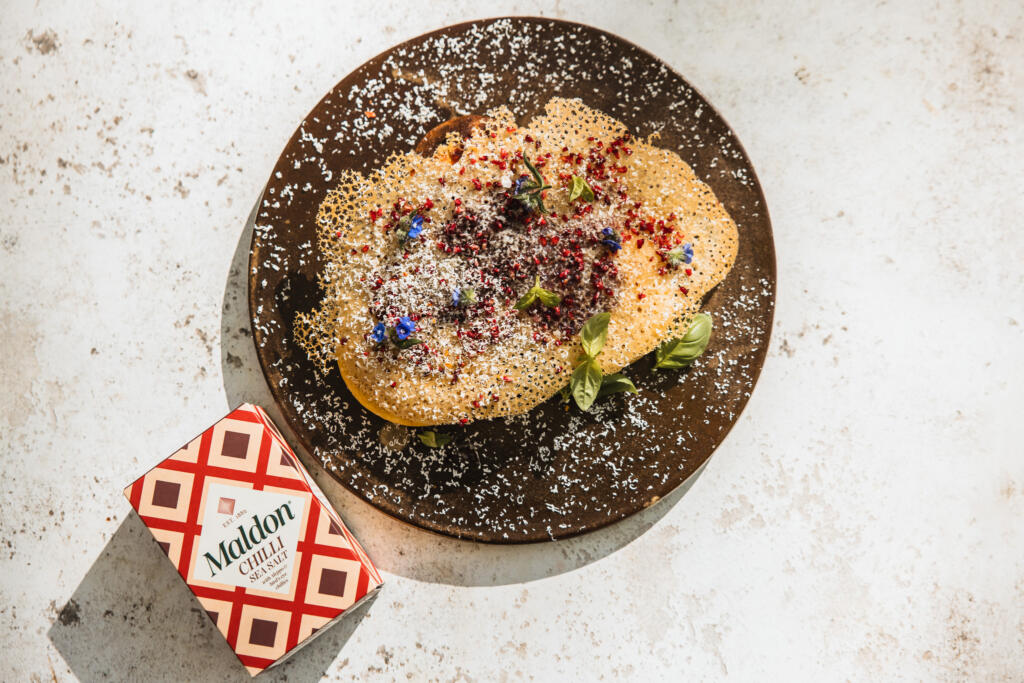
When live-fire cooking meets modern outdoor grilling, desserts become something truly unforgettable. This Cloud Cake recipe by Chef Matt Burgess, also known as @matblak, is a bold collaboration celebrating texture, flavour and innovation – combining the versatility of the Weber Lumin electric grill with the delicate finishing power of Maldon Chilli Sea Salt.
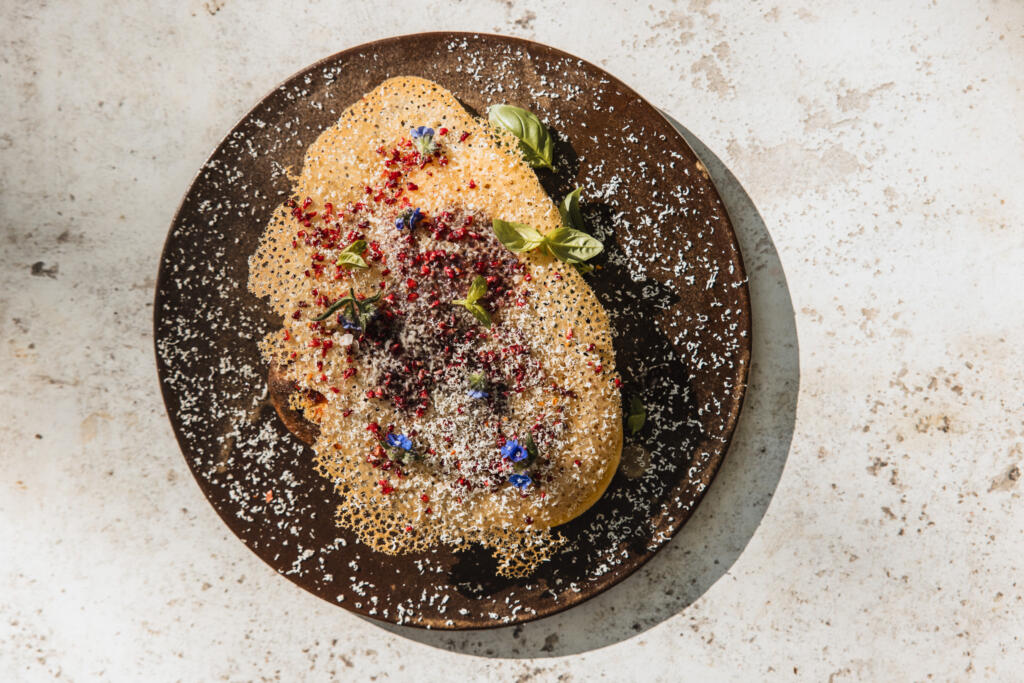
Soft, airy, and lightly steamed under the lid of the Weber Lumin, this raspberry cloud cake is balanced with bright fruit acidity, crisp raspberry coral, white chocolate and a subtle hit of chilli salt. It is restaurant-quality outdoor cooking designed to show that barbecue cooking goes far beyond meat and flame.
Whether you are cooking on a balcony, terrace or garden setup, this recipe highlights how electric grilling, live-fire inspiration and premium ingredients can create a memorable summer dessert.
Who are Weber Grills?
Weber Grills are globally recognised as one of the leading names in barbecue and outdoor cooking innovation. Known for combining performance, reliability and design, Weber has become synonymous with modern grilling culture worldwide.
The Weber Lumin electric barbecue reaches temperatures over 315°C while also offering steaming, smoking, searing and warming functions. This versatility makes it ideal for dishes like cloud cake, where controlled heat and trapped steam are essential for creating this signature soufflé-like texture.
Unlike traditional desserts cooked indoors, this recipe users the Weber Lumin pancha and lid system to gently steam and lift the batter, producing an airy cake with a caramelised outer edge and soft centre.
For urban grillers, food lovers and chefs experimenting with outdoor desserts, the Weber Lumin proves that barbecue cooking can be sophisticated, technical and creative.
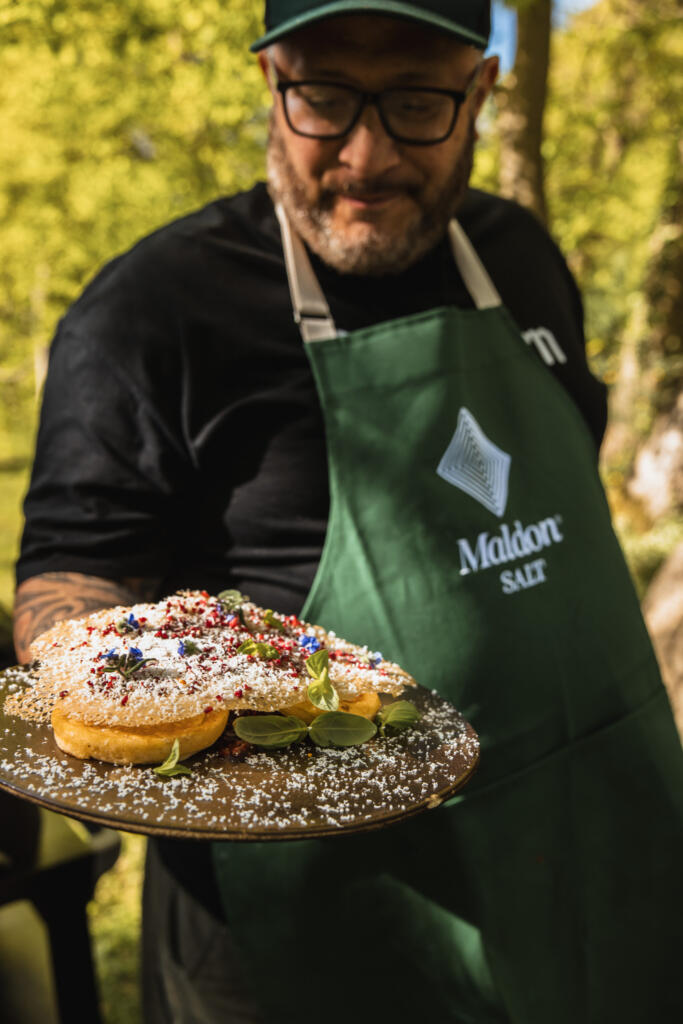
Chef Matt Burgess, widely recognised as @matblak, is a New Zealand Māori chef, live-fire specialist and founder of Kaiwhenua – Kai by Matblak. His cooking philosophy is built around fire, flavour, culture and connection.
After beginning his culinary career in Wellington, New Zealand, Matt went on to work with some of London’s most respected hospitality brands, including Soho House, Bluebird Chelsea, Gordon Ramsay’s Maze Grill, and Jamie Oliver’s Threadneedle street.
Today, through Kaiwhenua – meaning “food from the land” in Māori – Matt develops recipes, host supper clubs and creates premium condiments inspired by live-fire cooking and layered flavour. His work blends refined restaurant technique with open-fire cooking, making him one of the UK’s most exciting modern barbecue chefs.
Matt’s approach to dessert reflects the same philosophy throughout his cooking: balance, smoke, texture and restraint.
Explore Kaiwhenua and Kai by Matblak here: https://www.kaiwhenua.co.uk/
Why Maldon Chilli Sea Salt Matters in This Dish
Salt is often overlooked in desserts, but in this recipe Maldon Chilli Sea Salt plays a crucial role.
The delicate crunch of Maldon Sea Salt flakes enhances sweetness, sharpens raspberry acidity and balances the richness of white chocolate. The added chilli gives subtle warmth that lingers gently on the palate, elevating the flavour profile without overpowering the dessert.
In the cloud cake batter, the chilli salt helps heighten the fresh raspberry flavour. As a finishing touch, it creates contrast against the soft sponge, crisp coral and creamy chocolate.
This sweet-and-heat combination is what transforms the dish from a simple grilled sponge cake into a refined barbecue dessert.
What is a Cloud Cake?
A cloud cake is an ultra-light, souffle-style cake known for its airy texture and delicate rise. Inspired by Japanese souffle pancakes and steamed sponge techniques, cloud cakes rely heavily on whipped egg whites to create lift and softness.
Unlike dense sponge cakes, cloud cakes are designed to feel light, almost mousse-like in the centre, while maintaining a lightly caramelised exterior.
In this version, the Weber Lumin lid traps heat and steam during cooking, helping the cake rise gently while staying soft and moist inside.
How to Make Cloud Cake, Raspberry Coral with Chilli Sea Salt
Preheat the Weber Lumin with plancha to medium–low heat. You want gentle, even heat.
Whisk egg yolks with milk and vanilla. Add flour and baking powder. Mix smooth.
Whip egg whites with a pinch of Maldon Chilli Sea Slat to soft peaks. Add sugar gradually. Take to medium peaks.
Fold one third into the yolk mix to loosen. Fold the rest gently. Keep the air.
Fold in raspberries last.
Lightly butter the plancha. Spoon thick rounds, 2–3 cm high.
Cook undisturbed until the base sets. Close the lid to trap heat and allow the cake to rise and steam.
Flip carefully. Cook until just set. Centre stays soft. Remove and rest.
For the dressing, crush raspberries with lemon zest, juice and icing sugar. Keep it loose.
For the coral, mix all ingredients until smooth.
Pour a thin layer onto a hot section of the plancha.
Let it bubble and separate. Do not touch it.
Once dry and lightly coloured, lift carefully and cool. It will crisp as it cools.
Plate the cake. Spoon over dressing.
Add coral, micro planed white chocolate and basil.
Finish with a light pinch of Maldon Chilli Sea Salt.
Weber Lumin Cooking Tips
Always use the lid — trapped heat is essential for the signature cloud cake rise.
If the base colours too quickly, reduce the heat slightly.
Coral needs a dry, hot surface to crisp correctly.
Avoid overmixing the batter or the texture will become dense.
Cook in batches and avoid overcrowding the plancha
Explore More
Buy Weber Grills – Discover the Weber Lumin electric barbecue range and outdoor cooking accessories: https://www.weber.com/GB/en/home/
Discover Kai by Matblak – explore Matt Burgess’ recipes, sauces, live-fire cooking and flavour philosophy.
Shop Maldon Salt – Explore Maldon Sea Salt flakes and flavoured blends: https://maldonsalt.com/our-salt/
An elegant summer dessert with barely any effort. These mini strawberry, lemon and elderflower trifles layer light Madeira sponge soaked in elderflower and lemon with creamy lemon mascarpone, fresh strawberries and soft whipped cream. A final pinch of Maldon Original Sea Salt flakes heightens the fruit and balances the sweetness, making each individual glass feel that bit more special.
Why You’ll Love These Mini Trifles
No-Cook & Effortless: Just layer and chill – an impressive dessert that comes together in 15 minutes with no baking.
Perfectly Portioned: Individual glasses or jars look beautiful on the table and travel well for picnics and parties.
A Sweet-Salty Finish: A pinch of Maldon Original Sea Salt flakes lifts the strawberries and stops the dessert tasting one-note.
How to Make Mini Trifles (Step-by-Step)
Cut the sponge: Slice the Madeira sponge into 1-inch slices. Using a cookie cutter the same diameter as your glasses or jars, cut out 4 circles of sponge and set aside.
Make the elderflower lemon syrup: In a small bowl, mix together the elderflower cordial and lemon juice.
Make the lemon mascarpone: In another bowl, stir together the lemon yoghurt and mascarpone until smooth, then set aside.
Whip the cream: Add the double cream, icing sugar and vanilla bean paste to a bowl and lightly whip to soft peaks – take care not to over-whip so the topping stays light.
Assemble the trifles: Add a layer of sponge to the base of each glass and brush with the elderflower lemon syrup. Spoon over some lemon mascarpone, then a layer of chopped strawberries, and repeat the layers. Finish with a dollop of soft whipped cream and a pinch of Maldon Original Sea Salt flakes.
Tips for the Perfect Mini Trifles
Match cutter to glass: Cut the sponge to the width of your serving glass so each layer sits flush and looks neat.
Soft peaks only: Whip the cream just to soft peaks so the topping stays light and spoonable rather than stiff.
Soak, don’t drown: Brush the sponge with the syrup rather than pouring it on, so the layers stay defined and don’t collapse.
Assemble up to a few hours ahead and chill, then add the whipped cream and the final pinch of Maldon just before serving for the freshest finish.
Can I swap the strawberries?
Yes – raspberries, blueberries or any mix of summer berries work beautifully. Use whatever is freshest and in season.
How do I make these gluten-free?
Simply swap the Madeira sponge for a good gluten-free sponge cake; the rest of the recipe is naturally gluten-free.
A Maldon Salt Collaboration with Meliz Berg & AEG Kitchen Appliances
Maldon Original Sea Salt with AEG Kitchen Appliances
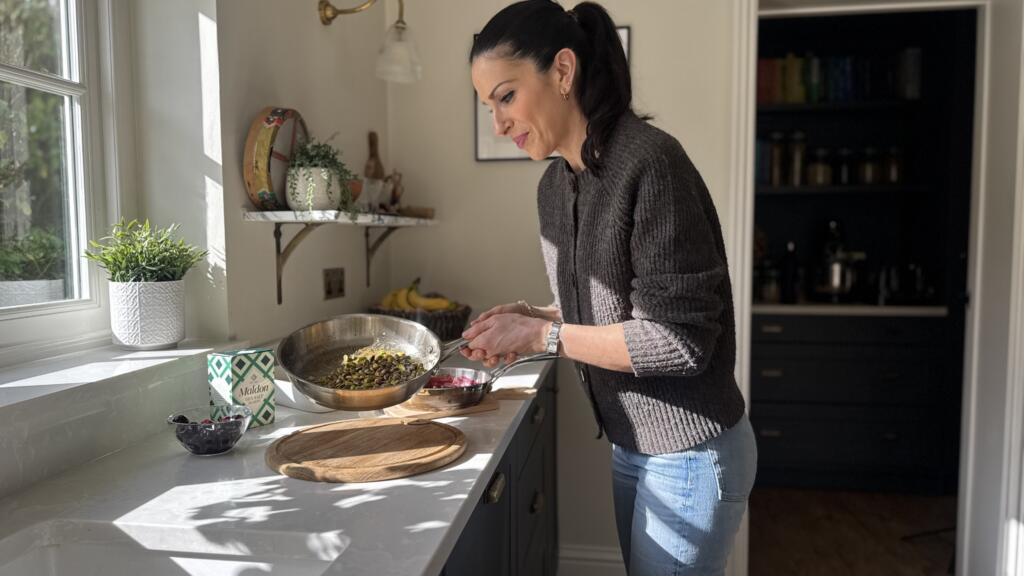
When it comes to creating memorable desserts, balance is everything. Sweet, tangy, creamy, crunchy – and, crucially, just the right amount of salt. These Creamy Cherry Filo Puffs with Sweet and Salty Pistachios celebrate contrast and balance, using Maldon Original Sea Salt flakes to elevate every layer of flavour and texture and AEG Kitchen Appliances for precision and performance.
Created in collaboration with Meliz Berg, and baked to perfection using AEG Kitchen Appliances, this recipe proves that a ‘pinch’ of the right sea salt can transform a sweet dish from good to unforgettable.
Why Maldon Salt is Important for Filo Puffs
Meliz Berg with Maldon Original Sea Salt
Salt plays a vital role in sweet cooking, enhancing flavours rather than overpowering them – and Maldon Sea Salt is uniquely suited to the task. Its light, pyramid-shaped flakes dissolve gently, delivering clean salinity exactly where it’s needed.
In this recipe, Maldon Salt:
Enhances the natural sweetness of cherries and honey
Balances the richness of butter, filo and tahini yoghurt
Adds a subtle crunch and flavour contrast when used as a finishing touch
From the filo layers to the sweet-and-salty pistachios, Maldon Sea Salt ensures every bite is perfectly balanced, never flat or overly sweet.
Cooking with AEG Kitchen Appliances
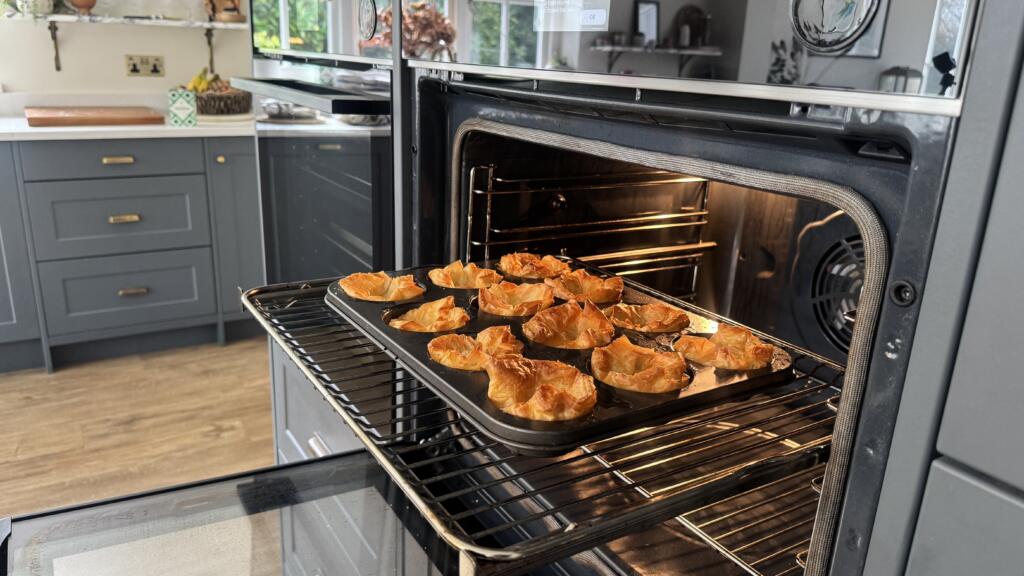
Filo Puffs coming out of the AEG Oven Setup
For over a century, AEG has been the forefront of kitchen innovation, designing appliances that empower people to cooking with confidence. Rooted in German engineering and driven by passion for taste, AEG focuses on intelligent technology that supporting creativity rather than complicating it – from ovens that enhance flavour and texture to intuitive controls that give you precision without stress.
To bring every element of this recipe to life, Meliz cooked using premium AEG Kitchen Appliances, including the AEG 7000 MealAssist Oven with SteamCrisp, featured throughout the cooking videos.
This innovative oven uses a combination of 25% steam and 75% heat for perfectly even cooking – ideal for slow-roasting vegetables with crisp, caramelised edges while keeping meats tender and juicy. With its CookSmart Touch Display, telescopic runners and pyrolytic self-cleaning, it offers precision, ease and outstanding performance.
How to Make Cream Cherry Filo Puffs with Sweet and Salty Pistachios
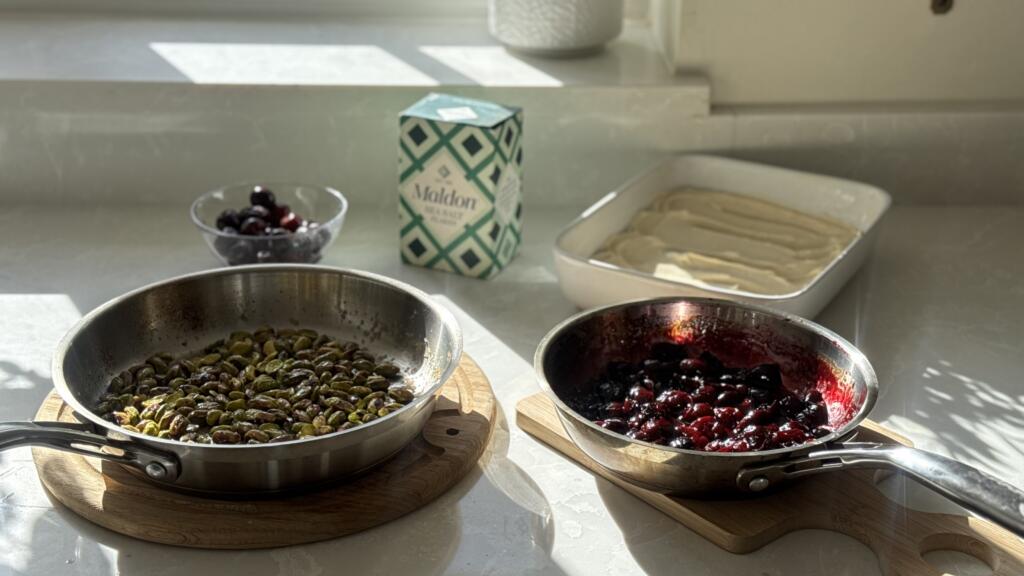
Ingredients (listed left) for the Filo Puff Filling
Step 1 – Tahini Yogurt:
Mix all the ingredients until thick and smooth. Cover and chill until needed
Step 2 – Cherries
Simmer cherries over medium heat until juices release.
Add orange juice and reduce until thickened, then stir in the honey and orange blossom water. Cool completely.
Step 3 – Sweet & Salty Pistachios
Melt butter in an ovenproof pan, add pistachios, sugar and Maldon Salt.
Stir well and bake at 180c fan for 10 minutes. Cool
Step 4 – Filo Puffs
Brush filo pastry with butter, sprinkle with sugar and a pinch of Maldon Sea Salt, fold into layers, and press into a muffin tray.
Bake for 15 minutes until golden and crisp. Cool fully.
Step 5 – Assemble
Swirl the cherries through the tahini yoghurt, spoon into filo cups, top with pistachios and finish with a final pinch of Maldon Sea Salt flakes.
Top Tips
Prepare all components in advance and assemble just before serving
Store filo cases and pistachios in airtight containers
Always finish sweet desserts with a light pinch of Maldon Sea Salt for balance
Have You Tried It?
Explore recipes, tips and inspiration designed to help you transform everyday dishes – sweet and savoury – with the perfectly balanced crunch of Maldon Sea Salt flakes.
If you try this recipe at home, we’d love to see it – tag us in your creations so we can share your wonderful cooking with our community. And if you’re feeling inspired to upgrade your kitchen, you can explore more AEG appliances here, and discover how their innovative technology can transform your everyday cooking.
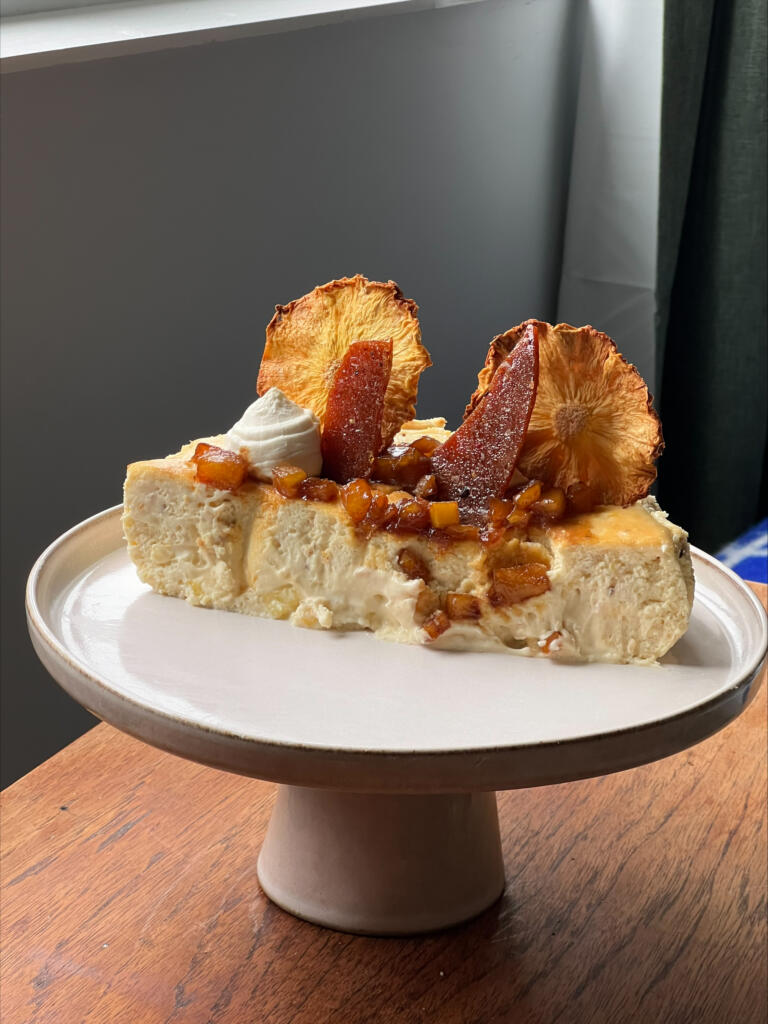
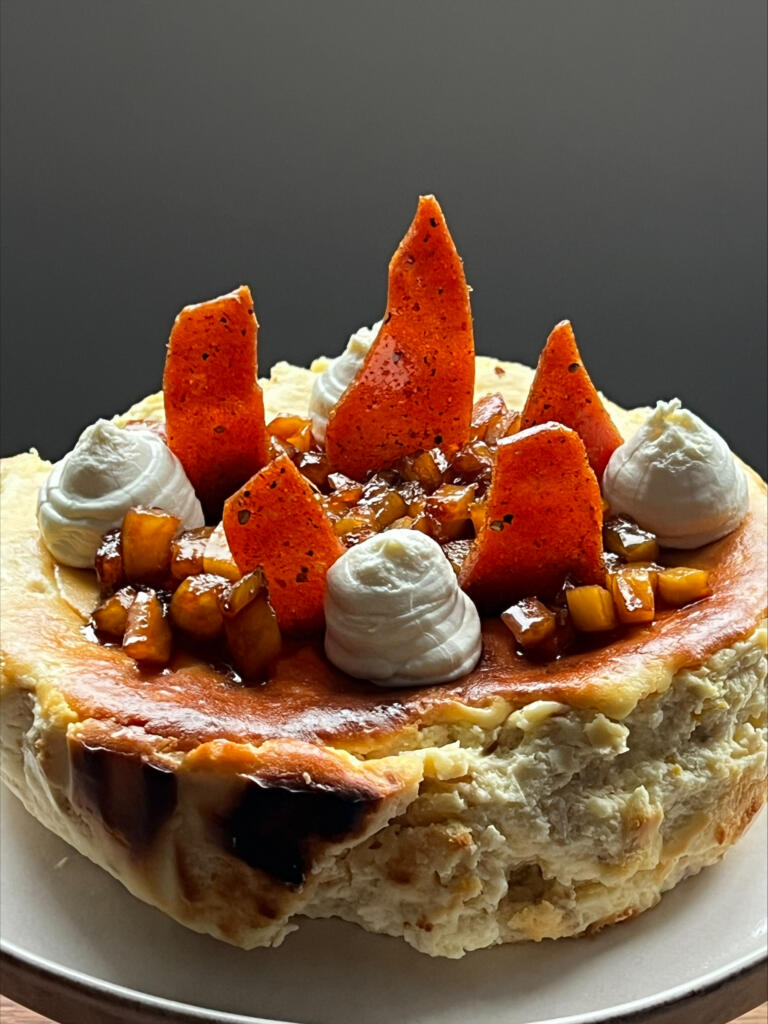
We’re excited to team up with Fiona’s Funky Food for a show-stopping dessert that blends tropical flavour with gourmet flair: a Pineapple & Coconut Basque Cheesecake infused with Maldon Smoked Sea Salt and finished with Maldon Pepper Sea Salt Caramel Shards. This unique twist on the trending Basque-style cheesecake combined creamy custard, bright pineapple, fresh lime, and toasted coconut, all elevated by the gentle smokiness of Maldon Smoked Sea Salt flakes.
The salt melts seamlessly into the batter, enhancing the natural sweetness and adding depth to every bite – a flavour upgrade that’s quickly becoming popular in modern baking, Springtime desserts, and tropical-inspired recipes.
To finish, the cheesecake is crowned with crisp Maldon Pepper Sea Salt Caramel Shards, where Pepper Sea Salt brings a subtle heat, crunchy texture, and that irresistible sweet-savoury balance food lovers crave. The result? A dessert that’s sweet, smoky, tropical, lightly spiced and packed with flavour – the perfect showcase of just how versatile Maldon Salt can be in both baking and confectionary.
Whether you’re searching for a unique Spring bake, a summer celebration dessert, or a creative cheesecake recipe, this collaboration delivers a flavour experience that’s bold, modern, and utterly unforgettable.
What is a Basque Cheese? (Everything You Need to Know About This Trending Dessert)
A Basque cheesecake, also known as a Burnt Basque Cheesecake, is an ultra-creamy, crustless cheesecake originally from San Sebastian, Spain. Unlike the classic New York-style cheesecake, the Basque version is baked at a very high temperature, creating it’s signature deeply caramelised, ‘burnt’ top, while the inside remains soft, custard-like and silky.
A traditional baked cheesecake is baked at a much lower temperature, often in a water bath to prevent cracks. It is a lot more dense, creamy, pale, and usually baked with a crumb crust at a low heat for a smooth, fully-set finish.
Not all cheesecakes are baked – and there’s a delicious science behind why some are simply chilled to set! A no-bake cheesecake relies on a different method of thickening and stabilising the filling, which creates a lighter, creamier texture compared to the dense, custard-like structure of a baked cheesecake. A no-bake cheesecake sets in the fridge because it uses stabilising ingredients like cream cheese, whipped cream, and sometimes gelatine – not eggs. Without eggs, there’s no need for baking!
How To Make a Pineapple & Coconut Basque Cheesecake
Step 1 – Prepare the Tin for the Basque Cheesecake
Preheat the oven to 220°C / 200°C fan (428°F / 392°F fan).
Line a 20cm (8-inch) springform tin with overlapping parchment sheets, ensuring the edges rise above the rim. This helps contain the high-rise Basque-style batter.
Step 2 – Make the Tropical Cheesecake Batter
Beat the cream cheese and caster sugar until smooth and lump free.
Add the eggs one at a time, mixing gently to avoid incorporating too much air.
Pour in the double cream and coconut cream and mix until silky.
Sift in the plain flour and fold lightly.
Stir in the vanilla extract, lime zest, toasted desiccated coconut, caramelised pineapple and 7-10g Maldon Smoked Sea Salt flakes.
Taste and adjust to your preference – you ideally want a soft smokiness that enhances the tropical flavours without overpowering them.
Tip – to get caramelised pineapple, you need to cook the pieces in a hot pan with butter and sugar until browned and glossy. This quick method adds a sweet, golden, caramelised flavour.
Step 3 – Bake the Basque Cheesecake
Pour the batter into the prepared tin.
Bake for 30-35 minutes, or until the top is deeply caramelised, with a slightly jiggly centre – the signature Basque look.
Cool completely at room temperature, then refrigerate for 4+ hours, ideally overnight, for the custard-like interior to set.
Step 4 – Make the Maldon Pepper Sea Salt Caramel Shards
Line a tray with parchment.
In a saucepan, heat the cater sugar and water over medium heat without stirring until it reaches a deep amber colour.
Remove the heat and quickly stir in the Maldon Pepper Sea Salt.
Pour the caramel thinly onto the parchment. Allow it to harden fully, then break into shards. These add crunch, subtle heart, and a sweet-savoury finish.
Step 5 – Assemble and Decorate
Remove the chilled cheesecake from the tin.
Insert the caramel shards vertically for height and texture.
Optional: Finish with a light sprinkle of Maldon Smoked Sea Salt for a glossy, elevated garnish.
Optional:Add dollops of cream on top with an extra serving of the diced caramelised pineapple to give the dish that ‘wow’ factor.
Have You Tried This?
Loved making this tropical Basque cheesecake? If you give this recipe a try, we’d love to see it! Tag us in your creations and show us how your cheesecake turned out.
There are few desserts as universally loved and visually impressive as a molten chocolate fondant. Slicing through the delicate, baked sponge exterior to reveal a rich, flowing river of warm chocolate is the ultimate dinner party party trick. While they have a reputation for being difficult to master, this dark chocolate fondant recipe is surprisingly simple, requiring just 15 minutes of prep time. To cut through the richness of the dark chocolate and elevate the dessert to restaurant quality, we fold a generous pinch of Maldon Original Sea Salt flakes directly into the batter and finish the plated pudding with a final salty sprinkle.
Why You’ll Love This Dark Chocolate Fondant
The Perfect Molten Centre: Our precise baking time and temperature ensure that the outside sets into a light sponge while the inside remains delightfully gooey and liquid.
Sweet & Salty Balance: Dark chocolate and sea salt are a match made in heaven. The clean, bright salinity of Maldon Salt perfectly counteracts the bitterness of the cocoa and enhances the deep chocolate flavor.
Quick & Impressive: Despite looking incredibly complex, this molten chocolate fondant recipe comes together in under 30 minutes from start to finish.
How to Make Molten Chocolate Fondants (Step-by-Step)
Step 1 – Preheat and prepare
Preheat your oven to 200°C and place an empty baking tray onto the middle shelf to heat up. Take 2 ramekins (or dariole moulds) and grease the insides thoroughly with butter. Add the cocoa powder to one mould and tap it around to completely coat the buttery sides. Tip the excess cocoa powder into the second mould and repeat the process. Tip out any final excess cocoa powder, then set the prepared moulds aside.
Step 2 – Melt the chocolate
Place the unsalted butter and broken dark chocolate pieces into a heatproof bowl. Set the bowl over a pan of gently simmering water (a bain-marie), ensuring the base of the bowl does not touch the water. Stir continuously until the butter and chocolate have melted together into a smooth, glossy liquid. Remove the bowl from the heat and set aside to cool slightly.
Step 3 – Whisk the eggs
In a separate large bowl, add the whole egg, the 2 egg yolks, the caster sugar, and a generous pinch of Maldon Original Sea Salt flakes. Whisk the mixture vigorously until it becomes pale, thick, and fluffy.
Step 4 – Fold the batter
Pour the cooled, melted chocolate mixture into the fluffy egg mixture. Sift in the plain flour, then use a spatula to carefully fold everything together until just combined, ensuring you don’t knock the air out of the eggs.
Step 5 – Bake the fondants
Pour the fondant dark chocolate batter evenly into the prepared moulds, making sure to leave a 2cm gap at the top so they have room to rise. Carefully place the moulds onto the preheated tray in the oven and bake for exactly 10 minutes, until the tops have formed a crust and the edges are set.
Step 6 – Invest and serve
Remove the fondants from the oven and allow them to rest in their moulds for 30 seconds. Place a small dessert plate upside down on top of a mould, quickly flip it over, and carefully pull the mould away to invert the fondant. Serve immediately with a dusting of extra cocoa powder, a final sprinkle of Maldon Original Sea Salt flakes, and a scoop of vanilla ice cream.
Tips for the Perfect Gooey Centre
Do Not Skip the Cocoa Dusting: Greasing your moulds with butter and dusting them with cocoa powder is the secret to ensuring your fondants easily slip out of their ramekins without tearing and spilling their liquid centers.
Watch the Clock: Timing is everything with a molten chocolate fondant. Ovens vary, but 10 minutes at 200°C is usually the sweet spot. If you leave them in too long, they will bake all the way through and become standard chocolate cakes.
Use Quality Chocolate: Because chocolate is the star of the show here, ensure you are using a high-quality dark chocolate (ideally 70% cocoa solids or higher) for the richest, most decadent flavour.
Frequently Asked Questions
Can I prepare chocolate fondants in advance?
Yes, this is a fantastic make-ahead dessert! You can prepare the batter, pour it into the greased and dusted moulds, and keep them in the fridge for up to 24 hours. When you are ready for dessert, simply bake them straight from the fridge (you may need to add 1-2 extra minutes to the baking time since the batter is chilled).
Why didn’t my fondant melt in the middle?
If your chocolate fondant is cooked solidly all the way through, it was left in the oven for too long. Fondants continue to cook slightly from residual heat once removed from the oven, so it’s vital to pull them out as soon as the outer edges look set but the very centre still has a slight jiggle to it.
Why add sea salt to a chocolate dessert?
Salt is a natural flavour enhancer. Adding a pinch of Maldon Original Sea Salt to a rich chocolate dessert like this does not make it taste “salty.” Instead, the salt counteracts the bitterness of the cocoa, balances out the sugar, and makes the dark chocolate taste even more intense and complex.
Bring bold, classic American flavours into your kitchen with our latest collaboration featuring recipe creator Chloe Hood.
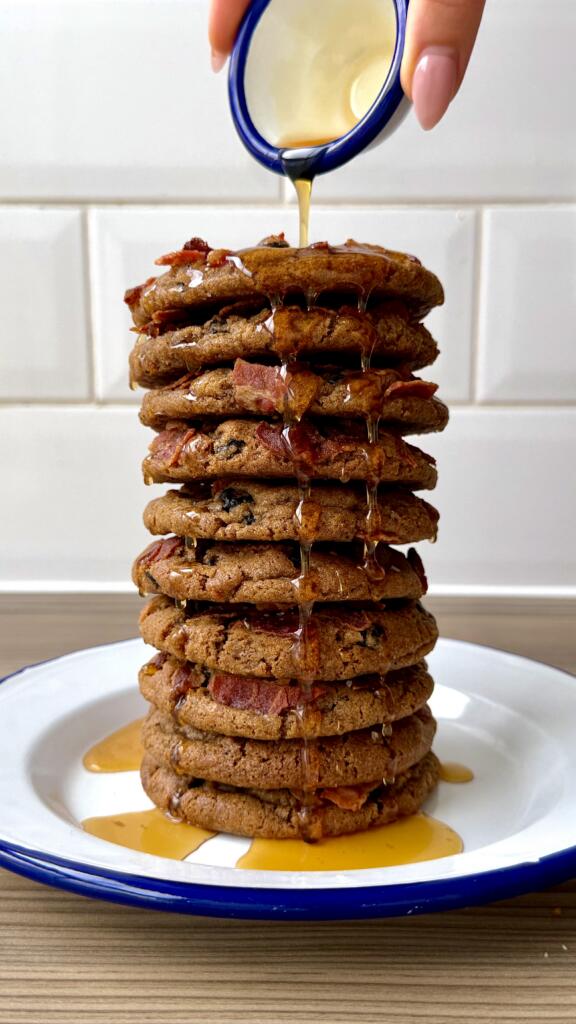
These Blueberry, Bacon & Maple Syrup Cookies are a deliciously unique twist on the sweet-and-salty (swalty) cookie trend, stacked high like an irresistible tower of pancakes and finished with a glossy drizzle of maple syrup.
Crafted with nutty brown butter, rich maple sweetness and chewy pops of dried blueberries, each cookie is studded with smoky, crispy bacon and elevated with the deep, rich flavour of Maldon Smoked Sea Salt flakes. The result is a cookie that’s decadent, surprising, and perfectly balanced – sweet, salty, smoky and buttery in every bite.
Perfect for adventurous bakers, weekend treats, or anyone craving a standout cookie recipe.
How to make Blueberry, Bacon and Maple Syrup Cookies
By Chloe Hood – A Stack of Blueberry, Bacon & Maple Syrup Cookies
Heat butter in a saucepan over a medium heat, stirring continuously, until deep brown and smelling nutty. Cool to room temperature.
Using an electric mixer, beat together browned butter, sugars and maple syrup.
Briefly mix in the egg and vanilla to combine.
In a separate bowl, combine flour, cinnamon, bicarb and Maldon Smoked Sea Salt.
Gradually, using a spatula, fold the dry mixture into the wet.
Before the dough is fully combined, fold in the dried blueberries.
Divide the dough into 10 equal balls (approximately 70g each).
Roll the top half of each dough ball in the bacon pieces.
Place on baking paper, cover and rest in the fridge overnight.
When ready to bake, preheat oven to 180°C (fan).
Space dough balls out on cold, baking paper-lined trays. Bake for 9 minutes.
Remove from the oven and bang the tray on the kitchen counter three times. Then, apply a circular motion around the cookies, using a cookie cutter.
Bake for 4 more minutes.
Repeat tray bangs and circular motion.
Whilst they’re still hot, sprinkle with Maldon Smoked Sea Salt.
Leave for 15 minutes before transferring to a wire rack to finish cooling.
Stacked them up and drizzle over maple syrup!
Made This Recipe? We Want to See!
If you recreated this recipe, don’t forget to tag @maldonsalt so we can admire your delicious stack of cookies. You can find out more details about Maldon Smoked Sea Salt flakes here.