


- Fire up the barbecue ready for indirect smoking with a temperature of about 140-150C.
- Drizzle a little oil over the mushrooms and season with Maldon Chilli Sea Salt. Smoke for 40 minutes and then remove.
- Open up the air vents of the barbecue to increase the temperature to around 180C.
- Drizzle a little more oil over the squash and season generously with Maldon Garlic Sea Salt, roast indirectly until tender and lightly charred at the edges – 45 minutes or so.
- Soften the onions in oil over a medium heat, on the BBQ or on the hob. Then add the garlic, sage and thyme and stir for a couple of minutes.
- Chop the smoked mushrooms and add to the pan of onions along with the chopped chestnuts. Pour in the cream, allowing it to bubble and thicken. Leave to cool.
- Mash the squash with the butter, smoked paprika and nutmeg. Leave to cool.
- Unroll the pastry, roll out very slightly thinner, lift onto a baking tray.
- Spread the squash over the pastry leaving 3cm border.
- Spoon the mushroom mix in a line down the centre.
- Brush a little beaten egg on the pastry border then roll up the pastry so it looks like a fat sausage roll. Snip a pattern in the top with scissors. Brush the egg all over and sprinkle generously with Maldon Garlic Sea Salt.
- Bake indirect, between two fires, at about 200C for as long as it takes to cook the pastry to crisp and golden brown, perhaps 45-55 minutes.
Topic: Mains / Dinner
Celebrate the holidays in style with a Christmas Spiced Orange Roast Duck recipe that is sure to become the star of your Christmas dinner. This elegance dish features succulent duck roasted to golden brown perfection, infused with festive flavours and aromatic spices. The tender meat is beautifully complimented by a rich orange glaze, offering a citrusy brightness that balances the deep, savoury notes of the duck. With crispy skin seasoned with Maldon Sea Salt flakes and a warming blend of Christmas spices, this roast duck promises a memorable dining experience, perfect for special occasions!
The combination of orange and spices elevates the natural richness of the dusk, creating a dish that’s both indulgent and full of holiday spirit. You can make the glaze with freshly squeezed oranges (we used clementines), caramelized shallots, and a hit of cinnamon to enhance the duck’s succulent meat, while the crispy skin adds an irresistible crunch. Try adding a pinch of star anise to bring a sophisticated flavour to the dish! Whether you’re hosting a family gathering or a festive dinner party, this spiced roast duck recipe is a showstopping centrepiece that captures the warmth and comfort of Christmas in every bite.
How to Roast Duck Perfectly
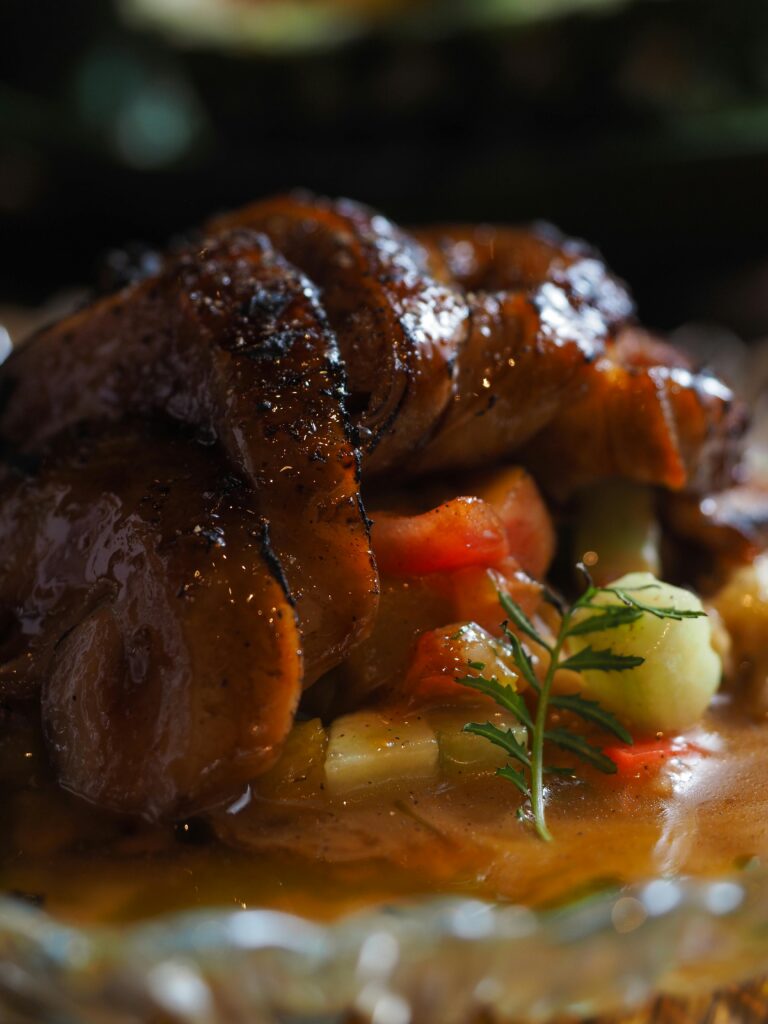
Roasting duck perfectly involves ensuring the skin is crispy while keeping the meat
tender and succulent. Start by patting the skin dry and rubbing Maldon Smoked Sea Salt
into it. Place the duck breast side down initially to allow the fat to render out, ensuring a
crispy skin as it roasts evenly. Always keep an eye on it and baste regularly to maintain
moisture.
Making the Christmas Spiced Orange Roast Duck
Prepare the Ingredients:
Preheat your oven to 180°C. Pat dry the skin of the duck and rub 1 tsp of Maldon
Smoked Sea Salt into it. Peel and halve the banana shallots and set aside. Halve the
clementines and prepare your potatoes for roasting.
Roast the Duck:
Place the duck breast side down in a roasting tin with the shallots and roast for 1 hour.
While the duck is roasting, boil the potatoes until tender and set aside to steam and
fluff.
Turn and Season the Duck:
After 1 hour, drain off the fat (reserving for the potatoes). Carefully turn the duck breast
side up, surround it with 3 halved clementines, a cinnamon stick, and bay leaves.
Continue roasting for another hour, basting occasionally.
Crispy the Potatoes:
In a separate roasting tin, roast the potatoes in the reserved duck fat, seasoning with
Maldon Smoked Sea Salt. Ensure they are crispy and golden brown.
Create the Glaze:
In the final stages of cooking the duck, reduce the juice of the remaining 3 clementines
in a small pan. Add honey and Seville orange marmalade and simmer until it forms a
sticky glaze. Brush this over the duck and roast for the final 10 minutes.
How to Make Christmas Spiced Orange Roast Duck

- Preheat oven to 180C. Pat the skin of the duck dry and rub 1tsp of the Maldon Sea Salt into the skin. Place the bird breast side down in a roasting tin with the shallots and roast for 1 hour.
- While this is roasting, peel and halve any large potatoes. Place them in a pan of water and boil them for 8 minutes, or until a knife can be inserted. Then tip the potatoes into a colander in the sink and allow them to steam. Shake the colander a little to fluff up the potatoes and then set aside.
- After 1 hour, drain off all the fat reserving it to cook your potatoes in! Then carefully lift and turn the duck in the tray. Surround it with 3 clementines, halved, the cinnamon and bay and return to the oven for a further one hour (keep watching and basting).
- Meanwhile, roast the potatoes in the duck fat adding a good pinch of Maldon Sea Salt.
- Before the end of the cooking, add the juice of the 3 remaining clementines to a small pan and simmer until reduced by half, then add the honey and marmalade. Brush the duck with the sticky glaze and return to the oven for the final 10 minutes.
- Serve the duck with the roast potatoes, braised red cabbage and sprouts.
Can You Freeze Cooked Duck?
Yes, you can freeze cooked duck. Once fully cooled, wrap the duck tightly in foil or
plastic wrap and then place it in a freezer-safe bag. It can be stored in the freezer for up
to 3 months. Thaw in the refrigerator before reheating.
Marmalade Glaze for Duck
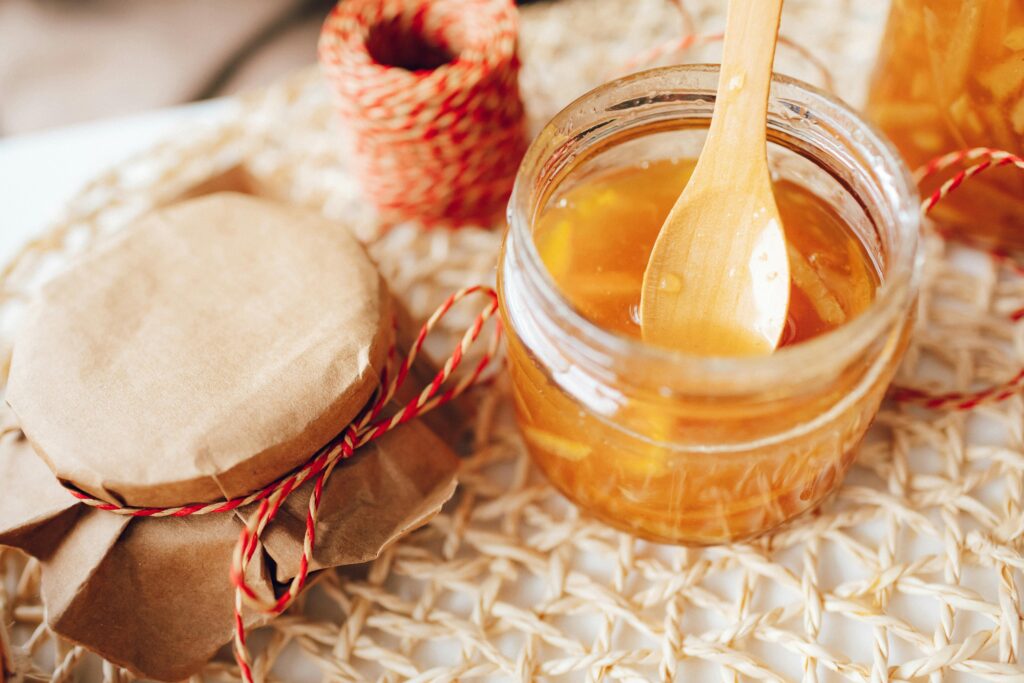
A marmalade glaze adds a sweet and tangy dimension to roast duck. Reduce the
clementine juice until it thickens slightly, then stir in honey and Seville orange
marmalade. Brush over the duck in the final stages of roasting for a glossy and
flavourful finish.
Create a showstopping festive centrepiece this Christmas with a mouth-watering mushroom, butternut squash, chestnut and caramelised onion wreath. Golden brown and packed with seasonal ingredients, this dish is the perfect vegetarian main for your holiday table. Made with a sheet of light, flaky puff pastry and filled with savoury roasted vegetables, this wreath is sure to impress both vegetarians and meat-lovers alike! The combination of earth mushrooms, sweet caramelised onions and nutty chestnuts brings together the flavours of winter, while the Maldon Sea Salt flakes adds the perfect finishing touch.
This recipe is great addition to your collection of vegetarian puffy pastry recipes and is ideal for those looking for an easy yet stunning main course for Christmas!
How to caramelise onions

Caramelising onions is a slow cooking process that draws out the natural sugars,
resulting in sweet, golden brown onions perfect for adding depth to recipes. Start by
heating olive oil and butter in a pan over low heat. Add finely sliced onions and a pinch
of Maldon Sea Salt flakes and cook for at least 10 minutes until soft and translucent. Add soft brown sugar and continue cooking until onions are sticky and caramelised, usually
another 5 minutes. If you have any leftover, you can use them as a filling for a delicious portobello mushroom and stilton burger, paired with rocket in a sweet brioche bun.
Making the Mushroom, Butternut Squash, Chestnut and Caramelised Onion Wreath
Prepare the Ingredients:
Preheat your oven to 200°C. Slice the red onions finely and prepare the butternut
squash by peeling and dicing into 2cm cubes. Tear the mixed mushrooms into pieces
and crumble the chestnuts.
Roast the Vegetables:
Place the mushrooms and butternut squash on a baking tray. Drizzle with olive oil and
season with Maldon Sea Salt and pepper. Roast for 25 minutes until the squash is
tender and mushrooms are golden brown. Allow to cool.
Make the Filling:
In a large bowl, combine the roasted vegetables, caramelised onions, crumbled
chestnuts, shredded sage leaves, grated nutmeg, and dried cranberries. Season with a
pinch of Maldon Garlic Sea Salt.
Assemble the Wreath:
Unroll the puff pastry sheet onto a baking tray. Pile the vegetable filling down the
middle of the pastry. Roll the pastry over to encase the filling, sealing the edges with an
egg or milk wash. Shape into a wreath, sealing the ends together. Use leftover pastry for
decorations if desired. Chill in the fridge for 30 minutes.
Bake the Wreath:
Once chilled, bake in the preheated oven for 35-40 minutes or until the pastry is golden
and crisp. Allow to cool slightly before serving warm or cold.
Mushroom, Butternut Squash, Chestnut and Caramelised Onion Wreath Recipe

- Preheat the oven to 200c.
- Start by making the caramelised onions. To a frying pan add 1 tbsp of olive olive plus a knob of butter and allow it to melt. When foaming, add the sliced onions and a pinch of Maldon Sea Salt. Fry these on a low heat for at least 10 minutes until they are soft and translucent. Then add the soft brown sugar and continue to cook for another 5 minutes until the onions have gone sticky, soft and caramelized. Set aside to cool.
- Place all the mushrooms onto a baking tray along with the diced butternut squash. Then drizzle with the remaining olive oil and some salt and pepper. Place into the hot oven and roast for 25 minutes until the squash is tender and the mushrooms are golden. Set the tray aside to cool.
- Once the vegetables have cooled you can make the filling. Simply mix in a bowl with the caramelized onions, chestnuts, sage, nutmeg, dried cranberries and Maldon Garlic Sea Salt.
- Unroll the pastry onto a baking tray and then pile the filling down the middle in a line. Then roll the pastry over to seal it, as though making a large sausage roll. Use the egg wash to seal it down, and then take the two open ends and join them together, sealing them as well. Any excess pastry can be cut off and used to decorate the wreath, if desired. Egg wash the whole outside of the wreath and then place into the fridge for 30 minutes.
- Once the wreath has chilled, place it into the preheated oven and bake for 35 – 40 minutes until it is golden and crisp on the outside. Cool slightly before serving – can be served warm or cold.
Can You Freeze Butternut Squash?

Yes, you can freeze butternut squash. Peel and dice the squash into cubes, blanch in
boiling water for 3-5 minutes, then cool in ice water. Drain and pat dry before placing in
a single layer on a baking tray to freeze. Once frozen, transfer to a freezer bag for
long-term storage.
Side Dishes to Serve
A delicious flaky mushroom wreath is the epitome of comfort food. However, now you need the perfect sides to make the ultimate festive feast! Here are a few tasty side dishes you can serve with your mushroom wreath.
Roasted Potatoes with Rosemary & Thyme
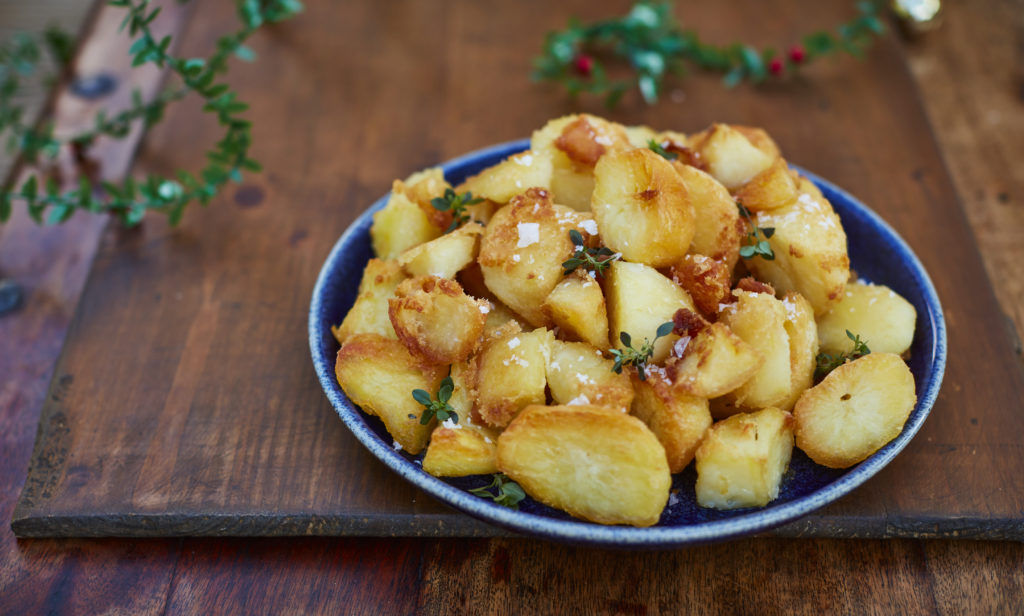
The ideal accompaniment for this recipe – the classic roast potato. Crispy on the outside and heavenly fluffy on the inside. Normally you can season your ‘tatties’ with salt and pepper, but we’ve added a twist by infusing rosemary and thyme to give a delightful flavour and an addictive crunch.
Carrots with Honey & Lemon

Oh-so-sweet and tender! These carrots are cooked in a delicious honey and lemon glaze that offers a sweetness and and touch of colour to your dinner plate.
Brussels Sprouts with Smoked Bacon
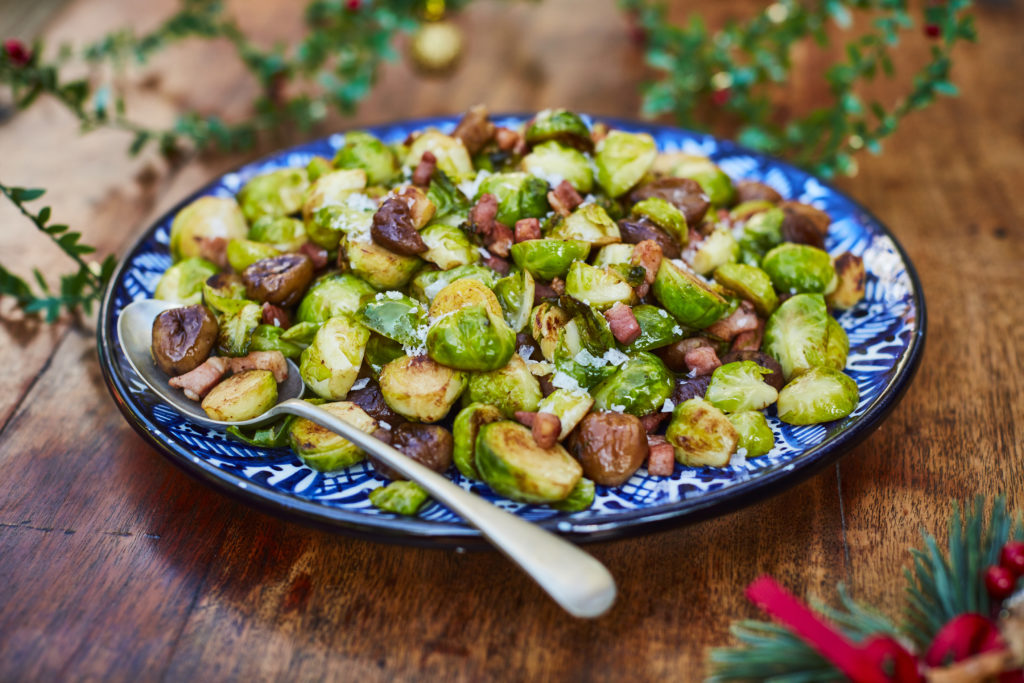
Add smoked bacon to your humble brussels sprouts to give a crispy, savoury element to the dish. It compliments the wreath’s mushroom and caramelised onions beautifully!
We’ve teamed up with Chef Romy Gill MBE to share some of our favourite recipes from her latest cookbook, Romy Gill’s India.
In this cookbook, Romy shares over 70 recipes which are inspired by her beloved family, with flavours that define her childhood. From iconic dishes like Butter Chicken, which is a staple in every Indian home, to the delicious simplicity of a Masala Omelette, Romy invites cooks to savour the authentic tastes of India without a fuss! The instructions for each dish are easy to follow along with readily available ingredients. Every dish is designed with the home cook in mind, ensuring that your journey into Indian cuisine is as delightful as it is delicious!
Today we’re sharing Romy’s delicious Masala Crab, also known as Kekada Masala.
How to make masala crab
Simi, Romy’s childhood friend, and her share a bond rooted in the industrial New Town in Burnpur. Their common passions, particularly our love for culinary adventures, has bonded us forever. Countless college escapades involved outings to watch movies, then occasionally getting caught. The consequences were often chores piled up at home, but the shared laughter and memories made it worthwhile. It was during one of these movie escapades that she stumbled upon a scene portraying the joy of savouring crabs. Intrigued and captivated, the desire to taste the delicacy lingered in Romy’s mind. The opportunity finally presented itself when she had crab in England and then with Simi’s roots from Kerela she crafted the recipe infusing it with the flavours that complement the crab meat. This dish became the most loved starter in her restaurant. The creamy coconut milk, the pungent mustard seeds, the moreish curry leaves and the sourness of the tamarind elevates the dish.
- Heat the oil in a pan over a high heat. Once the oil is hot, add the mustard seeds and curry leaves. As soon as the mustard seeds start to pop, add the garlic and cook for30 seconds, then add the onion and cook for 3–4 minutes.
- Reduce the heat to medium then add the coconut and cook for 1 minute. Add the chilli powder, turmeric, ground coriander, Maldon Sea Salt, tamarind, sugar and coconut milk and cook, stirring, for a further 2 minutes.
- Add the crab meat, mix well and cook for 3 minutes, then serve immediately. Romy enjoys it on crispy toasted sourdough bread, but you can also serve it with rice or any Indian flatbreads of your choice.
Where to buy Romy Gill’s India: Recipes From Home

You can find where to purchase Romy’s NEW cookbook here and start being creative with food and flavours in the comfort of your kitchen.
Make sure you have your Maldon Salt ready for these recipes! If you are running out, please feel free to browse on our Where to Buy Page to find your nearest store in which stocks our beloved Maldon Salt.
Lastly, we LOVE seeing your creations – please tag us on Instagram using the #maldonsalt so we can share your own take on Romy’s recipes!
We’ve teamed up with Chef Romy Gill MBE to share some of our favourite recipes from her latest cookbook, Romy Gill’s India.
In this cookbook, Romy shares over 70 recipes which are inspired by her beloved family, with flavours that define her childhood. From iconic dishes like Butter Chicken, which is a staple in every Indian home, to the delicious simplicity of a Masala Omelette, Romy invites cooks to savour the authentic tastes of India without a fuss! The instructions for each dish are easy to follow along with readily available ingredients. Every dish is designed with the home cook in mind, ensuring that your journey into Indian cuisine is as delightful as it is delicious!
Today, we’re sharing Romy’s delicious Butter Chicken, also known as Mung Makhani.
How to make butter chicken
There are so many different recipes for butter chicken. This is Romy’s take, because there is a lot of spark and dispute going on in India about butter chicken. Romy served so much butter chicken in her restaurant, so she went in search of the very best butter chicken recipe and researched how it all started. She found this gave me a better understanding of this best-loved dish. With its silky smooth, gently spiced tomato, cashew and cream gravy, it’s a comforting, warming dish that feels decadent. It was in 2013 when Romy started to take a closer look at butter chicken and its history. Her mentor, chef Manjit Gill, took her to the first ever Moti Mahal restaurant in Daryagang in Delhi. A restaurant co-founded by Kundan Lal Jaggi, Kundal Lal Gujral and Maggu (also known as Thakur Das) and it was where they created both butter chicken and dal makhani.
- To make the marinade, mix all of the marinade ingredients together in a large bowl. Prick the chicken pieces with a fork to allow the marinade to penetrate the meat. Add the chicken to the bowl and stir well to coat thoroughly. Cover the bowl and set aside in the fridge to marinate for at least a couple of hours.
- When ready to cook, preheat the oven to 180°Cfan/400°F/gas 6.
- Spread the marinated chicken out on a baking tray and cook in the hot oven for 15 minutes.
- While the chicken is cooking, make the sauce. If the chicken finishes cooking before you have finished making the sauce, switch the oven off after the15 minutes and leave the meat to rest in the oven. Blanch the tomatoes in a bowl of boiling water for a few minutes, then remove their skins. Cut into quarters and remove the seeds, then roughly chop and place in a food processor. Blitz to a smooth purée.
- Heat the butter in a saucepan over a medium heat. Once the butter has melted, add the ginger and garlic and cook for 1 minute. Add the puréed fresh tomatoes as well as the tomato purée and cook for 8–10 minutes until the tomatoes are cooked through, stirring regularly to avoid them sticking and burning. Add all the spices, chilli powder, Maldon Sea Salt and sugar, mix well and cook for a further 2 minutes until emulsified.
- Lower the heat, then add the ground cashew nuts and cream, and stir well. Add 500–600 ml (20–24 Fl oz/2 1/2 cups–scant 3 cups) water – the quantity you choose to add depends on how runny you want the sauce to be. Bring the mixture to a boil, and when it starts bubbling, add the chicken, lower the heat and cook for a further 8–10 minutes. Sprinkle over the cardamom seeds and dried fenugreek leaves. Stir and leave to rest for at least 10 minutes before serving with rice or any Indian flatbreads.
- Where to buy Romy Gill’s India: Recipes From Home
You can find where to purchase Romy’s NEW cookbook here and start being creative with food and flavours in the comfort of your kitchen.
Make sure you have your Maldon Salt ready for these recipes! If you are running out, please feel free to browse on our Where to Buy Page to find your nearest store in which stocks our beloved Maldon Salt.
Lastly, we LOVE seeing your creations – please tag us on Instagram using the #maldonsalt so we can share your own take on Romy’s recipes!
This pizza uses my aromatic nettle sourdough pizza dough and is best cooked in a Gozney Dome. There are few things as delicious as a woodfired pizza. This recipe was born in the dusty Valencian hills, I was walking with my wife, Sophie and our best friends when we came across a beautiful little village and sat down to eat at a weather beaten family restaurant. As the evening sun nestled in the surrounding trees we ate the most delicious honey, figs and goats cheese – accented with a mouth watering hit of chilli. Whenever I make this pizza I’m fixated by the bubbling brown butter and vibrant colours. Every bite takes me back to that little Spanish paradise.
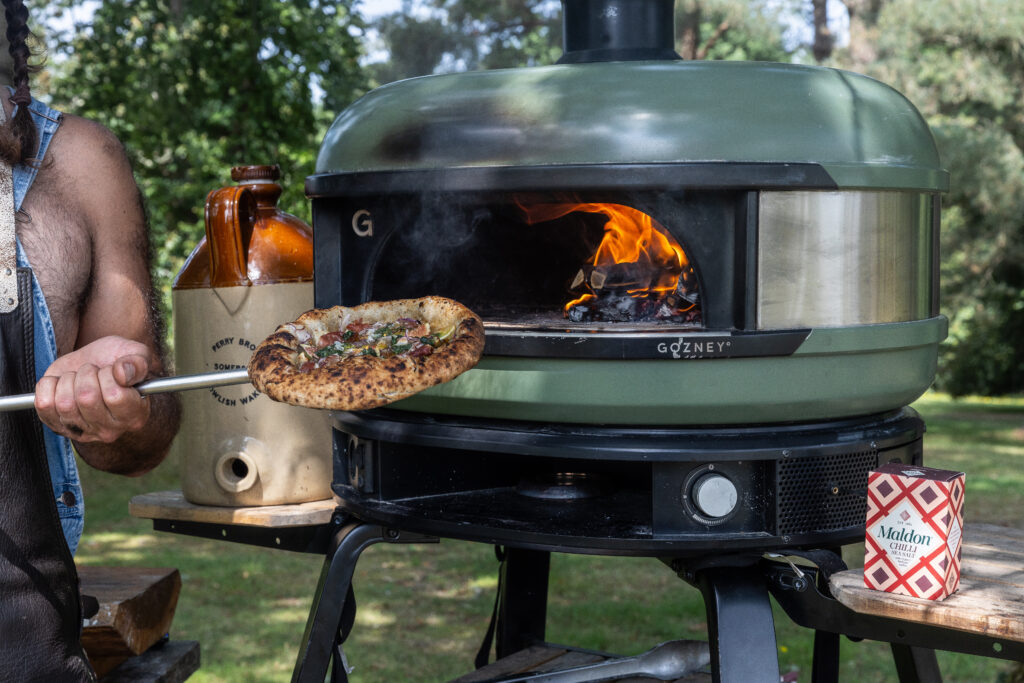
It’s best to start the dough the day before for the best flavour but you can make it early in the morning if you run out of time. You will need a ripe sourdough starter but you could swap out with 3g of dried yeast if needed.
You will need your Gozney oven clean, enough fuel to keep her hot and the appropriate pizza peels – one for loading and one for turning. If you need some instruction on the basics then Gozney has a great YouTube channel that will help you.

Here is how to make the pizza…
- The day before, mix your dough. Mix the water, starter and oil by hand in a large bowl until combined. Add in the flour and mix again, leave covered for 15 minutes to fully hydrate then add in the salt and knead by hand for about 10 minutes until the dough becomes smooth. Add in the sieved nettles and knead until combined. Place into an oiled bowl, cover with a cloth and leave on the worktop. After 20 mins fold the dough and leave again for another 20 mins, repeat this two more times. Shape into four balls by dividing the dough and folding each piece in on itself. Place into an oiled tray, cover with cling film and place in the fridge overnight. Make sure the fridge is running at about 5C.
- Now for your spicy pizza party day! Heat up your Gozney dome with a small wood fire, move the fire to the right hand side, loosely wrap the garlic bulb in foil and roast off until soft and smokey, this should take about 20 minutes on the far left hand side of the oven. Remove and once cool, squeeze out the pulp and mix into the soft butter with a teaspoon of the Maldon Chilli Sea Salt. Taste and set aside at room temperature.
- Get the topping ready and laid out and run up your pizza oven to over 450C, making sure the base is at least 350C (I use an infrared thermometer to check). Remove the dough balls from the fridge for an hour, still covered.
- Clean off a smooth work surface and dust with the semolina flour. Dust the pizza balls with a little semolina, pick up a dough ball and place on the worktop with a good dusting of semolina. Gently and evenly push the dough out to a circle. Using both hands, stretch the dough out to a dinner plate size. Add two spoons of the chilli butter and evenly spread around the pizza. Top with the goats cheese, figs, Iberico ham and drizzle over with honey. Slide a pizza peel underneath the pizza and confidently slide into the oven, making sure there is a rolling flame from the wood fire. After about 30 seconds turn the pizza to give it an evenly cooked crust. Remove the pizza and place onto a cooling rack to harden up. Sprinkle over a little more Maldon Chilli Sea Salt and cut into 6 wedges.
- Best eaten with an ice cold glass of spanish beer in the Valencian hills, but then again – what isn’t?
We’re delighted to review the talented Uyen Luu and her latest cookbook, Quick and Easy Vietnamese. Uyen is a Vietnamese-born, London-based food writer, cook, and photographer known for her vibrant approach to Vietnamese cuisine. Her latest cookbook, Quick and Easy Vietnamese, offers a fresh perspective on the flavours of Vietnam, presenting an array of simple yet authentic recipes that are perfect for busy home cooks!


The book is designed to make Vietnamese cooking accessible for everyone, with easy-to-follow instructions and a mindset of being resourceful with time and ingredients, maximising on flavour and never wasting a thing. There are so many simple yet delicious recipes to choose from that can all be whipped up with minimum fuss! From tasty Pork and Prawn Wontons to savoury Dill Fishcakes. If you’re craving something sweet, Uyen also shares dessert options such as Sweetcorn Rice Pudding! There is a collection of recipes that are perfect for any time of the week.
Today we’ve shared on our our favourites from the book, Char Siu Crispy Pork Belly.

Here is how to make Char Siu Crispy Pork Belly
Uyen loves Chinese char siu pork, but she loves the fatty, crispy belly even more, so this combines the two. It’s a winner at every dinner party or the perfect weekend dinner treat. Serve with Vermicelli Noodle Salad Bowlsor steamed rice and vegetables or with bánh hoi.
- Bring a large saucepan of water to the boil, add the pork andsimmer for 10 minutes, then remove from the water. Rinse undercold water, then pat dry with paper towels. Stab and roughly scorethe meat side.
- Combine the roast red pork seasoning mix, soy sauce and water in a small bowl, then spread the mixture evenly onto the surface of a tray (pan) or box that fits the meat. Put the pork belly on top, skin side up, and brush the marinade onto the sides of the meat. The seasoning mixture should cover the flesh side and leave the skin dry.
- Rub the vinegar all over the skin and sprinkle with 1 table spoon of the salt. Marinate at room temperature, uncovered, for at least2 hours, or overnight in the refrigerator, covered, dabbing off any moisture from the skin every 30 minutes when you’re able and rubbing on the remaining salt.
- When you’re ready to cook, preheat the oven to 220ÅãC fan(475ÅãF). Transfer the pork to a roasting tin lined with baking parchment. Pat the skin dry with paper towels, then roast in the oven for 1 hour 10 minutes. Remove from the oven and set aside to rest for at least 30 minutes. Slice when at room temperature.
Note:
If you can’t get hold of the roast red pork seasoning mix, use 1 teaspoon Chinese five spice, 2 tablespoons garlic powder, 2 tablespoons brown sugar, 2 tablespoons dark soy sauce, 2 tablespoons tomato ketchup and 1/4 teaspoon red food colouring.
- Wash and dry the tomatoes, using a serrated knife, remove a little less than 1/3 of each tomato horizontally.
- Drain the tomatoes, taking care not to break them, chop the flesh, place in a bowl, season with salt and pepper and dress with half the oil.
- Drain and dice the mozzarella, mix with the pulp. Wash and dry the basil well, season the tomatoes with salt and pepper, fill them with half of the mixture in the bowl.
- Spread the rest of the mixture on four plates, place a tomato on each plate, decorate with basil leaves, drizzle with the rest of the oil and finish seasoning with a pinch of pepper and Maldon Sea Salt flakes on each tomato.
We’ve teamed up with Tom Jackson to make a delicious Pizza Fritta Pasta Salad paired with artichokes, ricotta, mint and a cooked tomato dressing.
Tom’s first pizza fritta happened a couple of summers ago in Naples. Volcanically hot tomato sauce, marbled with ricotta, funky guanciale (cured pig cheek) and basil, all encased in a huge half-moon of charred, chewy Neapolitan dough. Unsurprisingly, Tom’s second (and third, fourth, etc.) pizza fritta also happened on that trip. The one Tom had with artichokes and olives was his favourite, and it kindly led him here. To keep things vegetarian, switch the ’nduja for harissa or chilli crisp (or, indeed, a plant-based ’nduja). To make it vegan, switch the ricotta for a plant-based variety or a spoonful or two of moutabal. This recipe makes more dressing than you’ll need, but you’ll be glad of it later!
Here is how to make a pizza fritta pasta salad
- Start by making the dressing. Off the heat, place the chunk of ’nduja, the basil sprig and the onion wedge in a medium-sized saucepan then tip the crushed tomatoes on top. Place over a high heat, then, once simmering, reduce the heat to low–medium. Cook for 20-30 minutes, stirring occasionally, by which time the tomatoes and ‘nduja should have broken down. Remove from the heat and leave to cool to room temperature, discarding the basil and onion. Transfer the sauce to a bowl and stir through the datterini tomatoes. Add the vinegar, olive oil and a good pinch of Maldon Chilli Sea Salt. Check for balance, then set aside to marinate. This ‘dressing’ keeps well for up to 3 days in the fridge and is great with lots of other things (just bring back up to room temperature before use).
- Cook the pasta in plenty of salty boiling water until al dente (2 minutes less than the total packet instructions), then drain. Rinse briefly, until the pasta is just warm, then drain again.
- Gently toss the pasta with roughly 200g (7oz) of your tomato dressing, then add the artichokes, olives, pine nuts and tear in the mint leaves. Toss again, then add the ricotta and gently marble through the dressed pasta (don’t overmix). If you like, finish with more ricotta, a pinch of Maldon Chilli Sea Salt and a drizzle of olive oil.
Introducing a delightful homemade butternut squash ravioli recipe that marries the sweet, nutty flavours of butternut squash with the rich, flaky goodness of Maldon Sea Salt flakes. This exquisite dish is elevated by a luscious brown butter sage sauce that compliments the creamy filling perfectly. The butternut squash filling, seasoned with salt and pepper, creates a smooth and and flavourful centre for the ravioli. We used a potato masher to puree the ingredients, but you can also use a food processor for a faster result!
Here are a few points that you need to remember when making a homemade butternut squash ravioli…
- When roasting your squash, make sure to drizzle generously with olive oil and cook until beautifully tender. You then blend with a selection of creamy cheeses, a pinch of Maldon Sea Salt, pepper and a generous helping of nutmeg.
- When rolling out the pasta dough using a machine, always start at the widest setting and gradually making it thinner. Lay the dough on a flat surface, placing spoonful’s of the delicious filling evenly apart, and cover with another sheet of dough. Use a ravioli cutter to assemble the ravioli, ensuring each piece is well-sealed to prevent leakage during cooking. If you don’t have a ravioli cutter, you can use a glass instead to cut out equal-sized circles. Take your filling and place into the centre of each cut-out circle, making sure there is space around the edge to close the ravioli by crimping. To save time, you can prepare the dough and filling in advance, storing them in plastic wrap in the refrigerator.
- Cooking the ravioli is a breeze and takes around 3-4 minutes in boiling water, or until they float to the top. The addition of a brown butter sage sauce elevates the pasta dish further! Made up of melted butter and fresh sage leaves, cook until the butter turns a golden brown colour, emitting a nutty aroma. Transfer the ravioli tot he brown butter sauce, soaking up the rich flavours.
- This homemade butternut squash ravioli recipe, infused with the distinctive taste of Maldon Sea Salt, is sure to impress with its balance of textures and flavours, making it a perfect choice for a special dinner or a cosy night in.
How to make butternut squash?
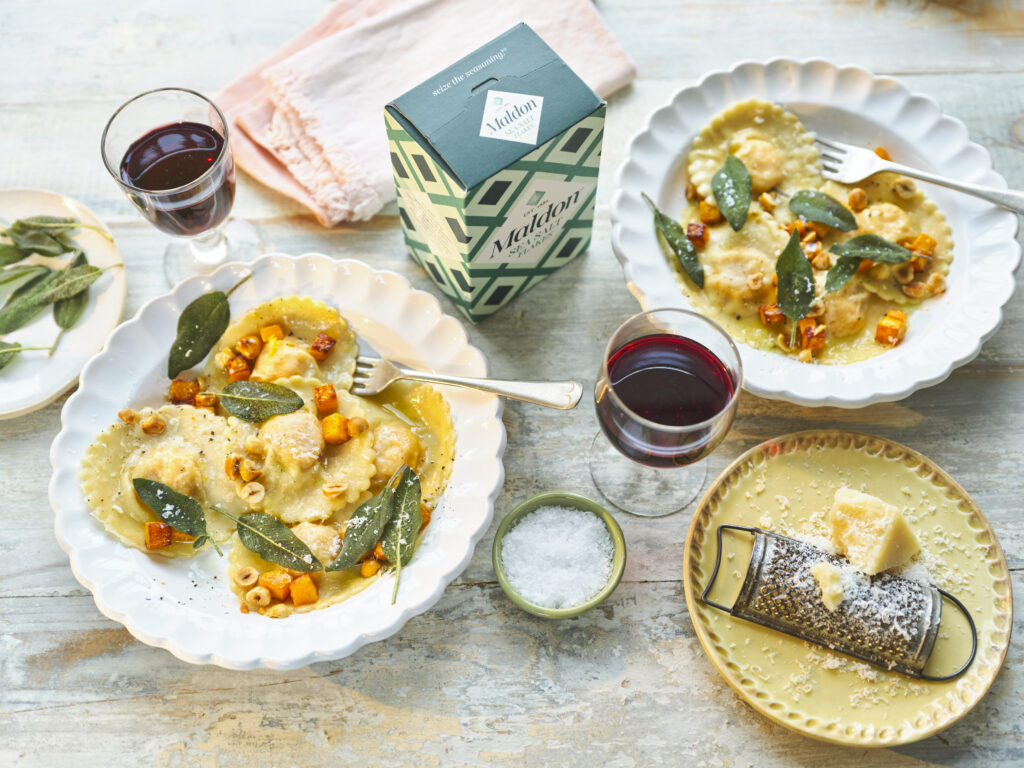
- Begin by roasting the butternut squash.
- Preheat the oven to 180c then place the peeled and roughly chopped butternut squash onto a roasting tray or baking sheets.
- Drizzle with a little oil, cover with tin foil and then roast for 30 minutes until soft and tender, and a knife can be inserted easily. Set aside to cool.
- Once the butternut squash is cooled, place it into a bowl and use a potato masher or ricer to puree it.
- Then to the pureed squash add the ricotta, parmesan, a pinch of Maldon Sea Salt, cracked black pepper and a grating of nutmeg. Set aside.
How to make ravioli pasta?
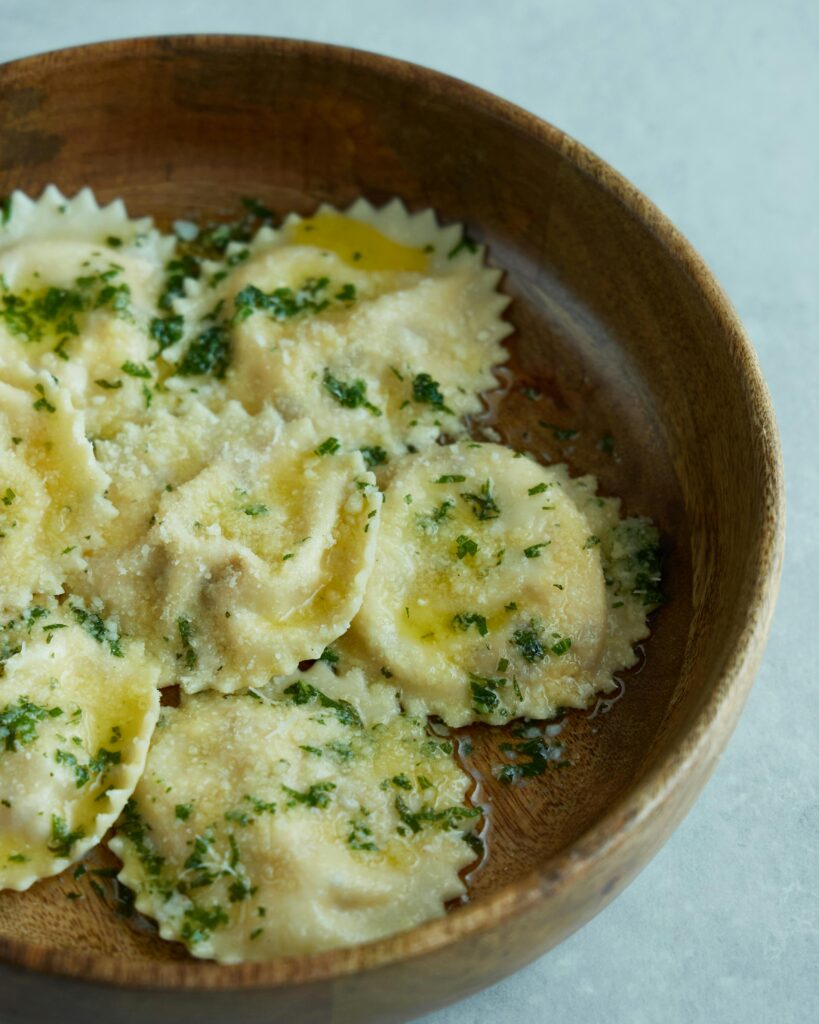
- While the butternut squash is roasting, make your pasta. Tip the OO pasta flour onto a clean work surface and form a circle with it.
- Then in the middle make a clear well so you are left with a ring of flour. Crack the 3 eggs into the middle. Then use a fork to break the yolks and gently whisk the eggs together so they are beaten.
- Once beaten, use the fork to slowly flick in little bits of flour onto the eggs, and continue to whisk them in. Keep doing this while it thickens, and when it becomes too thick discard the fork and use your hands to knead the flour and eggs. Continue to knead for 5 minutes until you have a smooth dough.
- Wrap it in clingfilm and then rest it in the fridge for 30 minutes.
- Once the dough has rested it is time to roll and shape the ravioli. Start with a smaller piece of pasta dough and flatten it out, then roll it through the widest setting of the pasta machine. Go through the widest setting again, and then continue to go down the settings until you have the thinnest pasta sheets – you should be able to see your hand through it when held to the light! Dust a tray with a little semolina and lay your pasta sheets on here to stop then sticking, whilst you continue with the rest.
- When you have all your pasta sheets ready, you can shape the ravioli. Place one sheet of pasta on the work surface and use a teaspoon amount of the butternut squash filling to dot along the sheet, keeping a 3cm gap between each. Wet your finger in a small bowl of water and run this around the edge of the filling, then place a second sheet of pasta over the top and gently seal the two together – making sure there aren’t any large air pockets. Then use a cutter to stamp each ravioli out and set aside on a semolina lined tray while you do the remaining.
How to make pasta without a machine?
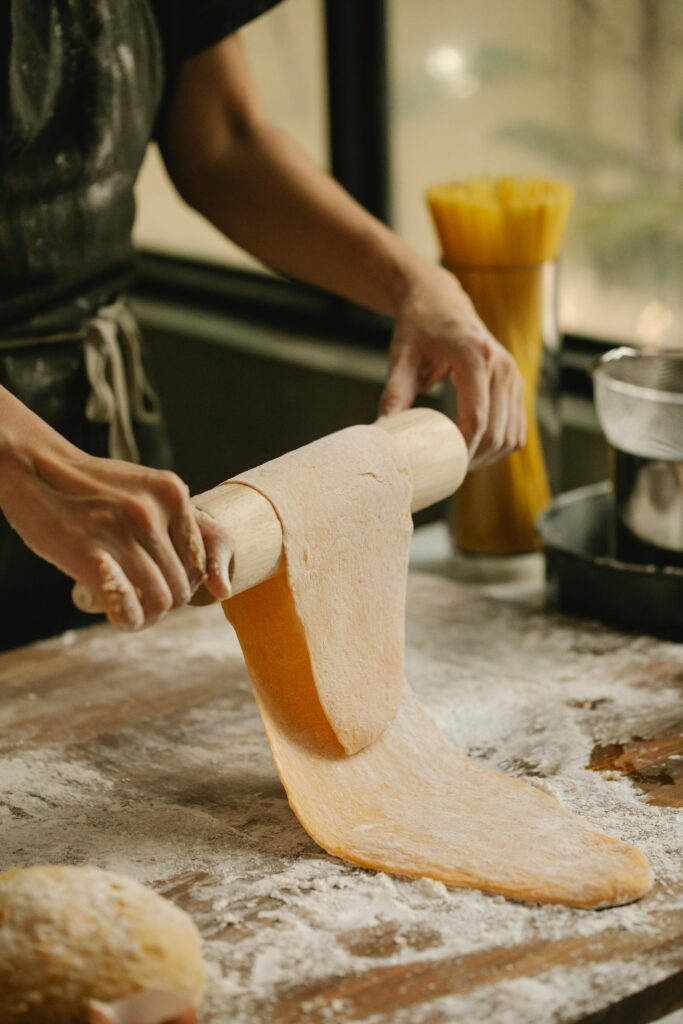
If you don’t have a pasta maker or machine, you can you use a rolling pin and a chef’s knife!
- Lightly dust your surface with flour.
- Once your dough has been in the fridge for 30 minutes, cut the dough in half.
- Roll out one half the dough with a rolling pin into a rectangle around 16 inches and 8 inches wide. Make sure to continue to roll and stretch gently with your hands until the dough is as thin as you can make it.
- Repeat the process for the second half of the dough.
- Choose one sheet from the two, and begin spooning the butternut squash filling onto the pasta sheet, leaving around 1 inch between each ball of filling.
- With a brush, gently brush water between the balls of fillings and around the outside of the sheet so that the other sheet of pasta will stick to it.
- Lay the second sheet of pasta on top, pressing down gently between the filling mounds to seal the sheets together and remove any air pockets.
- Cut the ravioli into rectangles using a ravioli cutter or sharp knife. Make sure to press any edges down again to ensure they’re sealed.
How to cook ravioli?
- Place a large pan of salted water on to boil.
- Place the ravioli in to boil, they should only take a couple of minutes. You know they are ready when they float to the surface.
How to serve butternut squash ravioli?
- In a large sauté pan, add the butter and allow it to melt, when foaming add the sage leaves and let them bubble in the butter. Then add the hazelnuts and swirl them in.
- As soon as your ravioli are cooked, lift them from the pan with a slotted spoon or spider and place them directly into the butter pan.
- Toss them through the butter and serve immediately, with a good grating of parmesan cheese.
What goes well with butternut squash ravioli?
Butternut squash ravioli pairs wonderfully with a variety of side dishes and accompaniments that compliment it’s sweet and savoury flavours.
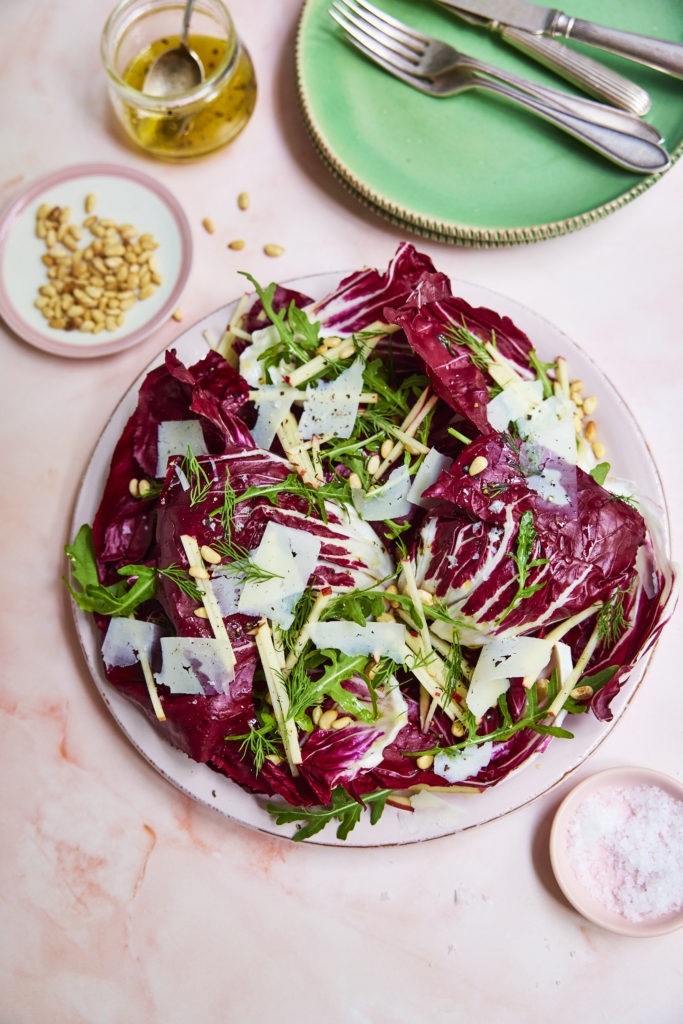
Salad
A fresh, crispy salad can balance the richness of the ravioli. Consider a delicious radicchio salad with shaved parmesan and toasted pine nuts. The peppery radicchio and the acidity of the dressing provides a delicious contrast to the sweet squash filling.
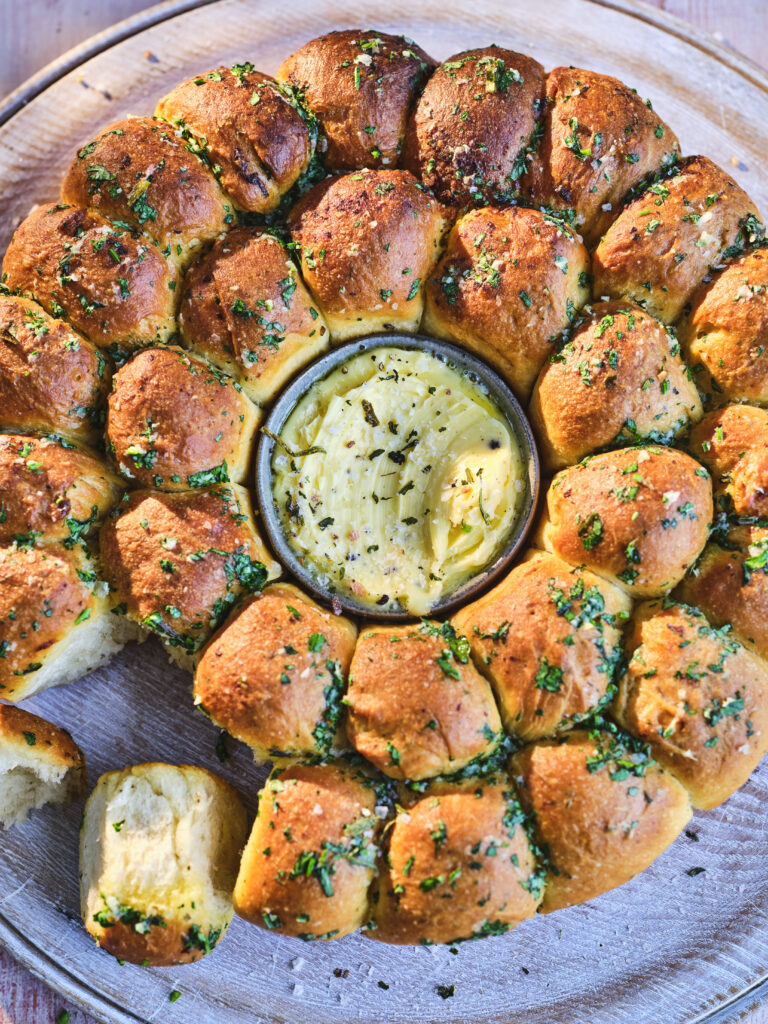
Bread
A warm, crust bread can be perfect for sopping up any leftover brown butter sage sauce. garlic bread or focaccia with rosemary and sea salt can also be a flavourful addition.
Vegetables
Roasted or sauteed vegetables make a great side dish. Brussels sprouts, asparagus, or green beans with a touch of olive oil and Maldon Sea Salt can add a delightful crunch and vibrancy to your meal.
These pairings can enhance the flavours of your butternut squash ravioli, creating a well-rounded and satisfying dining experience.
Can you freeze fresh pasta?
Yes, you can freeze fresh pasta, and it’s a great way to preserve it for later use! Here’s a detailed guide on how to freeze freshly cooked pasta effectively.
- Cook the pasta al dente, as it will continue to cook slightly when reheated. Drain the pasta and let it cool completely.
- Toss the cooled pasta with a small amount of olive oil to prevent sticking.
- Divide the pasta into portions and place them in airtight containers or freezer bags. Remove as much air as possible from the bags.
- Label the containers or bags with the date and freeze up to 2 months.
- Reheat the pasta by dropping the frozen pasta directly into boiling water for 1-2 minutes.
Freezing fresh pasta is an excellent way to save time and reduce waste, ensuring you always have a quick and delicious meal option on hand!