The talented Rukmini Iyer is a celebrated author and culinary innovator, known as the queen of fuss-free flavour. In her latest cookbook, ‘The Green Cookbook’, Iyer continues her mission to simplify delicious home-cooked meals. This vibrant collection features 75 brand-new recipes designed to help you get a delectable dinner on the table every day of the week with minimum hassle and maximum flavour. Whether you’re a ‘seasoned’ vegan, a dedicated vegetarian, or simply looking to incorporate more plant-based meals into your diet, ‘The Green Cookbook’ offers a treasure trove of inspiration!
Here is how to make all-in-one orzo with baked feta, tomatoes and olives…
This is an update on one of Rukmini’s favourite Green Roasting Tin recipes, a really simple dish of baked orzo with fresh cherry tomatoes. Here, she adds in a big square of feta to bake on top of the pasta, along with olives for a briny hit of flavour – all your food groups in one go. It’s perfect for a light dinner on a summer evening.
Preheat the oven to 180°C fan/200°C/gas 6.
Put the orzo into a medium roasting tin, pour over the boiling stock and stir, then top with the tomatoes and olives.
Place the block of feta cheese in the middle of the dish, then drizzle over the olive oil, a scatter of fresh basil leaves (reserve some for later) and a good grind of freshly ground black pepper. Transfer to the oven to bake for 25 minutes.
Carefully remove the baked feta with a fish slice and give the orzo a good mix with a wooden spoon before serving, then replace the feta as pictured. Scatter over the reserved basil leaves and top with a drizzle of extra virgin olive oil and a scatter of chilli flakes. Once cooked, let the dish stand for a few minutes before serving hot.
Buy ‘The Green Cookbook’ Today!
Whether you’re preparing a quick meal for yourself or entertaining guests, her innovative and accessible recipes are sure to become staples in your kitchen. From 15-minutes pasta dishes that are perfect for those hectic weeknights to budget-friendly batch cooking that ensures you have a hearty meal ready to go, Iyer’s recipes are crafted with real-life demands in mind. Buy a copy from here and embrace the simplicity and joy of fuss-free cooking!
Make sure you have your Maldon Salt ready for these recipes! If you are running out, please feel free to browse on our Where to Buy Page to find your nearest store in which stocks our beloved Maldon Salt.
Lastly, we LOVE seeing your creations – please tag us on Instagram using the #maldonsalt so we can share your own take on Rukmini’s recipes!
The talented Rukmini Iyer is a celebrated author and culinary innovator, known as the queen of fuss-free flavour. In her latest cookbook, ‘The Green Cookbook’, Iyer continues her mission to simplify delicious home-cooked meals. This vibrant collection features 75 brand-new recipes designed to help you get a delectable dinner on the table every day of the week with minimum hassle and maximum flavour. Whether you’re a ‘seasoned’ vegan, a dedicated vegetarian, or simply looking to incorporate more plant-based meals into your diet, ‘The Green Cookbook’ offers a treasure trove of inspiration!
Here is how to make miso barley mushroom with coriander pesto…
This is one of Rukmini’s favourite recipes in the book. The combination of miso, barley and mushrooms is inspired by Niki Segnit’s Flavour Thesaurus: More Flavours, while the incredibly moreish coriander pesto is her version of Noor Murad’s from Ottolenghi Test Kitchen: Extra Good Things – a happy melange of inspiration where the pearl barley and mushrooms look after themselves in the oven, leaving you to just blitz the pesto (and bask in the admiration of your dinner guests when they take their first bite).
Preheat the oven to 180°C fan/200°C/gas 6. Put the pearl barley, boiling water, miso paste, onion, black pepper and diced shiitake mushrooms in a lidded casserole dish or medium roasting tin, then cover with the lid or foil and roast in the oven for 1 hour.
Put the mushrooms and red onion into another large roasting tin with the garlic, olive oil, haricot beans and a pinch of sea salt. Stir, then pop into the oven for 25–30 minutes until the mushrooms are cooked through.
Blitz the coriander leaves and stems, coriander seeds, pine nuts, olive oil, sea salt and lemon juice in a high-speed blender or small food process or until smooth. Taste and adjust the salt and lemon juice, then set aside.
Stir 2 tablespoons of the pesto through the hot pearl barley, then divide between four plates. Top with the mushrooms and remaining pesto and serve hot.
Buy ‘The Green Cookbook’ Today!
Whether you’re preparing a quick meal for yourself or entertaining guests, her innovative and accessible recipes are sure to become staples in your kitchen. From 15-minutes pasta dishes that are perfect for those hectic weeknights to budget-friendly batch cooking that ensures you have a hearty meal ready to go, Iyer’s recipes are crafted with real-life demands in mind. Buy a copy from here and embrace the simplicity and joy of fuss-free cooking!
Make sure you have your Maldon Salt ready for these recipes! If you are running out, please feel free to browse on our Where to Buy Page to find your nearest store in which stocks our beloved Maldon Salt.
Lastly, we LOVE seeing your creations – please tag us on Instagram using the #maldonsalt so we can share your own take on Rukmini’s recipes!
This summer, elevate your cookouts with vegan loaded hot dogs, perfectly seasoned with Maldon Sea Salt flakes. These plant-based delights are bursting with flavour, topped with vibrant mix of fresh vegetables, savoury sauces, and a touch of smoky goodness.
Each bite offers a satisfying crunch and a delightful blend of textures, making them the ultimate crowd-pleaser for any sunny day gathering. Whether you’re a seasoned vegan or simply exploring plant-based options, these loaded hot dogs promise to be a delicious highlight of your summer feasts.
Here is how to make loaded vegan hot dogs…
Start by making some pink pickled onions to serve with the hot dogs.
Place the finely sliced red onion into a small bowl and add the Maldon Sea Salt, then use your fingers to scrunch it in and help soften the onions. Next add the vinegar and the caster sugar and then stir to dissolve. Set the onions aside to pickle as you prepare the hot dogs.
Heat a griddle pan and add the vegan sausages, cooking on each side until charred and cooked through.
Slice open the hot dog buns and add the slice of smoked cheese, then the warm sausage – allowing the cheese to melt underneath. Then top the hot dogs however you like, we chose a drizzle of American mustard, sliced jalapenos, the pickled red onions, some crispy onions, and some finely chopped chives.
Hake has a good sturdy texture that is great as a burger – think of these as giant fish fingers in a bun – but you could use any chunky white fish here. They are best cooked in a pan over the fire as you want a good amount of oil to get the all-important crispy bread crumbs. Genevieve Taylor loves membrillo, a tart sticky paste made from slow-cooked quinces. Normally served alongside cheese, here it adds a sweet and sour note to the chutney. It’s pretty easy to find these days, definitely online, or make friends with someone who has a quince tree, as they are likely to have a tonne of the stuff.
Here is how to make the hake burgers…
For the chutney, set a small saucepan on the hob over a medium heat and pour in the olive oil. Add the tomatoes, garlic and chilli flakes, if using, and cook for a few minutes until the tomatoes have collapsed. Add the membrillo and sherry vinegar and season with a little salt and pepper. Cook for another few minutes, stirring until the membrillo has dissolved, then remove from the heat, scoop into a bowl and set aside to cool.
When you are ready to cook, fire up the barbecue ready for direct grilling. Tip the breadcrumbs into a bowl and stir through the smoked paprika and a generous grind of salt and pepper. Crack the egg into another bowl and lightly beat with a fork. Add the flour to a third bowl. Toss the fillets about in the flour to coat all over, then dip into the egg until evenly covered. Add to the bowl of breadcrumbs and flip over a couple of times so each one is evenly coated in crumbs. Line up on a plate. If your hands get unbearably messy, stop, wash and begin again.
Drizzle a little olive oil over the aubergine slices and season with Maldon Sea Salt and pepper. Set on the grill bars over the fire and grill until lightly charred all over. Slide away from the fire so they keep warm and set a flameproof frying pan over the fire to heat up. Pour in a good amount of olive oil so it coats the pan by a couple of millimetres. Once the oil is hot, add the crumbed fish and fry for a couple of minutes on each side until crisp and golden. Use a temperature probe to test the fish for doneness – it should be 60°C (140°F)deep in the centre. Slide the pan off the heat a little if the crumbs are colouring too quickly so the fish can finish cooking. Once the fish is done, split the buns open and toast briefly on the cut side. To serve, add a little rocket to the base of each bun, then add the fish and a couple of slices of aubergine.
Finish with a dollop of the chutney, top with the bun lid and tuck in.
Purchase ‘SCORCHED’ by Genevieve Taylor
Live-fire expert Genevieve Taylor covers everything you’ll ever need to know about buying and cooking all kinds of fish in her third cookbook: Scorched. From cooking whole dish, fillets, shellfish to burgers and skewers, this is the ultimate guide to barbecuing fish!
You can purchase your very own copy here, where you can become inspired with over 85 recipes and gain insight on how to set up your barbecue, sourcing your fuel and lighting your fire.
Much as Genevieve Taylor loves fish and meat proteins, she adores pulses and try to eat them several times a week. Cheap and cheerful, a bowlful of beans is an excellent way of making your fish go a little further. Fresh oregano is one of her favourite herbs, giving a slightly floral note to this pesto-style dressing.
Here is how to make the recipe
As is usual, a few hours before you want to cook, lay the mackerel fillets skin-side up on a rack over a tray and slide into the fridge to dry the skin and minimize sticking.
For the pesto, pour a good 4 tablespoons of the olive oil into a bowl and stir through the chopped oregano and garlic, the lemon zest and juice. Season to taste with Maldon Sea Salt and pepper and a good pinch of sugar. Spoon out a tablespoon or so into a separate small bowl ready to baste the fish, then set both bowls a side.
When you are ready to cook, fire up the barbecue ready for direct grilling but leaving an area coal-free so you have room to manoeuvre if things are getting hot. Set a grill tray or cage over the fire to heat up.
Once the fire has a little heat in it, start on the beans. Set a flame proof pan over the fire (it’s fine to rest the pan on the grill tray so you can heat two things at once!) and pour in the olive oil. Add the tomatoes and garlic and fry for a few minutes, just until the tomatoes are softening. Add the beans and cinnamon, then season to taste with the sugar and salt and pepper. Bring up to a simmer and cook for a few minutes. Take the pan off the heat and cover with a lid or foil to keep warm – they are more flavourful eaten warm rather than hot, so don’t worry too much about them cooling a little.
Remove the mackerel from the fridge and drizzle the remaining tablespoon of oil all over the skin side, spreading it out into a thin, even layer. Sprinkle generously with Maldon Sea Salt flakes and take to the grill along with the smaller bowl of pesto and a silicone brush.
Lay the fillets, skin-side down, on the hot grill tray and rest a lightly oiled weight on top to press the fillets flat, keeping the skin in maximum contact with the hot surface. After a couple of minutes, the weight will have done its job so remove it, then brush the oregano pesto over the flesh side of the fish. Cook for another couple of minutes until the skin is crisp. Use a fish slice to tease the fillets from the grill tray and rest on top of the beans. Drizzle over the rest of the pesto and tuck in.
Purchase ‘SCORCHED’ by Genevieve Taylor
Live-fire expert Genevieve Taylor covers everything you’ll ever need to know about buying and cooking all kinds of fish in her third cookbook: Scorched. From cooking whole dish, fillets, shellfish to burgers and skewers, this is the ultimate guide to barbecuing fish!
You can purchase your very own copy here, where you can become inspired with over 85 recipes and gain insight on how to set up your barbecue, sourcing your fuel and lighting your fire.
Kitty really loves saag aloo and often craves it, so she created this simple and delicious one-pan dinner inspired by those flavours. This is not at all like an authentic saag aloo, it’s Kitty’s own version. You can use any spices you have in the cupboard here. Kitty also made this with chicken thighs by frying them skin-side down for 5–10 minutes until golden and crisp, then roasting in the oven for 25–35 minutes until cooked through. Then continue as instructed.
Here is how to make roast chicken, spiced spinach and yogurt
Preheat the oven to 240°C fan (475°F).
Season the chicken all over with Maldon Sea Salt, then set aside to rest for 30 minutes.
Place the chicken into an ovenproof frying pan (skillet), low-sided casserole dish (Dutch oven) or cast-iron pan. Pour the oil over the chicken and massage it in with your hands. The oil will give the chicken a little kickstart in the oven, so give it some love and attention and get the oil into every nook and cranny to achieve maximum crispness.
Roast in the oven, legs at the back, for 30 minutes. After this time, reduce the heat to 180°C fan (400°F), then rotate the chicken and roast for a further 10–25 minutes until golden and crisp all over and the juices from the leg run clear. (If you have a meat thermometer, you’re aiming for 70°C/158°F at the base of the breast.)
Remove the pan from the oven, then lift out the chicken and set aside on a plate to rest.
Put the pan back over a medium heat and add the onions with a pinch of salt, tossing them in the chicken fat in the pan. Very slowly fry the onions for 10–15 minutes, stirring every so often until they are very, very soft and caramelised. If they start to fry too quickly, just turn down the heat and add a splash of water. Add the cumin, mustard seeds, turmeric, chilli flakes, ginger and garlic and fry for a further 5 minutes.
Add the spinach a handful at a time, mixing it into the onions as you go and letting it wilt with each batch. Let this cook down for a further 4–5 minutes until the spinach has soaked up all the flavours. Squeeze in the lemon juice and add a few grinds of black pepper, then taste.
Lay the chicken back on top of the spinach and serve to the table with the yoghurt and chilli.
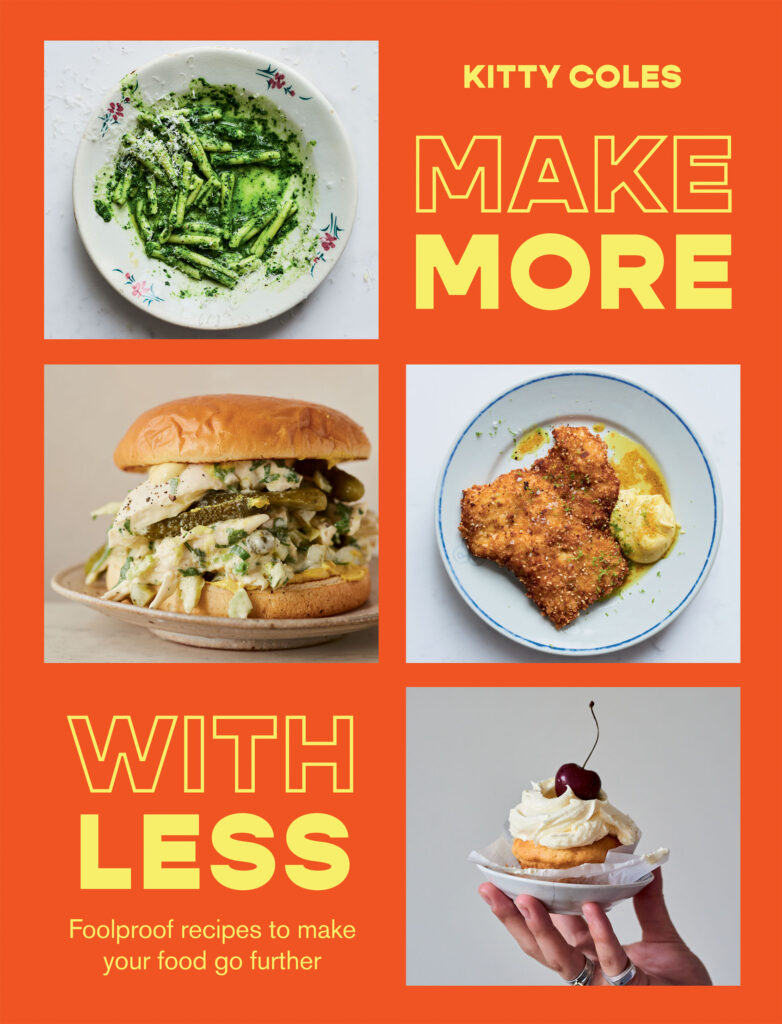
Purchase Make More With Less by Kitty Coles
Make More With Less by Kitty Coles (Hardie Grant, £22), Photography by Issy Croker.
Looking for fool proof recipes to make your food go further? Make More With Less by Kitty Coles takes core ingredients and transforms them into flavour-packed, simple dishes. From turning a few tins of beans into a comforting bean pasta to making leftover chicken tacos! the options are endless and the creativity never stops!
You can purchase your very own copy here, where you can flick through, raid your fridge and Kitchen cupboards and get started on creating low-waste, low-fuss and versatile recipes that you will make over and over again.
This is an all-year-round one-pot meal that makes the most of your store cupboard. It’s a classic Italian dish made in various ways and we love it every time. You can bulk it out by frying off finely chopped onions, celery and carrots at the start with the garlic until soft for a more veg-packed version. Kitty also throws in a handful of shredded seasonal greens at the end to wilt, such as spinach, cavolo nero (lacinato kale) or kale. Use any pasta or bean type you have!
Here is how to make pasta and beans
In a large saucepan, heat the olive oil over a medium heat and add the garlic and rosemary before the oil is hot to prevent the herbs burning. Season with a pinch of salt and cook, stirring frequently, for 2 minutes until the garlic softens and turns very lightly golden. Add the chilli flakes and tomato puree, then continue to cook, stirring constantly, until fragrant and the tomato puree turns a dark red.
Add one-quarter of the beans with the liquid from the jar or tin (or 150 ml/5 fl oz/scant ⅔ cup of liquid if using beans for the week). Then, with the back of a fork or masher, crush the beans until completely broken down, this will create the creamy texture you want for the sauce. Now add the remaining beans, plus the bean liquid and stock mixture, then season with black pepper and a pinch of Maldon Sea Salt.
Bring to the boil over a medium-high heat, then stir in the pasta and cook for 2 minutes less than the packet instructions, as the pasta will continue to cook off the heat. The sauce should be reduced and the consistency of half-sauce, half-soup…so a bit of a wet sloppy pasta sauce (but in a delicious way). Adjust the consistency as needed with additional water, stock, or bean liquid, keeping in mind that any liquid will tighten up as it cools due to starch from the beans and pasta.
For the flavoured oil, add 4 tablespoons of extra virgin olive oil to a pan with the garlic, rosemary and chilli flakes, while the oil is still cold, so that the garlic cooks evenly and not too quickly. Gently cook for 3–4 minutes until fragrant and the garlic is lightly golden, then turn off the heat and squeeze in the lemon juice.
Remove the pasta from heat and add most of the grated Parmesan, leaving some to serve and stir rapidly to incorporate and become creamy. Ladle a few spoonful’s into bowls, then drizzle each serving with the flavoured olive oil and the reserved Parmesan.
Purchase Make More With Less by Kitty Coles
Make More With Less by Kitty Coles (Hardie Grant, £22), Photography by Issy Croker.
Looking for fool proof recipes to make your food go further? Make More With Less by Kitty Coles takes core ingredients and transforms them into flavour-packed, simple dishes. From turning a few tins of beans into a comforting bean pasta to making leftover chicken tacos! the options are endless and the creativity never stops!
You can purchase your very own copy here, where you can flick through, raid your fridge and Kitchen cupboards and get started on creating low-waste, low-fuss and versatile recipes that you will make over and over again.
Start by putting a large pan of salted water on the heat and when it comes up to boil, add the bucatini. Cook this following the packet instructions for al dente.
While the pasta is cooking, put a large sauté pan on the heat and add the butter and oil. Allow them to melt and then add the red chilli, garlic, and fennel seeds. Let the spices sizzle for a couple of minutes until smelling fragrant, then add the crab meat. Stir the spices through the crab and heat through.
Next add the asparagus tips along with a splash of the pasta water – this will help them steam and cook. After a couple of minutes turn the heat off and check the pasta. It should be perfectly al dente. Use tongs to lift and transfer the bucatini from the water to the pan with the crab. Once all the pasta is added, ladle in a little more pasta water and toss this through – this will help the pasta to create a sauce and allow all the ingredients to cling to the bucatini.
When you are happy with consistency, finally add the lemon zest, followed by the juice, and chopped chervil. Toss this through and then add the Maldon Garlic Sea Salt and some cracked black pepper to taste. If the pasta looks a little dry, just add another splash of the pasta water.
Then serve the bucatini piled in bowls, with a final drizzle of good quality olive oil.
Serve and enjoy!
Start by making the pickled radishes. In a small pan pour in the vinegar, caster sugar, Maldon, and spices. Place it onto the heat and gently warm so the sugar and salt dissolve. Put the chopped radishes into a bowl and when the vinegar mixture is ready, pour over them. Set these aside to pickle while you make the rest of the recipe.
Preheat the oven to 200c.
In an ovenproof tray add the chicken thigh pieces, skin up. Rub the skin with some olive oil and plenty of Maldon Sea Salt. Place into the preheated oven and roast the chicken for 30 minutes until the skin is golden brown and crispy, and the meat is cooked through.
While the chicken is cooking, start on the beans.
Place a large shallow pan on the heat and then add the white beans, along with the juices from the jars. Place a lid on the pan and gently warm the beans up, letting them simmer for 5 minutes.
In a food processor or high-powered blender, add the watercress, crème fraiche, Dijon mustard, lemon zest and juice, some Maldon Sea Salt and black pepper and a tbsp of olive oil. Blend together to make a smooth, bright green sauce.
Pour the sauce into the beans and stir through. Take off the heat.
Now you are ready to plate up. Spoon the beans into the middle of a serving platter or shallow bowl. Place the crispy chicken thighs into the middle of this. Then scatter over some of the beautiful, pink pickled radishes. Finally garnish with a drizzle of good quality olive oil, some extra Maldon Sea Salt, sprigs of dill and some lemon wedges for squeezing.
Why do we eat lamb at Easter?
Have you ever wondered why we eat lamb during Easter? Many think it’s due to seasonality because Easter usually falls on or around lambing season in the UK. (February to April). But that’s actually false for many British farmers who know and keep lamb…The lamb you’re eating for your Easter Sunday roast would have most likely been born in December, kept warm indoors throughout the winter and fattened on grain – so it’s not actually born in Spring at all!
Alternatively, Farm2Fork also suggests if you are eating grass-fed lamb on Easter Day, then it most likely travelled from New Zealand to be a part of your roast dinner.
So, if we don’t eat lamb because it’s in season, why do we eat it?
The main reason is due to religion and faith. In Christianity, Jesus is often referred to as the ‘lamb of God’ in the Gospel of John. As a result, the eating of lamb represents the person we are commemorating and the sacrifice he made for humanity.
However, if we go even deeper in history, before the birth of Christianity, we can see roast lamb being used in the early Passover. When Egypt experienced the terrible plagues and deaths of firstborn sons, the Jews painted (sacrificed) lamb’s blood on their doors so that God would ‘pass over’ their homes and punish the sinners. Later on, when certain Jews would convert to Christianity, they carried over the tradition of eating lamb.
Although Christians do not practise sacrifice in this manner any longer, it is fair to say that we have built our traditions of eating lamb due to historic and religious customs.
If you’re looking for something other than lamb to eat on Easter, check out our perfect Easter recipes; a selection of of meat and vegetarian options for you to enjoy during your Easter Sunday roast.
Image by <a href=”https://pixabay.com/users/vivienviv0-671182/?utm_source=link-attribution&utm_medium=referral&utm_campaign=image&utm_content=581759″>vivienviv0</a> from <a href=”https://pixabay.com//?utm_source=link-attribution&utm_medium=referral&utm_campaign=image&utm_content=581759″>Pixabay</a>
How to butterfly a leg of lamb
In this recipe, we use a butterflied lamb joint, ready to be stuffed, tied and then roasted in the oven. Jamie Oliver shows readers a brilliant method in butterflying your lamb joint yourself and not done by your local butcher!
Try to prepare you lamb the day before you want to cook.
Use a sharp knife and carefully cut down the leg to expose the bone.
Making sure you keep the knife as close to the bone as possible, begin cutting along the edge to completely expose the bone.
Cut around the bone until you are able to remove it.
You can now lay the lamb flat on a chopping board, making sure it is skin-side down.
Using your knife again, make an incision halfway into the flesh on each side (where the meat is thicker), then open it out like a book – or – like butterfly wings on each side!
You should now have a flat piece of lamb of equal thickness.
You have now successfully butterflying your leg of lamb, ready to be stuffed with your favourite seasonings and then tied before roasting!
How to tie a leg of lamb
Once you have butterflied your leg of lamb and packed it full of delicious ingredients such as rosemary, pine nuts, garlic or mint (the list goes on!), you now need to tie it together to seal in all the flavours.
Cut a length of butcher’s twine, long enough to wrap around the lamb a few times.
Place the twin on a flat surface.
Lie the leg of lamb on top of the twine.
Slide the twine under the leg, positioning it roughly 1 inch from the end.
Cross the ends of the two ends of the twine over the top of the leg, pulling them tightly.
Tie a strong knot to hold the leg in place.
Now work towards the other end of the leg, looping the twine around and making sure you’re pulling it tight each time to secure the shape.
Once you have reached the end of the leg, tie another secure knot to hold the twine in place.
Cut with scissors any excess twine.
Now that you have tied your lamb, you’re ready to cook in the oven!
How to cook a leg of lamb
The best way to cook a leg of lamb perfectly is through roasting in the oven until pink on the inside, or roasted slowly for several hours until the meat is very tender and falls apart.
Cooking time for leg of lamb:
For a medium cooked lamb where the inside is blushing pink, it will take around 25 minutes per pound of meat. Alternatively, the internal temperature of the lamb should be around 130F.
If you’re looking for a succulent, falling apart lamb, it will take around 40 – 45 minutes per pound. Alternatively, the internal temperature of the lamb should be around 175F.
Cooking times for different levels of rareness for the lamb:
Rare: Around 15 minutes per pound / internal temperature 125 degrees F.
Medium Rare: 20 minutes per pound / internal temperature 130 degrees F.
Medium: 25 minutes per pound / internal temperature 135 degrees F.
Well-Done: 30 minutes per pound / internal temperature 155 degrees F.
Tender (falling apart lamb) – 40 minutes per pound / internal temperature 275 degrees F.
After you have cooked your leg of lamb to your desired texture and taste, you are now ready to carve!
How to carve a leg of lamb
We followed Waitrose step-by-step guide on how to successfully carve a leg a of lamb.
Once you have taken the meat out of the oven and rested for a few minutes, hold the bone, turning the leg so the thickest part of the meat is uppermost.
Cut a narrow wedge of meat from the centre.
Begin carving slices down to the bone with a knife angled along the line of the wedge. Cut across the base of the slices to free them from the bone.
Turn the joint over and carve the remaining meat parallel to the bone.
How to make stuffed leg of lamb with apricots, pistachios and parsley
You should now know the the basics for a leg of lamb; from it’s humble origins, tying, roasting to carving it perfectly, let’s now explore our delicious recipe where we stuff a leg of lamb with the delicious flavours of apricots, nutty pistachios and parsley.
Preheat the oven to 220c.
Start by making the stuffing mixture. In a large bowl add the fresh breadcrumbs, chopped pistachios, apricots, lemon zest, parsley, garlic, chilli flakes, and plenty of seasoning with Maldon Original Sea Salt Flakes and cracked black pepper. Mix this altogether well. In a small jug whisk the egg and olive oil, then pour this into the stuffing and mix again to help bind it.
Open the butterflied lamb joint and line on the flesh side with the stuffing, packing it in tightly with your hands. Roll the meat as tightly as you can and then use butchers string to tie it up firmly.
Place the rolled lamb onto a baking tray and into the hot oven, we want to brown the skin before turning the heat down for a slower cook.
After 30 minutes, turn the oven down to 180c and cook for a remaining 50 minutes – 1 hour. If the lamb looks a little dark on top, simply cover with some foil.
When the lamb is cooked to your liking, remove from the oven, and loosely cover with foil then allow it to rest for 15 minutes.
Carve the meat and then bring to the table and serve alongside your favourite trimmings; we did roast potatoes, seasonal greens, and a lamb jus.
What to serve with leg of lamb
The options for what to serve with a leg of lamb are endless! Because the meat has a beautiful rich and flavourful taste, a combination of sweet and savoury both go well with the dish.
Roast Potatoes
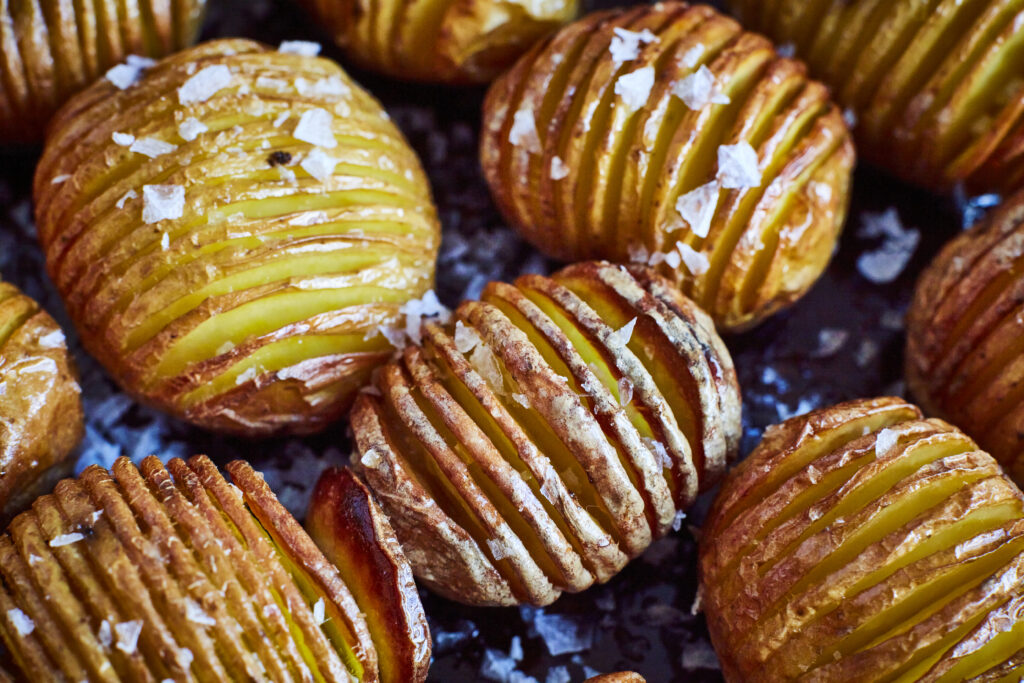
One of the most common pairings with a leg of lamb – easy oven roast potatoes. Beautifully crispy on the outside and fluffy on the inside, they’re perfect to soak up the oozing juices of the lamb. If you really want to impress your guests, try making Hasselback roast potatoes, which give an extra dimension to the dish with it’s extra crispy texture, which compliments the soft meat of the lamb.
Lemon & Honey Glazed Roasted Carrots
If you want to add a gentle sweetness to the dish, serve these roasted carrots, coated in lemon and honey to give a delightfully sweet kick to the dish, a delicate flavours that works perfectly alongside leg of lamb.
Broccoli with Zaatar
Try adding a bit of green to the dish with roasted stem broccoli, paired with zaatar, chilli flakes and Maldon Salt to make a delicious spice blend that adds a bold flavour to the lamb. You can also serve this on a bed of feta, to give a gorgeous creaminess to the plate.
We hope you enjoyed making this classic Easter Sunday lunch!
Make sure you have your Maldon Salt ready for these recipes! If you are running out, please feel free to browse on our Where to Buy Page to find your nearest store in which stocks our beloved Maldon Salt.
Lastly, we LOVE seeing your creations – please tag us on Instagram using the #maldonsalt so we can share your delicious dishes!