Within this article, we will take you on a journey of learning everything you need to know about smoked salt and how to use it.
We first explore the basic composition and characteristics of smoked salt, before deep-diving into how the flavoured salt can enhance profiles of dishes and the many ways you can use the condiment in your cooking, baking and drinks!
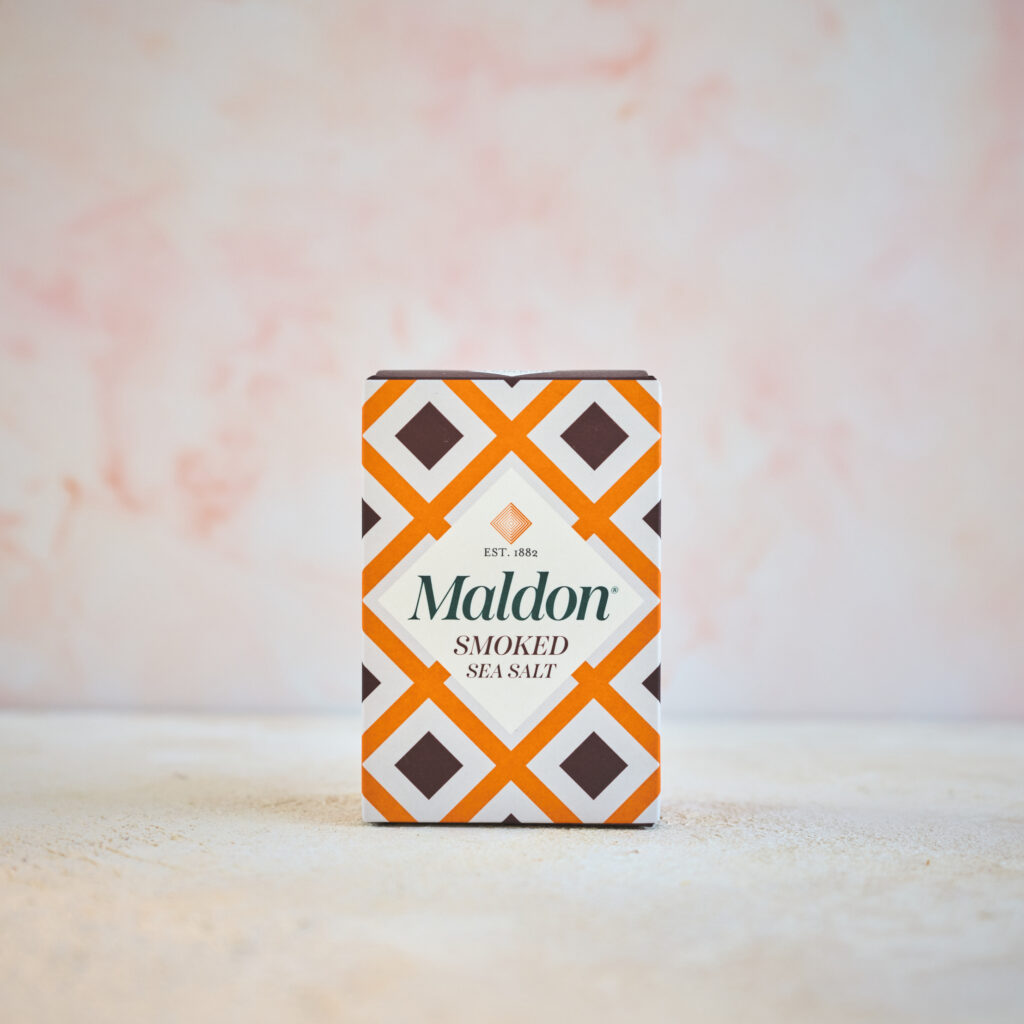
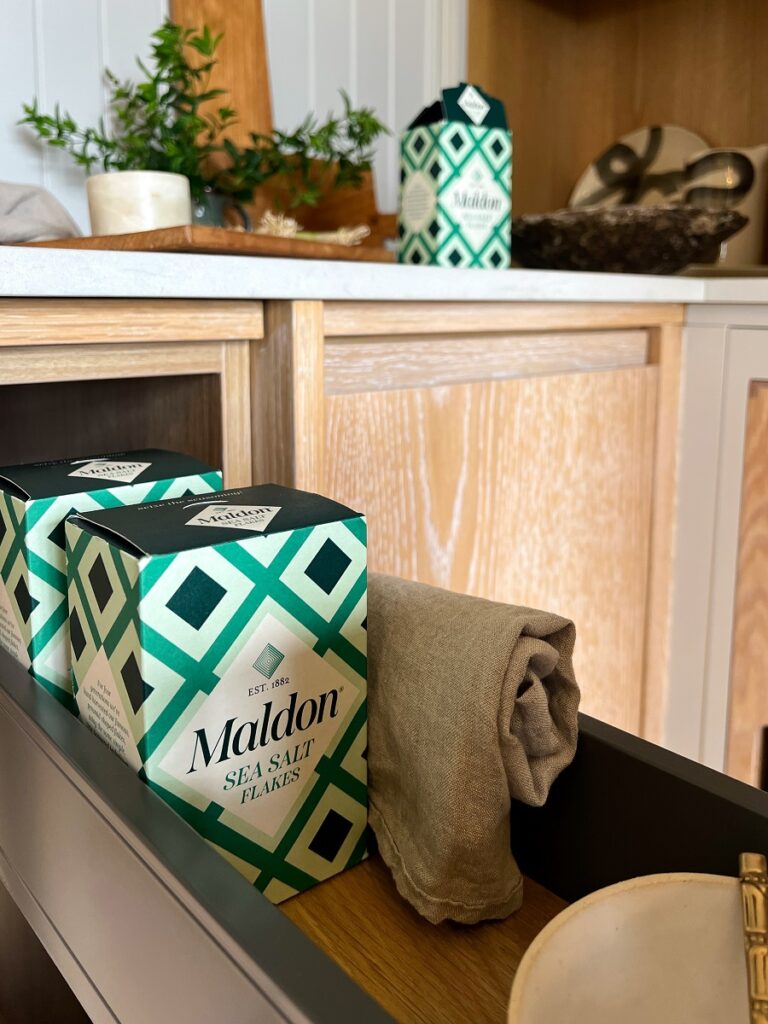
Maldon Smoked Sea Salt 125g Pack
What is smoked salt?
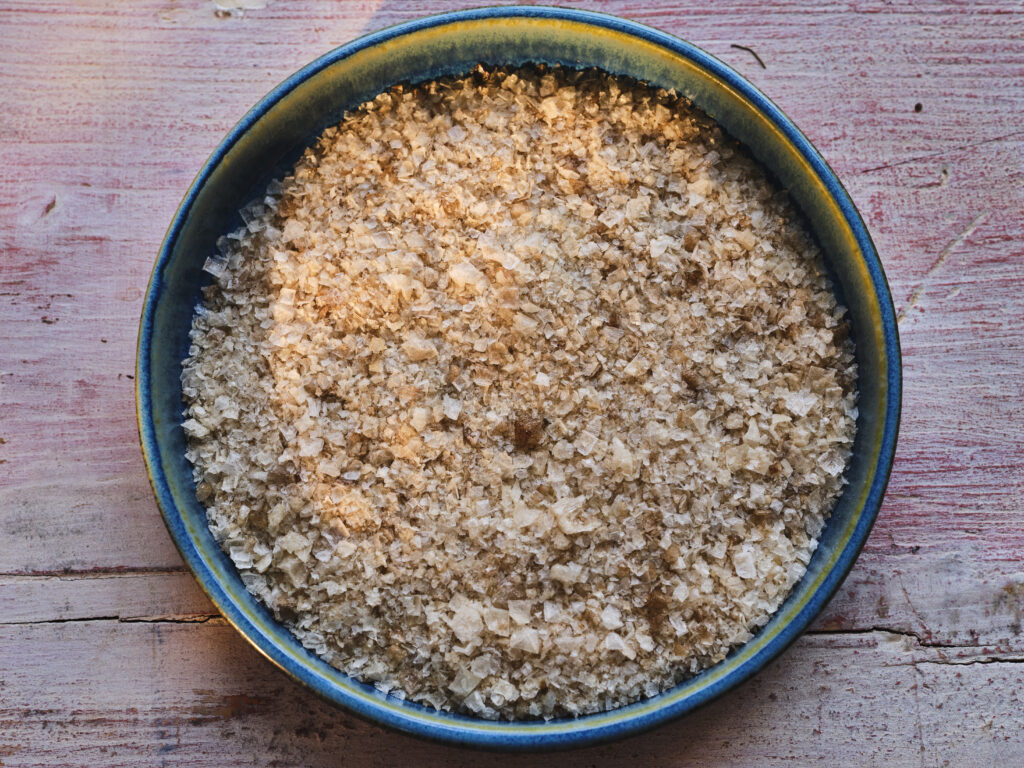
Our Maldon Smoked Sea Salt flakes is created through hand-harvesting our pyramid-shaped flakes and gently smoking over oak for a distinctively deep, rich and bold taste. Due to the way it is smoked over the wood, the sea salt flakes have a slightly brown/beige colourisation, holding a deliciously smoky flavour that is perfect for fish and grilled vegetables.
Smoked salt is suitable for vegetarians and often acts as a great alternative to bacon crumble/bits. The salt is a natural product, being completely different from a smoke-flavoured salt, as this would contain an additive, which is not natural.
Maldon Smoked Sea Salt Flakes
Maldon Salt offers two formats of the Smoked Sea Salt:
Smoked Sea Salt 125g packet is the perfect size for everyday use in households. Available to purchase at Sainsburys.
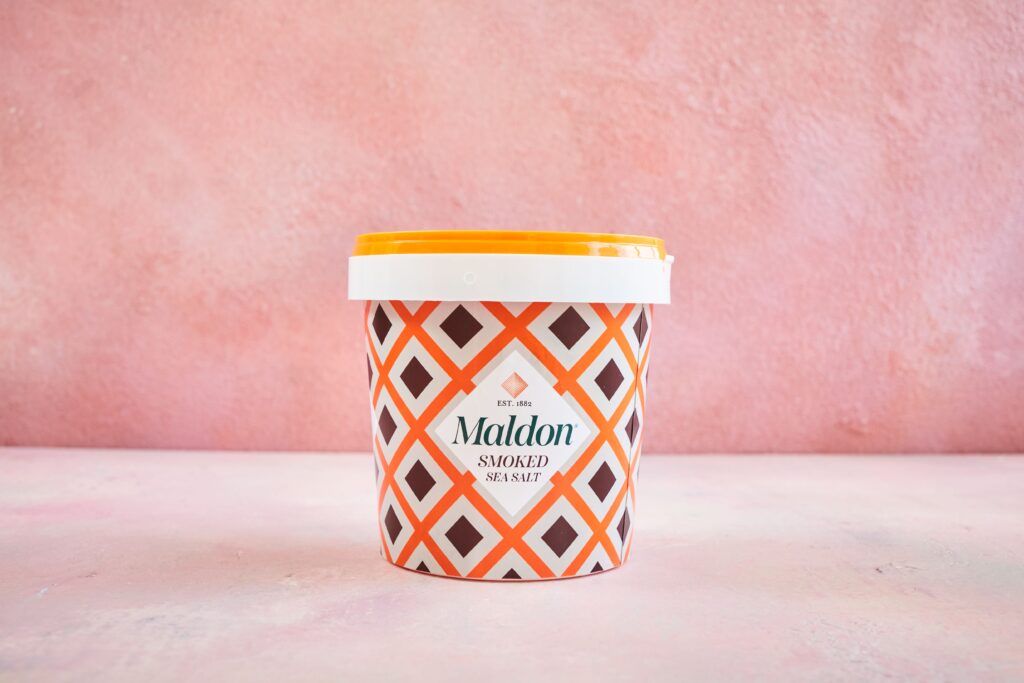
Smoked Sea Salt 500g tub is a larger size, making it ideal for kitchens and cafes. Available to purchase via Wholesale only. Please get in touch for stocklists.
Maldon Smoked Sea Salt 125g Maldon Smoked Sea Salt 500g tub
How to use smoked salt?
Maldon Smoked Sea Salt holds a signature, smoky flavour where a delicate blend of fresh sea salt flakes is hit with a balanced smokiness from the oak wood. Because it is our much-loved sea salt that is used and nothing else, the flakes allow a beautiful, textural crunch as you bite into your food, whilst obtaining that delicious grilled flavour – without having the need to grill!
Cooking with smoked salt
Sprinkled over griddled meat and vegetables, smoked salt elevates the food to add a richer, wood-smoked flavour that is perfect for both summer and winter dishes when you need a ‘smoky’ kick to warm yourself up!
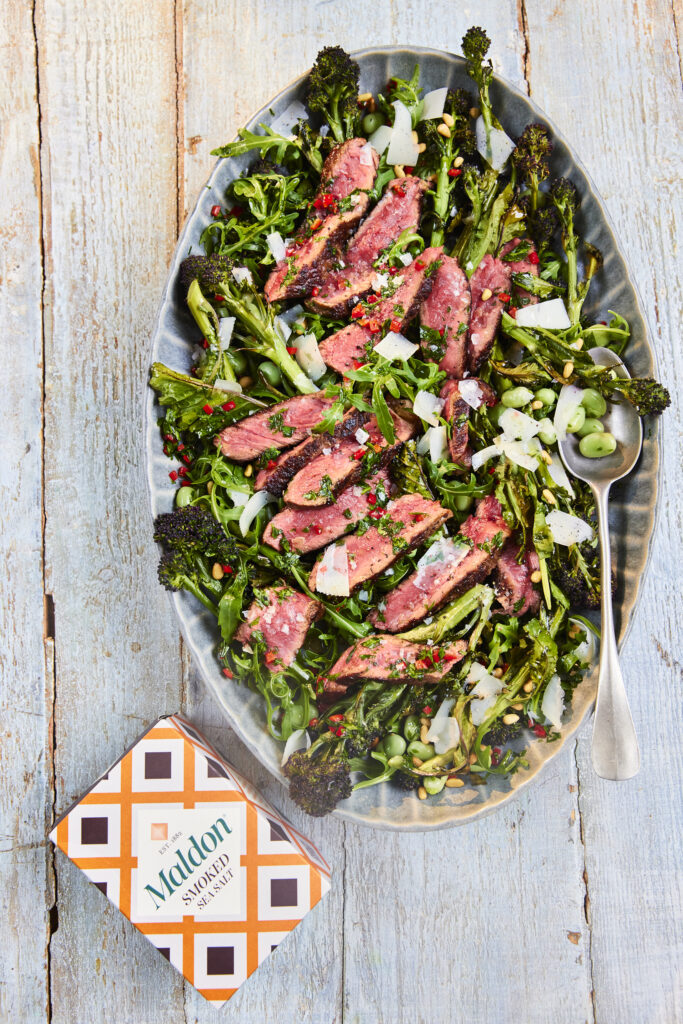
Steak Salad with Purple Broccoli, Parmesan and Chilli & Herb Dressing
Meats
Our beautiful seared steak recipe uses Maldon Smoked Sea Salt to elevate the flame-grilled flavour further. If you are craving the smoky flavour profile, but do not have a griddled pan to achieve this, sprinkle a good pinch of smoked salt before serving and you wouldn’t be able to tell the difference! We pair the juicy steak with purple sprouting broccoli and broad beans to give some earthy goodness to the dish.
Additionally, a delicious chilli & herb dressing is drizzled over the the dish, where smoked sea salt flakes is used to elevate the red chillies and herbs (parsley and coriander).
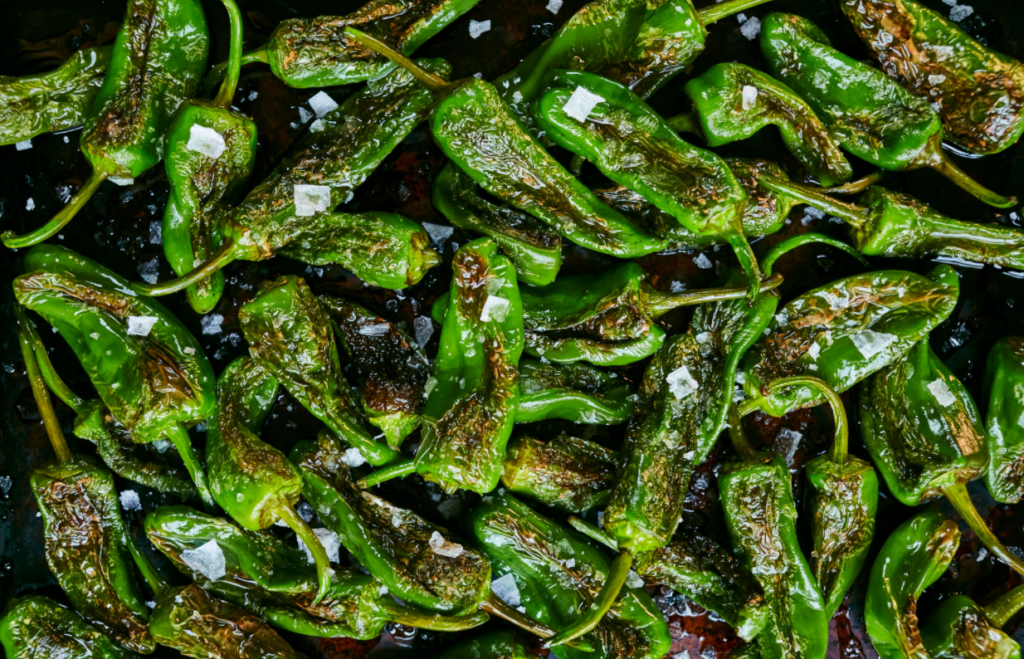
Padron Peppers
Vegetables
To make vegetables taste like they have been grilled over a smoky BBQ, make sure to generously sprinkle them with smoked sea salt straight after pulling them out of the oven. Our padron peppers showcase just how easy it can be to achieve a smoky flavour profile without having to grill/bbq the vegetables. Super easy and a great crowd-pleasing appetizer for a dinner party.
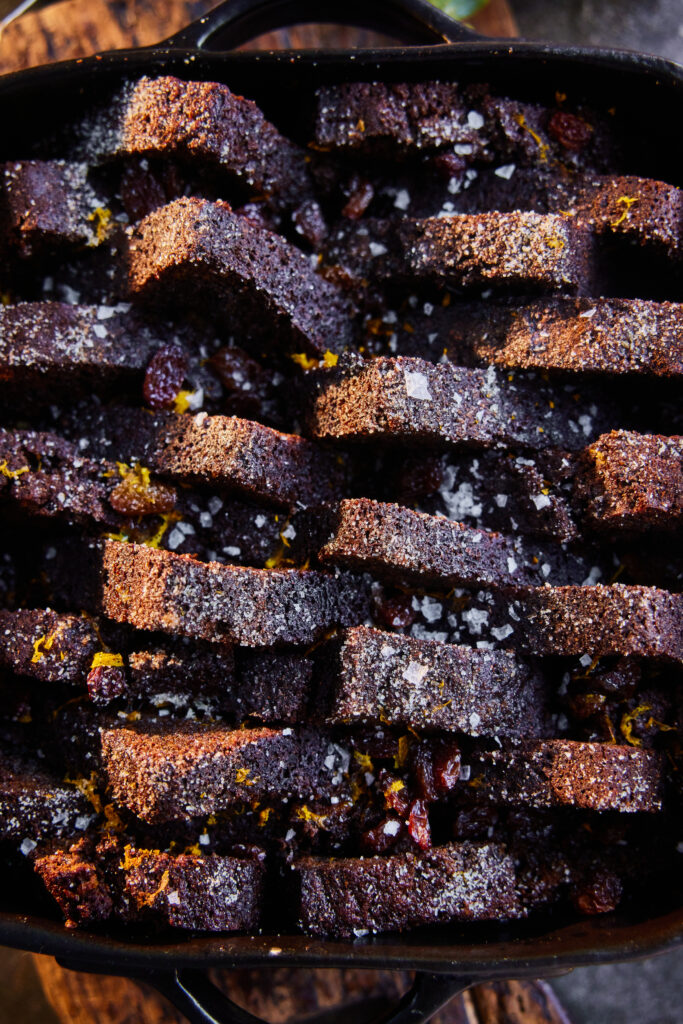
Gingerbread Loaf
Baking with smoked salt
Did you know that smoked flavours work wonders with baked goods? Sprinkling a good handful of smoked sea salt into the mixture for a gingerbread loaf will make your taste buds sing as the smoky flavours compliment the spicy ginger notes perfectly!
To give chocolate a gentle smokiness, we also recommend adding a pinch of the smoked salt to fudgy brownies, both in the mixture and topped before serving. The smoky notes from the salt balances out the sweet, richness from the chocolate, creating the ultimate flavour sensation.
Bloody Mary
Drinks made with smoked salt
For a fun twist, try adding smoked salt to the rim of a glass to your classic margarita. Our refreshing mango and jalapeno margarita uses a blend of smoked salt and chilli powder to give a fiery kick to the drink, adding a perfect balance of sweet and spicy from the fresh mango juice.
If you prefer the tangy aroma of tomato juice, try our Bloody Mary recipe, where we incorporate a smoked salt rim to the glass to elevate the smoky notes of the drink further.
Get the grilled flavour without having to grill…
This article has explored the delicious flavour profile of Maldon Smoked Sea Salt and the many ways it can be used in your kitchens, whether that be cooking, baking or making drinks!
Make sure you have your Maldon Salt ready when making any of these recipes! If you are running out, please feel free to browse on our Where to Buy Page to find your nearest store in which stocks our beloved Maldon Salt.
Lastly, we LOVE seeing your creations – please tag us on Instagram using the #maldonsalt so we can share your own culinary masterpieces!
If you’re the head chef in your household, you deserve a kitchen that works as hard as you do – a space that’s both beautiful and brilliantly practical. Naked Kitchens make bespoke kitchens that are made to be used, loved and admired – and built for real life. In this special guest post, we invited them to share their expert tips on creating the perfect home cook’s kitchen…
Even if you’re not a keen cook, the kitchen is still the heart of the home – the place where conversations happen, homework gets done, and guests always seem to gather. But if cooking is your thing – if you take pride in a slow-cooked ragu, plan your week around Sunday roasts, or dream about hosting a perfectly timed dinner party – then a well-designed kitchen can transform your everyday life.
A space that flows effortlessly, where ingredients and utensils are exactly where you need them, where classic design meets modern convenience – that’s the cook’s kitchen dream! It doesn’t need to be vast or flashy – it just needs to work for you. So if you’re planning a new kitchen, here are six expert tips for creating one that’s as timeless as it is practical – and an absolute joy to cook in…
1) Start with how you cook
It’s easy to fall for the dream – scrolling through perfectly styled kitchens on Instagram, all gleaming surfaces and artfully placed lemons. But a real kitchen isn’t just for looking at. It’s for living in – and cooking in, day after day.
So instead of starting with how you want it to look, begin with how you actually use it. What do you cook most often? Which tools, pans or ingredients do you reach for without thinking? Where do you prep, stir, wash up, serve?
A great cook’s kitchen is one that’s designed around your routines. That might mean deeper drawers by the hob, spice racks near the prep zone, or storing oils and Maldon Salt right beside the cooker. Layout matters too – especially how your sink, oven and fridge relate to one another in the classic kitchen ‘work triangle’ – and how your different kitchen zones work together.
When all of that flows intuitively, the kitchen becomes a place of calm efficiency – where nothing jars and everything is to hand. (There’s a name for this: kitchen ergonomics. And yes, it really does make cooking feel easier and more enjoyable.)
An efficient, ergonomic kitchen can also be stunningly beautiful. Image: Naked Kitchens
2) Design for the home you actually live in
A lot of ‘dream kitchens’ look beautiful in brochures but wouldn’t work for a moment in real life. They’re designed for photoshoots – vast, empty, and usually staged in showrooms. But your kitchen needs to fit your home, your life, and your cooking habits.
That’s where true bespoke design comes into its own. Whether your kitchen is in a Georgian townhouse, a Victorian terrace or a 1930s semi, a made-to-measure approach can make every inch work harder – and look better. We take awkward corners, chimney breasts, low ceilings or uneven floors and turn them into assets, not obstacles.
Our designers will often start not with the cabinetry, but with the architectural character of the space – using it to guide layout, proportions, and the finer details. The result is a kitchen that feels not just practical, but beautifully in tune with its surroundings.
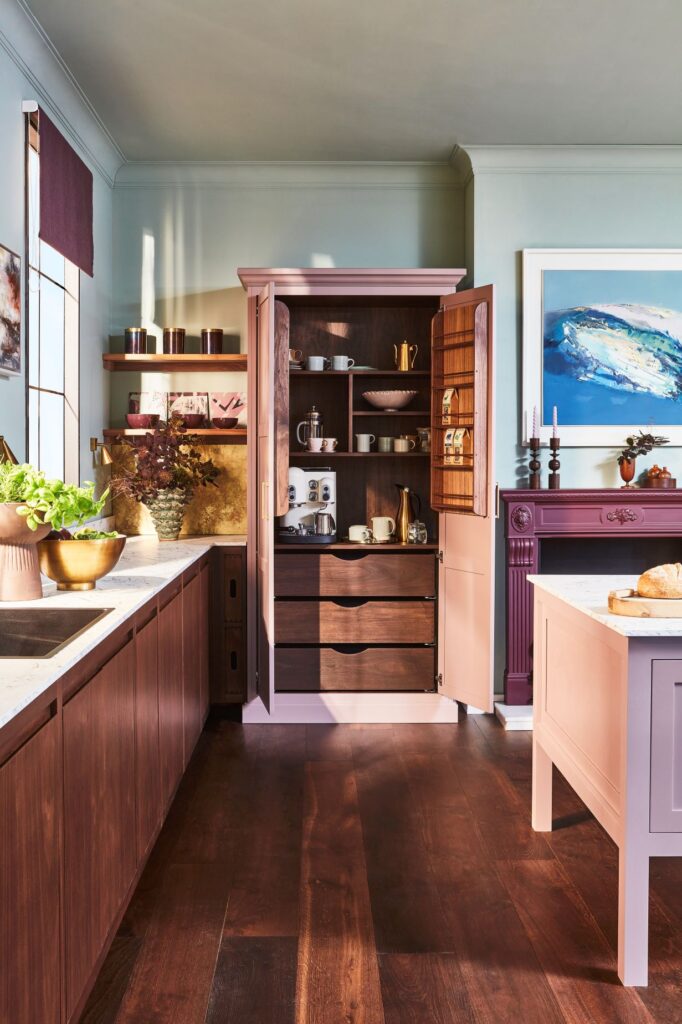
A bespoke pantry cupboard can be designed for what and how you cook. Image: Naked Kitchens
3) Go for bespoke and beautiful kitchen storage
There’s something wonderfully reassuring about a well-organised kitchen – where dry goods, herbs and oils are always within reach, and everything has its place. That’s why we design bespoke storage that’s not just practical, but pleasing to look at and use.
Take the classic pantry or larder cupboard: a mainstay of traditional kitchens, it’s the ideal place to store everything from pulses to preserves, spice jars to Maldon Salt. We can build yours to suit exactly what you cook with, how you store food, and how you like to move around the space.
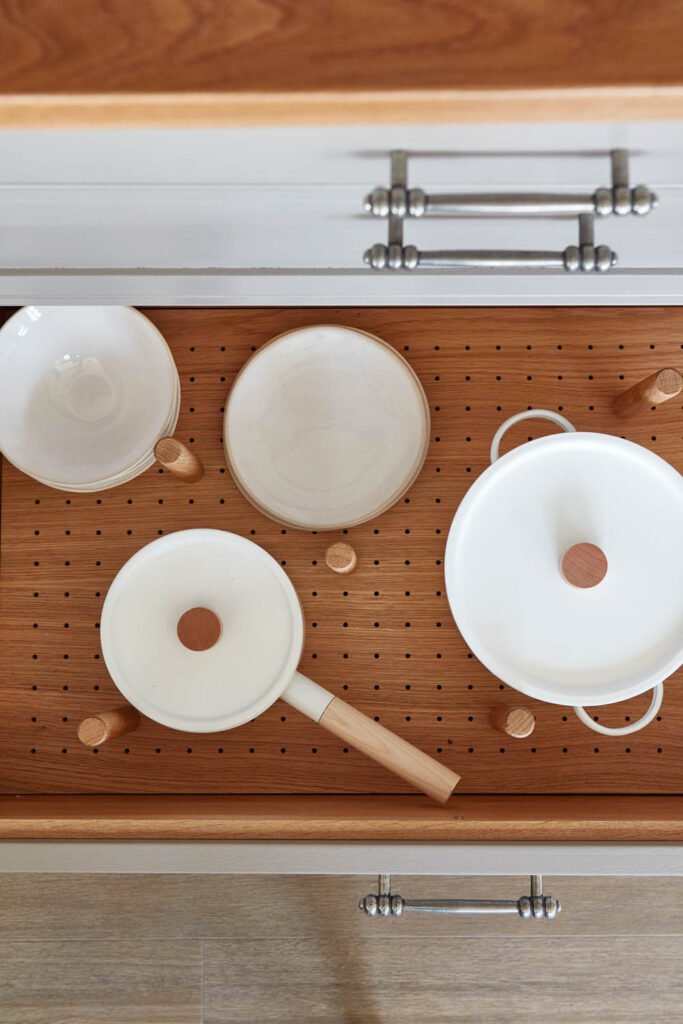
Traditional joinery details – like dovetailed drawers, framed doors and classic shelving – don’t just look beautiful, they also help the kitchen feel calm, composed and built to last. And whether it’s a walk-in pantry, a butler’s cupboard, or pegboard drawers for pans, these storage features are designed to make cooking easier and more joyful.
A bespoke pegboard kitchen drawer: no more fighting to dig out your pots and pans. Image: Naked Kitchens
4) Choose timeless, quality materials that will stand the test of time
A proper cook’s kitchen takes a beating – all that chopping, stirring, boiling, baking, plate-stacking, drawer-opening and fridge-foraging. That’s why materials matter.
High-quality timber cabinets in oak or walnut veneer finishes, and worktops of solid timber, quartz or marble are great investments for the long term, while hand-finished drawers and precision-made doors with well-made handles will survive all that endless opening and closing.
Every home cook has their quirks, preferences and rituals – and a kitchen should reflect that. From the colour of your cabinets to the type of handles you choose, every detail is an opportunity to express your style.
Don’t be afraid to think outside the box: for example, traditional styles can be bold and unique. A Shaker kitchen in a strong heritage colour, paired with brass taps or patterned tiles, can feel just as expressive as a contemporary space. The trick is to combine lasting elegance with thoughtful details – perhaps a deep Belfast sink or a freestanding painted pantry cupboard.
These elements give the kitchen depth and narrative – a sense that it belongs to you, and to the house it’s in. It’s why so many of our clients mix classic styling with their own distinctive twist. (For more tips on style, check out Choosing colours for your kitchen – an expert guide.)
6) Make room for a touch of magic
Finally, every kitchen deserves a moment of joy – an unexpected bespoke feature that lifts your spirits whenever you see it.
It might be a secret spice drawer, a mirrored bar cabinet, a built-in coffee nook, or even a dedicated drawer for your favourite salt! Some of our most-loved kitchens include ingenious personal touches that feel indulgent and a little bit playful.
Bespoke design makes room for these moments. So whether your dream feature is a breakfast pantry, a wine fridge disguised as a dresser, or a pull-out table for rolling pastry – let’s build it in!
A bespoke pull-out drawer just for your Maldon Salt? Why not?… Image: Naked Kitchens
Naked Kitchens make beautiful, bespoke, bomb-proof kitchens which, thanks to their unique combination of British craftsmanship and cutting-edge automation, don’t cost the earth. They can custom-make the cook’s kitchen you dream about: any size, any space, any design; and built for life.
This article will be exploring all things kimchi and understanding the fermentation process behind it.
We first delve into what kimchi is and the history behind the dish, before looking into how you can serve it with different dishes.
After that, we take a look at the science of kimchi, understanding the fermentation process involved to make the dish and the chemical processes that occur. With belly’s sure to be rumbling, we finish off by catching up with the talented Chef Judy Joo, where we share her incredibly tasty pogi kimchi recipe, (cabbage kimchi), and demonstrate her methods of making the much-loved dish.
What is kimchi?
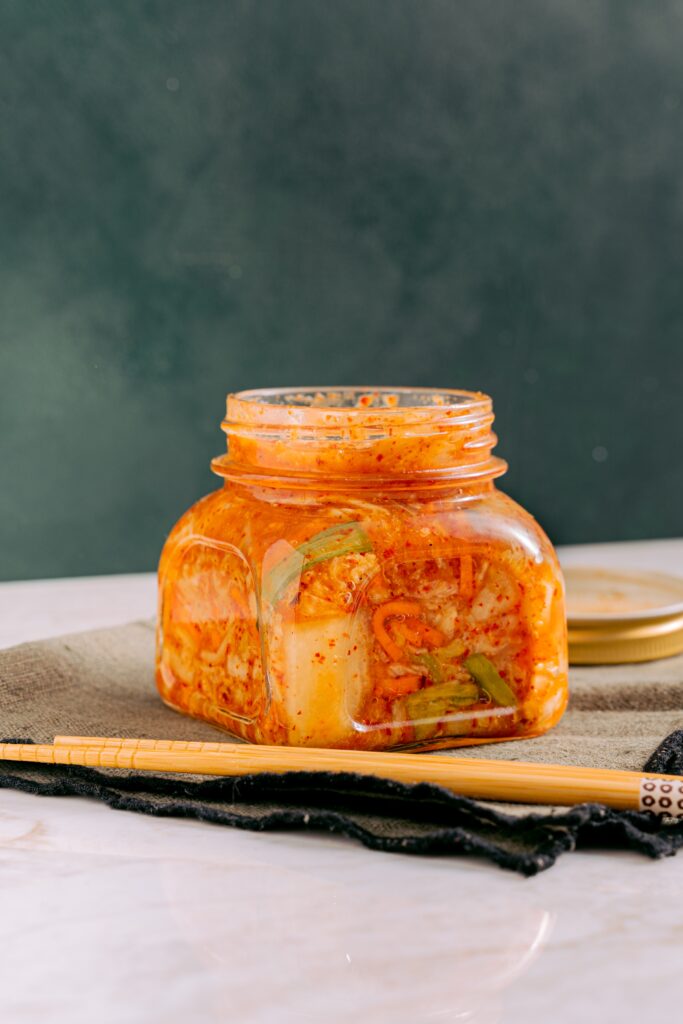
Kimchi is a traditional, fermented vegetable condiment for many Korean households, and has been for generations. The original name for kimchi was ‘chimchae’, which translates to ‘salted vegetables’. The origin of the dish began over 3,000 years ago, where Korean ancestors salted and fermented their vegetables to keep during the cold winter months, obtaining a balance between health and nutrition.
The dish has a complex flavour profile comprising of vegetables, such as napa cabbage, and the unique paste that you make from Korean red pepper powder (gochujangyong gochugaru), garlic, ginger, chilli, salt and fish sauce. This leaves a strikingly rich, red colour that has become kimchi’s signature.
You then slather the paste into the vegetables to make the kimchi. Although cabbage is the most popular vegetable to use, you can also include carrots, radishes and scallions which are all frequently used, depending on the region and season in which they are produced.
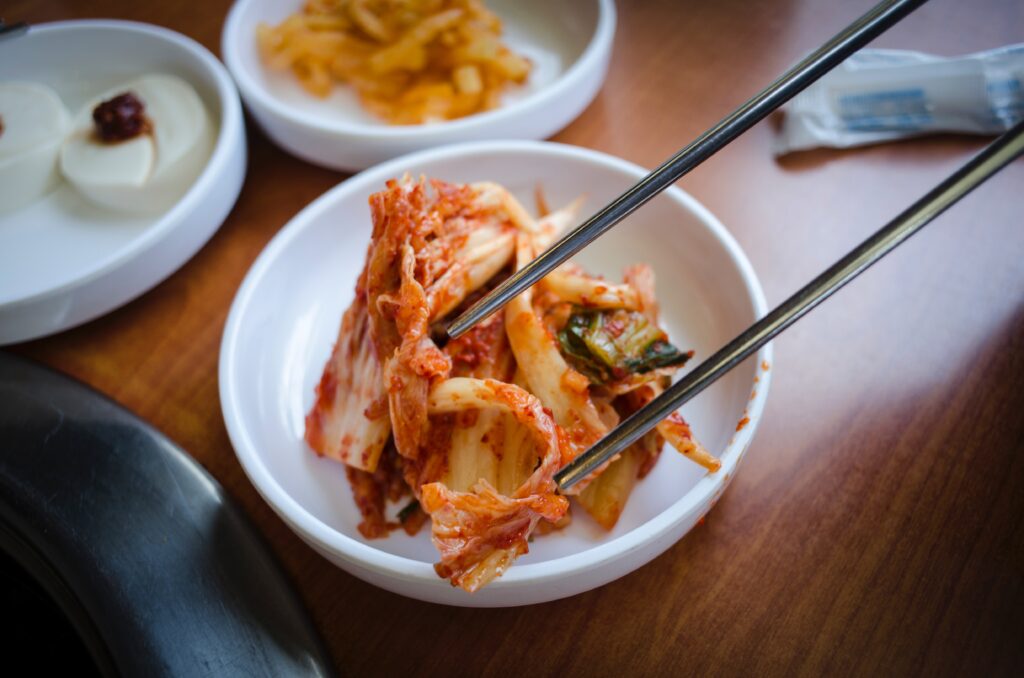
The taste of the mixture, once pickled and fermented, can vary depending on the ingredients used, but the dish generally has a spicy, sour and almost tangy taste to it. Generally, the longer you let the paste ferment in the fridge, the flavour will get deeper and intense.
Kimchi uses
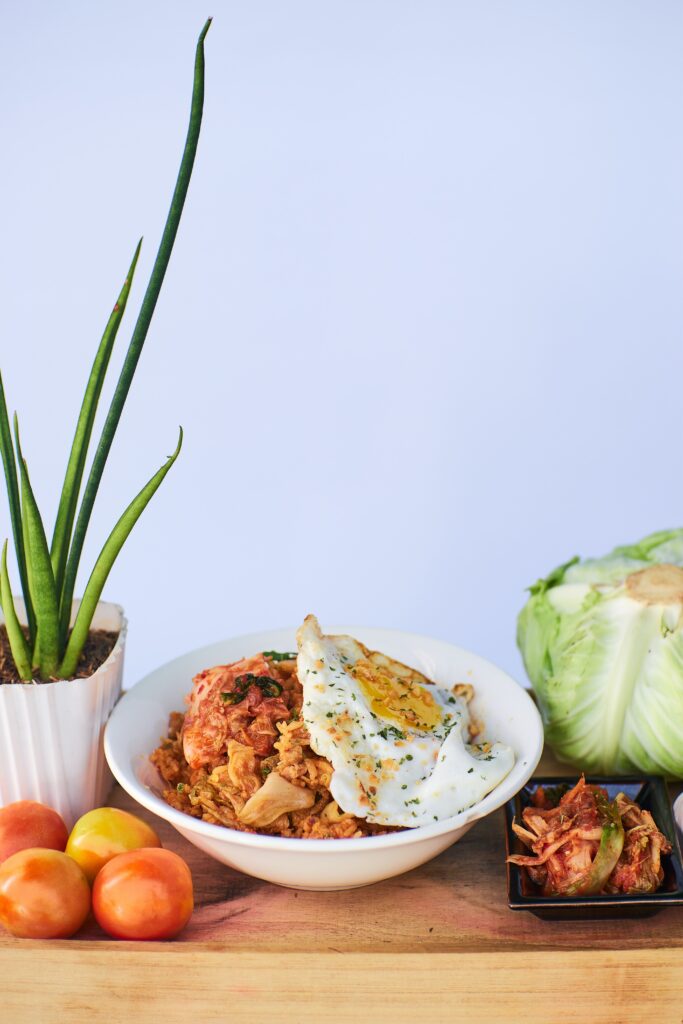
In Korean culture, kimchi can be served with every meal. For breakfast, it is usually paired with rice. Kimchi bokkeumbap (fried rice) is one of the post popular ways to enjoy kimchi in Korea.
The options are endless when serving kimchi for lunch and dinner, but kimchi jjigae (kimchi stew) is a staple in Korea. It’s a combination of kimchi, tofu and juicy pork, with each ingredients slowly melting in your mouth to create the ultimate flavour sensation.
The process of making kimchi involves brining (salting) the vegetable mix to draw out the water content. This helps to preserve the ingredients and help the seasonings to penetrate and seep into the food over time. We recommend using Maldon sea salt flakes to provide the ideal concentration, which is a range between 2-5% to create the perfect kimchi.
Organic lactic acid, produced by the bacteria during fermentation of the vegetables, creates the optimum PH of 4.2 for kimchi to obtain it’s delicious and unique flavour that we all know and love.
The process can only occur when a salty and oxygen-free environment is successful. To put it simply, mix vegetables and salt together and put them in a air-tight container/jar.
The fermentation process of kimchi is considerably short in comparison to other fermented-based dishes such as sauerkraut. Kimchi can easily ferment at room temperature for 2-3 days, whereas sauerkraut would need to ferment for about 3-4 weeks!
Chef Judy Joo
Judy Joo is a talented Korean-American chef, restaurateur and author of two best-selling cookery books, as well as being featured in Forbes Travel Guide, National Geographic and The Guardian. Considered as being the leading expert in Korean cooking for the West, Judy showcases Korea’s cuisine in many distinctive and vibrant flavours, sharing her heritage throughout the dishes she creates.
From moving to London, Judy has shared her talent and skillset in an impressive selection of restaurants, including Restaurant Gordon Ramsay, Claridge’s and Boxwood Café. Today, she is admired by many for battling her way through the food industry and encouraging people to live outside of their comfort zone.
Cabbage Kimchi Recipe (Pogi Kimchi)
Judy reassures us that although kimchi may look daunting, the recipe is very straightforward! You only need to have one/two large bowls for the brining of the cabbage and large container to ferment it in. She does recommend that you wear plastic or latex gloves when smearing the paste onto the cabbage leaves to avoid them feeling a little tingly and potentially staining your hands (only temporally!).
Serves: 4.5 litres (8 pints)
Ingredients:
2 litres (3 1⁄2 pints) warm water
225 g (8 oz) coarse sea salt (we recommend Maldon Salt)
1 very large Korean cabbage or several heads Chinese cabbage (2.2–2.7 kg/5–6 lb total), bottom(s) trimmed, wilted and tough outer leaves discarded and rinsed well
In a large bowl, stir together the warm water and 115 g (4 oz) of the salt until the salt has dissolved; let the salted water cool. Meanwhile, partially cut the cabbage(s) in half lengthways, starting from the root end and cutting about halfway to the top. Using your hands, pull the cabbage(s) apart to split in half completely. Repeat so that each half is halved in the same way, which keeps the leaves intact and whole.
Loosen the leaves of each wedge so that they are easy to spread. Sprinkle the remaining 115 g (4 oz) salt over and between all the leaves, salting the core area more heavily. Put the cabbage into a large bowl (use two if they don’t fit) cut-side up. Pour the cooled salted water over the cabbage, then pour enough cold water into the bowl to cover the cabbage; don’t overfill the bowl, as some liquid will be drawn out of the cabbage. Weigh down the cabbage with a plate so the wedges are completely immersed. Leave at room temperature for 6–8 hours, flipping the wedges halfway through.
Rinse the wedges well under cold running water and gently squeeze out any excess moisture. Put the wedges, cut-side down, in a colander and leave to drain for at least 30 minutes.
Meanwhile, in a small saucepan, combine the onions, mushrooms, anchovies, spring onions, the 8 crushed garlic cloves and the kelp and bring to the boil over a high heat. Reduce the heat to maintain a simmer for 20 minutes. Strain the liquid, discarding the solids and leave the anchovy stock to cool completely.
When the stock has cooled, in a food processor, combine the remaining garlic cloves, chilli flakes, fish sauce, salted shrimp, sugar and ginger and process until smooth. Add enough of the stock to make a smooth paste, about 475 ml (16 fl oz) total. Discard any remaining stock. Transfer the spice paste to a large bowl and stir in the carrots, spring onions and radish.
Rub the spice paste all over the cabbage wedges and between each leaf. Pull the outermost leaf of each wedge tightly over the rest of the wedge, forming a tidy parcel. Pack the wedges into one or more glass or other non-reactive containers with a tight-fitting lid (see Tip, below). Press a piece of clingfilm directly on the surface of the kimchi, then cover. The kimchi can be eaten at this young stage or after it sits at room temperature and starts to get sour and ‘bubble’, about 2–3 days. Store the kimchi in the fridge, where it will continue to ferment at a slower pace. I like to age mine at least 2 weeks, but it really is up to preference. Cut the kimchi before serving.
This article has explored the unique history of kimchi and understanding the fermentation process behind it. Judy Joo’s tasty cabbage kimchi is a perfect example of how straightforward the dish is to make, with her recommendations on how to store the recipe before serving.
Make sure you have your Maldon Salt ready when making kimchi! If you are running out, please feel free to browse on our Where to Buy Page to find your nearest store in which stocks our beloved Maldon Salt.
Lastly, we LOVE seeing your creations – please tag us on Instagram using the #maldonsalt so we can share your own kimchi creations!
We’ll first take you on a journey of understanding the two salt’s varying origins; their composition, taste and other relevant factors to help provide a clear comparison of the two.
After getting to know the history behind the salts, we then demonstrate the usage, knowing which salt is better suited for a particular dish or beverage to the other.
Once we have covered off all things cooking and seasoning, we touch upon the importance of ethical sourcing of the two salts, before letting you all know where you can purchase your very own pack of our Kalahari Desert Salt and Himalayan Pink Salt, Selected by Maldon.
Kalahari Salt vs. Himalayan Salt: Comparisons
Origin
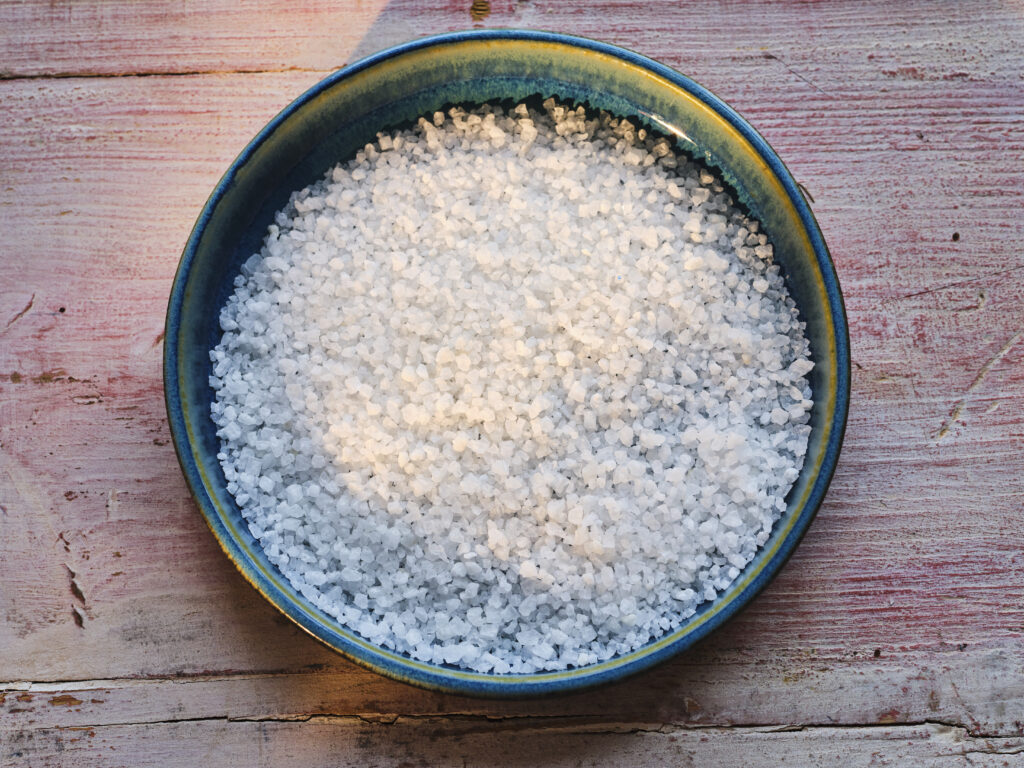
Kalahari Salt:
Firstly, Kalahari Salt is sourced from the vast desert plains of the Kalahari Desert in South Africa, where natural salt formations occur from an underground salt deposit that has existed for millions of years. It is why Kalahari translates to the phrase ‘the land without water’, as salt lakes, like Lake Makgadikgadi, that had once existed have since dried up from continuous water evaporation, leaving a salt desert in its place.
The salt is extracted from the natural underground salt deposits, where water dissolves the salt to create a brine solution. After that, it brought to the surface and then it is then dried from the sun’s rays to leave a coarse rock salt as the finished product.
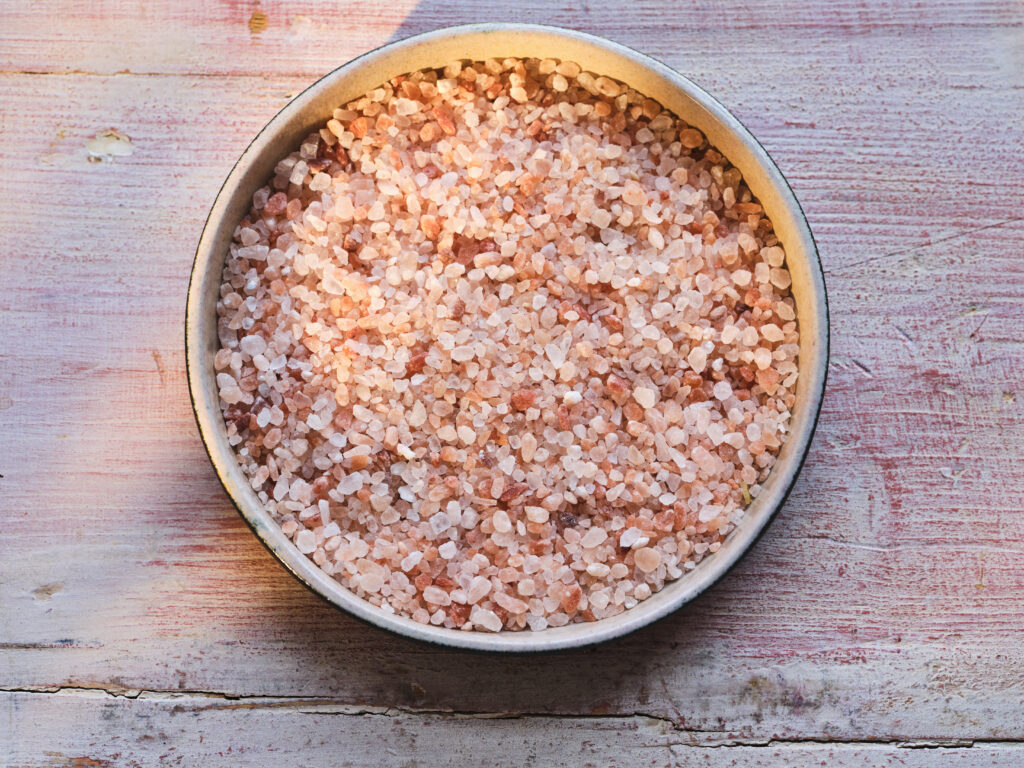
Himalayan Salt:
In contrast, Himalayan Pink Salt is sourced from the foothills of the Himalayas in Pakistan. Deposits were formed thousands of years ago when ancient seas came inland and slowly began to evaporate, leaving behind natural salt accumulations.
When continents shifted through tectonic activity, the rock that surrounded the seabed was forced to shift upward through constructive plate boundary pressures, creating a mountain range. This mountain range is now known to many as the Himalayas, where rock crystals of salt can be mined from areas close to the range to source the popular rock salt.
Composition
It is important to note that all types of salts are made of sodium chloride, with the nutrient content varying only slightly. These trace minerals are why composition may differ slightly in their structure and colourisation. Both salts are completely additive free, being of natural composition only.
Kalahari Salt:
Once extracted from the desert, the Kalahari salt holds a coarse grain size, containing many minerals and trace elements.
This is why Kalahari salt is white in colour, due to the evaporated water from the lake leaving a thin layer of trace minerals under a layer of pure white crystal salt, which is roughly 98% sodium chloride.
Himalayan Salt:
This rock salt is famous for its rosy pink hue due to the minerals within the underground salt deposits that it is mined from. Trace minerals of calcium, magnesium, potassium, copper and iron all play a big part in the colourisation of the Himalayan salt.
Himalayan salt, like Kalahari salt, is also coarsely ground in its most unrefined form, but can be purchased in a more finely grounded version if desired.
Taste
Kalahari Salt and Himalayan Salt:
Because all types of rock salt are composed of sodium chloride as the majority element, there is very little difference in taste.
Himalayan Pink Salt tends to hold a subtle sweetness to its flavour profile due to containing trace elements of iron oxide. In comparison, Kalahari Desert has been known to have a more delicate taste due to the way it is extracted.
Kalahari Salt vs Himalayan Salt: Usage
Kalahari Salt:
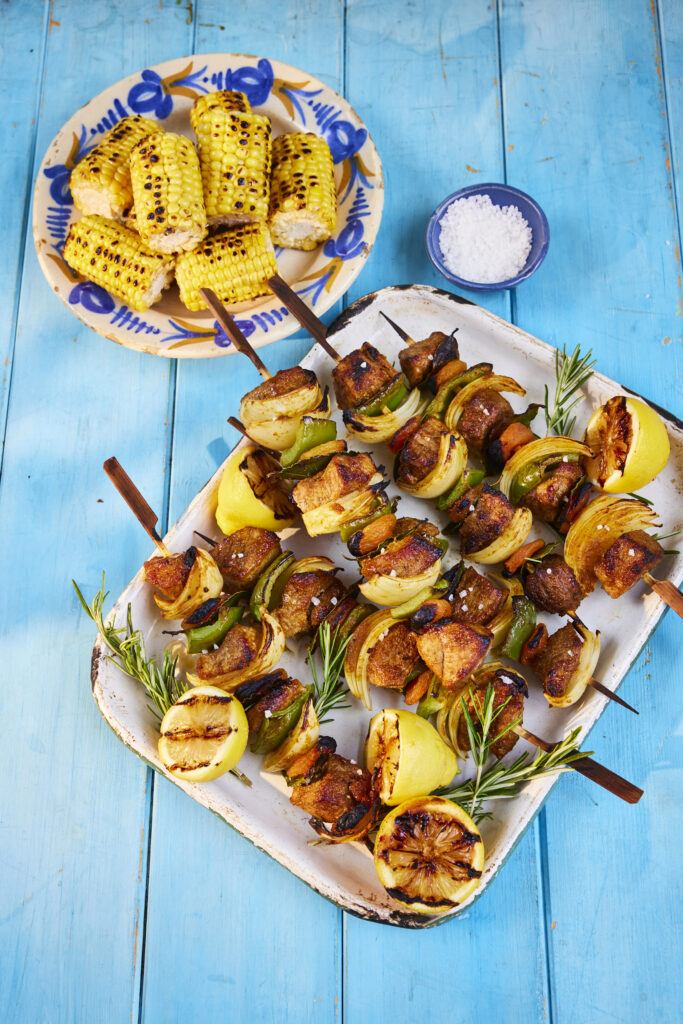
Kalahari Desert Salt is ideal for boosting the flavours of meat dishes. It can be used on meat for barbecuing and grilling (think of a traditional South African Braai). It is also great when added to fish, white meat and poultry.
Not only is Kalahari Salt used for just meats, you can incorporate the salt into baking. The delicate release of the saltiness is perfect for cooking authentic breads such as mealie bread, known as mealiebrood.
Himalayan Salt:
Many use Himalayan Salt as part of the cooking process for sauces and marinades – which is why it is perfect when used in curries, dhals and other authentic South Asian dishes.
Because the salt contains a beautiful pink hue, you tend to see the salt used as a salt rim on a delicious cocktail for both vibrancy and texture as you take your first sip.
Kalahari Salt and Himalayan Salt: Ethical Factors
We ensure all our suppliers have ethical standards in place. Both our Himalayan Pink Salt and Kalahari Desert Salt producers have had multiple audits and accreditation in relation to ethical and welfare standards.
We have spent years searching for the perfect partners and we have found producers who have multiple GFSI certificates (Global Food Safety Initiative i.e. BRC) and also have a state-of-the-art optical sorter to ensure only the correct grade of salt is selected. The finished product is then packed in our own BRC Accredited production site in the UK, under the careful eye of our quality assurance team.
Keep a lookout in your local supermarket or wholesaler who could be stocking our Merchants Range!
Kalahari Salt vs. Himalayan Salt Conclusion
This article has taken you on a journey to understanding the differences between Kalahari Salt and Himalayan Salt. From gaining insight to the origins of the salts, to what dishes suit best when choosing from the two.
Selected by seasoned experts, Maldon Salt continues to bring fantastic flavour at your fingertips!
We are delighted to team up with Penguin Books once again to explore the incredibly talented Jane Dunn.
Jane is a bestselling food writer, blogger and photographer from the South of England, where her culinary creativity never ceases to fail! From birthday cake cookies to gin & tonic cupcakes, Jane’s recipes have become worldwide favourites, promising keen bakers recipes that are full to the brim with deliciousness and a touch of nostalgia.
So…it’s with no surprise that with the launch of Jane’s THIRD cookbook, ‘Jane’s Patisserie Everyday,’ it has also become the NUMBER ONE bestseller for Sunday Times. The book covers from loved classics of chunky cookies and cloud-like cupcakes, to delicious savoury tray bakes and cheesy breads!
With over 70 new and exclusive recipes that have been requested by fans, Jane has created a cookbook that has everything you need to produce showstopping bakes for your friends and families. Additionally, there are 30 classic favourites to choose from, including tips on how to freeze your bakes and also a section on free-from cooking.
A few recipes include: Carrot Cake Blondies, Marmite & Cheese Buns and Chocolate Cheesecake Muffins….and many more!
In Conversation with Jane Dunn
With a (big) slice of cake and a cup of tea, we managed to sit down with Jane and discuss all things about the release of her newest cookbook; from looking into the inspirations behind writing the book to what a normal day in the life looks like for her.
Hello Jane! BIG congratulations on the release of your THIRD book! Tell us, what inspired you create your brand-new cookbook?
Ohhh thank you so much! I genuinely can’t believe I’m on my third book already, it feels completely surreal. I wanted to make sure with my third book that I created something that people could genuinely use every day of the week, whether that was for something sweet or savoury, and have delicious recipes to enjoy. I have always aimed my recipes at people who have absolutely no ability to cook or bake, people who have started their cooking journey, or people who are fully fledged cooks and just want something tasty… it’s a book for everyone.
The book includes 70 new fan-requested recipes! (Which are all utterly delicious!) What was the most requested recipe from your fans?
I adore putting the exclusive recipes into the book as people are so excited to make them, and I adore seeing the bakes on social media! The most highly requested book by far was the cornflake brownies, and the tiramisu… they were tied for first place and I can see that so many people have made them already!
You also feature plenty of classics within your book…come on, you must have a favourite!
Classic bakes and meals are by far the best ones out there – you cannot beat a classic such as the custard creams, party rings, school cake and so on…. I struggle to pick however as I adore them all. I reckon I would eat the jam roly poly over and over again though, with LOTS and LOTS of custard to boot. My mum and dad however are superfans of the spotted dick recipe as it’s their favourite classic.
What would be your top tips for someone wanting to get into baking?
It may sound silly, but you just want to take it slow… make sure you read through the recipe, make sure you have some weighing scales, and if you’re nervous, grab a super cheap oven thermometer and you will be fine. Baking may be like a science, but it’s really easy once you have those bits sorted… baking is like therapy for me and I adore it, it’s nice to follow a process and take your time with it rather than having to rush about and feel stressed. You can enjoy making it, decorating it, and of course eating it! Bake what you want to bake, become confident with the basics, and then have fun experimenting!
There’s a whole chapter dedicated to ‘Free-From’ – is this something that you are passionate about sharing to your readers?
Oh yes I definitely wanted to bring some baking inspiration to free-from in my third book. It’s a chapter that is designed to help inspire people who haven’t done free-from baking before, and a chapter to help you out if you suddenly have a guest with dietary requirements. There are some simple recipes in there as go-to’s as well as swaps that can be super useful in the baking and cooking world to suit gluten free and also vegan. I have many friends who have dietary requirements and I always want to be able to cater for them as well.
What does a normal day in the life look for you, Jane?
I would say my days are probably the cosiest of days, and I am super lucky. I generally wake up, grab a coffee and walk my mad dog Thor, and then we go via the shop to my studio and bake. My studio is right next to a farm, so I usually have to drive past Lottie the donkey who I can hear throughout the day. I spend most of my time testing recipes over and over, whilst writing down my notes and editing videos whilst everything is cooling. I always have a team of trusty taste testers about to give feedback, and they are always super complimentary… it’s funny to watch people nab as much cake as they can get away with. I usually spend some time going through social media, answering any dilemmas and also interacting with my followers as I adore it, and it’s so nice to see people make my recipes and get involved. I am very lucky with what I do as it brings so many people so much joy, and I just love it myself.
Name three things in the kitchen you can’t live without!
I would have to say it’s my weighing scales, a decent spatula and my parchment paper stash. Genuinely I can’t think of how many weighing scales I have been through now after pouring liquids onto them one too many times, or simply using them too many times… they’re an absolute must. My spatulas have to have a decent 90º angle on them so they can get to every single drop of ingredients in a pan, with an ever so slight bend to use them in a bowl… I hate wasting ingredients so I am a firm believer in scraping that bowl clean with your spatula. And finally my parchment paper stash… you can’t be a baker without parchment paper in my opinion, the amount of tins I have to line on a daily basis, and it makes it so much easier!
These little parcels of heaven are so delightful and moreish. Jane loves to serve hers with plenty of clotted cream and a cherry conserve, but you can serve them however you like. These are a great ‘make-ahead’ option as you can prep the scone dough, shape and then freeze – you just need to add 2 minutes to the baking time.
Makes: 9
Prep: 30 minutes
Baking time: 10-13 minutes
Cool time: 30 minutes
Lasts: 3+ days, at room temperature
Ingredients:
100g chilled unsalted butter, cubed
325g self-raising flour, plus extra for dusting
150g ground almonds
50g caster sugar
1 tsp baking powder
½ tsp Maldon sea salt flakes
190ml whole milk
1 tsp lemon juice
1 tsp almond extract
150g glacé cherries, chopped
1 egg, beaten
30g flaked almonds
Method:
Preheat the oven to 220ºC/200ºC fan and line a large baking tray with parchment paper.
Place the tray in the oven to preheat.
Add the butter, flour, ground almonds, sugar, baking powder and Maldon Salt to a large bowl. Rub the ingredients together with your fingertips until the mixture resembles breadcrumbs. Warm the milk in a pan on the hob or in the microwave, then pour into the mixture with the lemon juice and almond extract. Mix the dough together with a spatula, adding the glacé cherries.
On a floured work surface, tip out the scone dough and flatten with your hands until 5cm thick. Cut out eight scones using a 6–7cm cutter. Carefully place onto the preheated tray, then glaze with the beaten egg.
Sprinkle over the flaked almonds, then bake in the oven for 10–13 minutes, or until golden.
Leave to cool slightly and then enjoy.
Want to create a recipe from this book?!
You can find where to purchase Jane’s NEW cookbook here and start baking delicious sweet treats and savoury snacks for your friends and family.
Make sure you have your Maldon Salt ready for these recipes! If you are running out, please feel free to browse on our Where to Buy Page to find your nearest store in which stocks our beloved Maldon Salt.
Lastly, we LOVE seeing your creations – please tag us on Instagram using the #maldonsalt so we can share your own take on Jane’s recipes!
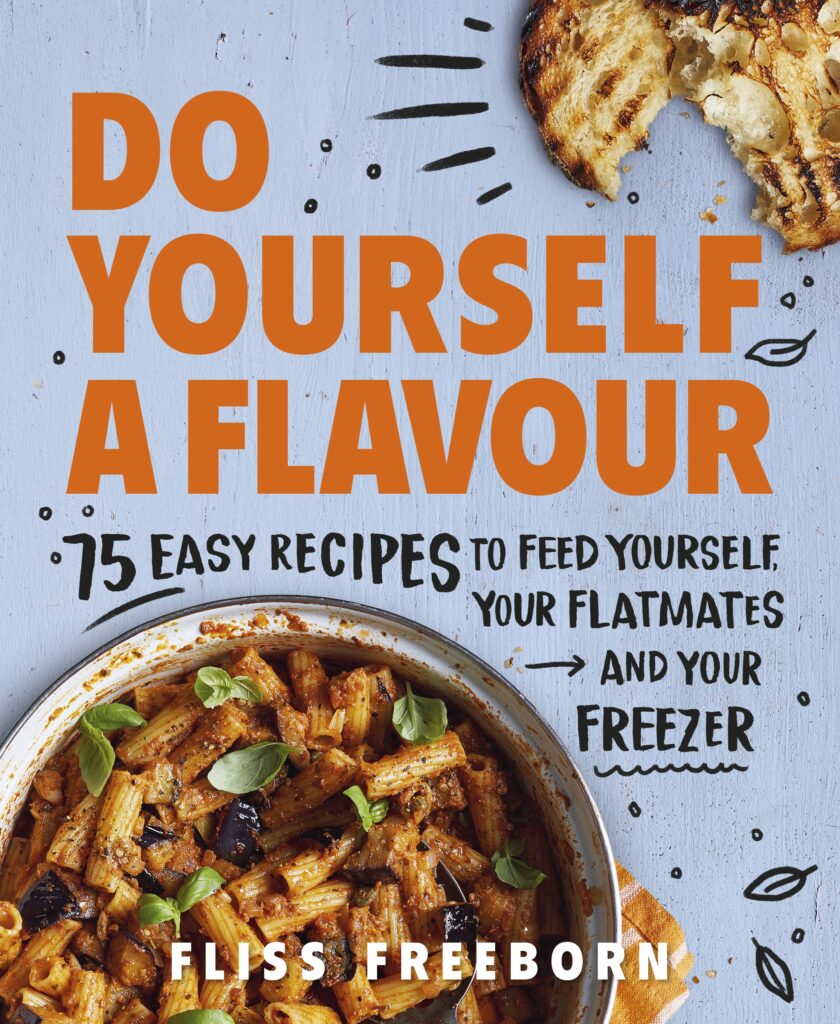
Do Yourself A Flavour by Fliss Freeborn (Ebury Press, £17.99) Photography by Luke Albert.
In this month’s edition of Maldon’s Cookbook Club, we have partnered up with Penguin Books to explore the culinary masterpieces of Fliss Freeborn.
Fliss has been writing about food since she was 8 years old, where her first ‘cookbook‘ featured recipes including clotted cream and golden syrup on toast! It was her love for cooking which allowed her to share recipes and quirky takes on food through her own blog, ‘Student Cuisine for the Gloomy Teen’. The great success of the blog eventually led Fliss to winning the award for best cookery writing at the 2023 Fortnum & Mason Food and Drink Awards – an amazing achievement!
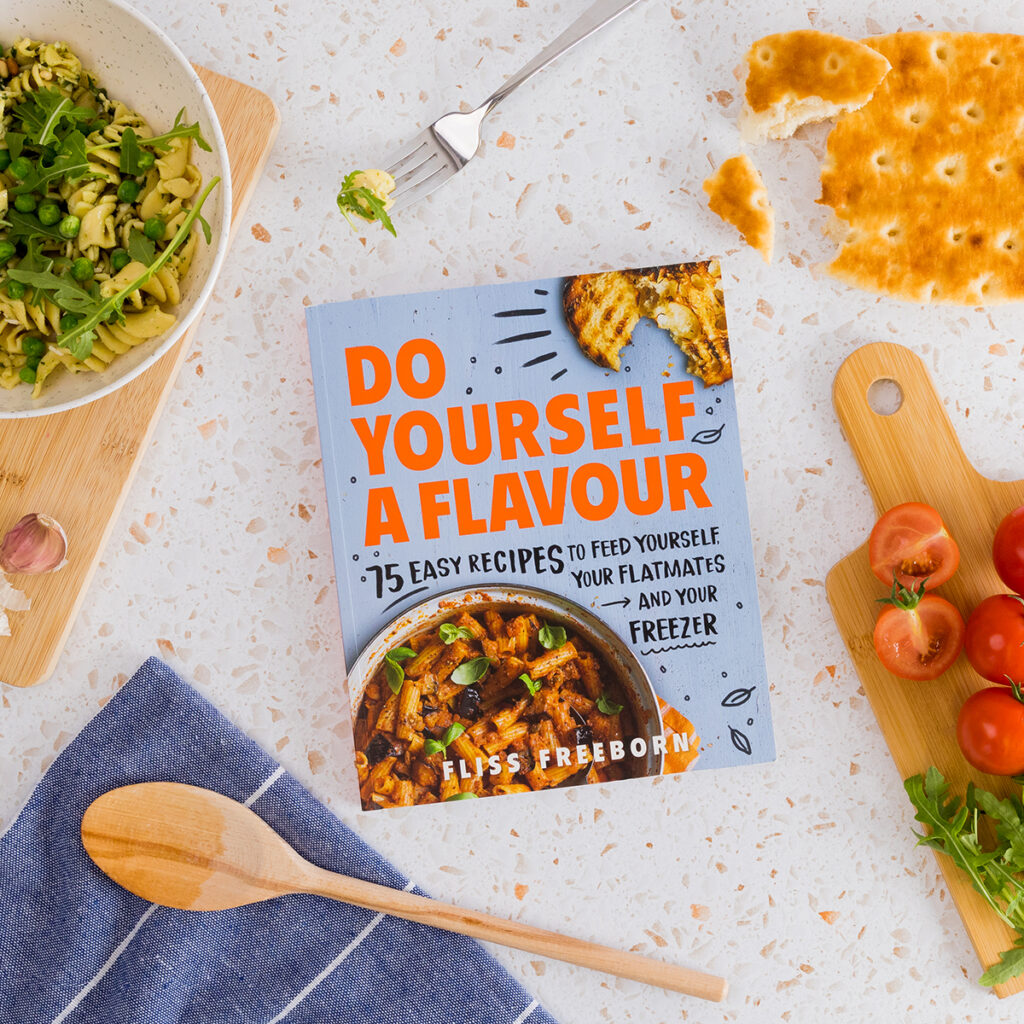
Do Yourself A Flavour by Fliss Freeborn (Ebury Press, £17.99) Photography by Luke Albert.
And the excitement doesn’t stop there…June 27th was the date in which Fliss released her debut cookbook: ‘Do Yourself a Flavour‘.
If you are a young person wanting to expand your culinary skills beyond basic pot noodles and beans on toast, than this cookbook will be your best friend! Too well does Fliss understand the struggles of cooking during university on a restrictive budget. She wants show people that you too can create delicious tasting foods without breaking the bank or needing the latest kitchen accessory!
With a collection of over 75 recipes to choose from, you’ll find yourself reading the chapters of speedy meals, tasty dinners and crowd-pleasing feasts. If you like the ‘sweeter’ things in life, she also offers easy sweet treats and bakes. Hilariously, she also dedicates a few pages for feeding the drunk or when you are hungover – which can be a real life-saver!
The cookbook is also brimming with tips and tricks, from using up leftovers to cooking for the freezer – this is truly the ultimate ‘foodie’ guide for any young person looking to advance their cooking.
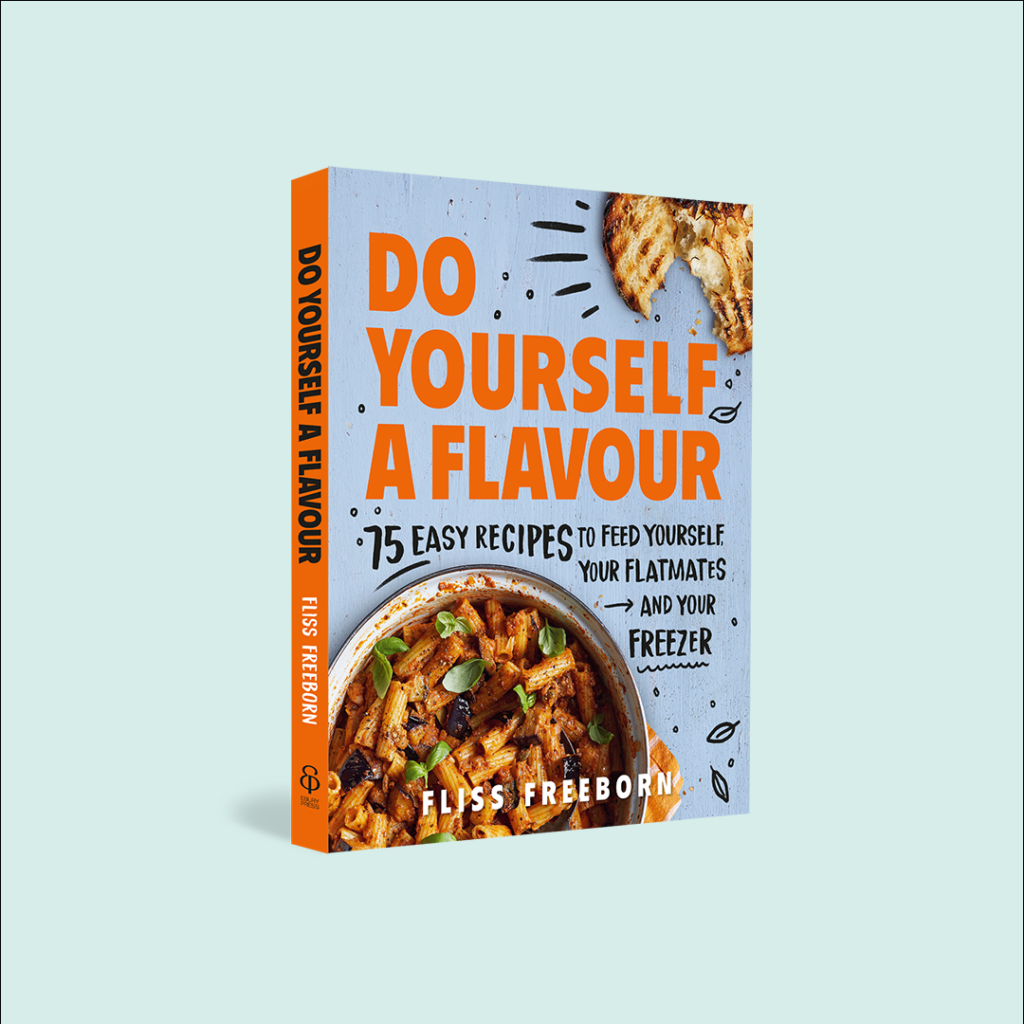
Do Yourself A Flavour by Fliss Freeborn (Ebury Press, £17.99) Photography by Luke Albert.
In Conversation with Fliss Freeborn…
When Fliss had a spare minute from cooking, we had our notepad and pen at the ready, wanting to get to know Fliss on a more personal level. We touch upon her inspirations behind the cookbook to her own top tips for people wanting to learn how to cook. We also look into what a normal day in the life looks like for Fliss!
Fliss, we are obsessed with your cookbook ‘Do Yourself a Flavour’. Tell us, where did your love for cooking first come from?
My parents considered cooking from scratch to be a non-negotiable life-skill, so I was lucky enough to have been encouraged in the kitchen from a very young age. I even had one of those high-chairs which clamped to the kitchen counter to save space – my parent’s first kitchen was tiny but they still wanted to involve me with everything. My dad used to make me taste and smell everything that was going into the cooking pot, which included all the different herbs and spices from the rack mounted on the wall. I then started baking at the age of around six, and I was obsessed with that for a good few years – it was during the crazy cupcake craze of 2008-2012 that I got really into cake decoration, which gave me the confidence to experiment with proper meals later on in my teenage years.
Your book has a collection of recipes to help people cook tasty food without breaking the bank – is this something that is important to you?
Yes. My parents split up when I was 14 or so, and to help out, I took over the majority of the cooking and food shopping. We’d never been a financially stable family due to my dad being an entrepreneur with several different businesses which he had to keep afloat – something which I was very much made aware of as a child – so our food budget was never enormous. I am very privileged to have never gone hungry, and to have had lots of educational opportunities given to me, but making food stretch as far as possible and not wasting anything was key in our household, as I’m sure it was in many others. It’s very important to me that we learn to be respectful of the ingredients we’re working with – even if they come, like mine do, from a budget supermarket. Knowing how to make something tasty out of a few cheaper ingredients is a precious skill to have, so I’m thrilled to be able to pass on this knowledge in the book.
There’s plenty of tips and tricks in your book to help young people expand their love for cooking! What would be your main top tips for people wanting to learn how to cook?
As Mary Poppins once said: find the fun and snap: the job’s a game. If you don’t enjoy cooking, it’s always going to be a chore, so find out what sort of things you like to eat and then see if you can find the joy in figuring out how to make it yourself. My second tip is to trust your instincts – you don’t have to be a slave to the recipe. If you taste it and you think it needs more cumin, add more cumin. I say in the book that you have to imagine you have a nonna on your shoulder – if she says ‘a splash more’ you add a splash more. And lastly, slightly antagonistically to that previous tip, do things slowly and carefully at first – you can always add, but you can’t take-away!
There are over 75 delicious recipes to choose from…come on, you must have a favourite!
Ah the age old favourite child question. Well, just like my mother, I do have a favourite* – it’s the mussel linguine, which I originally wrote out as a series of limericks but it’s in there as a conventional recipe too. It uses one of those cheap packets of pre-cooked mussels that lots of people bypass at the supermarket, but amps it up using lots of fresh parsley, lemon zest, chilli and cherry tomatoes. It’s a really uplifting dish.
*Big joke. Huge joke. It’s both me and my brother. We are her favourite. Ahem.
We love the humour of your cookbook, from the title to the catchy chapters; is this your way of showing people to have more fun with cooking?
Yes, I suppose it is – that’s something I hadn’t really considered before, seeing as my writing is simply a direct reflection of the way my brain works. I’m thrilled that my turn of phrase makes sense to other people when it comes to descriptions in my recipes. The humour is also probably subconscious response to the fact that many recipes are written in more or less the same way: do this, add this, stir that and serve. Mine are somewhat – ok, very much – more playful but I still hope are just as functional as those without the humour.
What does a normal day in the life look for you Fliss?
I travel a lot, and also do a lot of ad-hoc temporary work, so having a routine feels like wearing a straightjacket to me: a ‘normal’ day is kind of hard to pin down. To answer your question though, let me take you through what sometimes happens when I’m at home in Glasgow with no direct employer-related obligations.
I’ll wake up at about 9am (sorry, everyone) and then make three cubic feet of tea while having good old scroll through some cat videos, many of which I send to my boyfriend who is already being a productive human at work. Then, I’ll answer some emails and doomscroll Twitter until my social media time limit kicks in, which is always a good reminder to do something useful, like hang up the washing I forgot about yesterday.
I don’t get hungry til around 11:30 usually, and I answer the call of my stomach with whatever I can find in the fridge, which is usually cheese, or maybe some olives, or bread if I’ve made some. Then, I panic about all the things I have to do, so I’ll either have a shower, or go for a brief and hateful jog to delay actually doing the things, before heading to the library or a coffee shop to do some writing. And some more panicking for good measure.
By 3.30pm I’m hungry and restless and ready to buy whatever anyone wants to sell me, so I might head to the local bakery for a spot of cash haemorrhaging before returning home to eat whatever I’ve bought with plenty of salted butter – and possibly a salad if I’m feeling virtuous. After lunch, I start thinking about dinner.
(The above holds unless I’m on a fun writing project, where I can zone everything out including hunger signals, and only exit my trance-like state when I realised I’ve also been needing to pee for the last 12 hours. This trance-like state can continue for about four days, after which I need a holiday to the Maldives but will make do with thinking about sand.)
In the evening, we’ll often be hosting a friend or two for tea. I’ll have planned what I’m making before I invite them, and I’ll usually have done a pudding in advance. If we’re not hosting, we’re meeting pals at the pub. I say we, because at this point, my chap has arrived home from work, so I can show him cat videos in person. But whether we’ve been pubbing, entertaining, working, or simply lounging about watching Taskmaster, we tend to head to bed around 11:30pm where I am guaranteed to have some sort of ridiculous dream sequence involving fish which I’ll have to write down in the notebook on the nightstand at 4am.
What a charmed and peaceful life I lead!
Name three things in the kitchen you simply can’t live without!
Salt, lemons, microplane grater. Easy. And brief because I talked too much in the last one.
Do Yourself A Flavour by Fliss Freeborn (Ebury Press, £17.99) Photography by Luke Albert.
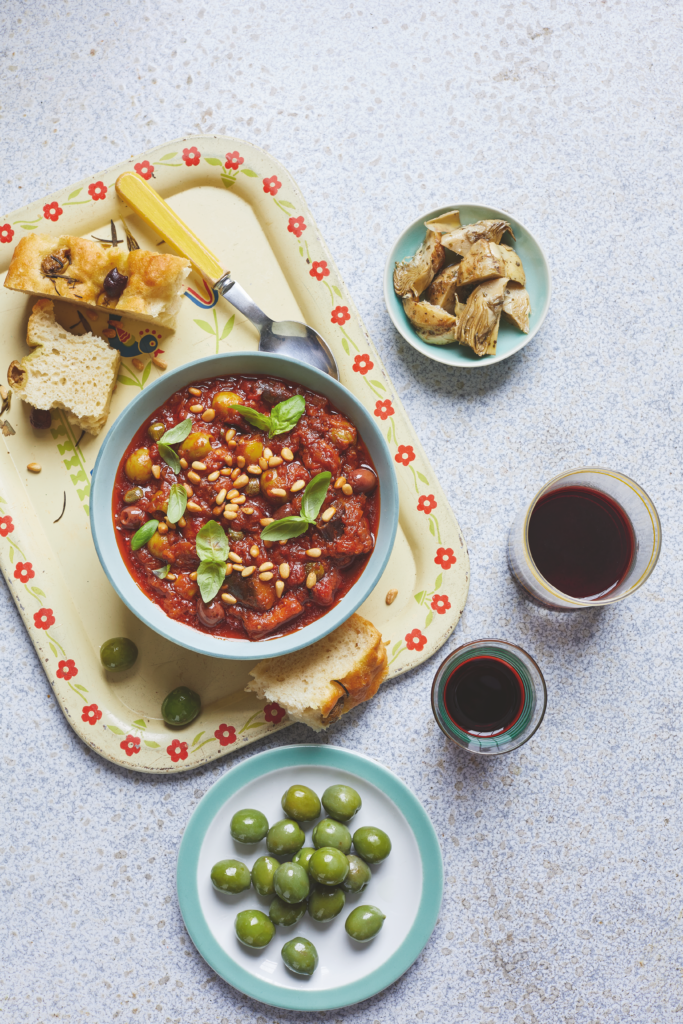
Sicilian-Style Aubergine Stew
Whenever Fliss asks her friends what they’d like to eat, they never really have a clue, to which she suggests either a curry, roast, a risotto or perhaps a ‘caponata’.
‘A caponata?’…
It a sour Sicilian stew made with lots of olive oil, aubergines, tomatoes and capers, lifted by a heavy hit of red wine vinegar. You can use pine nuts to this dish, but Fliss likes to use chopped almonds for a more heartier crunch!
This recipe is closely based on a caponata but with more flexibility on the ingredients. It freezes well, so if cooking for fewer than four people, you can save portions for another rainy day!
Serves: 4 as a main, 6 as a side
Prep Time: 30 minutes
Cooking Time: 1 hour, plus 2-4 hours resting on the hob
Ingredients:
a third of a mug of good olive oil
2 large or 3 smaller aubergines
4 shallots, if you can find them, or 2 medium white onions if you can’t
2 garlic cloves (optional)
2 tins of chopped tomatoes or peeled plum tomatoes
a tablespoon of raisins (exceedingly optional, but very authentic)
2 tablespoons of double-concentrated tomato purée
a smallish glass or half a mug of red wine (about 150ml)
a good tablespoon of capers (if your palate hasn’t yet reached maturity, you may leave these delicious morsels out)
2 tablespoons of pitted olives, or more if you like them (I’ll use whatever’s in the cupboard or fridge; it doesn’t matter if they’re green or black. Again, if you’re not a culinary chad, you can leave these out)
4–5 tablespoons of EITHER (in order of preference) red wine vinegar, balsamic vinegar, white wine vinegar or malt vinegar
salt and freshly ground black pepper
2 tablespoons of pine nuts, if the budget allows, or the same quantity of chopped almonds if it doesn’t, to serve
A pinch of Maldon Salt
a good handful of fresh basil, if you want, to serve
Method:
Pour your olive oil into a large, deep saucepan – it should definitely cover the bottom and come up the sides a little. Place over a medium heat. As it warms up, roughly chop your aubergines into oblongs of around 2–3cm. Add them to the pan, along with some salt, and fry them, stirring often, until the oil has soaked in and there’s a little bit of golden-brown colouring on the flesh – around 6–8 minutes. You may need to do this in batches to get some properly nice browning.
Just as the aubergines are colouring, remove them from the pan and set aside in a bowl – you’ll want them again in just a minute. There should be a small amount of olive oil left in the pan. Finely chop and fry your shallots or onions with a pinch of salt in this oil, adding more if necessary. Cover until they’re translucent and cooked through, around 10 minutes. Add the garlic halfway if you’re using it. Then, return the aubergines to the pan and fry for a little longer. Next, add your tins of chopped tomatoes, breaking up any plum ones with a spoon as you go. Add a good pinch of salt now, and a grinding of black pepper, along with your raisins, if they’re going in. Squeeze in the tomato purée and add the red wine, then stir and simmer for around 45 minutes–1 hour with a lid on.
Once that time is up, stretch and have a cup of tea, then take the chance to add the capers and olives, if using. Next, pour in your vinegar. It should smell really sour at this point, and have a good acidic top note when you taste it, but with a deep richness underneath from all that previous simmering.
Adjust for seasoning (does it need acidity? Or perhaps more Maldon Salt? Or maybe it’s too tangy for you and you need a splash of olive oil? When you’re happy, let it simmer – uncovered – for around 10 minutes while you doom-scroll. You can serve it now, but it’s much better if you switch off the heat and leave it on the hob to meld for a few hours, reheating when you want to serve it.
To serve, toast the almonds or pine nuts in a dry frying pan and scatter them over the pot, along with some torn fresh basil leaves.
Caponata is usually served as a side, but we’ve taken to having this dish as part of an Italian-themed main, served with lots of focaccia, some antipasti, such as artichokes and salami, and a huge green salad.
Do Yourself A Flavour by Fliss Freeborn (Ebury Press, £17.99) Photography by Luke Albert.
Want to create a recipe from this book?!
You can find where to purchase Fliss’ cookbook here and start getting creative in the kitchen!
Make sure you have your Maldon Salt ready for these recipes! If you are running out, please feel free to browse on our Where to Buy Page to find your nearest store in which stocks our beloved Maldon Salt.
Lastly, we LOVE seeing your creations – please tag us on Instagram using the #maldonsalt so we can share your own take on Fliss’ recipes!
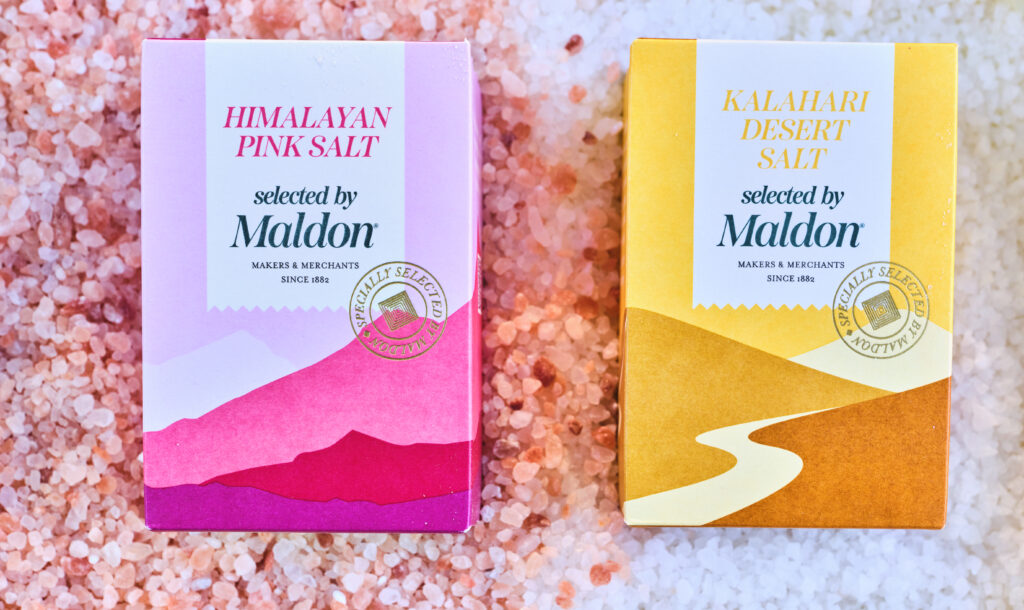
Maldon Salt have been proud markers and merchants of salt since 1882. Our passion to create and celebrate great taste and bringing delicious new products to the tables has driven to the launch of a new range…The Merchants Range.
Selected by Maldon’s master salt merchants, who for four generations have been making and sourcing exceptional salts and seasonings, we proudly introduce to you the first two NEW salts from this range: Himalayan Pink Salt and Kalahari Desert Salt, Selected by Maldon.
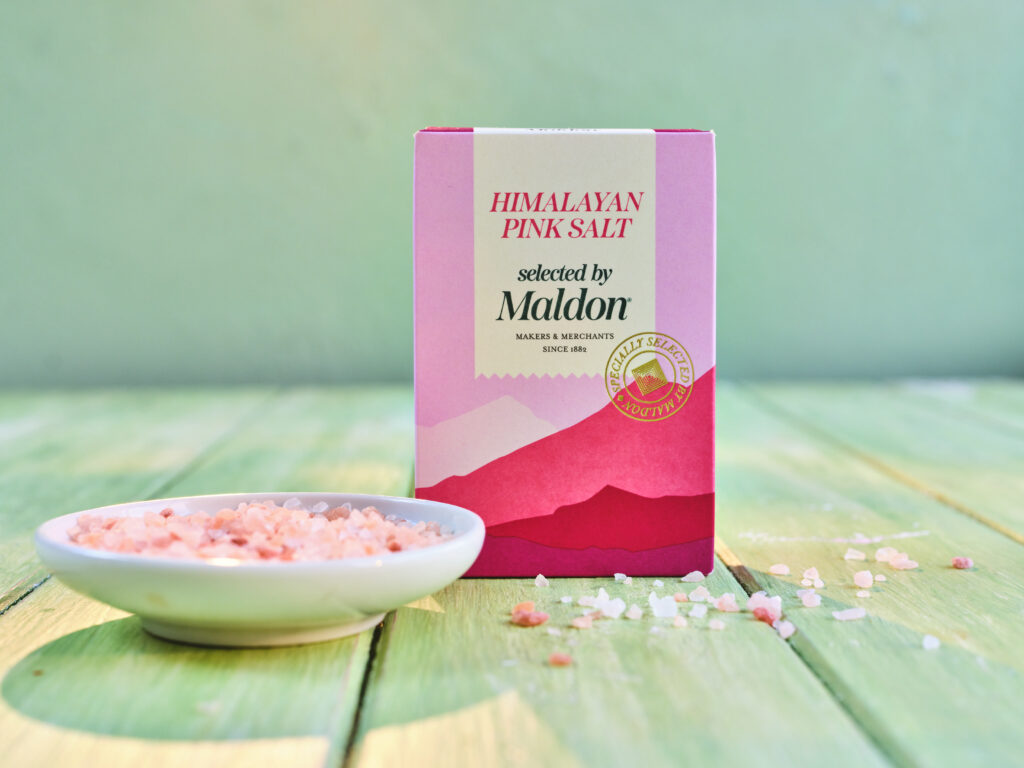
Himalayan Pink Salt, Selected by Maldon
Himalayan Pink Salt is an established trend, that until now has lacked a premium player with a quality product who are able to educate people on it’s usage.
This pink coarse rock is sourced from the foothills of the Himalayas which has been prized for centuries. It’s beautiful pink colour stems from trace elements, concentrated in certain parts of the mine. These differences allow the salt to have a range of colours, from deep to pale pink.
Notably, Himalayan Pink Salt is a quality rock salt that has versatile uses for professional chefs who are looking for special ingredients to elevate their cooking. It is also perfect for cooking authentic recipes from the region. It can be used by adding to curries and sauces whole, or can be put in your grinder for everyday use.
Buy directly from Amazon to have your very own pack now!
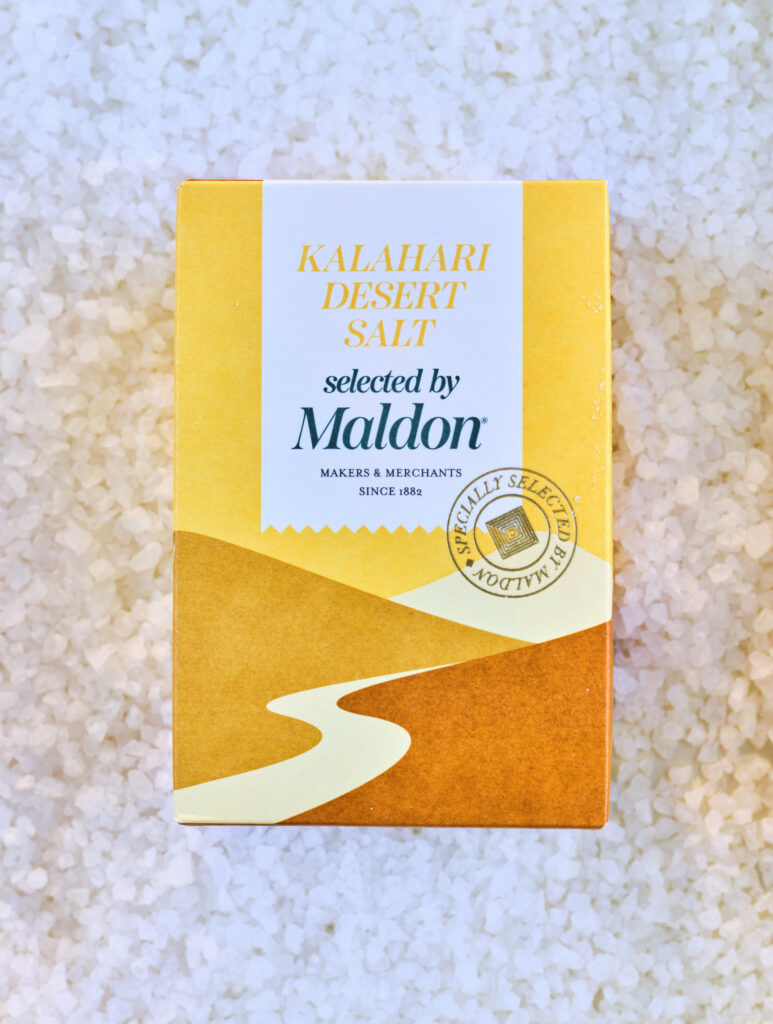
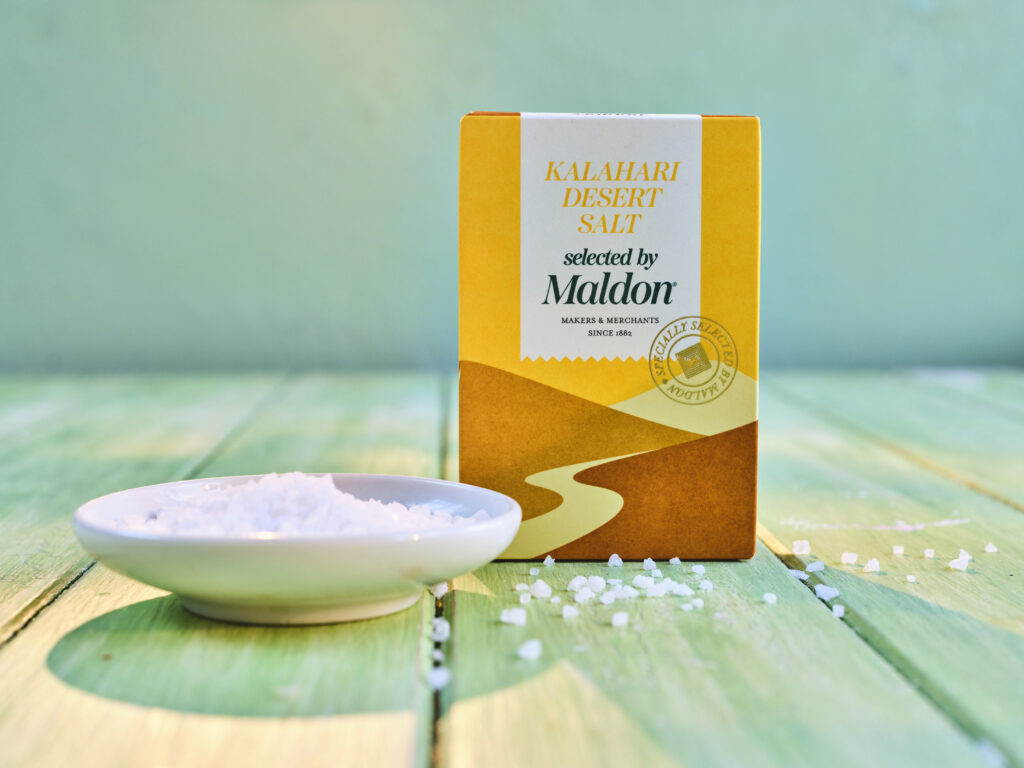
Kalahari Desert Salt, Selected by Maldon
Selected by our seasoned experts, this naturally coarse salt has been harvested from the vast desert plains of the Kalahari, South Africa.
Sourced from the naturally occurring underground salt lake in the desert, the salt is broken down by water, leaving an impressive brine solution that the desert’s sun dries. This leaves the salt to contain essential minerals and trace elements.
We recommend using Kalahari Desert Salt for barbecues, particularly with meat to enhance it’s flavour. You can also use it for baking breads to gradually release the saltiness.
Buy directly from Amazon to have your very own pack now!
Makers and Merchants…
Make sure to keep an eye out in your local store in the coming months…
Tag us on social media with your new packs and recipe creations using the #maldonsalt.
Want to find out more? Please email us on info@maldonsalt.co.uk and keep up to date via social media @maldonsalt.
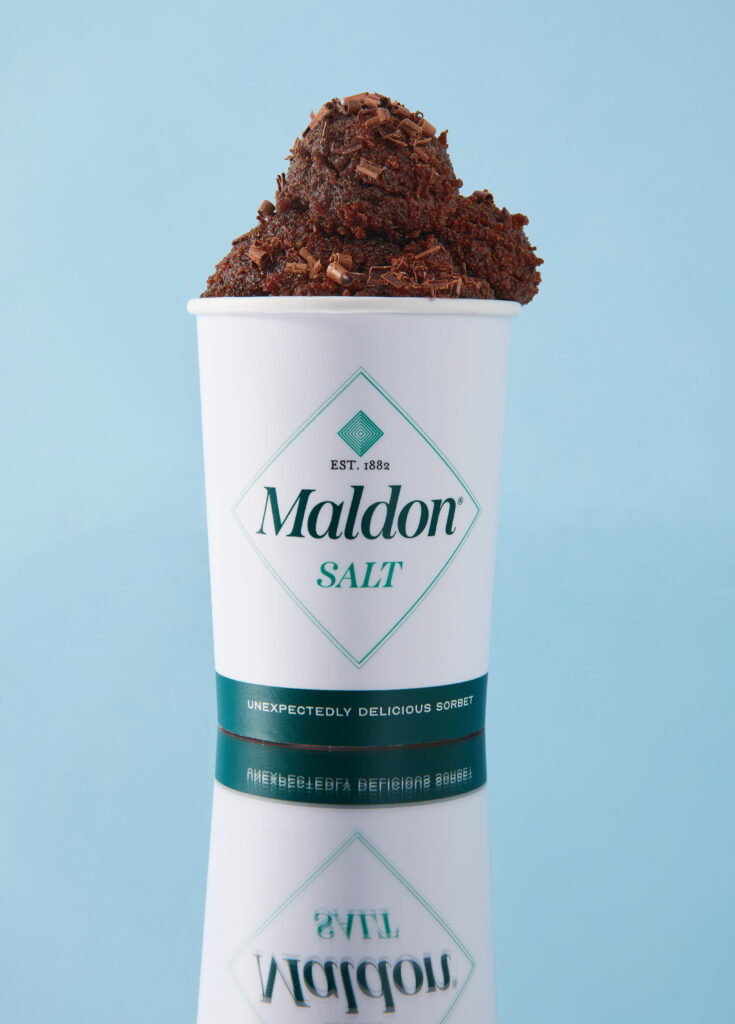
Back by popular demand, the concept store will return to The Village from 29th June – 27th August, serving an unexpectedly delicious line up of ice creams and sorbets. The project is all about bringing the joy of ice cream back…but with a twist! Classic, household names that you would typically find in the pantry are now in the freezer, featuring sauces, condiments, biscuits, breakfasts and of course…salt!
Yes, that’s right! Maldon Salt is part of The Ice Cream Project this year, along with various other classic brands. Hand-made in small batches in Devon, each recipe is created with only the very best ingredients.
Here is the full list of flavours to choose from…
Maldon Salt (Sorbet)* – Rich dark chocolate elevated with Maldon sea salt flakes and dark chocolate shavings.
Ambrosia Rice Pudding – Creamy and delicious, laced with the original Devon rice pudding.
Birds Eye Petits Pois (Sorbet)* – Smooth and refreshing with the natural sweetness of specially selected peas.
Blue Dragon Original Sweet Chilli – Rich, creamy vanilla with the sticky sweet tang of chilli and a touch of heat.
Branston – Mellow cheddar cheese with the ‘chunky, crunchy bite’ of Branston.
Heinz Tomato Ketchup – The unmistakable taste of sun-ripened tomatoes with the perfect combination of sweet, salty and tangy flavours.
Kellogg’s Coco Pops – Milk chocolate with the crunch of chocolate flavoured toasted rice.
Kellogg’s Rice Krispies – Rich creamy milk with toasted rice.
KP Original Salted Peanuts – The great taste and crunch of KP Salted Peanuts with the rich, roasted flavour of peanut butter.
McVitie’s Digestives – Blended with the ‘classic sweet and salty crunch’ of the original digestive biscuit.
TipTree Lemon Curd – Deep and creamy with the distinctive sweet and tart zing of finest sicilian lemon curd.
Ribena (Sorbet)* – The unmistakably delicious taste of juicy blackcurrants, bursting with ‘berryness’.
Warburtons Crumpets – Packed with melt-in-your-mouth toasted crumpet and notes of butter.
*Maldon sea salt, Ribena and Bird Eye Peas are all sorbets. All flavours are made in a factory that handles milk and cream so we can’t guarantee there is no cross contamination.
HAVE A SCOOP!
The Ice Cream Project is live from the 29th June – 27th August 2023. You can have a scoop for £3.50 or delve into buying a 500ml tub for £15.
The Ice Cream Project
11 Pont St, London, SW1X 9EH
Opening Hours:
Monday – Saturday, 10am – 6pm
Sunday: 12 – 5pm
Make sure to tag us with your Maldon Salt ice cream scoop! Use the handle @maldonsalt for us to feature you on your Instagram page.
‘The best way to increase flavour in a dish is to add spice…and it doesn’t have to be complicated!’ – Spice Kitchen.
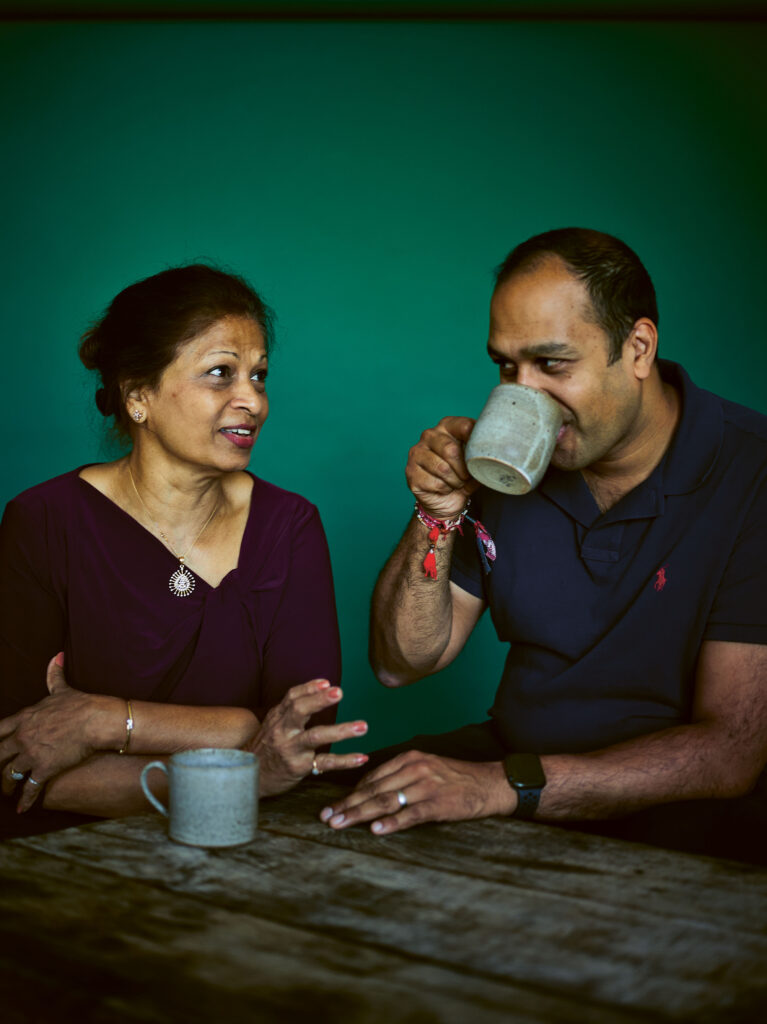
The faces behind Spice Kitchen are iconic mother and son duo, Shashi and Sanjay Aggarwal. The team specialise in producing small batches of freshly ground spice and tea blends from sourcing only the best, freshest raw ingredients across the globe. From this, they then hand-blend, roast and grind to authentic, delicious recipes in which are then sent on to customers.
Well known for their exquisite spice tins, there are various collections to choose from, including their iconic Indian Spice Tin and their Middle Eastern & African Spice Tin, each holding an assembly of 9 vibrant and gorgeously fresh spices that have been carefully selected to make recipes from the comfort of your home. It’s no surprise that due to the exceptional quality of the spices, Spice Kitchen has won 4 Great Taste Awards and went on to win the 2018 Gift of the Year Award!
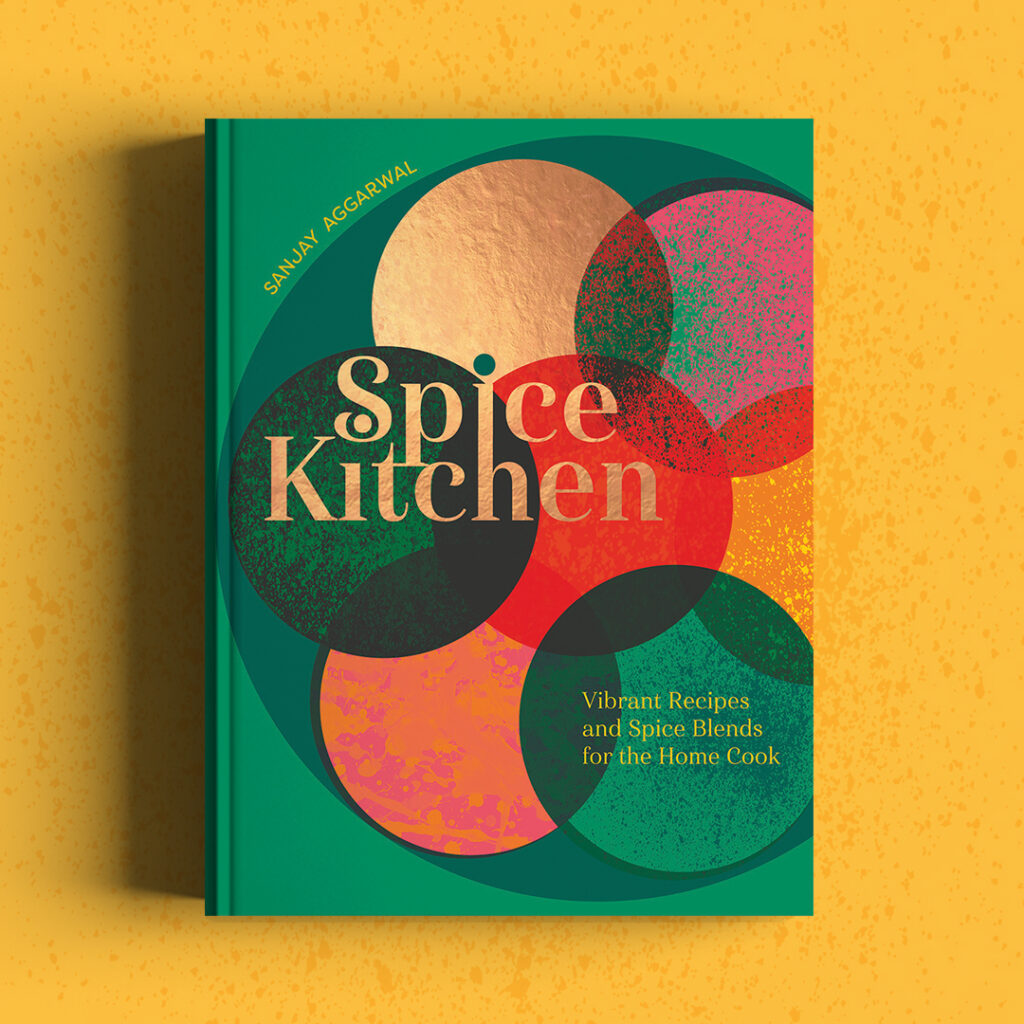
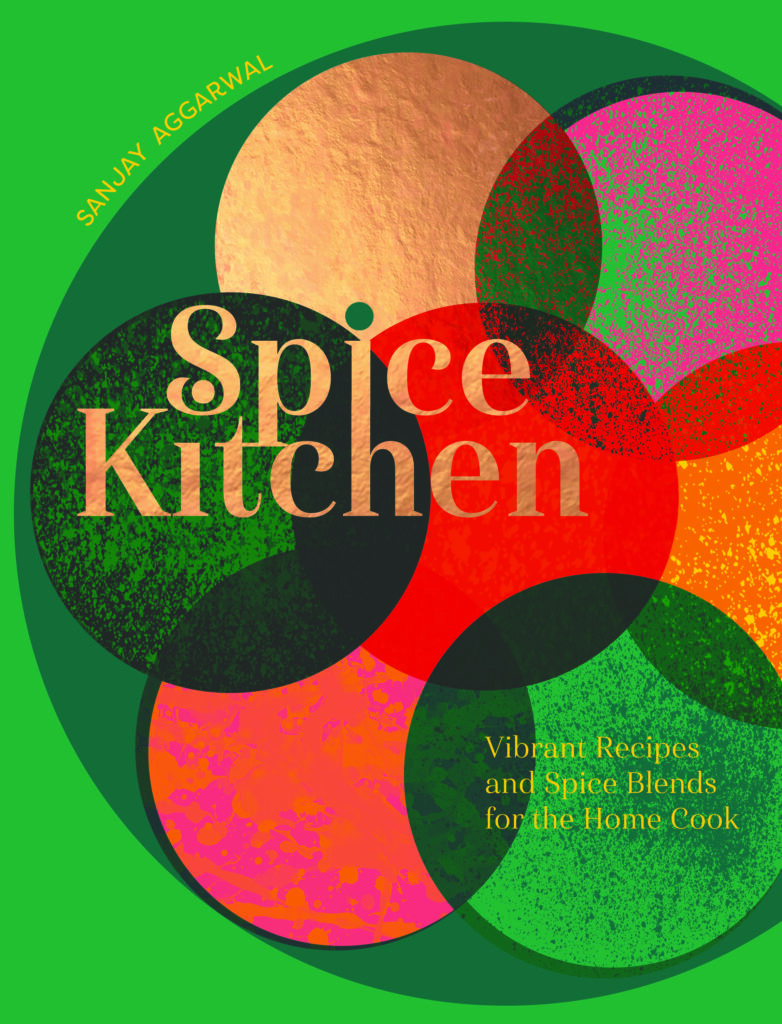
Spice Kitchen by Sanjay Aggarwal (Quadrille Books, £22) Photography by Dan Jones
We are delighted to team up with Spice Kitchen to delve into one of their tasty recipes from the team’s recent cookbook: ‘Spice Kitchen‘. The book is all about empowering you to become confident in cooking with spices and blends, showing you how to transform your mealtimes and add HUGE flavour from the use of one simple spice blend.
Sanjay wants to demystify the inner-panic that you may have around spices and blends, reassuring you that you do not need to waste time, invest in fancy equipment or stock a full cupboard on herbs and mixes to create a delicious dish…simply following the book will unlock you to cook a meal fuss-free and deliver on fantastic flavour!
Spice Kitchen by Sanjay Aggarwal (Quadrille Books, £22) Photography by Dan Jones
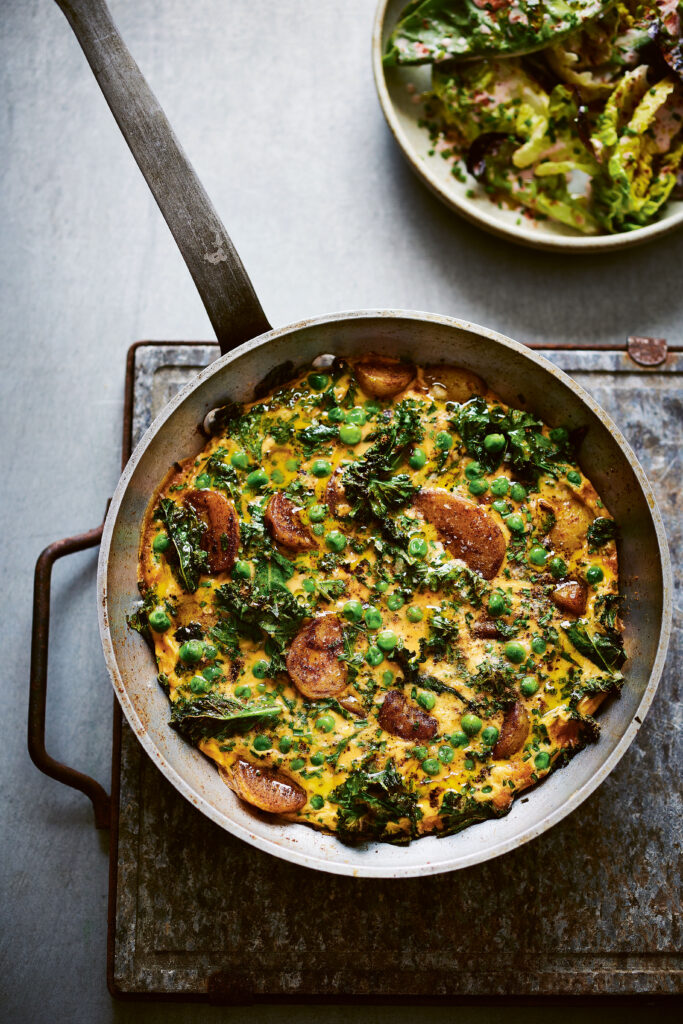
When we were exploring the book, we came across a delicious frittata recipe made from an infusion of vibrant curry spices and Maldon Salt to elevate the flavours to new heights. The frittata is also paired with a fresh, leafy salad to give that satisfying crunch as you take in your first bite.
Spiced Frittata with a Leafy Salad
Spice Kitchen by Sanjay Aggarwal (Quadrille Books, £22) Photography by Dan Jones
Sanjay makes this all the time with any potatoes left in the fridge after the weekend. It’s also a great lunch for the team at Spice Kitchen when they’ve got a busy day, because it serves a few and it really quick to throw together!
Serves: 4 people
Ingredients:
300g (10½oz) baby new potatoes
1 tbsp vegetable, sunflower or
rapeseed (canola) oil
1 tbsp Tandoori Masala (page 27)
100g (3½oz) kale (hard stalks
removed) and chopped
100g (3½oz) frozen peas
6 eggs
100ml (scant ½ cup) double
(heavy) cream
Generous pinch of Maldon Salt
1 tbsp chopped chives
For the Salad
3 tbsp Greek-style yoghurt
1 tbsp olive oil
2 tsp lemon juice
2 tsp Tandoori Masala (page 27)
200g (7oz) mixed salad leaves or
rocket (arugula)
Method:
Heat your oven to 180°C fan/200°C/400°F/gas mark 6.
Scrub the potatoes, add to a small saucepan and cover with cold water. Bring to the boil, then turn down to simmer for 10 minutes, until the potatoes can be pierced with a fork. Drain and set aside to cool a little.
Slice the potatoes in half or in thirds. Warm the oil in a frying pan (skillet), ideally one that can go in the oven, add the potatoes and sprinkle over the spice mix. Cook for a couple of minutes until everything smells gorgeously fragrant, then add the kale.
Continue to cook until the potatoes are crisp and golden at their edges and the kale is crisp but still vibrant green. Stir through the peas, then from from the heat. If you don’t have an ovenproof frying pan you can tip the vegetables into a baking dish once they’re cooked.
Beat the eggs with the cream, season with Maldon Salt, and add the chives. Pour over the vegetables and transfer to the oven.
Cook for 8 minutes until puffed and brown. Meanwhile whisk together the yogurt, olive oil, lemon juice and tandoori blend. Taste for seasoning.
Wash and dry the salad leaves if needed, then toss through the dressing.
Serve the frittata hot, in large slices, with the salad.
Spice Kitchen by Sanjay Aggarwal (Quadrille Books, £22) Photography by Dan Jones
Buy Your Very Own Copy Today!
With this book you can enjoy creating recipes from around the world! From the likes of a authentic Mamma Spice’s Dal Makhani, to a fiery blackened Cajun chicken feast, the ideas are endless and it showcases just how versatile spices can be!
Sanjay also shares his own top tips in making the spice blends from scratch, including classics from Garam Masala, Za’atar, Harissa and Tandoori.
You can purchase your very own ‘signed’ copy of Spice Kitchen Cookbook here, and begin transforming your mealtimes to culinary masterpieces!
Make sure you have your Maldon Salt ready for these recipes! If you are running out, please feel free to browse on our Where to Buy Page to find your nearest store in which stocks our beloved Maldon Salt.
Lastly, we LOVE seeing your creations – please tag us on Instagram using the #maldonsalt so we can share your own take on Spice Kitchen’s recipes!
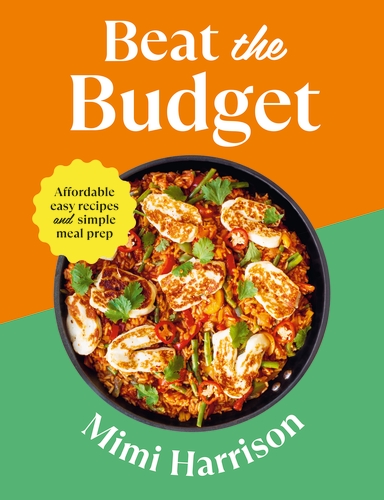
Mimi is a skilful recipe developer and content creator who is behind the popular platform, Beat the Budget. Her brand is motivated by her own experience of depending on cheap and unhealthy foods whilst studying at University because it was convenient. Mimi wanted to change her path, and begun creating a blog and Instagram presence online to provide more healthy and affordable alternatives that are delicious and not expensive to make!
As her culinary creations grew, so did Mimi’s success, where she now has over 270k followers on Instagram. Her tasty recipes have also been featured on likes of ASDA and Sainsbury’s Magazine.
Excitingly, on 8th June Mimi released our debut cookbook: ‘Beat the Budget: Affordable Easy Recipes and Simple Meal Prep‘. The book’s mission is about proving that delicious food doesn’t have to be expensive and complicated and that you can achieve these results with the simplest of methods and ingredients.
With a collection of flavour-packed, fuss-free recipes to choose from, you can put down an amazing dish on the table without breaking the bank, which is why every recipe featured in the book comes at just £1.25 per portion! Chapters include easy breakfasts, soups and salads, one-pot wonders, fakeaways and sweet treats. What is also useful about this book is that Mimi shares her own tips and tricks on meal prepping and shopping lists, along with showcasing recipes that can be easily made with an air fryer or slow cookers to keep energy prices down.
In Conversation with Mimi Harrison
We were lucky enough to grab the chance in sitting down with Mimi and discuss all things surrounding how book and the inspirations behind it! Mimi even shared her top tips for people trying to budget when cooking, and her own personal favourite recipe from the book!
Mimi, it’s fair to say we are LOVING your debut cookbook ‘Beat the Budget’! Tell us, where did the inspiration to create affordable, easy recipes come from?
Thank you so much! That makes me so happy to hear. I started Beat the Budget (originally called Mimi Makes) at uni when I was struggling to balance healthy, delicious food with my new £20 weekly food budget. I felt like at the time, I could only find either cheap and unhealthy recipes or healthy and super expensive dishes, so I really wanted to start posting recipes that were balanced but also really affordable.
What are your main top tips for people trying to budget when cooking?
It’s all in the planning- spend around 20 minutes before you go shopping to plan out multiple recipes. I like to then write the shopping list according to the supermarket layout so you’re not walking back and forth, making impulse purchases. Also make sure you’re not hungry when you shop as this will cause you to throw all sorts into your trolly.
Cross-over ingredients- with more expensive ingredients, try and choose recipes where you can spread the cost of the ingredient over multiple recipes, which will reduce waste and cut costs. An example of this that I like to use is sharing a pot of crème fraiche- you can add a dollop to soup, loosen and drizzle over fajitas or use it as the base for a creamy pasta/risotto. All of these recipes feel really different whilst using the same ingredient.
Meal prep all the way- most of my recipes serve 4-6 servings which make them either ideal for a family or great for meal prep, hopefully making my book suitable for a lot of people! I save so much money on meal prepping as you’re spreading the costs over multiple dishes. What I love to do is select a freezable recipe, make a batch of it and then freeze half of the servings in individual containers. Overtime, you stock up on a variety of meals which will prevent boredom and make your meal prep more sustainable! I call this a freezer-cycle.
Slow cookers and air fryers are used in a few of your recipes, if you had to only choose one of the appliances, which one would you keep?
Ahh that’s such a hard one! I love them both but if I had to choose, I’d probably choose my airfryer as I love the crispy-ness that you can achieve with a minimal amount of oil. Oil is so pricey so I don’t just limit it for health reasons! I also want to steer clear of my oven at all costs when the weather is so hot like it is currently!
Meal prep advice is featured within the book, why do you think people should start meal prepping more?
As mentioned above, the savings you can make when meal prepping are obviously amazing. You can bulk buy bigger quantities of ingredients which will save you money but you also reduce waste as it’s easier to plan to use all of your ingredients up. With costs aside, meal prepping saves you so much time! I feel like if you can still eat delicious food that you won’t get bored of by implementing the freezer cycle, all the negatives of meal prepping can be eliminated.
There are so many recipes to choose from, come on, you must have a favourite?
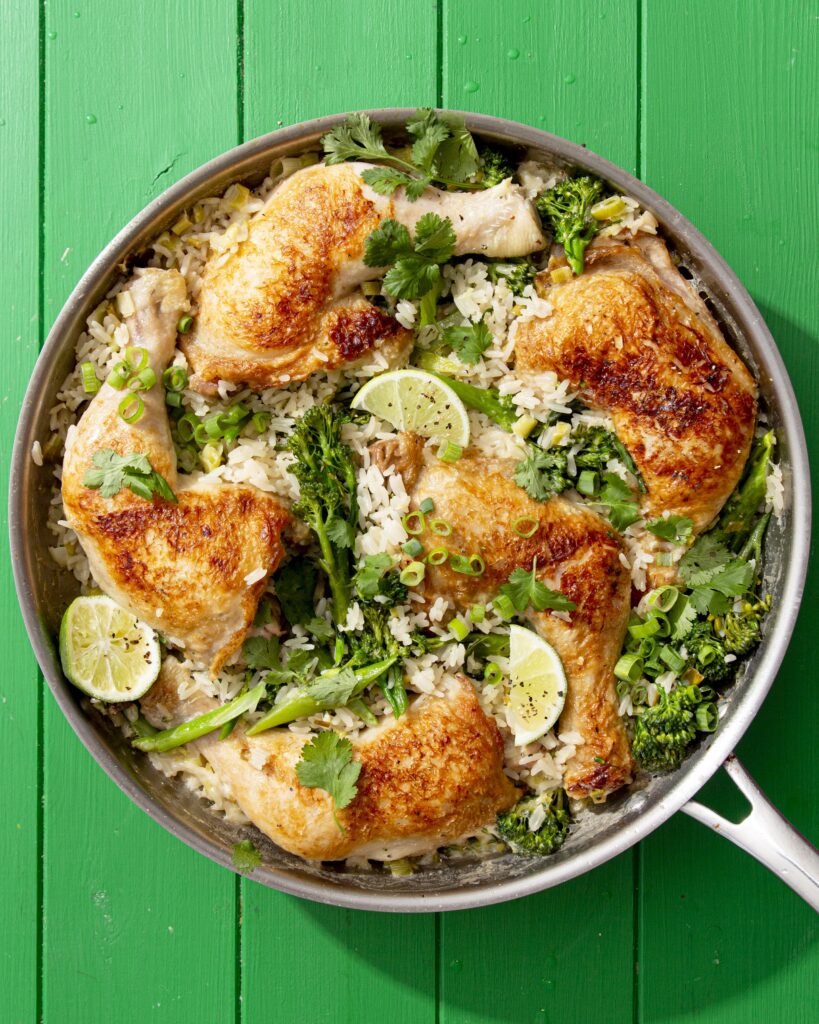
Ahhhh I can’t choose an absolute favourite as I love them all so much, but my favourite this week is my Ginger & Lime Chicken Legs with Coconut Rice. Chicken legs are the most underrated cut of meat- they’re even cheaper than chicken thighs! I love how it comes together in one pan and it’s really fresh whilst feeling hearty at the same time.
What does a normal day in the life look like for you Mimi?
I’m filming or testing recipes most days at the moment which is so much fun. I usually go for a walk/run with my dog & then head out to the studio to start prepping my ingredients for the day. At the moment I have to stop filming by around 2 o’clock as the studio gets too hot! So then it’s time to divide the food into meal prep containers and the rest of the day will be laptop/editing time.
Name 3 things in the kitchen you can’t live without!
My ninja possible pan- I use it everyday at least twice, the size and shape means that it’s perfect for cooking 4-5 servings at a time (which we love). You can also put it in the oven so that it reduces clean up by making a lot of one pot dishes!
My plastic bench scraper– I get so many questions about this in my reels! It’s a rectangular piece of plastic that helps you to scoop up any chopped vegetables in one sweep. It saves so much time with prep. You can get them for around a pound from Amazon!
My glass meal prep containers- they’re oven/microwave/air fryer proof which means that I can just chuck my meal prep directly into whatever appliance I need to reheat it. Also, they’re so sturdy that nothing is escaping/spilling out of them.
Ginger & Lime Chicken Legs with Coconut Rice
This is one of Mimi’s favourite recipes in the book. Not only is it one-pot, but is also requires minimal prep. She loves how comforting the meal is, yet every mouthful feels so fresh and vibrant with the zingy ginger notes and the kick of lime, contrasting with the creamy rice. Oh, and if you’re looking for the gains, this recipes has 60g of protein in it! Woohoo!
Serves: 5 people
Preparation Time: 5 minutes
Cooking Time: 40 minutes
Ingredients:
1 tbsp rapeseed oil
5 chicken legs, (about 1.1kg)
50 g spring onions, thinly sliced
4 garlic cloves, crushed
2 tbsp fresh ginger, peeled and finely grated
350 g rice, rinsed
750 ml chicken stock juice of ½ lime + wedges to serve
1 x 400 g can coconut milk
100 g tenderstem broccoli, florets sliced and stems thinly sliced
Set a deep pan over a medium heat and add the rapeseed oil. Season both sides of the chicken legs with salt and pepper, then place the legs skin-side down in the pan and leave to fry for around 15 minutes.
Rotate and cook the chicken legs for a further 15 minutes on the other side. The skin should be crispy and golden brown and the meat almost cooked through. Remove from the pan and set aside.
Add the spring onion to the same pan (reserving some of the greener ends for garnish) and add the garlic and ginger. Fry over a medium heat for a few minutes.
Add the rice to the pan and stir, then pour in the stock, lime juice and coconut milk.
Add the chicken legs back to the pan, skin-side facing upwards. Cover and leave to cook over a medium/low heat for18 minutes, adding the broccoli after eight minutes.
Garnish with the reserved green spring onion ends, lime wedges and fresh coriander and dig in!
Meal Prep Tip:
Separate portions of broccoli and coconut rice into sealed containers along with a cooked chicken leg in each container. Chill in the fridge for up to three days or freeze for up to three months. If eating from frozen, defrost in the fridge overnight. To reheat from chilled, heat in the microwave for two minutes on high. Top with the garnishes (stored separately) and enjoy!
Want to Create a Recipe From This Book?!
You can find where to purchase Mimi’s cookbook here and start whipping up easy yet delicious recipes for yourself and the family.
Make sure you have your Maldon Salt ready for these recipes! If you are running out, please feel free to browse on our Where to Buy Page to find your nearest store in which stocks our beloved Maldon Salt.
Lastly, we LOVE seeing your creations – please tag us on Instagram using the #maldonsalt so we can share your own take on Mimi’s recipes!