Article Type: Recipe
Spicy cucumber salad is a quick and easy dish that bursts with flavour, making it the perfect addition to any summer feast. This vibrant dish features baby cucumbers, also known as Persian cucumbers, sliced Hasselback style into delightful spirals. We tossed them in a mouth-watering mix of sesame oil, soy sauce, rice vinegar, crispy chilli oil, and a touch of honey for sweetness achieving the perfect balance between sweet and spicy. A pinch of Maldon Chilli Sea Salt adds a fiery kick, while a sprinkle of sesame seeds provides a nutty crunch. Finished with a handful of fresh coriander, this vibrant salad is sure to impress.
Here is how to make a spicy cucumber salad
- Start by cutting the cucumbers into spirals. In a similar method to Hasselback potatoes, place your cucumber between two chopsticks on your board, then use your knife to make small cuts all the way down in one direction. Next, turn the cucumber over and repeat the cuts again but in the other direction.
- Alternatively, if you don’t want to spiralise the cucumbers like this, you can cut the cucumbers into a rough chucks.
- Into a bowl, mix the sesame oil, soy sauce, rice vinegar, crispy chilli oil, honey, Maldon Chilli Sea Salt and toasted sesame seeds. Then toss the cucumbers throughout so they are evenly coated.
- Set aside for them to absorb the flavours and oils for a minimum of 10 minutes before serving.
- Scatter over the coriander leaves and serve.
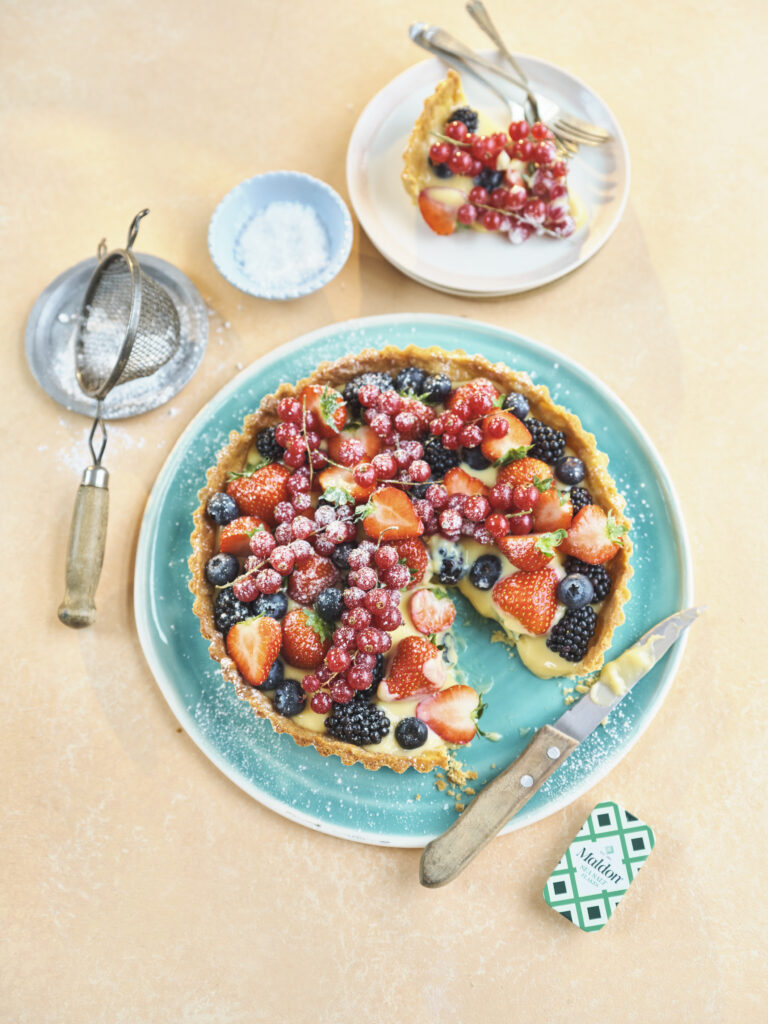
Indulge in the perfect summer dessert with this exquisite Summer Berries Custard Tart, a delightful combination of creamy vanilla custard and a vibrant array of fresh berries. This tart, featuring the renowned Maldon Sea Salt flakes, elevates a classic favourite into a gourmet experience. Whether you are hosting a backyard barbecue or a sophisticated garden party, this berry custard tart promises to be the star of your summer celebrations.
Creating this delicious dessert starts with a buttery tart shell made from all-purpose flour, unsalted butter, and a hint of Maldon Sea Salt flakes. The dough comes together effortlessly in a food processor or blender, with cold water ensuring the perfect consistency. Once baked to golden perfection, the shell is filled with a smooth and rich pastry cream, crafted from egg yolks, milk, sugar, and vanilla bean paste or extract. The crowning glory is an assortment of fresh summer berries, which not only add a burst of colour but also balance the sweetness of the custard with their natural tartness. A light dusting of icing sugar completes this show-stopping fruit tart, making it as beautiful as it is delicious.
How to make pastry for tarts
- Start by making the pastry. Place the all-purpose flour and Maldon Sea Salt flakes into the food processor, and then add the cold cubed butter.
- Pulse the food processor until it resembles fine breadcrumbs. Then add the caster sugar and give it one more pulse to incorporate. Then add the egg yolk and pulse again until it starts to come together and form a dough – if it looks a little dry and chalky, simply add a teaspoon of cold water and pulse again.
- Once the dough is formed, remove from the food processor, and bring together with your hands so it is cohesive and smooth.
- Flatten into a disc shape and wrap in cling film, then place into the fridge for 30 minutes.
- Preheat the oven to 180c.
How to make custard filling for tarts
While the pastry is chilling, start making the custard. Place the milk and vanilla bean paste into a large saucepan and place onto a gentle heat. Put the egg yolks, caster sugar and cornflour into a mixing bowl and use some electric beaters to whisk until pale and fluffy.
Heat the milk until scalding point but not boiling, then remove from
the heat and gradually pour it into the egg and sugar mixture very slowly,
whisking all the time. Once all the milk is added, pour this mixture back into
the pan and heat very gently, constantly stirring and moving it with a rubber
spatula. The custard will thicken, you want to take this to quite a thick
custard stage so it supports the fruit in the tart. Once thickened, remove from the heat and place into a clean bowl, and close cover with some clingfilm on the surface to stop it for getting a skin.
Set aside in the fridge to cool.
How to cook a custard tart?
- After 30 minutes, remove the pastry from the fridge and on a lightly floured surface, roll it out into a circle which is a bit larger than the 23cm tart tin (you need the pastry to come up the sides and overhang slightly).
- Lift it and drape into the tart tin, using your finger to lightly press it in up all the sides and corners.
- Use some scrunched up baking paper in the middle and then fill with baking beans. Blind bake the pastry for 10 minutes to 15 minutes, then remove the paper and return for a further 5 until it is lightly golden and dry to the touch. Remove from the oven and use a whole beaten egg to lightly egg wash the pastry while it is still hot. This will help seal any cracks before adding the custard.
- Set aside to cool slightly and then use a serrated knife to trim off the top edge neatly. Then set aside to cool fully.
How to decorate a custard tart?
- Once both your pastry case and custard are cooled you are ready to assemble.
- Spoon the custard into the pastry case and smooth over with a palate knife.
- Assemble your summer fruits all over the top, and then dust with some icing sugar and a final pinch of Maldon Sea Salt.
- Serve immediately.
Other tart decorations
If you don’t want to top your custard tart with a medley of summer berries, why not try add a drizzle of homemade lemon curd or jam instead? The sweet, silky sauce compliments the buttery pastry of the tart perfectly, giving you a sudden burst of sweetness as you take your first bite.
If it’s not the season for summer berries, try decorating with sliced apples, paired with a sprinkling of cinnamon. This flavour profile is both warming and comforting, perfect on a cosy autumnal day when you’re stuck indoors and wanting to bake something. The beautiful display of sliced apples against the creamy custard filming is also striking and a great crowd-pleaser!
What to serve with summer berries custard tart?
Now that you have a finished custard tart that’s ready to be enjoyed, let’s think of a few recipes you can serve along with this decadent dessert!
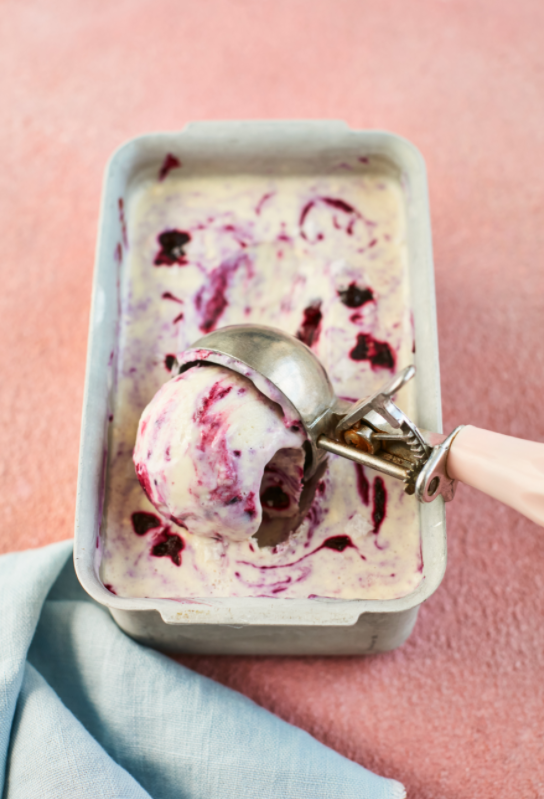
Our homemade blackcurrant ice cream is a match-made-in-heaven when paired with a custard tart. This is because the cold, soft texture of the ice cream compliments the buttery tart shell, creating a delicious symphony of textures as you take your first bite.
If you’re craving a summery tipple, we recommend whipping up a Fig Bellini. This cocktail is super quick and easy to make, infused with the flavours of sweet fig jam and a kick of zest through the use of lemon juice and prosecco, which matches the sweet burst of the summer berries on the custard tart.
Can you freeze custard tarts?
Because the custard tarts are made from eggs, cream and milk, it’s important to store any leftovers in the fridge for no longer than three days. The tarts are at their optimum taste and texture when served fresh the day of making it.
In terms of freezing your custard, you can freeze them up to 3 months if stored in an airtight container. However, please note that they may not hold their shape that well once thawed under room temperature. This is because of the moisture content in the creamy custard filling.
The talented Rukmini Iyer is a celebrated author and culinary innovator, known as the queen of fuss-free flavour. In her latest cookbook, ‘The Green Cookbook’, Iyer continues her mission to simplify delicious home-cooked meals. This vibrant collection features 75 brand-new recipes designed to help you get a delectable dinner on the table every day of the week with minimum hassle and maximum flavour. Whether you’re a ‘seasoned’ vegan, a dedicated vegetarian, or simply looking to incorporate more plant-based meals into your diet, ‘The Green Cookbook’ offers a treasure trove of inspiration!
Here is how to make all-in-one orzo with baked feta, tomatoes and olives…
This is an update on one of Rukmini’s favourite Green Roasting Tin recipes, a really
simple dish of baked orzo with fresh cherry tomatoes. Here, she adds in a big
square of feta to bake on top of the pasta, along with olives for a briny hit
of flavour – all your food groups in one go. It’s perfect for a light dinner on
a summer evening.
- Preheat the oven to 180°C fan/200°C/gas 6.
- Put the orzo into a medium roasting tin, pour over the boiling stock and stir, then top with the tomatoes and olives.
- Place the block of feta cheese in the middle of the dish, then drizzle over the olive oil, a scatter of fresh basil leaves (reserve some for later) and a good grind of freshly ground black pepper. Transfer to the oven to bake for 25 minutes.
- Carefully remove the baked feta with a fish slice and give the orzo a good mix with a wooden spoon before serving, then replace the feta as pictured. Scatter over the reserved basil leaves and top with a drizzle of extra virgin olive oil and a scatter of chilli flakes. Once cooked, let the dish stand for a few minutes before serving hot.
Buy ‘The Green Cookbook’ Today!
Whether you’re preparing a quick meal for yourself or entertaining guests, her innovative and accessible recipes are sure to become staples in your kitchen. From 15-minutes pasta dishes that are perfect for those hectic weeknights to budget-friendly batch cooking that ensures you have a hearty meal ready to go, Iyer’s recipes are crafted with real-life demands in mind. Buy a copy from here and embrace the simplicity and joy of fuss-free cooking!
Make sure you have your Maldon Salt ready for these recipes! If you are running out, please feel free to browse on our Where to Buy Page to find your nearest store in which stocks our beloved Maldon Salt.
Lastly, we LOVE seeing your creations – please tag us on Instagram using the #maldonsalt so we can share your own take on Rukmini’s recipes!
The talented Rukmini Iyer is a celebrated author and culinary innovator, known as the queen of fuss-free flavour. In her latest cookbook, ‘The Green Cookbook’, Iyer continues her mission to simplify delicious home-cooked meals. This vibrant collection features 75 brand-new recipes designed to help you get a delectable dinner on the table every day of the week with minimum hassle and maximum flavour. Whether you’re a ‘seasoned’ vegan, a dedicated vegetarian, or simply looking to incorporate more plant-based meals into your diet, ‘The Green Cookbook’ offers a treasure trove of inspiration!
Here is how to make miso barley mushroom with coriander pesto…
This is one of Rukmini’s favourite recipes in the book. The combination of miso,
barley and mushrooms is inspired by Niki Segnit’s Flavour Thesaurus: More
Flavours, while the incredibly moreish coriander pesto is her version of Noor
Murad’s from Ottolenghi Test Kitchen: Extra Good Things – a happy melange
of inspiration where the pearl barley and mushrooms look after themselves
in the oven, leaving you to just blitz the pesto (and bask in the admiration
of your dinner guests when they take their first bite).
- Preheat the oven to 180°C fan/200°C/gas 6. Put the pearl barley, boiling water, miso paste, onion, black pepper and diced shiitake mushrooms in a lidded casserole dish or medium roasting tin, then cover with the lid or foil and roast in the oven for 1 hour.
- Put the mushrooms and red onion into another large roasting tin with the garlic, olive oil, haricot beans and a pinch of sea salt. Stir, then pop into the oven for 25–30 minutes until the mushrooms are cooked through.
- Blitz the coriander leaves and stems, coriander seeds, pine nuts, olive oil, sea salt and lemon juice in a high-speed blender or small food process or until smooth. Taste and adjust the salt and lemon juice, then set aside.
- Stir 2 tablespoons of the pesto through the hot pearl barley, then divide between four plates. Top with the mushrooms and remaining pesto and serve hot.
Buy ‘The Green Cookbook’ Today!
Whether you’re preparing a quick meal for yourself or entertaining guests, her innovative and accessible recipes are sure to become staples in your kitchen. From 15-minutes pasta dishes that are perfect for those hectic weeknights to budget-friendly batch cooking that ensures you have a hearty meal ready to go, Iyer’s recipes are crafted with real-life demands in mind. Buy a copy from here and embrace the simplicity and joy of fuss-free cooking!
Make sure you have your Maldon Salt ready for these recipes! If you are running out, please feel free to browse on our Where to Buy Page to find your nearest store in which stocks our beloved Maldon Salt.
Lastly, we LOVE seeing your creations – please tag us on Instagram using the #maldonsalt so we can share your own take on Rukmini’s recipes!
The talented Rukmini Iyer is a celebrated author and culinary innovator, known as the queen of fuss-free flavour. In her latest cookbook, ‘The Green Cookbook’, Iyer continues her mission to simplify delicious home-cooked meals. This vibrant collection features 75 brand-new recipes designed to help you get a delectable dinner on the table every day of the week with minimum hassle and maximum flavour. Whether you’re a ‘seasoned’ vegan, a dedicated vegetarian, or simply looking to incorporate more plant-based meals into your diet, ‘The Green Cookbook’ offers a treasure trove of inspiration!
Here is how to make spiced roasted carrots and hazelnuts with silky butterbean mash…
Rukmini could eat an entire bowl of this in front of the television, but it’s really too
nice not to share with friends! The carrots roast beautifully with coriander
seeds under foil, while the rich, silky butterbean mash takes just 10 minutes
to put together. A substantial, flavour-packed dish which is, as her friend
Alex Dorgan would say, incidentally vegan!
- Preheat the oven to 180°C fan/200°C/gas 6.Lightly grind the coriander seeds and black peppercorns in a pestle and mortar, then add them to a medium roasting tin along with the carrots, olive oil, water and ½ teaspoon Maldon Sea Salt. Cover with foil, then roast in the oven for 40 minutes.
- After 40 minutes, remove the foil, drizzle the carrots with the agave or maple syrup, then return to the oven for a further 15 minutes to reduce the liquid and get some colour on the carrots. Put the hazelnuts on a small baking tray and pop them into the oven at the same time to toast.
- Meanwhile, put the olive oil, lemon zest, coriander seeds, spring onions and garlic into a small frying pan and warm through over a low heat for 5 minutes – you’re not aiming to get any colour on the garlic, so keep the heat down.
- Put the butterbeans and the infused oil, spring onions, etc. into a high-speed blender or food processor and blitz until very smooth. Adda squeeze of lemon juice, then taste and adjust the Maldon Sea Salt if needed. Warm the mash and spoon into shallow bowls, topped with the roasted carrots. Scatter the carrots with a little Maldon Sea Salt, the toasted hazelnuts and flat-leaf parsley and serve warm.
Buy ‘The Green Cookbook’ Today!
Whether you’re preparing a quick meal for yourself or entertaining guests, her innovative and accessible recipes are sure to become staples in your kitchen. From 15-minutes pasta dishes that are perfect for those hectic weeknights to budget-friendly batch cooking that ensures you have a hearty meal ready to go, Iyer’s recipes are crafted with real-life demands in mind. Buy a copy from here and embrace the simplicity and joy of fuss-free cooking!
Make sure you have your Maldon Salt ready for these recipes! If you are running out, please feel free to browse on our Where to Buy Page to find your nearest store in which stocks our beloved Maldon Salt.
Lastly, we LOVE seeing your creations – please tag us on Instagram using the #maldonsalt so we can share your own take on Rukmini’s recipes!
Elevate your cocktail hour with a refreshing grapefruit Paloma, perfectly complimented by a Himalayan Pink Salt rim, Selected by Maldon. This tequila cocktail combines equal parts blanco tequila, pink grapefruit juice, club soda for fizz and a touch of agave for sweetness, resulting in a harmonious blend of flavours. The finishing touch of the salt rim not only elevates the presentation, but also perfectly balances the citrusy tang and smooth tequila notes, making this Paloma cocktail and unforgettable tipple!
What is in a paloma cocktail?
A classic paloma cocktail consists of tequila, lime juice, grapefruit and soda with salt being added to the rim of the glass as an added option. Paloma translates to ‘dove’ in Spanish, with the cocktails true origins unknown, although it is believed to have dated back to the 1950s. The legend Don Javier Delgado Corona, who was the former bartender and owner of La Capilla in Tequila, Mexico, is known to be the Paloma’s original creator. He wanted to create a cocktail that’s both sweet and sour, a little bitter and salty with plenty of bubbles and ice. What’s not to love about a refreshing Paloma!
How to make a paloma cocktail
There are many paloma cocktail recipes that have their own ‘tasty‘ twist to the original. Our recipe includes club soda, fresh pink grapefruit juice, blanco tequila and lime juice. We also include a salt rim using Himalayan Pink Salt, Selected by Maldon. This pink coarse rock salt is selected by our seasoned experts, from the foothill of the Himalayas and has been prized for centuries. It’s perfect for rimming the glass of your paloma as the the salt with counteract the bitterness from tequila, and elevate the sweetness of the grapefruit and lime. Additionally, is also adds texture to the drink, building up a pleasurable experience as you take your first sip.
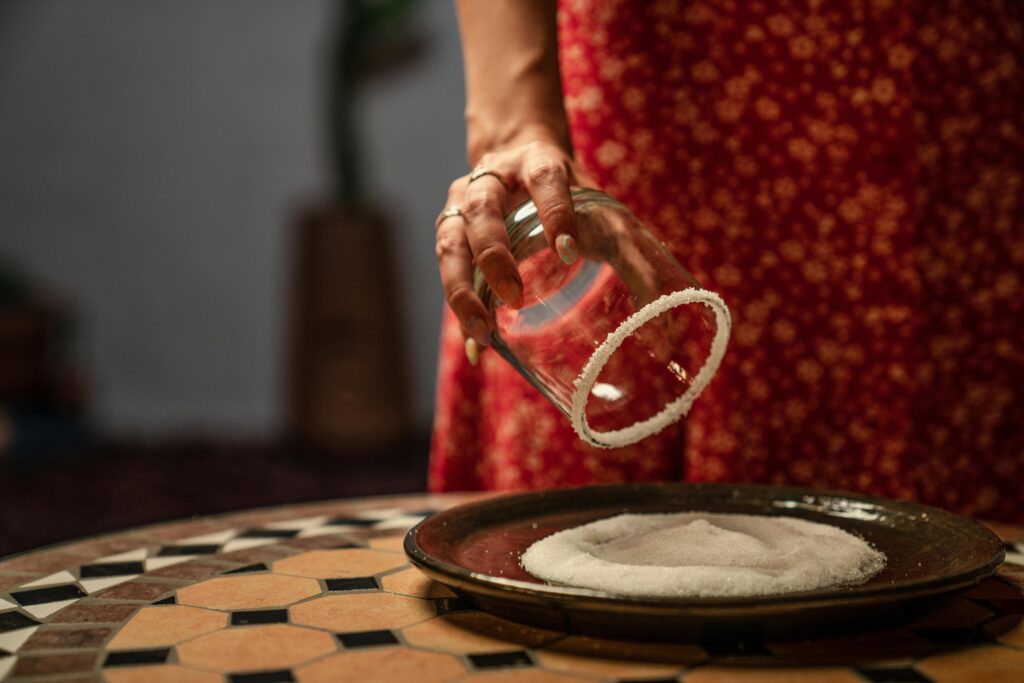
- Start by rimming the glass with salt. Lightly crush the Himalayan Pink Salt, Selected by Maldon, then place onto a small plate.
- Take the glass and rub a little lime juice, grapefruit juice or agave around the rim of the glass.
- Then, invert it onto the plate and press the salt onto the rim firmly.
- In a cocktail shaker, add the blanco tequila , fresh pink grapefruit juice, lime juice and agave.
- Add a few ice cubes and then give it a shake until the outside feels cold.
- Add some ice cubes to the prepared glass with the rim and begin pouring in the cocktail mixture.
- Top up with club soda and then garnish with some pink grapefruit slices before serving.
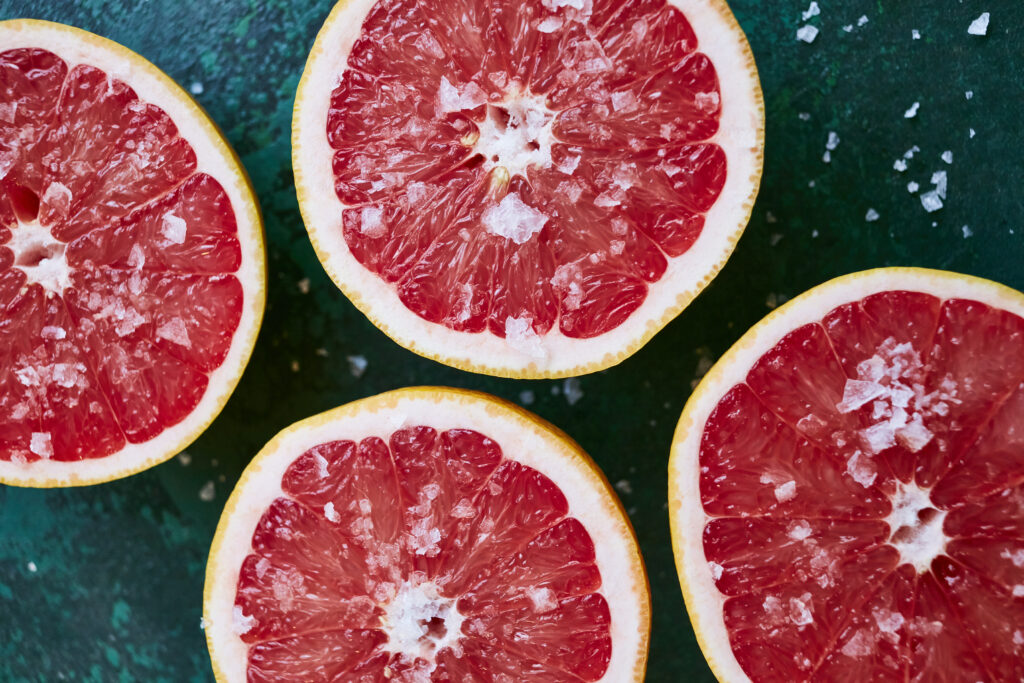
How to slice a grapefruit?
This is the fastest, simplest and mess-free way of slicing a grapefruit.
- Place the grapefruit on a cutting board. Using a sharp chef’s knife, begin slicing off a half inch off the top and bottom of the fruit.
- Stand the grapefruit upright so the flesh is exposed and begin to cut the skin off. Make sure you are following the contour of the grapefruit and the white pith.
- Repeat the peeling technique.
- Using a sharp paring knife, hold the grapefruit in your hand, and begin to cut downward between the membrane and the segment.
- Once you have reached the centre of the grapefruit, stop and make a second angled cut. The segment should then pop out.
- Repeat until all segments have been removed.
How to use a cocktail shaker?
We used a two-piece cocktail shaker to make our paloma cocktail. These are also known as Boston or French Shaker. They comprise of two flat-bottomed cones, one larger than the other. The large cone is made of stainless steel usually, while the smaller cone can be glass, stainless or plastic.
- Start by combining your ingredients in the glass (the smaller cone).
- Fill the large cone with ice and quickly up-end over the smaller cone, quickly to avoid spilling any ice! Gently tap the top of with your palm to create a secure seal between the two parts.
- Begin lifting the shaker with one hand on the top and the other gripping the base.
- Shake quickly and vigorously to ensure the mix is blended well.
- After shaking for around 12 second, the large cone will start to feel cold to the touch. This is when you know it’s ready to serve. Hold the larger cone in one hand and break the seal by tapping the base with your palm.
- Before you pour your cocktail, place a strainer over the top of the cone and strain the mixture into the glass, leaving the ice behind. The ice that we used for shaking should be removed.
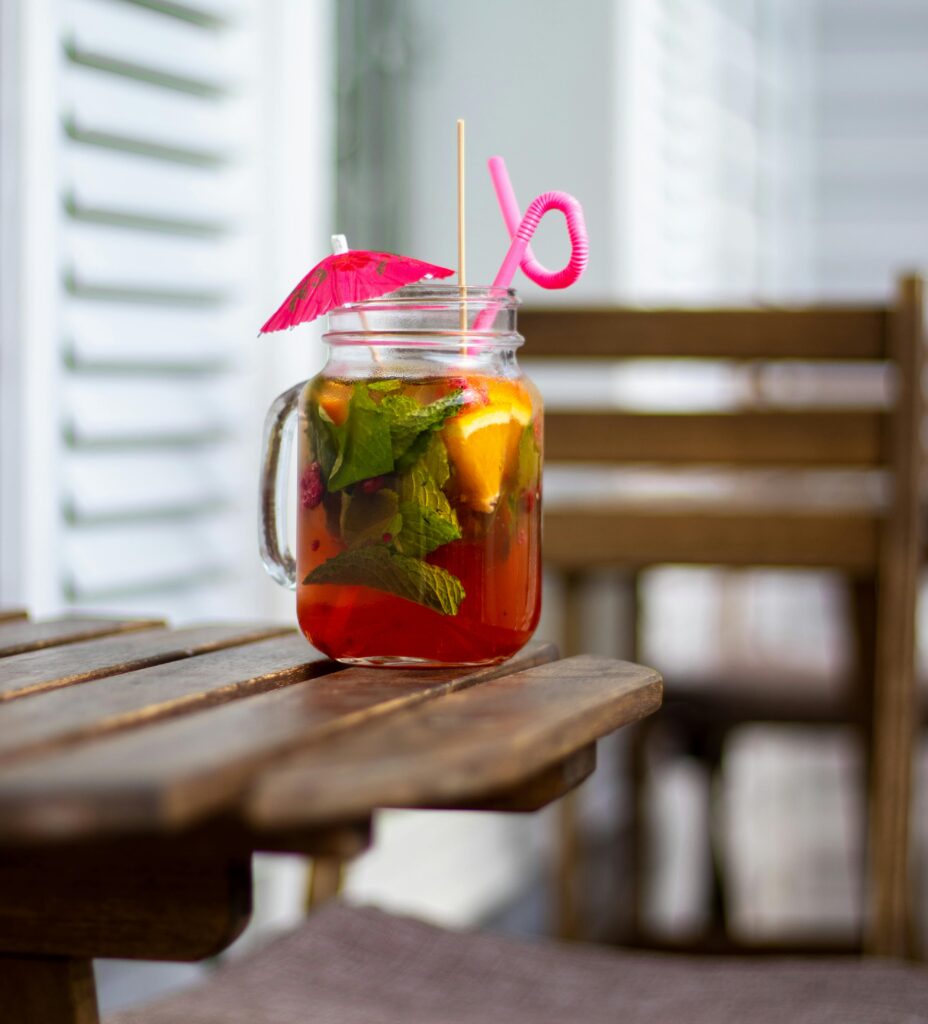
What to use instead of a cocktail shaker?
Creating a cocktail shaker alternative is very easy and you only need a few objects that can be found in your home. If you have a mason jar, or any other glass with with secure lid, it will make an effective cocktail shaker.
- Clean your mason jar thoroughly before using, ensuring it’s clean and safe to use.
- Add your cocktail ingredients into the jar.
- Add your ice cubes.
- Close the lid, fastening it on securely.
- Shake vigorously.
- Take the lid off and pour cocktail mix into your glass.
How to rim a glass with salt?
If you’re wanting to make a classic salt rim for a cocktail such as a margarita, we recommend starting of with a lime.
- Begin by cutting a lime in half, and then again until it forms a quarter or wedge.
- Cut a notch in the lime wedge, making sure to not cut all the way through. Near enough in the centre will do.
- Run the notch all around the glass until it’s the rim of the glass is completely wet from the lime juice.
- Add some Himalayan Pink Salt into a small dish that’s bigger than the diameter of your glass.
- Tip the glass over into the salt, almost like a cookie cutter going into the dough.
- Hold the glass up and you will find a perfect salt rim around your glass.
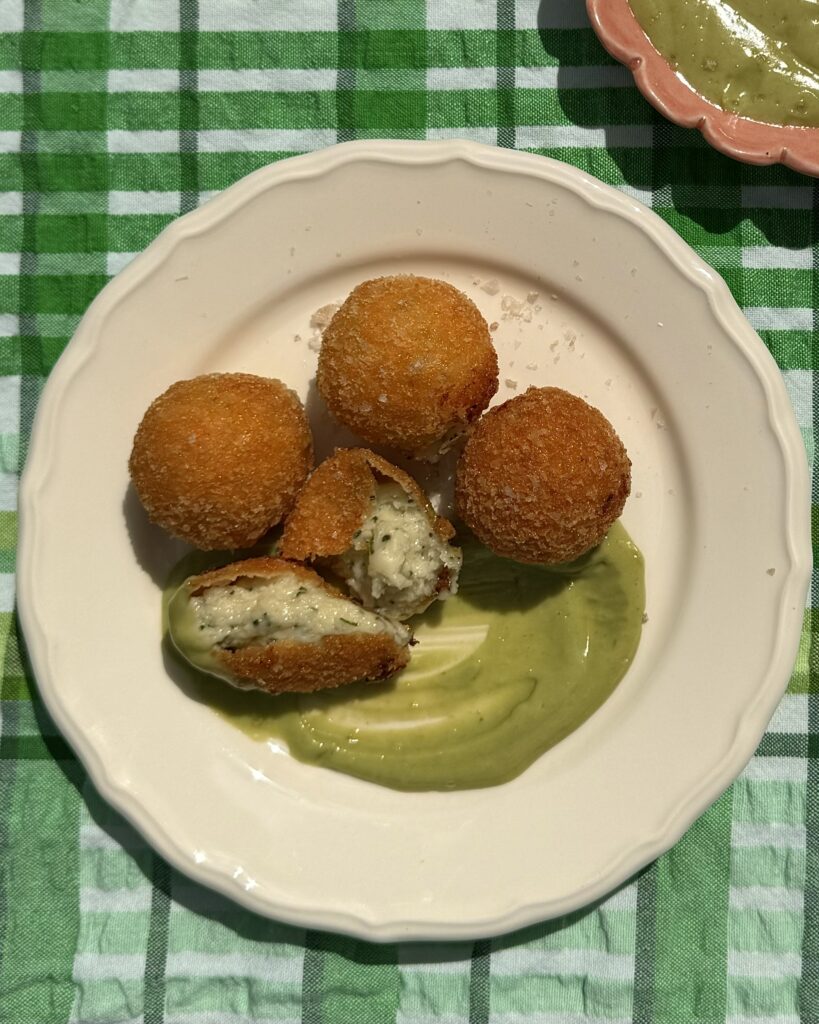
Elevate your summer dinner party with our irresistible Cheese and Chives Croquettes featuring a tantalizing twist of Maldon Smoked Sea Salt.
Blended with three creamy cheese to create a beautiful bechamel sauce (cheddar, mozzarella and Gruyere), these croquettes are a burst of rich flavour in every bite. Fresh chopped chives and a generous pinch of Maldon Smoked Sea Salt is added for an extra burst of flavour. Each croquette is coated in crunchy panko breadcrumbs and fries to golden perfection, making them seriously crispy on the outside and melt-in-your-mouth delicious on the inside!
We pair these croquettes with a vibrant green aioli sauce for the ultimate side dish that will leave your guests craving more! Whether you’re hosting an intimate gathering or a fabulous feast, these croquettes are guaranteed to impress!
How is how to make cheese and chive croquettes…
- In a saucepan, heat the milk until it’s warm but not boiling (about 50°C).
- In another saucepan, melt the butter over medium heat. Once melted, add the 60g flour and whisk continuously to form a smooth paste forms.. Cook for about 2 minutes, stirring constantly.
- Gradually pour the warm milk into the roux, whisking constantly to avoid lumps. Continue cooking and stirring until the sauce thickens, about 5-7 minutes.
- Grate the cheddar, gruyere and mozzarella cheese.
- Add the cheddar, gruyere and mozzarella cheeses to the sauce and stir until it melts and incorporates completely.
- Stir in the chopped chives and season with the Maldon Smoked Sea Salt and pepper to taste. Remove from heat and let the mixture cool completely.
- Once the béchamel mixture has cooled, use your hands to shape it into small cylinders or balls, about 3.5cm in diameter.
- Place the 75g flour, breadcrumbs and beaten eggs in separate shallow bowls.
- Dip each croquette first into the flour, then beaten eggs, then coat evenly with breadcrumbs. Place the coated croquettes on a plate.
- In a deep pan or fat fryer, heat oil to 180°C over medium heat.
- Carefully place a few croquetas at a time into the hot oil.
- Fry the croquettes until they are golden brown and crispy on all sides, about 2-3 minutes per side. Drain and sprinkle with more Maldon Smoked Sea Salt.
- For the cheats aioli, bring a pan of water to the boil and add the parsley. Blanch for 1-2 minutes then drain the parsley and cool down in iced water. Once the parsley has cooled, drain it again and squeeze out any excess water. in a food processor or blender, combine the mayonnaise, minced garlic, lemon juice, pinch of smoked salt and parsley. Blitz until smooth and then serve alongside your warm croquettes.
This recipe is created by Nomadic Dinners, who run immersive woodland feats as an alternative way of dining.
One thing for certain is that when peaches are in season, they are delicious. At Nomadic Dinners, they use them as soon as they are ripe. This recipe is ridiculously simple and is humble enough to place the star ingredient centre stage.
- Wash and halve the peaches removing the pits.
- Dust your peach halves with equal parts of Maldon Sea Salt flakes and sugar.
- Stick a skillet or small paella pan on the fire at a medium heat adding the stick of butter until it has melted completely. Don’t worry if the butter burns a bit.
- Once the butter has fully melted, gently place the peach halves face down and cook for a few minutes until they have caramelised and there is an unmistakable ambrosial smell and colour.
- Arrange the peach halves on serving plates. Add vanilla ice cream and a sprig of mint for colour
- This dessert satisfies even the most discerning of taste buds. A perfect combination of sweet, salty and fruity.
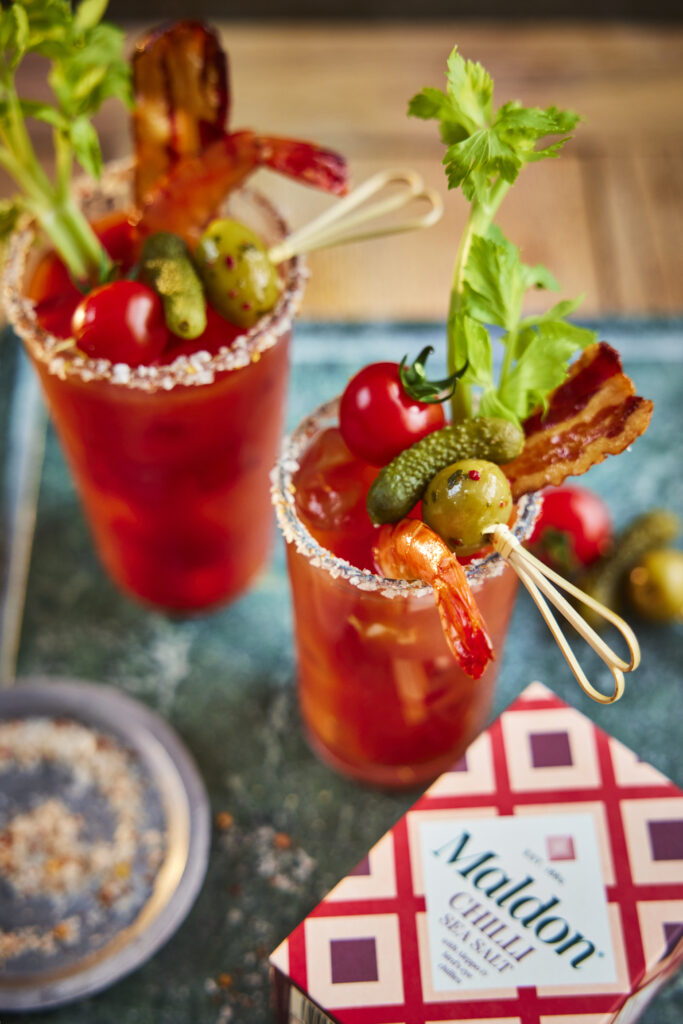
What is a Loaded Bloody Mary?
Elevate your weekend brunches with a fully loaded Bloody Mary recipe that promises a burst of flavour in every sip. A loaded Bloody Mary is an elevated version of the classic cocktail that enhances the basic blend of vodka, tomato juice, and seasonings with an array of savoury and sometimes spicy extras. Infused with Maldon Chilli Sea Salt, each glass features a tantalizing chilli sea salt rim that perfectly compliments the robust Bloody Mary mix. Garnished with crispy, candied bacon, shrimp, green olives, cornichons or pickles and a lemon wedge, this cocktail is a feast for the eyes and the palate! Get ready to impress your guests with a drink that’s as visually stunning as it is delicious.
How to Make a Fully Loaded Bloody Mary
A fully loaded Bloody Mary is an elaborate version of the classic cocktail that includes
not just the standard ingredients but also a variety of garnishes and extras, making it
almost a meal in itself.
For a truly over-the-top brunch experience, transform your loaded Bloody Mary into a
fully loaded masterpiece! You can follow the same basic steps outlined previously but
with some additional flair:
- Get Creative with Garnishes: Think beyond the celery stick. Consider skewers with olives, pickled vegetables, or even mini mozzarella balls. Sliders, mini quiches, or even a small grilled cheese can add a hearty touch.
- Spice it Up (or Down): For a kick, add a dollop of sriracha or horseradish to the glass. Jalapeno slices or pickled peppers can also add a spicy touch. If you prefer a milder version, skip the hot sauce and opt for a squeeze of fresh lemon.
- Rim it Right: Elevate the presentation with a flavoured rim. We used Maldon Chilli Sea Salt flakes for a fiery kick. You can also try a celery salt mixture, a smoky paprika dust, or even a toasted sesame seed rim for a unique twist. Remember, there are no hard and fast rules with a loaded.
Here’s how to make a Loaded Bloody Mary…
- Place a large frying pan on the heat. Add the slices of streaky bacon and cook for 3 minutes on each side until crispy. Remove from the pan and set onto a plate with some kitchen paper to remove any excess oil.
- Turn the heat down in the pan slightly and then add the two large prawns. Cook these for a couple of minutes on each side until bright pink and cooked through. Remove these from the pan and set aside too.
- To assemble the bloody Mary’s start by creating the chilli salt rim for the glasses. Rub a little lemon juice around the top rim of each highball glass. Place some of the Maldon Chilli Sea Salt into a small plate and then turn the glass upside down onto the salt and press it in, so the salt sticks along the top.
- Fill each glass with ice. Then pour in a 50ml measure of vodka into each. Next pour in the spiced tomato juice to fill up the glass. We like to splash in some tabasco and Worcestershire sauce at this stage, but this is up to your taste.
- Finally garnish each glass with a stick of celery, some crispy bacon, a prawn, and a skewer with a cherry tomato, cornichon, and olive on. Drink and enjoy immediately.
What to serve with a Bloody Mary?
A cocktail is the best way to start a meal, especially if you’re having a Bloody Mary which packed full of delicious ingredients. We’ve listed below a few dishes that pair perfectly with this classic cocktail.
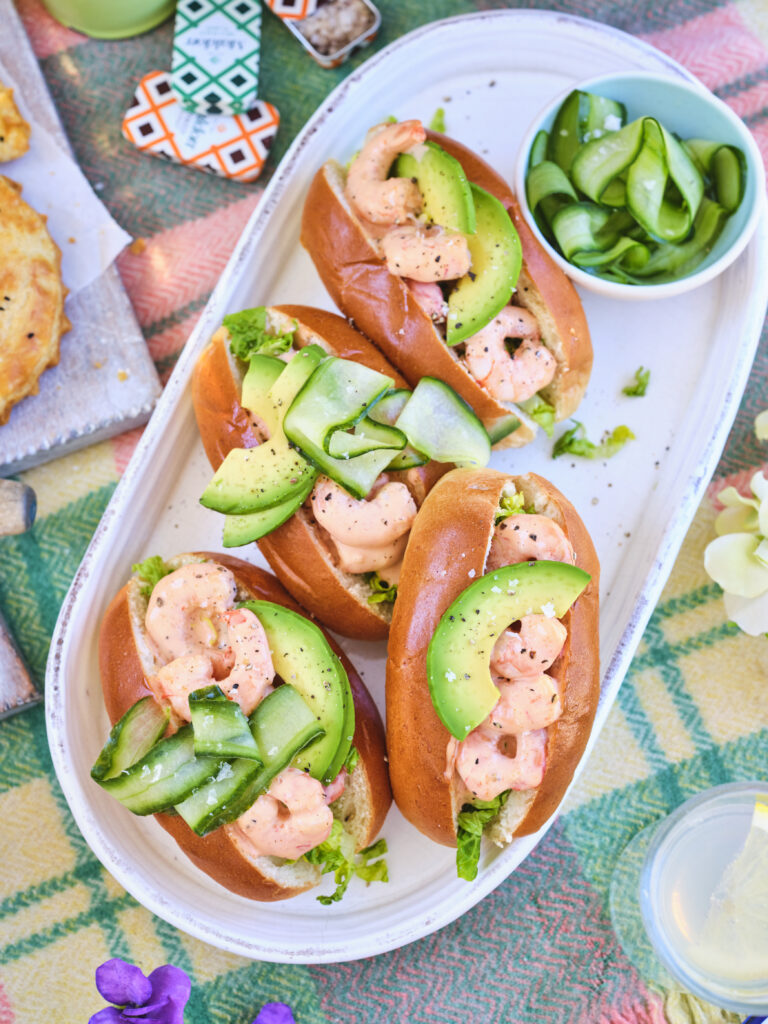
Because a Bloody Mary has a spicy kick to it, it compliments the mild, juicy prawns beautifully. The addition of the brioche bun also adds a gentle sweetness, balancing out the fiery pepperiness of the cocktail.
Dipping cheese in tomato sauce is a classic combination loved by many. Why don’t you transform this delicious pairing with Cheese and Chive Croquettes and a Bloody Mary mix instead. The zesty, peppery notes of the cocktail compliment the cheese and chive blend in the croquettes, made up of cheddar, greyer and mozzarella.
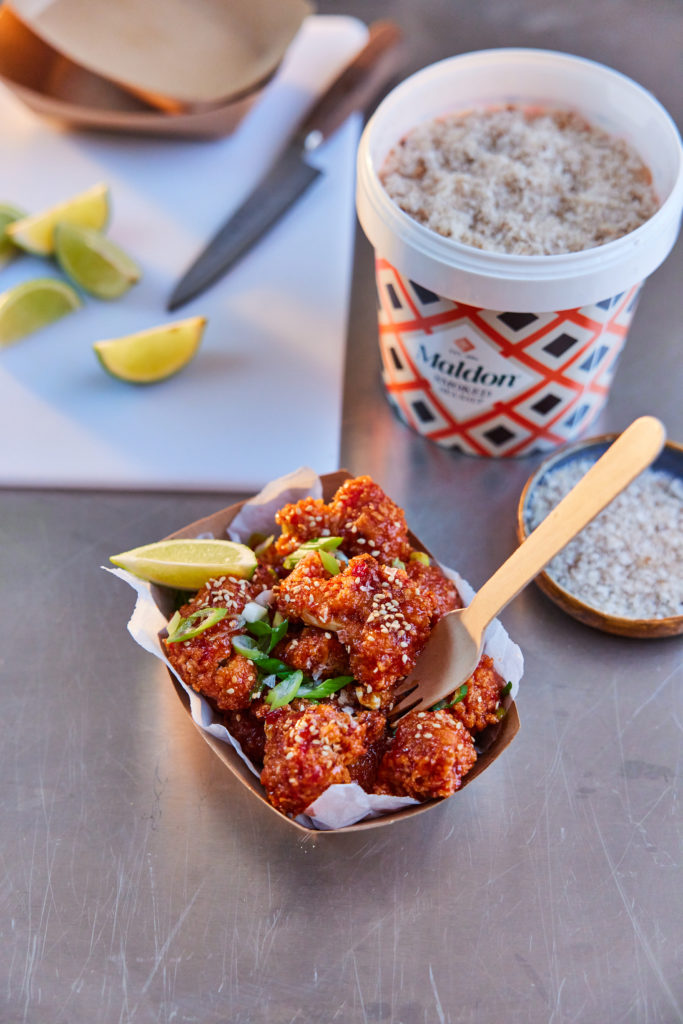
This is a great vegan and healthier alternative to cheese and chive croquettes. Cauliflower cooked bang-bang style provides a delicious crunch with every bite, which pairs with the silky smooth consistency of the Bloody Mary.
Transform your summer barbecues with BBQ Corn Ribs, infused with the rich, smoky flavor of Maldon Smoked Sea Salt flakes. These corn ribs are grilled to perfection, delivering a delightful combination of sweetness and charred goodness.
Topped with a drizzle of spicy Sriracha mayo, they offer a tantalizing kick that complements the smokiness beautifully. Perfect as a side dish or a standout appetizer, these BBQ Corn Ribs are sure to be a hit at any summer gathering, adding a gourmet twist to your seasonal fare.
Here is how to make BBQ corn ribs with Sriracha mayo…
- Start by carefully cutting each corn on cob into ribs. The safest way to do this is to place the flat bottom on the board so the corn is standing upright and then using a sharp knife, bash it down through the core – being careful of your hands and fingers!
- Preheat the oven to 200c.
- Once you have your 16 ribs, place them into a large baking tray. Then in a small bowl mix together the olive oil, smoked paprika, cumin, garlic powder, harissa paste and Maldon Smoked Sea Salt. Drizzle this all over the ribs and then use your hands to rub it in so each one is evenly coated. Place into the preheated oven and cook for 25 minutes, turning halfway. The ribs should curl as they cook. You can equally cook these in the air fryer or on a BBQ.
- Mix the mayonnaise and the siracha and serve alongside the corn ribs for people to dip into. Scatter over some chopped coriander and some lime wedges for squeezing and they are ready to enjoy.