Celebrate Easter with a vibrant Spring Vegetable Quiche, bursting with fresh, seasonal flavors. A buttery, flaky crust holds a creamy, savory filling packed with tender asparagus, sweet peas, baby spinach, and colorful bell peppers. Light, wholesome, and perfect for brunch, this quiche is a delightful centrepiece that captures the essence of spring in every bite. Serve warm or chilled for an easy, elegant Easter dish.
Here is how to make a vegetable quiche
Start by making the pastry. Place the flour and Maldon Sea Salt into a large bowl and mix together. Then add the cold, cubed butter and use your fingers to rub the butter into the flour until it resembles fine breadcrumbs and there are no large lumps of butter left. Alternatively, you can do this by pulsing it a few times in a food processor. Then add the cold water (start with 3 tbsp and see if you need more) and mix together until it starts to clump and there are no floury or dry patches. Tip onto the work surface and gently knead until it comes together as a smooth pastry.
Then lightly flour the work surface and roll the pastry out with a rolling pin until it is £1 in thickness. Carefully lift it and line a 23cm fluted tart tin, pressing gently into the sides, but leaving some pastry to overhang. Use a cutlery fork to prick some holes onto the base and then place the lined tin into the fridge to chill for 30 minutes.
Preheat the oven to 180c.
After 30 minutes, take the pastry case out of the fridge and put onto a flat baking sheet. Scrunch up some baking paper and put this onto the pastry then fill with baking beans. Blind bake the pastry for 15 mins, then remove the baking beans and paper and return for another 5 – 7 mins, until the pastry is very lightly golden and feels chalky to the touch.
Remove from oven and set aside to allow to cool slightly. Then take a sharp serrated knife and carefully trim off the excess pastry overhangs so it has a nice, neat edge.
Heat a frying pan on a medium heat and add the knob of butter and 1 tbsp of olive oil. Then add the sliced leek and sauté gently until soft and starting to caramelize. Place a pan of water on to boil, and then add the asparagus and frozen peas – you just want to blanch them quickly for 2 minutes, then remove from the pan and place into a bowl with iced water to stop them cooking any further.
In a jug, whisk together the eggs, cream, milk and chives and season well with Maldon Sea Salt and cracked black pepper.
Spoon the veg into the pastry case and crumble over the goat’s cheese. Then pour over the egg mixture and bake in the oven for 30 mins until the filling is set and the top is golden.
Remove from the oven and allow to cool slightly then serve with a green salad.
Steak with frites and garlic butter is the epitome of timeless dining, made famous by the legendary Le Relais de l’Entrecôte in Paris. A favourite for date nights, especially on Valentine’s Day, or any celebratory meal for two, this dish combines simple ingredients with impeccable flavour. Juicy, tender steak paired with crisp, golden fries (or chips), and a decadent garlic butter creates a meal that’s as it is elegant. This recipe ensures restaurant-quality results, perfect for recreating the romance and charm of a French bistro at home.
For the steak, we use thick-cut sirloin from Hawksmoor, celebrated for it’s robust flavour and beautifully marbled texture. Seasoned simply with Maldon Sea Salt flakes, freshly cracked pepper, and sprigs of thyme, the steak is seared to perfection, ensuring a rich, caramelised crust. The frites, made from skin-on Maris Piper potatoes, are fried until crisp and golden, retaining their natural flavour and texture. To complete the dish, we whip up a silky garlic butter infused with fresh parsley, adding an aromatic richness that elevates every bite. Together, these components create a culinary masterpiece that feels both luxurious and comforting.
How to make steak frites with garlic butter
Step 1
Start by preparing your chips. Cut your potatoes into skinny chip pieces – you can peel them or keep the skin on, but we kept the skin on for more flavour. Then place them in a large bowl and cover with cold water – toss them around then leave them in the water for 1 hour. This will help remove the starch from the potatoes which means they will be crispier when fried.
Step 2
After 30 minutes take the steak out the fridge to allow it to come to room temperature.
Step 3
Now you can prepare the garlic butter. In a bowl beat the softened butter until smooth with a spoon, then add the chopped parsley, crushed garlic cloves and plenty of Maldon Sea Salt and cracked black pepper. Then place two sheets of clingfilm onto your worktop and spoon the butter into the middle. Use the clingfilm to shape the butter into a thick sausage shape and roll it tightly, twisting each end to keep it secure. Then place the butter into the fridge.
Step 4
After 1 hour, remove the chips from the water and dry them very well on some kitchen paper. Preheat the oven to 180c.
Step 5
Pour in the veg oil into a large high-sided pan so it comes up 2 third of the way up the sides. Then place it on the heat and heat until it reaches 140c. Then add the chips to the oil and fry for about 5 to 6 minutes until they are cooked through but only lightly golden in colour – you may need to do this in batches. Remove them from the oil with a slotted spoon when ready and place on a tray lined with kitchen paper.
Step 6
While the chips are frying, we can get started on the steak. Season the steaks liberally with Maldon Sea Salt and cracked black pepper on both sides. Take a large frying pan, heat to a medium high temperature. Start by adding the steak on the side with the biggest part of fat and rendering this down – you may need to hold it in place with some tongs. You want the fat to go lovely deep golden and crisp. Then you can place the steak on one of the flesh sides and cook for 1 – 2 minutes on each side. When you are cooking the final side, add a knob of butter along with the bunch of thyme. Use a spoon to baste the steak with the butter and thyme.
Step 7
Once the steaks have a good level of colour and caramelization on each side, place the pan into the preheated oven for 6 minutes. Ensure you have an oven safe pan before you do this, if not simply transfer to a baking tray along with the pan juices. After the 6 minutes, remove the steaks from the oven and place onto a plate and pour over any cooking juices. Let this rest while you finish the chips.
Step 8
Turn the temperature up on the veg oil, so it reaches 180c. Then fry the chips again for approximately 2-3 minutes until very crisp and golden. Remove from the oil with a slotted spoon onto the tray again with kitchen paper to soak up any excess oil. Then add the chips to a large bowl while still hot and toss well with Maldon Sea Salt and cracked black pepper.
Step 9
In a small bowl, whisk together the Dijon mustard, olive oil and lemon juice to make a dressing. Drizzle and toss this over the butterhead lettuce along with the finely chopped chives.
Step 10
Now you can serve! Serve each rested steak on a plate or serving board. Take the garlic butter from the fridge and unwrap it, then cut some discs to put onto the steak, allowing it to melt. Add the chips to a bowl and serve with the mustardy green salad. Feel free to serve with any additional sauces you like, such as bearnaise or peppercorn. Perfect for a special Valentine’s Day dinner.
What is steak frites?
Steak frites is a dish consisting of a steak paired with fried potatoes, also known as ‘frites’. It’s commonly served in Belgium and French brasseries.
Tim Menger (Head Chef of Entrecôte in Melbourne’s Prahran) says steak frites is a dish that’s ’emblematic’ of France’s approach to food, going on to say it ‘encompasses a lot of what French bistro cooking is’. On the other hand, many claim that the steak frites is Belgium’s national dish due to the invention of the ‘frite’ in the 17th century – and let’s face it – without frites, there no such thing as steak frites!
Both have their differences, with Belgium serving Belgian fries with their steak, which is traditionally pre-cooked and cooled, then refried in oil again when ordered, creating the ultimate crispy, golden chip with a soft, fluffy interior. Belgian fries tend to be thicker in size, needing to be at least 10mm on each side. Whereas, France cut them between 6mm-9mm, creating a ‘skinnier’ chip.
France also adds a delicious Bearnaise sauce to their steak, covering the cut of meat to add refinement and flavour. This sauce is made of butter, egg yolk, white wine vinegar and herbs and is sometimes referred to as the ‘child’ of hollandaise sauce. This is because a bearnaise sauce uses shallot, black pepper and tarragon, whereas hollandaise uses white pepper and a pinch of cayenne. This creamy richness
What kind of steak is steak frites?
The bistro/brasserie staple of steak frites was traditionally made from the rump cut, however nowadays many chefs make steak frites from a variety of parts of the cow, including hanger (also known as onglet), rib-eye, porterhouse or flank. We used sirloin for our steak frites recipe. This is because sirloin is a tender cut of beef that’s affordable and easy to find at the grocery store. It’s also suitable for quick, high-heat cooking in the pan when searing.
What’s the best way to cook a perfect steak?
Cooking the perfect steak begins with choosing the right cut and understanding the best appliance to cook it on. Popular cuts like ribeye, sirloin, fillet and rump all offer distinct texture and flavours.
Ribeye is known for its marbled fat and rich taste
Fillet is tender and lean.
Sirloin balances flavour and tenderness
Rump provides a bolder, meatier bite.
Regardless of the cut, achieving a beautifully seared crust while maintaining a juicy interior requires the right equipment. Cast iron skillets are ideal for their ability to retain high, even heat whilst heavy-bottomed frying pan or a grill will also yield excellent results. For maximum flavour, make sure the steak is at room temperature before cooking and the pan is smoking hot to achieve a proper sear!
The stages of cooking a steak
Understanding the ‘doneness’ levels of steak is essential to tailoring it to your preference. Here’s a guide to each stage:
Blue: The steak is seared on the outside while the inside remains almost entirely raw by being cooked at a very high temperature for a short period of time. It feels very soft to the touch and is cooked to about 46–49°C (115–120°F) for a maximum time of 1-2 minutes on each side.
Rare: Warm on the outside with a cool red centre. Rare steak is tender and juicy. It reaches an internal temperature of 49–52°C (120–125°F). Cooked for 2-3 minutes per side over medium-high heat.
Medium Rare: The sweet spot for many steak lovers. Medium rare is warm with a red-to-pink centre. The texture is juicy but slightly firmer, cooked to 54–57°C (130–135°F) for 3-4 minutes per side.
Medium: This steak is firm and pink in the centre, with less moisture than medium rare. It’s cooked to 60–63°C (140–145°F) for 4-6 minutes per side.
Medium Well: A slight hint of pink remains, but the steak is mostly cooked through and noticeably firmer. It reaches 65–69°C (150–155°F) for around 11-16 minutes in total.
Well Done: The steak is cooked through completely, with no pink, and is firm to the touch. It’s cooked to 71°C (160°F) or higher for 18 minutes, depending on the thickness of the meat.
To check doneness, use an instant-read thermometer for precision or press the steak gently. The softer it feels, the rarer it is. Always allow the steak to rest for a few minutes after cooking to let the juices redistribute, ensuring every bite is as succulent as possible.
What’s the difference between fries and frites
‘Fries’ are long, thin pieces of fried potato, cut julienne or batonnet style and deep-dried in oil. It’s country of origin is from Belgium and France. It is believed that American soldiers stationed in Belgium were first introduced to French fries during World War I. Because the language of the Belgium army was French, soldiers nicknamed the fried potatoes as ‘French fries’.
‘Frites’ is the French word for French fries. It is a shortened version of the French phrase ‘pommes frites’ which means fried potatoes.
This style of fried potato is very popular amongst fast food chains that serve French fries, including McDonald’s, Five Guys and Arby’s.
Serving suggestions and variations
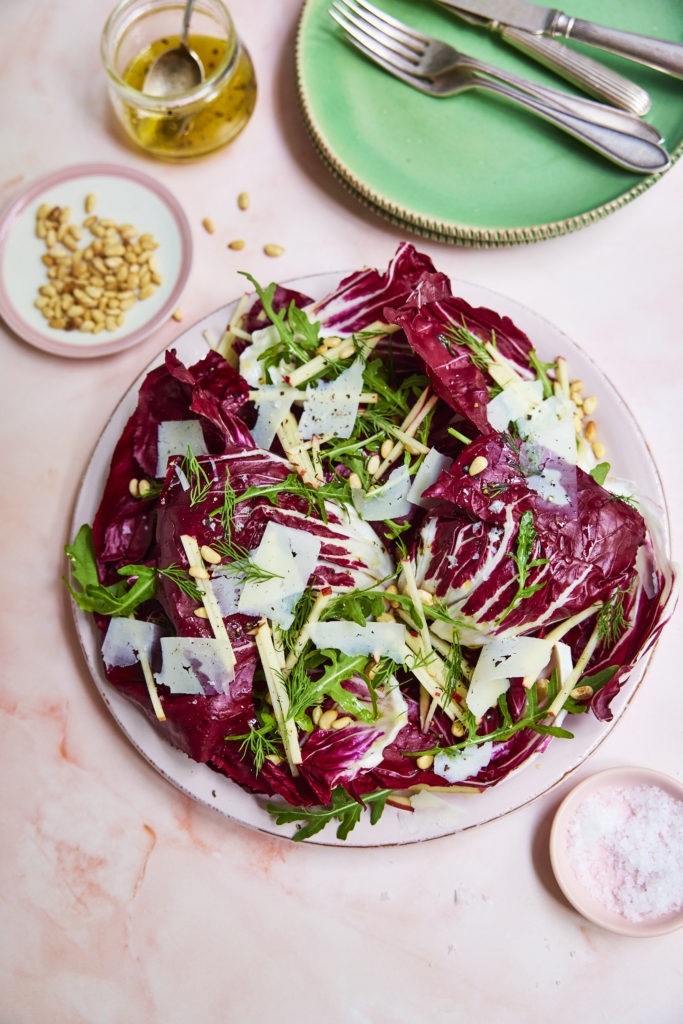
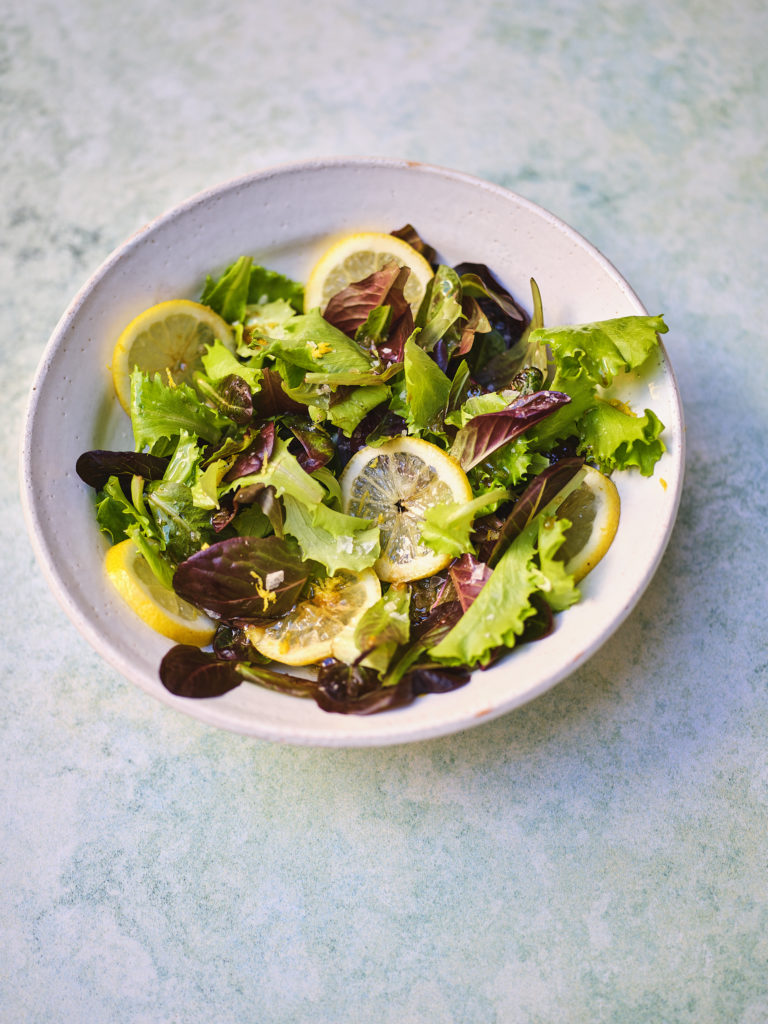
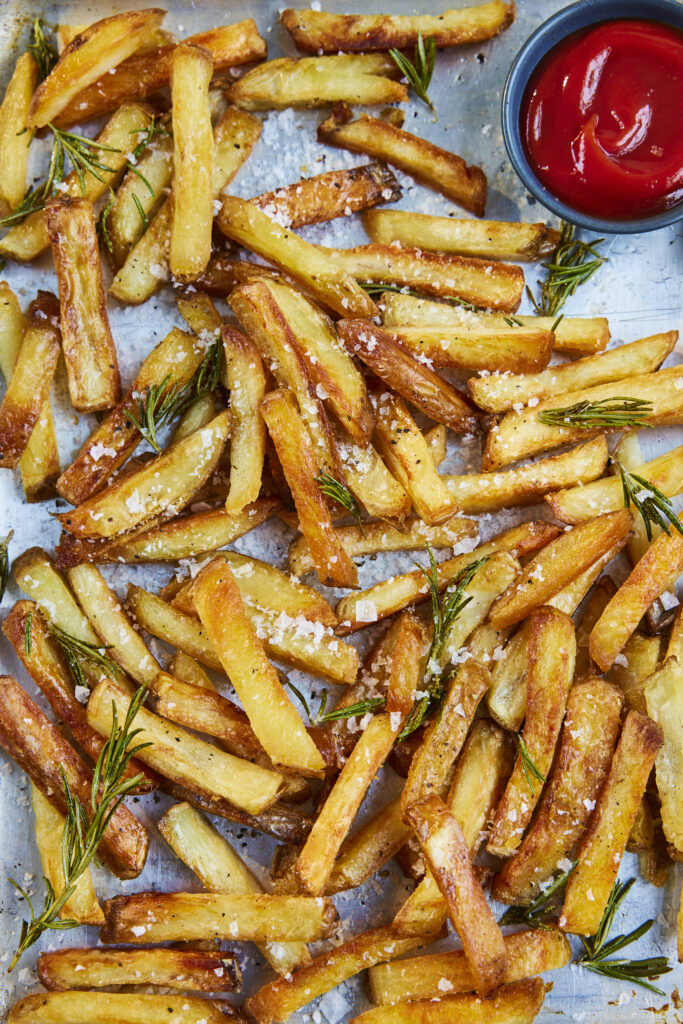
Radicchio salad with pine nutsCrispy green leaf salad with lemonHomemade ‘chunky’ chipsHomemade tomato sauce
Steak frites is a classic French bistro dish, but there are plenty of ways to elevate and customise it. Here are a few serving suggestions and variations you could following.
Serving suggestions:
Finish with Maldon Salt. A generous pinch of flaky Maldon Sea Salt over the steak just before serving will enhance the flavours with a delicate crunch. It also works well on the fries for extra seasoning!
Pair with a side salad. A simple arugula salad with a lemon vinaigrette or a crunchy radicchio salad balances the richness of the dish.
Dipping sauces for fries. Serve with a classic homemade tomato sauce, aioli, Dijon mustard or Sriracha mayonnaise for extra indulgence.
Wine pairing. A bold red wine like a Cabernet Sauvignon or a Syrah compliments the richness of the juicy steak and butter.
Variations:
Truffle garlic butter. Mix in a small amount of truffle oil or finely shaved truffle into the garlic butter for an earthy depth of flavour.
Herb & Citrus twist. Add chopped fresh herbs, such as parsley, thyme or tarragon, and squeeze lemon juice into the garlic butter for a fresh take.
Transform your weeknight dinners with air fryer spicy Peking duck, seasoned to perfection with Maldon Chilli Sea Salt. This quick and easy dish brings the irresistible flavours of a takeaway favourite right to your kitchen. Crispy skin, tender duck and a bold chilli kick make it a satisfying and hassle-free option for busy evenings. Why settle for a delivery when you can enjoy this flavourful ‘fakeaway’ in no time?
Perfect for celebrating Lunar New Year or elevating any weeknight, this spicy Peking duck pairs beautifully with steamed pancakes, fresh cucumber and spring onions. The Maldon Chilli Sea Salt adds a fiery twist, enhancing the classic flavours while keeping preparation simple and convenient. Serve it up and impress your family or guests with this effortless, restaurant-style feast.
What is Lunar New Year?
The Lunar New Year, also known as the Chinese New Year, is a 15-day festival which begins on the first day of the first lunar month in the calendar, ending with the ‘Lantern Festival’ on the 15th day. It’s full of celebration, centred around removing the bad and the old, and welcoming the new and the good. It’s a time where many worship ancestors, exorcise evil sprits and pray for good harvest. The date of the Lunar New Year changes every year. In 2024, this will occur on the 29th January. Across many countries, including China, South Korea, North Korea, Singapore and Cambodia, each year is associated with an animal from the zodiac. For 2025, this will be the Year of the Snake. The Snake represents wisdom, transformation and renewal.
Why do you eat duck during Lunar New Year
According to Reader’s Digest, duck is one of the most popular dishes at Lunar New Year dinner. This is because duck symbolises loyalty and is a great choice for good fortune because of it’s ‘reddish hue’ – the luckiest colour in Chinese culture.
Here is how to make Air Fryer Spicy Peking Duck
To a large pan, add the Shaoxing wine, soy sauce, soft brown sugar, spices, Maldon Chilli Sea Salt, spring onions, ginger, lemongrass, hoisin and chicken stock. Bring it up to a simmer and then add the duck legs and breast. Continue to simmer gently for 1 hour 30 minutes.
After this time, remove the duck from the pan and pat dry using kitchen paper. Preheat the air fryer to 200c. Then place the duck into the basket and cook for 10 – 15 mins so skin goes really crispy and caramelized.
While the duck is crisping up, mix together the rice vinegar, Maldon Sea Salt and caster sugar together in a small bowl and then add the julienned carrot. Toss it through and set aside to lightly pickle.
When the duck is cooked, remove it from the air fryer. Slice the duck breast and shred the duck leg meat, then place it onto a serving platter. Warm through the Chinese pancakes and then serve alongside the crispy duck, hoisin sauce and the julienned spring onions, cucumber and pickled carrots. Let everyone tuck in and make their own pancakes up!
Preheat the oven to 180c.
Firstly, start with the Hasselback potatoes. The easiest way to make the cuts is to place a potato onto a chopping board and put a chopstick flat on either side. Then using a knife, carefully cut slices all the way along the potato – the chopsticks will ensure that you don’t cut fully through the potato. Repeat this with each potato.
Place the leg of lamb onto a large roasting tray skin side up, and then nestle the prepared potatoes around it. Cut the shallots in half lengthways and add them to the tray. Cut the garlic bulbs in half, cutting through the cloves like a cross section. Add two of the halves to the tray. Use a sharp knife to insert some small cuts into the skin of the lamb, then press some of the other cut garlic cloves and small sprigs from the rosemary into the cuts. Slice the lemon in half and add this to the tray as well. Finally slot the bay leaves into some of the cuts of the potatoes.
Drizzle the potatoes, shallots, garlic and lemons with 3 tbsp of the olive oil then drizzle the remaining two across the lamb. Season well with Maldon Sea Salt and cracked black pepper. Place into the preheated oven and roast for 1 hour 25 minutes.
While the lamb and potatoes are cooking, make the salsa verde. Add the chopped shallot, anchovies, capers and herbs into a bowl. Add the red wine vinegar and give it a stir. Then slowly drizzle in the olive oil and give it a good mix. Season with Maldon Sea Salt and cracked black pepper to taste. Set aside.
Once the lamb is cooked, remove it from the oven. The potatoes should be lovely and golden, and tender in the middle – but if they need a little longer, simply lift the lamb out onto a board to rest and return them to the oven for 10 minutes. Allow the lamb to rest before carving and serving with the potatoes, some greens and the salsa verde.
Fire up the barbecue ready for indirect smoking with a temperature of about 140-150C.
Drizzle a little oil over the mushrooms and season with Maldon Chilli Sea Salt. Smoke for 40 minutes and then remove.
Open up the air vents of the barbecue to increase the temperature to around 180C.
Drizzle a little more oil over the squash and season generously with Maldon Garlic Sea Salt, roast indirectly until tender and lightly charred at the edges – 45 minutes or so.
Soften the onions in oil over a medium heat, on the BBQ or on the hob. Then add the garlic, sage and thyme and stir for a couple of minutes.
Chop the smoked mushrooms and add to the pan of onions along with the chopped chestnuts. Pour in the cream, allowing it to bubble and thicken. Leave to cool.
Mash the squash with the butter, smoked paprika and nutmeg. Leave to cool.
Unroll the pastry, roll out very slightly thinner, lift onto a baking tray.
Spread the squash over the pastry leaving 3cm border.
Spoon the mushroom mix in a line down the centre.
Brush a little beaten egg on the pastry border then roll up the pastry so it looks like a fat sausage roll. Snip a pattern in the top with scissors. Brush the egg all over and sprinkle generously with Maldon Garlic Sea Salt.
Bake indirect, between two fires, at about 200C for as long as it takes to cook the pastry to crisp and golden brown, perhaps 45-55 minutes.
Transform your festive leftovers into a decadent treat!
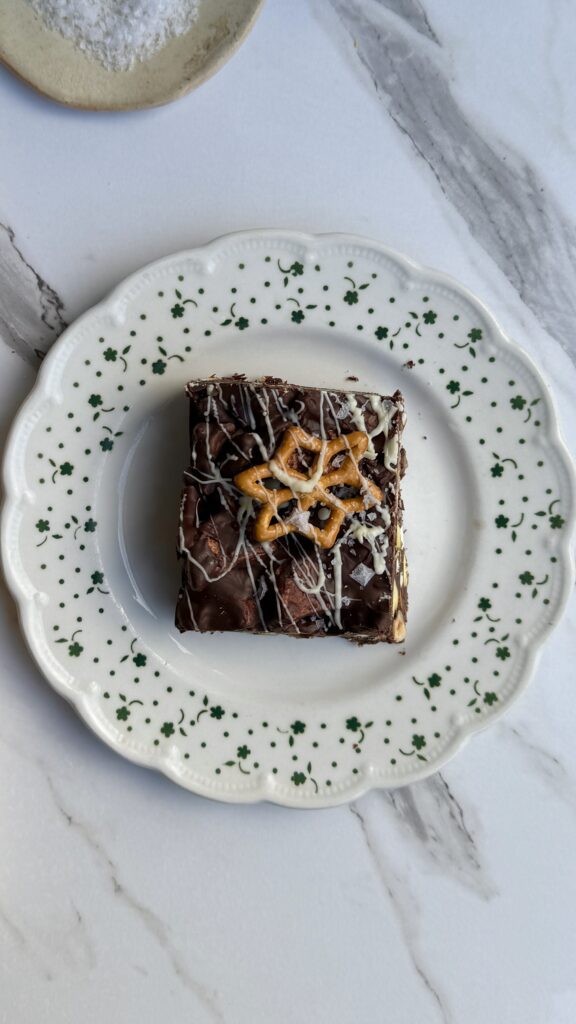
Don’t let your Christmas chocolate go to waste! Elevate your leftovers with a recipe that’s as indulgent as it is simple: Festive Rocky Road, featuring the perfect balance of sweetness and Maldon Sea Salt’s signature flaky finish. This no-bake delight combines rich layers of dark, milk and Christmas chocolate for a holiday-inspired twist, creating a treat that’s ideal for sharing – or keeping all to yourself!
This Rocky Road is packed with festive charm. Crunchy pretzels bring a satisfying texture, while gooey marshmallows and sweet glace cherries add pops of softness and colour. A mix of nuts – think pistachios, almonds, hazelnuts or pecans – offer warm and depth, enhanced by zest of orange for a hint of citrusy brightness. Drizzle with white chocolate and finish with a pinch of Maldon Sea Salt flakes to create a show-stopping treat that’s perfectly balanced: sweet, salty, and oh-so-delicious!
Here is how to make the Festive Rocky Road
Line a 9×9-inch (or similar) square baking tin with parchment paper.
In a heatproof bowl, combine the dark chocolate, milk chocolate, butter, and golden syrup. Melt the mixture over a pot of simmering water, stirring occasionally until smooth. Remove from heat.
To the melted chocolate mixture, add crushed pretzels, marshmallows, leftover Christmas chocolate, glacé cherries, mixed nuts, and orange zest. Stir until all ingredients are well coated with the chocolate mixture.
Pour the mixture into the prepared tin, spreading it evenly with a spatula. Press it down lightly to ensure all ingredients are packed in well.
Drizzle the melted white chocolate over the rocky road mixture, using a spoon or fork for a decorative effect. Place a few extra pretzels on top and finish with a good sprinkle of Maldon Sea Salt.
Place the tin in the fridge for at least 2 hours, or until the rocky road is set.
Once firm, remove from the tin and cut into squares or bars. Serve immediately, or store in an airtight container in the fridge for up to a week.
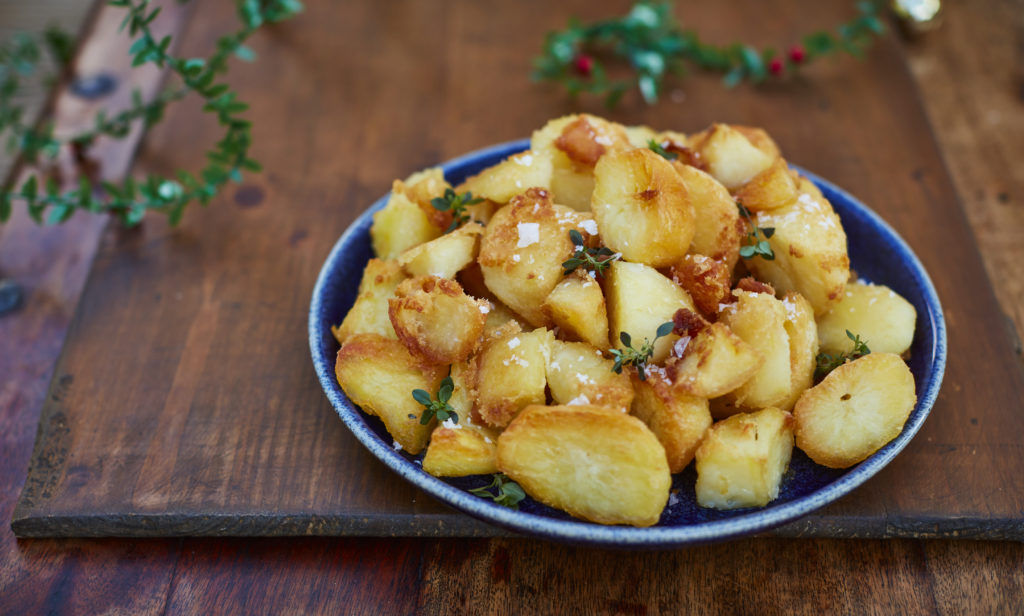
These roast potatoes will be the star of the festive season! They might even steal the spotlight on the big day. Thanks to Maldon Garlic Sea Salt, these epic roast potatoes have a double layer of seasoning. Use the Maldon Garlic Sea Salt when parboiling the potatoes and then again after roasting to layer the flavour. Resulting in the crispiest roast potatoes with fluffy insides. If that’s not delicious enough, they’re served with a sticky garlicky glaze, made with honey and balsamic vinegar, plus a sprinkle of Maldon Garlic Sea Salt of course.
Here is how to make garlic roast potatoes
Preheat the oven to 200°C/180°C fan/gas mark 6 .
Peel and slice the potatoes in half.
Put the potatoes in a pan of cold salted water, season the water with a generous pinch of Maldon Garlic Sea Salt. Bring to the boil then simmer gently for around 6 – 8 minutes until they are about half cooked.
Drain and shake them hard in a colander so that you rough up the edges – this gives you super crunchy potatoes. Leave them to steam cool in the colander.
Add the oil to a deep roasting tray. You can also use duck or goose fat depending on what you prefer. The tray should be big enough so the potatoes are in a single layer. Pop the tray in the hot oven for 5 minutes or until the oil is smoking hot.
Remove the tray and carefully spoon the potatoes into the tray and baste with the hot oil, season well with Maldon Garlic Sea Salt.
Roast for 45 – 55 minutes, turning halfway through, until they are crunchy on the outside and fluffy inside.
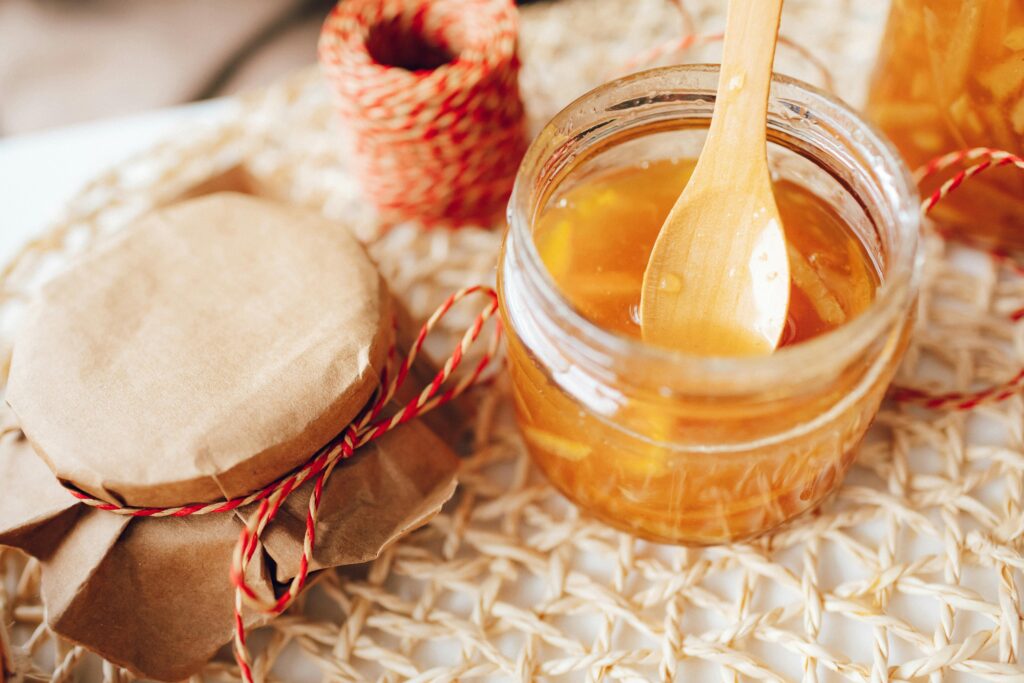
Meanwhile, make the glaze. In a small pan heat the honey on a medium heat, when it starts to bubble, stir in the balsamic vinegar and a generous pinch of Maldon Garlic Sea Salt. Simmer for a few minutes until it starts to thicken.
Plate up the roast potatoes and pour over the glaze. Enjoy!
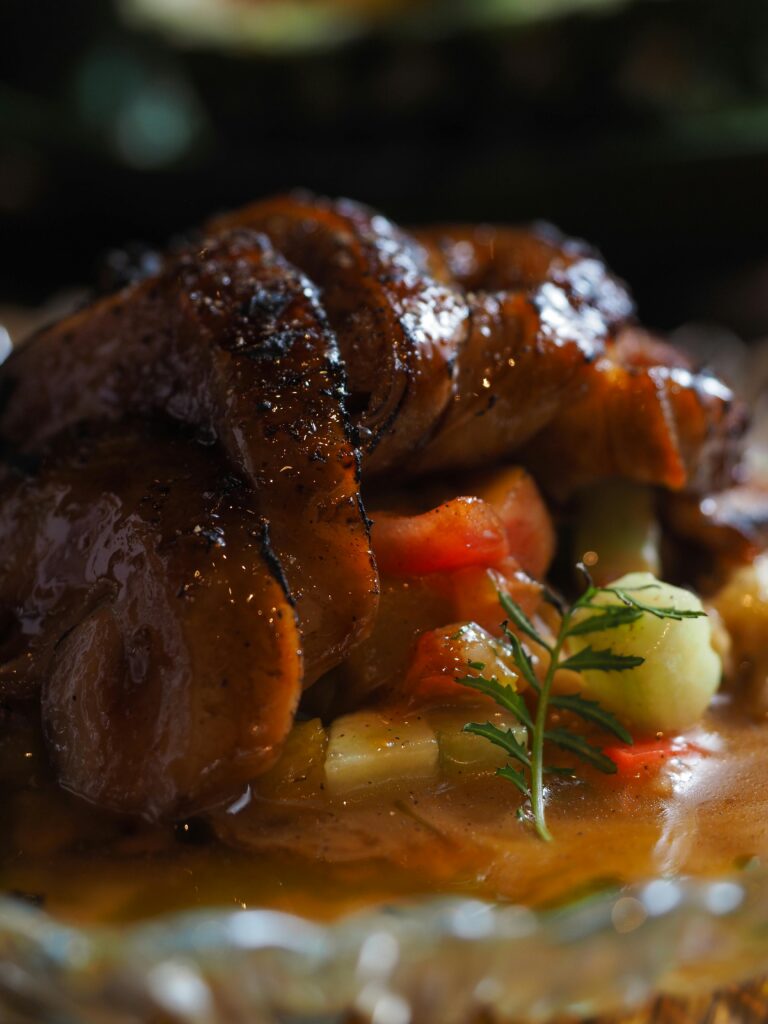
Celebrate the holidays in style with a Christmas Spiced Orange Roast Duck recipe that is sure to become the star of your Christmas dinner. This elegance dish features succulent duck roasted to golden brown perfection, infused with festive flavours and aromatic spices. The tender meat is beautifully complimented by a rich orange glaze, offering a citrusy brightness that balances the deep, savoury notes of the duck. With crispy skin seasoned with Maldon Sea Salt flakes and a warming blend of Christmas spices, this roast duck promises a memorable dining experience, perfect for special occasions!
The combination of orange and spices elevates the natural richness of the dusk, creating a dish that’s both indulgent and full of holiday spirit. You can make the glaze with freshly squeezed oranges (we used clementines), caramelized shallots, and a hit of cinnamon to enhance the duck’s succulent meat, while the crispy skin adds an irresistible crunch. Try adding a pinch of star anise to bring a sophisticated flavour to the dish! Whether you’re hosting a family gathering or a festive dinner party, this spiced roast duck recipe is a showstopping centrepiece that captures the warmth and comfort of Christmas in every bite.
How to Roast Duck Perfectly
Roasting duck perfectly involves ensuring the skin is crispy while keeping the meat tender and succulent. Start by patting the skin dry and rubbing Maldon Smoked Sea Salt into it. Place the duck breast side down initially to allow the fat to render out, ensuring a crispy skin as it roasts evenly. Always keep an eye on it and baste regularly to maintain moisture.
Making the Christmas Spiced Orange Roast Duck
Prepare the Ingredients:
Preheat your oven to 180°C. Pat dry the skin of the duck and rub 1 tsp of Maldon Smoked Sea Salt into it. Peel and halve the banana shallots and set aside. Halve the clementines and prepare your potatoes for roasting.
Roast the Duck:
Place the duck breast side down in a roasting tin with the shallots and roast for 1 hour. While the duck is roasting, boil the potatoes until tender and set aside to steam and fluff.
Turn and Season the Duck:
After 1 hour, drain off the fat (reserving for the potatoes). Carefully turn the duck breast side up, surround it with 3 halved clementines, a cinnamon stick, and bay leaves. Continue roasting for another hour, basting occasionally.
Crispy the Potatoes:
In a separate roasting tin, roast the potatoes in the reserved duck fat, seasoning with Maldon Smoked Sea Salt. Ensure they are crispy and golden brown.
Create the Glaze:
In the final stages of cooking the duck, reduce the juice of the remaining 3 clementines in a small pan. Add honey and Seville orange marmalade and simmer until it forms a sticky glaze. Brush this over the duck and roast for the final 10 minutes.
How to Make Christmas Spiced Orange Roast Duck
Preheat oven to 180C. Pat the skin of the duck dry and rub 1tsp of the Maldon Sea Salt into the skin. Place the bird breast side down in a roasting tin with the shallots and roast for 1 hour.
While this is roasting, peel and halve any large potatoes. Place them in a pan of water and boil them for 8 minutes, or until a knife can be inserted. Then tip the potatoes into a colander in the sink and allow them to steam. Shake the colander a little to fluff up the potatoes and then set aside.
After 1 hour, drain off all the fat reserving it to cook your potatoes in! Then carefully lift and turn the duck in the tray. Surround it with 3 clementines, halved, the cinnamon and bay and return to the oven for a further one hour (keep watching and basting).
Meanwhile, roast the potatoes in the duck fat adding a good pinch of Maldon Sea Salt.
Before the end of the cooking, add the juice of the 3 remaining clementines to a small pan and simmer until reduced by half, then add the honey and marmalade. Brush the duck with the sticky glaze and return to the oven for the final 10 minutes.
Serve the duck with the roast potatoes, braised red cabbage and sprouts.
Can You Freeze Cooked Duck?
Yes, you can freeze cooked duck. Once fully cooled, wrap the duck tightly in foil or plastic wrap and then place it in a freezer-safe bag. It can be stored in the freezer for up to 3 months. Thaw in the refrigerator before reheating.
Marmalade Glaze for Duck
A marmalade glaze adds a sweet and tangy dimension to roast duck. Reduce the clementine juice until it thickens slightly, then stir in honey and Seville orange marmalade. Brush over the duck in the final stages of roasting for a glossy and flavourful finish.
Create a showstopping festive centrepiece this Christmas with a mouth-watering mushroom, butternut squash, chestnut and caramelised onion wreath. Golden brown and packed with seasonal ingredients, this dish is the perfect vegetarian main for your holiday table. Made with a sheet of light, flaky puff pastry and filled with savoury roasted vegetables, this wreath is sure to impress both vegetarians and meat-lovers alike! The combination of earth mushrooms, sweet caramelised onions and nutty chestnuts brings together the flavours of winter, while the Maldon Sea Salt flakes adds the perfect finishing touch.
This recipe is great addition to your collection of vegetarian puffy pastry recipes and is ideal for those looking for an easy yet stunning main course for Christmas!
How to caramelise onions
Caramelising onions is a slow cooking process that draws out the natural sugars, resulting in sweet, golden brown onions perfect for adding depth to recipes. Start by heating olive oil and butter in a pan over low heat. Add finely sliced onions and a pinch of Maldon Sea Salt flakes and cook for at least 10 minutes until soft and translucent. Add soft brown sugar and continue cooking until onions are sticky and caramelised, usually another 5 minutes. If you have any leftover, you can use them as a filling for a delicious portobello mushroom and stilton burger, paired with rocket in a sweet brioche bun.
Making the Mushroom, Butternut Squash, Chestnut and Caramelised Onion Wreath
Prepare the Ingredients:
Preheat your oven to 200°C. Slice the red onions finely and prepare the butternut squash by peeling and dicing into 2cm cubes. Tear the mixed mushrooms into pieces and crumble the chestnuts.
Roast the Vegetables:
Place the mushrooms and butternut squash on a baking tray. Drizzle with olive oil and season with Maldon Sea Salt and pepper. Roast for 25 minutes until the squash is tender and mushrooms are golden brown. Allow to cool.
Make the Filling:
In a large bowl, combine the roasted vegetables, caramelised onions, crumbled chestnuts, shredded sage leaves, grated nutmeg, and dried cranberries. Season with a pinch of Maldon Garlic Sea Salt.
Assemble the Wreath:
Unroll the puff pastry sheet onto a baking tray. Pile the vegetable filling down the middle of the pastry. Roll the pastry over to encase the filling, sealing the edges with an egg or milk wash. Shape into a wreath, sealing the ends together. Use leftover pastry for decorations if desired. Chill in the fridge for 30 minutes.
Bake the Wreath:
Once chilled, bake in the preheated oven for 35-40 minutes or until the pastry is golden and crisp. Allow to cool slightly before serving warm or cold.
Mushroom, Butternut Squash, Chestnut and Caramelised Onion Wreath Recipe
Preheat the oven to 200c.
Start by making the caramelised onions. To a frying pan add 1 tbsp of olive olive plus a knob of butter and allow it to melt. When foaming, add the sliced onions and a pinch of Maldon Sea Salt. Fry these on a low heat for at least 10 minutes until they are soft and translucent. Then add the soft brown sugar and continue to cook for another 5 minutes until the onions have gone sticky, soft and caramelized. Set aside to cool.
Place all the mushrooms onto a baking tray along with the diced butternut squash. Then drizzle with the remaining olive oil and some salt and pepper. Place into the hot oven and roast for 25 minutes until the squash is tender and the mushrooms are golden. Set the tray aside to cool.
Once the vegetables have cooled you can make the filling. Simply mix in a bowl with the caramelized onions, chestnuts, sage, nutmeg, dried cranberries and Maldon Garlic Sea Salt.
Unroll the pastry onto a baking tray and then pile the filling down the middle in a line. Then roll the pastry over to seal it, as though making a large sausage roll. Use the egg wash to seal it down, and then take the two open ends and join them together, sealing them as well. Any excess pastry can be cut off and used to decorate the wreath, if desired. Egg wash the whole outside of the wreath and then place into the fridge for 30 minutes.
Once the wreath has chilled, place it into the preheated oven and bake for 35 – 40 minutes until it is golden and crisp on the outside. Cool slightly before serving – can be served warm or cold.
Can You Freeze Butternut Squash?
Yes, you can freeze butternut squash. Peel and dice the squash into cubes, blanch in boiling water for 3-5 minutes, then cool in ice water. Drain and pat dry before placing in a single layer on a baking tray to freeze. Once frozen, transfer to a freezer bag for long-term storage.
Side Dishes to Serve
A delicious flaky mushroom wreath is the epitome of comfort food. However, now you need the perfect sides to make the ultimate festive feast! Here are a few tasty side dishes you can serve with your mushroom wreath.
The ideal accompaniment for this recipe – the classic roast potato. Crispy on the outside and heavenly fluffy on the inside. Normally you can season your ‘tatties’ with salt and pepper, but we’ve added a twist by infusing rosemary and thyme to give a delightful flavour and an addictive crunch.
Oh-so-sweet and tender! These carrots are cooked in a delicious honey and lemon glaze that offers a sweetness and and touch of colour to your dinner plate.
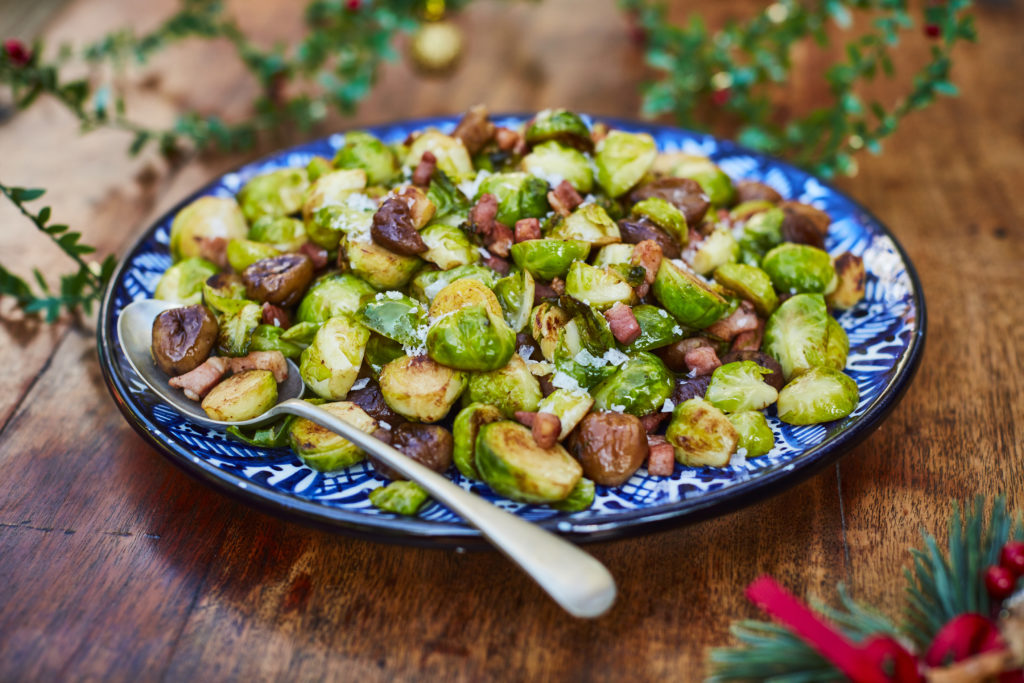
Add smoked bacon to your humble brussels sprouts to give a crispy, savoury element to the dish. It compliments the wreath’s mushroom and caramelised onions beautifully!
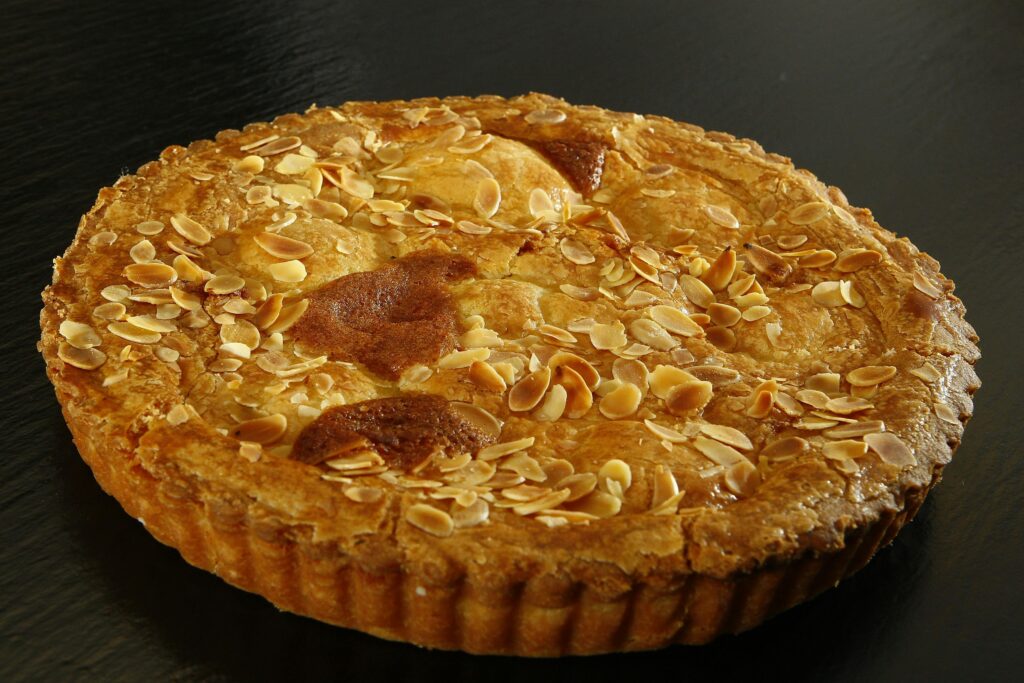
Indulge in the rich, comforting flavours of a spiced apple frangipane tart, where the warm, nutty essence of almond meal meets the crisp sweetness of Granny Smith apples. This elegant apple tart is elevated with the subtle smokiness of Maldon Smoked Sea Salt, adding a sophisticated twist to the classic dessert. Each bite of this tart reveals layers of flavour, from the buttery crust to the spiced apples on top, dusted with a delicate sprinkle of powdered sugar.
What is frangipane?
Frangipane is usually made as a filling for tarts, comprising of finely ground almonds, butter, sugar and eggs. You can also add a drop of almond extract in the mixture if you like a more intense almond flavour. Once you have made the frangipane, you can then spread it evenly across a blind-baked tart shell, creating a delicious, creamy mixture once baked.
Frangipane vs marzipan
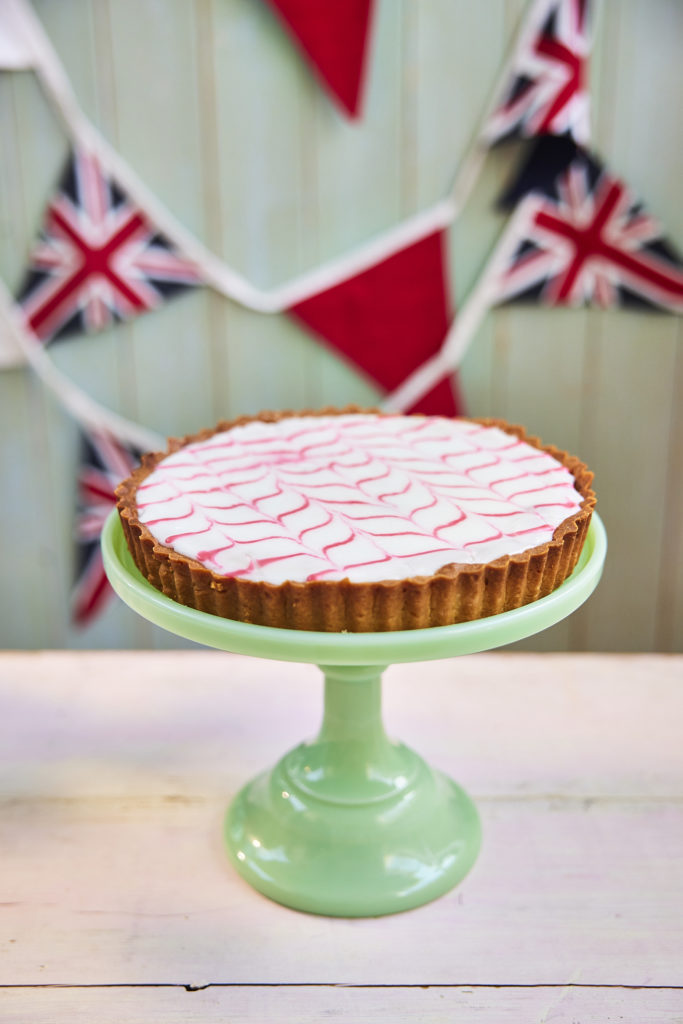
Although both frangipane and marzipan’s main ingredient is almond meal, marzipan does not include butter, whereas frangipane does! Because of this, the main difference between frangipane and marzipan is the texture. Frangipane is very rich and used as a cream-based filling for tarts. In contrast, marzipan is more of a thick paste, used for decorating cakes and cupcakes. Our delicious orange and pistachio Battenberg cake uses marzipan to protect the soft, fluffy interior of the cake.
As a result, you can’t substitute one from the other, as they consist of different components and have different purposes in baking. However, if you’re running out of time, bakers tend to use almond paste instead of marzipan for a quicker solution when decorating.
Frangipane tart recipe
To make a classic frangipane tart, start by preparing the frangipane filling. Cream together room-temperature butter and sugar until light and fluffy, then add an egg yolks and a touch of almond extract for extra flavour (optional). Gradually fold in the finely ground almonds or almond meal to create a smooth mixture. Pour the frangipane filling into a blind-baked tart shell, ensuring it spreads evenly across the base.
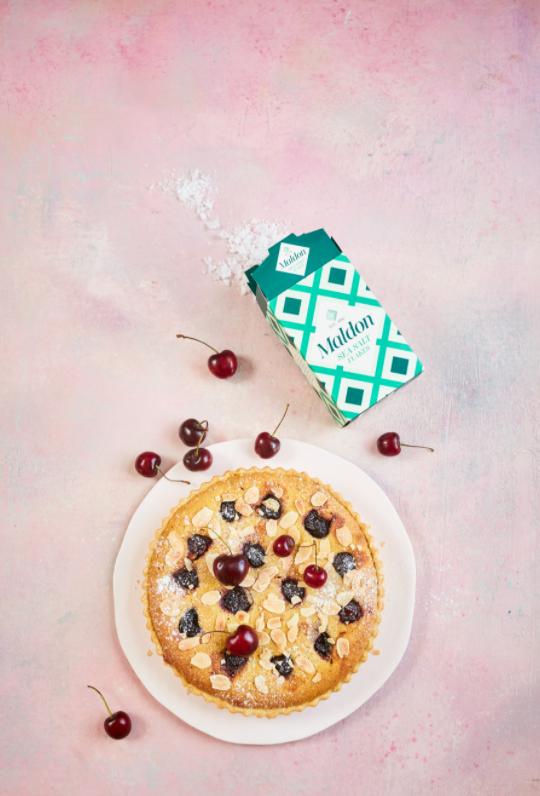
If you are wanting to add fruit to your tart, we recommend lemons, apples or cherries. If opting for apples, you need to make sure your chosen apples (preferably Granny Smiths), are thinly sliced. Arrange the apples slices in a decorative pattern on top of the frangipane . Bake the tart is a preheated oven at 350°F (180°C) for about 30-45 minutes, or until the filling is set and the apples are golden. Once cooled, dust the tart with powdered sugar for a final touch. You can serve warm or at room temperature to enjoy the perfect balance of sweet almond filling and tart apples.
How to make a spiced apple frangipane tart
Start by making the pastry. In a food processor add the plain flour and icing sugar. Then add the cold, cubed butter and pulse until it resembles fine breadcrumbs. Next add the egg yolk and cold water. Pulse again until the pastry starts to come together. If it looks a little dry, add a splash more water.
Bring the pastry together with your hands and tip out of the food processor. Knead very gently and then wrap in clingfilm in a flat disc shape and put into the fridge to chill for 30 mins.
After 30 mins, remove the pastry from the fridge and the roll it out on a lightly floured work surface. Roll a large circle around 2cm in thickness and the use your rolling pin to lift the pastry and drape over a 23cm fluted tart tin. Gently press in the corners and up the sides, leaving some overhang at the top. Use a fork to lightly prick the base of the tart. Then place this back into the fridge for another 30 mins.
Preheat the oven to 180c.
After 30 minutes, remove the chilled pastry case from the fridge. Scrunch up some baking paper and then line the pastry with this and some baking beans. Place into the preheated oven to blind bake. Bake it for 15 minutes, then remove the beans and paper and return to the oven for an additional 5 minutes until the pastry feels chalky and lightly golden in colour. Remove from the oven and allow to cool slightly
While the pastry is blind baking, make the frangipane. Using an electric hand whisk, place the softened butter, sugar and pinch of Maldon Smoked Sea Salt in a large bowl and whisk together for 2 – 3 minutes until pale and fluffy. Then add the eggs, yolks, and vanilla and whisk again. Finally add the cinnamon, nutmeg, ground almonds and flour and whisk until combined.
When the pastry case has cooled slightly, take a small, serrated knife and carefully trim off the excess pastry so you have a nice smooth line around the top. Dust off any pastry remains.
Spoon the frangipane filling into the pastry case and smooth out with a palette knife. Then arrange the apple slices on the top and lightly press into the filling.
Place the tart back into the oven for around 40 – 45 minutes until the apples are golden and the frangipane is puffed up and golden brown too.
Remove from the oven and allow to cool before dusting with icing sugar and serving.
Can you freeze frangipane?
Once you have made your frangipane, you can store in the fridge for up to 5 days, or frozen for up to 1 month in the freezer. Make sure you thaw the frangipane overnight in a fridge before using it in your bakes. When you are storing leftover frangipane, make sure it’s covered with clingfilm to prevent freezer burn.