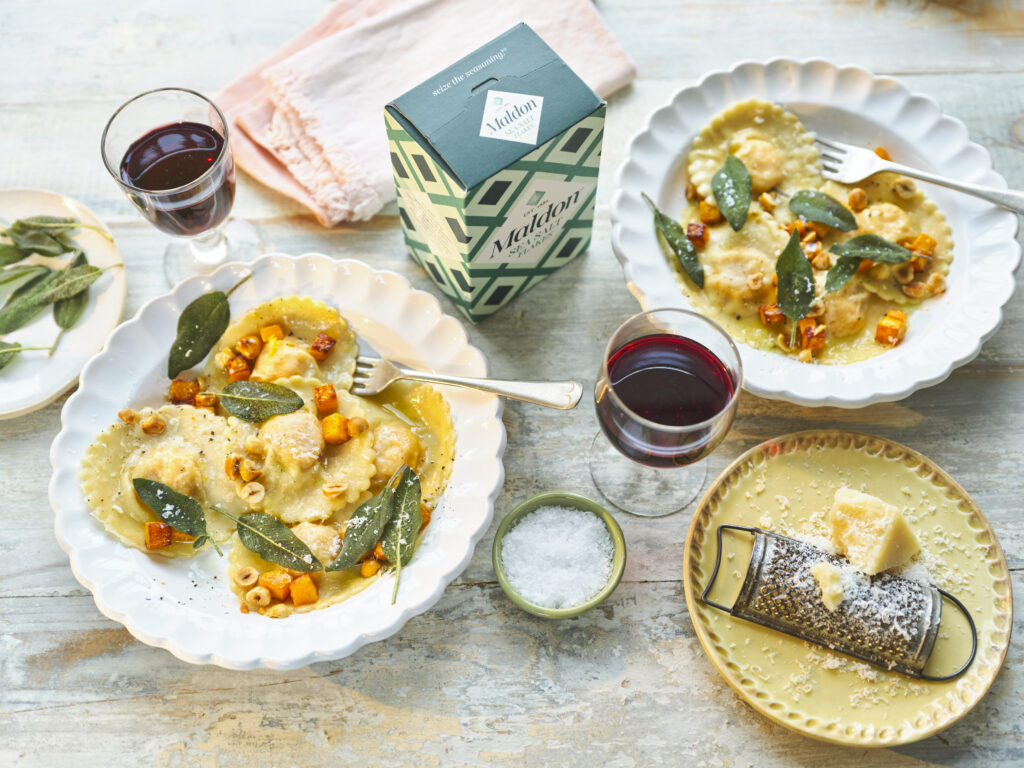
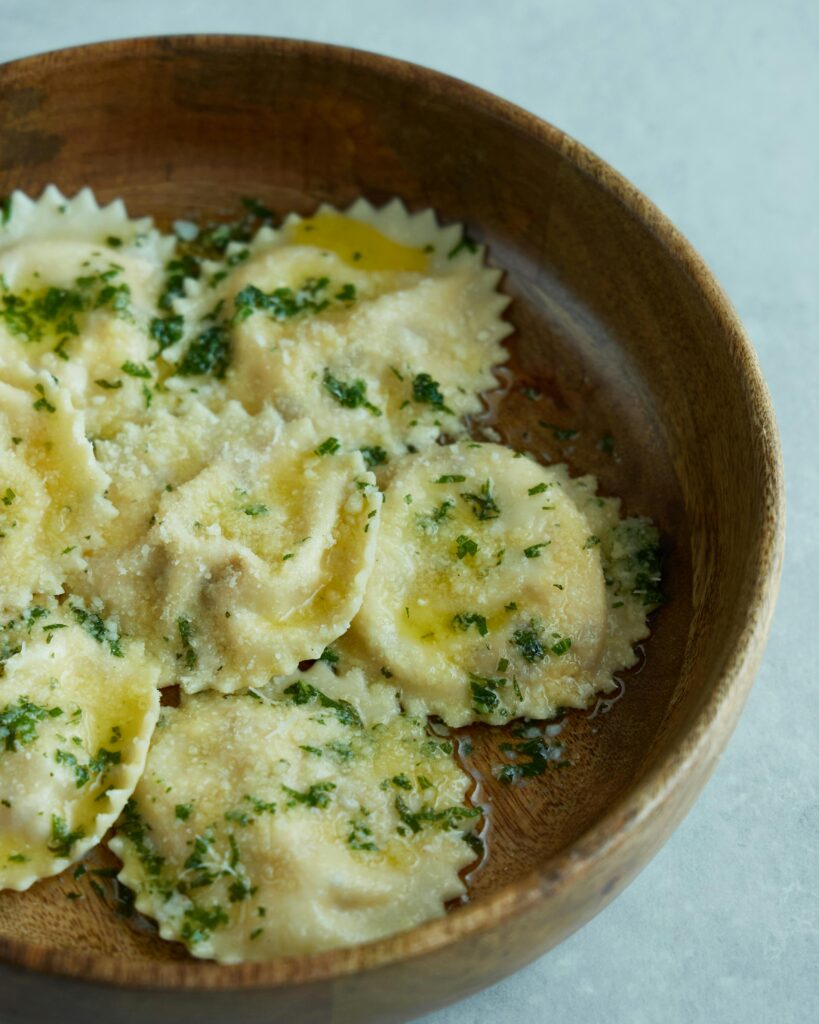
Introducing a delightful homemade butternut squash ravioli recipe that marries the sweet, nutty flavours of butternut squash with the rich, flaky goodness of Maldon Sea Salt flakes. This exquisite dish is elevated by a luscious brown butter sage sauce that compliments the creamy filling perfectly. The butternut squash filling, seasoned with salt and pepper, creates a smooth and and flavourful centre for the ravioli. We used a potato masher to puree the ingredients, but you can also use a food processor for a faster result!
Here are a few points that you need to remember when making a homemade butternut squash ravioli…
When roasting your squash, make sure to drizzle generously with olive oil and cook until beautifully tender. You then blend with a selection of creamy cheeses, a pinch of Maldon Sea Salt, pepper and a generous helping of nutmeg.
When rolling out the pasta dough using a machine, always start at the widest setting and gradually making it thinner. Lay the dough on a flat surface, placing spoonful’s of the delicious filling evenly apart, and cover with another sheet of dough. Use a ravioli cutter to assemble the ravioli, ensuring each piece is well-sealed to prevent leakage during cooking. If you don’t have a ravioli cutter, you can use a glass instead to cut out equal-sized circles. Take your filling and place into the centre of each cut-out circle, making sure there is space around the edge to close the ravioli by crimping. To save time, you can prepare the dough and filling in advance, storing them in plastic wrap in the refrigerator.
Cooking the ravioli is a breeze and takes around 3-4 minutes in boiling water, or until they float to the top. The addition of a brown butter sage sauce elevates the pasta dish further! Made up of melted butter and fresh sage leaves, cook until the butter turns a golden brown colour, emitting a nutty aroma. Transfer the ravioli tot he brown butter sauce, soaking up the rich flavours.
This homemade butternut squash ravioli recipe, infused with the distinctive taste of Maldon Sea Salt, is sure to impress with its balance of textures and flavours, making it a perfect choice for a special dinner or a cosy night in.
How to make butternut squash?
Begin by roasting the butternut squash.
Preheat the oven to 180c then place the peeled and roughly chopped butternut squash onto a roasting tray or baking sheets.
Drizzle with a little oil, cover with tin foil and then roast for 30 minutes until soft and tender, and a knife can be inserted easily. Set aside to cool.
Once the butternut squash is cooled, place it into a bowl and use a potato masher or ricer to puree it.
Then to the pureed squash add the ricotta, parmesan, a pinch of Maldon Sea Salt, cracked black pepper and a grating of nutmeg. Set aside.
How to make ravioli pasta?
While the butternut squash is roasting, make your pasta. Tip the OO pasta flour onto a clean work surface and form a circle with it.
Then in the middle make a clear well so you are left with a ring of flour. Crack the 3 eggs into the middle. Then use a fork to break the yolks and gently whisk the eggs together so they are beaten.
Once beaten, use the fork to slowly flick in little bits of flour onto the eggs, and continue to whisk them in. Keep doing this while it thickens, and when it becomes too thick discard the fork and use your hands to knead the flour and eggs. Continue to knead for 5 minutes until you have a smooth dough.
Wrap it in clingfilm and then rest it in the fridge for 30 minutes.
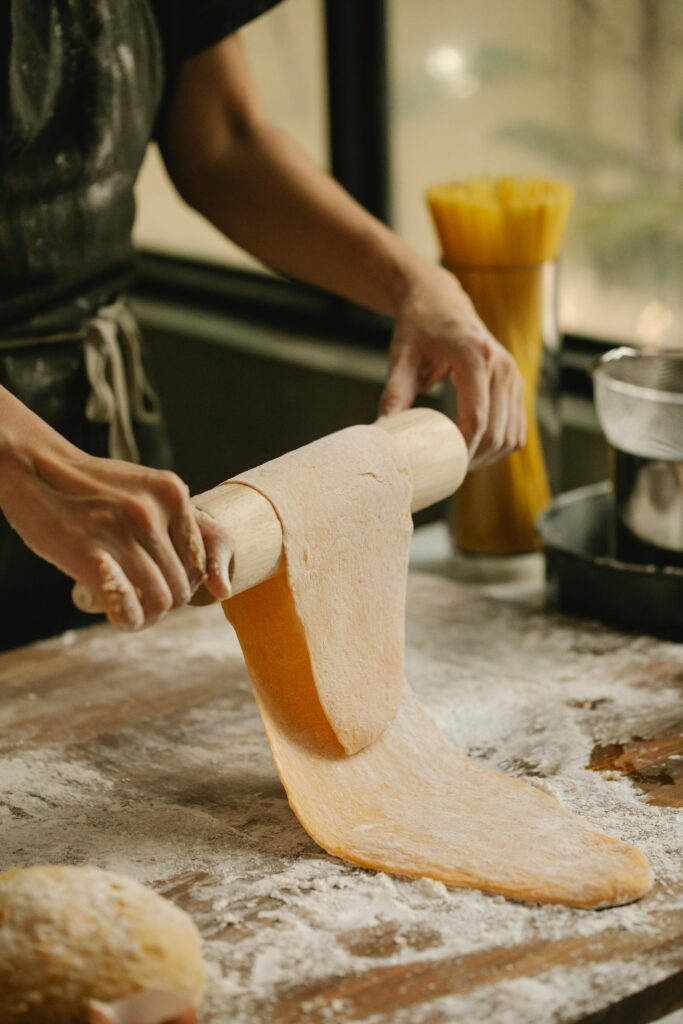
Once the dough has rested it is time to roll and shape the ravioli. Start with a smaller piece of pasta dough and flatten it out, then roll it through the widest setting of the pasta machine. Go through the widest setting again, and then continue to go down the settings until you have the thinnest pasta sheets – you should be able to see your hand through it when held to the light! Dust a tray with a little semolina and lay your pasta sheets on here to stop then sticking, whilst you continue with the rest.
When you have all your pasta sheets ready, you can shape the ravioli. Place one sheet of pasta on the work surface and use a teaspoon amount of the butternut squash filling to dot along the sheet, keeping a 3cm gap between each. Wet your finger in a small bowl of water and run this around the edge of the filling, then place a second sheet of pasta over the top and gently seal the two together – making sure there aren’t any large air pockets. Then use a cutter to stamp each ravioli out and set aside on a semolina lined tray while you do the remaining.
How to make pasta without a machine?
If you don’t have a pasta maker or machine, you can you use a rolling pin and a chef’s knife!
Lightly dust your surface with flour.
Once your dough has been in the fridge for 30 minutes, cut the dough in half.
Roll out one half the dough with a rolling pin into a rectangle around 16 inches and 8 inches wide. Make sure to continue to roll and stretch gently with your hands until the dough is as thin as you can make it.
Repeat the process for the second half of the dough.
Choose one sheet from the two, and begin spooning the butternut squash filling onto the pasta sheet, leaving around 1 inch between each ball of filling.
With a brush, gently brush water between the balls of fillings and around the outside of the sheet so that the other sheet of pasta will stick to it.
Lay the second sheet of pasta on top, pressing down gently between the filling mounds to seal the sheets together and remove any air pockets.
Cut the ravioli into rectangles using a ravioli cutter or sharp knife. Make sure to press any edges down again to ensure they’re sealed.
How to cook ravioli?
Place a large pan of salted water on to boil.
Place the ravioli in to boil, they should only take a couple of minutes. You know they are ready when they float to the surface.
How to serve butternut squash ravioli?
In a large sauté pan, add the butter and allow it to melt, when foaming add the sage leaves and let them bubble in the butter. Then add the hazelnuts and swirl them in.
As soon as your ravioli are cooked, lift them from the pan with a slotted spoon or spider and place them directly into the butter pan.
Toss them through the butter and serve immediately, with a good grating of parmesan cheese.
What goes well with butternut squash ravioli?
Butternut squash ravioli pairs wonderfully with a variety of side dishes and accompaniments that compliment it’s sweet and savoury flavours.
Salad
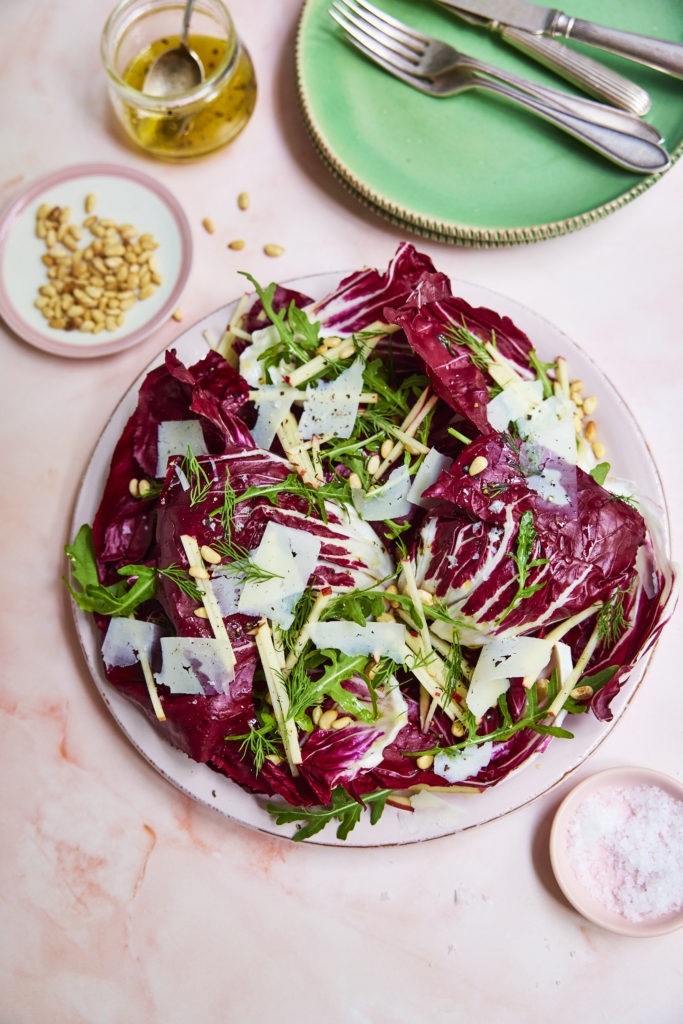
A fresh, crispy salad can balance the richness of the ravioli. Consider a delicious radicchio salad with shaved parmesan and toasted pine nuts. The peppery radicchio and the acidity of the dressing provides a delicious contrast to the sweet squash filling.
Bread
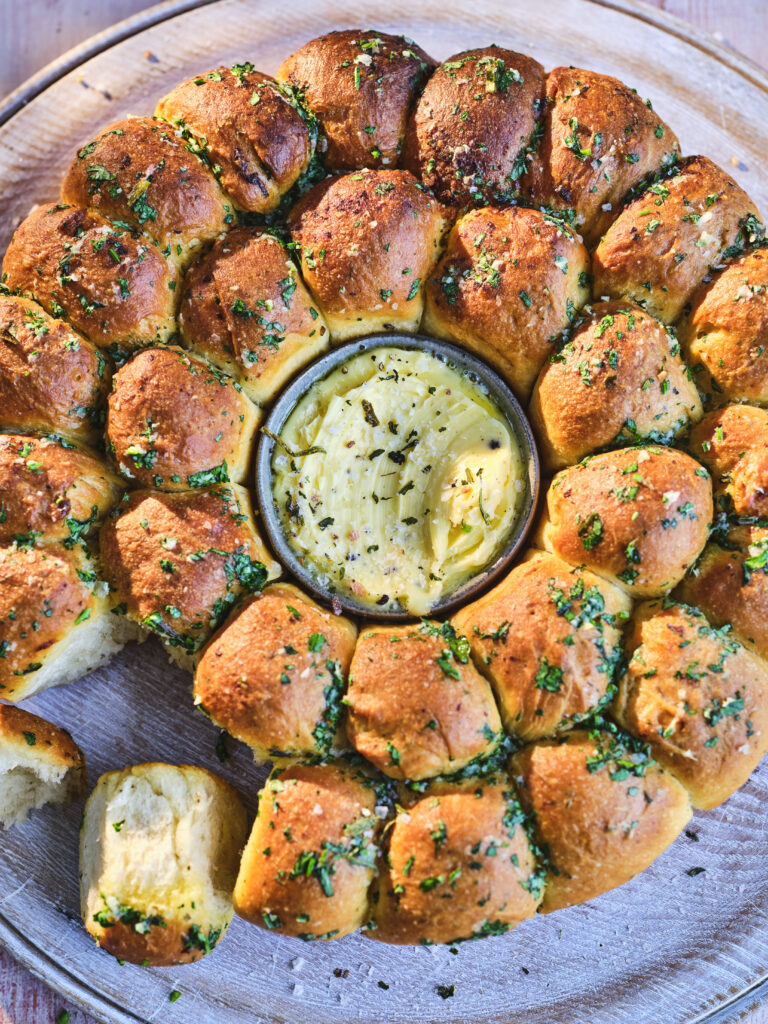
A warm, crust bread can be perfect for sopping up any leftover brown butter sage sauce. garlic bread or focaccia with rosemary and sea salt can also be a flavourful addition.
Vegetables
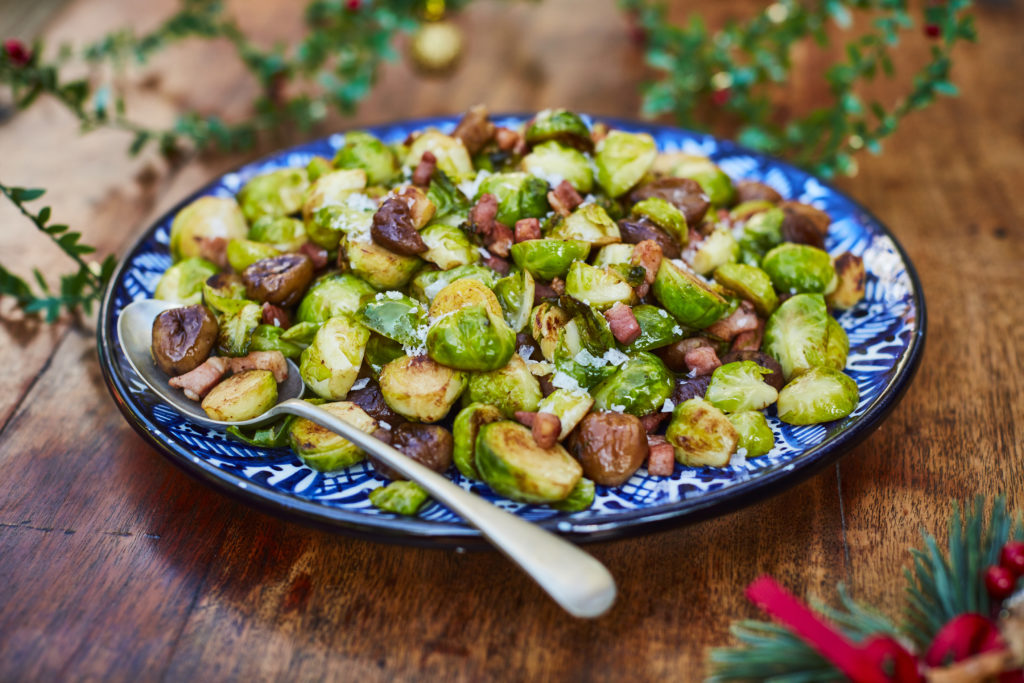
Roasted or sauteed vegetables make a great side dish. Brussels sprouts, asparagus, or green beans with a touch of olive oil and Maldon Sea Salt can add a delightful crunch and vibrancy to your meal.
These pairings can enhance the flavours of your butternut squash ravioli, creating a well-rounded and satisfying dining experience.
Can you freeze fresh pasta?
Yes, you can freeze fresh pasta, and it’s a great way to preserve it for later use! Here’s a detailed guide on how to freeze freshly cooked pasta effectively.
Cook the pasta al dente, as it will continue to cook slightly when reheated. Drain the pasta and let it cool completely.
Toss the cooled pasta with a small amount of olive oil to prevent sticking.
Divide the pasta into portions and place them in airtight containers or freezer bags. Remove as much air as possible from the bags.
Label the containers or bags with the date and freeze up to 2 months.
Reheat the pasta by dropping the frozen pasta directly into boiling water for 1-2 minutes.
Freezing fresh pasta is an excellent way to save time and reduce waste, ensuring you always have a quick and delicious meal option on hand!
The talented Rukmini Iyer is a celebrated author and culinary innovator, known as the queen of fuss-free flavour. In her latest cookbook, ‘The Green Cookbook’, Iyer continues her mission to simplify delicious home-cooked meals. This vibrant collection features 75 brand-new recipes designed to help you get a delectable dinner on the table every day of the week with minimum hassle and maximum flavour. Whether you’re a ‘seasoned’ vegan, a dedicated vegetarian, or simply looking to incorporate more plant-based meals into your diet, ‘The Green Cookbook’ offers a treasure trove of inspiration!
Here is how to make all-in-one orzo with baked feta, tomatoes and olives…
This is an update on one of Rukmini’s favourite Green Roasting Tin recipes, a really simple dish of baked orzo with fresh cherry tomatoes. Here, she adds in a big square of feta to bake on top of the pasta, along with olives for a briny hit of flavour – all your food groups in one go. It’s perfect for a light dinner on a summer evening.
Preheat the oven to 180°C fan/200°C/gas 6.
Put the orzo into a medium roasting tin, pour over the boiling stock and stir, then top with the tomatoes and olives.
Place the block of feta cheese in the middle of the dish, then drizzle over the olive oil, a scatter of fresh basil leaves (reserve some for later) and a good grind of freshly ground black pepper. Transfer to the oven to bake for 25 minutes.
Carefully remove the baked feta with a fish slice and give the orzo a good mix with a wooden spoon before serving, then replace the feta as pictured. Scatter over the reserved basil leaves and top with a drizzle of extra virgin olive oil and a scatter of chilli flakes. Once cooked, let the dish stand for a few minutes before serving hot.
Buy ‘The Green Cookbook’ Today!
Whether you’re preparing a quick meal for yourself or entertaining guests, her innovative and accessible recipes are sure to become staples in your kitchen. From 15-minutes pasta dishes that are perfect for those hectic weeknights to budget-friendly batch cooking that ensures you have a hearty meal ready to go, Iyer’s recipes are crafted with real-life demands in mind. Buy a copy from here and embrace the simplicity and joy of fuss-free cooking!
Make sure you have your Maldon Salt ready for these recipes! If you are running out, please feel free to browse on our Where to Buy Page to find your nearest store in which stocks our beloved Maldon Salt.
Lastly, we LOVE seeing your creations – please tag us on Instagram using the #maldonsalt so we can share your own take on Rukmini’s recipes!
Elevate your summer dinner party with our irresistible Cheese and Chives Croquettes featuring a tantalizing twist of Maldon Smoked Sea Salt.
Blended with three creamy cheese to create a beautiful bechamel sauce (cheddar, mozzarella and Gruyere), these croquettes are a burst of rich flavour in every bite. Fresh chopped chives and a generous pinch of Maldon Smoked Sea Salt is added for an extra burst of flavour. Each croquette is coated in crunchy panko breadcrumbs and fries to golden perfection, making them seriously crispy on the outside and melt-in-your-mouth delicious on the inside!
We pair these croquettes with a vibrant green aioli sauce for the ultimate side dish that will leave your guests craving more! Whether you’re hosting an intimate gathering or a fabulous feast, these croquettes are guaranteed to impress!
How is how to make cheese and chive croquettes…
In a saucepan, heat the milk until it’s warm but not boiling (about 50°C).
In another saucepan, melt the butter over medium heat. Once melted, add the 60g flour and whisk continuously to form a smooth paste forms.. Cook for about 2 minutes, stirring constantly.
Gradually pour the warm milk into the roux, whisking constantly to avoid lumps. Continue cooking and stirring until the sauce thickens, about 5-7 minutes.
Grate the cheddar, gruyere and mozzarella cheese.
Add the cheddar, gruyere and mozzarella cheeses to the sauce and stir until it melts and incorporates completely.
Stir in the chopped chives and season with the Maldon Smoked Sea Salt and pepper to taste. Remove from heat and let the mixture cool completely.
Once the béchamel mixture has cooled, use your hands to shape it into small cylinders or balls, about 3.5cm in diameter.
Place the 75g flour, breadcrumbs and beaten eggs in separate shallow bowls.
Dip each croquette first into the flour, then beaten eggs, then coat evenly with breadcrumbs. Place the coated croquettes on a plate.
In a deep pan or fat fryer, heat oil to 180°C over medium heat.
Carefully place a few croquetas at a time into the hot oil.
Fry the croquettes until they are golden brown and crispy on all sides, about 2-3 minutes per side. Drain and sprinkle with more Maldon Smoked Sea Salt.
For the cheats aioli, bring a pan of water to the boil and add the parsley. Blanch for 1-2 minutes then drain the parsley and cool down in iced water. Once the parsley has cooled, drain it again and squeeze out any excess water. in a food processor or blender, combine the mayonnaise, minced garlic, lemon juice, pinch of smoked salt and parsley. Blitz until smooth and then serve alongside your warm croquettes.
This is an all-year-round one-pot meal that makes the most of your store cupboard. It’s a classic Italian dish made in various ways and we love it every time. You can bulk it out by frying off finely chopped onions, celery and carrots at the start with the garlic until soft for a more veg-packed version. Kitty also throws in a handful of shredded seasonal greens at the end to wilt, such as spinach, cavolo nero (lacinato kale) or kale. Use any pasta or bean type you have!
Here is how to make pasta and beans
In a large saucepan, heat the olive oil over a medium heat and add the garlic and rosemary before the oil is hot to prevent the herbs burning. Season with a pinch of salt and cook, stirring frequently, for 2 minutes until the garlic softens and turns very lightly golden. Add the chilli flakes and tomato puree, then continue to cook, stirring constantly, until fragrant and the tomato puree turns a dark red.
Add one-quarter of the beans with the liquid from the jar or tin (or 150 ml/5 fl oz/scant ⅔ cup of liquid if using beans for the week). Then, with the back of a fork or masher, crush the beans until completely broken down, this will create the creamy texture you want for the sauce. Now add the remaining beans, plus the bean liquid and stock mixture, then season with black pepper and a pinch of Maldon Sea Salt.
Bring to the boil over a medium-high heat, then stir in the pasta and cook for 2 minutes less than the packet instructions, as the pasta will continue to cook off the heat. The sauce should be reduced and the consistency of half-sauce, half-soup…so a bit of a wet sloppy pasta sauce (but in a delicious way). Adjust the consistency as needed with additional water, stock, or bean liquid, keeping in mind that any liquid will tighten up as it cools due to starch from the beans and pasta.
For the flavoured oil, add 4 tablespoons of extra virgin olive oil to a pan with the garlic, rosemary and chilli flakes, while the oil is still cold, so that the garlic cooks evenly and not too quickly. Gently cook for 3–4 minutes until fragrant and the garlic is lightly golden, then turn off the heat and squeeze in the lemon juice.
Remove the pasta from heat and add most of the grated Parmesan, leaving some to serve and stir rapidly to incorporate and become creamy. Ladle a few spoonful’s into bowls, then drizzle each serving with the flavoured olive oil and the reserved Parmesan.
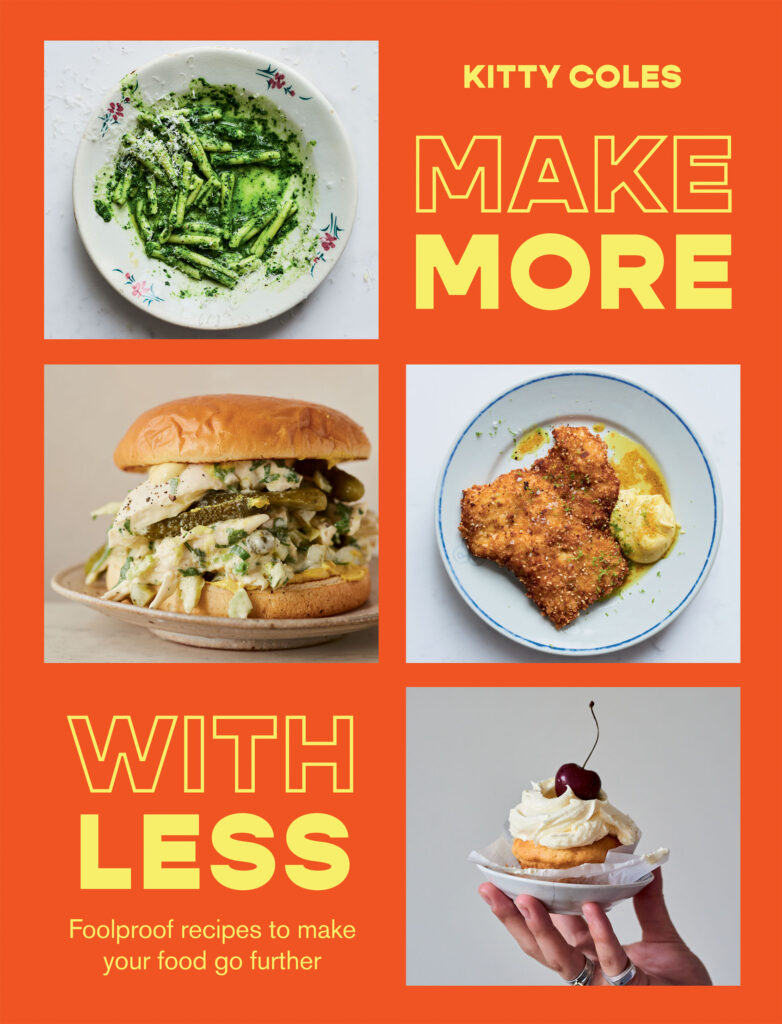
Purchase Make More With Less by Kitty Coles
Make More With Less by Kitty Coles (Hardie Grant, £22), Photography by Issy Croker.
Looking for fool proof recipes to make your food go further? Make More With Less by Kitty Coles takes core ingredients and transforms them into flavour-packed, simple dishes. From turning a few tins of beans into a comforting bean pasta to making leftover chicken tacos! the options are endless and the creativity never stops!
You can purchase your very own copy here, where you can flick through, raid your fridge and Kitchen cupboards and get started on creating low-waste, low-fuss and versatile recipes that you will make over and over again.
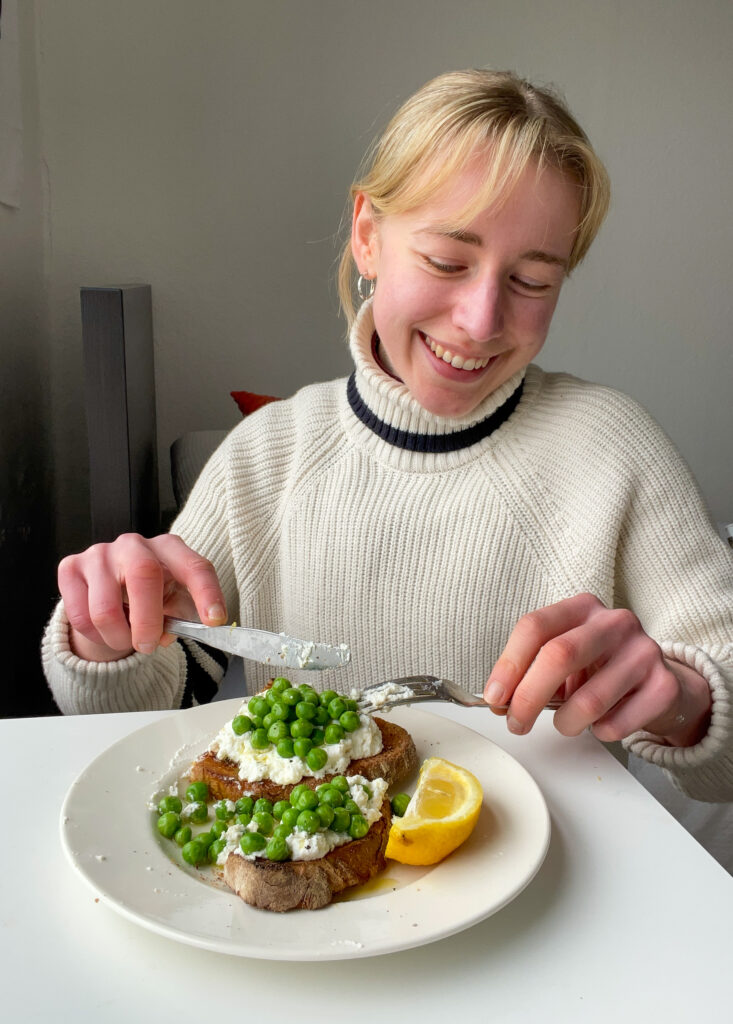
This dish celebrates the simple – the simplicity of Spring – flavours and ingredients that are light, fresh and a little bit zingy. This is more of a concept than a strict recipe – heavily inspired by @anchovytrevor – but that’s the beauty of using minimal but great ingredients that sing well together. What I love about new Maldon Garlic Sea Salt is the addition of wild garlic! Not only do the little flecks look BEAUTIFUL alongside the salty pyramids we all know and love, but it adds a real depth to the garlicky flavour, contrasting oh so beautifully with the creamy, lemony ricotta and sweet peas.
Hannah Wilding
Here is how to make the recipe
Blanch the peas in a pan of boiling salted water for just a couple minutes until tender.
To a mixing bowl, add the ricotta, zest of the whole lemon and a good pinch of Maldon Garlic Sea Salt and whip to a soft and pillow consistency.
Toast your bread. Slather the whipped ricotta onto the toast and tumble over the peas. Finish with a good drizzle of Extra Virgin Olive Oil and cracked black pepper.
What is a picnic pie?
As we head into Spring, many people turn to the outdoors to have a picnic. This is where you pack a meal to be enjoyed in the open air, usually in the countryside, beach or garden. It’s a brilliant way to enjoy the sunshine, socialise with friends and family, and tuck into some delicious tasting foods.
Classic picnic foods include great British bakes of sandwiches, scotch eggs, and sausage rolls, but one of the main centrepieces for a picnic is a ‘picnic pie’. The name is self explanatory, this is a decadent pie that is to be enjoyed at a picnic. It’s a classic pie dish, usually having a shortcrust pasty base due to it’s solid structure, avoiding any crumbling/wreckage whilst travelling to your desired picnic location!
The filling options for your picnic pie are endless! From classic chicken and leek; steak and ale, and coronation chicken, to vegetarian options of spinach, dark greens and even Pilau! It’s important to note that many picnic pies have distinctive layers in between fillings.
How do you make layers in a picnic pie?
The construction of layers requires the most attention when making your picnic pie. We recommend having all the layers ready and cool enough to assemble inside the pastry case. Try using a loose-bottomed spring form cake tin, as the pastry won’t stick to the tin and you can easily lift of the pie to serve without wrecking the pastry!
Your first layer should be the strongest of the layers, preferably one that has a low water content, such as potatoes, beef and peppers. You can then start adding your ‘lighter’ ingredients, such as spinach, cheese or mushroom. You can then repeat the process until you have nice, visible layers. Try using colourful ingredients to make the layers really stand out and impress your guests!
How to make a layered vegetable picnic pie
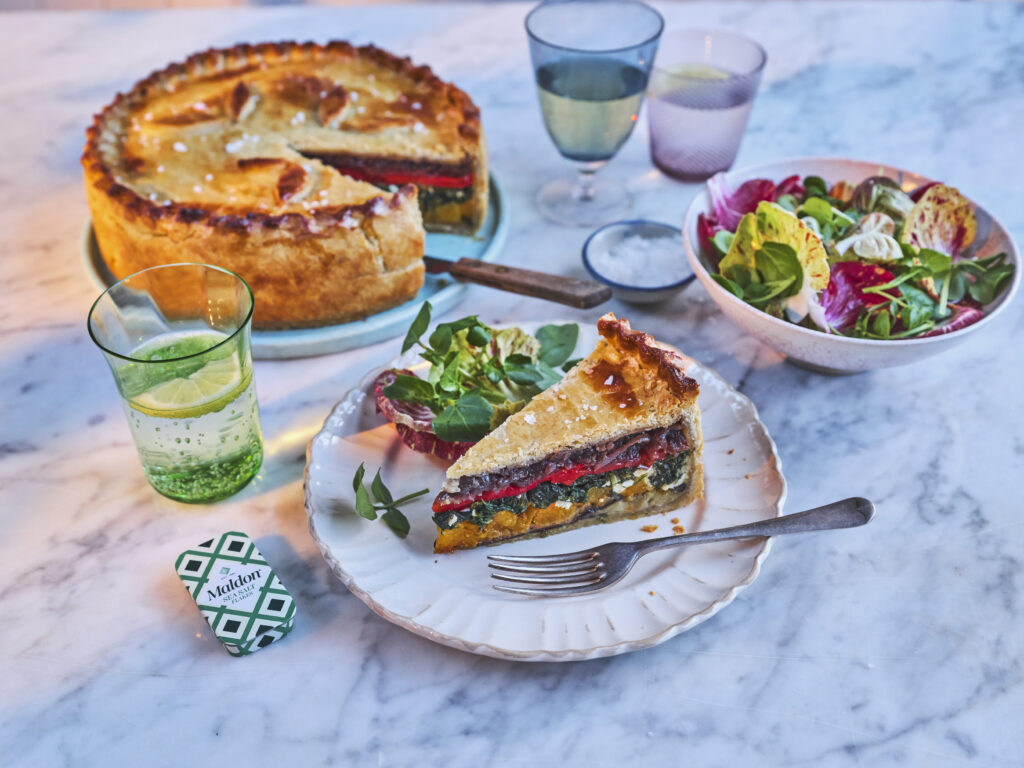
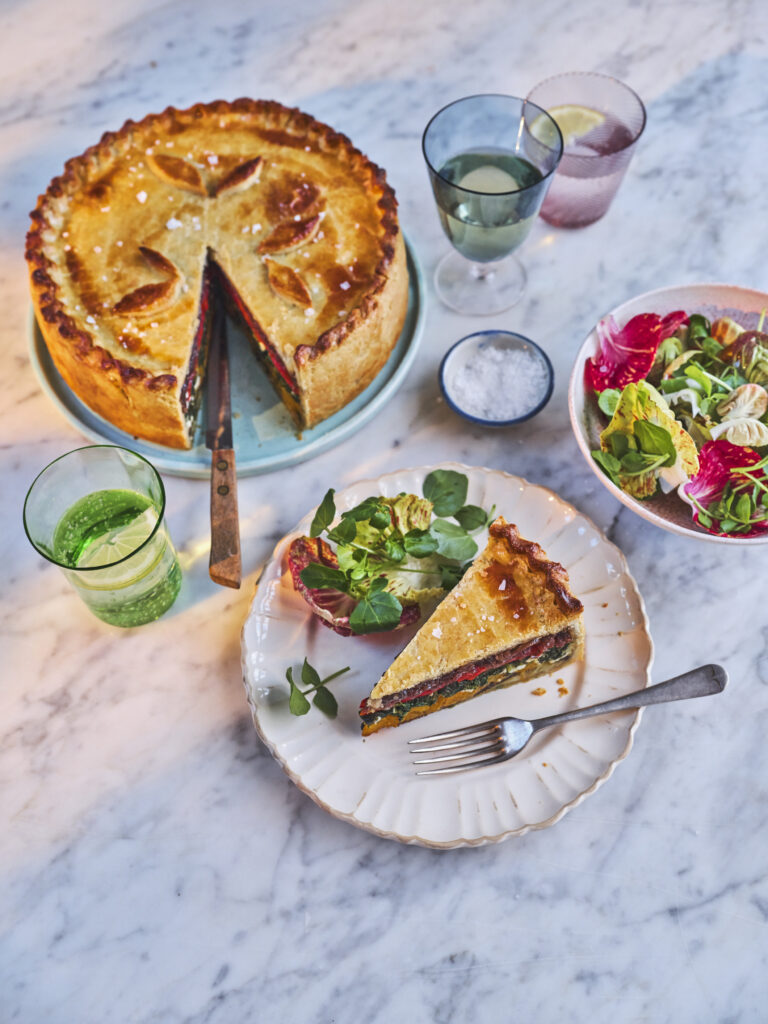
We made a showstopping layered vegetable pie, perfect for a picnic! The layers consist of butternut squash, aubergine, onions, red peppers, spinach and crumbly feta. Once compressed and assembled together, the layers are incredibly vivid – representing the beautiful colours of Springtime.
Making shortcrust pastry:
You can either do this by hand or with a food processor.
By hand, simply measure out the plain flour into a large bowl and add a generous pinch of salt. Then add the cold, cubed butter and use your fingertips to rub the butter into the flour. Keep doing this until no large lumps of butter remain and the mixture resembles fine breadcrumbs.
Add 1 beaten egg to the mix and use a metal knife to cut this through, then use your hands to gently bind the pastry together.
When it has come together as a ball simply tip onto your surface and knead very briefly so the pastry is smooth.
Flatten the ball into a disc shape and then cover in clingfilm and rest in the fridge (for at least 30 minutes) while you make the fillings.
Making the fillings for your pie:
Preheat the oven to 180c.
Peel the butternut squash and then cut into small cubes. Arrange them on a single layer in a baking tray and drizzle with olive oil, cumin seeds and a good pinch of Maldon Sea Salt flakes and some cracked black pepper. Place the butternut squash into the oven and roast for 20 – 30 minutes until the squash is soft and starting to caramelize. Remove from the oven and set aside to cool.
While the butternut squash is cooking you can also prepare the aubergine. Thinly slice both aubergine and lay them across a couple of baking trays in single layers. Drizzle with olive oil, Maldon Sea Salt flakes and then place into the oven for roughly 10 minutes on each side until they are collapsed and slightly charred on each side. Remove from the oven and set aside to cool.
For the caramelised red onions, finely slice all three onions. Heat a large frying pan on a medium low heat and drizzle in a generous amount of olive oil. Add the sliced red onions and fry gently for 10 minutes until softened. Add the crushed garlic and continue to fry for 5 minutes until everything has become soft, jammy, and caramelised. Remove the pan from the heat and allow the onions to cool.
This would be a good stage to line the cake tin with your pastry.
Lining a cake tin for your pastry crust:
Take out the chilled pastry and cut it into 2 pieces, one 2/3 and the other 1/3.
Lightly flour your work surface and then roll out the bigger piece of the pastry first, into a large circle approximately 1cm thick.
Take a 23cm cake tin and carefully lift the large pastry circle and drape into the cake tin. Then press into the base and up the sides, leaving an overhang of pastry over the edges of the cake tin. If your pastry tears or rips at any stage don’t worry, just use your fingers to carefully press the pastry hole together again. Set this in the fridge.
Next roll out the smaller 1/3 of pastry to a circle that is the same 23cm diameter as this will form the top of the pie. Place this onto a lined baking tray and pop into the fridge to chill also.
Making the layers for your pie:
Now you start preparing the fillings. We started with spinach. Place a large pan of water onto boil. Add the spinach to the water and allow it to wilt for a minute only, before immediately draining in a large colander. Run some cold water over the spinach to cool it down quickly and then use your hands to press as much liquid out as possible. Once all the liquid has been removed, tip the wilted spinach into a large bowl and crumble in the feta, the lemon zest and some Maldon Sea Salt flakes and cracked black pepper. Mix to combine and set aside.
Now let’s make the roasted red pepper layer. Simply remove four roasted red peppers from the jar and drain on some kitchen paper to remove the excess oil. Slice them open and set aside.
Remove the lined pastry tin from the fridge and start adding your vegetable layers.
We started with the roasted aubergine at the bottom of the pie.
Then added a layer of the roasted red peppers, followed by the spinach and feta mix. Next add the roasted butternut squash (pressing down gently on each layer so it is well compacted and even) and finished with a layer of the caramelised red onion.
Concealing with a pie lid:
Now take the pastry pie lid from the fridge and cut it to the correct size. Place this on top of the pie to enclose the fillings.
Use the second beaten egg as the egg wash and then fold the pastry overhang to tuck into the lid – use your fingers to create a crimping pattern around the edges to ensure that everything is tightly sealed.
Any extra pastry can be cut off and used to make patterns such as leaves for the top. Use the remaining egg wash to brush all over the pie top.
Cooking the layered picnic pie:
Place it into the oven in the middle shelf for 40 – 45 minutes until golden brown all over.
Remove from the oven and let it stand for 10 minutes before removing from the cake tin.
This can be cooled completely or served warm alongside fresh green salad.
Can you freeze picnic pie?
Once cooked, you can freeze the pie whole or pre-portioned up to 3 months. Make sure that the pie, or individually slices are wrapped well to avoid freezer burn.
What is freeze burn?
Freeze burn is when foods are exposed to cold air, dehydrating the outer layer as moisture is lost. This can make your foods have dry spots once defrosted. You can tell if your frozen foods have freeze burn as ice crystals will appear.
Joe Woodhouse; talented Food & Drink Photographer and Cookbook author of ‘More Daily Veg‘ brings us the comforting dish of whole baked baby squash – perfect with a cold, damp autumn day.
When Joe visited Wilding Cider in Chew Magna, North Somerset, run by Beccy and Sam Leach, Sam made this vegetarian dish for their supper. The pair used to run the restaurant Birch in Bristol before setting their sights on cider making.
This simple but warming dish is a perfect foil to coming in from a cold and drizzly day in an orchard. They sat in the barn, swapping ciders and wines for everyone to taste with a roasting fire going in the wood burner.
Joe added a green sauce to cut the richness a bit, but if you get a good-quality sharp Cheddar, it doesn’t need it!
Here is how to make the whole baked baby squash…
Preheat the oven to 200C (400F), Gas Mark 6. With a small knife, cut the tops off the squash in a circular motion to form caps. Scoop out and compost the seeds.
Mix together the cheese, crème fraiche and oats, and add a good couple of pinches of Maldon Salt and a healthy few grinds of black pepper.
Fill the squash with the oat mixture. Replace their lids. Rub each all over with a tablespoon of oil, place on a tray and bake for 25–35 minutes until a knife pierces the flesh easily.
Meanwhile, blend all the sauce ingredients together with salt and pepper. For a coarser sauce, hand chop everything and mix with the oil, which is equally as good, if not better.
Serve the squash with a salad, maybe a few potatoes to make it into a main. Add the sauce on the side and a good bottle of cider, from Wilding preferably!
Joe Woodhouse could happily eat this pie dish every week!
This recipes takes inspiration from spanakopita, which is classic, savoury Greek pie dish made from filo pastry and filled with spinach and creamy feta cheese. It’s the perfect dish that the whole family is happy to eat at any time of the year.
Joe adds sesame seeds to the dough to create an irresistible crunch, but you can also include toasted nuts to the filling, such as pine nuts or pistachios.
Here is how to make the spinach pie…
Heat the oil in a pan over a medium heat. Add the onions with a pinch of salt and cook for 10–12 minutes until soft and starting to colour. They still want to have texture but be at that stage when they go sweet and soft. Add to a large mixing bowl with the rest of the filling ingredients except the spinach.
In the same pan if it is big enough, add the spinach a couple of handfuls at a time and stir to wilt. Repeat until all the spinach is wilted. Remove to a sieve over a bowl and press out as much liquid as you can. Removing and draining in batches is also fine –whatever makes it most manageable.
Preheat the oven to 180C (350F), Gas Mark 4.
Roughly chop through the spinach and add to the rest of the filling. Mix well, taste for seasoning and add more Maldon Salt and black pepper as needed.
Brush your baking tin with butter. Add a sheet of filo and brush with butter. Repeat this for four more sheets. Then add the filling. Fold the overhanging filo sheets over the filling. Then brush the final two sheets with butter and lay on top of each other. Trim these fit the tin exactly. Put the trimmings in the middle of the tin to cover any exposed filling. Lay the final sheets on top. Score the top into six sections. Add the sesame seeds in an even layer. Bake for 45–55minutes. Remove from the oven and allow to sit for 10 –15 minutes before serving.
We’ve created a vibrant vegetable tart packed full of spring goodness, including radishes, asparagus and garden peas. With a generous helping of ricotta cheese to coat the base of the tart, you are met with a deliciously creamy flavour as you take your first bite.
This recipe is special as it represents the changing of seasons from the dark, cold Winter months to the bright, colourful Spring. It truly does encapsulate the springtime cooking with all it’s good, green and glory! Not to forget how quick and easy this dish is to prepare and enjoy amongst friend’s and family across a (hopefully) sunny weekend.
Preheat the oven to 180C.
Gently roll the puff pastry sheet onto a baking paper lined with paper. Use a sharp knife to carefully score a 1cm boarder all the way around the edges of the pastry, cutting most of the way through but not all the way. The brush the edges with the beaten egg and place into the preheated oven for 10 minutes until golden brown and puffed up.
Remove the pastry from the oven and gently press down the puffed-up pastry in the centre so you are left with just the boarder raised. Set aside to cool slightly.
In a bowl mix together the ricotta, lemon zest, chopped dill and parsley. Then season well with Maldon Salt and cracked black pepper. Set aside.
Put a pan of water on to boil. Once simmering, add the asparagus spears, broad beans, and peas. Blanch them for 2 minutes until just cooked and then remove from the pan with a slotted spoon and immediately place into a bowl of iced water – this will help the vegetables retain their green colour and some of the crunch. Once cold again, drain and set aside.
Add the julienned spring onion strips into another small bowl with iced water and submerge. This cold water will encourage the spring onion to coil up and create pretty curls.
To assemble the tart, spoon the ricotta mix onto the base of the pastry and spread evenly to the edges of the middle, leaving the boarders. Next arrange the asparagus spears, broad beans, and peas across the top. Finally top with the radishes, spring onion curls and pea shoots.
Drizzle over a little good quality olive oil and a final sprinkle of Maldon Salt and some cracked black pepper.
We join Jesse Jenkin’s (A.D.I.P) in creating a 70’s Californian classic…the delectable ‘protein style’ burger as the perfect fakeaway dish for you and your friends.
A ‘protein style’ burger means you have a burger wrapped in lettuce instead of a bun. The reason for it’s nickname is because you are essentially getting a burger without the carbs (from the bun), and instead you have a burger patty wrapped in shell of iceberg lettuce…more protein and less carbs! It’s believed that McDonald’s heightened this trend in Australia, where they added the lettuce wrapped burgers as part of their Create Your Taste Menu.
Mould 2 burger patties in to lose balls. Try not to overwork them as they can become rubbery. Jesse likes to season the top of his meat about 5 minutes before searing, giving the salt time to adhere to the meat. A note – avoid mixing the salt through the meat, this also results in a rubbery texture.
Add the butter and a splash of oil to a pan on medium heat. Sauté thinly sliced or diced white onions until soft and translucent – around 5 minutes. Add a pinch of Maldon Salt, brown sugar, Worcestershire sauce, and a splash of water. Cook until the water is gone and set aside.
Thinly slice red onion and tomatoes. Jesse likes to season his tomatoes with a small pinch of Maldon salt a few minutes before building the burger.
For the sauce – mince the sautéed onions, and pickles before mixing them with the mayonnaise, mustard, tomato paste, and pickle juice. A few twists of black pepper is a welcome addition here.
In a lightly oiled hot pan, smash the burger patties down using a small square of parchment paper – this helps achieves maximum contact with the pan and crispy edges. Weigh the burger down with the back of a spatula, another pan, or a chef’s press as I’ve used in the video. Once a good sear has formed, flip and add the cheese. After about a minute, turn off the heat and cover with a lid and a drop of water to create some steam – after about 30 seconds you should have some very melty cheese and a tender burger with a golden sear.
Pick the large outer leaves of an iceberg head and lay them out like a big flower. Jesse likes to start his build with sauce, then burger, adding sautéed onions, red onion, and tomato.