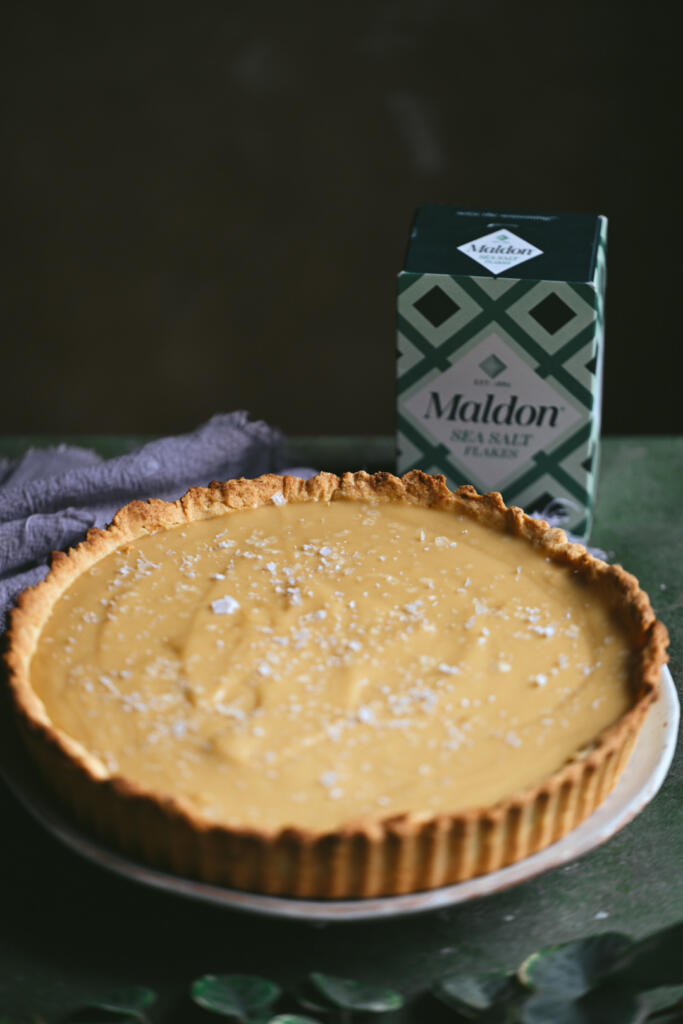
We’ve teamed up with Annie Mae Herring (also known as The Culinary Bee) to bring back an absolute British icon that is the Butterscotch Tart.
A gloriously wobbly, ridiculously nostalgic school pudding with buttery pastry and a thick, silky butterscotch filling. And for this one, we’ve seasoned it with Maldon Original Sea Salt Flakes because you need to season your desserts.
Why? A butterscotch tart is rich and sweet whereby Maldon Sea Salt is crushed directly into the butterscotch filling to balance the brown sugar and caramel richness, then finished on top of the tart to give tiny pops of salinity that make the butterscotch elevated.
How To Make Butterscotch Tart
Butterscotch tart with Annie Mae Herring and Maldon Salt
Heat the oven to 180°C fan.
Rub the butter into the flour and icing sugar until it resembles breadcrumbs. Add the egg yolk and enough cold water to bring everything together. Wrap and chill for 30 minutes.
Roll out the pastry and line a 23cm tart tin. Chill for another 15 minutes, prick the base, then line with baking paper and baking beans. Blind bake for 15 minutes. Remove the paper and beans and bake for another 8 to 10 minutes until lightly golden. Leave to cool completely.
For the filling, melt the butter in a saucepan over a medium heat. Add the dark brown sugar and stir until dissolved.
Whisk in the flour and cook for 1 minute. Gradually pour in the milk, whisking continuously, followed by the double cream. Add the vanilla and crushed Maldon Original Sea Salt Flakes.
Cook gently for 6 to 8 minutes, whisking regularly, until you have a thick, glossy butterscotch that coats the back of a spoon.
Pour into the cooled pastry case and smooth the top. Allow to cool, then refrigerate for at least 4 hours, or preferably overnight, until completely set.
Just before serving, finish with a final pinch of Maldon Original Sea Salt Flakes.
A Taste of Sicily: Maldon Salt and Giuseppe Federici
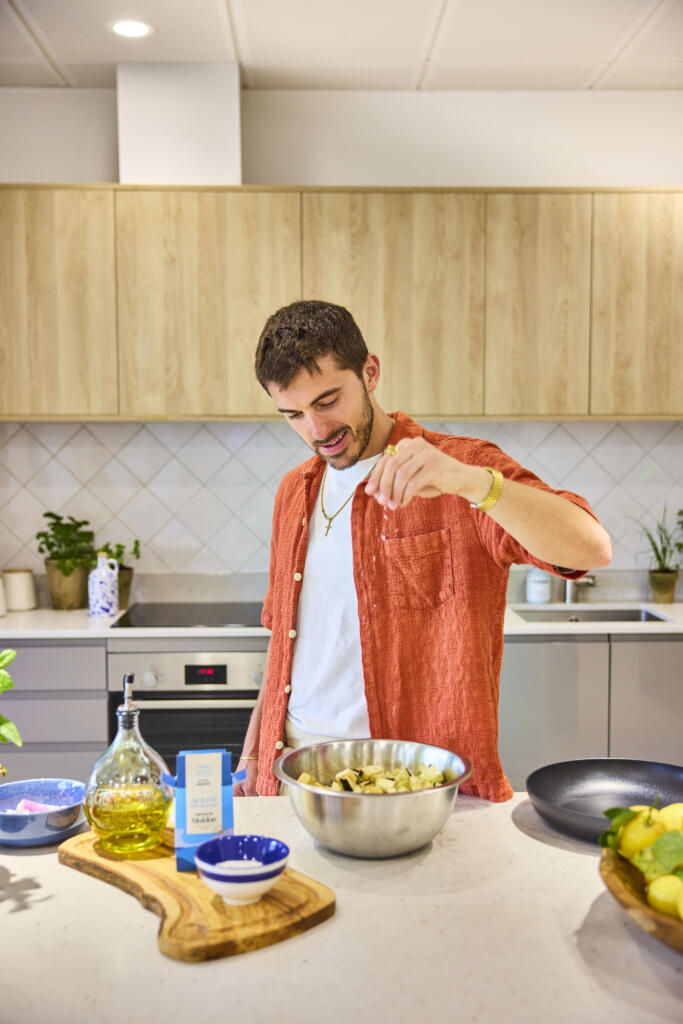
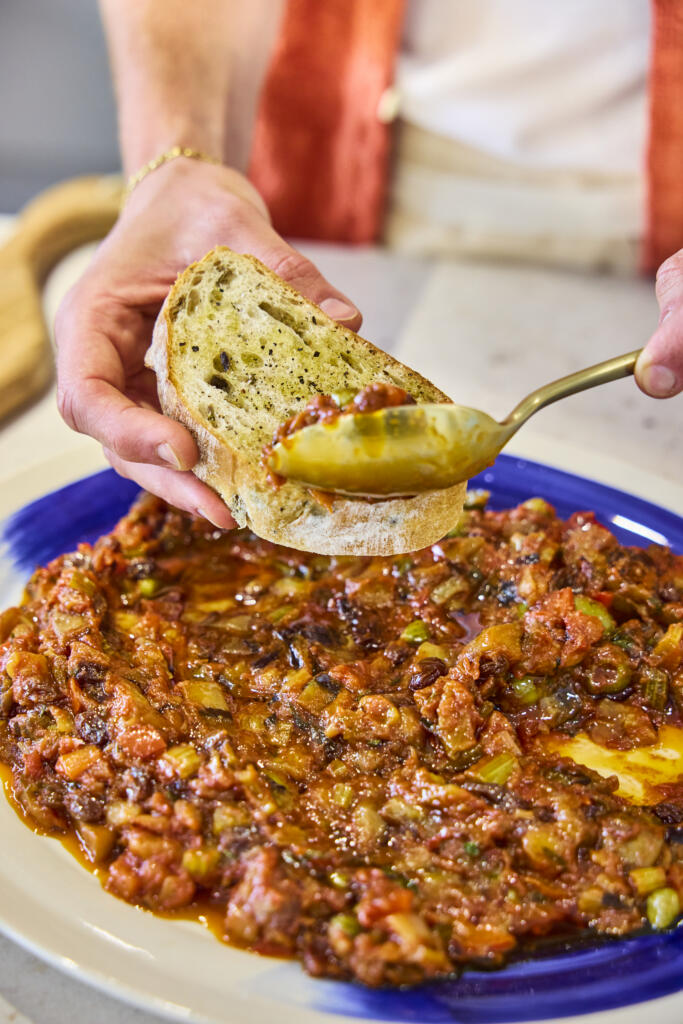
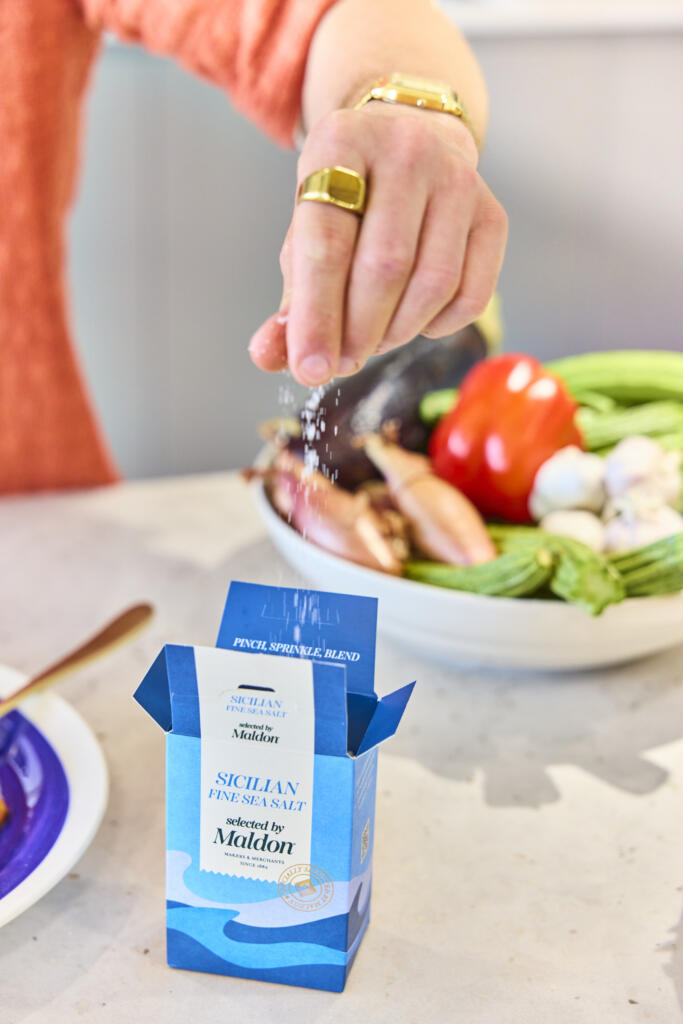
Maldon Salt has partnered with Sicilian home cook, recipe creator and bestselling author Giuseppe Federici (@sepps) to celebrate the launch of Sicilian Fine Sea Salt, Selected by Maldon. Inspired by the flavours, traditions and ingredients of Sicily, this Aubergine Caponata recipe showcases how a high-quality fine sea salt can elevate everyday cooking. Rich, vibrant and packed with Mediterranean flavour, this classic dish highlights the versatility and balanced taste of Maldon’s newest addition to the Merchants Range.
Welcoming Giuseppe Federici
Giuseppe Federici (@sepps) is a second-generation British Italian who comes from a long line of passionate food lovers, with Italian home cooking firmly at the heat of everything he does.
Today, Giuseppe has built one of the UK’s most engaged Italian food communities, sharing authentic Italian recipes, family stories and a genuine love for home cooking. Most loved of all the heart warming cooking videos he creates alongside his Nonna, which have captivated millions of viewers and inspired his first cookbook – Cooking with Nonna – a collection of of treasured Italian recipes with a plant-based twist.
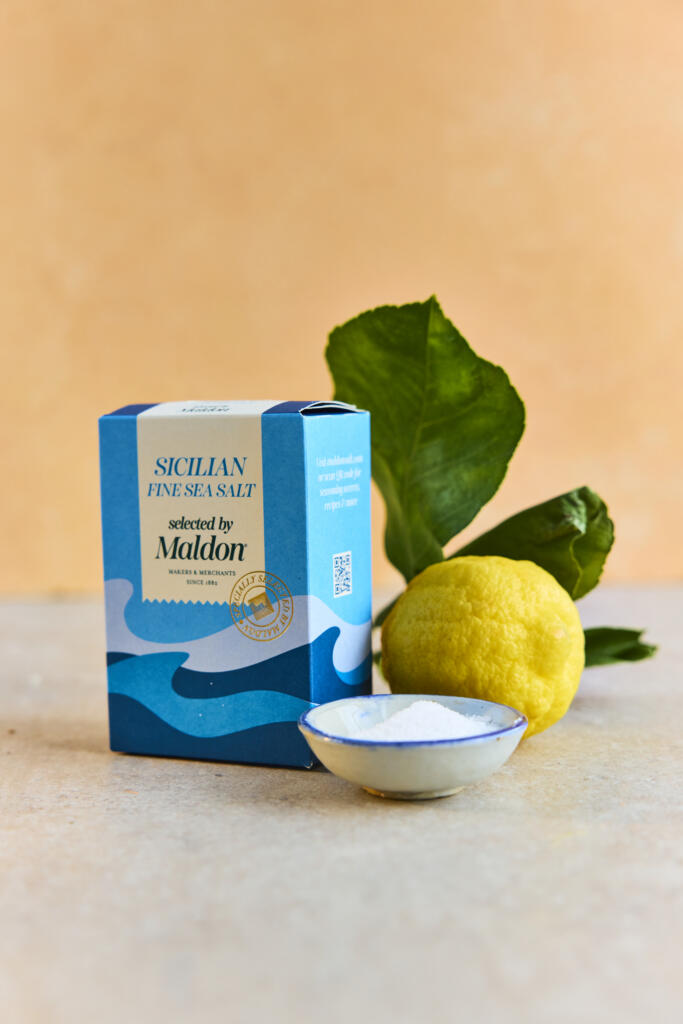
Discover Sicilian Fine Sea Salt, Selected by Maldon
Sicilian Fine Sea Salt, Selected by Maldon. 250g pack.
Harvested from the historic salt pans of Trapani on Sicily’s western coast, Sicilian Fine Sea Salt, Selected by Maldon is the latest addition to the Merchants Range. Carefully chosen by Maldon’s Master Salt Merchants, it is prized for its balanced flavour, exceptional versatility and delicate texture. Naturally dried in the Mediterranean coastal breeze, its fine crystals dissolve quickly and evenly, making it ideal for seasoning throughout the cooking process. Whether enriching sauces, seasoning vegetables, baking bread or salting pasta water, this premium fine sea salt delivers consistent flavour in every dish.
Nonna’s Aubergine Caponata Recipe
A much-loved staple of Sicilian cuisine, Caponata is a rich sweet-and-sour aubergine dish that celebrates the island’s vibrant flavours. Combining tender aubergines, briny olives and capers, sweet raisins and a tangy tomato base, this traditional recipe has been passed down through generations. In this version, Giuseppe draws inspiration from his Nonna’s cooking, creating a comforting dish that embodies the spirit of Sicilian home cooking.
The delicate texture of Sicilian Fine Sea Salt, Selected by Maldon plays an important role throughout the recipe – drawing excess moisture from the aubergines, seasoning the vegetables evenly and enhancing the balance of sweet, savoury and acidic flavours that makes Caponata so iconic.
How to Make Aubergine Caponata
Cut the aubergines into 2–3cm cubes. Place them in a large bowl, generously coat with Sicilian Fine Sea Salt, and set aside for at least 10 minutes to draw out excess moisture.
Dice the celery (slice each stalk down the middle first, then cut into 1–2cm pieces), the onion, and the red pepper.
Drain any liquid from the aubergines and pat dry. Heat a generous glug of olive oil in a large frying pan over medium heat. Fry the aubergines in batches until nicely coloured and soft, about 10 minutes. You want them soft but not mushy. Transfer to a large casserole dish.
Return the pan to the heat with 1 tbsp of olive oil. Add the celery and fry for 8–10 minutes until softened. Transfer to the casserole dish.
Add the onions and peppers to the pan and fry for about 5 minutes, until the onions have softened and the peppers are starting to char. Reduce the heat to low, add the red wine vinegar, and let it simmer for 1 minute so the vinegar reduces and coats the vegetables. Transfer everything to the casserole dish and season with Sicilian Fine Sea Salt, black pepper and a pinch of chilli flakes.
Top Tip: Like many traditional Italian dishes, Caponata tastes even better the next day, once the flavours have had time to fully develop.
Bring the Flavours of Sicily Home
Inspired to recreate Giuseppe’s family recipe? Sicilian Fine Sea Salt, Selected by Maldon is available now from Tesco, Sainsbury’s and Ocado. Harvested on Sicily’s western coast and selected for its balanced flavour and exceptional versatility, it’s the perfect pantry staple for everyday cooking.
For more authentic Italian recipes, explore Giuseppe Federici’s cookbook, featuring the beloved dishes, family traditions and heart-warming stories. From comforting pasta dishes to regional Italian classics, it’s your invitation to bring a little more Italy into your kitchen.
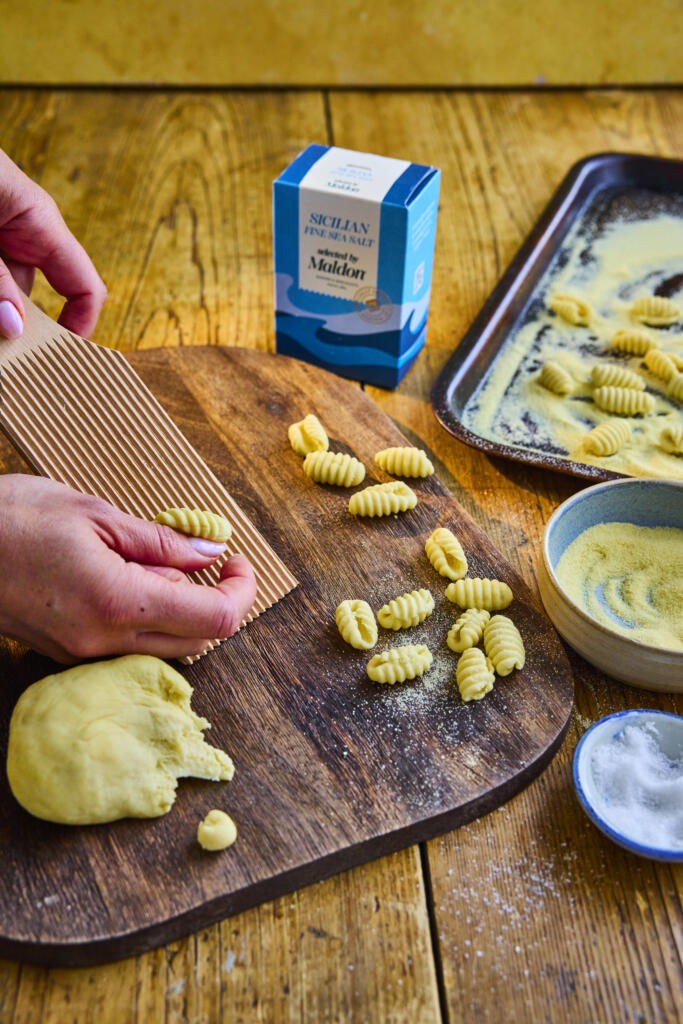
There’s nothing quite like pasta made from scratch, and cavatelli is one of the most satisfying shapes to shape by hand. Made from just semolina and water, these little grooved shells are tossed through a jammy roasted cherry tomato and aubergine sauce sweetened with whole roasted garlic, and seasoned with Sicilian Fine Sea Salt, Selected by Maldon. It’s rustic Sicilian cooking at its very best.
Why You’ll Love This Cavatelli
Pasta From Scratch: Just semolina flour and water make a beautiful eggless dough you shape by hand – no machine required.
A Jammy Roasted Sauce: Roasting the tomatoes, aubergine and garlic together does all the work, creating a deep, sweet sauce.
Naturally Vegetarian: A hearty, satisfying meat-free main that celebrates simple Sicilian produce.
How to Make Cavatelli (Step-by-Step)
Make the dough: Preheat the oven to 180°C. Mix the semolina flour with the water and olive oil in a large bowl, bring together into a ball, then knead on the worktop for 10 minutes until smooth and cohesive. Cover with a clean bowl and rest for 15 minutes.
Roast the veg: Add the diced aubergine and whole cherry tomatoes to a large roasting tray and toss with the olive oil. Nestle in the whole garlic bulb and roast for 20 minutes.
Shape the cavatelli: Pull small, gnocchi-sized pieces from the rested dough and press each one down a cavatelli shaper (a butter paddle) to create grooves and a little cavity. Place on a semolina-dusted tray to stop them sticking, and repeat until all the dough is used.
Make the sauce: Tip the soft aubergine and jammy tomatoes into a shallow sauté pan and squeeze in the roasted garlic from its skins. Season with Sicilian Fine Sea Salt, Selected by Maldon and cracked black pepper, and keep warm on a low heat. Bring a large pan of well-salted water to the boil.
Cook and combine: Drop the cavatelli into the boiling water and cook for 3–6 minutes, until just al dente. Lift them straight into the sauce with a slotted spoon, add a splash of pasta water and toss well to bind.
Serve: Spoon the pasta into bowls and finish with grated parmesan and plenty of fresh basil leaves.
Tips for the Perfect Cavatelli
Knead until smooth: A well-kneaded, smooth dough is easier to shape and gives the cavatelli their lovely chew.
Dust with semolina: Keep the shaped cavatelli on a semolina-dusted tray so they don’t stick together before cooking.
Save the pasta water: A splash of starchy pasta water binds the sauce around the cavatelli for a glossy finish.
What to Serve with Cavatelli
This is a generous main in its own right, but it’s lovely as part of a Sicilian spread with sesame semolina bread to soak up the sauce and a blood orange and fennel salad alongside. Finish the meal with Sicilian cannoli. A little extra parmesan and a drizzle of good olive oil never go amiss.
Frequently Asked Questions
What If I don’t have a cavatelli shaper?
No problem – roll small pieces of dough under your thumb or down the back of a fork to create the grooves and cavity. It takes a little practice but works beautifully.
Can I make the cavatelli ahead?
Yes. Shape them and keep on a semolina-dusted tray, then freeze on the tray before transferring to a bag. Cook from frozen, adding a minute or two to the boiling time.
Can I use a different flour?
Durum wheat semolina is key here – it gives cavatelli their signature bite and holds the shape. Plain or 00 flour won’t give the same texture.
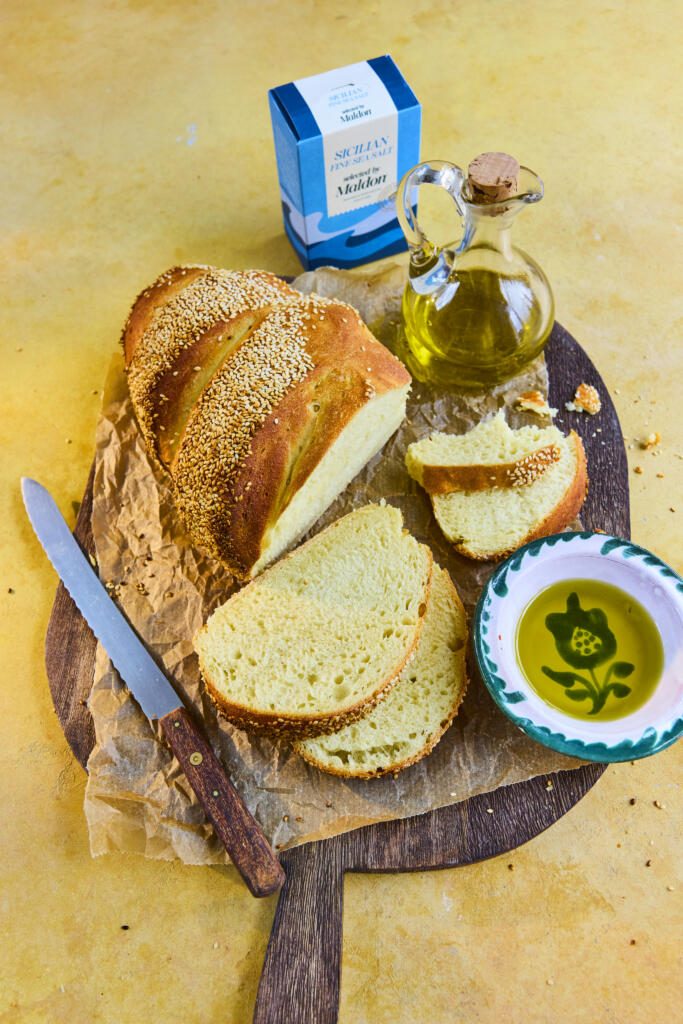
Golden, sesame-crusted and made with nutty durum wheat semolina, this Sicilian-style loaf is far simpler than it looks. Just semolina, water, yeast and Sicilian Fine Sea Salt, Selected by Maldon come together into a soft dough, rolled in sesame seeds and baked until the crust crackles. It’s the perfect bread for mopping up sauces or building an antipasto spread.
Why You’ll Love This Sesame Semolina Bread
A Golden Sesame Crust: Rolling the loaf in sesame seeds gives a nutty, crunchy crust and a beautiful finish.
Just a Few Ingredients: Semolina, water, yeast, sesame and a good sea salt are all you need for a proper Sicilian loaf.
Soft, Open Crumb: A long, slow prove rewards you with a light, springy crumb under that crisp crust.
How to Make Sesame Semolina Bread (Step-by-Step)
Start the dough: Place the semolina flour in a stand mixer and add the 250ml of warm water. Mix and knead for 5–10 minutes until there are no dry patches of flour. Cover the bowl with cling film and rest for 1 hour.
Add the yeast and salt: Mix the 50ml of water with the yeast and add it to the dough along with the Sicilian Fine Sea Salt, Selected by Maldon. Knead with the dough hook for 10–15 minutes until smooth and coming away from the sides of the bowl.
First prove: Cover the bowl again with cling film and leave to prove for 2–3 hours, or until the dough has tripled in size.
Shape and coat in sesame: Tip onto a lightly floured surface and shape into a long oval loaf (or a round loaf or buns). Scatter the sesame seeds on a tray, wet the top of the loaf lightly with water, then roll the top in the seeds to coat well. Set on a lined tray and score the top a few times with a sharp knife.
Second prove: Cover loosely with a plastic bag or cling film, raising the edges so it doesn’t stick to the dough, and prove for a second time for 45 minutes–1 hour.
Bake: Preheat the oven to 200°C. Remove the covering and bake for 15–20 minutes until golden brown – it should sound hollow when tapped on the base. Cool for at least 10 minutes before slicing and serving.
Tips for the Perfect Sesame Semolina Bread
Don’t rush the prove: The long, slow first prove is what gives the loaf its flavour and light, open crumb.
Wet before seeding: Lightly wetting the top of the loaf helps the sesame seeds stick for an even, golden crust.
Tap to test: A properly baked loaf sounds hollow when you tap the base – if not, give it a few more minutes.
What to Serve with Sesame Semolina Bread
This loaf is endlessly useful across a Sicilian table. Serve it warm with olive oil and a pinch of sea salt, alongside homemade cavatelli or grilled swordfish to mop up the juices, or as the base of an antipasto with burrata and tomatoes. It also makes excellent toast for the days after baking.
Frequently Asked Questions
Can I make rolls instead of a loaf?
Yes – shape the dough into small buns rather than one loaf, coat them in sesame and reduce the baking time, checking from around 12 minutes.
Do I need a stand mixer?
No. You can knead the dough by hand, though it will take a little longer to reach a smooth, elastic texture – around 12–15 minutes.
Why didn’t my bread rise?
The most common causes are yeast that’s past its best or a proving spot that’s too cold. Use fresh fast-action yeast and prove somewhere warm and draught-free.
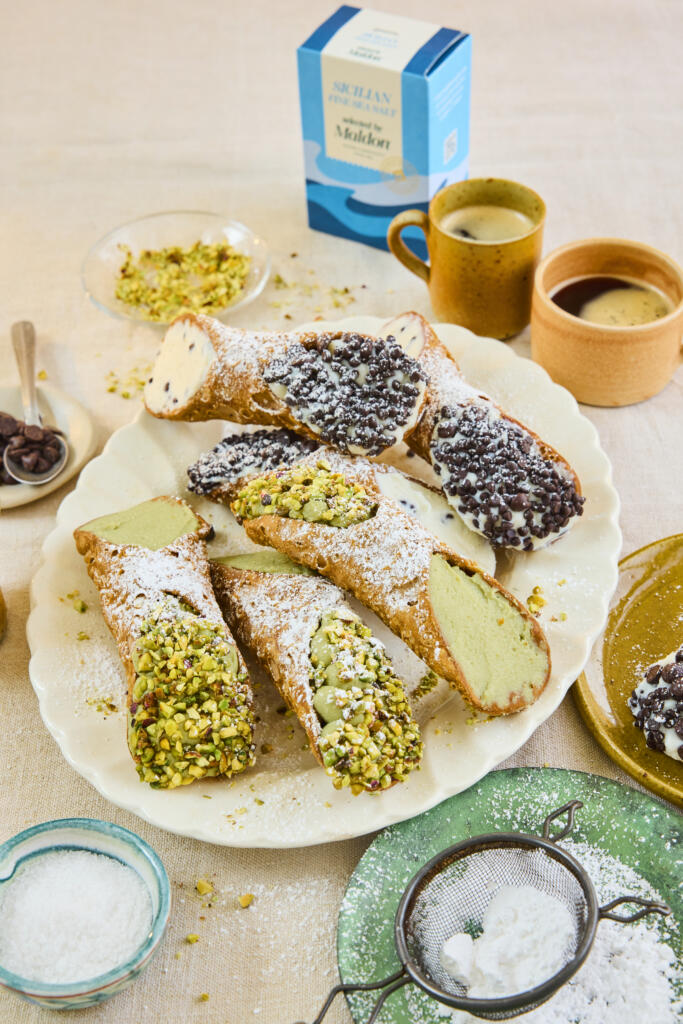
Crisp, blistered shells and a cool, creamy ricotta filling – these Sicilian cannoli are the island’s most famous sweet, made at home. The Marsala-spiked dough fries up golden and bubbly, while a pinch of Sicilian Fine Sea Salt, Selected by Maldon sharpens the sweetness. This recipe makes two classic fillings in one batch: pistachio, and chocolate and ricotta.
Why You’ll Love These Sicilian Cannoli
Two Fillings, One Batch: Make both the pistachio and the chocolate-and-ricotta cannoli at once for a proper Sicilian dessert platter.
Crisp, Bubbly Shells: A splash of Marsala in the dough gives the shells their signature blistered, shatteringly crisp texture.
A True Sicilian Classic: Few desserts feel as special as a freshly piped cannolo dusted with icing sugar.
How to Make Sicilian Cannoli (Step-by-Step)
Drain the ricotta: Place the ricotta for the fillings in a muslin cloth set in a sieve and squeeze out any excess liquid. Set aside – this keeps the fillings thick and the shells crisp.
Make the dough: In a large bowl, mix the plain flour, caster sugar, Sicilian Fine Sea Salt, Selected by Maldon and bicarbonate of soda. Rub in the cubed butter with your fingers until it resembles fine breadcrumbs.
Bring it together: Add the beaten egg and Marsala wine and mix. Tip onto a lightly floured surface and knead until you have a smooth dough.
Roll and shape: Roll the dough as thinly as possible with a rolling pin or pasta machine, then cut out 15cm circles. Wrap each tightly around a cannoli mould, sealing the join with a little beaten egg.
Fry the shells: Heat the vegetable oil to 180°C, deep enough to submerge the cannoli. Fry the wrapped moulds for around 30 seconds at a time, turning with tongs, until golden and bubbly. Drain on kitchen paper and carefully slide the shells off the moulds once cool. Repeat for all 6.
Make the fillings: Whisk the drained ricotta with the rest of each filling’s ingredients, holding back the chocolate chips and chopped pistachios. Stir the chocolate chips into the chocolate filling, then transfer each filling to its own piping bag.
Fill and finish: Snip the ends of the bags and pipe the fillings into the shells – 3 of each flavour. Dip the ends of the pistachio cannoli into the chopped pistachios, dust everything with icing sugar and serve.
Tips for the Perfect Sicilian Cannoli
Drain the ricotta well: Squeezing out excess liquid is the difference between a thick, luscious filling and a soggy shell.
Fill just before serving: Pipe the filling in at the last minute so the shells stay crisp rather than softening.
Roll it thin: The thinner you roll the dough, the more delicate and blistered the fried shells will be.
What to Serve with Sicilian Cannoli
Cannoli are the perfect finale to a Sicilian feast – serve them after Sicilian arancini or homemade cavatelli, with strong espresso to cut the sweetness. They also make a beautiful centrepiece for a dessert grazing board alongside fresh fruit and the blood orange and fennel salad to start the meal.
Frequently Asked Questions
What if I don’t have cannoli moulds?
You can improvise with metal cannoli tubes, or wrap the dough around clean, foil-covered wooden dowels. Just make sure whatever you use is oven- and oil-safe.
Can I make cannoli ahead?
Fry the shells and make the fillings up to a day ahead, storing them separately. Pipe the filling in only when you’re ready to serve so the shells stay crisp.
What is pistachio paste and can I substitute it?
Pistachio paste is finely ground pistachios, sometimes lightly sweetened. If you can’t find it, blitz shelled pistachios to a smooth butter, or use a good-quality pistachio butter.
A Fire-Cooked Dessert Collaboration Between Maldon Salt, Weber Grills and Chef Matt Burgess
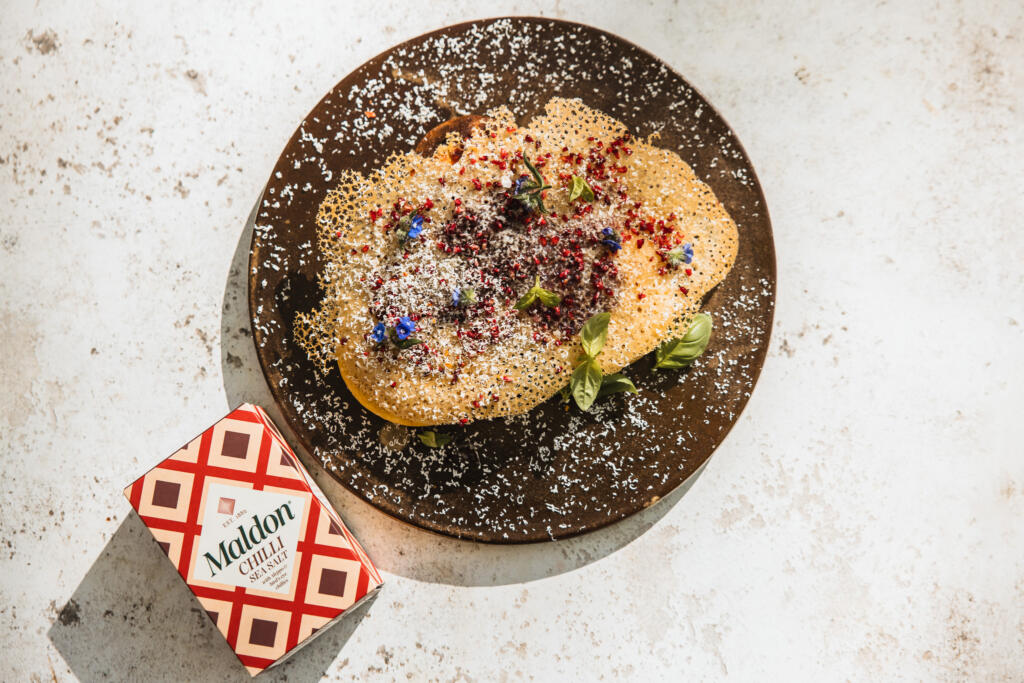
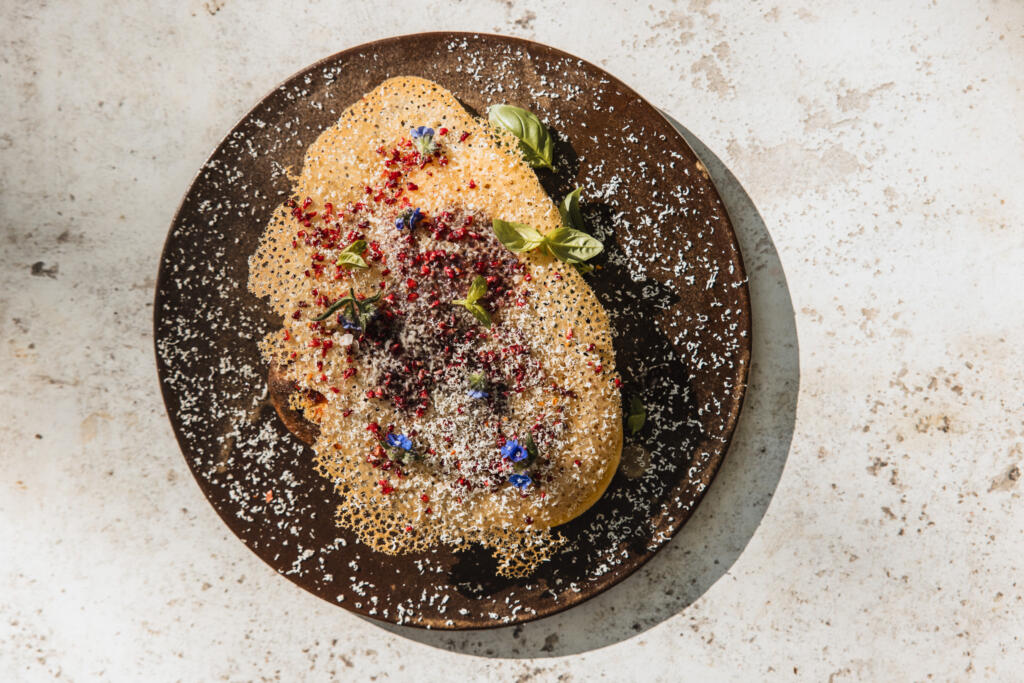
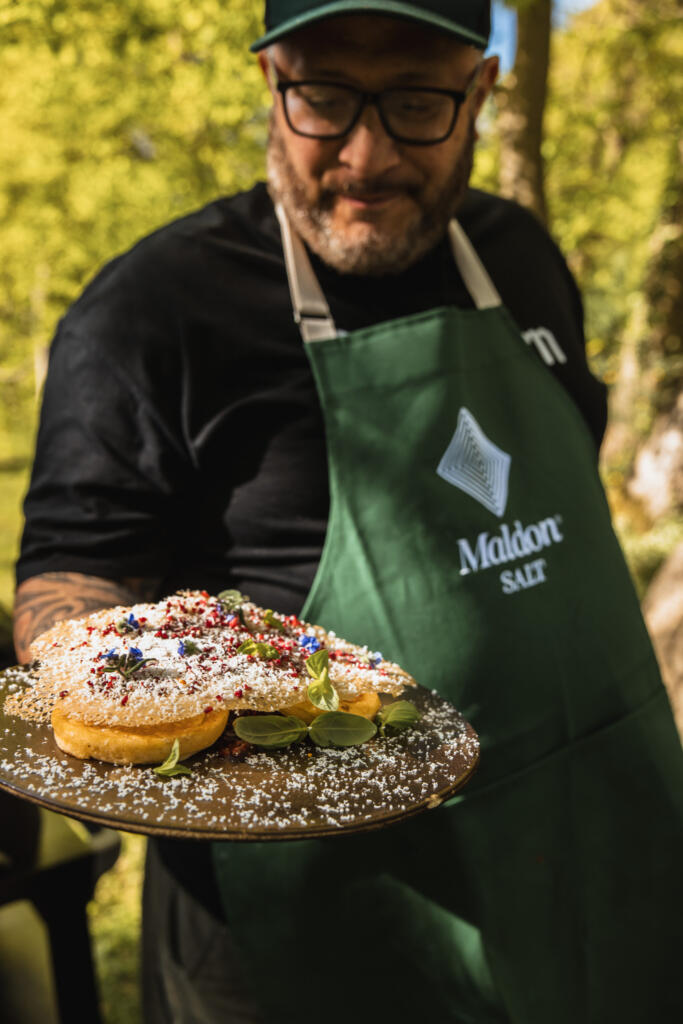
When live-fire cooking meets modern outdoor grilling, desserts become something truly unforgettable. This Cloud Cake recipe by Chef Matt Burgess, also known as @matblak, is a bold collaboration celebrating texture, flavour and innovation – combining the versatility of the Weber Lumin electric grill with the delicate finishing power of Maldon Chilli Sea Salt.
Soft, airy, and lightly steamed under the lid of the Weber Lumin, this raspberry cloud cake is balanced with bright fruit acidity, crisp raspberry coral, white chocolate and a subtle hit of chilli salt. It is restaurant-quality outdoor cooking designed to show that barbecue cooking goes far beyond meat and flame.
Whether you are cooking on a balcony, terrace or garden setup, this recipe highlights how electric grilling, live-fire inspiration and premium ingredients can create a memorable summer dessert.
Who are Weber Grills?
Weber Grills are globally recognised as one of the leading names in barbecue and outdoor cooking innovation. Known for combining performance, reliability and design, Weber has become synonymous with modern grilling culture worldwide.
The Weber Lumin electric barbecue reaches temperatures over 315°C while also offering steaming, smoking, searing and warming functions. This versatility makes it ideal for dishes like cloud cake, where controlled heat and trapped steam are essential for creating this signature soufflé-like texture.
Unlike traditional desserts cooked indoors, this recipe users the Weber Lumin pancha and lid system to gently steam and lift the batter, producing an airy cake with a caramelised outer edge and soft centre.
For urban grillers, food lovers and chefs experimenting with outdoor desserts, the Weber Lumin proves that barbecue cooking can be sophisticated, technical and creative.
Chef Matt Burgess, widely recognised as @matblak, is a New Zealand Māori chef, live-fire specialist and founder of Kaiwhenua – Kai by Matblak. His cooking philosophy is built around fire, flavour, culture and connection.
After beginning his culinary career in Wellington, New Zealand, Matt went on to work with some of London’s most respected hospitality brands, including Soho House, Bluebird Chelsea, Gordon Ramsay’s Maze Grill, and Jamie Oliver’s Threadneedle street.
Today, through Kaiwhenua – meaning “food from the land” in Māori – Matt develops recipes, host supper clubs and creates premium condiments inspired by live-fire cooking and layered flavour. His work blends refined restaurant technique with open-fire cooking, making him one of the UK’s most exciting modern barbecue chefs.
Matt’s approach to dessert reflects the same philosophy throughout his cooking: balance, smoke, texture and restraint.
Explore Kaiwhenua and Kai by Matblak here: https://www.kaiwhenua.co.uk/
Why Maldon Chilli Sea Salt Matters in This Dish
Salt is often overlooked in desserts, but in this recipe Maldon Chilli Sea Salt plays a crucial role.
The delicate crunch of Maldon Sea Salt flakes enhances sweetness, sharpens raspberry acidity and balances the richness of white chocolate. The added chilli gives subtle warmth that lingers gently on the palate, elevating the flavour profile without overpowering the dessert.
In the cloud cake batter, the chilli salt helps heighten the fresh raspberry flavour. As a finishing touch, it creates contrast against the soft sponge, crisp coral and creamy chocolate.
This sweet-and-heat combination is what transforms the dish from a simple grilled sponge cake into a refined barbecue dessert.
What is a Cloud Cake?
A cloud cake is an ultra-light, souffle-style cake known for its airy texture and delicate rise. Inspired by Japanese souffle pancakes and steamed sponge techniques, cloud cakes rely heavily on whipped egg whites to create lift and softness.
Unlike dense sponge cakes, cloud cakes are designed to feel light, almost mousse-like in the centre, while maintaining a lightly caramelised exterior.
In this version, the Weber Lumin lid traps heat and steam during cooking, helping the cake rise gently while staying soft and moist inside.
How to Make Cloud Cake, Raspberry Coral with Chilli Sea Salt
Preheat the Weber Lumin with plancha to medium–low heat. You want gentle, even heat.
Whisk egg yolks with milk and vanilla. Add flour and baking powder. Mix smooth.
Whip egg whites with a pinch of Maldon Chilli Sea Slat to soft peaks. Add sugar gradually. Take to medium peaks.
Fold one third into the yolk mix to loosen. Fold the rest gently. Keep the air.
Fold in raspberries last.
Lightly butter the plancha. Spoon thick rounds, 2–3 cm high.
Cook undisturbed until the base sets. Close the lid to trap heat and allow the cake to rise and steam.
Flip carefully. Cook until just set. Centre stays soft. Remove and rest.
For the dressing, crush raspberries with lemon zest, juice and icing sugar. Keep it loose.
For the coral, mix all ingredients until smooth.
Pour a thin layer onto a hot section of the plancha.
Let it bubble and separate. Do not touch it.
Once dry and lightly coloured, lift carefully and cool. It will crisp as it cools.
Plate the cake. Spoon over dressing.
Add coral, micro planed white chocolate and basil.
Finish with a light pinch of Maldon Chilli Sea Salt.
Weber Lumin Cooking Tips
Always use the lid — trapped heat is essential for the signature cloud cake rise.
If the base colours too quickly, reduce the heat slightly.
Coral needs a dry, hot surface to crisp correctly.
Avoid overmixing the batter or the texture will become dense.
Cook in batches and avoid overcrowding the plancha
Explore More
Buy Weber Grills – Discover the Weber Lumin electric barbecue range and outdoor cooking accessories: https://www.weber.com/GB/en/home/
Discover Kai by Matblak – explore Matt Burgess’ recipes, sauces, live-fire cooking and flavour philosophy.
Shop Maldon Salt – Explore Maldon Sea Salt flakes and flavoured blends: https://maldonsalt.com/our-salt/
A Flavour-Led Collaboration with Weber Grills
We’re excited to bring this recipe to life in collaboration with Weber Grills UK, combining bold live-fire cooking with the unmistakable quality of Maldon Salt. This partnership celebrates flavour, technique, and the joy of cooking outdoors – where smoke, heat, and seasoning work together to create unforgettable dishes.
Who Are Weber Grills
Weber is a globally trusted leader in outdoor cooking, known for it’s expertly designed grills and commitment to quality. Weber Grills UK continues that legacy with innovative charcoal, gas, and electric barbecues.
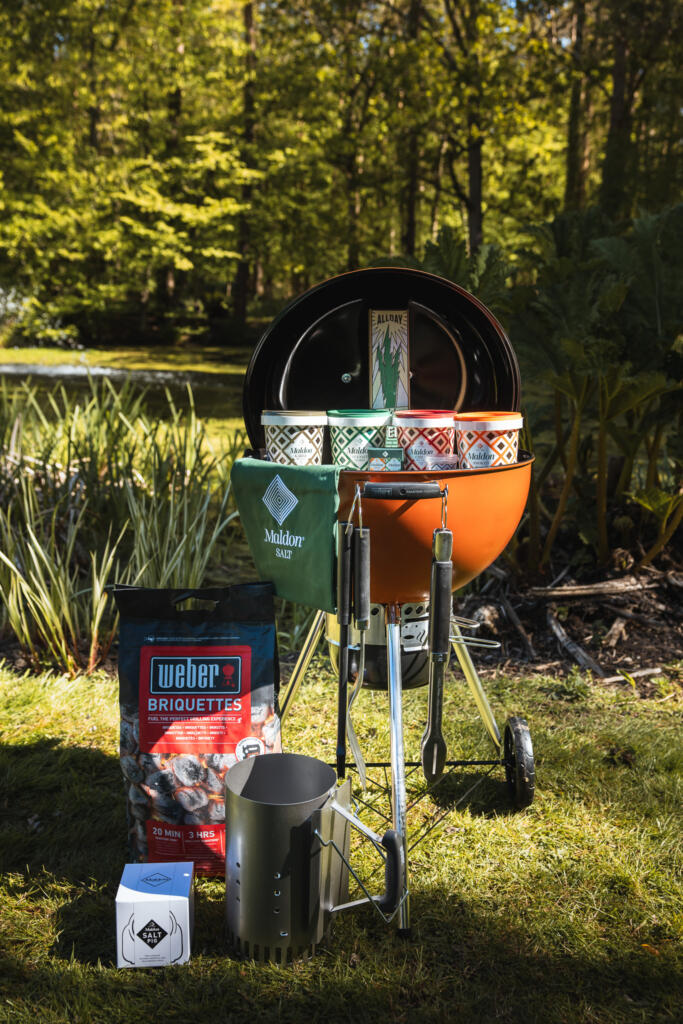
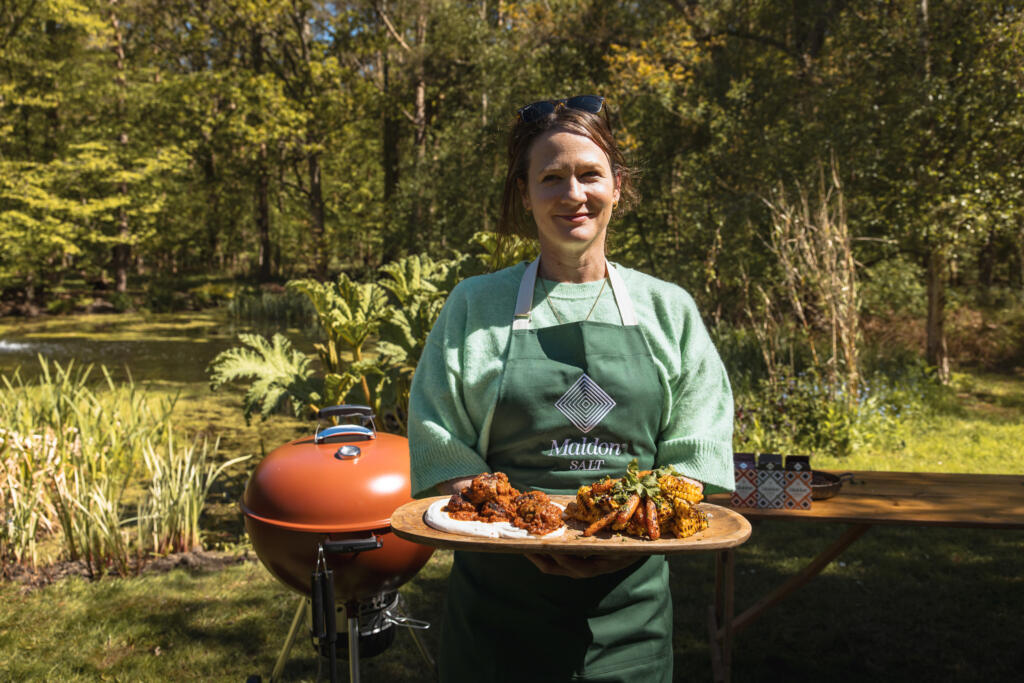
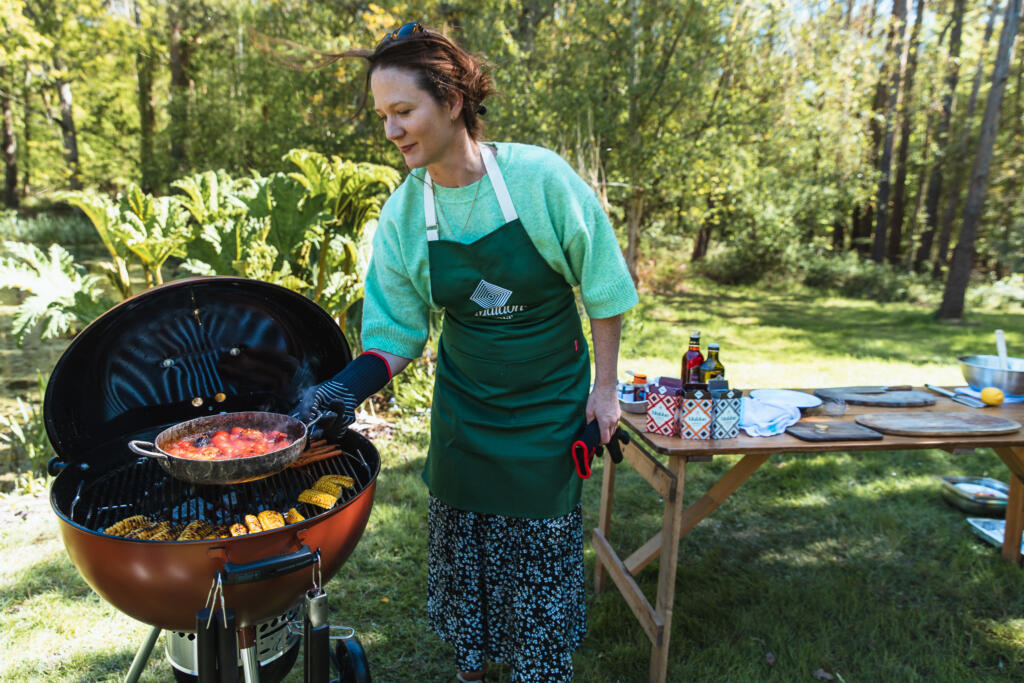
The Weber Master-Touch used in this recipe is ideal for smoking, searing, and grilling, giving you full control over heat and flavour – perfect for fishes like these Manuka-smoked lamb meatballs.
Meet the Chef: Melanie Brown of The Laundry
This recipe is created in collaboration with Melanie Brown, Chef, Sommelier, and founder of Brixton’s acclaimed restaurant The Laundry.
Melanie brings a unique perspective to cooking, combining classic European technique with bold, open-fire flavours inspired by her New Zealand upbringing. Her career spans leading kitchens, wine expertise, and restaurant ownership – giving her a holistic approach to flavour and hospitality.
Before opening The Laundry, Melanie worked in renowned kitchens including Raymond Blanc’s Le Petit Blanc and Jamie Oliver’s Fifteen, while also pioneering award-winning wine programmes in the UK.
Opened in Brixton, The Laundry is her flagship neighbourhood bistro – celebrated for its relaxed yet refined dining, seasonal produce, and carefully curated wine pairings.
At the heart of Melanie’s cooking is a philosophy rooted in honest ingredients, bold flavour, and open-fire cooking, where smoke becomes an essential ingredient rather than just a technique. This dish perfectly captures her style – layering smoke, spice, and freshness into a vibrant, balanced plate.
About This Recipe
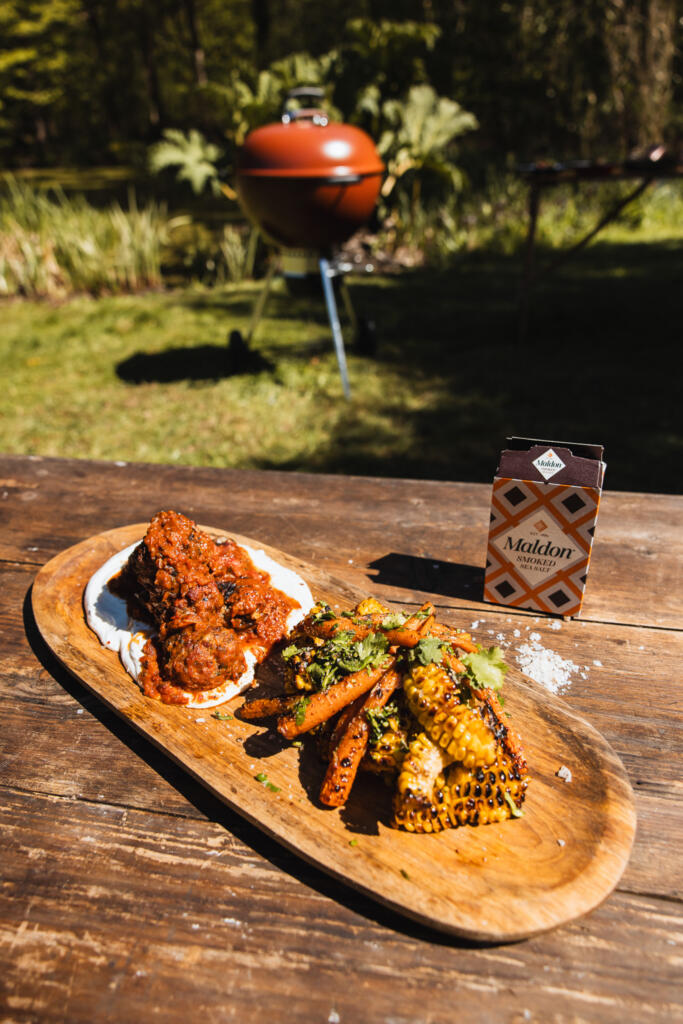
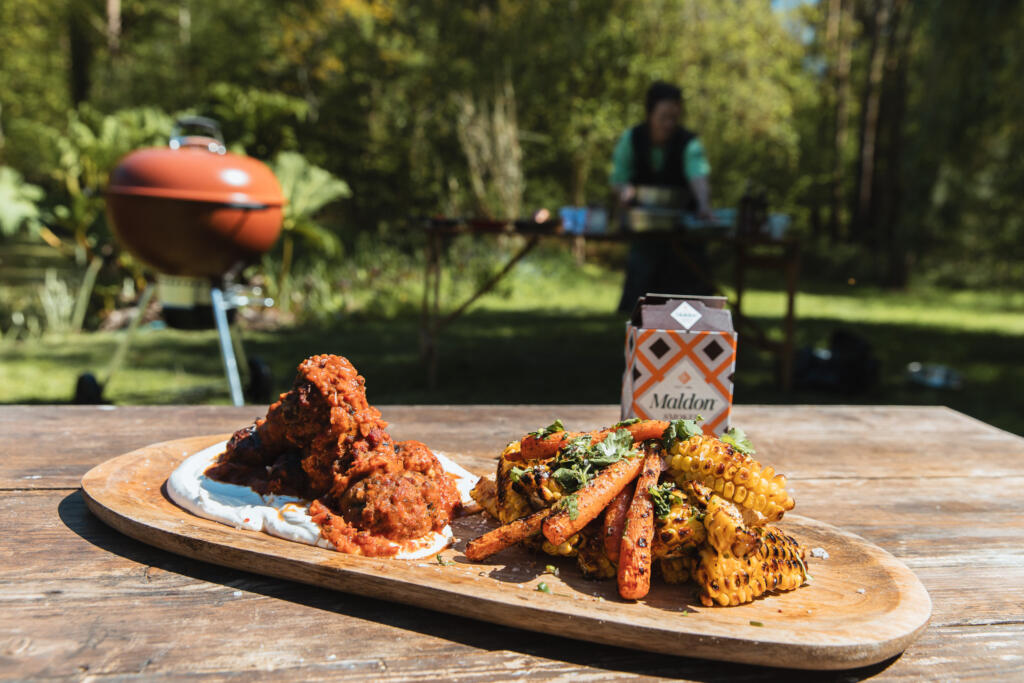
These Manuka-Smoked Lamb Meatballs are rich, juicy, and packed with warming spices, elevated by layers of smoke and char.
Served with:
A deep, smoky charred tomato reduction
Creamy, lightly smoked feta
A vibrant sumac corn and carrot salsa
This is a dish that delivers contrast in every bite – smoky, tangy, creamy, and fresh – perfect for elevating your barbecue menu.
Why Maldon Smoked Sea Salt Matters
Maldon Smoked Sea Salt play a key role in enhancing this recipe. Its signature flaky texture and gentle smokiness:
A subtle smoky depth that compliments the Manuka wood smoke
Balanced depth without overpowering the lamb
A clean, mineral finish that elevates every element
Used within the meatballs and the dressing, it ties the entire dish together with bold, consistent flavour.
How To Make Manuka-Smoked Lamb Meatballs with Charred Tomato Reduction & Sumac-Corn Salsa
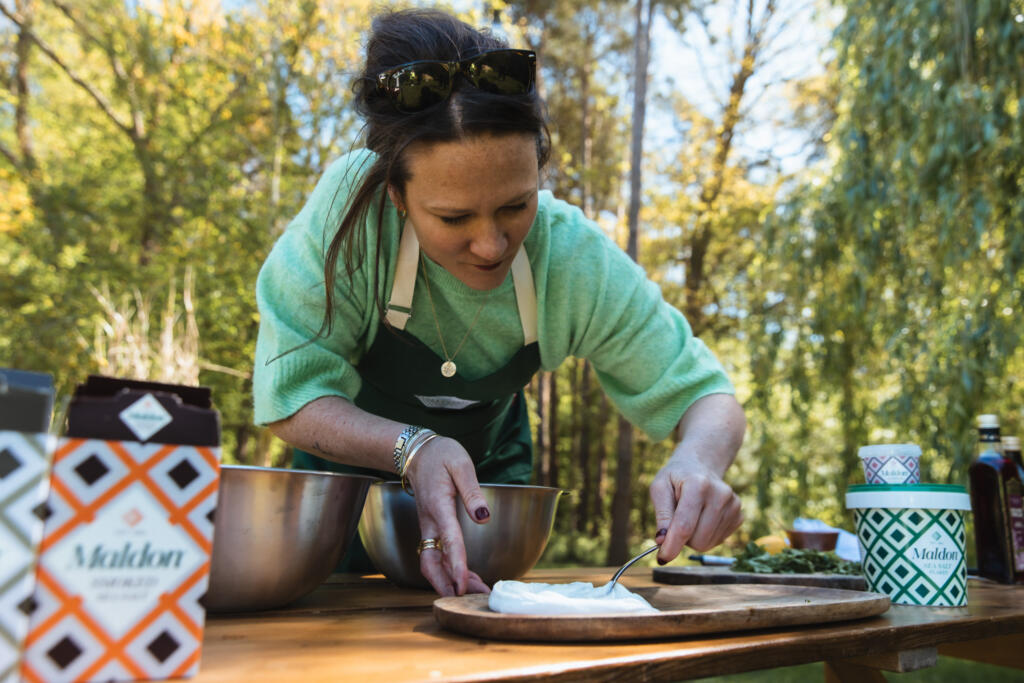
The Manuka Smoked Feta – Place the block of feta in a heat-proof dish. Use a stovetop smoker or a DIY foil tent with the Manuka chips to smoke the feta for 10–15 minutes until fragrant. Once smoked, place the feta in a food processor with the double cream and cream cheese. Blitz until completely smooth and aerated. Set aside.
The Meatballs – Combine soaked panko, lamb, Maldon Smoked Sea Salt, shallot, garlic, and spices. Roll into balls and sear in a hot pan until caramelised. Remove and set aside.
The Grill & The Salsa – Grill the halved vine tomatoes, corn, and carrots until charred and blistered. The Salsa: Whisk the sumac, red wine vinegar, Maldon Smoked Sea Salt, and light olive oil in a bowl. Cut the charred corn off the cob and toss into the dressing with the carrots and the oodles of coriander.
The Sauce Reduction & Blitz – In the meatball pan, sauté the shallot and garlic. Deglaze with red wine; reduce by half. Add tinned pomodorini and thyme. Simmer for 10 minutes. Add the charred vine tomatoes to the pan. Discard thyme and blitz the sauce until smooth. Stir in the balsamic. Reduce a little more.
Final Assembly – Return meatballs to the smooth sauce and simmer for 5–8 minutes.
To Plate – Spread a heavy layer of Smoked Feta Cream. Top with meatballs and sauce. Pile the Sumac-Corn-Carrot Salad on the side, Finish with lemon zest and more coriander.
Fire Up Your Grill & Get Cooking
Bring bold, smoky flavour to your next barbecue with this standout dish.
Tag us in your creations on socials – @maldonsalt – we’d love to see your take!
A Flavour-First Collaboration with Weber Grills
We’re proud to bring this recipe to life in partnership with Weber Grills UK, combining exceptional outdoor cooking with premium seasoning from Maldon Salt. This collaboration celebrates the art of live-fire cooking – where high-quality ingredients, expert grilling, and bold flavour comes together effortlessly. Whether you’re coking for a summer gathering or elevating your weekend barbecue, this dish showcases everything great grilling should be.
About Weber Grills
Weber is a globally recognised leader in outdoor cooking, trusted for high-quality grills that deliver consistent results. Weber Grills continues this heritage with expertly designed gas, charcoal, and electric grills built for performance and ease.
The Weber Genesis used in this recipe is perfect for two-zone cooking, allowing you to sear over high heat and finish gently, ensuring perfectly cooked, juicy lamb every time.
Meet the Chef: Ruben Dawnay of Ruben’s Rubens
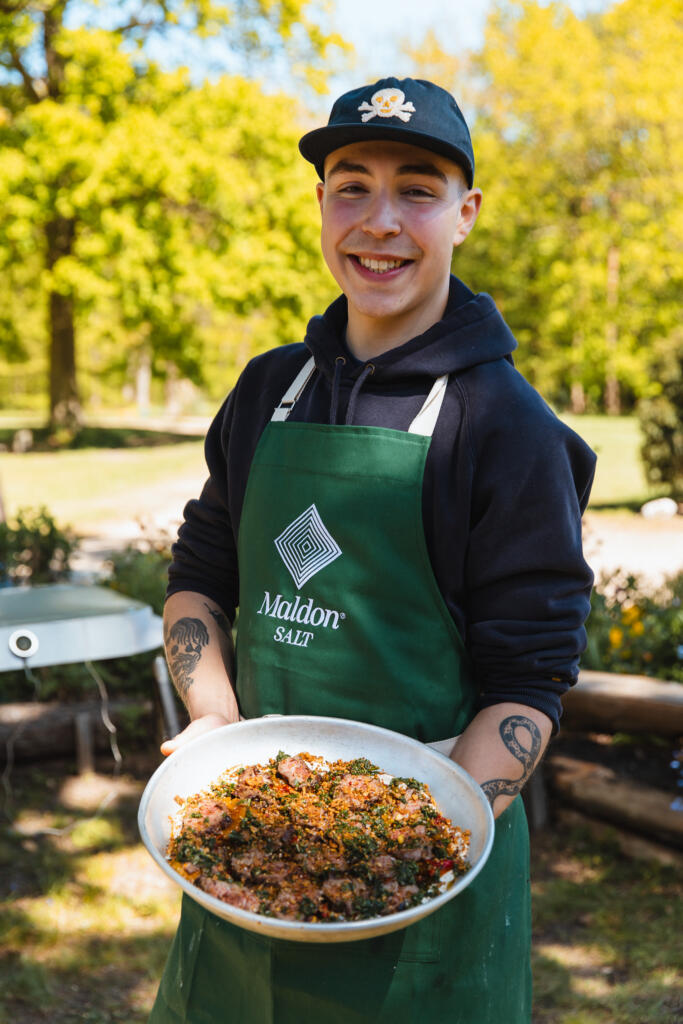
This recipe was created in collaboration with Ruben Dawnay, founder of Ruben’s Reubens, a London-based smokehouse renowned for its bold, fire-led cooking.
Ruben began his journey during lockdown, smoking meats and curing fish from his parent’s garden in Brixton. Inspired by his Polish-Jewish heritage, he developed a unique style that blends traditional deli influences with modern barbecue techniques.
Since then, Ruben’s Reubens has grown into one of London’s most exciting BBQ concepts – hosting pop-ups, residencies, and earning a loyal following for its flavour-packed smoked meats. Ruben has also been recognised as one of CODE Hospitality’s ’30 Under 30 Rising Stars’, cementing his position as a rising talent in the UK food scene.
About This Recipe
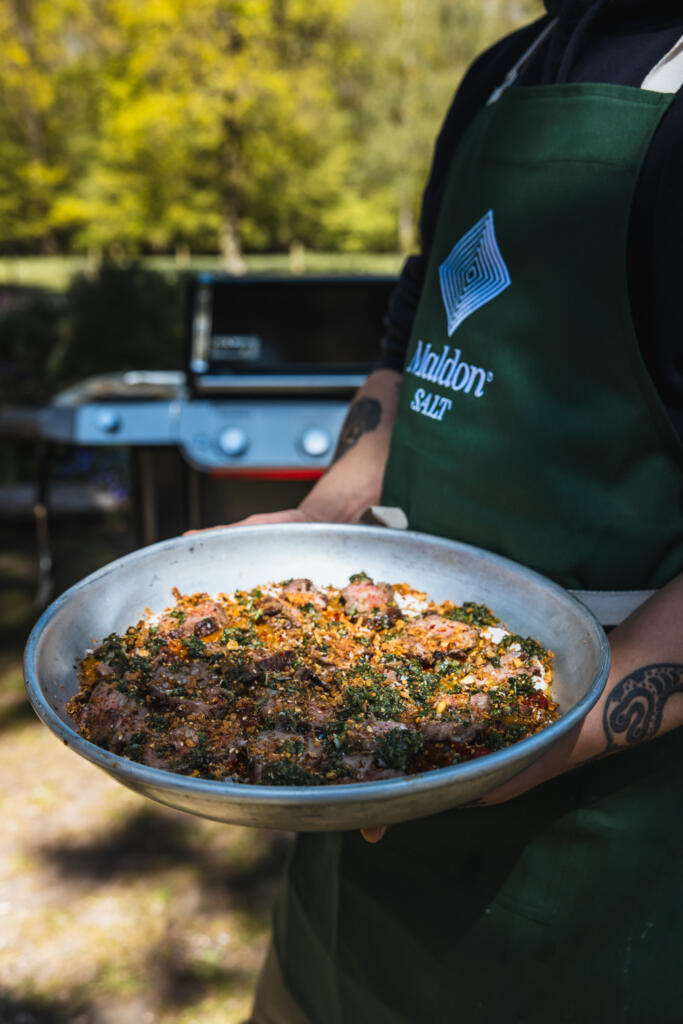
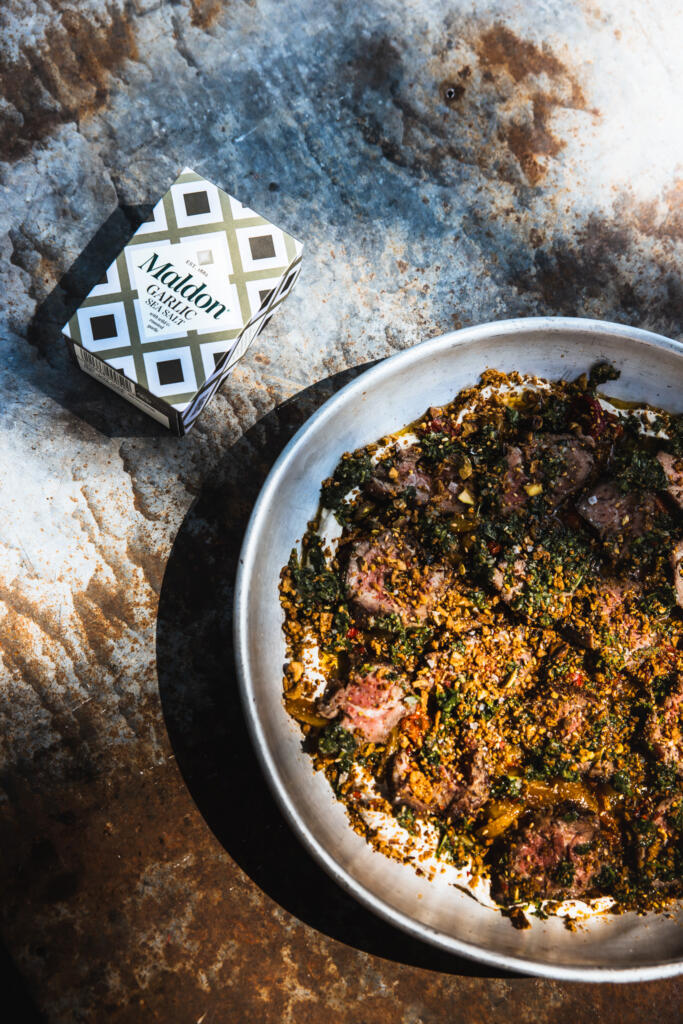
This Maldon Garlic Salt-Crusted Lamb Neck recipe is designed for sharing – bringing together rich, smoky, fresh, and tangy elements in every bite.
Expect layers of flavour from:
Perfectly seared lamb neck
Creamy whipped tahini
Charred, smoky rescaldo peppers
Bright, herb-packed salsa verde
Crunchy pistachio dukkah
It’s a dish that feels both rustic and refined – ideal for elevated outdoor cooking.
Why Maldon Garlic Sea Salt Matters
Maldon Garlic Sea Salt flakes are central to this recipe’s success. Their delicate, pyramid-shaped flakes provide a clean crunch and even seasoning, while the garlic infusion enhances the lamb’s natural richness.
Used both as a crust and finishing touch, Maldon Garlic Sea Salt delivers:
Bold, savoury depth
Balanced seasoning without overpowering
A signature texture that elevates each bite
This isn’t just seasoning – it’s a key flavour component.
How to Make Maldon Garlic Salt-Crusted Lamb Neck with Whipped Tahini, Rescaldo Peppers, Salsa Verde & Dukkah
Dukkah – Toast coriander, cumin and fennel seeds in a dry pan until fragrant, about 2 minutes. Tip into a mortar. Toast sesame seeds until golden, add to mortar. Toast pistachios until just coloured, 2–3 minutes. Roughly crush everything together, make sure to keep some texture. Fold in sumac, crispy shallots and Maldon Original Sea Salt Flakes. Set aside.
Rescaldo Peppers – Preheat Weber gas grill on high, all burners, lid down for 10 minutes. Grill whole peppers directly on the grates, lid down, turning every 3-4 minutes until completely charred and collapsed. Transfer to a bowl, cover with cling film, rest 15 minutes. Peel, deseed, slice into wide strips. Dress with olive oil, vinegar and Maldon Original Sea Salt Flakes.
Whipped Tahini – Whisk tahini, lemon juice and garlic together. Add ice water a splash at a time until smooth and pale. Season with Maldon Original Sea Salt Flakes. Fold in labneh.
Salsa Verde – Finely chop parsley, mint, anchovies and capers together on a board. Scrape into a bowl. Whisk in garlic, lemon zest and juice, then stream in olive oil. Finish with vinegar.
Lamb – Pat fillets dry. Rub with olive oil, press Maldon Garlic Sea Salt Flakes generously onto all surfaces, season with black pepper. Set Weber to 2-zone: one side high, one side low. Sear on the hot side 3-4 minutes per side until deep and crusted. Move to the indirect side, lid down, until lamb hits target of 55°C internal. Rest 5-10 minutes.
To Plate – spread tahini across the base. Lay rescaldo peppers on top. Slice lamb against the grain and lay this on the peppers. Spoon over salsa verde. Finish with a heavy shower of pistachio dukkah and a final pinch of Maldon Garlic Sea Salt Flakes on the cut face of the lamb.
Fire Up Your Grill & Get Cooking
Bring bold, fire-cooked flavour to your table with this standout dish.
Shop Weber Grills UK for the ultimate barbecue setup.
Discover Maldon Sea Salt for perfectly balanced seasoning
Tag us in your creations on socials – @maldonsalt – we’d love to see your take
A grazing-board hero that’s as good for you as it is moreish. This silky butterbean hummus is whipped smooth with tahini, lemon and Maldon Garlic Sea Salt, then served with homemade gluten-free seeded crackers and fresh crudités for dipping. It’s a generous, crowd-pleasing centrepiece for any picnic or summer spread, and almost entirely plant-based.
Why You’ll Love This Butterbean Hummus
Silky-Smooth Hummus: A splash of cold water at the end whips the butterbeans into the lightest, creamiest hummus.
Homemade Seeded Crackers: Crisp, seed-packed and naturally gluten-free, they’re far better than shop-bought – and easy to make.
Built for Sharing: A generous dip, crunchy crackers and colourful crudités make an effortless grazing platter.
How to Make Butterbean Hummus (Step-by-Step)
Make the cracker mix: Preheat the oven to 180°C. In a large bowl, mix the flaxseed, brown rice flour, ½ tsp Maldon Garlic Sea Salt, pumpkin seeds, sunflower seeds, hemp seeds and chia seeds. Pour over 250ml boiling water, stir together and set aside for 20 minutes to thicken as the chia and flax absorb the liquid.
Spread and bake the crackers: Line a large baking tray with parchment, tip on the mixture and smooth it right to the edges, as thin as possible. Sprinkle over the everything seasoning and fennel seeds, press them in gently, and bake for 30–40 minutes until golden and crisp. Cool completely on the tray.
Blitz the hummus: While the crackers bake, add the butterbeans, garlic, lemon juice, tahini, cumin, smoked paprika and Maldon Garlic Sea Salt to a food processor and blitz to a paste. Add the olive oil and blitz again until smooth.
Make it silky: With the motor running, drizzle in the cold water and keep blitzing until completely smooth and silky. Taste and adjust with a little more Maldon Garlic Sea Salt if needed.
Break, top and serve: Once cooled, snap the cracker sheet into rustic shards. Spoon the hummus into a bowl, drizzle with olive oil and finish with a pinch of cumin and Maldon Garlic Sea Salt. Serve with the crackers and crudités for dipping.
Tips for the Perfect Butterbean Hummus
Cold water for silk: Adding cold water at the end, with the motor running, is the trick to the smoothest, lightest hummus.
Spread the crackers thin: The thinner and more even the layer, the crisper the crackers – take them right to the edges of the tray.
Cool before breaking: Let the cracker sheet cool fully on the tray so it snaps cleanly into shards rather than bending.
The hummus keeps for up to 3 days in the fridge, and the crackers stay crisp for several days in an airtight container – making this an ideal make-ahead platter.
Why did my hummus turn out grainy?
Keep blitzing and add the cold water gradually with the motor running. The water emulsifies the tahini and beans into a smooth, silky texture – patience is key.
Are the crackers really gluten-free?
Yes – they’re bound by the chia and flaxseed rather than wheat, with brown rice flour, so they’re naturally gluten-free (do check your everything seasoning if you need them to be certified).
A Maldon Salt Collaboration with Meliz Berg & AEG Kitchen Appliances
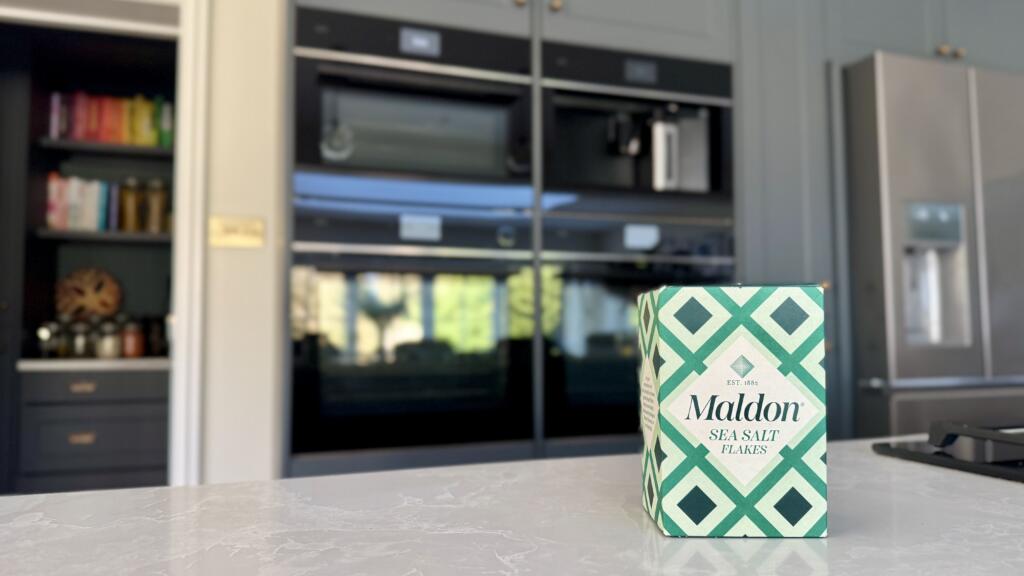
Maldon Original Sea Salt with AEG Kitchen Appliances
When it comes to creating memorable desserts, balance is everything. Sweet, tangy, creamy, crunchy – and, crucially, just the right amount of salt. These Creamy Cherry Filo Puffs with Sweet and Salty Pistachios celebrate contrast and balance, using Maldon Original Sea Salt flakes to elevate every layer of flavour and texture and AEG Kitchen Appliances for precision and performance.
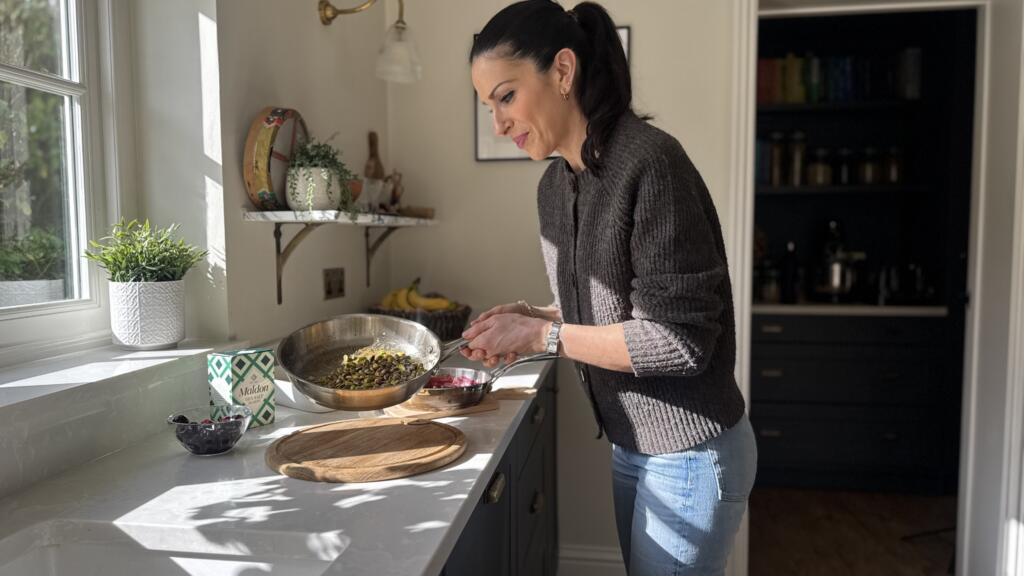
Created in collaboration with Meliz Berg, and baked to perfection using AEG Kitchen Appliances, this recipe proves that a ‘pinch’ of the right sea salt can transform a sweet dish from good to unforgettable.
Why Maldon Salt is Important for Filo Puffs
Meliz Berg with Maldon Original Sea Salt
Salt plays a vital role in sweet cooking, enhancing flavours rather than overpowering them – and Maldon Sea Salt is uniquely suited to the task. Its light, pyramid-shaped flakes dissolve gently, delivering clean salinity exactly where it’s needed.
In this recipe, Maldon Salt:
Enhances the natural sweetness of cherries and honey
Balances the richness of butter, filo and tahini yoghurt
Adds a subtle crunch and flavour contrast when used as a finishing touch
From the filo layers to the sweet-and-salty pistachios, Maldon Sea Salt ensures every bite is perfectly balanced, never flat or overly sweet.
Cooking with AEG Kitchen Appliances
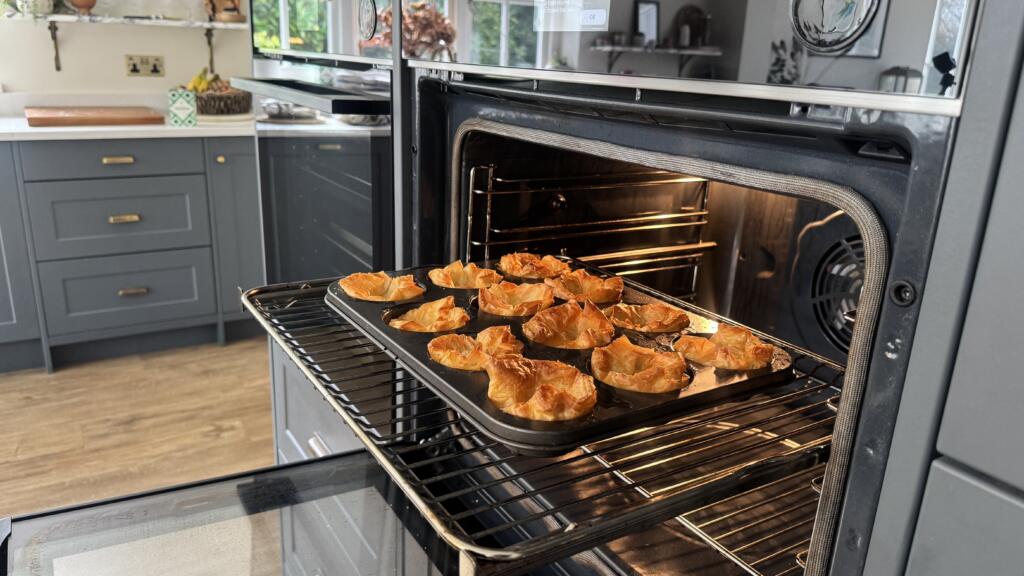
Filo Puffs coming out of the AEG Oven Setup
For over a century, AEG has been the forefront of kitchen innovation, designing appliances that empower people to cooking with confidence. Rooted in German engineering and driven by passion for taste, AEG focuses on intelligent technology that supporting creativity rather than complicating it – from ovens that enhance flavour and texture to intuitive controls that give you precision without stress.
To bring every element of this recipe to life, Meliz cooked using premium AEG Kitchen Appliances, including the AEG 7000 MealAssist Oven with SteamCrisp, featured throughout the cooking videos.
This innovative oven uses a combination of 25% steam and 75% heat for perfectly even cooking – ideal for slow-roasting vegetables with crisp, caramelised edges while keeping meats tender and juicy. With its CookSmart Touch Display, telescopic runners and pyrolytic self-cleaning, it offers precision, ease and outstanding performance.
How to Make Cream Cherry Filo Puffs with Sweet and Salty Pistachios
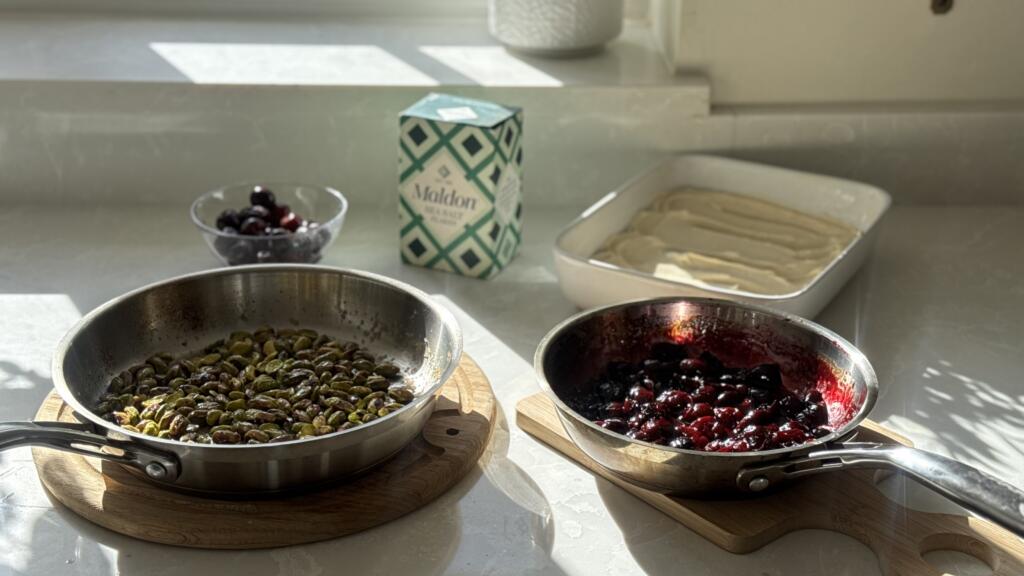
Ingredients (listed left) for the Filo Puff Filling
Step 1 – Tahini Yogurt:
Mix all the ingredients until thick and smooth. Cover and chill until needed
Step 2 – Cherries
Simmer cherries over medium heat until juices release.
Add orange juice and reduce until thickened, then stir in the honey and orange blossom water. Cool completely.
Step 3 – Sweet & Salty Pistachios
Melt butter in an ovenproof pan, add pistachios, sugar and Maldon Salt.
Stir well and bake at 180c fan for 10 minutes. Cool
Step 4 – Filo Puffs
Brush filo pastry with butter, sprinkle with sugar and a pinch of Maldon Sea Salt, fold into layers, and press into a muffin tray.
Bake for 15 minutes until golden and crisp. Cool fully.
Step 5 – Assemble
Swirl the cherries through the tahini yoghurt, spoon into filo cups, top with pistachios and finish with a final pinch of Maldon Sea Salt flakes.
Top Tips
Prepare all components in advance and assemble just before serving
Store filo cases and pistachios in airtight containers
Always finish sweet desserts with a light pinch of Maldon Sea Salt for balance
Have You Tried It?
Explore recipes, tips and inspiration designed to help you transform everyday dishes – sweet and savoury – with the perfectly balanced crunch of Maldon Sea Salt flakes.
If you try this recipe at home, we’d love to see it – tag us in your creations so we can share your wonderful cooking with our community. And if you’re feeling inspired to upgrade your kitchen, you can explore more AEG appliances here, and discover how their innovative technology can transform your everyday cooking.