


- Preheat the oven to 180c.
- Firstly, start with the Hasselback potatoes. The easiest way to make the cuts is to place a potato onto a chopping board and put a chopstick flat on either side. Then using a knife, carefully cut slices all the way along the potato – the chopsticks will ensure that you don’t cut fully through the potato. Repeat this with each potato.
- Place the leg of lamb onto a large roasting tray skin side up, and then nestle the prepared potatoes around it. Cut the shallots in half lengthways and add them to the tray. Cut the garlic bulbs in half, cutting through the cloves like a cross section. Add two of the halves to the tray. Use a sharp knife to insert some small cuts into the skin of the lamb, then press some of the other cut garlic cloves and small sprigs from the rosemary into the cuts. Slice the lemon in half and add this to the tray as well. Finally slot the bay leaves into some of the cuts of the potatoes.
- Drizzle the potatoes, shallots, garlic and lemons with 3 tbsp of the olive oil then drizzle the remaining two across the lamb. Season well with Maldon Sea Salt and cracked black pepper. Place into the preheated oven and roast for 1 hour 25 minutes.
- While the lamb and potatoes are cooking, make the salsa verde. Add the chopped shallot, anchovies, capers and herbs into a bowl. Add the red wine vinegar and give it a stir. Then slowly drizzle in the olive oil and give it a good mix. Season with Maldon Sea Salt and cracked black pepper to taste. Set aside.
- Once the lamb is cooked, remove it from the oven. The potatoes should be lovely and golden, and tender in the middle – but if they need a little longer, simply lift the lamb out onto a board to rest and return them to the oven for 10 minutes. Allow the lamb to rest before carving and serving with the potatoes, some greens and the salsa verde.
Season: Autumn
This aubergine traybake with tahini dressing is a Middle Eastern-inspired dish that combines bold flavours with vibrant textures in a single roasting tin. Perfect for busy weeknights or effortless entertaining, this recipe transforms tender roasted aubergine into a show-stopping centrepiece. The smoky heat of rose harissa pairs beautifully with creamy tahini dressing, while a sprinkle of Maldon Sea Salt flakes enhances every bite. Ready in just 45 minutes, this dish is finished with chopped parsley, but you can also use fresh mint leaves, toasted pine nuts and a touch of lemon juice for a extra burst of freshness.
Step 1
Preheat the oven to 180c.
Step 2
Prepare the aubergine but slicing them in half lengthways, keeping the stalk on, so you have 4 halves. Then score the flesh of each half with a sharp knife in a crisscross pattern – making sure to only cut the flesh and leave the skin intact.
Step 3
Then take a large baking tray and add the chickpeas, red onion wedges and red pepper chunks to the tray. In a small bowl, mix together the harissa and olive oil. Drizzle most of this in the tray and toss so all the ingredients are well coated.
Step 4
Next add the aubergine halves on top of the other veg in the tray so the cut side is facing up and then brush with the remaining harissa paste mix. Season well with Maldon Sea Salt flakes and cracked black pepper.
Step 5
Place the tray into the preheated oven for 25 minutes until everything is starting to look charred and softened. At this stage add the cherry tomatoes on the vine and nestle them in the tray around the aubergine, drizzling with a little extra oil. Then place the tray back in the oven for an additional 20 mins.
Step 6
While the veg is cooking, prepare the tahini dressing. Simply whisk together the tahini, lemon juice and olive oil. Then add as much water as needed until you reach a drizzle consistency – start with a tablespoon at a time. Season well with Maldon Sea Salt flakes and cracked black pepper.
Step 7
When the traybake is ready, remove from the oven and drizzle over the tahini dressing and the chopped parsley. Serve alongside some charred pitta bread, if you like.
Can you keep cooked aubergine in the fridge?
Yes, you can keep cooked aubergine in the fridge. Make sure to store it in an airtight contained for up to 3-5 days, however it’s best consumed within a few days for optimal freshness.
Can you keep cooked aubergine the freezer?
Yes, you can store cooked aubergine in the freezer for up three months in an airtight container. When you are defrosting your aubergine, thaw it in the fridge for 24 hours. Make sure to drain any excess water and pat dry to prevent it from becoming mushy!
Indulge in the perfect autumn dish with our air fryer pumpkin gnocchi, served with a rich, creamy sauce. Roasted pumpkin, caramelised onions, and soft gnocchi come together, topped with crispy sage, toasted walnuts, and a sprinkle of parmesan. This comforting homemade meal is easy to prepare and bursting with seasonal flavours, offering a flavour-packed experience. This air fryer pumpkin gnocchi recipe will transform pillowy gnocchi into a golden, slightly crisp delight, enhanced by a luscious pumpkin-infused sauce!
Whether you’re a fan of a classic potato gnocchi or a lover of seasonal pumpkin puree, this dish brings together the earthy richness and the aromatic crunch of fried sage, and the creamy decadence of parmesan cheese. Ready in no time, this dish is a celebration of simplicity and flavour, perfect for weeknights or impressing dinner guests.
Here’s how to make the pumpkin gnocchi and crispy sage recipe…

Step 1
Start by preparing the pumpkin by peeling and deseeding it, then cutting it into small 2cm pieces. Then preheat your air fryer to the desired setting – we did ours at 180c. Place the diced pumpkin into the basket along with the onion wedges and drizzle with olive oil then season with Maldon Garlic Sea Salt and cracked black pepper.
Step 2
Cut the garlic bulb into half so the cloves are exposed and then wrap each half in kitchen foil. Place these wrapped bulbs into the basket with the pumpkin and onions. Place the basket into the air fryer and roast for 15 – 20 minutes until the pumpkin is tender and the onions have softened and charred, remove from the basket and set aside. Once cool enough to handle, unwrap the foiled garlic bulbs and the garlic should be golden and soft inside – if they need a little simply wrap them again and place back in the air fryer for 5 minutes more.
Step 3
In a small frying pan add some oil and heat to a medium heat, then add the sage leaves and allow then to fry for a minute or so until crisp then remove and set aside. Place the walnuts into the air fryer and toast for 5 minutes. Then remove and roughly chop.
Step 4
Place a large pan of salted water on to boil and season well with Maldon Sea Salt. Then cook the gnocchi according to the packet instructions, then drain them but make sure to reserve a large mug of the cooking water. Place the drained gnocchi into a large frying pan.
Step 5
Put the roasted pumpkin and onion into a blender. Squeeze the garlic out of the paper skins and add to the blender too. Then add the grated parmesan, some Maldon Garlic Sea Salt and cracked black pepper to the blender along with 50ml of pasta water. Blend until smooth, adding a little more pasta water if required.
Step 6
Tip the smooth sauce into the pan with the cooked gnocchi and gently heat through, tossing well. Again, you can add a splash more of the pasta water here if it’s looking a little thick – you want a nice glossy sauce.
Step 7
Serve the gnocchi in bowls and then top with the toasted walnuts, crispy sage leaves and some extra grated parmesan.
Alternative sauces you can use for your gnocchi
Here are three delicious sauces to try instead of pumpkin for your gnocchi recipe:
Pesto Sauce

Brighten your gnocchi with a vibrant basil pesto. Blend fresh basil leaves, garlic, pine nuts, parmesan cheese, olive oil and a pinch of Maldon Sea Salt until you get a smooth sauce. Toss in your cooked gnocchi for a fresh, herbaceous twist. This sauce is perfect for those looking for a light yet flavourful option!
Creamy Parmesan Alfredo Sauce

For a rich and indulgent option, whisk together cream, butter, and freshly grated parmesan cheese over medium heat until smooth and velvety. The creamy Alfredo sauce coats the gnocchi beautifully, creating a luxurious dish for a cosy dinner. Add a touch of nutmeg for extra depth.
Tomato Butter Sauce

A simple yet irresistible choice, this sauce combined the tanginess of tomatoes with the richness of butter. Simmer crushed tomatoes with a generous amount of butter, garlic and a pinch of Maldon Sea Salt until thickened. Toss the gnocchi in the sauce and finish with fresh basil and parmesan for a comforting, hearty meal.
Each of these sauces offers a unique flavour profile, ensuring there’s something for evert palate. However, one of our favourites is a classic brown butter sauce. This is made by cooking unsalted butter in a pan until the milk solids turn slightly brown, giving a nutty, toasty flavour. The French name for brown butter is ‘beurre noisette’ which translates to ‘hazelnut butter’.
How to make brown butter sauce

If you’re looking to elevate your classic potato gnocchi recipe, brown butter sauce is a game-changer. Brown butter’s nutty caramelised richness perfectly compliments the light, pillowy texture of potato gnocchi, creating a luxurious yet simple dish. To make this alternative sauce, melt 150g unsalted butter in a pan over medium heart, stirring until it turns golden brown and develops a warm, toasty aroma. Add crispy sage leaves for an earthy kick and a pinch of Maldon Sea Salt and cracked black pepper to elevate the flavours. The brown butter sauce clings to each gnocchi, creating a dish that’s indulgent, aromatic, and incredibly satisfying. Top with freshly grated parmesan for a final touch of decadence.
How to make gnocchi without using potatoes
Here are three creative ways to make gnocchi without using potatoes:
Pumpkin or Sweet Potato Gnocchi

Replace traditional potatoes with pumpkin puree or mashed sweet potato for a flavourful twist. These ingredients add a hint of natural sweetness and vibrant colour to the gnocchi. Mix the puree with flour, egg, Maldon Sea Salt and a pinch of nutmeg or cinnamon for an autumn-inspired version that pairs beautifully with brown butter or cream sauces.
Cauliflower Gnocchi

For a low-carb and gluten-free option, use cauliflower! Steam or boil cauliflower florets until tender, then blend them into a smooth puree. Combine the puree with almond flour, an egg and Maldon Sea Salt to form a dough. This version is healthy and still satisfying, with a slightly nutty taste.
Ricotta Gnocchi

Craving indulgence? Swap the potatoes for creamy ricotta cheese to create light and tender gnocchi bites. Ricotta gnocchi, also known as ‘gnocchi di ricotta’ originates from Italy, and is similar to ‘Gnudi’ which is gnocchi-like dumplings filled with ricotta cheese and semolina.
Simply mix ricotta with flour, parmesan cheese and a pinch of Maldon Sea Salt. The dough comes together quickly and requires less kneading, resulting in soft, melt-in-your-mouth gnocchi with a subtle cheesy flavour.
Salted caramel snickerdoodles take the classic, beloved cookie to a whole new level with the perfect blend of sweet and salty indulgence! These treats are a heavenly combination of chewy, cinnamon-sugar-coated snickerdoodles infused with Carnation Caramel and topped with a delicate pinch of Maldon Sea Salt flakes.
Creamy richness of Carnation condensed milk adds a luxurious texture, while the caramel provides a sweet depth that harmonises beautifully with the hint of sea salt. Whether you’re a seasoned baker or a kitchen novice, this recipe is an easy yet impressive way to elevate your cookie game.
How to make salted caramel snickerdoodles
If you love snickerdoodles for their soft, buttery texture and warm cinnamon flavour, you’ll adore this decadent twist! The Carnation Caramel swirls through the cookie dough, creating pockets of gooey sweetness, while the Maldon Salt adds just the right amount of crunch and balance to the sugary richness. The use of Carnation condensed milk ensures the dough is easy to work with and bakes into perfectly soft, chewy cookies every time. The perfect treat for a cosy night in, or a holiday spread, these salted caramel snickerdoodles are sure to become your go-to recipe for flawless sweet-and-salty indulgence.
- Preheat your oven to 180°C (160°C fan), Gas Mark 4.
- In a small bowl, combine the ingredients for the cinnamon sugar and set aside.
- In a large bowl, add the flour, corn starch, baking powder, bicarb, cream of tartar and Maldon Salt. Give everything a good mix to combine, then set aside.
- Add the butter and sugars to another large bowl and using an electric hand whisk, beat on high for 2-3 minutes until light and fluffy. Add the condensed milk, egg yolk and vanilla and whisk on low until combined. Whilst continuing to whisk on low, slowly add the dry ingredients until a dough has formed.
- Roll the dough into equal sized balls – they should be around 45g each. Roll each ball in the cinnamon sugar making sure to coat completely. Place the balls onto the baking tray and pop in the fridge for 20 minutes to chill before baking.
- When ready to bake, space the balls evenly across the baking trays and bake for 12-15 minutes until golden round the edges and the top is set. Remove from the oven and allow to cool completely on the tray.
- For the cream cheese frosting, add the room temperature cream cheese and butter to a large bowl and using an electric hand whisk, beat for 3 minutes until light and fluffy. Add the condensed milk, caramel, vanilla and Maldon Salt and beat again for another 4-5 minutes until the icing becomes smooth and creamy.
- To frost the cookies, place a ½ tablespoon of the icing into the middle of the cookie and then use the back of the spoon to push the icing out and create an even covering across the cookie. Repeat with all the cookies until they have all been iced.
- These are best eaten (and shared!) after baking but will keep in an airtight container in the fridge for up to three days.
This recipe was created by Isobel Keane.
- Preheat oven to 180c degrees. Grease 2 x 24-hole mini muffin tins.
- Make pastry by blitzing together flour, ground almonds, butter, Maldon Salt, orange zest and water. Blitz for 20 seconds until pastry forms a ball. Leave to chill in fridge while you make your crumble.
- Make crumble by pulsing together flour, sugar, Maldon Salt, ground almonds and butter. Once the mixture looks like breadcrumbs.
- Mix marzipan into crumble mixture.
- Roll out pastry to a pound’s thickness and use a cookie cutter to cut out circles. Press into mini muffin tin.
- Scoop a teaspoon of mince meat into each pastry case. Evenly top pies with crumble mixture.
- Bake in the oven for 20 minutes, until golden brown.
- Allow to cool for 10 minutes. Serve with icing sugar and clotted cream or brandy butter.
Recipe created by @laoisecooks
These roast potatoes will be the star of the festive season! They might even steal the spotlight on the big day. Thanks to Maldon Garlic Sea Salt, these epic roast potatoes have a double layer of seasoning. Use the Maldon Garlic Sea Salt when parboiling the potatoes and then again after roasting to layer the flavour. Resulting in the crispiest roast potatoes with fluffy insides. If that’s not delicious enough, they’re served with a sticky garlicky glaze, made with honey and balsamic vinegar, plus a sprinkle of Maldon Garlic Sea Salt of course.
Here is how to make garlic roast potatoes
- Preheat the oven to 200°C/180°C fan/gas mark 6 .
- Peel and slice the potatoes in half.
- Put the potatoes in a pan of cold salted water, season the water with a generous pinch of Maldon Garlic Sea Salt. Bring to the boil then simmer gently for around 6 – 8 minutes until they are about half cooked.
- Drain and shake them hard in a colander so that you rough up the edges – this gives you super crunchy potatoes. Leave them to steam cool in the colander.
- Add the oil to a deep roasting tray. You can also use duck or goose fat depending on what you prefer. The tray should be big enough so the potatoes are in a single layer. Pop the tray in the hot oven for 5 minutes or until the oil is smoking hot.
- Remove the tray and carefully spoon the potatoes into the tray and baste with the hot oil, season well with Maldon Garlic Sea Salt.
- Roast for 45 – 55 minutes, turning halfway through, until they are crunchy on the outside and fluffy inside.
- Meanwhile, make the glaze. In a small pan heat the honey on a medium heat, when it starts to bubble, stir in the balsamic vinegar and a generous pinch of Maldon Garlic Sea Salt. Simmer for a few minutes until it starts to thicken.
- Plate up the roast potatoes and pour over the glaze. Enjoy!
Create a showstopping festive centrepiece this Christmas with a mouth-watering mushroom, butternut squash, chestnut and caramelised onion wreath. Golden brown and packed with seasonal ingredients, this dish is the perfect vegetarian main for your holiday table. Made with a sheet of light, flaky puff pastry and filled with savoury roasted vegetables, this wreath is sure to impress both vegetarians and meat-lovers alike! The combination of earth mushrooms, sweet caramelised onions and nutty chestnuts brings together the flavours of winter, while the Maldon Sea Salt flakes adds the perfect finishing touch.
This recipe is great addition to your collection of vegetarian puffy pastry recipes and is ideal for those looking for an easy yet stunning main course for Christmas!
How to caramelise onions

Caramelising onions is a slow cooking process that draws out the natural sugars,
resulting in sweet, golden brown onions perfect for adding depth to recipes. Start by
heating olive oil and butter in a pan over low heat. Add finely sliced onions and a pinch
of Maldon Sea Salt flakes and cook for at least 10 minutes until soft and translucent. Add soft brown sugar and continue cooking until onions are sticky and caramelised, usually
another 5 minutes. If you have any leftover, you can use them as a filling for a delicious portobello mushroom and stilton burger, paired with rocket in a sweet brioche bun.
Making the Mushroom, Butternut Squash, Chestnut and Caramelised Onion Wreath
Prepare the Ingredients:
Preheat your oven to 200°C. Slice the red onions finely and prepare the butternut
squash by peeling and dicing into 2cm cubes. Tear the mixed mushrooms into pieces
and crumble the chestnuts.
Roast the Vegetables:
Place the mushrooms and butternut squash on a baking tray. Drizzle with olive oil and
season with Maldon Sea Salt and pepper. Roast for 25 minutes until the squash is
tender and mushrooms are golden brown. Allow to cool.
Make the Filling:
In a large bowl, combine the roasted vegetables, caramelised onions, crumbled
chestnuts, shredded sage leaves, grated nutmeg, and dried cranberries. Season with a
pinch of Maldon Garlic Sea Salt.
Assemble the Wreath:
Unroll the puff pastry sheet onto a baking tray. Pile the vegetable filling down the
middle of the pastry. Roll the pastry over to encase the filling, sealing the edges with an
egg or milk wash. Shape into a wreath, sealing the ends together. Use leftover pastry for
decorations if desired. Chill in the fridge for 30 minutes.
Bake the Wreath:
Once chilled, bake in the preheated oven for 35-40 minutes or until the pastry is golden
and crisp. Allow to cool slightly before serving warm or cold.
Mushroom, Butternut Squash, Chestnut and Caramelised Onion Wreath Recipe

- Preheat the oven to 200c.
- Start by making the caramelised onions. To a frying pan add 1 tbsp of olive olive plus a knob of butter and allow it to melt. When foaming, add the sliced onions and a pinch of Maldon Sea Salt. Fry these on a low heat for at least 10 minutes until they are soft and translucent. Then add the soft brown sugar and continue to cook for another 5 minutes until the onions have gone sticky, soft and caramelized. Set aside to cool.
- Place all the mushrooms onto a baking tray along with the diced butternut squash. Then drizzle with the remaining olive oil and some salt and pepper. Place into the hot oven and roast for 25 minutes until the squash is tender and the mushrooms are golden. Set the tray aside to cool.
- Once the vegetables have cooled you can make the filling. Simply mix in a bowl with the caramelized onions, chestnuts, sage, nutmeg, dried cranberries and Maldon Garlic Sea Salt.
- Unroll the pastry onto a baking tray and then pile the filling down the middle in a line. Then roll the pastry over to seal it, as though making a large sausage roll. Use the egg wash to seal it down, and then take the two open ends and join them together, sealing them as well. Any excess pastry can be cut off and used to decorate the wreath, if desired. Egg wash the whole outside of the wreath and then place into the fridge for 30 minutes.
- Once the wreath has chilled, place it into the preheated oven and bake for 35 – 40 minutes until it is golden and crisp on the outside. Cool slightly before serving – can be served warm or cold.
Can You Freeze Butternut Squash?

Yes, you can freeze butternut squash. Peel and dice the squash into cubes, blanch in
boiling water for 3-5 minutes, then cool in ice water. Drain and pat dry before placing in
a single layer on a baking tray to freeze. Once frozen, transfer to a freezer bag for
long-term storage.
Side Dishes to Serve
A delicious flaky mushroom wreath is the epitome of comfort food. However, now you need the perfect sides to make the ultimate festive feast! Here are a few tasty side dishes you can serve with your mushroom wreath.
Roasted Potatoes with Rosemary & Thyme
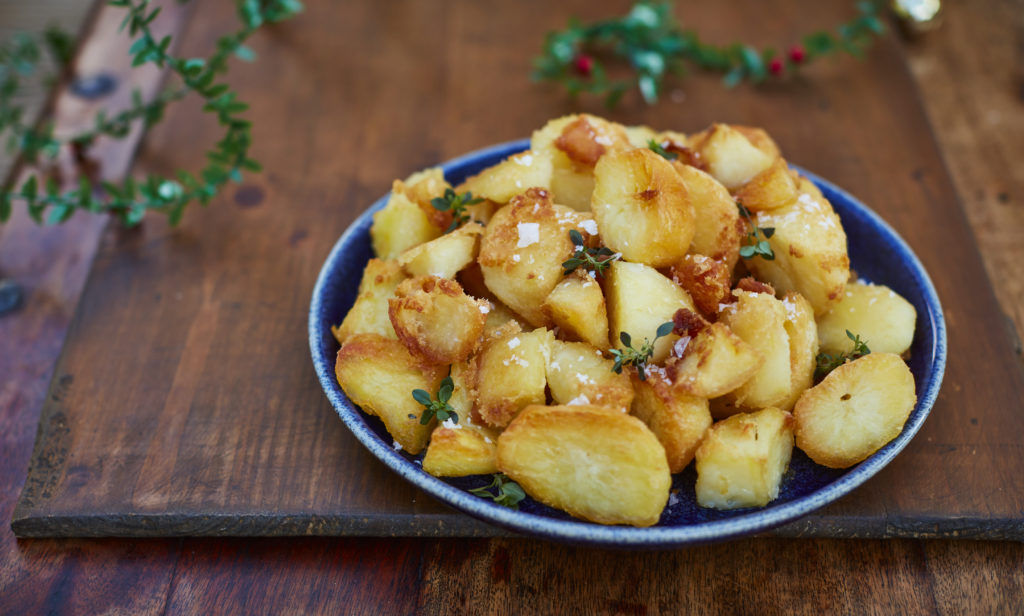
The ideal accompaniment for this recipe – the classic roast potato. Crispy on the outside and heavenly fluffy on the inside. Normally you can season your ‘tatties’ with salt and pepper, but we’ve added a twist by infusing rosemary and thyme to give a delightful flavour and an addictive crunch.
Carrots with Honey & Lemon

Oh-so-sweet and tender! These carrots are cooked in a delicious honey and lemon glaze that offers a sweetness and and touch of colour to your dinner plate.
Brussels Sprouts with Smoked Bacon
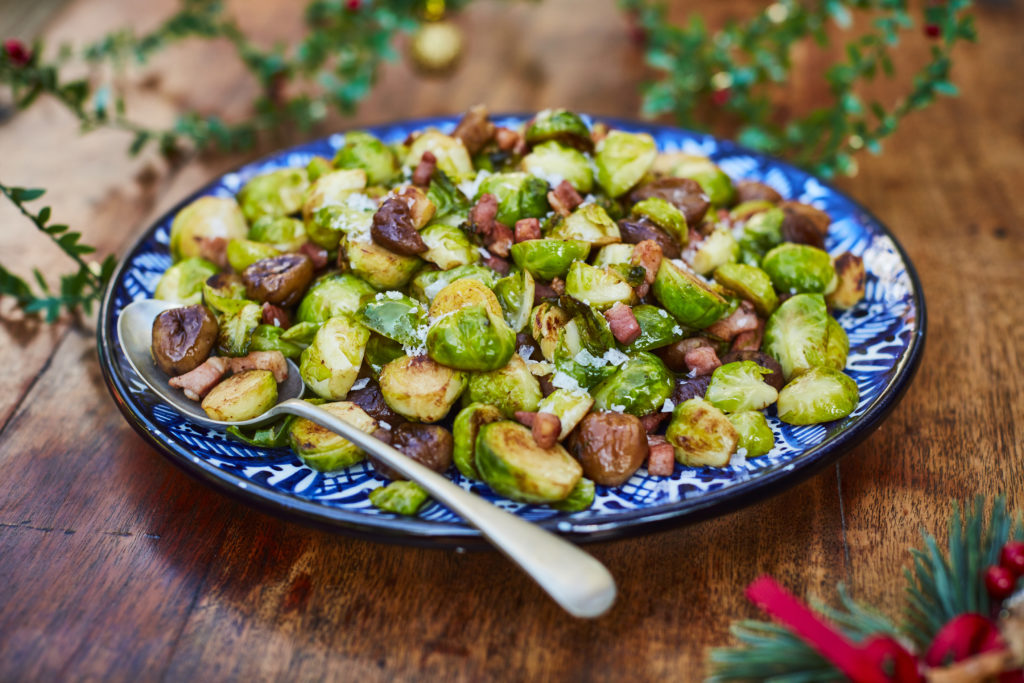
Add smoked bacon to your humble brussels sprouts to give a crispy, savoury element to the dish. It compliments the wreath’s mushroom and caramelised onions beautifully!
Indulge in the rich, comforting flavours of a spiced apple frangipane tart, where the warm, nutty essence of almond meal meets the crisp sweetness of Granny Smith apples. This elegant apple tart is elevated with the subtle smokiness of Maldon Smoked Sea Salt, adding a sophisticated twist to the classic dessert. Each bite of this tart reveals layers of flavour, from the buttery crust to the spiced apples on top, dusted with a delicate sprinkle of powdered sugar.
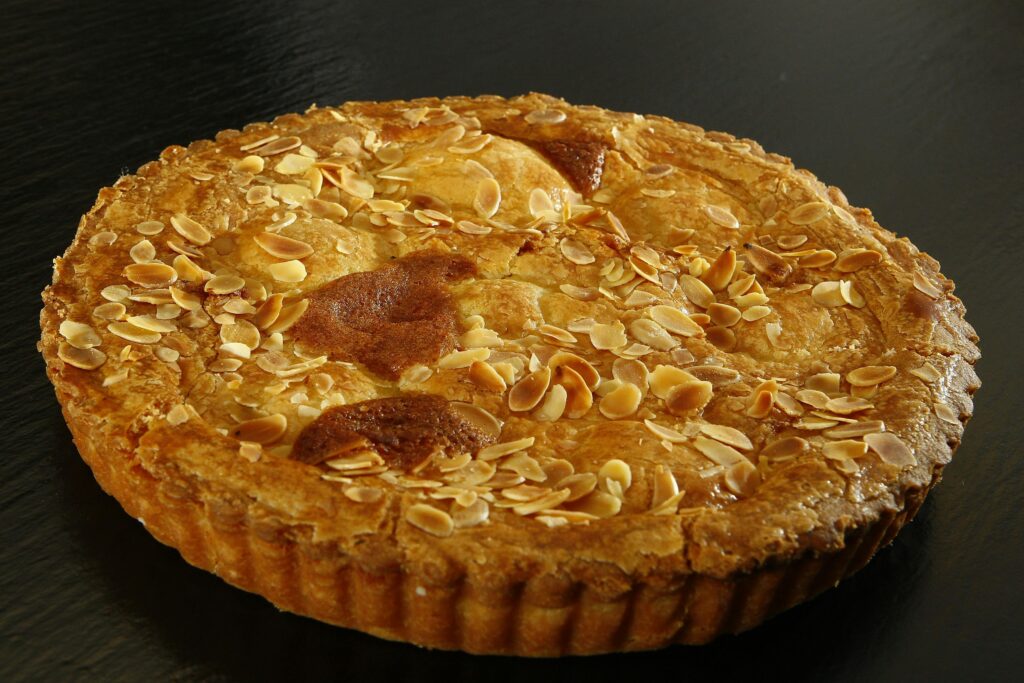
What is frangipane?
Frangipane is usually made as a filling for tarts, comprising of finely ground almonds, butter, sugar and eggs. You can also add a drop of almond extract in the mixture if you like a more intense almond flavour. Once you have made the frangipane, you can then spread it evenly across a blind-baked tart shell, creating a delicious, creamy mixture once baked.

Frangipane vs marzipan
Although both frangipane and marzipan’s main ingredient is almond meal, marzipan does not include butter, whereas frangipane does! Because of this, the main difference between frangipane and marzipan is the texture. Frangipane is very rich and used as a cream-based filling for tarts. In contrast, marzipan is more of a thick paste, used for decorating cakes and cupcakes. Our delicious orange and pistachio Battenberg cake uses marzipan to protect the soft, fluffy interior of the cake.
As a result, you can’t substitute one from the other, as they consist of different components and have different purposes in baking. However, if you’re running out of time, bakers tend to use almond paste instead of marzipan for a quicker solution when decorating.
Frangipane tart recipe
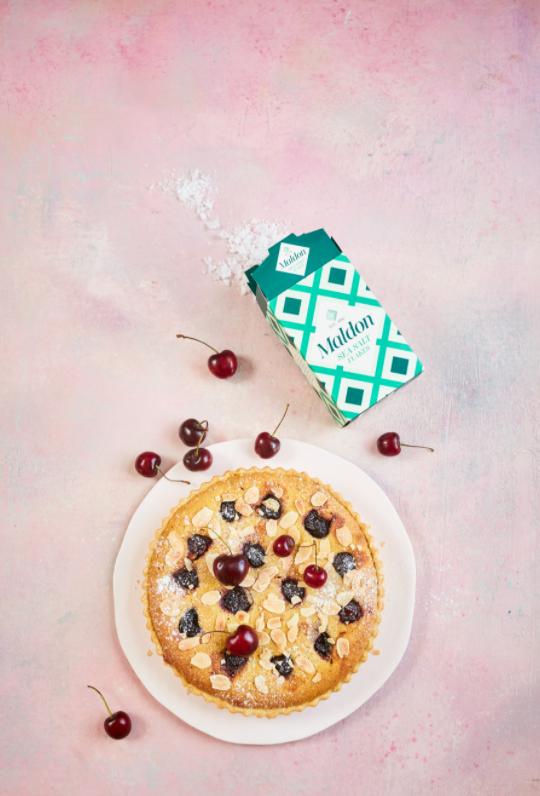
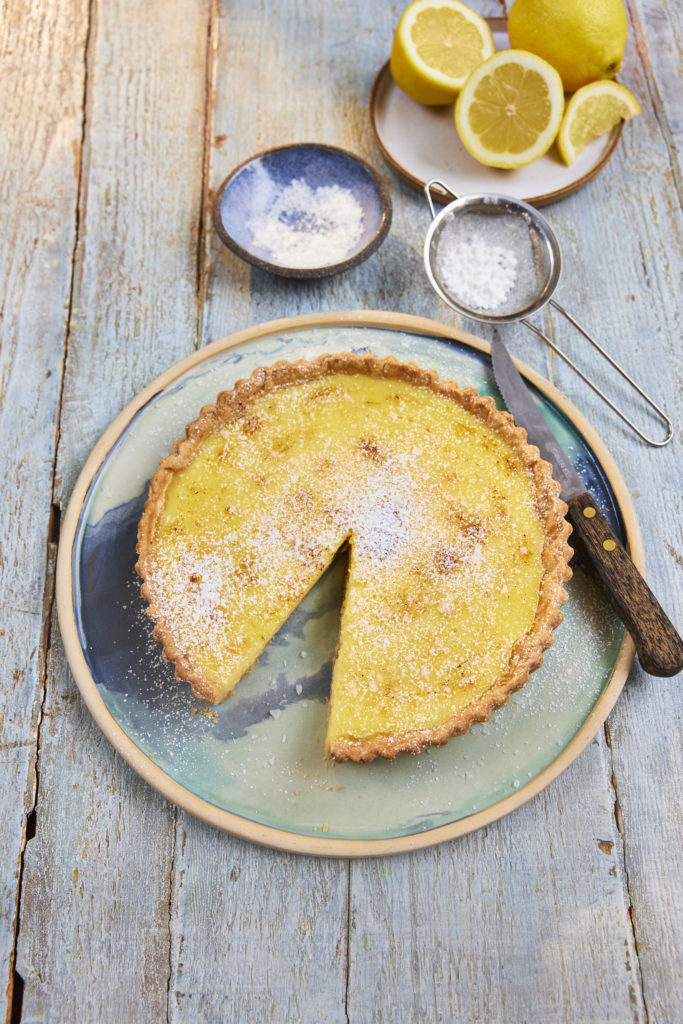
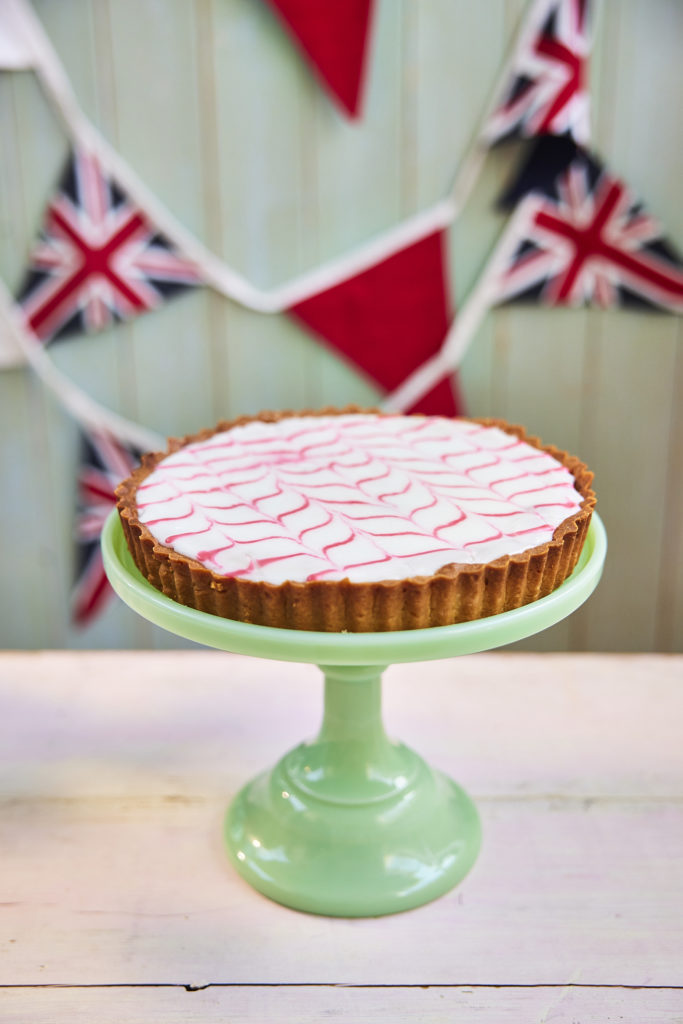
To make a classic frangipane tart, start by preparing the frangipane filling. Cream together room-temperature butter and sugar until light and fluffy, then add an egg yolks and a touch of almond extract for extra flavour (optional). Gradually fold in the finely ground almonds or almond meal to create a smooth mixture. Pour the frangipane filling into a blind-baked tart shell, ensuring it spreads evenly across the base.
If you are wanting to add fruit to your tart, we recommend lemons, apples or cherries. If opting for apples, you need to make sure your chosen apples (preferably Granny Smiths), are thinly sliced. Arrange the apples slices in a decorative pattern on top of the frangipane . Bake the tart is a preheated oven at 350°F (180°C) for about 30-45 minutes, or until the filling is set and the apples are golden. Once cooled, dust the tart with powdered sugar for a final touch. You can serve warm or at room temperature to enjoy the perfect balance of sweet almond filling and tart apples.
How to make a spiced apple frangipane tart

- Start by making the pastry. In a food processor add the plain flour and icing sugar. Then add the cold, cubed butter and pulse until it resembles fine breadcrumbs. Next add the egg yolk and cold water. Pulse again until the pastry starts to come together. If it looks a little dry, add a splash more water.
- Bring the pastry together with your hands and tip out of the food processor. Knead very gently and then wrap in clingfilm in a flat disc shape and put into the fridge to chill for 30 mins.
- After 30 mins, remove the pastry from the fridge and the roll it out on a lightly floured work surface. Roll a large circle around 2cm in thickness and the use your rolling pin to lift the pastry and drape over a 23cm fluted tart tin. Gently press in the corners and up the sides, leaving some overhang at the top. Use a fork to lightly prick the base of the tart. Then place this back into the fridge for another 30 mins.
- Preheat the oven to 180c.
- After 30 minutes, remove the chilled pastry case from the fridge. Scrunch up some baking paper and then line the pastry with this and some baking beans. Place into the preheated oven to blind bake. Bake it for 15 minutes, then remove the beans and paper and return to the oven for an additional 5 minutes until the pastry feels chalky and lightly golden in colour. Remove from the oven and allow to cool slightly
- While the pastry is blind baking, make the frangipane. Using an electric hand whisk, place the softened butter, sugar and pinch of Maldon Smoked Sea Salt in a large bowl and whisk together for 2 – 3 minutes until pale and fluffy. Then add the eggs, yolks, and vanilla and whisk again. Finally add the cinnamon, nutmeg, ground almonds and flour and whisk until combined.
- When the pastry case has cooled slightly, take a small, serrated knife and carefully trim off the excess pastry so you have a nice smooth line around the top. Dust off any pastry remains.
- Spoon the frangipane filling into the pastry case and smooth out with a palette knife. Then arrange the apple slices on the top and lightly press into the filling.
- Place the tart back into the oven for around 40 – 45 minutes until the apples are golden and the frangipane is puffed up and golden brown too.
- Remove from the oven and allow to cool before dusting with icing sugar and serving.
Can you freeze frangipane?
Once you have made your frangipane, you can store in the fridge for up to 5 days, or frozen for up to 1 month in the freezer. Make sure you thaw the frangipane overnight in a fridge before using it in your bakes. When you are storing leftover frangipane, make sure it’s covered with clingfilm to prevent freezer burn.
- Half fill a pan with water and add the vanilla pod, cinnamon stick, star anise, caster sugar and orange peel. Bring up to the boil and allow the sugar to dissolve before lowering the heat and adding the pears. Simmer gently for 15 minutes until the pear is tender. Remove from the heat and leave the pears to cool in the poaching liquid.
- To make the salted caramel sauce start by melting the sugar in a pan. Gently melt in the pan and swirl around but avoid vigorous stirring until the sugar has completely dissolved and it has gone a deep golden-brown colour. Then immediately take off the heat and add the butter and half of the cream – it will bubble a lot – whisk this in before adding the remaining cream and a generous pinch of Maldon Sea Salt, whisking to a smooth caramel sauce.
- Serve the pears with some crème fraiche, the salted caramel sauce and some toasted almonds.
- With a brush, begin ‘painting’ the wine glass on the side with sugar syrup. Sprinkle Maldon Sea Salt over the sugar syrup.
- Fill wine glass with cubed ice.
- Build drink in order of ingredients.
- Briefly stir to mix ingredients.
- Sip slowly and enjoy!