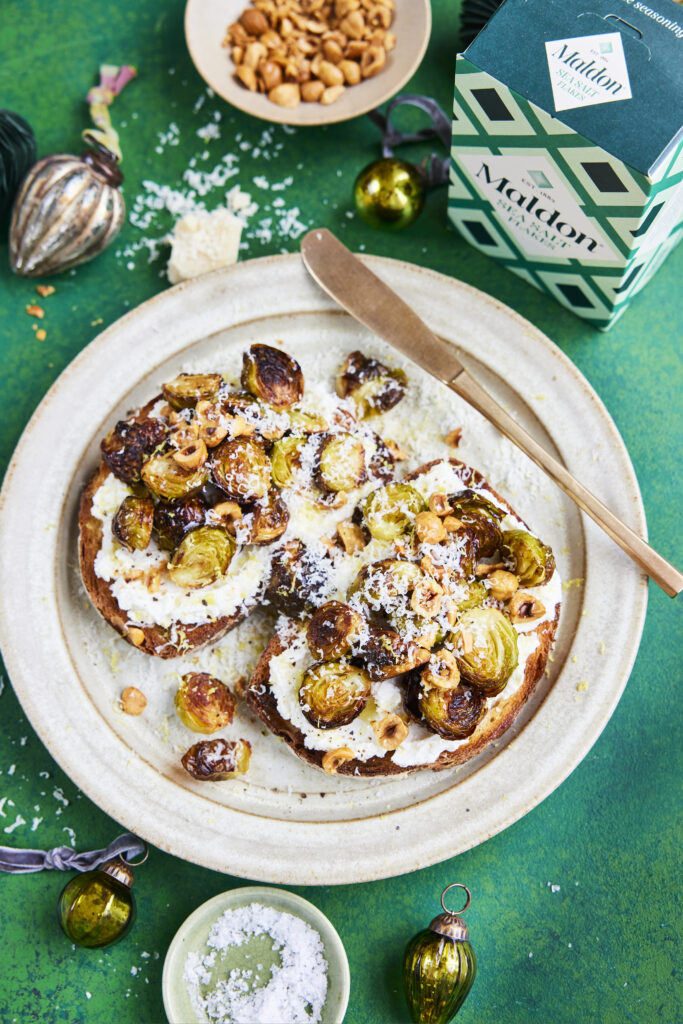
If you’re looking for a snack that’s both simple and sophisticated, charred Brussels sprouts on toast with ricotta and parmesan is your go-to festive treat! This delightful combination of crispy, oven-roasted Brussels sprouts, creamy ricotta, and tangy parmesan creates a mouth-watering appetizer, perfect for holiday gatherings. Nestled atop toasted sourdough, and finished with a sprinkle of Maldon Sea Salt, cracked black pepper, and a hint of lemon zest, this dish is packed with vibrant flavours and textures. For an added crunch, hazelnuts round out the recipe, making it a memorable dish that highlight seasonal product while keeping things easy and delicious!
Brussels sprouts, when charred to perfection, bring out their natural sweetness with a smoky edge that pairs beautifully with the creamy ricotta base. Tossed in olive oil, roasted to a golden crispy, and layered on slices of freshly toasted sourdough, these sprouts create an irresistible contrast between the crunch of the bread and their tender interior. The parmesan adds a sharp, salty bite, while the bright lemon zest and crunchy hazelnuts elevate the snack into something truly special.
Ideal as a light starter, festive canape, or even a creative side dish, this easy Brussels sprouts recipe is a delicious way to celebrate the season with wholesome, bold flavours.
Best Way to Roast Brussel Sprouts
Roasting Brussel sprouts to perfection involves coating them evenly with olive oil and seasoning them generously with Maldon Sea Salt and cracked black pepper. Spread them out on a large baking tray to ensure they roast evenly without steaming, making sure to check them halfway through roasting.
Making Charred Brussel Sprouts on Toast with Ricotta and Parmesan
Prepare the Ingredients:
Preheat your oven to 180°C. Halve the Brussel sprouts and place them on a large baking tray. Drizzle with olive oil and season with a pinch of Maldon Sea Salt and cracked black pepper.
Roast the Brussel Sprouts:
Place the tray in the oven and roast for 15-20 minutes until the Brussel sprouts are tender and charred in places, giving them a deep, roasted flavour.
Prepare the Toast and Ricotta Spread:
Toast the two slices of sourdough bread to your preference. In a small bowl, mix together the ricotta with the zest of half a lemon, adding a pinch of Maldon Sea Salt and black pepper to taste. Spread this ricotta mixture onto each piece of toast.
Assemble the Toast:
Roughly chop the toasted hazelnuts and have the finely grated parmesan ready. Top each slice of toast with the charred Brussel sprouts, followed by a scattering of toasted hazelnuts and a generous amount of grated parmesan. Serve immediately for a delightful crunch and creamy texture.
How to Make Charred Brussel Sprouts on Toast with Ricotta and Parmesan
Preheat the oven to 180c.
Place the Brussel sprouts onto a large baking tray and drizzle with the olive oil, then season with Maldon Sea Salt and black pepper. Place into the oven and roast for 15 – 20 minutes until charred in places.
Toast the two pieces of sourdough bread. In a small bowl mix together the ricotta and lemon zest along with some Maldon Sea Salt and black pepper. Then spread the ricotta mixture on top of each toast. Roughly chop the toasted hazelnuts.
Top each toast with the charred Brussel sprouts, a scattering of toasted hazelnuts and some grated parmesan cheese. Serve immediately.
Can You Freeze Roasted Brussel Sprouts?
Yes, you can freeze roasted Brussel sprouts. Once cooled, place them in a single layer on a baking tray to freeze. Once frozen, transfer to an airtight container or freezer bag. They can be stored in the freezer for up to 3 months. Reheat in the oven to maintain their crispiness.
Healthy Brussel Sprouts Recipe
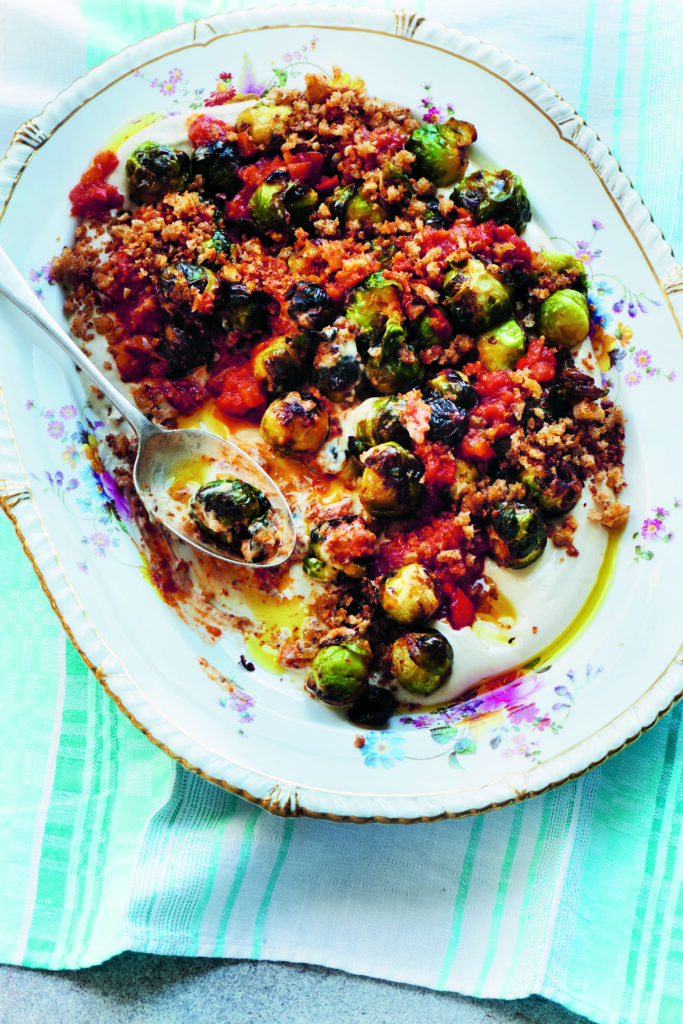
This recipe features healthy Brussel sprouts roasted to perfection, paired with creamy ricotta, crunchy hazelnuts, and tangy parmesan on sourdough toast. This dish is not only delicious but also packed with nutrients, making it an ideal vegetarian option for any meal. If you are craving something a little different, why not try Joe Woodhouse’s delicious roast Brussels sprouts with whipped tahini, paid with a spicy tomato chutney and a gorgeous crouton crumb.
What is an old fashioned
The Old Fashioned cocktail is a timeless classic that embodies the essence of simplicity and elegance in mixology. Traditionally served in a lowball or rocks glass, this whiskey cocktail is a staple in any bartender’s repertoire!
Classic Old Fashioned cocktail
The perfect Old Fashioned consists of stirring together two ounces of bourbon, whiskey or rye, a rich simple syrup, and Angostura bitters. A handful of ice cubes is added, before the drink is gently stirred to chill and dilute to perfections. The final touch is an orange twist, or orange peel, and a cocktail cherry (Maraschino cherries), which not only adds visual appeal, but also enhances the drink’s complex flavours, adding sweetness to the bitter cocktail.
The beauty of the Old Fashioned lies in it’s versatility and balance. While rye whiskey is the traditional choice, bourbon is also popular choices for those who prefer a slightly sweeter profile. Modern variations may also use simple syrup or even maple syrup in place of the more traditional sugar cube, offering a different dimension of sweetness. Whether enjoyed a pre-dinner aperitif or a nightcap, the Old Fashioned remains a quintessential whiskey cocktail that has stood the test of time.
What is the origin of the Old Fashion?
According to Nio Cocktails, the Old Fashioned was first created in the 1800s in America. It was then known simply as the ‘Whiskey Cocktail’ which included a spirit, sugar, water and bitters. It was a standard, quick and easy cocktail to make which was enjoyed by many, and often enjoyed in the morning as a hangover cure!
However, Difford’s Guide proclaims that although the cocktail was popularised in America, the origins of a cocktail that comprise of a spirit, sweetener and bitters are English, followed by the creation of the first aromatic bitters by London apothecary, Richard Stoughton in 1690.
Why is it called an Old Fashioned?
By the 1870-1880s, bartenders began adding their on ‘twists’ to the Whiskey Cocktail, such as adding more sweeteners, garnishes and even changing the spirit from rye whiskey to bourbon. Customers began to rebel against the innovated cocktail, preferring the traditional version instead. As a result, customers would order the ‘old-fashioned whiskey cocktail’ at the bar. Eventually the name was shortened to the title we know today, ‘Old Fashioned’.
Here’s how to make and serve an old fashioned
Start by soaking the rosemary and cinnamon stick in some high proof spirit for a few minutes – this will be the flaming part of the cocktail.
Take a tumbler and add the sugar, bitters and Maldon Smoked Sea Salt, stirring together. Then fill the glass with ice and add the whiskey or bourbon and stir again. Add a splash of soda water if you like and a slice of orange.
Then take the soaked rosemary and cinnamon stick and carefully balance on the rim of the drink. Use a lighter or matches to ignite them – they should flame and smoke. The smell of the smoked rosemary and cinnamon add Christmassy notes to your cocktail.
How to spice up and old fashioned
Although adding an orange twist to your classic Old Fashioned adds sweetness, it’s pretty simple! We’ve shared some of our favourite ways to elevate your Old Fashioned, with new and exciting twists to try!
Brown Butter Old Fashioned
If you’ve never tried a brown-butter Old Fashioned, then you’re missing out!
This recipe was shared by Liquor.com, where they highlight how the flavours of bourbon compliments the rich nuttiness of brown butter. Simply heat unsalted butter in a saucepan until it lightly browns and has a nutty aroma. Then, gently combine the browned butter with a bottle of bourbon. Pour the blend into a highball glass with ice, adding brown-sugar syrup and Angostura bitters before finishing with a maraschino cherry.
Honey Old Fashioned
If you have a sweet tooth, the The Glenlivet shared a delicious Honey Old Fashioned recipe. Rich, runny honey is incorporated with the bold flavours of the classic Old Fashioned mix, creating an smooth drink that’ll go down a treat with your guests.
Pumpkin Spice Old Fashioned
If are wanting something more ‘cosy’ in flavour, Liquor.com recommends the ever-so-popular pumpkin spice flavour with an Old Fashioned. You can achieve this by making a homemade syrup, adding pumpkin puree, pumpkin pie spice, brown sugar, and vanilla extract. Combine the pumpkin pie liquid mix with your bourbon and orange bitters and you will taste the delightful automanual flavours.
Old Fashioned vs. Manhattan
The Old Fashioned and The Manhattan are two of the most popular whiskey cocktails. Although the two cocktails have many similarities, the have different flavours.
What is a Manhattan?
This is a classic cocktail, comprising of whiskey (usually rye), sweet vermouth, and bitters. It’s served in a stemmed glass, and garnished with a cherry.
What is the difference between an Old Fashioned and a Manhattan?
The main difference between the Old Fashioned and Manhattan is the sweeteners used in each. The Old Fashioned traditionally uses sugar, either as a cube or in simple syrup form. In contrast, the Manhattan uses sweet vermouth, which is a type of fortified wine. The vermouth adds a earthier, spicier notes in comparison to the Old Fashioned, which is sweet yet bitter. As a result, many would say the flavour profile of the Manhattan is more in-depth and complex, whereas the Old Fashioned is more simple.
Start by assembling your toasted sandwich. Take each slice of sourdough bread and spread the outside of each with mayonnaise. Then fill by spreading a tsp of Dijon mustard, followed by the leftover turkey meat – this is a good point to season the toastie with a pinch of Maldon Chilli Sea Salt and some black pepper. Top this with the sliced up leftover stuffing and pigs in blankets. Then top with slices of brie. Finally finish with a generous amount of cranberry sauce then sandwich the top slice of bread on top.
Place a heavy bottomed pan on a medium heat and add the knob of butter. When melted add your sandwich, then use a heavy weight to press it down. Allow this to cook on one side for approximately 3 – 5 minutes before lifting the weight and carefully flipping the sandwich. The other side should be golden and crisp on the bottom. Add the weight back on and cook the other side for the same time.
As soon as the toastie is done, remove it from the pan and cut in half. The cheese should be oozy, and you can serve it with a cornichon and cocktail stick in the top. It is delicious served with warm leftover gravy for dunking.
Pisco Sour origin
The Pisco Sour is a classic South American cocktails, known for it’s refreshing balance of citrus, sweetness, and the distinctive aroma of pisco. Pisco is a spirit made from fermented grape juice. Originating in the early 20th century, it’s believed that the cocktail was popularized by American bartender Victor Morris, created within his very own bar, Morris Bar, in Lima, Peru.
The Pisco Sour combines pisco – whether Peruvian or Chilean – with fresh lime juice, simple syrup, and egg white. The egg white creates a frothy, smooth texture at the top of the cocktail. This beverage is typically garnished with a dash of Angostura bitters, adding a subtle spice to it’s otherwise tart and tangy profile.
What is Pisco?
Pisco, the main ingredient of the Pisco Sour, is distilled from aromatic grape varieties, with Peruvian pisco traditionally being unaged and produced in a pure form, like Pisco Acholado or Mosto Verde, and Chilean pisco often aged in wood.
The variety of pisco used can significantly influencer the cocktail’s flavour, with brands like Macchu Pisco and Campo de Encanto offering diverse expressions. The Pisco Sour is a classic that’s intertwined with South American culture, rivalling other sour/bitter cocktails such as the Whiskey Sour.
Here’s how to make a clementine Pisco Sour
Place the sugar syrup in a cocktail shaker along with the lemon juice, pisco, Maldon Sea Salt, egg white and clementine juice. Add some ice to the cocktail shaker, close firmly and shake well for 30 seconds.
Strain this into your martini or nick & nora glass.
Garnish with a wheel of clementine, a sprig of rosemary and some pomegranate seeds, if you like.
Can you freeze a Pisco Sour?
Today we see many variations of the Pisco Sour, such as the Frozen Pisco Sour, which is equally delicious!
An excellent recipe, created by A Beautiful Mess, demonstrates just how easy it is to transform a classic pisco sour to a frozen Pisco sour.
Serves: 1
Ingredients:
1 1/2 oz Pisco
2 tbsp sugar
Juice from one lime (roughly 3/4 oz.)
Zest from one lime
1 egg white
1 to 1 1/2 cups of ice
A pinch of Maldon Sea Salt, to elevate the sweetness
Method:
In a blender, combine the sugar, lime juice, lime zest and Maldon Sea Salt flakes. Blend until the sugar dissolves.
Add the pisco, egg white, and ice. Blend until combines and very frothy.
Pour into a glass and enjoy!
Tag us in your creations!
Make sure you have your Maldon Salt ready when making your pisco sours! If you are running out, please feel free to browse on our Where to Buy Page to find your nearest store in which stocks our beloved Maldon Salt.
Lastly, we LOVE seeing your creations – please tag us on Instagram using the #maldonsalt so we can share your own take on the recipes!
Half fill a pan with water and add the vanilla pod, cinnamon stick, star anise, caster sugar and orange peel. Bring up to the boil and allow the sugar to dissolve before lowering the heat and adding the pears. Simmer gently for 15 minutes until the pear is tender. Remove from the heat and leave the pears to cool in the poaching liquid.
To make the salted caramel sauce start by melting the sugar in a pan. Gently melt in the pan and swirl around but avoid vigorous stirring until the sugar has completely dissolved and it has gone a deep golden-brown colour. Then immediately take off the heat and add the butter and half of the cream – it will bubble a lot – whisk this in before adding the remaining cream and a generous pinch of Maldon Sea Salt, whisking to a smooth caramel sauce.
Serve the pears with some crème fraiche, the salted caramel sauce and some toasted almonds.
Take the rock glass and fill with cubed ice.
Build drink in glass in the same order as the ingredients listed.
Stir briefly.
Take a chocolate shard and sprinkle with Maldon Smoked Sea Salt.
Add chocolate shard on the edge of the glass.
Sip slowly and enjoy!
This recipe was created by Caitlin Carrick-Varty (@cake.onmyface), who is an artist, baker and storyteller. She wrote a blog, Cake On My face, of baking recipes in letters to her brother from 2018-2024. Now, she is writing about what she is baking in her kitchen on her substack.
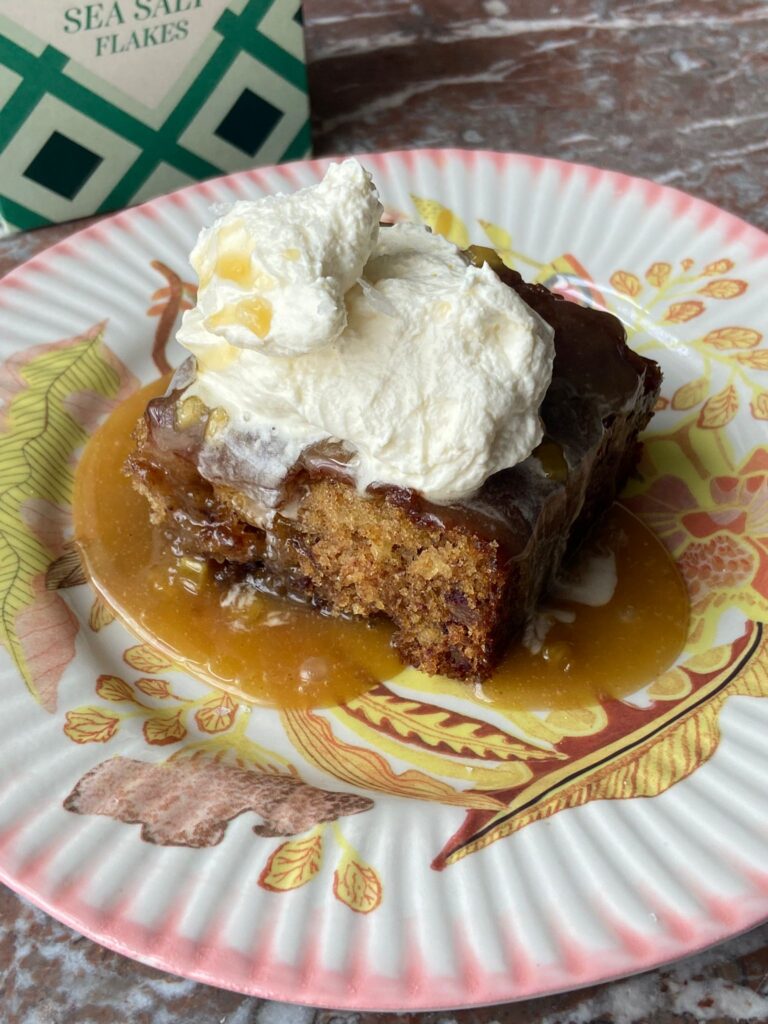
We’ve teamed up with Caitlin to make a delicious salted date cake, paired with a delicious ginger toffee sauce.
This cake is a meeting of salted caramel, sticky toffee pudding, and the fluffy, damp kind of ginger cake from English lineage. There is nothing – actually nothing – more joyful than toffee sauce and warm, dark cake. Sea salt is key in this, amongst all that sweetness, and helps the small amount of cardamom sing through. Caitlin adds ginger too, for a little heat under the salted and caramelised sauce – she’s got a tub of the stuff in her fridge and knowing that, makes her feel slightly more prepared for life!
Here is how to make her salted date cake with ginger toffee sauce
Preheat the oven to 180 / 160 fan.
Add the dates, water, and bicarb to a bowl and stir once or twice, cover with a plate and set aside.
Grease and line, with baking paper, a 9-inch square baking tin. You can use a slightly different size tin, just keep an eye on the baking time.
In a large bowl, cream the butter, sugar and vanilla extract until the mix is lighter and fluffed up around the sides of the bowl. A wooden spoon will work, electric beaters will be quicker. Beat in one egg until fully combined, then the other.
Take the bowl of dates and use a fork to mash them up a bit in the water. Pour the whole lot into the butter mixer, along with the flour, baking powder, Maldon salt, and cardamom. Mix until a liquid batter forms.
Pour into the prepared tin and bake for 30 mins, or until a skewer inserted into the cake comes out with just a few crumbs attached.
When the cake is out of the oven you can whip up the sauce, it’s quick-quick. Melt all the sauce ingredients, except the cream and ground ginger, in a saucepan over medium heat. Stir with a spatula to help it on its way. Allow to simmer for 2 mins, this is to cook the ginger and get a darker colour to the sauce. Take the pan off the heat, stir in the cream and ground ginger, and put back on the heat to bubble for a further minute or so.
Prick the cake all over with a toothpick or skewer, and pour over about a third of the hot sauce. If you can wait, allow the cake to sit like this, in the tin, for 15 mins.
Slice into big wedges and serve with double cream if you want, whipped or poured straight out the tub, and some of the extra sauce for good measure.
Notes – You can make the sauce in advance and heat up as and when you need it (what a sentence). Cool completely at room temp before storing in an airtight container in the fridge for up to 3 days.
Transform your next meal with a delectable Potato Gratin recipe that promises creamy, flavourful potatoes in every bite. Infused with Maldon Garlic Sea Salt flakes, this dish takes the classic comfort food to new heights! Perfect as a side dish, these au gratin potatoes are made with King Edwards or Maris Pipers for the ideal balance of fluffiness and flavour. Whether you’re hosting a dinner party or enjoying a family meal, this gratin dish will leave everyone asking for seconds.
What is potato gratin?
Potatoes au Gratin, also known as Dauphinoise Potatoes, is a classic French dish. It was first served during a state dinner held by Charles-Henri in France 1788 and his companions. Consisting of potatoes, thinly sliced but thicker than a penny, it’s then cooked in a cream sauce in a shallow baking dish with butter and garlic.
In contrast, Scalloped Potatoes are made with roux consisting of flour, butter and milk, whereas Potatoes au Gratin are made with cream and butter and sometimes cheese. However, purists would argue that a gratin doesn’t have to include cheese. This is because the French word for ‘gratin’ translates to ‘crust’. This delicious crust can be achieved not only from cheese, but with breadcrumbs, egg or butter.
How to make potato gratin?
Begin by preheating the oven to 160Fan °C / 350°F / Gas Mark 4.
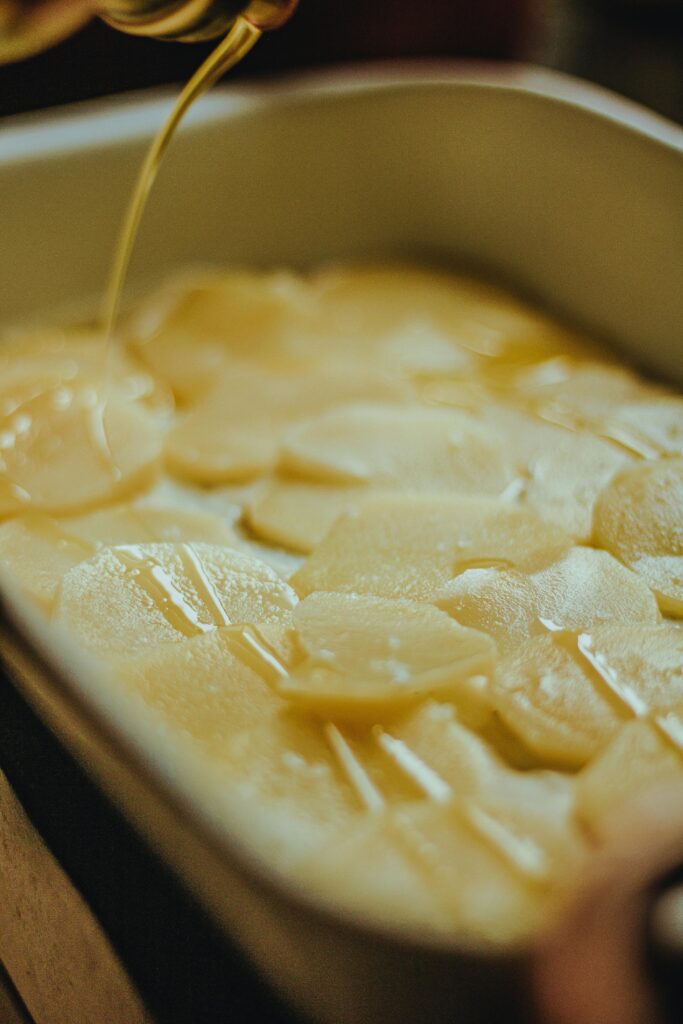
Take a large shallow cast iron dish, gratin dish or baking tray and rub it all over with some butter. Then prepare the potatoes by thinly slicing them, or using a mandolin. We have kept the skins on in this recipe, but you can peel the potatoes if you like.
Once you have thinly sliced potatoes, carefully lay them in a spiral shape in the pan or dish so they fan out in circles.
In a saucepan add the double cream, crushed garlic cloves, fresh thyme leaves, Maldon Garlic Sea Salt and cracked black pepper. Place this on a gently heat and then bring up to scalding point. Take off the heat and then carefully pour all over the potatoes. This will create a irresistibly creamy texture.
Finely grate a little parmesan over the top and cover with foil. Place into the preheated oven to bake for 1 hour 30 minutes until the potatoes are tender. Remove the foil and bake for additional 10 to 15 minutes to achieves a golden, bubbly top.
Serve immediately. This simple yet elegant dish dish pairs beautifully with any main course, offering a rich and comforting additional to your dinner party.
How to cook potato gratin in the air fryer?
If you’re looking for a quicker way to cook your potato gratin, then try cooking it in an air fryer! Usually in the oven it takes over an hour, but using a standard air fryer can take half the time!
Slice the potatoes into thin, 1/8 rounds using a sharp knife of mandolin.
Combine the cream, milk, garlic, thyme and pepper in a heat-proof mug. Microwave for 2 – 3 minutes, allowing the flavours to blend together.
Grease your baking dish with butter to avoid the creamy potatoes from sticking to the base.
Arrange the potatoes slices into the dish, creating layers.
Pour the cream mixture over the potatoes, ensuing they are evenly coated.
Transfer the baking dish into the air fryer basket, covering with foil. Air Fryer at 200C for 25-45 minutes, or until the potatoes are tender. You should be able to pass through the potatoes to the bottom when using a knife.
Add a sprinkling of parmesan cheese or breadcrumbs on top and cook for additional 4 to 5 minutes. This will create a beautiful, crunchy crust.
Once golden and bubbling at the top, remove the dish from the air fryer basket, cooling for at least 10 minutes before serving.
What to serve with potato gratin?
Now that you’ve made the deliciously creamy au gratin potatoes, you’re probably wondering what you can serve with them?
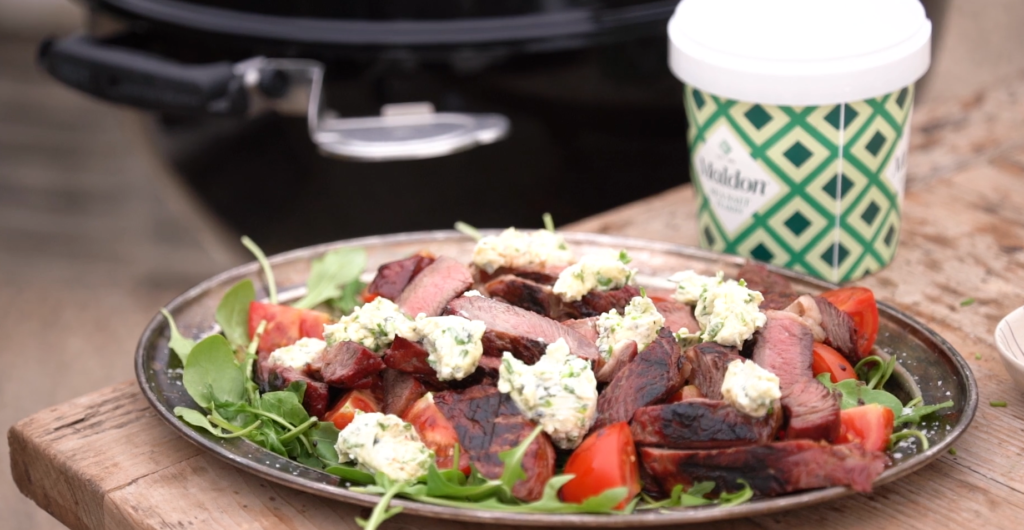
Meat and potatoes is a classic pairing. This is because the textures and flavours compliment each other so well. The fluffy texture of the potatoes combines beautifully with the meat’s chewy consistency. Potatoes also have a mildness to them which pairs well with the sweeter, bolder flavours of steak and it’s juices.
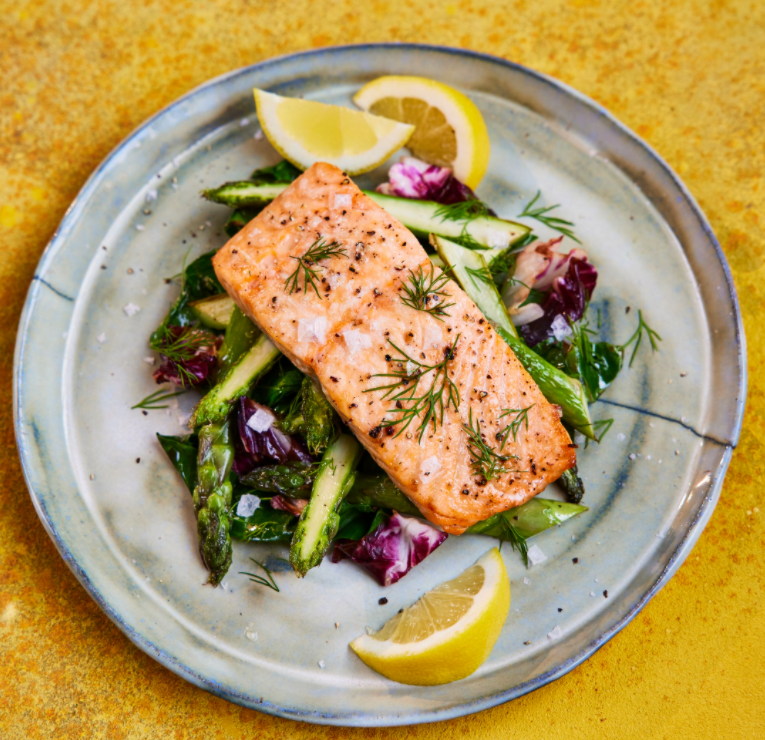
Grilled salmon is beautifully tender, complimenting the crispy exterior of gratin potatoes. We pair our salmon with fried greens and asparagus greens for a fresh, crips bite which harmonizes the creaminess of the potatoes.
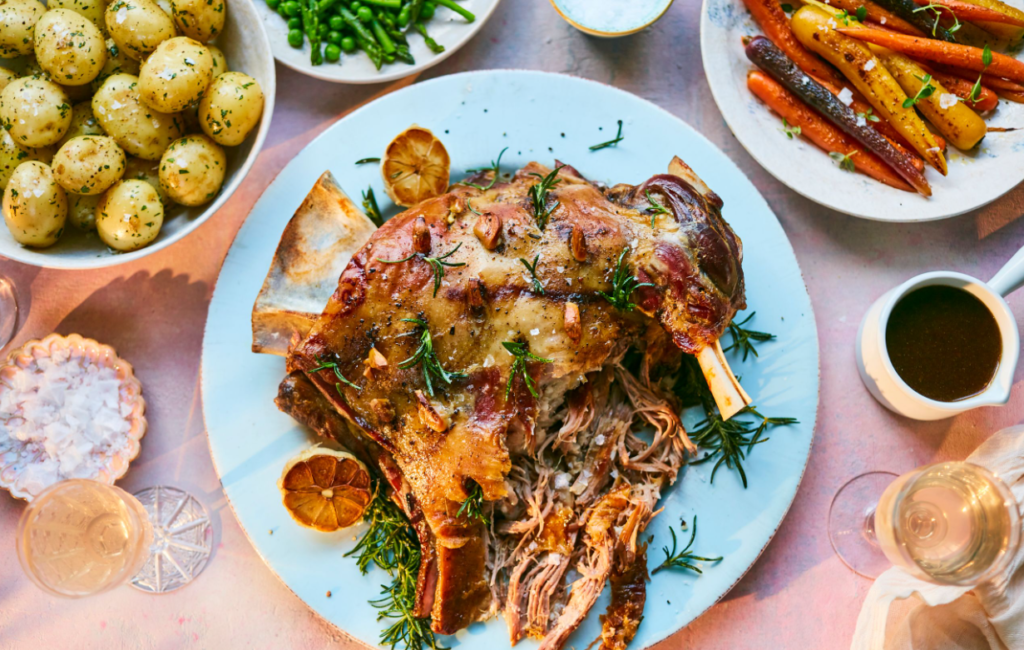
This is one of our favourite flavour combinations. The lamb roast has a rich, deep aroma that pairs perfectly with creamy potatoes. Because lamb also holds a gamey flavour, it brings out the natural earthiness of the potatoes, making it an indulgent feast.
Can you freeze potato gratin?
We wouldn’t recommend freezing gratin au potatoes, as it’s extremely rich in diary. Dairy products, such as milk and cheese, will separate during the freezing and thawing process, leaving you with a stodgy, very wet gratin.
However, you can store leftovers in the refrigerator for up to 3 days if kept in an airtight container. The oils from the cream and butter may separate once reheated but the taste will still be delicious.
This is an all-year-round one-pot meal that makes the most of your store cupboard. It’s a classic Italian dish made in various ways and we love it every time. You can bulk it out by frying off finely chopped onions, celery and carrots at the start with the garlic until soft for a more veg-packed version. Kitty also throws in a handful of shredded seasonal greens at the end to wilt, such as spinach, cavolo nero (lacinato kale) or kale. Use any pasta or bean type you have!
Here is how to make pasta and beans
In a large saucepan, heat the olive oil over a medium heat and add the garlic and rosemary before the oil is hot to prevent the herbs burning. Season with a pinch of salt and cook, stirring frequently, for 2 minutes until the garlic softens and turns very lightly golden. Add the chilli flakes and tomato puree, then continue to cook, stirring constantly, until fragrant and the tomato puree turns a dark red.
Add one-quarter of the beans with the liquid from the jar or tin (or 150 ml/5 fl oz/scant ⅔ cup of liquid if using beans for the week). Then, with the back of a fork or masher, crush the beans until completely broken down, this will create the creamy texture you want for the sauce. Now add the remaining beans, plus the bean liquid and stock mixture, then season with black pepper and a pinch of Maldon Sea Salt.
Bring to the boil over a medium-high heat, then stir in the pasta and cook for 2 minutes less than the packet instructions, as the pasta will continue to cook off the heat. The sauce should be reduced and the consistency of half-sauce, half-soup…so a bit of a wet sloppy pasta sauce (but in a delicious way). Adjust the consistency as needed with additional water, stock, or bean liquid, keeping in mind that any liquid will tighten up as it cools due to starch from the beans and pasta.
For the flavoured oil, add 4 tablespoons of extra virgin olive oil to a pan with the garlic, rosemary and chilli flakes, while the oil is still cold, so that the garlic cooks evenly and not too quickly. Gently cook for 3–4 minutes until fragrant and the garlic is lightly golden, then turn off the heat and squeeze in the lemon juice.
Remove the pasta from heat and add most of the grated Parmesan, leaving some to serve and stir rapidly to incorporate and become creamy. Ladle a few spoonful’s into bowls, then drizzle each serving with the flavoured olive oil and the reserved Parmesan.
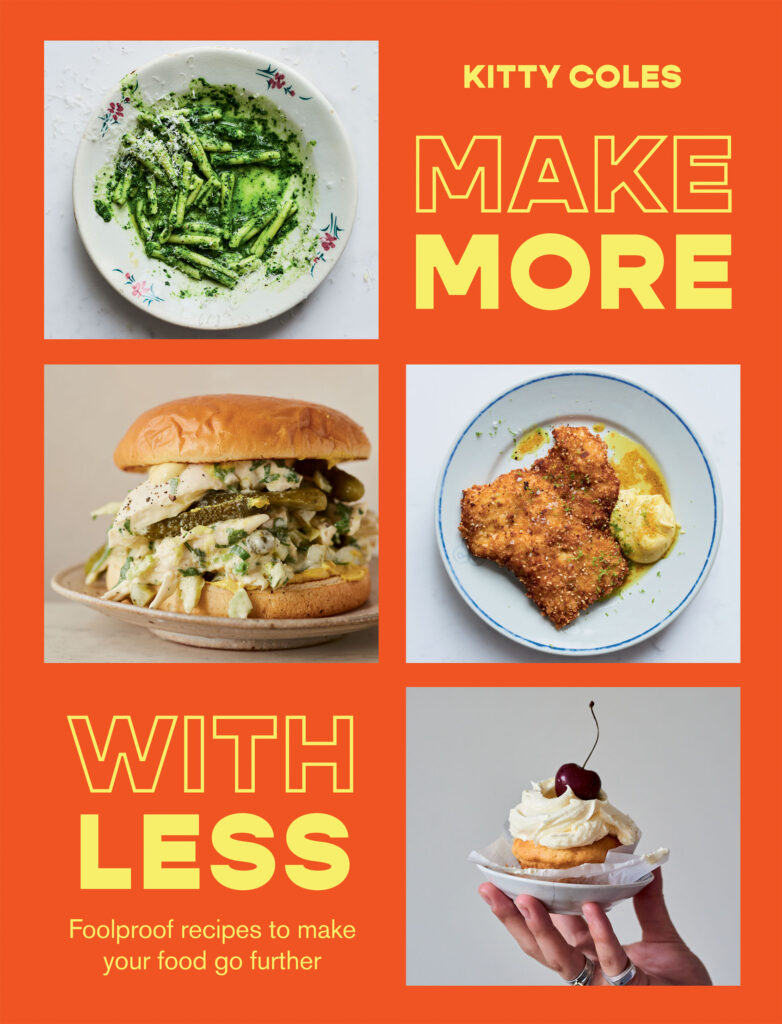
Purchase Make More With Less by Kitty Coles
Make More With Less by Kitty Coles (Hardie Grant, £22), Photography by Issy Croker.
Looking for fool proof recipes to make your food go further? Make More With Less by Kitty Coles takes core ingredients and transforms them into flavour-packed, simple dishes. From turning a few tins of beans into a comforting bean pasta to making leftover chicken tacos! the options are endless and the creativity never stops!
You can purchase your very own copy here, where you can flick through, raid your fridge and Kitchen cupboards and get started on creating low-waste, low-fuss and versatile recipes that you will make over and over again.
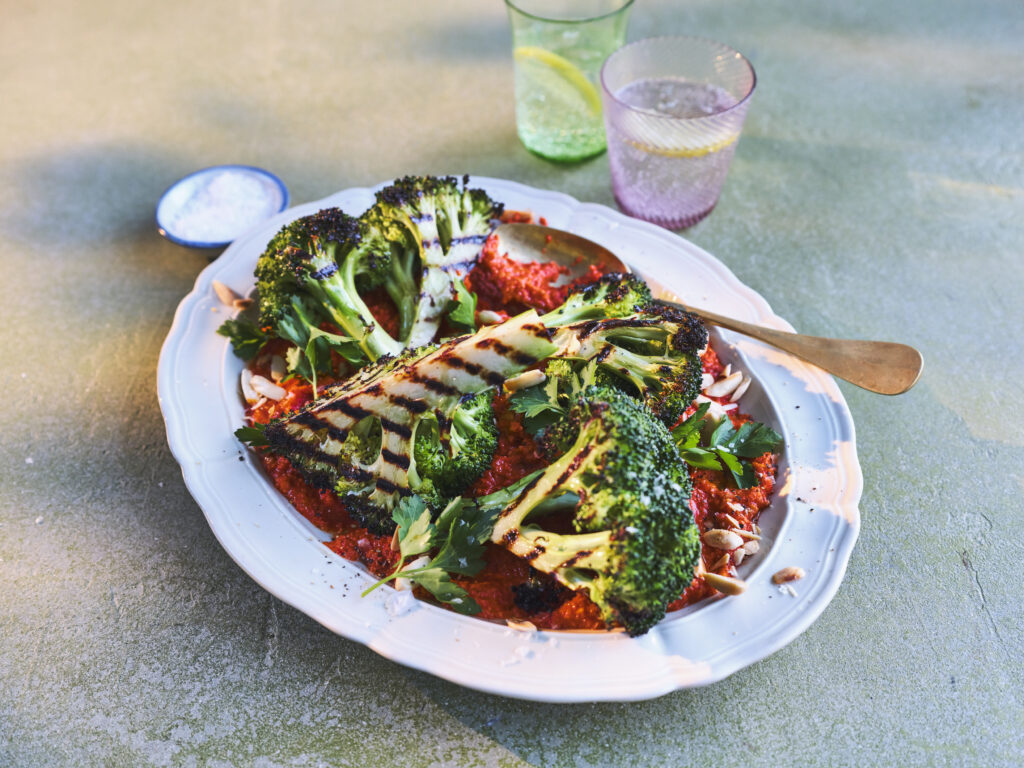
Lightly griddled broccoli wedges with a delicious Romesco sauce is the perfect side dish for your springtime banquet. The combination of sweet and slightly acidic with the smoky red pepper Romesco sauce pairs beautifully with the charred broccoli, a flavour profile that will certainly impress your dinner guests.
Broccoli contains compounds that some people may consider bitter. However, gently griddling your broccoli will allow a delicious earthy, almost sweet taste to rise. It also brings out many nutrients, including a wide array of vitamins, minerals and fibre.
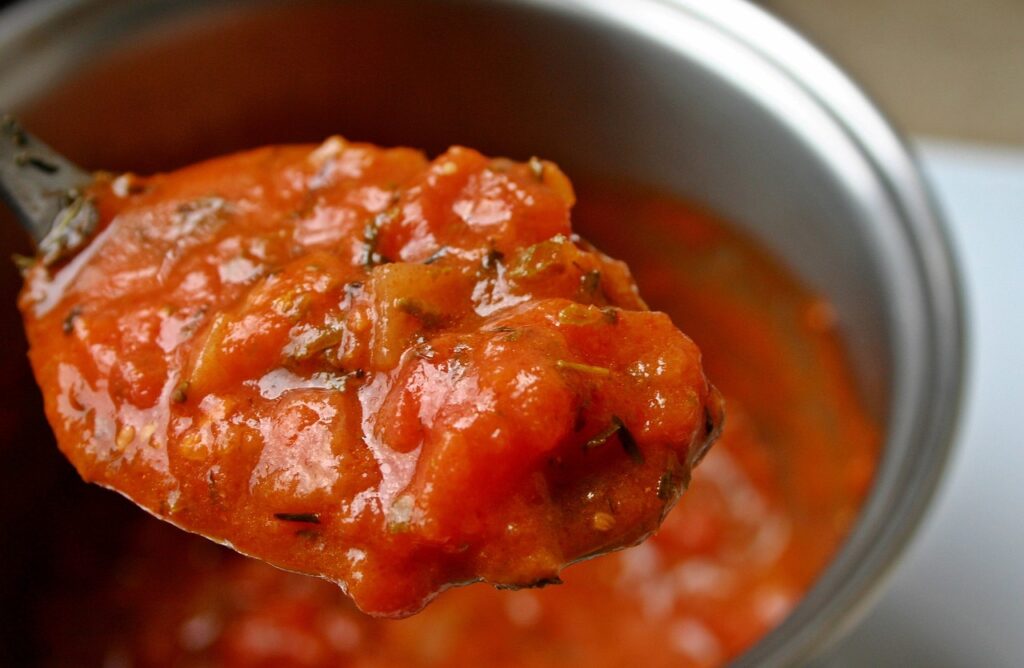
Image by <a href=”https://pixabay.com/users/catkin-127770/?utm_source=link-attribution&utm_medium=referral&utm_campaign=image&utm_content=482403″>Catkin</a> from <a href=”https://pixabay.com//?utm_source=link-attribution&utm_medium=referral&utm_campaign=image&utm_content=482403″>Pixabay</a>
What is Romesco sauce?
Romesco sauce is a rich Spanish sauce comprising of roasted red peppers, which are pureed and thickened with toasted almonds and sometimes pieces of bread.
The origin of the sauce dates back to the 18th century, where fishermen were believed to have made the sauce to eat with their rather bland meals, whilst catching their fish off the coast of Catalonia, Northwest Spain.
The taste of Romesco sauce is lightly sweet and tangy in flavour, with a delicious hint of garlic and smoky flavours and a touch of spice. As the sauce is a classic Mediterranean condiment, it’s the perfect accompaniment to fish, grilled vegetables and roasted chicken.
Is Romesco sauce served hot or cold?
Romesco sauce is very adaptable and can be served either hot or cold depending on the dish that you’re making.
Romesco sauce can freeze and last for up to 3 months in the freezer. We do not recommend storing the sauce longer than 3 months as the flavour can start to degrade and the colour becomes dull.
You can freeze Romesco sauce easily by using an ice cub tray:
Portion the sauce into the ice cube tray. You can use spoons to make it easier to pour into each ice cube square.
Wrap the ice cub tray with a layer of clingfilm to prevent spillages and also limit the chance of any odours in your freezer.
Put the tray in the freeze carefully, keeping it as flat as possible.
Once frozen solid, you can pop the cubes out of the ice cube tray into a freezer bag, making sure it is sealed up.
Label the bag with the contents and the date it was made, before placing it back in the freezer.
The best way to defrost Romesco sauce is by taking a cube out of the freezer and popping it into the dish, allowing it to thaw whilst the dish continues to cook.
Image by <a href=”https://pixabay.com/users/jeshoots-com-264599/?utm_source=link-attribution&utm_medium=referral&utm_campaign=image&utm_content=569070″>Jan Vašek</a> from <a href=”https://pixabay.com//?utm_source=link-attribution&utm_medium=referral&utm_campaign=image&utm_content=569070″>Pixabay</a>
How to make Romesco sauce?
Start by making the romesco sauce.
In a large frying pan, add the blanched almonds and toast them until they turn colour and start to char in places, turning them over so they evenly toast. Then tip them out the pan and allow to cool slightly.
In a food processor add the roasted red peppers, toasted almonds, handful of parsley and the garlic cloves. Pulse this until everything has broken down to a chunky paste. Then add the sherry vinegar, lemon juice and olive oil and pulse again to your desired texture – you don’t want it to be completely smooth.
Tip the mixture from the food processor to a bowl and stir through the paprika and Aleppo pepper. Taste the sauce and then add some Maldon Sea Salt flakes and cracked black pepper.
How to make griddled broccoli?
Prepare the broccoli. Heat a griddle pan onto a high heat. Slice the broccoli heads into wedges by cutting each one in half lengthways through the stalk, then cut each half again into quarters.
Rub each wedge with olive oil, and then place onto the griddle pan. Let each side cook for 5 minutes until prominently char lines appear on the stalk before turning and doing the other side. This can be done in batches; the broccoli will char but also steam as it cooks.
Image by <a href=”https://pixabay.com/users/zichrini-3417353/?utm_source=link-attribution&utm_medium=referral&utm_campaign=image&utm_content=3267634″>Hanna</a> from <a href=”https://pixabay.com//?utm_source=link-attribution&utm_medium=referral&utm_campaign=image&utm_content=3267634″>Pixabay</a>
Do you have to boil broccoli before frying?
You do not need to boil broccoli before frying in the pan if you implement a steaming method to it. This is where you trap hot air in the pan to help soften the broccoli. This allows the broccoli to be a little softer in texture when you bite into it, but still irresistibly crunchy.
You can blanch the florets before stir-frying to help soften the stems and stop the enzyme that leads to browning. We recommend adding a good pinch of Maldon Sea Salt flakes and a dash of olive oil to your blanching water to help the broccoli retain it’s crunchy texture and vibrant green colour.
How to serve griddled broccoli with Romesco sauce:
When you are ready to serve, spoon the romesco sauce across the base of a large serving platter.
Then arrange the charred broccoli wedges on top.
Finally scatter with some chopped smoked almonds, a drizzle of olive oil and a final sprinkle of Maldon Sea Salt flakes and Aleppo pepper.
Image by <a href=”https://pixabay.com/users/meszarcsekgergely-18097400/?utm_source=link-attribution&utm_medium=referral&utm_campaign=image&utm_content=7744338″>Meszárcsek Gergely</a> from <a href=”https://pixabay.com//?utm_source=link-attribution&utm_medium=referral&utm_campaign=image&utm_content=7744338″>Pixabay</a>
How long does it take to cook raw broccoli?
Broccoli can be easy to overcook, it should always retain it’s vivid bright green colour when cooked and should have a little ‘crunch‘ to it.
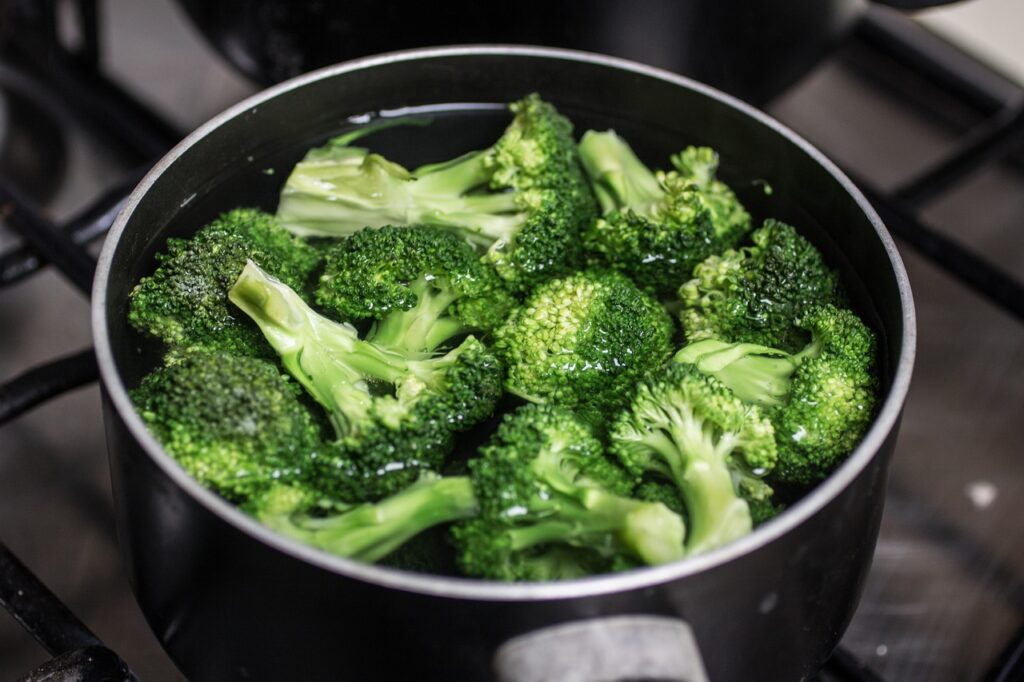
When you are boiling broccoli in a pan of boiling water, we recommend cooking the florets for 6-8 minutes.
If you aresteaming your broccoli, make sure to place a steamer over boiling water and cook for the same time, around 6-8 minutes.
You can stir-fry your broccoli for a delicious, crunchy texture. You need to separate into bite-sized florets, adding 1 tbsp of olive oil into the frying plan and adding the broccoli, cooking for around 4-5 minutes or until nice and tender.
When roasting broccoli, we recommend preheating your oven to 400 degrees F for 20 minutes to allow the vegetable to be perfectly roasted.
How long does broccoli keep in the fridge?
Fresh broccoli can last up to 3-5 days in the fridge when properly stored in an air-tight container. If it is cut-up broccoli, we recommend no more than 4 days stored in the fridge, otherwise the vegetable will start to decay in colour and texture and have a unpleasant odour.
If you are storing cooked broccoli in the fridge, make sure to store in a shallow, air-tight container or wrapped in foil. It can be stored for up to 3-5 days.