Cabbage has become one of the biggest trends in modern cooking – loved for it’s affordability, versatility, and incredible ability to transform under high heat. When roasted, Savoy cabbage turns golden at the edges, rich and buttery at the core, and the perfect canvas for bold flavours. It’s no surprise that cabbage steak recipes are trending across Instagram and TikTok as cooks rediscover this once-humble vegetable.
Why are cabbages becoming popular again in food?
Cabbage is experiencing a major comeback as one of the biggest food trends of 2026, and there are several reasons for it’s rise in popularity.
It’s highly budget-friendly – Food prices have pushed home cooks towards ingredients that are affordable, versatile, and yield a lot per purchase. Cabbage fits this perfectly, making it a hero for cost-conscious cooing.
It’s an incredibly versatile ingredient – Chefs and creators highlight that cabbage can be roasted, sautéed, braised, fermented, grilled or served raw, making it one of the most adaptable vegetables available.
Social media trends are boosting it’s appeal – Pinterest Predicts and TikTok have reported major strikes in searches for cabbage dishes – from cabbage dumplings to fermented cabbage. Home cooks are incredibly inspired by visually striking cabbage steaks and charred wedges.
It offers strong nutritional benefits – Cabbage is a nutrient-dense cruciferous vegetable rich in vitamin C, folate, and potassium. It also has anti-inflammatory and gut-supportive properties, making it a go-to ingredient for health-focused cooks.
‘Simple Ingredients Done Well’ trend = Food analysts say the cabbage trend reflects a cultural shift toward everyday ingredients that deliver comfort, flavour, and a sense of home.
How to Cook Cabbage Steaks?
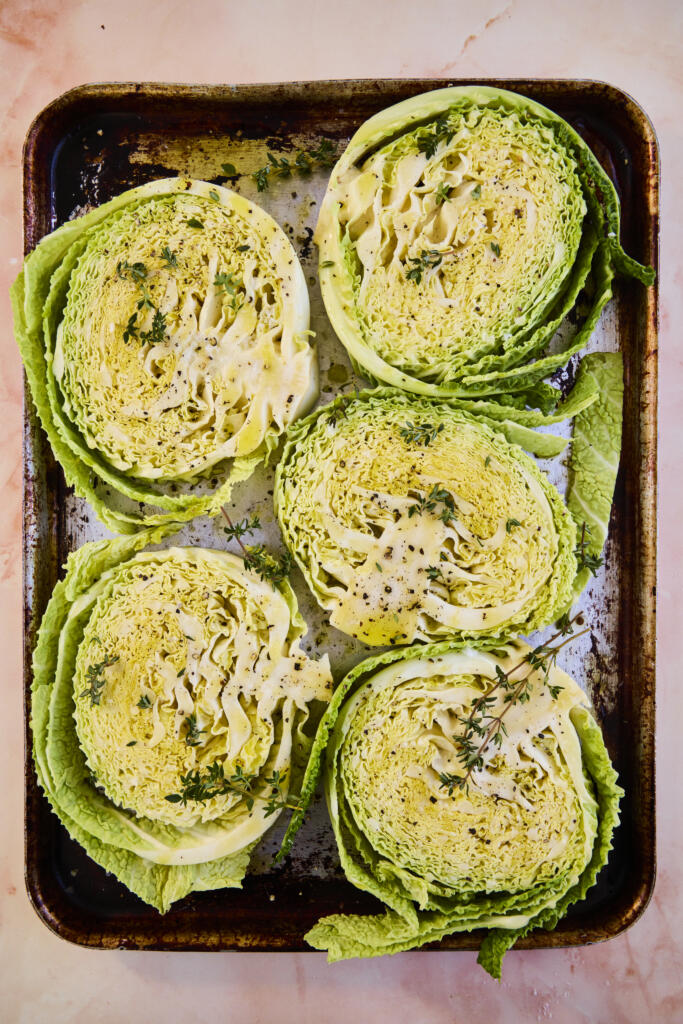
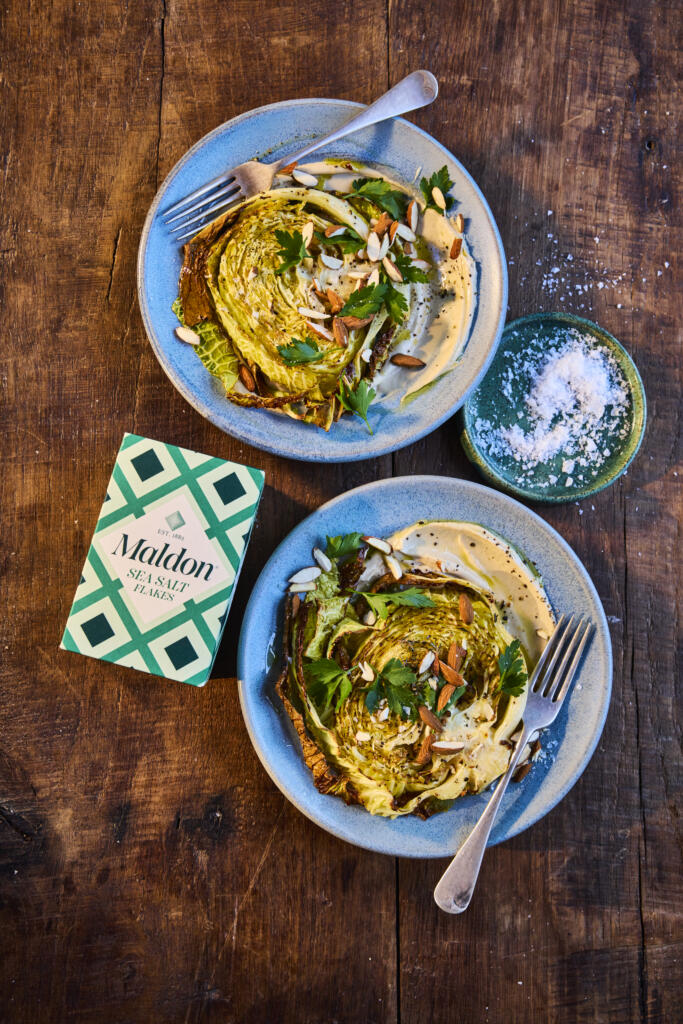
Raw Savoy cabbage steaks on a trayClose-up of the roasted edges + Maldon Sea Salt flakesFinal plated dish with tahini drizzle and toppings
This recipe brings together deeply caramelised roasted cabbage, a silky tahini sauce, and the clean, crisp finish of Maldon Original Sea Salt flakes. Topped with almonds and parsley, it’s a modern, plant-forward dish that punches fat above it’s simplicity.
Perfect as a side, centrepiece, or a hearty weeknight vegan dish – and ideal for sharing on Instagram thanks to those charred, crinkled Savoy leaves.
1. Prepare the cabbage steaks
Preheat the oven to 180c.
Take each savoy cabbage and slice into 1inch (roughly 2cm) ‘steaks’ to make 4 individual cabbage steaks. Discard the smaller pieces of cabbage from the ends – this can be used in another dish.
2. Roast until golden
Place the 4 cabbage steaks onto a baking tray and drizzle with the olive oil, some Maldon Original Sea Salt and cracked black pepper. Add some sprigs of thyme to the tray and then place into the preheated oven to roast for 25 minutes.
3. Make the tahini sauce
To make the tahini sauce, add the tahini to a mixing bowl along with the olive oil, lemon juice and Maldon Original Sea Salt flakes and pepper. It will be very thick so gradually add the water until it reaches a thick creamy consistency – you can add more water if you want it to be looser.
4. Plate and finish
To serve, place some of the creamy tahini sauce onto a place and then top with a roasted cabbage steak.
Garnish with some roasted chopped almonds and some parsley.
What to serve with cabbage steaks
A gain base: quinoa, bulgur, couscous, or wild race
Savoy cabbage works beautifully because it’s crinkled leaves roast into crisp, caramelised layers with soft centres. You can also use a classic green cabbage for a more neutral flavour. For a more vibrant, festive colour, you can use a red cabbage, but it may take slightly longer to cook and has a firmer texture.
Why are my cabbage steaks not crispy?
Make sure the steaks are well coated in oil and have space on the roasting tray – overcrowding causes steaming, not browning. More steam being produced means the cabbage is getting wet and will not get crispy.
Can I make cabbage steaks ahead of time?
You can part-roast cabbage steaks and finish just before serving. Add the tahini sauce and additional garnishes only at the end.
How do I store leftovers?
Store in an airtight container for up to 2 days. Reheat in the oven to restore crispness.
Can I make this recipe vegan and gluten-free?
This cabbage steaks recipe is naturally vegan and gluten-free – just make sure the topping (like nuts) are suitable for your guests.
How thick should I cut cabbage steaks?
We recommend cutting your cabbage steaks 2-3cm in thickness. This ensures a nice crispy edge and tender centres.
Make It, Taste It, Love It!
We’d love to see how you cabbage steaks turned out. Share your creation and tag us on Instagram at @maldonsalt so we can celebrate your seasoning mastery.
In a blender or food processor, combine the chopped strawberries, sugar, fresh lime juice, rum, Maldon Chilli Sea Salt and water.
Blend the mixture until smooth and well combined.
Pour the strawberry mixture into a shallow, freezer-safe dish or container.
Place the dish in the freezer and let it freeze for about 2 hours, or until the mixture starts to firm up.
Using a fork, scrape the frozen mixture towards the centre to create flaky ice crystals, keep scraping until you have a mound of shaved strawberry granita.
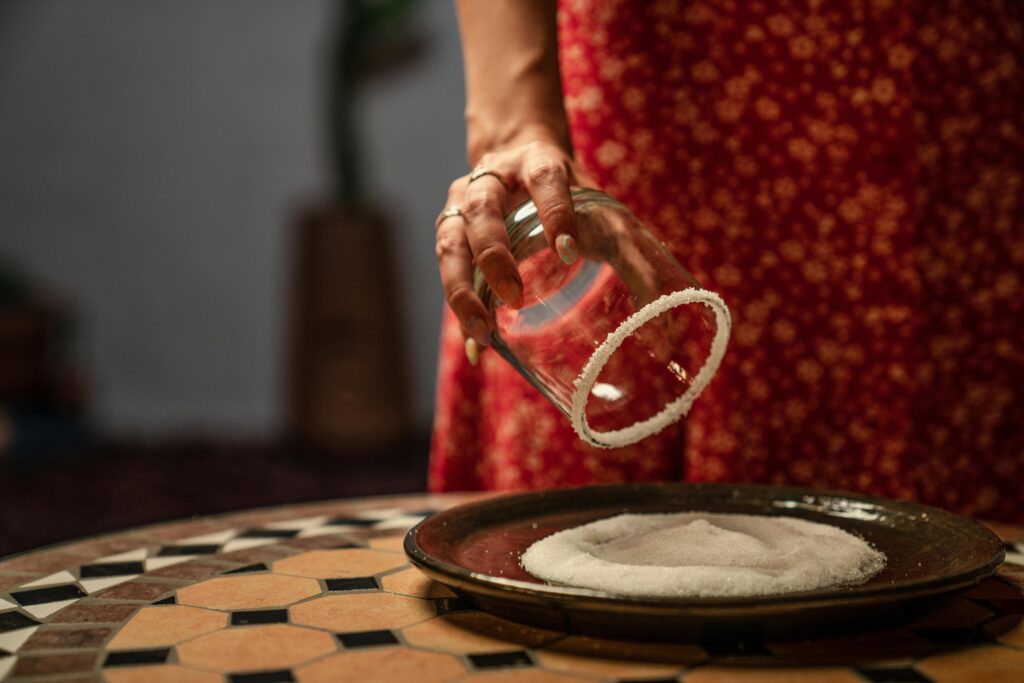
Prepare the glasses to serve. Take a quarter of a lime and gently coat the edge of the glass with the juice. Place a generous amount of Maldon Chilli Sea Salt onto a plate along with the sugar and carefully dip the edge of the glass in it until you have an evenly coated rim.
Spoon the strawberry granita into each glass.
Garnish with fresh strawberry slices and mint.
Spicy cucumber salad is a quick and easy dish that bursts with flavour, making it the perfect addition to any summer feast. This vibrant dish features baby cucumbers, also known as Persian cucumbers, sliced Hasselback style into delightful spirals. We tossed them in a mouth-watering mix of sesame oil, soy sauce, rice vinegar, crispy chilli oil, and a touch of honey for sweetness achieving the perfect balance between sweet and spicy. A pinch of Maldon Chilli Sea Salt adds a fiery kick, while a sprinkle of sesame seeds provides a nutty crunch. Finished with a handful of fresh coriander, this vibrant salad is sure to impress.
Here is how to make a spicy cucumber salad
Start by cutting the cucumbers into spirals. In a similar method to Hasselback potatoes, place your cucumber between two chopsticks on your board, then use your knife to make small cuts all the way down in one direction. Next, turn the cucumber over and repeat the cuts again but in the other direction.
Alternatively, if you don’t want to spiralise the cucumbers like this, you can cut the cucumbers into a rough chucks.
Into a bowl, mix the sesame oil, soy sauce, rice vinegar, crispy chilli oil, honey, Maldon Chilli Sea Salt and toasted sesame seeds. Then toss the cucumbers throughout so they are evenly coated.
Set aside for them to absorb the flavours and oils for a minimum of 10 minutes before serving.
Scatter over the coriander leaves and serve.
The talented Rukmini Iyer is a celebrated author and culinary innovator, known as the queen of fuss-free flavour. In her latest cookbook, ‘The Green Cookbook’, Iyer continues her mission to simplify delicious home-cooked meals. This vibrant collection features 75 brand-new recipes designed to help you get a delectable dinner on the table every day of the week with minimum hassle and maximum flavour. Whether you’re a ‘seasoned’ vegan, a dedicated vegetarian, or simply looking to incorporate more plant-based meals into your diet, ‘The Green Cookbook’ offers a treasure trove of inspiration!
Here is how to make miso barley mushroom with coriander pesto…
This is one of Rukmini’s favourite recipes in the book. The combination of miso, barley and mushrooms is inspired by Niki Segnit’s Flavour Thesaurus: More Flavours, while the incredibly moreish coriander pesto is her version of Noor Murad’s from Ottolenghi Test Kitchen: Extra Good Things – a happy melange of inspiration where the pearl barley and mushrooms look after themselves in the oven, leaving you to just blitz the pesto (and bask in the admiration of your dinner guests when they take their first bite).
Preheat the oven to 180°C fan/200°C/gas 6. Put the pearl barley, boiling water, miso paste, onion, black pepper and diced shiitake mushrooms in a lidded casserole dish or medium roasting tin, then cover with the lid or foil and roast in the oven for 1 hour.
Put the mushrooms and red onion into another large roasting tin with the garlic, olive oil, haricot beans and a pinch of sea salt. Stir, then pop into the oven for 25–30 minutes until the mushrooms are cooked through.
Blitz the coriander leaves and stems, coriander seeds, pine nuts, olive oil, sea salt and lemon juice in a high-speed blender or small food process or until smooth. Taste and adjust the salt and lemon juice, then set aside.
Stir 2 tablespoons of the pesto through the hot pearl barley, then divide between four plates. Top with the mushrooms and remaining pesto and serve hot.
Buy ‘The Green Cookbook’ Today!
Whether you’re preparing a quick meal for yourself or entertaining guests, her innovative and accessible recipes are sure to become staples in your kitchen. From 15-minutes pasta dishes that are perfect for those hectic weeknights to budget-friendly batch cooking that ensures you have a hearty meal ready to go, Iyer’s recipes are crafted with real-life demands in mind. Buy a copy from here and embrace the simplicity and joy of fuss-free cooking!
Make sure you have your Maldon Salt ready for these recipes! If you are running out, please feel free to browse on our Where to Buy Page to find your nearest store in which stocks our beloved Maldon Salt.
Lastly, we LOVE seeing your creations – please tag us on Instagram using the #maldonsalt so we can share your own take on Rukmini’s recipes!
The talented Rukmini Iyer is a celebrated author and culinary innovator, known as the queen of fuss-free flavour. In her latest cookbook, ‘The Green Cookbook’, Iyer continues her mission to simplify delicious home-cooked meals. This vibrant collection features 75 brand-new recipes designed to help you get a delectable dinner on the table every day of the week with minimum hassle and maximum flavour. Whether you’re a ‘seasoned’ vegan, a dedicated vegetarian, or simply looking to incorporate more plant-based meals into your diet, ‘The Green Cookbook’ offers a treasure trove of inspiration!
Here is how to make spiced roasted carrots and hazelnuts with silky butterbean mash…
Rukmini could eat an entire bowl of this in front of the television, but it’s really too nice not to share with friends! The carrots roast beautifully with coriander seeds under foil, while the rich, silky butterbean mash takes just 10 minutes to put together. A substantial, flavour-packed dish which is, as her friend Alex Dorgan would say, incidentally vegan!
Preheat the oven to 180°C fan/200°C/gas 6.Lightly grind the coriander seeds and black peppercorns in a pestle and mortar, then add them to a medium roasting tin along with the carrots, olive oil, water and ½ teaspoon Maldon Sea Salt. Cover with foil, then roast in the oven for 40 minutes.
After 40 minutes, remove the foil, drizzle the carrots with the agave or maple syrup, then return to the oven for a further 15 minutes to reduce the liquid and get some colour on the carrots. Put the hazelnuts on a small baking tray and pop them into the oven at the same time to toast.
Meanwhile, put the olive oil, lemon zest, coriander seeds, spring onions and garlic into a small frying pan and warm through over a low heat for 5 minutes – you’re not aiming to get any colour on the garlic, so keep the heat down.
Put the butterbeans and the infused oil, spring onions, etc. into a high-speed blender or food processor and blitz until very smooth. Adda squeeze of lemon juice, then taste and adjust the Maldon Sea Salt if needed. Warm the mash and spoon into shallow bowls, topped with the roasted carrots. Scatter the carrots with a little Maldon Sea Salt, the toasted hazelnuts and flat-leaf parsley and serve warm.
Buy ‘The Green Cookbook’ Today!
Whether you’re preparing a quick meal for yourself or entertaining guests, her innovative and accessible recipes are sure to become staples in your kitchen. From 15-minutes pasta dishes that are perfect for those hectic weeknights to budget-friendly batch cooking that ensures you have a hearty meal ready to go, Iyer’s recipes are crafted with real-life demands in mind. Buy a copy from here and embrace the simplicity and joy of fuss-free cooking!
Make sure you have your Maldon Salt ready for these recipes! If you are running out, please feel free to browse on our Where to Buy Page to find your nearest store in which stocks our beloved Maldon Salt.
Lastly, we LOVE seeing your creations – please tag us on Instagram using the #maldonsalt so we can share your own take on Rukmini’s recipes!
Elevate your cocktail hour with a refreshing grapefruit Paloma, perfectly complimented by a Himalayan Pink Salt rim, Selected by Maldon. This tequila cocktail combines equal parts blanco tequila, pink grapefruit juice, club soda for fizz and a touch of agave for sweetness, resulting in a harmonious blend of flavours. The finishing touch of the salt rim not only elevates the presentation, but also perfectly balances the citrusy tang and smooth tequila notes, making this Paloma cocktail and unforgettable tipple!
What is in a paloma cocktail?
A classic paloma cocktail consists of tequila, lime juice, grapefruit and soda with salt being added to the rim of the glass as an added option. Paloma translates to ‘dove’ in Spanish, with the cocktails true origins unknown, although it is believed to have dated back to the 1950s. The legend Don Javier Delgado Corona, who was the former bartender and owner of La Capilla in Tequila, Mexico, is known to be the Paloma’s original creator. He wanted to create a cocktail that’s both sweet and sour, a little bitter and salty with plenty of bubbles and ice. What’s not to love about a refreshing Paloma!
How to make a paloma cocktail
There are many paloma cocktail recipes that have their own ‘tasty‘ twist to the original. Our recipe includes club soda, fresh pink grapefruit juice, blanco tequila and lime juice. We also include a salt rim using Himalayan Pink Salt, Selected by Maldon. This pink coarse rock salt is selected by our seasoned experts, from the foothill of the Himalayas and has been prized for centuries. It’s perfect for rimming the glass of your paloma as the the salt with counteract the bitterness from tequila, and elevate the sweetness of the grapefruit and lime. Additionally, is also adds texture to the drink, building up a pleasurable experience as you take your first sip.
Start by rimming the glass with salt. Lightly crush the Himalayan Pink Salt, Selected by Maldon, then place onto a small plate.
Take the glass and rub a little lime juice, grapefruit juice or agave around the rim of the glass.
Then, invert it onto the plate and press the salt onto the rim firmly.
In a cocktail shaker, add the blanco tequila , fresh pink grapefruit juice, lime juice and agave.
Add a few ice cubes and then give it a shake until the outside feels cold.
Add some ice cubes to the prepared glass with the rim and begin pouring in the cocktail mixture.
Top up with club soda and then garnish with some pink grapefruit slices before serving.
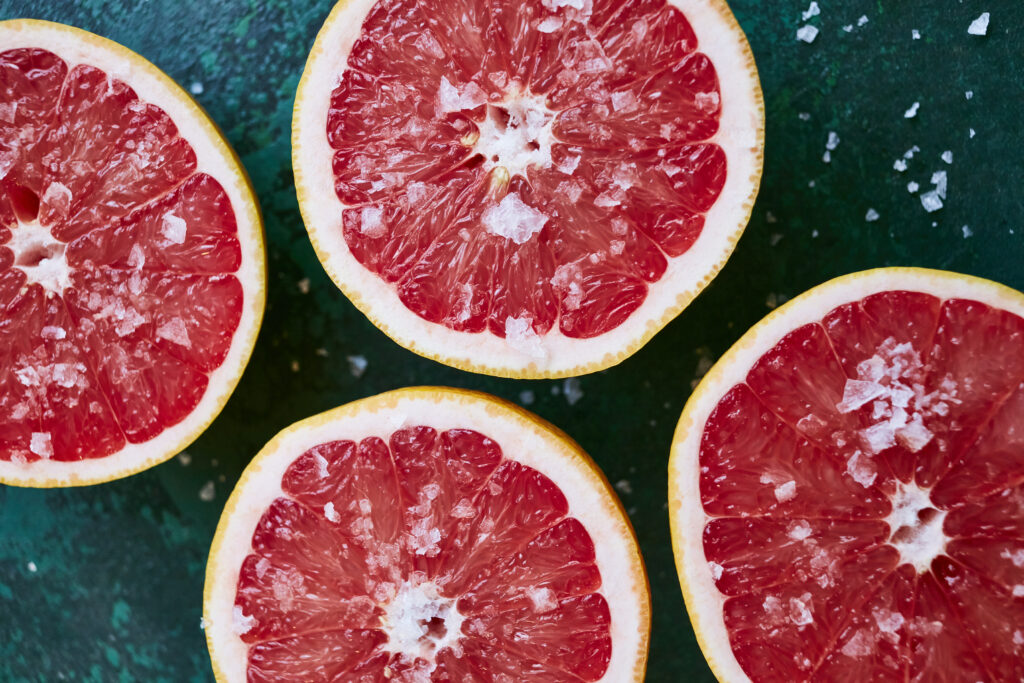
How to slice a grapefruit?
This is the fastest, simplest and mess-free way of slicing a grapefruit.
Place the grapefruit on a cutting board. Using a sharp chef’s knife, begin slicing off a half inch off the top and bottom of the fruit.
Stand the grapefruit upright so the flesh is exposed and begin to cut the skin off. Make sure you are following the contour of the grapefruit and the white pith.
Repeat the peeling technique.
Using a sharp paring knife, hold the grapefruit in your hand, and begin to cut downward between the membrane and the segment.
Once you have reached the centre of the grapefruit, stop and make a second angled cut. The segment should then pop out.
Repeat until all segments have been removed.
How to use a cocktail shaker?
We used a two-piece cocktail shaker to make our paloma cocktail. These are also known as Boston or French Shaker. They comprise of two flat-bottomed cones, one larger than the other. The large cone is made of stainless steel usually, while the smaller cone can be glass, stainless or plastic.
Start by combining your ingredients in the glass (the smaller cone).
Fill the large cone with ice and quickly up-end over the smaller cone, quickly to avoid spilling any ice! Gently tap the top of with your palm to create a secure seal between the two parts.
Begin lifting the shaker with one hand on the top and the other gripping the base.
Shake quickly and vigorously to ensure the mix is blended well.
After shaking for around 12 second, the large cone will start to feel cold to the touch. This is when you know it’s ready to serve. Hold the larger cone in one hand and break the seal by tapping the base with your palm.
Before you pour your cocktail, place a strainer over the top of the cone and strain the mixture into the glass, leaving the ice behind. The ice that we used for shaking should be removed.
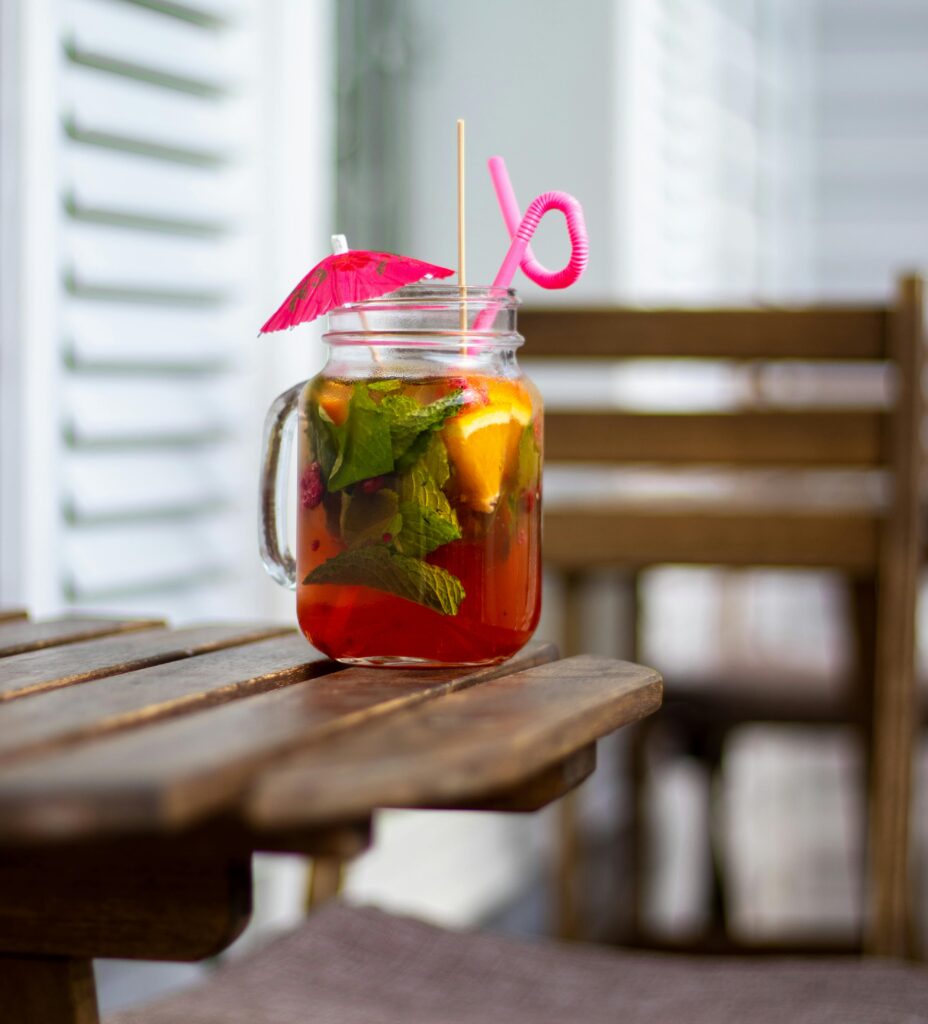
What to use instead of a cocktail shaker?
Creating a cocktail shaker alternative is very easy and you only need a few objects that can be found in your home. If you have a mason jar, or any other glass with with secure lid, it will make an effective cocktail shaker.
Clean your mason jar thoroughly before using, ensuring it’s clean and safe to use.
Add your cocktail ingredients into the jar.
Add your ice cubes.
Close the lid, fastening it on securely.
Shake vigorously.
Take the lid off and pour cocktail mix into your glass.
How to rim a glass with salt?
If you’re wanting to make a classic salt rim for a cocktail such as a margarita, we recommend starting of with a lime.
Begin by cutting a lime in half, and then again until it forms a quarter or wedge.
Cut a notch in the lime wedge, making sure to not cut all the way through. Near enough in the centre will do.
Run the notch all around the glass until it’s the rim of the glass is completely wet from the lime juice.
Add some Himalayan Pink Salt into a small dish that’s bigger than the diameter of your glass.
Tip the glass over into the salt, almost like a cookie cutter going into the dough.
Hold the glass up and you will find a perfect salt rim around your glass.
This summer, elevate your cookouts with vegan loaded hot dogs, perfectly seasoned with Maldon Sea Salt flakes. These plant-based delights are bursting with flavour, topped with vibrant mix of fresh vegetables, savoury sauces, and a touch of smoky goodness.
Each bite offers a satisfying crunch and a delightful blend of textures, making them the ultimate crowd-pleaser for any sunny day gathering. Whether you’re a seasoned vegan or simply exploring plant-based options, these loaded hot dogs promise to be a delicious highlight of your summer feasts.
Here is how to make loaded vegan hot dogs…
Start by making some pink pickled onions to serve with the hot dogs.
Place the finely sliced red onion into a small bowl and add the Maldon Sea Salt, then use your fingers to scrunch it in and help soften the onions. Next add the vinegar and the caster sugar and then stir to dissolve. Set the onions aside to pickle as you prepare the hot dogs.
Heat a griddle pan and add the vegan sausages, cooking on each side until charred and cooked through.
Slice open the hot dog buns and add the slice of smoked cheese, then the warm sausage – allowing the cheese to melt underneath. Then top the hot dogs however you like, we chose a drizzle of American mustard, sliced jalapenos, the pickled red onions, some crispy onions, and some finely chopped chives.
We like them crispy, EXTRA spicy and oh-so delicious!
Blend bread to a crumb-like texture. Toast in the pan over high heat for a few minutes, then add olive oil to coat the breadcrumbs, dried parsley and a generous pinch of Maldon Garlic Sea Salt.
Cook in the pan, occasionally tossing, for 3-5 minutes. Serve right away or store in a vacuum-sealed container and keep in your freezer – just re-heat to serve.
Perfect on any dish especially over some creamy pasta – fantastic flavour at your fingertips!
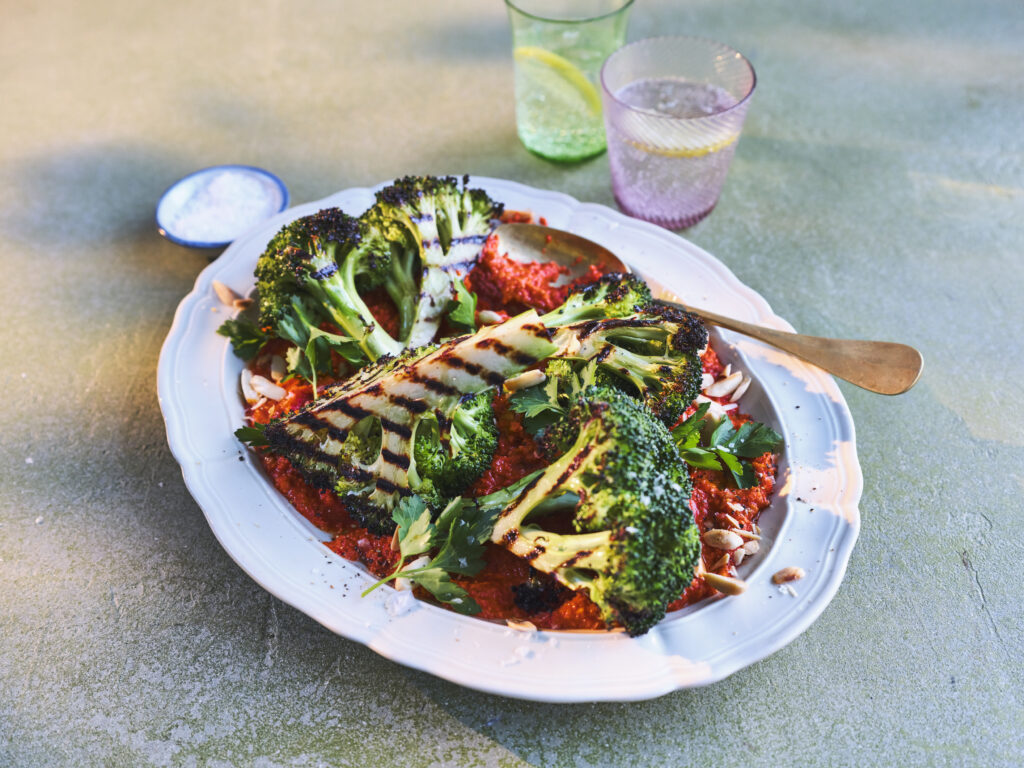
Lightly griddled broccoli wedges with a delicious Romesco sauce is the perfect side dish for your springtime banquet. The combination of sweet and slightly acidic with the smoky red pepper Romesco sauce pairs beautifully with the charred broccoli, a flavour profile that will certainly impress your dinner guests.
Broccoli contains compounds that some people may consider bitter. However, gently griddling your broccoli will allow a delicious earthy, almost sweet taste to rise. It also brings out many nutrients, including a wide array of vitamins, minerals and fibre.
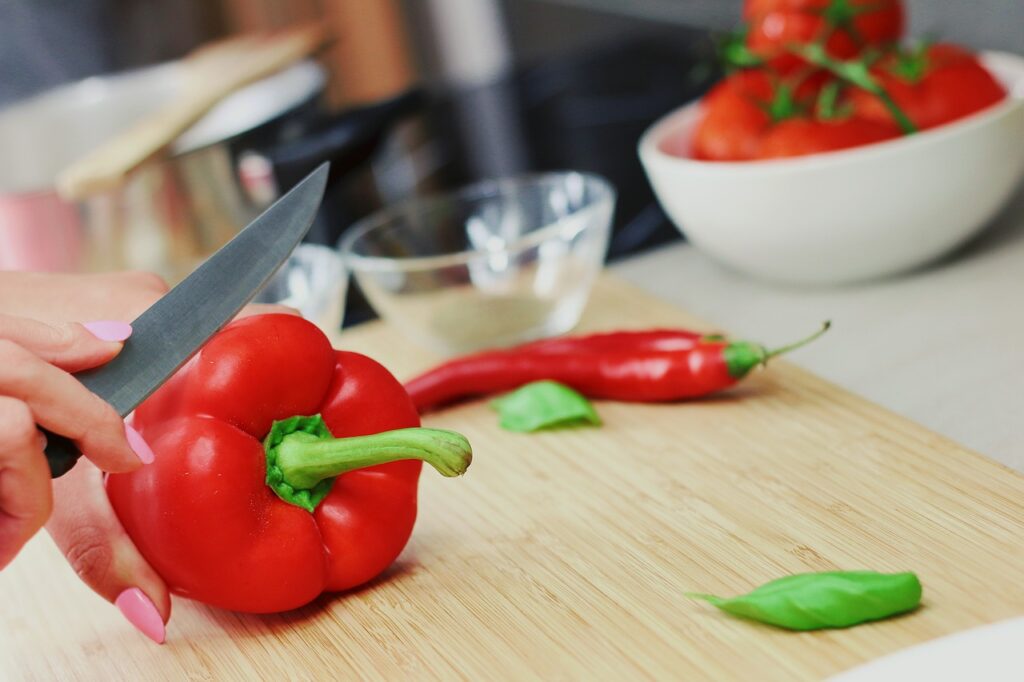
Image by <a href=”https://pixabay.com/users/catkin-127770/?utm_source=link-attribution&utm_medium=referral&utm_campaign=image&utm_content=482403″>Catkin</a> from <a href=”https://pixabay.com//?utm_source=link-attribution&utm_medium=referral&utm_campaign=image&utm_content=482403″>Pixabay</a>
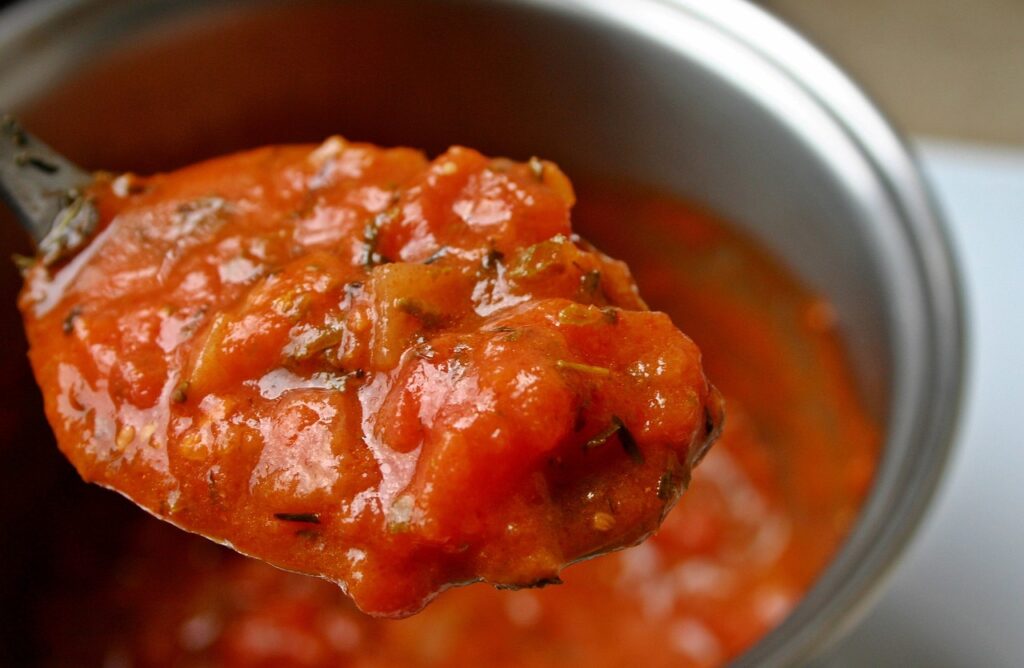
What is Romesco sauce?
Romesco sauce is a rich Spanish sauce comprising of roasted red peppers, which are pureed and thickened with toasted almonds and sometimes pieces of bread.
The origin of the sauce dates back to the 18th century, where fishermen were believed to have made the sauce to eat with their rather bland meals, whilst catching their fish off the coast of Catalonia, Northwest Spain.
The taste of Romesco sauce is lightly sweet and tangy in flavour, with a delicious hint of garlic and smoky flavours and a touch of spice. As the sauce is a classic Mediterranean condiment, it’s the perfect accompaniment to fish, grilled vegetables and roasted chicken.
Is Romesco sauce served hot or cold?
Romesco sauce is very adaptable and can be served either hot or cold depending on the dish that you’re making.
Romesco sauce can freeze and last for up to 3 months in the freezer. We do not recommend storing the sauce longer than 3 months as the flavour can start to degrade and the colour becomes dull.
You can freeze Romesco sauce easily by using an ice cub tray:
Portion the sauce into the ice cube tray. You can use spoons to make it easier to pour into each ice cube square.
Wrap the ice cub tray with a layer of clingfilm to prevent spillages and also limit the chance of any odours in your freezer.
Put the tray in the freeze carefully, keeping it as flat as possible.
Once frozen solid, you can pop the cubes out of the ice cube tray into a freezer bag, making sure it is sealed up.
Label the bag with the contents and the date it was made, before placing it back in the freezer.
The best way to defrost Romesco sauce is by taking a cube out of the freezer and popping it into the dish, allowing it to thaw whilst the dish continues to cook.
Image by <a href=”https://pixabay.com/users/jeshoots-com-264599/?utm_source=link-attribution&utm_medium=referral&utm_campaign=image&utm_content=569070″>Jan Vašek</a> from <a href=”https://pixabay.com//?utm_source=link-attribution&utm_medium=referral&utm_campaign=image&utm_content=569070″>Pixabay</a>
How to make Romesco sauce?
Start by making the romesco sauce.
In a large frying pan, add the blanched almonds and toast them until they turn colour and start to char in places, turning them over so they evenly toast. Then tip them out the pan and allow to cool slightly.
In a food processor add the roasted red peppers, toasted almonds, handful of parsley and the garlic cloves. Pulse this until everything has broken down to a chunky paste. Then add the sherry vinegar, lemon juice and olive oil and pulse again to your desired texture – you don’t want it to be completely smooth.
Tip the mixture from the food processor to a bowl and stir through the paprika and Aleppo pepper. Taste the sauce and then add some Maldon Sea Salt flakes and cracked black pepper.
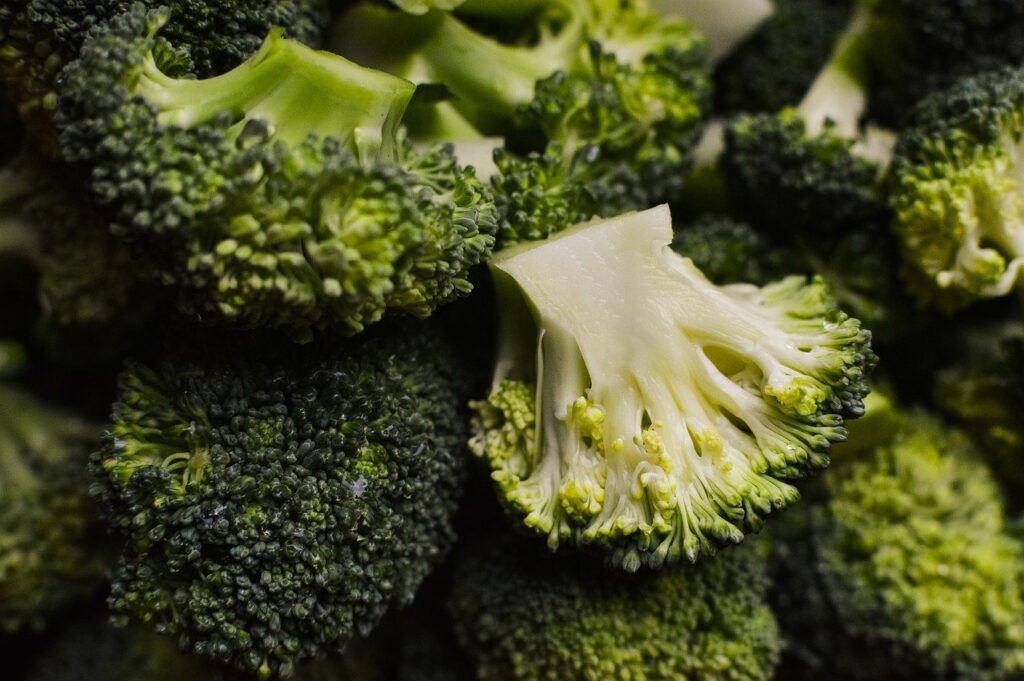
How to make griddled broccoli?
Prepare the broccoli. Heat a griddle pan onto a high heat. Slice the broccoli heads into wedges by cutting each one in half lengthways through the stalk, then cut each half again into quarters.
Rub each wedge with olive oil, and then place onto the griddle pan. Let each side cook for 5 minutes until prominently char lines appear on the stalk before turning and doing the other side. This can be done in batches; the broccoli will char but also steam as it cooks.
Image by <a href=”https://pixabay.com/users/zichrini-3417353/?utm_source=link-attribution&utm_medium=referral&utm_campaign=image&utm_content=3267634″>Hanna</a> from <a href=”https://pixabay.com//?utm_source=link-attribution&utm_medium=referral&utm_campaign=image&utm_content=3267634″>Pixabay</a>
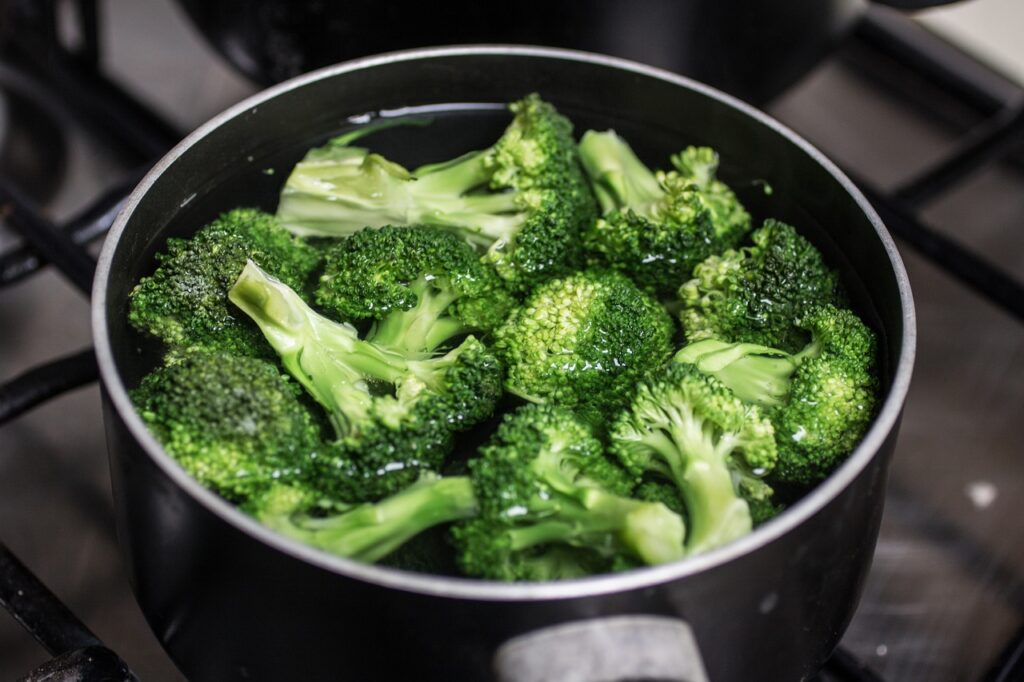
Do you have to boil broccoli before frying?
You do not need to boil broccoli before frying in the pan if you implement a steaming method to it. This is where you trap hot air in the pan to help soften the broccoli. This allows the broccoli to be a little softer in texture when you bite into it, but still irresistibly crunchy.
You can blanch the florets before stir-frying to help soften the stems and stop the enzyme that leads to browning. We recommend adding a good pinch of Maldon Sea Salt flakes and a dash of olive oil to your blanching water to help the broccoli retain it’s crunchy texture and vibrant green colour.
How to serve griddled broccoli with Romesco sauce:
When you are ready to serve, spoon the romesco sauce across the base of a large serving platter.
Then arrange the charred broccoli wedges on top.
Finally scatter with some chopped smoked almonds, a drizzle of olive oil and a final sprinkle of Maldon Sea Salt flakes and Aleppo pepper.
Image by <a href=”https://pixabay.com/users/meszarcsekgergely-18097400/?utm_source=link-attribution&utm_medium=referral&utm_campaign=image&utm_content=7744338″>Meszárcsek Gergely</a> from <a href=”https://pixabay.com//?utm_source=link-attribution&utm_medium=referral&utm_campaign=image&utm_content=7744338″>Pixabay</a>
How long does it take to cook raw broccoli?
Broccoli can be easy to overcook, it should always retain it’s vivid bright green colour when cooked and should have a little ‘crunch‘ to it.
When you are boiling broccoli in a pan of boiling water, we recommend cooking the florets for 6-8 minutes.
If you aresteaming your broccoli, make sure to place a steamer over boiling water and cook for the same time, around 6-8 minutes.
You can stir-fry your broccoli for a delicious, crunchy texture. You need to separate into bite-sized florets, adding 1 tbsp of olive oil into the frying plan and adding the broccoli, cooking for around 4-5 minutes or until nice and tender.
When roasting broccoli, we recommend preheating your oven to 400 degrees F for 20 minutes to allow the vegetable to be perfectly roasted.
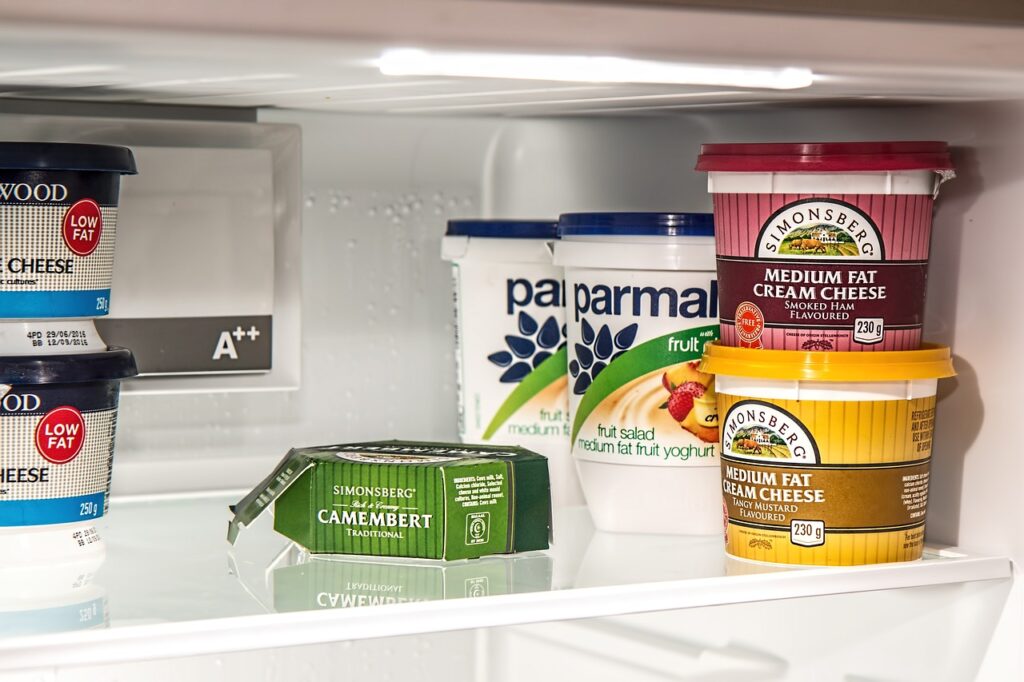
How long does broccoli keep in the fridge?
Fresh broccoli can last up to 3-5 days in the fridge when properly stored in an air-tight container. If it is cut-up broccoli, we recommend no more than 4 days stored in the fridge, otherwise the vegetable will start to decay in colour and texture and have a unpleasant odour.
If you are storing cooked broccoli in the fridge, make sure to store in a shallow, air-tight container or wrapped in foil. It can be stored for up to 3-5 days.