These ridiculously easy and very tasty skewers take just a couple of minutes to cook, so plan on making them as part of a bigger spread to get the most out of your good fuel. They make a lovely little nibble while you’re cooking your main course. It can be a little tricky to source, but you could also make these using morcilla, a delicious Spanish black pudding, if you can find some.
Here is how to make the skewers…
Fire up the barbecue ready for hot direct grilling but, as usual, leaving a fire-free zone on your grill so you can slide the skewers further from the heat. Use a small sharp knife to separate the orangey-pink coral from the scallop and drop both into a bowl. Add the chorizo, sage, garlic and olive oil. Season generously with salt and pepper and stir well to coat.
Starting and ending with chorizo (the more solid texture of which will hold everything else in place), alternately thread the can chill in the fridge for 30–60 minutes, if you like. When you are ready to cook, rest the skewers directly over the fire, either hung between two bricks, or onto hot clean grill bars. Grill for just a minute or so on each side until lightly caramelized. The fat from the chorizo will cause the fire to flare a little so if it’s all getting a bit much, slide a little further away from the fire.
Squeeze over some lemon juice and tuck in while sizzling hot.
Purchase ‘SCORCHED’ by Genevieve Taylor
Live-fire expert Genevieve Taylor covers everything you’ll ever need to know about buying and cooking all kinds of fish in her third cookbook: Scorched. From cooking whole dish, fillets, shellfish to burgers and skewers, this is the ultimate guide to barbecuing fish!
You can purchase your very own copy here, where you can become inspired with over 85 recipes and gain insight on how to set up your barbecue, sourcing your fuel and lighting your fire.
Much as Genevieve Taylor loves fish and meat proteins, she adores pulses and try to eat them several times a week. Cheap and cheerful, a bowlful of beans is an excellent way of making your fish go a little further. Fresh oregano is one of her favourite herbs, giving a slightly floral note to this pesto-style dressing.
Here is how to make the recipe
As is usual, a few hours before you want to cook, lay the mackerel fillets skin-side up on a rack over a tray and slide into the fridge to dry the skin and minimize sticking.
For the pesto, pour a good 4 tablespoons of the olive oil into a bowl and stir through the chopped oregano and garlic, the lemon zest and juice. Season to taste with Maldon Sea Salt and pepper and a good pinch of sugar. Spoon out a tablespoon or so into a separate small bowl ready to baste the fish, then set both bowls a side.
When you are ready to cook, fire up the barbecue ready for direct grilling but leaving an area coal-free so you have room to manoeuvre if things are getting hot. Set a grill tray or cage over the fire to heat up.
Once the fire has a little heat in it, start on the beans. Set a flame proof pan over the fire (it’s fine to rest the pan on the grill tray so you can heat two things at once!) and pour in the olive oil. Add the tomatoes and garlic and fry for a few minutes, just until the tomatoes are softening. Add the beans and cinnamon, then season to taste with the sugar and salt and pepper. Bring up to a simmer and cook for a few minutes. Take the pan off the heat and cover with a lid or foil to keep warm – they are more flavourful eaten warm rather than hot, so don’t worry too much about them cooling a little.
Remove the mackerel from the fridge and drizzle the remaining tablespoon of oil all over the skin side, spreading it out into a thin, even layer. Sprinkle generously with Maldon Sea Salt flakes and take to the grill along with the smaller bowl of pesto and a silicone brush.
Lay the fillets, skin-side down, on the hot grill tray and rest a lightly oiled weight on top to press the fillets flat, keeping the skin in maximum contact with the hot surface. After a couple of minutes, the weight will have done its job so remove it, then brush the oregano pesto over the flesh side of the fish. Cook for another couple of minutes until the skin is crisp. Use a fish slice to tease the fillets from the grill tray and rest on top of the beans. Drizzle over the rest of the pesto and tuck in.
Purchase ‘SCORCHED’ by Genevieve Taylor
Live-fire expert Genevieve Taylor covers everything you’ll ever need to know about buying and cooking all kinds of fish in her third cookbook: Scorched. From cooking whole dish, fillets, shellfish to burgers and skewers, this is the ultimate guide to barbecuing fish!
You can purchase your very own copy here, where you can become inspired with over 85 recipes and gain insight on how to set up your barbecue, sourcing your fuel and lighting your fire.
Blend bread to a crumb-like texture. Toast in the pan over high heat for a few minutes, then add olive oil to coat the breadcrumbs, dried parsley and a generous pinch of Maldon Garlic Sea Salt.
Cook in the pan, occasionally tossing, for 3-5 minutes. Serve right away or store in a vacuum-sealed container and keep in your freezer – just re-heat to serve.
Perfect on any dish especially over some creamy pasta – fantastic flavour at your fingertips!
Light, fluffy and FULL of flavour! This recipe was created by Lara Green, who adds a delicious twist to a sourdough focaccia with Maldon Chilli Sea Salt and Maldon Garlic Sea Salt to impress your guests. It pairs perfectly with dips, pasta and antipasti, where the hints of chilli and garlic elevate it from ‘fluffy’ to fantastic.
Cold proofing overnight in the fridge makes for an extra soft, pillowy focaccia with the most delicious golden crust.
How to make chilli and garlic sourdough focaccia
Place the warm water into a bowl with the levain/sourdough starter and honey and whisk to combine. Add the flours and stir until no dry bits remain. Put a towel over the bowl and place somewhere warm.
30 minutes later, add both the Maldon Chilli Sea Salt and Maldon Garlic Sea Salt, using your fingers to pinch them into the dough. Cover the bowl with the tea towel and place back in the warm spot.
30 minutes later, perform your first set of stretch and folds: starting from the furthest edge, pull and stretch the dough up and then fold it down over itself. Turn the bowl and repeat until you have completed four stretch and folds. Set your timer for three additional sets of folds – spaced half an hour apart, leaving the covered dough to rest after each set.
Using 2 tbsp of the oil, generously grease and line a 9-inch baking dish with parchment paper, then place more oil on top of the paper. Transfer the focaccia dough to the baking dish, cover and place back in the warm spot for another 1-2 hours. Then cover with cling film and place in the fridge overnight.
The following morning, remove the focaccia from the fridge and place in the warm spot to bring it back to room temperature. You’ll know when it’s ready as the dough will have noticeably risen and look soft and pillowy on the surface (around 3-4 hours).
Preheat the oven to 215C.
Remove the cling film from the baking pan and with wet hands, massage the dough to create dimples in the surface of the focaccia. Drizzle with the remaining tbsp of oil and scatter with a pinch of both the Maldon Chilli Sea Salt and Maldon Garlic Sea Salt.
Bake in the oven for 15 minutes, then turn the pan and bake for another 10 minutes until golden brown on the surface and light and crispy on the base and edges. Allow to cool thoroughly before cutting into slices.
*If using Instant Yeast instead of a sourdough starter, simply add the yeast with the flour and mix to combine. Follow the same sequence of steps above.
Why do we eat lamb at Easter?
Have you ever wondered why we eat lamb during Easter? Many think it’s due to seasonality because Easter usually falls on or around lambing season in the UK. (February to April). But that’s actually false for many British farmers who know and keep lamb…The lamb you’re eating for your Easter Sunday roast would have most likely been born in December, kept warm indoors throughout the winter and fattened on grain – so it’s not actually born in Spring at all!
Alternatively, Farm2Fork also suggests if you are eating grass-fed lamb on Easter Day, then it most likely travelled from New Zealand to be a part of your roast dinner.
So, if we don’t eat lamb because it’s in season, why do we eat it?
The main reason is due to religion and faith. In Christianity, Jesus is often referred to as the ‘lamb of God’ in the Gospel of John. As a result, the eating of lamb represents the person we are commemorating and the sacrifice he made for humanity.
However, if we go even deeper in history, before the birth of Christianity, we can see roast lamb being used in the early Passover. When Egypt experienced the terrible plagues and deaths of firstborn sons, the Jews painted (sacrificed) lamb’s blood on their doors so that God would ‘pass over’ their homes and punish the sinners. Later on, when certain Jews would convert to Christianity, they carried over the tradition of eating lamb.
Although Christians do not practise sacrifice in this manner any longer, it is fair to say that we have built our traditions of eating lamb due to historic and religious customs.
If you’re looking for something other than lamb to eat on Easter, check out our perfect Easter recipes; a selection of of meat and vegetarian options for you to enjoy during your Easter Sunday roast.
Image by <a href=”https://pixabay.com/users/vivienviv0-671182/?utm_source=link-attribution&utm_medium=referral&utm_campaign=image&utm_content=581759″>vivienviv0</a> from <a href=”https://pixabay.com//?utm_source=link-attribution&utm_medium=referral&utm_campaign=image&utm_content=581759″>Pixabay</a>
How to butterfly a leg of lamb
In this recipe, we use a butterflied lamb joint, ready to be stuffed, tied and then roasted in the oven. Jamie Oliver shows readers a brilliant method in butterflying your lamb joint yourself and not done by your local butcher!
Try to prepare you lamb the day before you want to cook.
Use a sharp knife and carefully cut down the leg to expose the bone.
Making sure you keep the knife as close to the bone as possible, begin cutting along the edge to completely expose the bone.
Cut around the bone until you are able to remove it.
You can now lay the lamb flat on a chopping board, making sure it is skin-side down.
Using your knife again, make an incision halfway into the flesh on each side (where the meat is thicker), then open it out like a book – or – like butterfly wings on each side!
You should now have a flat piece of lamb of equal thickness.
You have now successfully butterflying your leg of lamb, ready to be stuffed with your favourite seasonings and then tied before roasting!
How to tie a leg of lamb
Once you have butterflied your leg of lamb and packed it full of delicious ingredients such as rosemary, pine nuts, garlic or mint (the list goes on!), you now need to tie it together to seal in all the flavours.
Cut a length of butcher’s twine, long enough to wrap around the lamb a few times.
Place the twin on a flat surface.
Lie the leg of lamb on top of the twine.
Slide the twine under the leg, positioning it roughly 1 inch from the end.
Cross the ends of the two ends of the twine over the top of the leg, pulling them tightly.
Tie a strong knot to hold the leg in place.
Now work towards the other end of the leg, looping the twine around and making sure you’re pulling it tight each time to secure the shape.
Once you have reached the end of the leg, tie another secure knot to hold the twine in place.
Cut with scissors any excess twine.
Now that you have tied your lamb, you’re ready to cook in the oven!
How to cook a leg of lamb
The best way to cook a leg of lamb perfectly is through roasting in the oven until pink on the inside, or roasted slowly for several hours until the meat is very tender and falls apart.
Cooking time for leg of lamb:
For a medium cooked lamb where the inside is blushing pink, it will take around 25 minutes per pound of meat. Alternatively, the internal temperature of the lamb should be around 130F.
If you’re looking for a succulent, falling apart lamb, it will take around 40 – 45 minutes per pound. Alternatively, the internal temperature of the lamb should be around 175F.
Cooking times for different levels of rareness for the lamb:
Rare: Around 15 minutes per pound / internal temperature 125 degrees F.
Medium Rare: 20 minutes per pound / internal temperature 130 degrees F.
Medium: 25 minutes per pound / internal temperature 135 degrees F.
Well-Done: 30 minutes per pound / internal temperature 155 degrees F.
Tender (falling apart lamb) – 40 minutes per pound / internal temperature 275 degrees F.
After you have cooked your leg of lamb to your desired texture and taste, you are now ready to carve!
How to carve a leg of lamb
We followed Waitrose step-by-step guide on how to successfully carve a leg a of lamb.
Once you have taken the meat out of the oven and rested for a few minutes, hold the bone, turning the leg so the thickest part of the meat is uppermost.
Cut a narrow wedge of meat from the centre.
Begin carving slices down to the bone with a knife angled along the line of the wedge. Cut across the base of the slices to free them from the bone.
Turn the joint over and carve the remaining meat parallel to the bone.
How to make stuffed leg of lamb with apricots, pistachios and parsley
You should now know the the basics for a leg of lamb; from it’s humble origins, tying, roasting to carving it perfectly, let’s now explore our delicious recipe where we stuff a leg of lamb with the delicious flavours of apricots, nutty pistachios and parsley.
Preheat the oven to 220c.
Start by making the stuffing mixture. In a large bowl add the fresh breadcrumbs, chopped pistachios, apricots, lemon zest, parsley, garlic, chilli flakes, and plenty of seasoning with Maldon Original Sea Salt Flakes and cracked black pepper. Mix this altogether well. In a small jug whisk the egg and olive oil, then pour this into the stuffing and mix again to help bind it.
Open the butterflied lamb joint and line on the flesh side with the stuffing, packing it in tightly with your hands. Roll the meat as tightly as you can and then use butchers string to tie it up firmly.
Place the rolled lamb onto a baking tray and into the hot oven, we want to brown the skin before turning the heat down for a slower cook.
After 30 minutes, turn the oven down to 180c and cook for a remaining 50 minutes – 1 hour. If the lamb looks a little dark on top, simply cover with some foil.
When the lamb is cooked to your liking, remove from the oven, and loosely cover with foil then allow it to rest for 15 minutes.
Carve the meat and then bring to the table and serve alongside your favourite trimmings; we did roast potatoes, seasonal greens, and a lamb jus.
What to serve with leg of lamb
The options for what to serve with a leg of lamb are endless! Because the meat has a beautiful rich and flavourful taste, a combination of sweet and savoury both go well with the dish.
Roast Potatoes
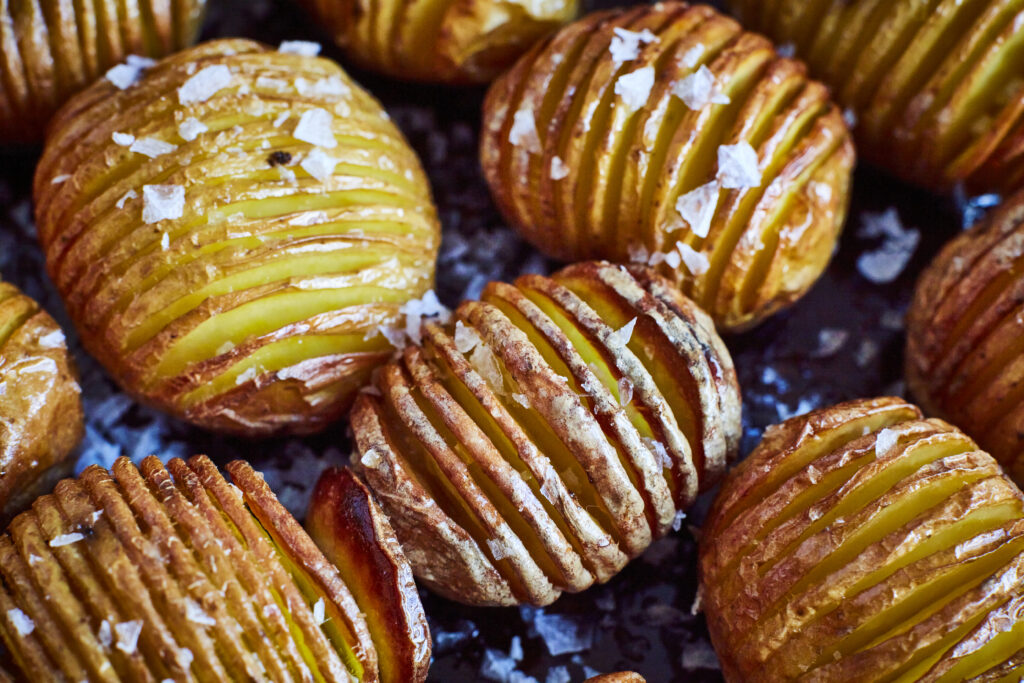
One of the most common pairings with a leg of lamb – easy oven roast potatoes. Beautifully crispy on the outside and fluffy on the inside, they’re perfect to soak up the oozing juices of the lamb. If you really want to impress your guests, try making Hasselback roast potatoes, which give an extra dimension to the dish with it’s extra crispy texture, which compliments the soft meat of the lamb.
Lemon & Honey Glazed Roasted Carrots
If you want to add a gentle sweetness to the dish, serve these roasted carrots, coated in lemon and honey to give a delightfully sweet kick to the dish, a delicate flavours that works perfectly alongside leg of lamb.
Broccoli with Zaatar
Try adding a bit of green to the dish with roasted stem broccoli, paired with zaatar, chilli flakes and Maldon Salt to make a delicious spice blend that adds a bold flavour to the lamb. You can also serve this on a bed of feta, to give a gorgeous creaminess to the plate.
We hope you enjoyed making this classic Easter Sunday lunch!
Make sure you have your Maldon Salt ready for these recipes! If you are running out, please feel free to browse on our Where to Buy Page to find your nearest store in which stocks our beloved Maldon Salt.
Lastly, we LOVE seeing your creations – please tag us on Instagram using the #maldonsalt so we can share your delicious dishes!
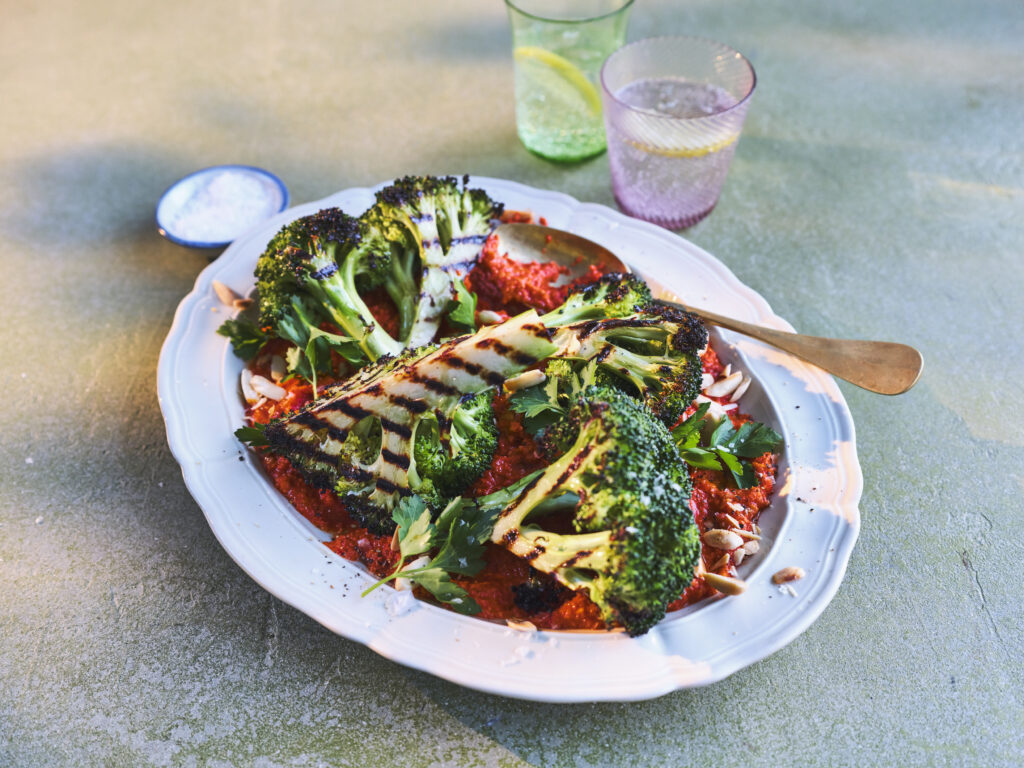
Lightly griddled broccoli wedges with a delicious Romesco sauce is the perfect side dish for your springtime banquet. The combination of sweet and slightly acidic with the smoky red pepper Romesco sauce pairs beautifully with the charred broccoli, a flavour profile that will certainly impress your dinner guests.
Broccoli contains compounds that some people may consider bitter. However, gently griddling your broccoli will allow a delicious earthy, almost sweet taste to rise. It also brings out many nutrients, including a wide array of vitamins, minerals and fibre.
Image by <a href=”https://pixabay.com/users/catkin-127770/?utm_source=link-attribution&utm_medium=referral&utm_campaign=image&utm_content=482403″>Catkin</a> from <a href=”https://pixabay.com//?utm_source=link-attribution&utm_medium=referral&utm_campaign=image&utm_content=482403″>Pixabay</a>
What is Romesco sauce?
Romesco sauce is a rich Spanish sauce comprising of roasted red peppers, which are pureed and thickened with toasted almonds and sometimes pieces of bread.
The origin of the sauce dates back to the 18th century, where fishermen were believed to have made the sauce to eat with their rather bland meals, whilst catching their fish off the coast of Catalonia, Northwest Spain.
The taste of Romesco sauce is lightly sweet and tangy in flavour, with a delicious hint of garlic and smoky flavours and a touch of spice. As the sauce is a classic Mediterranean condiment, it’s the perfect accompaniment to fish, grilled vegetables and roasted chicken.
Is Romesco sauce served hot or cold?
Romesco sauce is very adaptable and can be served either hot or cold depending on the dish that you’re making.
Romesco sauce can freeze and last for up to 3 months in the freezer. We do not recommend storing the sauce longer than 3 months as the flavour can start to degrade and the colour becomes dull.
You can freeze Romesco sauce easily by using an ice cub tray:
Portion the sauce into the ice cube tray. You can use spoons to make it easier to pour into each ice cube square.
Wrap the ice cub tray with a layer of clingfilm to prevent spillages and also limit the chance of any odours in your freezer.
Put the tray in the freeze carefully, keeping it as flat as possible.
Once frozen solid, you can pop the cubes out of the ice cube tray into a freezer bag, making sure it is sealed up.
Label the bag with the contents and the date it was made, before placing it back in the freezer.
The best way to defrost Romesco sauce is by taking a cube out of the freezer and popping it into the dish, allowing it to thaw whilst the dish continues to cook.
Image by <a href=”https://pixabay.com/users/jeshoots-com-264599/?utm_source=link-attribution&utm_medium=referral&utm_campaign=image&utm_content=569070″>Jan Vašek</a> from <a href=”https://pixabay.com//?utm_source=link-attribution&utm_medium=referral&utm_campaign=image&utm_content=569070″>Pixabay</a>
How to make Romesco sauce?
Start by making the romesco sauce.
In a large frying pan, add the blanched almonds and toast them until they turn colour and start to char in places, turning them over so they evenly toast. Then tip them out the pan and allow to cool slightly.
In a food processor add the roasted red peppers, toasted almonds, handful of parsley and the garlic cloves. Pulse this until everything has broken down to a chunky paste. Then add the sherry vinegar, lemon juice and olive oil and pulse again to your desired texture – you don’t want it to be completely smooth.
Tip the mixture from the food processor to a bowl and stir through the paprika and Aleppo pepper. Taste the sauce and then add some Maldon Sea Salt flakes and cracked black pepper.
How to make griddled broccoli?
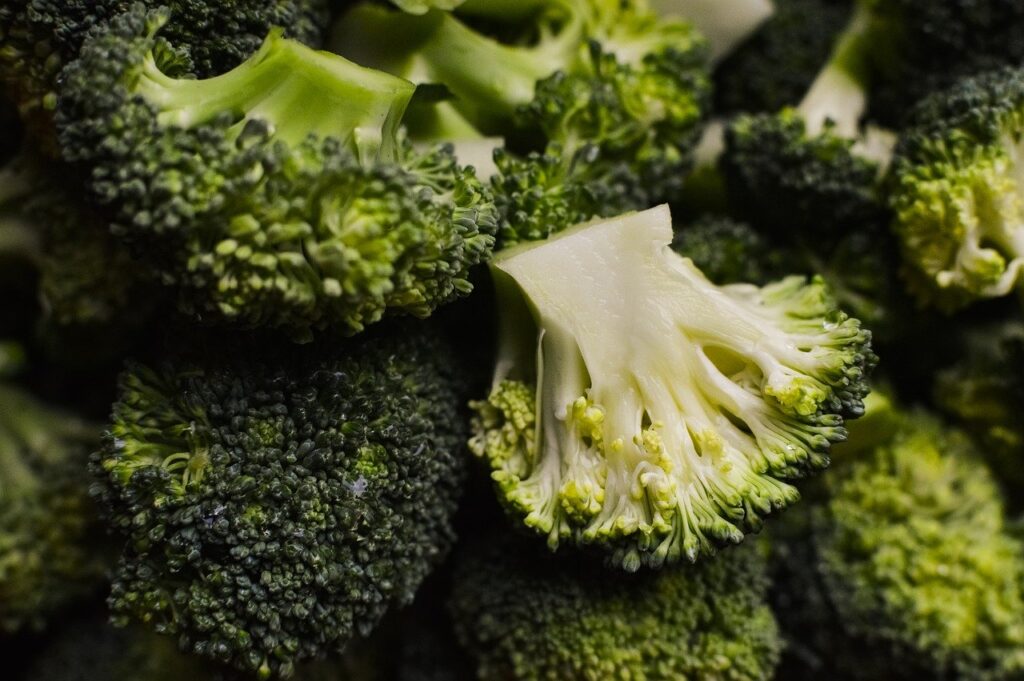
Prepare the broccoli. Heat a griddle pan onto a high heat. Slice the broccoli heads into wedges by cutting each one in half lengthways through the stalk, then cut each half again into quarters.
Rub each wedge with olive oil, and then place onto the griddle pan. Let each side cook for 5 minutes until prominently char lines appear on the stalk before turning and doing the other side. This can be done in batches; the broccoli will char but also steam as it cooks.
Image by <a href=”https://pixabay.com/users/zichrini-3417353/?utm_source=link-attribution&utm_medium=referral&utm_campaign=image&utm_content=3267634″>Hanna</a> from <a href=”https://pixabay.com//?utm_source=link-attribution&utm_medium=referral&utm_campaign=image&utm_content=3267634″>Pixabay</a>
Do you have to boil broccoli before frying?
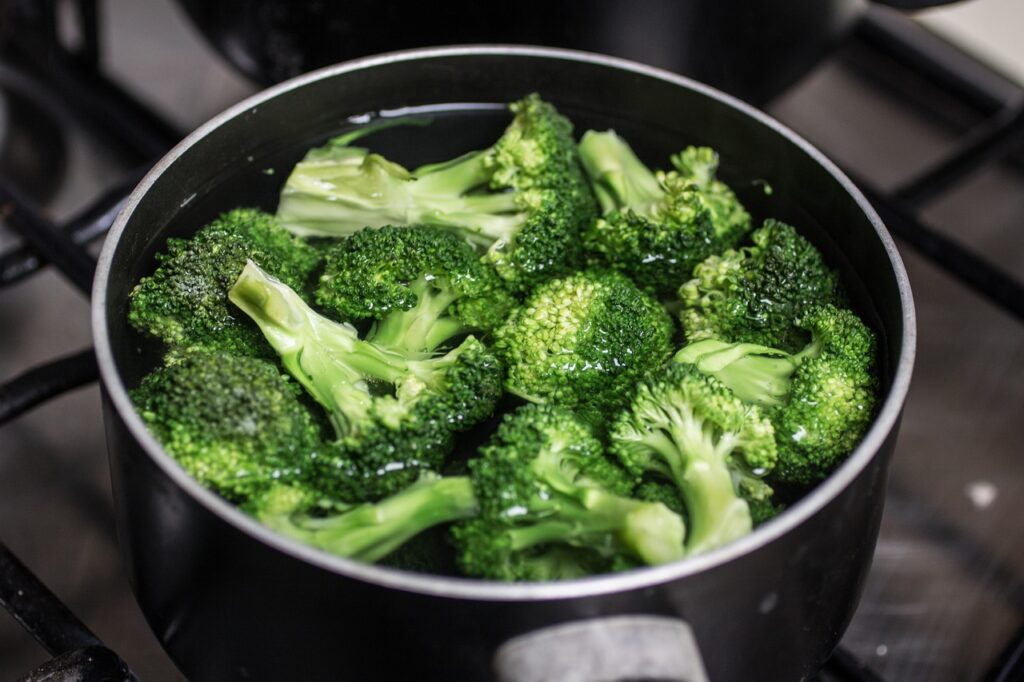
You do not need to boil broccoli before frying in the pan if you implement a steaming method to it. This is where you trap hot air in the pan to help soften the broccoli. This allows the broccoli to be a little softer in texture when you bite into it, but still irresistibly crunchy.
You can blanch the florets before stir-frying to help soften the stems and stop the enzyme that leads to browning. We recommend adding a good pinch of Maldon Sea Salt flakes and a dash of olive oil to your blanching water to help the broccoli retain it’s crunchy texture and vibrant green colour.
How to serve griddled broccoli with Romesco sauce:
When you are ready to serve, spoon the romesco sauce across the base of a large serving platter.
Then arrange the charred broccoli wedges on top.
Finally scatter with some chopped smoked almonds, a drizzle of olive oil and a final sprinkle of Maldon Sea Salt flakes and Aleppo pepper.
Image by <a href=”https://pixabay.com/users/meszarcsekgergely-18097400/?utm_source=link-attribution&utm_medium=referral&utm_campaign=image&utm_content=7744338″>Meszárcsek Gergely</a> from <a href=”https://pixabay.com//?utm_source=link-attribution&utm_medium=referral&utm_campaign=image&utm_content=7744338″>Pixabay</a>
How long does it take to cook raw broccoli?
Broccoli can be easy to overcook, it should always retain it’s vivid bright green colour when cooked and should have a little ‘crunch‘ to it.
When you are boiling broccoli in a pan of boiling water, we recommend cooking the florets for 6-8 minutes.
If you aresteaming your broccoli, make sure to place a steamer over boiling water and cook for the same time, around 6-8 minutes.
You can stir-fry your broccoli for a delicious, crunchy texture. You need to separate into bite-sized florets, adding 1 tbsp of olive oil into the frying plan and adding the broccoli, cooking for around 4-5 minutes or until nice and tender.
When roasting broccoli, we recommend preheating your oven to 400 degrees F for 20 minutes to allow the vegetable to be perfectly roasted.
How long does broccoli keep in the fridge?
Fresh broccoli can last up to 3-5 days in the fridge when properly stored in an air-tight container. If it is cut-up broccoli, we recommend no more than 4 days stored in the fridge, otherwise the vegetable will start to decay in colour and texture and have a unpleasant odour.
If you are storing cooked broccoli in the fridge, make sure to store in a shallow, air-tight container or wrapped in foil. It can be stored for up to 3-5 days.
This recipe was created by Nomadic Dinners, who run immersive woodland feasts as an alternative way of dining. Nomadic welcome you all to dine amongst ancient oak trees, starlit skies and a roaming wildfire in a hidden woodland setting unlike any other. It’s an opportunity to explore a connection with the world around us; where new friendships are foraged around a shared table.
Their ethos remains the same: using food and nature as a catalyst to bring people close together.
You can book a seat for one of their many Woodland Feasts today! Join in to experience a restaurant without walls and no boundaries, where food is a universal language and the story of their Woodland is shown through the dishes that they serve you.
Smoky Cedar Planked Trout Recipe
Cedar planked trout is one of Nomadic’s favourite springtime recipes to grill outdoors at Nomadic Dinners and is a real showstopper if you are looking to up your barbeque game to the next level.
This particular version has a springtime twist using bright green fresh nettle tips to layer over the cedar that combined with Maldon Smoked Sea Salt create a deep earthy flavour and the unmistakable aroma of the great outdoors.
Soak your cedar plank overnight ensuring it is fully immersed. If you can’t be bothered or forget, give it a good soak an hour before. This stops it catching fire and creates more smoke for the fish when it cooks
Blanch nettles in water to get rid of the stingers and layer on top of the board. Layer your trout over the top. Add sliced lemon. Nail in down end to end so it doesn’t flop over. Massage with olive oil, add Maldon Smoked Sea Salt flakes.
Place the cedar plank on the BBQ at a 45 degree angle set far back from the flame so it cooks slowly and wait for the translucent skin to gradually change colour to a beautiful rose colour. Remember to cook to temperature not to time. It will become apparent when the trout is ready (don’t worry about burnt ends, these are delicious).
Nomadic serves this trout dish with a simple foragers salad of hairy bittercress, sorrel, chicory and young spinach leaves, freshly grated horseradish and bonfire potatoes in wild garlic but this fish is so versatile it can pair with almost anything.
Photo by Min An: https://www.pexels.com/photo/two-person-standing-near-assorted-color-paper-lanterns-1313814/
What is the Lunar New Year?
The Lunar New Year is one of the most celebrated holidays in Chinese culture. It marks the first day of the year in the Lunar Calendar, where celebrations generally run for 15 days. With each day comes a special meaning and traditions to honour, but this can vary between regions and cultures.
It’s important to note that the date of the Lunar New Year changes every year. For 2024, this will occur from 10th February until the 15th Day.
On the first day, many families will visit other family members, starting with the most senior members first. Firecrackers, dragon and lion dances occur to chase away the evil monsters, named Nian.
The remaining days are filled to the brim with festivities; families will visit relatives, friends and temples, whilst eating certain types of dishes in the hopes of a prosperous and hopeful new year. On the final fifteenth day, we end with the Lantern Festival, where people hang glowing lanterns in temples or carry them during a night time parade , marking the first full moon after the Lunar New Year, completing the celebrations.
Photo by RDNE Stock project: https://www.pexels.com/photo/wood-man-red-love-6691853/
The Chinese Zodiac Calendar
For many cultures, each year is associated with an animal from the Chinese Zodiac calendar. There are 12 animals in the Chinese Zodiac calendar, which are the following:
Rat
Ox
Tiger
Hare
Dragon
Snake
Horse
Sheep
Monkey
Rooster
Dog
Pig
Here is the below list for the animals associated with the upcoming years:
10th February, 2024 – Year of the Dragon
29th January, 2025 – Year of the Snake
17th February, 2026 – Year of the Horse
The Year of the Dragon is associated with bravery, strength and luck. As a result, this Lunar New Year will be a time to celebrate Chinese traditions, eating rich cuisine and making wishes for a joyous new year.
Lunar New Year and Dumplings
Dumplings symbolise longevity and wealthy. This is because dumplings look like money pouches, which represent fortune and prosperity for the coming year. More so, dumplings are a great way to spend time with your family, as they are mixed by hand for a certain amount of time to ensure the meat is succulent and juicy. As a result, you can enjoy getting creative in the kitchen with relatives, sharing your appreciation for delectable foods and festivities to come.
In this recipe, we take on the classic Chinese dumplings with a ‘fiery‘ twist to represent the Year of the Dragon. We do this by using Maldon Chilli Sea Salt flakes, which provide a deliciously spicy, aromatic taste that works perfect with the pork meat.
If you like the ‘spicy‘ things in life, we recommend cooking up a few Chicken momos, paired with a beautiful tomato chilli chutney. However, if you are not too keen on the heat, why not whip up our pulled pork bao buns – they buns are so soft and fluffy.
If you are a vegetarian, you can swap out the pulled pork for sticky miso roasted aubergine that mimics the taste and texture of meat.
Recipe created by: https://www.instagram.com/ugcwithnav/
How to make Chinese dumplings
Mix all sauce ingredients (except oil) in a bowl. Heat neutral oil to its smoking point – watch closely, it smokes quickly! – then drizzle sizzling oil over the sauce for a fiery kick.
For the dumpling filling, place the pork, egg, chicken stock, cornflour, Maldon Chilli Sea Salt, sesame oil, shiitake mushrooms, birds-eye chilli and Chinese garlic chives in a large bowl. Mix vigorously for 2-3 minutes.
Place a small teaspoon of filling into the centre of a dumpling wrapper, dab the edges with water and fold the wrapper over the filling. Pinch in the sides and squeeze to create pleats for a classic dumpling look.
Then it’s up to you if you’d like to steam some or pan fry some but we’re doing both!
Place your dumplings in a steamer. On high heat, add 2 cups of boiling water to a wok. Place your dumplings in the steamer, ensure they’re not overcrowded and steam for about 10-15 minutes on medium heat until they look glossy and cooked through.
For that irresistible crispy bottom, heat a teaspoon of neutral oil in a non-stick pan, place your dumplings in the sizzling oil. Ensure not to overcrowd the pan. Once the bottoms are browned (takes 3-4 minutes), add the cornstarch slurry, cover with a lid (10-15 minutes) and cook until they’re cooked through.
Once done, serve up your gorgeous spicy dumplings. Add a final pinch of Maldon Chilli Sea Salt and pair them with your spicy sizzling dumpling sauce!
Happy Lunar New Year!
Recipe created by: https://www.instagram.com/ugcwithnav/
What to serve with Chinese dumplings
A great dish to serve with Chinese dumplings is a hearty chicken noodle soup. The soup is full of a rich, flavourful both and soft noodles that compliments the succulent dumplings perfectly. It’s the perfect way to turn your dumplings from an appetizer to a full meal!
Pairing your dumplings with a refreshing cucumber salad is a match made in heaven! The crispness from the cucumbers provides a wonderful contrast to the soft, warm dumplings.
Why not try using a delicious Chinese Curry sauce to drizzle on top of your dumplings. This sauce is very rich with a bundle of aromatic spices which offer a warm, slightly spicy flavour. You can find most pre-mixed brands in the best retailers, including Goldfish Chinese Curry Sauce.
Can I cook dumplings in an air fryer?
You can air-fry frozen dumplings very easily. Make sure to add an oil spray on top of the frozen dumplings so that they cook crispy and not come out dry. You want to make sure the outside stays nice and golden and cooked perfectly on the inside.
All air fryers cook differently, but we recommend a base time of 6-8 minutes on 380°F/193°C. Flip the dumplings over and continue to cook for another 2-6 minutes until crispy.
If you are wanting to cook Chinese dumplings in the air fryer from scratch, you will need to make sure that the dumpling’s filling is cooked first, especially if you are using meats like pork, chicken or beef. After you have cooked the filling, you can then proceed to making the dumplings following the above recipe, but instead of frying them, pop them in the air fryer for 6-8 minutes, turning them over and cooking for an additional 2-6 minutes until nice and golden.
Can you freeze Chinese dumplings?
According to Expondo, you can freeze dumplings depending on how you prepared them.
Raw dumplings can be stored in the freeze for up to 3 months, whereas cooked dumplings can only be stored in the freeze for 4 weeks. It’s important to note that the dumplings, raw or cooked, should not be touching each other. If they are touching, the dumplings will stick together into a large clump, and once thawed, will rip the dough – ruining the perfect parcel you have created.
As we celebrate ‘Healthy January’, we are delighted to team up with renowned Chef Richard Buckley and share one of our favourite vegetarian-based recipes from his cookbook.
Richard Buckley is an award-winning chef and owner of The Oak in Bath (UK), a Michelin Green Star recipient.
Buckley was raised a vegetarian and, after graduating with a degree in English Literature, he set about studying vegetable cookery whilst working in a series of top vegetarian restaurants. This culminated in his five-year role as head chef for Demuth’s Restaurant where he developed and refined his plant-centric cooking style. He has a passion for sharing the knowledge and techniques that he has learnt and developed in order to increase the general standard of vegan cookery across the country.
With over 15 years spent studying plants and working at top vegetarian restaurants, Richard released his cookbook: ‘Plants Taste Better’.
Plants Taste Better is a plant-based recipe book, where plants take centre stage on the dinner plate. With over 70 mouth-watering recipes, ranging from the simple to the stand-out, Plants Taste Better will guide and inspire you to get creative with vegan cookery.
This book balances the traditional with modernity to show readers how to make even the simplest ingredients shine. With delicious, thoughtful recipes and stunning images, you will be amazed what you can accomplish in your kitchen when you combine vegetables alongside a deeper understanding of the techniques requested.
Recipes include flavoursome snacks of Fritters and Squash & Hazelnut Pate, to showstopping mains of Carrot, Pea & Cardamom Tagine and Beetroot and Mushroom Casserole. If you have a sweet tooth, try getting your hands stuck into a decadent Chocolate Salted Caramel Taste, or Burnt Peaches.
On the topic of food, let’s share one of our favourite recipes from the cookbook!
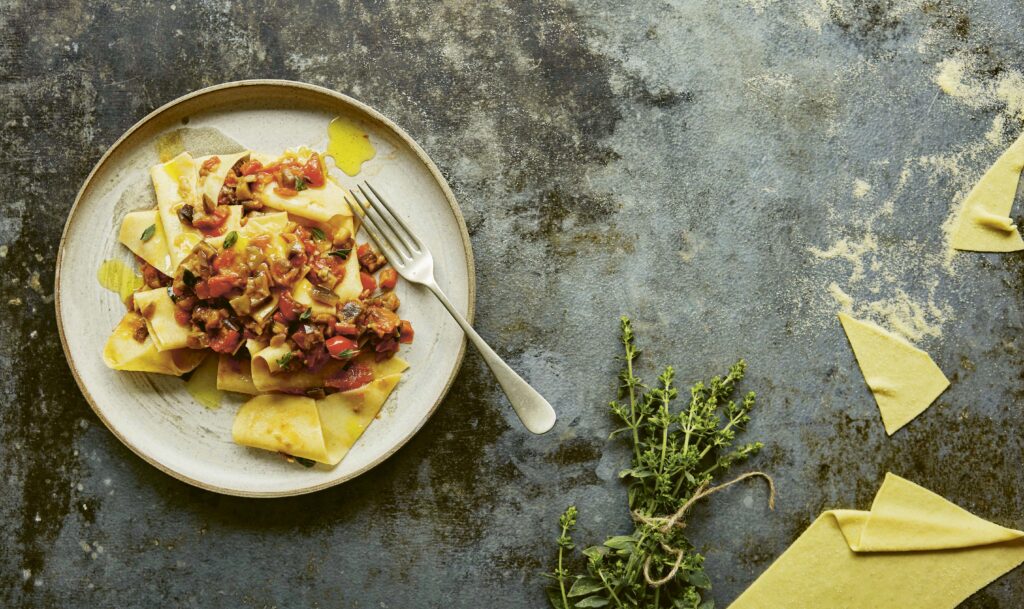
Aubergine (Eggplant) Ragu with Pangrattato and Maltagliati
This dish is a great way of making use of a couple of leftovers: the pangrattato is fried breadcrumbs from a stale loaf – a fantastic thing to have on hand to sprinkle on almost everything that needs a bit of texture – and the maltagliati is essentially pasta offcuts. When you are making a lot of pasta you get left with lots of bits that weren’t quite the right fit; let them dry out and keep them in a pile and you have a quick, easy, free lunch. Obviously, if you aren’t making a lot of pasta then you can just roll out a batch of your favourite pasta and cut it into raggedy shape or alternatively just use your favourite store-bought dried pasta or break up some dried lasagne sheets.
Serves: 4 people
Ingredients:
FOR THE PANGRATTATO:
250g (9oz) stale bread
4 cloves of garlic
extra virgin olive oil
FOR THE SEMOLINA PASTA:
400g (14oz/21/3 cups) fine semolina
235g (81/3oz) warm water
FOR THE RAGU:
75ml (2¾fl oz/1/3 cup) extra virgin
olive oil, plus a little extra if needed
2 aubergines (eggplants), cut into 1cm (1/2-inch) dice
500g (2¼lb) plum tomatoes
1 medium onion, diced
2 cloves of garlic
½ red chilli
2g marjoram leaves
Maldon Sea Salt flakes
freshly ground black pepper
Method:
To make the pangrattato, blitz your stale bread in a food processor or blender to make breadcrumbs – the bigger the crumb the more crunch you get, just remember there is a line somewhere between breadcrumb and crouton. Purée the garlic, add it to the breadcrumbs and rub it in until all the crumbs are coated. Heat a couple of tablespoons of oil in a frying pan (skillet), add the breadcrumbs and fry gently until golden and crispy. Turn onto a baking tray (sheet) to cool and store in an airtight container until needed.
To make the pasta, put the semolina in a pile on a clean work surface. Make a well in the middle and carefully pour in the water, being sure not to let any spill out. Using a fork, whisk the water around, allowing the semolina to fall into the middle slowly. When it reaches the thickness of pancake batter, swap the fork for a dough scraper and chop in the remaining semolina to form a rough dough. Using your hand, bring it together into a rough ball and knead it a couple of times until homogenous but still dimpled and not smooth. Cover with a bowl and leave for 30 minutes to rest.
Knead again; it should become very smooth and silky very quickly. Form it back into a ball, wrap in cling film (plastic wrap), and leave to rest at room temperature for at least 2 hours before using. You can keep it in the fridge overnight, but it will become sticky and harder to work.
When ready to use, either roll the dough by hand using a rolling pin on a lightly floured surface, until it is just a little thinner than a credit card, or roll through a pasta machine following the instructions on page 124. Cut it into rough pieces and leave scattered on the work surface to dry until you need them.
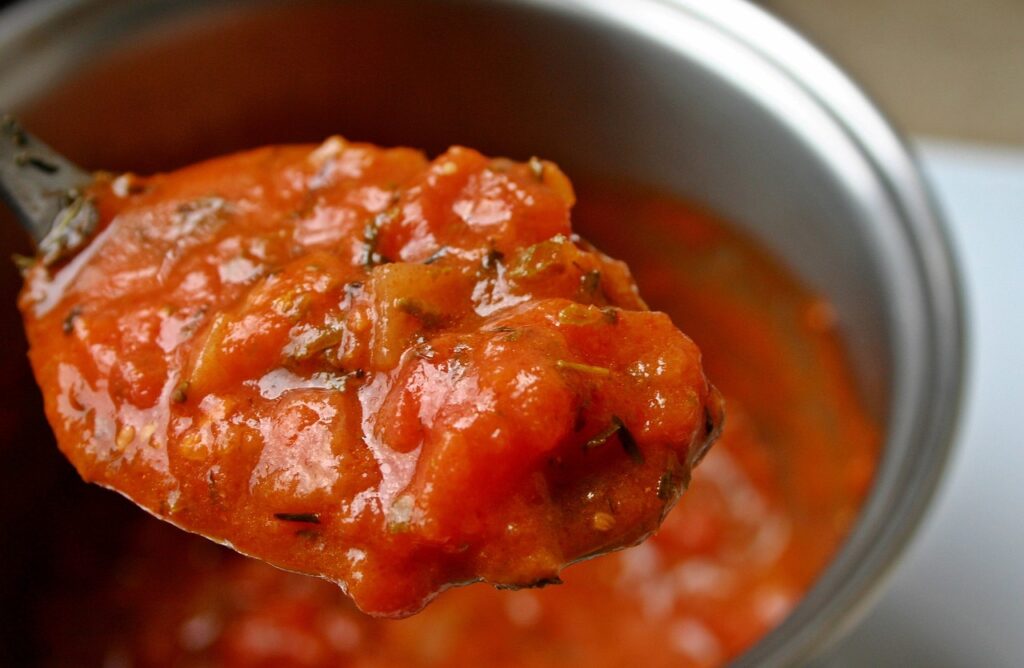
To make the ragu, heat the olive oil in a large saucepan over a medium heat, add the aubergine (eggplant) and cook for up to around 45 minutes until it is broken down to a mush, catching on the pan, browning and existing in the space between dice and purée: be patient, it’s the key to the flavour of this sauce. Remove the aubergine (eggplant) from the pan and set to one side in a bowl. Put the tomatoes in a food processor or blender and blitz to a rough paste. Cook the onion in the same pan as the aubergine until soft, adding a little oil if needed.
Mince the garlic and chilli together, add to the onion in the pan and cook for 30 seconds. Add the tomatoes and cook gently for about 15 minutes until the mixture is thickened and rich. Add the aubergine back in, along with the marjoram, and cook for 5 minutes to bring the flavours together. Season to taste with salt and pepper.
To serve, bring a large saucepan of water to the boil and season as for pasta water (see page 125). Heat the ragu gently in a pan next to it. Add the maltagliati to the boiling water and stir to prevent them sticking. As soon as they float to the surface, lift one out and check its doneness – we are looking for a crisp, al dente texture. If your pasta is freshly rolled this could be as fast as 20 seconds. Using a spider, quickly lift the pasta out into the ragu and stir it through. Using a ladle, add a little of the pasta cooking water to the ragu to create a glossy, creamy texture.
Lay out 4 warmed, rimmed plates or pasta bowls and split the ragu and maltagliati among them. Sprinkle generously with the pangrattato and any leftover herbs.
Purchase ‘Plants Taste Better’ Today
Move aside meat, it’s time to give plants the spotlight in the kitchen! You can purchase your very own copy through Quarto Books today. The perfect gift for your fellow veggie friend…or yourself!
Make sure you have your Maldon Salt ready for these recipes! If you are running out, please feel free to browse on our Where to Buy Page to find your nearest store in which stocks our beloved Maldon Salt.
Lastly, we LOVE seeing your creations – please tag us on Instagram using the #maldonsalt so we can share your own take on Richard’s recipes!
The only get ahead gravy recipe you’ll need this Christmas! Prep this the day before using chicken wings and then there is no faffing with gravy making on the big day. Fennel and sherry add delicious sweetness and Unami. Make double if you have a big group! You can also freeze this in advance if you want to be really well prepped.
Preheat the oven to 200c.
Place some oil in a large roasting tray and add the 3 shallots, garlic bulb, fennel, and celery. Next add the chicken wings, bay leaf and thyme sprigs. Roast in the oven for 1 hour until everything is caramelized and golden and the vegetables are tender.
In a dry frying pan, brown the flour until it is lightly brown and smelling toasty.
When the chicken wings and vegetables are cooked, transfer the roasting tray from the oven onto the hob. Press and squeeze the chicken wings so all the juices come out, then add the browned flour and place on a low heat. Whisk in the flour to the pan juices and allow it to bubble and thicken. Then add the sherry and allow this to bubble and thicken. Then slowly add the hot chicken stock, again allowing it to bubble and thicken between each addition. Finally add some Dijon mustard, a teaspoon of apple jelly and some Maldon Salt and cracked black pepper.
Strain the gravy and then check the seasoning. Reheat when required and serve alongside your Christmas dinner and rosemary roast potatoes.