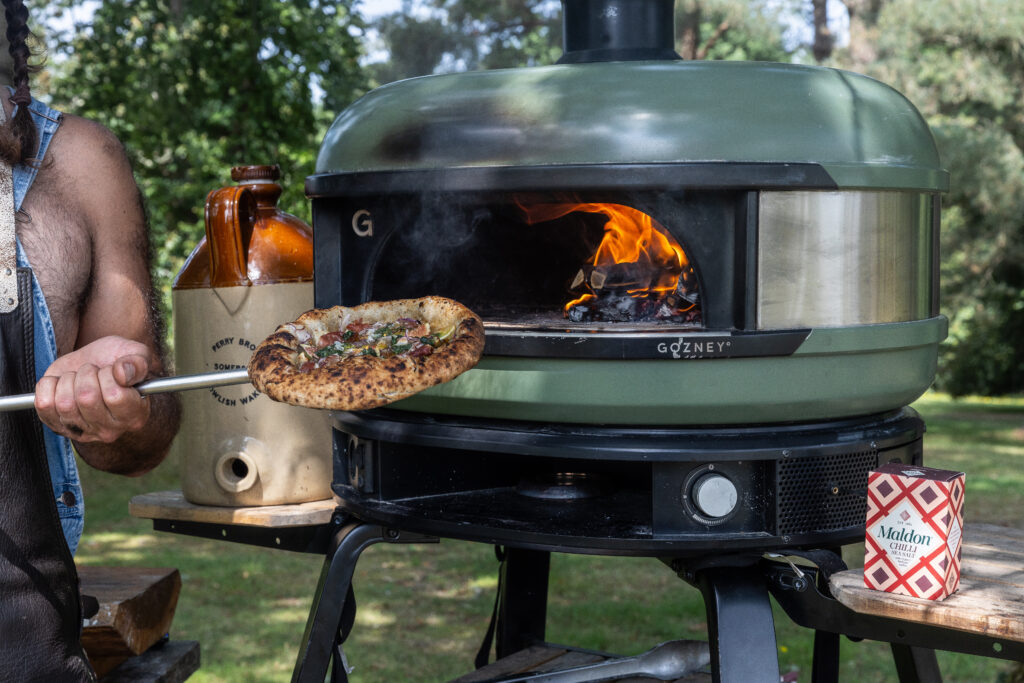
This pizza uses my aromatic nettle sourdough pizza dough and is best cooked in a Gozney Dome. There are few things as delicious as a woodfired pizza. This recipe was born in the dusty Valencian hills, I was walking with my wife, Sophie and our best friends when we came across a beautiful little village and sat down to eat at a weather beaten family restaurant. As the evening sun nestled in the surrounding trees we ate the most delicious honey, figs and goats cheese – accented with a mouth watering hit of chilli. Whenever I make this pizza I’m fixated by the bubbling brown butter and vibrant colours. Every bite takes me back to that little Spanish paradise.
It’s best to start the dough the day before for the best flavour but you can make it early in the morning if you run out of time. You will need a ripe sourdough starter but you could swap out with 3g of dried yeast if needed.
You will need your Gozney oven clean, enough fuel to keep her hot and the appropriate pizza peels – one for loading and one for turning. If you need some instruction on the basics then Gozney has a great YouTube channel that will help you.
Here is how to make the pizza…
The day before, mix your dough. Mix the water, starter and oil by hand in a large bowl until combined. Add in the flour and mix again, leave covered for 15 minutes to fully hydrate then add in the salt and knead by hand for about 10 minutes until the dough becomes smooth. Add in the sieved nettles and knead until combined. Place into an oiled bowl, cover with a cloth and leave on the worktop. After 20 mins fold the dough and leave again for another 20 mins, repeat this two more times. Shape into four balls by dividing the dough and folding each piece in on itself. Place into an oiled tray, cover with cling film and place in the fridge overnight. Make sure the fridge is running at about 5C.
Now for your spicy pizza party day! Heat up your Gozney dome with a small wood fire, move the fire to the right hand side, loosely wrap the garlic bulb in foil and roast off until soft and smokey, this should take about 20 minutes on the far left hand side of the oven. Remove and once cool, squeeze out the pulp and mix into the soft butter with a teaspoon of the Maldon Chilli Sea Salt. Taste and set aside at room temperature.
Get the topping ready and laid out and run up your pizza oven to over 450C, making sure the base is at least 350C (I use an infrared thermometer to check). Remove the dough balls from the fridge for an hour, still covered.
Clean off a smooth work surface and dust with the semolina flour. Dust the pizza balls with a little semolina, pick up a dough ball and place on the worktop with a good dusting of semolina. Gently and evenly push the dough out to a circle. Using both hands, stretch the dough out to a dinner plate size. Add two spoons of the chilli butter and evenly spread around the pizza. Top with the goats cheese, figs, Iberico ham and drizzle over with honey. Slide a pizza peel underneath the pizza and confidently slide into the oven, making sure there is a rolling flame from the wood fire. After about 30 seconds turn the pizza to give it an evenly cooked crust. Remove the pizza and place onto a cooling rack to harden up. Sprinkle over a little more Maldon Chilli Sea Salt and cut into 6 wedges.
Best eaten with an ice cold glass of spanish beer in the Valencian hills, but then again – what isn’t?
We’re delighted to review the talented Uyen Luu and her latest cookbook, Quick and Easy Vietnamese. Uyen is a Vietnamese-born, London-based food writer, cook, and photographer known for her vibrant approach to Vietnamese cuisine. Her latest cookbook, Quick and Easy Vietnamese, offers a fresh perspective on the flavours of Vietnam, presenting an array of simple yet authentic recipes that are perfect for busy home cooks!
The book is designed to make Vietnamese cooking accessible for everyone, with easy-to-follow instructions and a mindset of being resourceful with time and ingredients, maximising on flavour and never wasting a thing. There are so many simple yet delicious recipes to choose from that can all be whipped up with minimum fuss! From tasty Pork and Prawn Wontons to savoury Dill Fishcakes. If you’re craving something sweet, Uyen also shares dessert options such as Sweetcorn Rice Pudding! There is a collection of recipes that are perfect for any time of the week.
Today we’ve shared on our our favourites from the book, Char Siu Crispy Pork Belly.
Here is how to make Char Siu Crispy Pork Belly
Uyen loves Chinese char siu pork, but she loves the fatty, crispy belly even more, so this combines the two. It’s a winner at every dinner party or the perfect weekend dinner treat. Serve with Vermicelli Noodle Salad Bowlsor steamed rice and vegetables or with bánh hoi.
Bring a large saucepan of water to the boil, add the pork andsimmer for 10 minutes, then remove from the water. Rinse undercold water, then pat dry with paper towels. Stab and roughly scorethe meat side.
Combine the roast red pork seasoning mix, soy sauce and water in a small bowl, then spread the mixture evenly onto the surface of a tray (pan) or box that fits the meat. Put the pork belly on top, skin side up, and brush the marinade onto the sides of the meat. The seasoning mixture should cover the flesh side and leave the skin dry.
Rub the vinegar all over the skin and sprinkle with 1 table spoon of the salt. Marinate at room temperature, uncovered, for at least2 hours, or overnight in the refrigerator, covered, dabbing off any moisture from the skin every 30 minutes when you’re able and rubbing on the remaining salt.
When you’re ready to cook, preheat the oven to 220ÅãC fan(475ÅãF). Transfer the pork to a roasting tin lined with baking parchment. Pat the skin dry with paper towels, then roast in the oven for 1 hour 10 minutes. Remove from the oven and set aside to rest for at least 30 minutes. Slice when at room temperature.
Note:
If you can’t get hold of the roast red pork seasoning mix, use 1 teaspoon Chinese five spice, 2 tablespoons garlic powder, 2 tablespoons brown sugar, 2 tablespoons dark soy sauce, 2 tablespoons tomato ketchup and 1/4 teaspoon red food colouring.
We’ve teamed up with Tom Jackson to make a delicious Pizza Fritta Pasta Salad paired with artichokes, ricotta, mint and a cooked tomato dressing.
Tom’s first pizza fritta happened a couple of summers ago in Naples. Volcanically hot tomato sauce, marbled with ricotta, funky guanciale (cured pig cheek) and basil, all encased in a huge half-moon of charred, chewy Neapolitan dough. Unsurprisingly, Tom’s second (and third, fourth, etc.) pizza fritta also happened on that trip. The one Tom had with artichokes and olives was his favourite, and it kindly led him here. To keep things vegetarian, switch the ’nduja for harissa or chilli crisp (or, indeed, a plant-based ’nduja). To make it vegan, switch the ricotta for a plant-based variety or a spoonful or two of moutabal. This recipe makes more dressing than you’ll need, but you’ll be glad of it later!
Here is how to make a pizza fritta pasta salad
Start by making the dressing. Off the heat, place the chunk of ’nduja, the basil sprig and the onion wedge in a medium-sized saucepan then tip the crushed tomatoes on top. Place over a high heat, then, once simmering, reduce the heat to low–medium. Cook for 20-30 minutes, stirring occasionally, by which time the tomatoes and ‘nduja should have broken down. Remove from the heat and leave to cool to room temperature, discarding the basil and onion. Transfer the sauce to a bowl and stir through the datterini tomatoes. Add the vinegar, olive oil and a good pinch of Maldon Chilli Sea Salt. Check for balance, then set aside to marinate. This ‘dressing’ keeps well for up to 3 days in the fridge and is great with lots of other things (just bring back up to room temperature before use).
Cook the pasta in plenty of salty boiling water until al dente (2 minutes less than the total packet instructions), then drain. Rinse briefly, until the pasta is just warm, then drain again.
Gently toss the pasta with roughly 200g (7oz) of your tomato dressing, then add the artichokes, olives, pine nuts and tear in the mint leaves. Toss again, then add the ricotta and gently marble through the dressed pasta (don’t overmix). If you like, finish with more ricotta, a pinch of Maldon Chilli Sea Salt and a drizzle of olive oil.
What is a Loaded Bloody Mary?
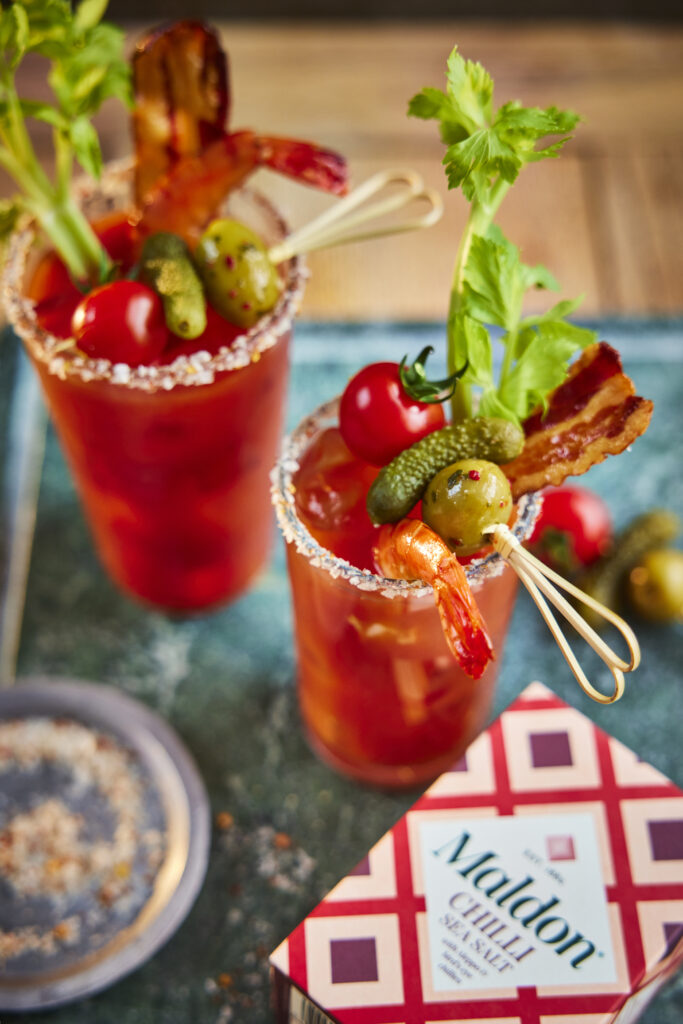
Elevate your weekend brunches with a fully loaded Bloody Mary recipe that promises a burst of flavour in every sip. A loaded Bloody Mary is an elevated version of the classic cocktail that enhances the basic blend of vodka, tomato juice, and seasonings with an array of savoury and sometimes spicy extras. Infused with Maldon Chilli Sea Salt, each glass features a tantalizing chilli sea salt rim that perfectly compliments the robust Bloody Mary mix. Garnished with crispy, candied bacon, shrimp, green olives, cornichons or pickles and a lemon wedge, this cocktail is a feast for the eyes and the palate! Get ready to impress your guests with a drink that’s as visually stunning as it is delicious.
How to Make a Fully Loaded Bloody Mary
A fully loaded Bloody Mary is an elaborate version of the classic cocktail that includes not just the standard ingredients but also a variety of garnishes and extras, making it almost a meal in itself. For a truly over-the-top brunch experience, transform your loaded Bloody Mary into a fully loaded masterpiece! You can follow the same basic steps outlined previously but with some additional flair:
Get Creative with Garnishes: Think beyond the celery stick. Consider skewers with olives, pickled vegetables, or even mini mozzarella balls. Sliders, mini quiches, or even a small grilled cheese can add a hearty touch.
Spice it Up (or Down): For a kick, add a dollop of sriracha or horseradish to the glass. Jalapeno slices or pickled peppers can also add a spicy touch. If you prefer a milder version, skip the hot sauce and opt for a squeeze of fresh lemon.
Rim it Right: Elevate the presentation with a flavoured rim. We used Maldon Chilli Sea Salt flakes for a fiery kick. You can also try a celery salt mixture, a smoky paprika dust, or even a toasted sesame seed rim for a unique twist. Remember, there are no hard and fast rules with a loaded.
Here’s how to make a Loaded Bloody Mary…
Place a large frying pan on the heat. Add the slices of streaky bacon and cook for 3 minutes on each side until crispy. Remove from the pan and set onto a plate with some kitchen paper to remove any excess oil.
Turn the heat down in the pan slightly and then add the two large prawns. Cook these for a couple of minutes on each side until bright pink and cooked through. Remove these from the pan and set aside too.
To assemble the bloody Mary’s start by creating the chilli salt rim for the glasses. Rub a little lemon juice around the top rim of each highball glass. Place some of the Maldon Chilli Sea Salt into a small plate and then turn the glass upside down onto the salt and press it in, so the salt sticks along the top.
Fill each glass with ice. Then pour in a 50ml measure of vodka into each. Next pour in the spiced tomato juice to fill up the glass. We like to splash in some tabasco and Worcestershire sauce at this stage, but this is up to your taste.
Finally garnish each glass with a stick of celery, some crispy bacon, a prawn, and a skewer with a cherry tomato, cornichon, and olive on. Drink and enjoy immediately.
What to serve with a Bloody Mary?
A cocktail is the best way to start a meal, especially if you’re having a Bloody Mary which packed full of delicious ingredients. We’ve listed below a few dishes that pair perfectly with this classic cocktail.
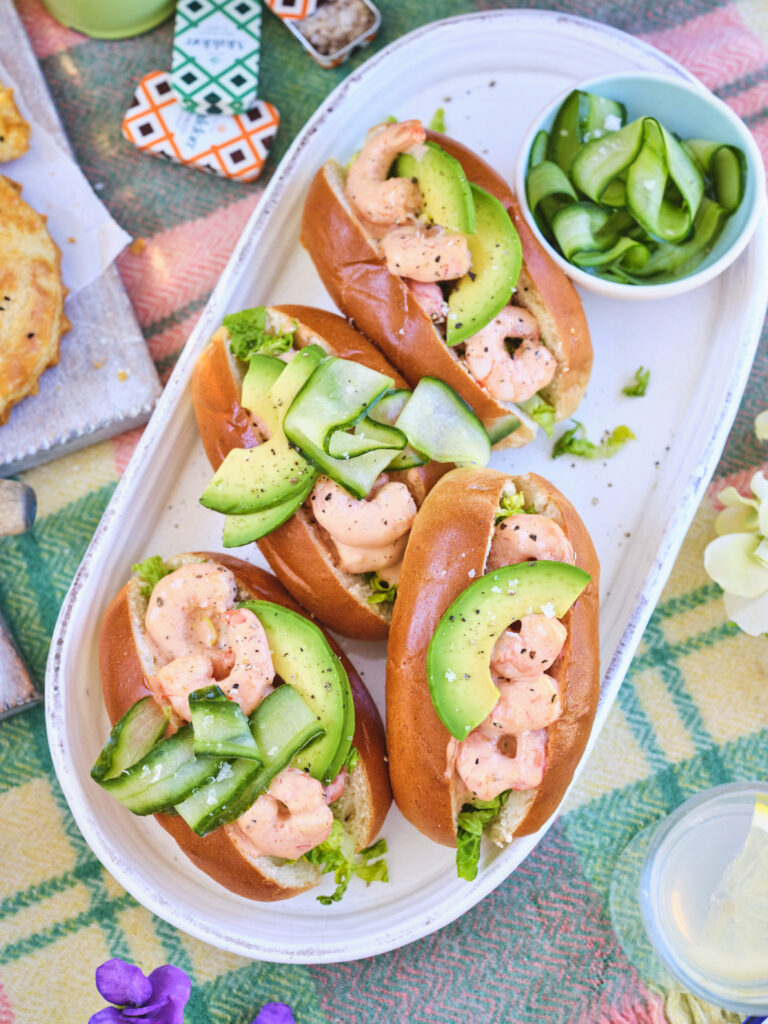
Because a Bloody Mary has a spicy kick to it, it compliments the mild, juicy prawns beautifully. The addition of the brioche bun also adds a gentle sweetness, balancing out the fiery pepperiness of the cocktail.
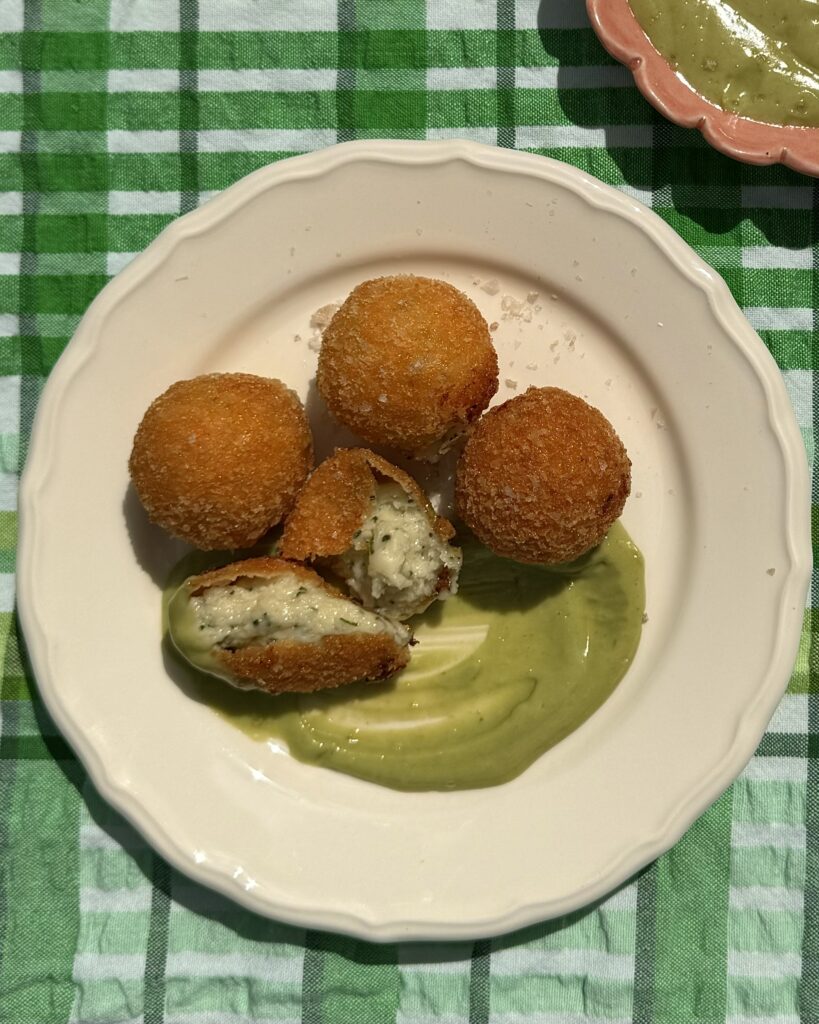
Dipping cheese in tomato sauce is a classic combination loved by many. Why don’t you transform this delicious pairing with Cheese and Chive Croquettes and a Bloody Mary mix instead. The zesty, peppery notes of the cocktail compliment the cheese and chive blend in the croquettes, made up of cheddar, greyer and mozzarella.
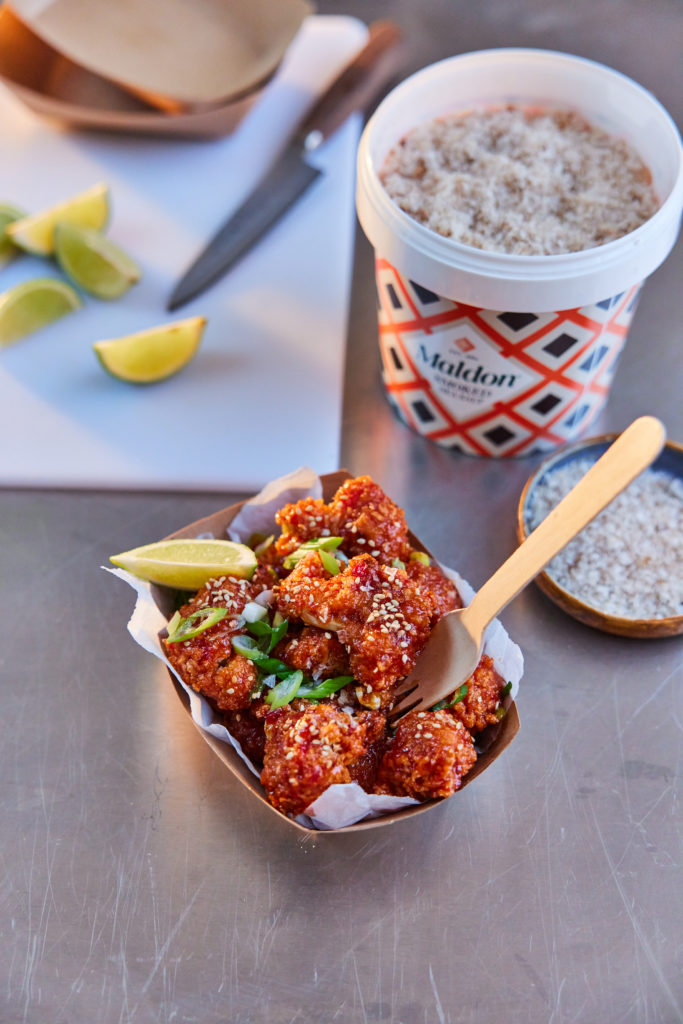
This is a great vegan and healthier alternative to cheese and chive croquettes. Cauliflower cooked bang-bang style provides a delicious crunch with every bite, which pairs with the silky smooth consistency of the Bloody Mary.
These ridiculously easy and very tasty skewers take just a couple of minutes to cook, so plan on making them as part of a bigger spread to get the most out of your good fuel. They make a lovely little nibble while you’re cooking your main course. It can be a little tricky to source, but you could also make these using morcilla, a delicious Spanish black pudding, if you can find some.
Here is how to make the skewers…
Fire up the barbecue ready for hot direct grilling but, as usual, leaving a fire-free zone on your grill so you can slide the skewers further from the heat. Use a small sharp knife to separate the orangey-pink coral from the scallop and drop both into a bowl. Add the chorizo, sage, garlic and olive oil. Season generously with salt and pepper and stir well to coat.
Starting and ending with chorizo (the more solid texture of which will hold everything else in place), alternately thread the can chill in the fridge for 30–60 minutes, if you like. When you are ready to cook, rest the skewers directly over the fire, either hung between two bricks, or onto hot clean grill bars. Grill for just a minute or so on each side until lightly caramelized. The fat from the chorizo will cause the fire to flare a little so if it’s all getting a bit much, slide a little further away from the fire.
Squeeze over some lemon juice and tuck in while sizzling hot.
Purchase ‘SCORCHED’ by Genevieve Taylor
Live-fire expert Genevieve Taylor covers everything you’ll ever need to know about buying and cooking all kinds of fish in her third cookbook: Scorched. From cooking whole dish, fillets, shellfish to burgers and skewers, this is the ultimate guide to barbecuing fish!
You can purchase your very own copy here, where you can become inspired with over 85 recipes and gain insight on how to set up your barbecue, sourcing your fuel and lighting your fire.
Photo by Min An: https://www.pexels.com/photo/two-person-standing-near-assorted-color-paper-lanterns-1313814/
What is the Lunar New Year?
The Lunar New Year is one of the most celebrated holidays in Chinese culture. It marks the first day of the year in the Lunar Calendar, where celebrations generally run for 15 days. With each day comes a special meaning and traditions to honour, but this can vary between regions and cultures.
It’s important to note that the date of the Lunar New Year changes every year. For 2024, this will occur from 10th February until the 15th Day.
On the first day, many families will visit other family members, starting with the most senior members first. Firecrackers, dragon and lion dances occur to chase away the evil monsters, named Nian.
The remaining days are filled to the brim with festivities; families will visit relatives, friends and temples, whilst eating certain types of dishes in the hopes of a prosperous and hopeful new year. On the final fifteenth day, we end with the Lantern Festival, where people hang glowing lanterns in temples or carry them during a night time parade , marking the first full moon after the Lunar New Year, completing the celebrations.
Photo by RDNE Stock project: https://www.pexels.com/photo/wood-man-red-love-6691853/
The Chinese Zodiac Calendar
For many cultures, each year is associated with an animal from the Chinese Zodiac calendar. There are 12 animals in the Chinese Zodiac calendar, which are the following:
Rat
Ox
Tiger
Hare
Dragon
Snake
Horse
Sheep
Monkey
Rooster
Dog
Pig
Here is the below list for the animals associated with the upcoming years:
10th February, 2024 – Year of the Dragon
29th January, 2025 – Year of the Snake
17th February, 2026 – Year of the Horse
The Year of the Dragon is associated with bravery, strength and luck. As a result, this Lunar New Year will be a time to celebrate Chinese traditions, eating rich cuisine and making wishes for a joyous new year.
Lunar New Year and Dumplings
Dumplings symbolise longevity and wealthy. This is because dumplings look like money pouches, which represent fortune and prosperity for the coming year. More so, dumplings are a great way to spend time with your family, as they are mixed by hand for a certain amount of time to ensure the meat is succulent and juicy. As a result, you can enjoy getting creative in the kitchen with relatives, sharing your appreciation for delectable foods and festivities to come.
In this recipe, we take on the classic Chinese dumplings with a ‘fiery‘ twist to represent the Year of the Dragon. We do this by using Maldon Chilli Sea Salt flakes, which provide a deliciously spicy, aromatic taste that works perfect with the pork meat.
If you like the ‘spicy‘ things in life, we recommend cooking up a few Chicken momos, paired with a beautiful tomato chilli chutney. However, if you are not too keen on the heat, why not whip up our pulled pork bao buns – they buns are so soft and fluffy.
If you are a vegetarian, you can swap out the pulled pork for sticky miso roasted aubergine that mimics the taste and texture of meat.
Recipe created by: https://www.instagram.com/ugcwithnav/
How to make Chinese dumplings
Mix all sauce ingredients (except oil) in a bowl. Heat neutral oil to its smoking point – watch closely, it smokes quickly! – then drizzle sizzling oil over the sauce for a fiery kick.
For the dumpling filling, place the pork, egg, chicken stock, cornflour, Maldon Chilli Sea Salt, sesame oil, shiitake mushrooms, birds-eye chilli and Chinese garlic chives in a large bowl. Mix vigorously for 2-3 minutes.
Place a small teaspoon of filling into the centre of a dumpling wrapper, dab the edges with water and fold the wrapper over the filling. Pinch in the sides and squeeze to create pleats for a classic dumpling look.
Then it’s up to you if you’d like to steam some or pan fry some but we’re doing both!
Place your dumplings in a steamer. On high heat, add 2 cups of boiling water to a wok. Place your dumplings in the steamer, ensure they’re not overcrowded and steam for about 10-15 minutes on medium heat until they look glossy and cooked through.
For that irresistible crispy bottom, heat a teaspoon of neutral oil in a non-stick pan, place your dumplings in the sizzling oil. Ensure not to overcrowd the pan. Once the bottoms are browned (takes 3-4 minutes), add the cornstarch slurry, cover with a lid (10-15 minutes) and cook until they’re cooked through.
Once done, serve up your gorgeous spicy dumplings. Add a final pinch of Maldon Chilli Sea Salt and pair them with your spicy sizzling dumpling sauce!
Happy Lunar New Year!
Recipe created by: https://www.instagram.com/ugcwithnav/
What to serve with Chinese dumplings
A great dish to serve with Chinese dumplings is a hearty chicken noodle soup. The soup is full of a rich, flavourful both and soft noodles that compliments the succulent dumplings perfectly. It’s the perfect way to turn your dumplings from an appetizer to a full meal!
Pairing your dumplings with a refreshing cucumber salad is a match made in heaven! The crispness from the cucumbers provides a wonderful contrast to the soft, warm dumplings.
Why not try using a delicious Chinese Curry sauce to drizzle on top of your dumplings. This sauce is very rich with a bundle of aromatic spices which offer a warm, slightly spicy flavour. You can find most pre-mixed brands in the best retailers, including Goldfish Chinese Curry Sauce.
Can I cook dumplings in an air fryer?
You can air-fry frozen dumplings very easily. Make sure to add an oil spray on top of the frozen dumplings so that they cook crispy and not come out dry. You want to make sure the outside stays nice and golden and cooked perfectly on the inside.
All air fryers cook differently, but we recommend a base time of 6-8 minutes on 380°F/193°C. Flip the dumplings over and continue to cook for another 2-6 minutes until crispy.
If you are wanting to cook Chinese dumplings in the air fryer from scratch, you will need to make sure that the dumpling’s filling is cooked first, especially if you are using meats like pork, chicken or beef. After you have cooked the filling, you can then proceed to making the dumplings following the above recipe, but instead of frying them, pop them in the air fryer for 6-8 minutes, turning them over and cooking for an additional 2-6 minutes until nice and golden.
Can you freeze Chinese dumplings?
According to Expondo, you can freeze dumplings depending on how you prepared them.
Raw dumplings can be stored in the freeze for up to 3 months, whereas cooked dumplings can only be stored in the freeze for 4 weeks. It’s important to note that the dumplings, raw or cooked, should not be touching each other. If they are touching, the dumplings will stick together into a large clump, and once thawed, will rip the dough – ruining the perfect parcel you have created.
Struggling for ideas on what to cook during the Christmas holidays? Why not combine all the best flavours of Christmas and wrap them under a blanket of golden puff pastry with our showstopping sausage rolls!
We use good quality pork sausages as the main component for our rolls, with bursts of sweet cranberries and chestnuts for a nutty bite!
Why add salt to sausage meat?
Adding a pinch of Maldon Sea Salt to the raw sausage meat will improve the texture and enhance the flavour of the pork, whilst also lowering the water content, resulting in a perfectly seasoned meat ready to be used for making sausage rolls!
Here is how to make our Christmas Sausage Rolls…
Start by making the filling – in a large bowl mix together the sausage meat, cranberries, chestnuts, sage, cranberry sauce, some Maldon salt and cracked black pepper.
Unroll the pastry, place half the sausage meat down the length of it on one side, and then fold the rest of the sheet over it, using the egg wash to seal it tightly. Repeat this with the second sheet of pastry. Press the seal using a fork and then place the two long sausage rolls into the fridge for 30 minutes to firm up.
Preheat the oven to 180C.
After 30 minutes, remove the sausage rolls and then cut them into 6 individual sausage rolls – so 12 in total. Place them onto a baking tray lined with parchment paper and brush them all over with egg wash. Sprinkle the tops with nigella seeds and then bake in the oven for 15 minutes. They should be golden brown and crisp on top.
Remove from the oven and allow to cool slightly before serving with extra cranberry sauce for dipping and a final sprinkle of Maldon Salt.
Can you make these vegetarian?
Absolutely! We make a delicious meat-free version of this recipe, where we use vegetarian sausages, finished off with black sesame seeds. There are many well-known brands that offer meat-free alternatives, including Richmond, Linda McCartney and Cauldron.
What to serve with sausage rolls?
Sausage rolls are the ultimate comfort food – there’s no doubt about that! So, when your are baking these for a gathering, what other tasty finger foods and side dishes could you serve?
Firstly, homemade chips. These are the perfect companion to your sausage rolls. The chip’s crispy, golden skins have the same soft interior as of the humble sausage roll, making it a match made in heaven.
If you are looking for something with a pinch of spice, try our BBQ sweetcorn, paired with a harissa and coriander butter. The smoky flavours contrast the sweet burst of cranberries in the sausage rolls, playing with that irresistible sweet and spicy flavour balance.
Both delicious and hearty, this pie recipe is a comfort food classic which is loved by many family and friends. Being the secondary part to the series of using chicken three ways, we use roughly 100g of leftover chicken from grilling it in our within Spatchcock BBQ Chicken recipe.
We use a filo pastry for a lighter topping option, however you are welcome to use shortcrust pastry instead for a firmer option.
Here’s how to make our Chicken, Leek and Bacon Filo Pie…
Start by making the white sauce for your pie filling. In a large pan add 100g of butter and allow it to melt. When the butter begins to foam, add the plain flour and use a wooden spoon to stir it in and create a paste. Cook this for couple of minutes until it begins to smell biscuity.
Then take the pan off the heat and add a splash of the milk, use a whisk to immediately stir this in to avoid lumps. As soon as the milk is absorbed, add another splash making sure to whisk it in fully. Alternate doing this and placing the pan back on the heat to allow it to bubble and thicken between each addition. Keep going until all the milk has been added and you are left with a thick, creamy, and smooth sauce.
Turn the heat off the white sauce and stir in the wholegrain mustard, Maldon Salt and cracked black pepper to taste. Check the seasoning and then set aside.
In another pan, add the lardons and cook until they are beginning to turn crispy. Now add the sliced leeks and diced onions. Keep cooking these until they are fully softened and translucent.
Once the leeks and onion are soft, add the garlic and cook for a further couple of minutes. Then add the leftover shredded chicken and warm through.
Finally stir this mixture into the white sauce and add the chopped tarragon.
Preheat the oven to 180C Fan.
Take a small pie dish and pour the filling in.
Take one sheet of filo pastry at a time and lay it onto your board.
Brush both sides with the final 100g of melted butter, and then use your hands to scrunch the filo up and place on top of the pie filling. Continue to do this with the remaining filo sheets until the whole pie top is covered.
Place it into the preheated oven and bake for about 15 minutes until the filo is golden brown and crispy on top.
Remove from the oven and allow it to sit for a couple of minutes before serving alongside your favourite green vegetables.
Loaded fries are deliciously easy to make but hold so much flavour you’ll be finding yourself grabbing for seconds! It is the ultimate comfort food to be shared amongst your guests whilst watching a game on the TV.
When it comes to the fries, there is no shame in using shop bought, especially if you are tight for time! However, if you would like to make your own, make sure you wash and peel your potatoes first. Peeling is very important for making fries as the skin can become quite bitter when kept on and baked.
For toppings , we used chorizo; spring onions and pickled jalapenos to give heat to the dish, whilst also adding cheese and sour cream to add a level of creaminess.
Start by cooking the fries according to the packet instructions (no shame in shop bought here!). Alternatively, if you would like to make your own, preheat your oven to 200C. Cut 600g worth of potatoes into finger length size, coating them in oil and a generous sprinkling of Maldon Salt. Bake for 40 minutes or until golden.
While the chips are cooking make the pickled red onions. Place the finely sliced red onion in a large bowl and add the Maldon Salt, then scrunch the salt into the onions to help soften them. In a small pan heat together the vinegar, water, and caster sugar until the sugar dissolves. Then pour the vinegar water over the onions and mix well, then set aside to pickle and cool.
When the fries come out the oven, spread them across a baking tray – if they aren’t already. Then sprinkle and toss in the smoked paprika. Grate over the cheddar cheese and then place them back into the oven until the cheese melts.
Remove from the oven and scatter over the crispy chorizo pieces, some pickled jalapenos, drizzle over the sour cream. Drain the pink pickled onions and then scatter some across the top too and finally finish with some sliced spring onions and coriander leaves before serving.
This can be made vegetarian or even vegan very easily. Simply substitute the kefir for water or nut milk and leave out the chorizo! These are so satisfying to eat and they keep so well so it is worth making ten of them.
The original filling, Olia’s dad’s favourite, has just the split peas and caramelised onion, but I do love to add the saltiness and spice of chorizo. Olia’s husband is vegetarian though, so she often split the peas and onions in two, and add chorizo to one and leave the other meatless.
To make the dough mix the kefir with yeast, sugar, Maldon Salt and add 350g of the flour, all in one go. Mix this using a spoon. The dough will look quite wet – that’s what you want. Cover it and leave somewhere warm for an hour to rise.
Meanwhile cook the split peas according to instructions. The packet might advise to soak the peas, but I don’t normally bother, the ones I use cook quickly enough. Cook them until they are soft, drain and let them cool.
Heat the oil in a frying pan and add the onions and a generous pinch of Maldon Salt. The salt will make the onions extract liquid and there will less chance for them to burn if you forget about them for a moment. Cook over a medium-low heat for about 15-20 minutes or until they look nice and brown. If the pan becomes dry during cooking, add little spaces of water and deglaze the pan.
Take the onions out and add to the bowl of peas.
Don’t rinse out the pan, add another small drizzle of oil and cook the chorizo for 3 minutes or until just cooked. Scrape the chorizo and the flavoursome oil into the peas and onions.
When the dough doubles in size, flour the surface really well and pour the dough out onto the surface. Then keep sprinkling the top of the dough with flour and using a dough scraper or floured hands keep on folding it in on itself. It should remain very soft, but should become less sticky.
Divide the dough into 10 pieces, they should each weigh about 70g. Knead a little flour into each piece, so they become less sticky. Then one by one, flatten each piece out into a circle (about 12cm diameter) and add 2 tbsp of the filling in the middle. Bring two edges up and pinch them together, then flip it over onto a floured surface, seam-side down and flatten the bun gently with the palm of your hand. Keep them on a floured tray or board until ready to fry.
Have a plate lined with kitchen paper – to absorb the oil – at the ready.
Take a large frying pan and fill with oil. It should be a good 2-3 fingers deep. When the oil is hot and shimmering, carefully lay in the bun, put as many as the pan would fit to make turning comfortable for you. Cook them over a medium heat, lowering the heat if you feel the buns are starting to colour too quickly. Cook for about 2 minutes or until the underside is golden and gently flip (be careful not to splash yourself or people around you) and cook on the other side until golden brown.
Then lift out and drain on the kitchen paper. These are good as they are with some fresh salad on the side or alongside a simple chicken or vegetable broth.