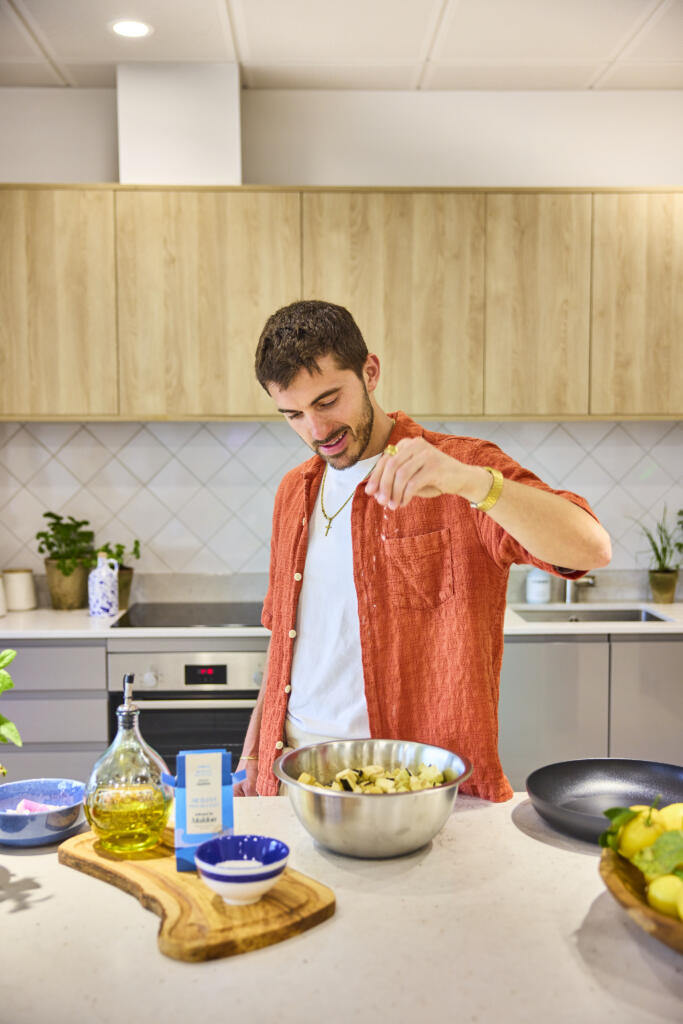
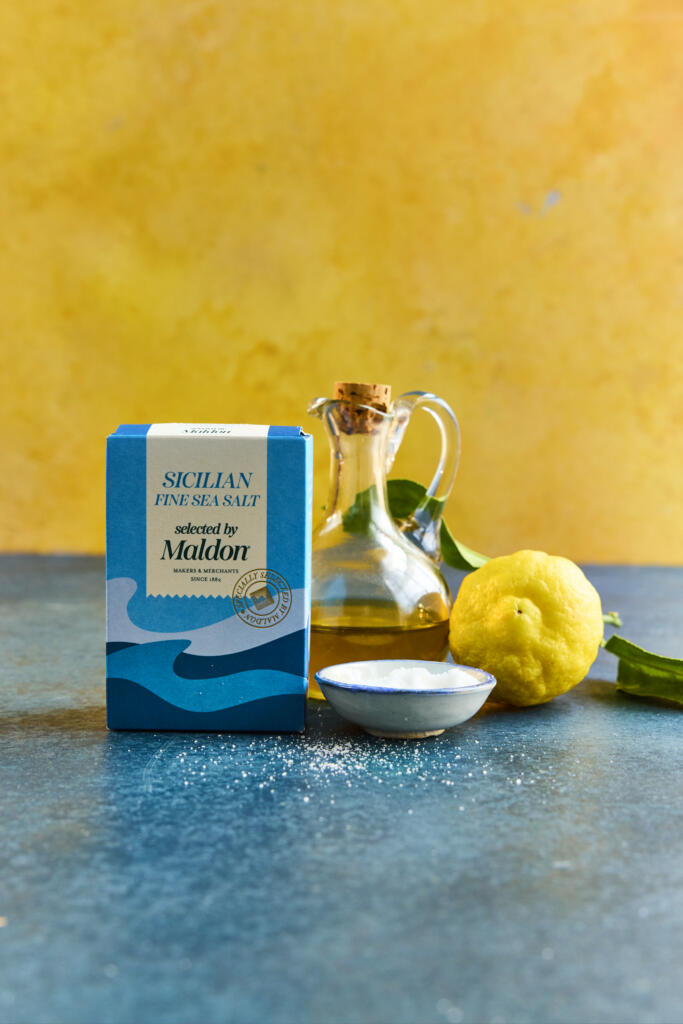
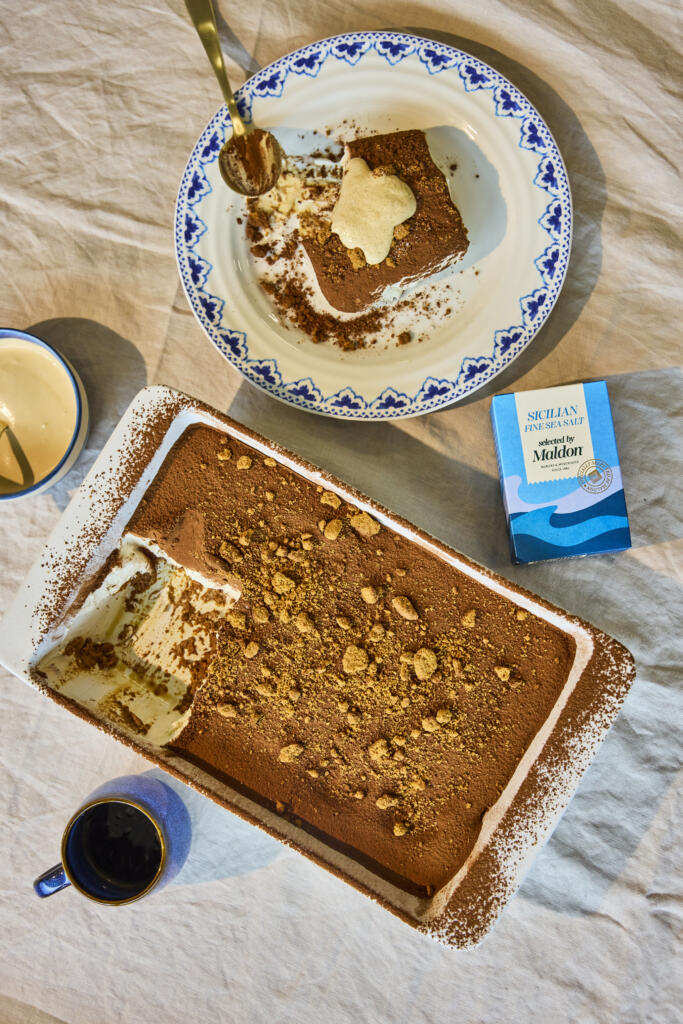
To celebrate the launch of Sicilian Fine Sea Salt, Selected by Maldon, Maldon Salt has partnered with award-winning Italian cook Giuseppe Federici (@sepps) to showcase recipes inspired by the flavours, traditions and family food culture that define Italian cooking. This indulgent Vegan Tiramisu combines rich espresso, creamy Biscoff filling and a subtle salted coffee cream, creating a delicious twist on one of Italy’s most iconic dessert.
Welcoming Giuseppe Federici
Giuseppe Federici (@sepps) is a second-generation British Italian who comes from a long line of passionate food lovers, with Italian home cooking at the heart of everything he creates.
Today, Giuseppe shares authentic Italian recipe videos, family traditions and cooking inspirations with his hugely engaged audience. His beloved videos cooking alongside his Nonna have captured the hearts of millions and inspired his cookbook – Cooking with Nonna – a collection of treasured family recipes and stories based down through generations with a plant-based twist.
Introducing Sicilian Fine Sea Salt, Selected by Maldon
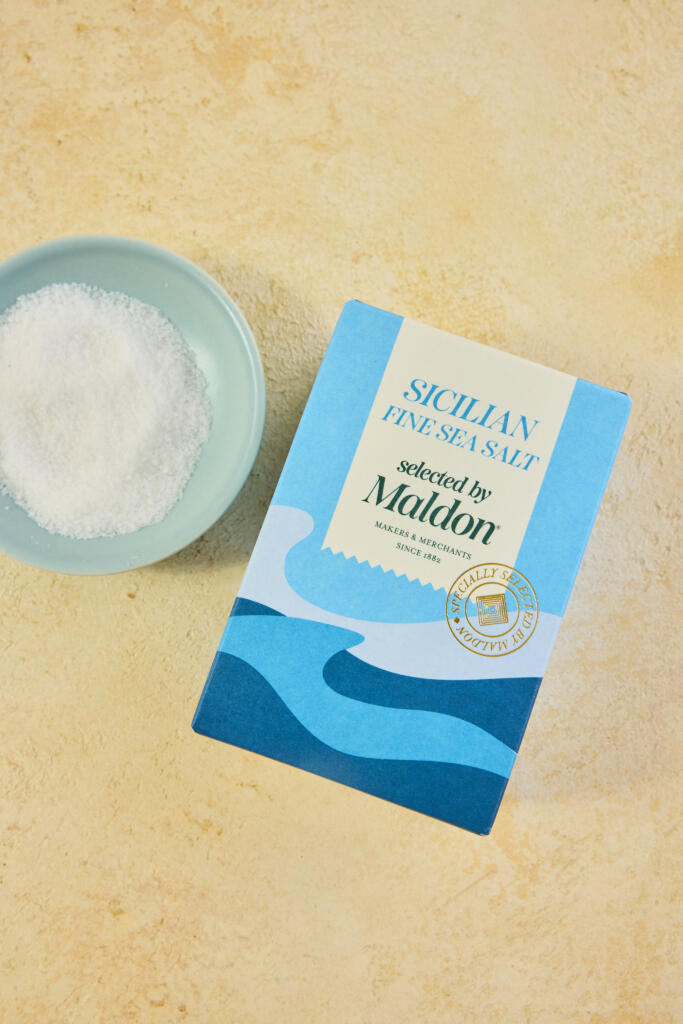
Harvested from the historic salt pans of Trapani on Sicily’s western coast, Sicilian Fine Sea Salt, Selected by Maldon is celebrated for its balanced flavour and delicate texture. Naturally dried in the Mediterranean breeze and selected by Maldon’s Master Salt Merchants, this versatile fine sea salt dissolves easily and seasons evenly throughout cooking and baking.
In desserts, a touch of fine sea salt helps enhance sweetness, balance richness and enhances complex flavours such as coffee, chocolate and caramel.
How to Make Vegan Tiramisu with Biscoff
This irresistible vegan tiramisu layers espresso-soaked Biscoff biscuits with a silky cream made from vegan cream cheese, plant-based cream and Biscoff spread. Finished with cocoa powder, crunchy Biscoff crumbs and a luxurious salted coffee cream, it’s a crowd-pleasing dessert that’s perfect for entertaining and special occasions.
A small amount of Sicilian Fine Sea Salt, Selected by Maldon in the coffee cream enhances the roasted coffee notes while perfectly balancing the sweetness of the dessert.
For the Tiramisu
Ensure the espresso is completely cooled before starting.
We used the brand-new KitchenAid Artisan Plus Stand Mixer in Wild Blueberry for mixing. Mix the vegan cream cheese and Biscoff spread until smooth. In a separate bowl, whip the plant-based cream to soft, pourable peaks, then whisk in the vanilla and sugar.
Gently fold the cream cheese mixture into the whipped cream until fully combined.
Arrange a layer of Biscoff biscuits in a serving dish and lightly drizzle with the cooled espresso. Repeat with a second layer.
Spoon over a layer of the cream mixture, then repeat the layers of biscuits, coffee and cream until the dish is filled, finishing with cream on top.
Chill for at least 2 hours, or overnight for best results.
Before serving, dust with cocoa powder, sprinkle over the Biscoff crumbs and finish with a spoonful of salted coffee cream.
For the Salted Coffee Cream
Place the plant cream, vanilla extract, cacao butter, sugar, Sicilian Fine Sea Salt, vanilla essence, espresso and instant coffee into a saucepan.
Heat gently, stirring frequently, until the mixture is smooth and fully combined. Do not boil.
Remove from the heat and allow to cool completely before serving or storing.
Bring Italian Dolce to Your Table
Whether served as as the grand finale to an Italian feast or prepared for effortless entertaining, this Vegan Tiramisu delivers layers of coffee-soaked indulgence and creamy sweetness in every spoonful.
Sicilian Fine Sea Salt, Selected by Maldon is available now from Tesco, Sainsbury’s, and Ocado. For more authentic Italian recipes and family favourites, explore Giuseppe Federici’s cookbook, celebrating the dishes, traditions and stories.
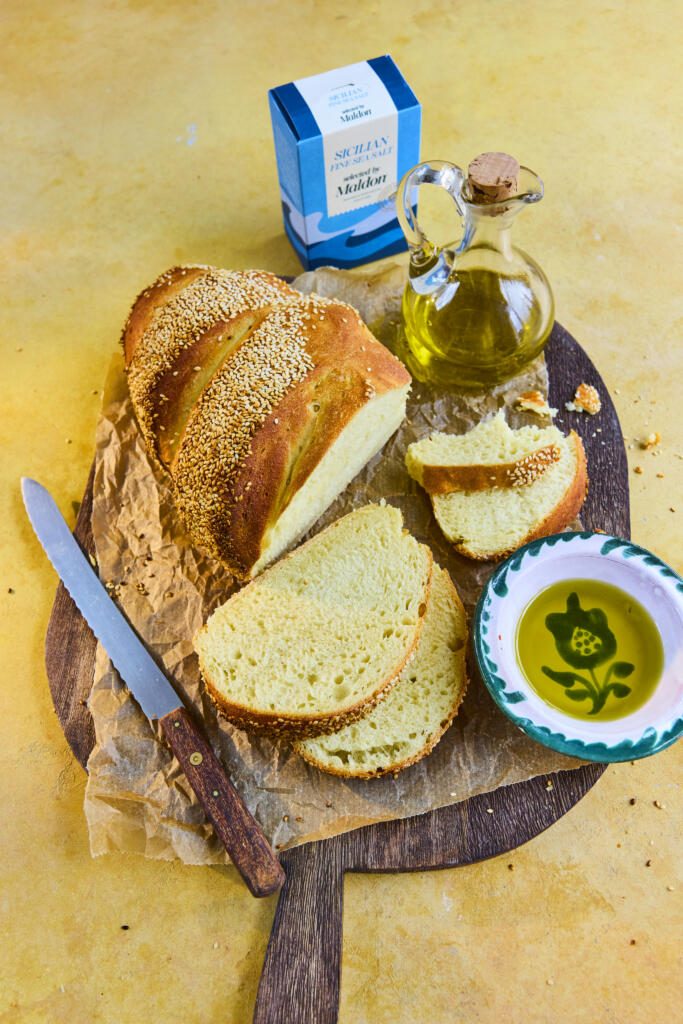
Golden, sesame-crusted and made with nutty durum wheat semolina, this Sicilian-style loaf is far simpler than it looks. Just semolina, water, yeast and Sicilian Fine Sea Salt, Selected by Maldon come together into a soft dough, rolled in sesame seeds and baked until the crust crackles. It’s the perfect bread for mopping up sauces or building an antipasto spread.
Why You’ll Love This Sesame Semolina Bread
A Golden Sesame Crust: Rolling the loaf in sesame seeds gives a nutty, crunchy crust and a beautiful finish.
Just a Few Ingredients: Semolina, water, yeast, sesame and a good sea salt are all you need for a proper Sicilian loaf.
Soft, Open Crumb: A long, slow prove rewards you with a light, springy crumb under that crisp crust.
How to Make Sesame Semolina Bread (Step-by-Step)
Start the dough: Place the semolina flour in a stand mixer and add the 250ml of warm water. Mix and knead for 5–10 minutes until there are no dry patches of flour. Cover the bowl with cling film and rest for 1 hour.
Add the yeast and salt: Mix the 50ml of water with the yeast and add it to the dough along with the Sicilian Fine Sea Salt, Selected by Maldon. Knead with the dough hook for 10–15 minutes until smooth and coming away from the sides of the bowl.
First prove: Cover the bowl again with cling film and leave to prove for 2–3 hours, or until the dough has tripled in size.
Shape and coat in sesame: Tip onto a lightly floured surface and shape into a long oval loaf (or a round loaf or buns). Scatter the sesame seeds on a tray, wet the top of the loaf lightly with water, then roll the top in the seeds to coat well. Set on a lined tray and score the top a few times with a sharp knife.
Second prove: Cover loosely with a plastic bag or cling film, raising the edges so it doesn’t stick to the dough, and prove for a second time for 45 minutes–1 hour.
Bake: Preheat the oven to 200°C. Remove the covering and bake for 15–20 minutes until golden brown – it should sound hollow when tapped on the base. Cool for at least 10 minutes before slicing and serving.
Tips for the Perfect Sesame Semolina Bread
Don’t rush the prove: The long, slow first prove is what gives the loaf its flavour and light, open crumb.
Wet before seeding: Lightly wetting the top of the loaf helps the sesame seeds stick for an even, golden crust.
Tap to test: A properly baked loaf sounds hollow when you tap the base – if not, give it a few more minutes.
What to Serve with Sesame Semolina Bread
This loaf is endlessly useful across a Sicilian table. Serve it warm with olive oil and a pinch of sea salt, alongside homemade cavatelli or grilled swordfish to mop up the juices, or as the base of an antipasto with burrata and tomatoes. It also makes excellent toast for the days after baking.
Frequently Asked Questions
Can I make rolls instead of a loaf?
Yes – shape the dough into small buns rather than one loaf, coat them in sesame and reduce the baking time, checking from around 12 minutes.
Do I need a stand mixer?
No. You can knead the dough by hand, though it will take a little longer to reach a smooth, elastic texture – around 12–15 minutes.
Why didn’t my bread rise?
The most common causes are yeast that’s past its best or a proving spot that’s too cold. Use fresh fast-action yeast and prove somewhere warm and draught-free.
Fluffy Scrambled Eggs on Sourdough with Maldon Pepper Sea Salt
This classic scrambled eggs recipe delivers soft, creamy eggs served on toasted sourdough, finished with the bold flavour of Maldon Pepper Sea Salt. Perfect for a quick breakfast or brunch, this easy dish uses simple ingredients elevated with premium seasoning for a rich, satisfying result.
How to Make Classic Scrambled Eggs with Maldon Pepper Sea Salt
Crack the eggs into a bowl and whisk gently with a fork.
Add a knob of butter to a frying pan over a medium-low heat.
Once melted and foaming, pour in the eggs.
Using a rubber spatula, gently stir the eggs, moving them slowly to prevent overcooking.
Meanwhile, toast the sourdough bread and butter it.
Cook the eggs for 3-5 minutes until soft and slightly underdone in the centre.
Remove from the heat and give a final stir.
Spoon the eggs onto the toast.
Finish with a generous pinch of Maldon Pepper Sea Salt and garnish with chopped chives. Serve immediately.
Tips for Perfect Scrambled Eggs
Cook low and slow for creamy, soft eggs.
Stir gently to avoid breaking the curds too much.
Remove from heat slightly early – residual heat will finish cooking.
Finish with Maldon Pepper Sea Salt for a balanced peppery flavour and texture.
What is Maldon Pepper Sea Salt
Maldon Pepper Sea Salt is a premium blend of Maldon’s signature pyramid-shaped flakes combined with Tellicherry and pink peppercorns, designed to enhance flavour with both seasoning and spice.
Why use Maldon Pepper Sea Salt on scrambled eggs?
It adds both texture and a perfectly balanced peppery finish, elevating simple scrambled eggs without the needs for separate salt and pepper.
How do you make scrambled eggs soft and creamy?
Cook the eggs over low heat, stir gently, and remove them before fully set so they stay soft and silky.
Are Burford brown eggs good for scrambled eggs?
Burford brown eggs are known for their rich yolks and flavour, perfect when making scrambled eggs. We like to use Clarence Court Burdford Brown eggs as they have a dense golden yolk.
Can I make scrambled eggs without butter?
Yes, but butter adds richness and helps create a creamy texture. You can substitute with olive oil if preferred.
What bread is best with scrambled eggs?
Sourdough is ideal due to its texture and slight tang, but any crusty bread works well.
Are scrambled eggs healthy?
Eggs are high in protein and nutrients. This dish is balanced but contains fats from butter and eggs, so enjoy as part of a varied diet.
Can I add extra topping to scrambled eggs?
Yes – popular toppings to scrambled eggs include smoked salmon, avocado spinach, or mushrooms.
Serving Suggestions
Serve these classic scrambled eggs with Maldon Pepper Sea Salt with:
Smoked salmon for a luxury brunch
Avocado slices for a modern twist
Grilled tomatoes or mushrooms for a full breakfast experience
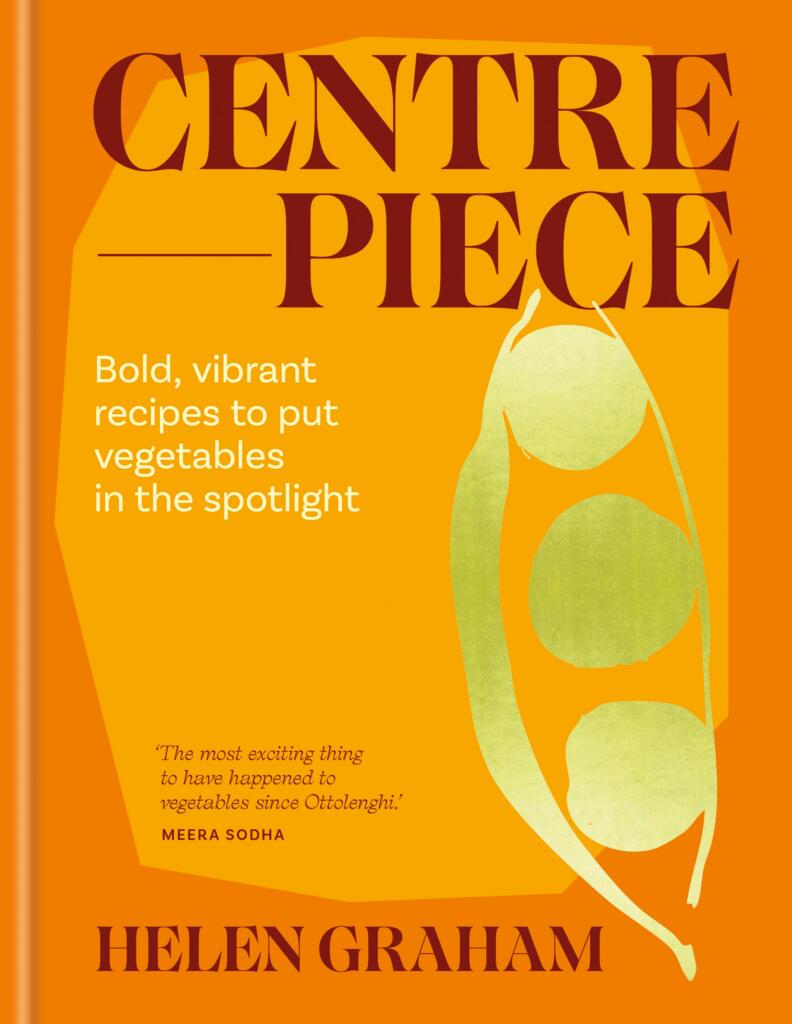
Centrepiece by Helen Graham
Helen Graham. Captured by Yuki Sugiura
Vegetables take their well-deserved moment in the spotlight in Centrepiece, the beautiful debut cookbook from chef and food writer Helen Graham. Known for her bold, generous flavours and deeply considered approach to plant-forward cooking, Graham celebrates vegetables not as an afterthought, but as the heart of the table. Drawing inspiration from the Middle East, North Africa, and her Ashkenazi Jewish heritage, Centrepiece is a vibrant collection of recipes designed to be cooked, shared and lingered over – dishes that feel just as fitting for a dinner party as a relaxed weekend meal at home.
In this feature, we’re diving into one of the book’s standout recipes: Pilpil-style Roast Cabbage with Shiitake and Preserved Lemon. It’s a dish that perfectly captures the spirit of Centrepiece. – humble ingredients transformed through thoughtful technique and fearless seasoning. Roasted until deeply caramelised, the cabbage is paired with savoury mushrooms, sharp preserved lemon and a spicy pilpil-inspired oil that brings warmth and depth to every bite. It’s a simple yet striking, and a brilliant example of how Graham elevates everyday vegetables into something truly special.
Why Maldon Salt is important in pilpil-style dishes
Pilpil-style cooking (inspired by Basque methods) is all about emulsification, heat and purity of ingredients. Maldon Sea Salt isn’t just seasoning here – it’s structure.
Draws out moisture – Maldon Sea Salt helps pull excess water from the cabbage and mushrooms as they roast. This encourages deep caramelised, intensifying sweetness in the cabbage and umami in the shiitake rather than steaming them.
Balances bold elements – Preserved lemon is intensely salty and citrusy; chilli oil brings heat. A good pinch of Maldon Sea Salt lets you season precisely, so those assertive flavours stay bright and balanced, not muddled or flat.
Supports emulsification – In pilpil-style oils, Maldon Sea Salt helps stabilise the emulsion between oil, vegetable juices, and aromatics – giving you that glossy, clinging finish instead of a split or greasy sauce.
How to make Pilpil-style Roast Cabbage with Shiitake & Preserved Lemon
The word pilpil actually refers to a Basque sauce for fish in which oil and garlic come together with the cooking juices, emulsifying into a thick sauce. The sauce is named pilpil after the way it sputters in the pan. This is my homage to that sauce, with the addition of persevered lemon.
Preheat the oven to 180c, Gas Mark 6.
Line a baking tray with nonstock baking paper.
Place all the ingredients for the shiitake marinade in a bowl and whisk until thoroughly combined; it will form a stiff paste.
Cut the cabbages in half through the cores and place on the lined tray. Spoon one-quarter of the marinade on the cut side of each cabbage and use the back of the spoon to press it into all the crevices, ensuring the cut side is evenly covered. If any areas look a little dry, give them a drizzle of olive oil. Toast for 30-35 minutes until the marinade is starting to look caramelised and you can slide a knife easily through the cores.
Meanwhile, for the sauce, place all the ingredients except the oil in a jug and use a stick blender to blitz it into a fine, paste. With the blender still on, slowly add the olive oil, a trickle at a time, until it’s all combined and you have a thickened, pale yellow sauce.
Make the spiced parsley by stirring all the ingredients together in a small bowl.
Smooth the pilpil sauce on to a serving dish, top with the warm cabbage halves sprinkled over the spiced parsley to serve.
Have You Tried it?
Centrepiece, debut cookbook by Helen Graham
If you try this recipe at home, we’d love to see it – tag us in your creations so we can share your wonderful cooking with our community. And if you’re feeling inspired to whip up delicious recipes in your kitchen, you can purchase Centrepiece by Helen Graham here.
A Maldon Salt, Meliz Berg & AEG Collaboration
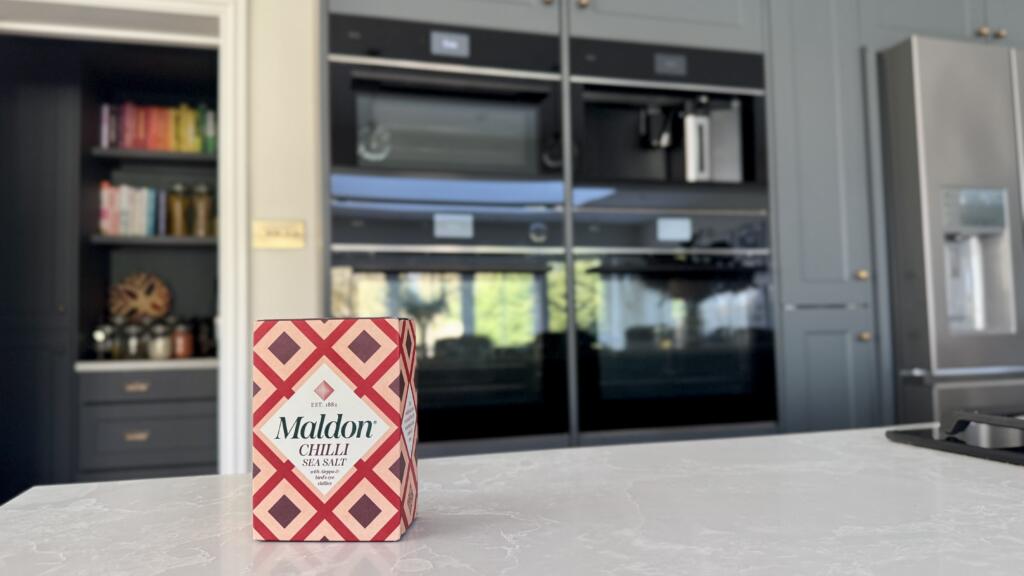
Maldon Chilli Sea Salt with AEG Kitchen Appliances
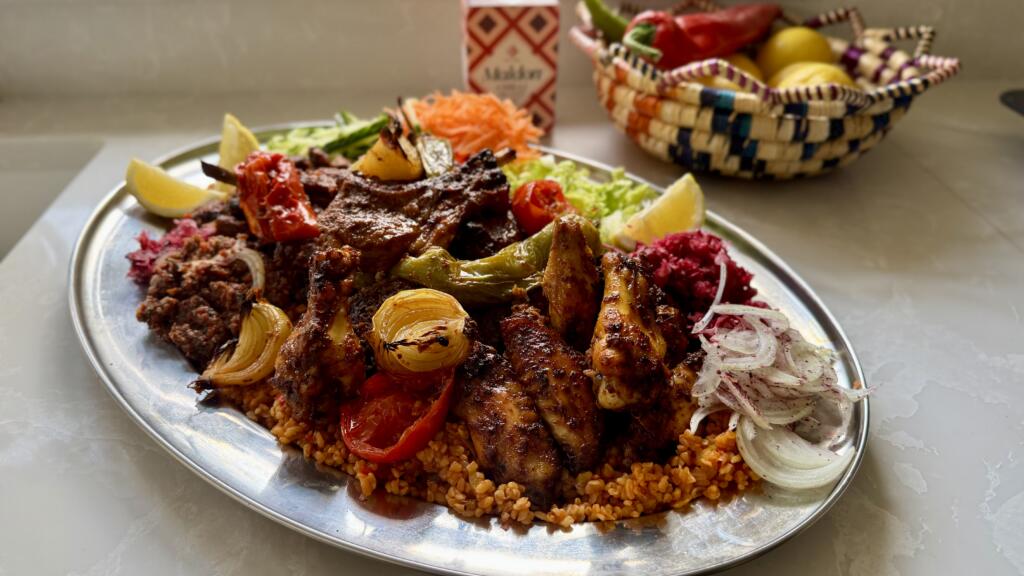
If there’s one thing that unites us all, it’s the joy of a proper ‘fakeaway’ – big flavour, minimal fuss, and the kind of pread that makes everyone crowd around the table. In collaboration with Maldon Salt, celebrated food writer Meliz Berg, and AEG Kitchen Appliances, this Ultimate Mixed Grill Platter brings together bold marinades, perfectly cooked meats and vegetables, and a pinch of Maldon Chilli Sea Salt to finish.
Why Maldon Chilli Sea Salt Makes the Difference
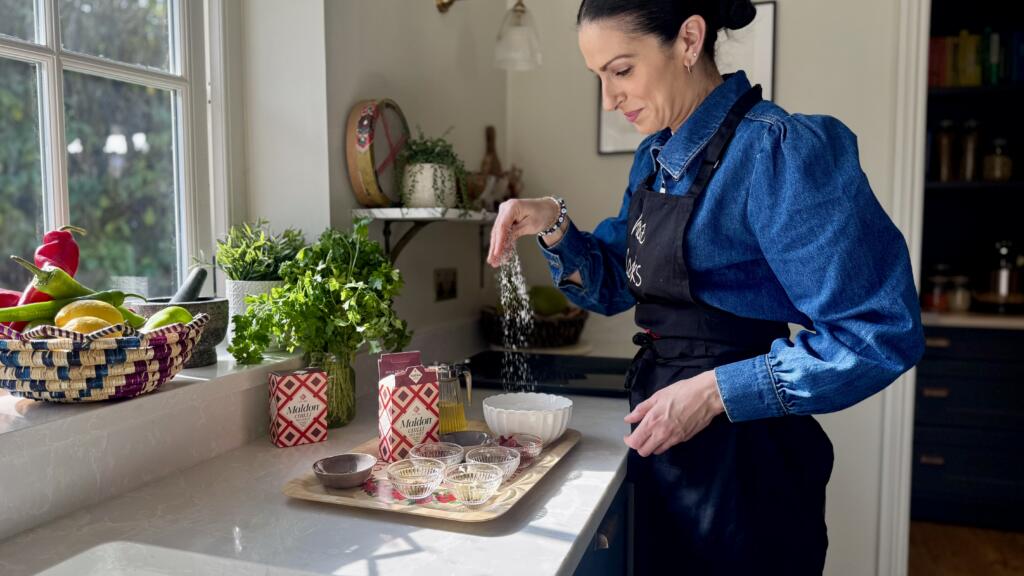
Meliz Berg seasoning with Maldon Chilli Sea Salt
A finishing salt matters – and Maldon Chilli Sea Salt delivers more than heat alone. With it’s signature pyramid flakes and gentle chilli warmth (from the infused Aleppo pepper and bird’s eye chilli), it lifts marinades, enhances caramelisation and adds crunch at the final moment, allowing each ingredient to shine without overwhelming it. Sprinkle just before cooking, it seasons with precision and personality.
About AEG: Designed for Taste
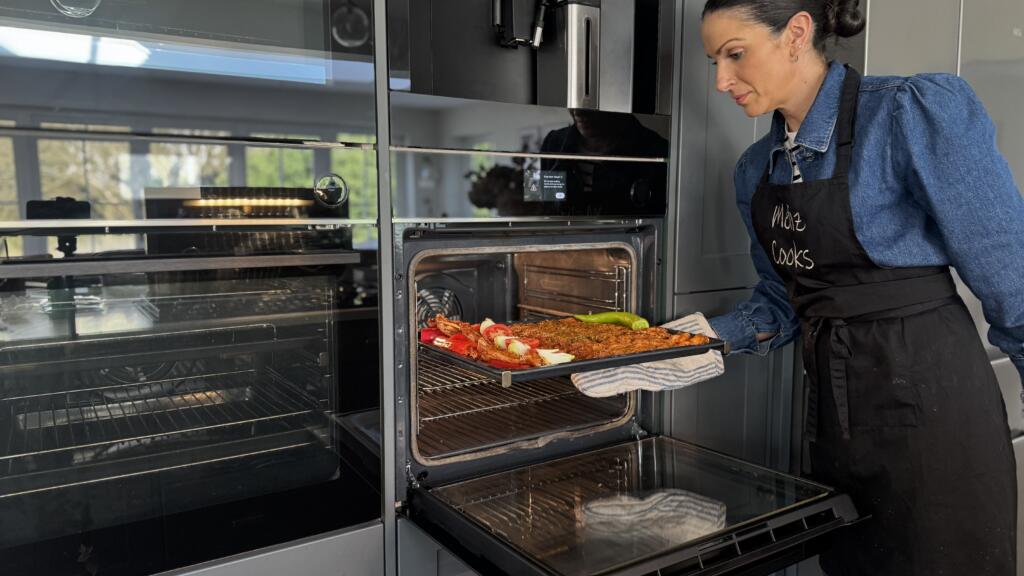
Meliz Berg with AEG Oven Setup
For oven a century, AEG has been the forefront of kitchen innovation, designing appliances that empower people to cooking with confidence. Rooted in German engineering and driven by passion for taste, AEG focuses on intelligent technology that supporting creativity rather than complicating it – from ovens that enhance flavour and texture to intuitive controls that give you precision without stress.
Cooking with Confidence: AEG in the Kitchen
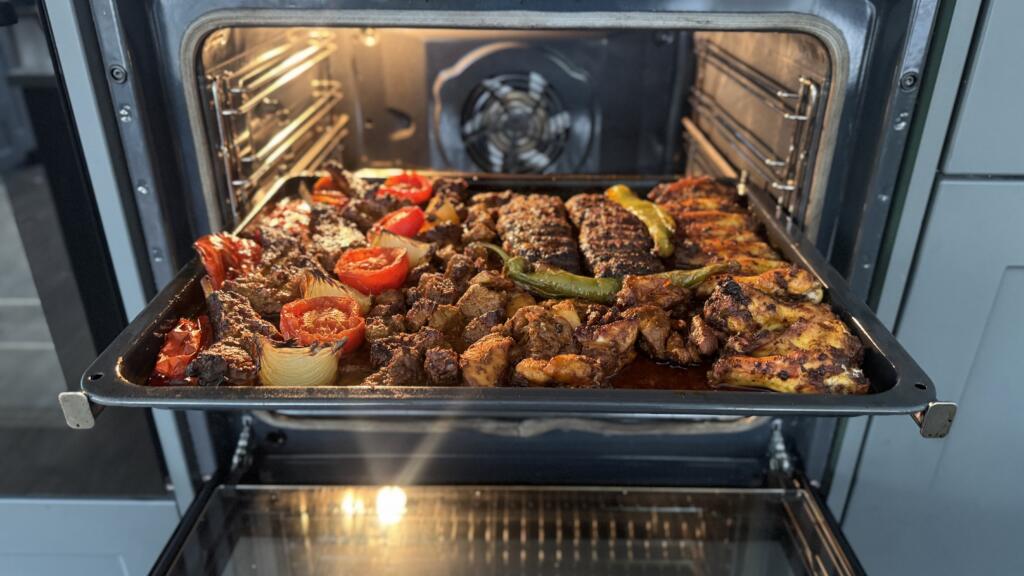
Mixed Grill Platter, cooked by AEG Oven Setup
To bring every element of this recipe to life, Meliz cooked using premium AEG Kitchen Appliances, including the AEG 7000 MealAssist Oven with SteamCrisp, featured throughout the cooking videos.
This innovative oven uses a combination of 25% steam and 75% heat for perfectly even cooking – ideal for slow-roasting vegetables with crisp, caramelised edges while keeping meats tender and juicy. With its CookSmart Touch Display, telescopic runners and pyrolytic self-cleaning, it offers precision, ease and outstanding performance.
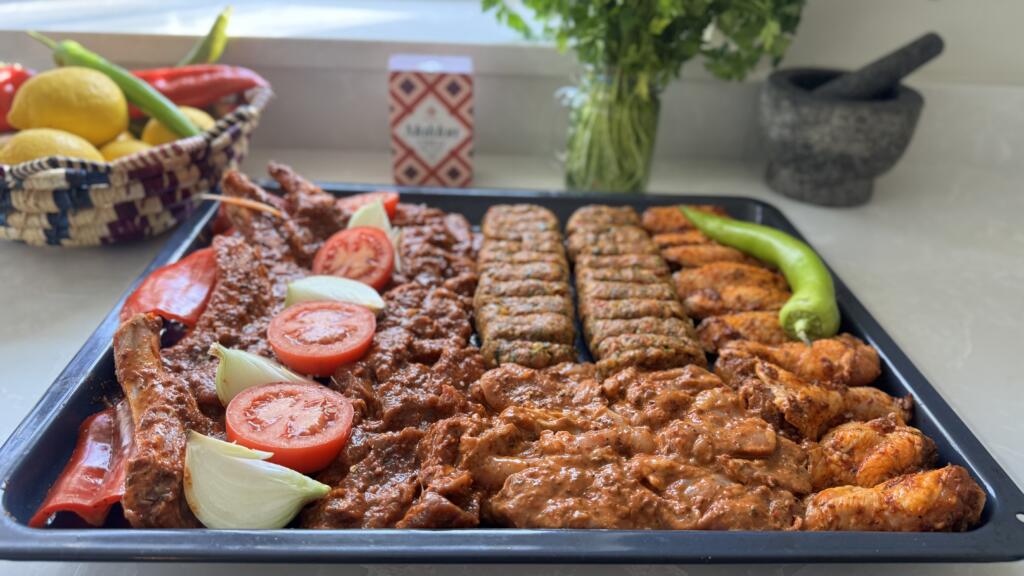
Designed for entertaining, batch-cooking or freezing ahead, this platter used one versatile base marinade that adapts beautifully across chicken wings, lamb cutlets, kofte and chicken shish – all cooked together at the same temperature for ease and consistency. It’s modern Middle Eastern-inspired cooking as its most generous, unfussy and flavour-forward.
Step 1 – Prepare the Base Marinade
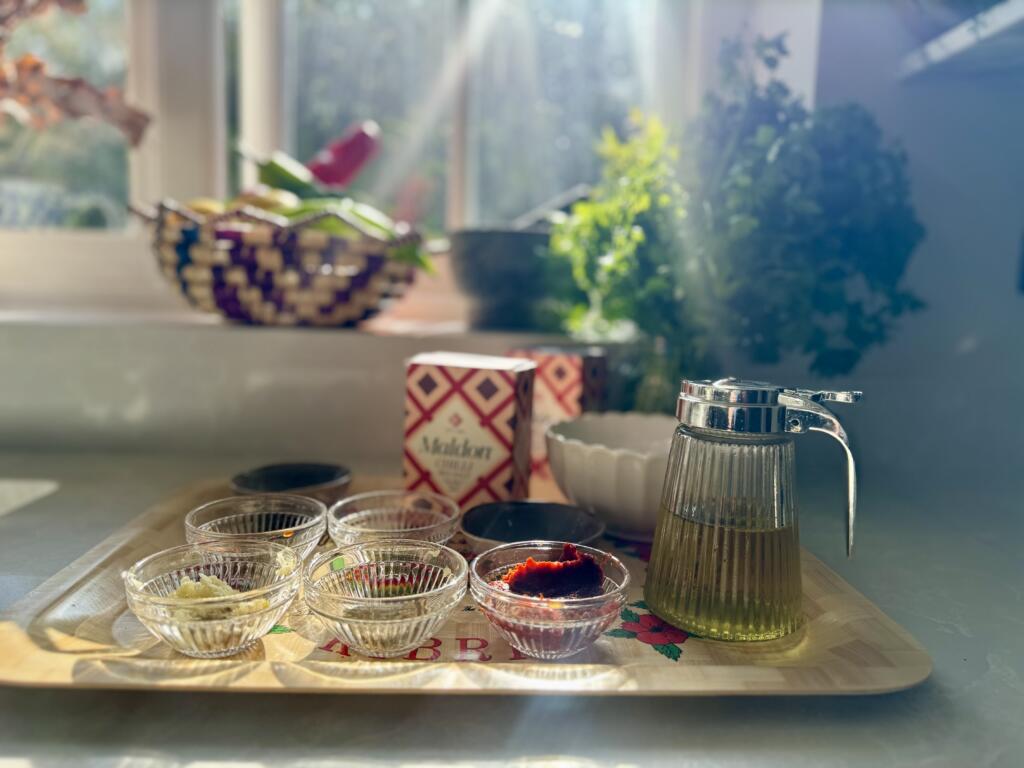
Ingredients (listed left) for the Base Marinade
Start by making the base minade – this is the backbone of the entire platter.
Mixed together the garlic, red pepper paste, olive oil, spices and oregano until you have a thick, aromatic paste. This single marinade adapts beautifully across chicken, lamb and mince, giving you flexibility without extra work.
Step 2 – Make the Chicken Wings
Add the chicken wings to the marinade and stir well. Cover and refrigerate for at least 4 hours, no longer than 24.
Preheat oven to 200c Fan.
Grease a large baking tray with the olive oil.
Take the chicken wings out of the fridge 30 minutes before cooking.
Place the oiled tray in the preheated oven to heat up for 15 minutes.
Season the marinated chicken wings with the Maldon Chilli Sea Salt, stir well, then carefully lay all the chicken wings flat on the hot, oiled baking tray.
Bake in the oven on the middle shelf for 30-35 minutes until beautifully tender and charred around the edges.
Step 3 – Make the Lamb Cutlets or Lamb Shish
Add the milk to the marinade recipe and stir well until smooth. Add the lamb to the marinade and stir well. Cover and refrigerate for at least 4 hours, no longer than 24 hours.
Preheat oven to 200c Fan.
Grease a large baking tray with the olive oil.
Take the lamb out of the fridge 30 minutes before cooking.
Place the oiled tray in the preheated oven to heat up for 15 minutes.
Season the marinated lamb with the Maldon Chilli Sea Salt, stir well, then carefully lay the lamb on the hot, oiled baking tray along with the vegetables.
Bake in the oven on the middle shelf for 30-35 minutes until beautifully tender and charred around the edges.
Step 4 – Make the Lamb or Chicken Kofte
Add the onions and peppers to a clean muslin cloth and squeeze out all the juice (keep the juice to add to the chicken shish marinade if making).
Add the drained onions, peppers to the rest of the ingredients and stir well. Cover and pop in the fridge for at least an hour but preferably overnight for all the flavours to come together.
Preheat oven to 200c Fan.
Grease a large baking tray with the olive oil.
Take the mixture out of the fridge 30 minutes before cooking.
Place the oiled tray in the preheated oven to heat up for 15 minutes.
Shape the mixture into two extra large long köfte (you can shape them into smaller sized köfte, but please note the cooking time will reduce by at least 10 minutes to ensure the smaller köfte stay as tender as possible), making ridges at 1cm intervals along the left of the köfte using a skewer dipped in water (to prevent it from sticking to the mixture).
Carefully lay the köfte on the hot, oiled baking tray along with the vegetables.
Bake in the oven on the middle shelf for 30-35 minutes until beautifully tender and charred around the edges.
Step 5 – Make the Chicken Shish
Add the yoghurt, pomegranate molasses and honey (and the reserved onion and red pepper juices, if you have them) to the marinade, and stir well until smooth.
Add the chicken to the marinade and stir well. Cover and refrigerate for at least 4 hours, no longer than 24.
Preheat oven to 200c Fan.
Grease a large shallow baking tray with the olive oil.
Take the chicken out of the fridge 30 minutes before cooking.
Place the oiled tray in the preheated oven to heat up for 15 minutes.
Season the marinated chicken with the Maldon Chilli Sea Salt, stir well, then carefully lay the chicken on the hot, oiled baking tray along with the vegetables.
Bake in the oven on the middle shelf for 30-35 minutes until beautifully tender and charred around the edges.
Have You Tried It?
Ready to be Roasted: Complete Mixed Grill Platter in Base Marinade with Maldon Chilli Sea Salt
This is the kind of food that invites people to linger – platters placed at the centre of the table, hands reaching in, conversations getting louder and the dishes empty. Guided by Meliz Berg’s bold, generous flavours, brought to life with AEG’s precision cooking, and finished with the unmistakable crunch of Maldon Chilli Sea Salt, this mixed grill is about more than what’s on the tray.
If you try this recipe at home, we’d love to see it – tag us in your creations so we can share your wonderful cooking with our community. And if you’re feeling inspired to upgrade your kitchen, you can explore more AEG appliances here, and discover how their innovative technology can transform your everyday cooking.
A Collaboration with Meliz Berg and AEG Kitchen Appliances
We’re excited to share our latest recipe collaboration with Meliz Berg and AEG Kitchen Appliances. Meliz Berg is an award-winning cookbook author, creator of Meliz Cooks, and one of our celebrated talents from The Maldon 50. Known for her vibrant, flavour-driven dishes inspired by her Turkish-Cypriot heritage, Meliz brings here signature warmth and creativity to this Slow-Roasted Vegetables, Creamy Garlic Yogurt & Garlic Butter recipe. Using Maldon Garlic Sea Salt throughout, she creates a beautifully balanced dish that’s perfect for effortless hosting. This collaboration highlights just how transformative great seasoning and clever cooking techniques can be in elevating simple ingredients.
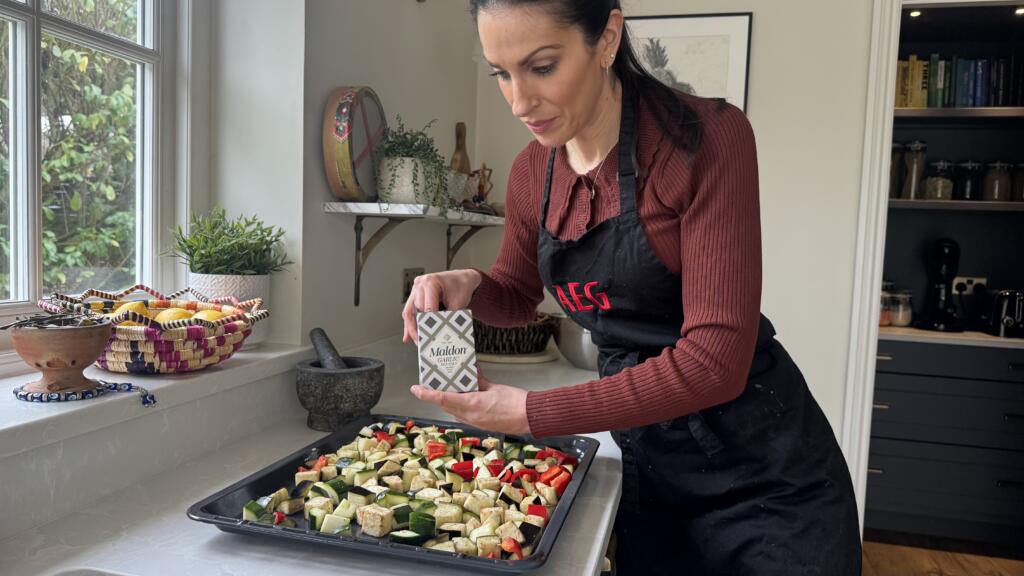
Meliz Berg seasoning the dish with Maldon Garlic Sea Salt
Crafted With AEG
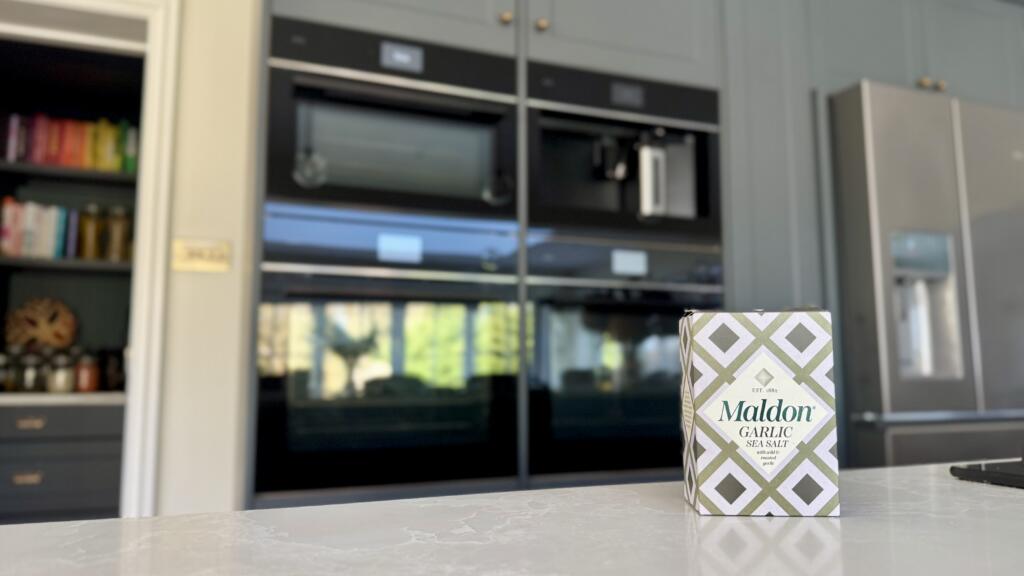
Maldon Garlic Sea Salt and AEG Built-in-OvenAEG 8000 MealAssist Microwave and Build-in-Oven
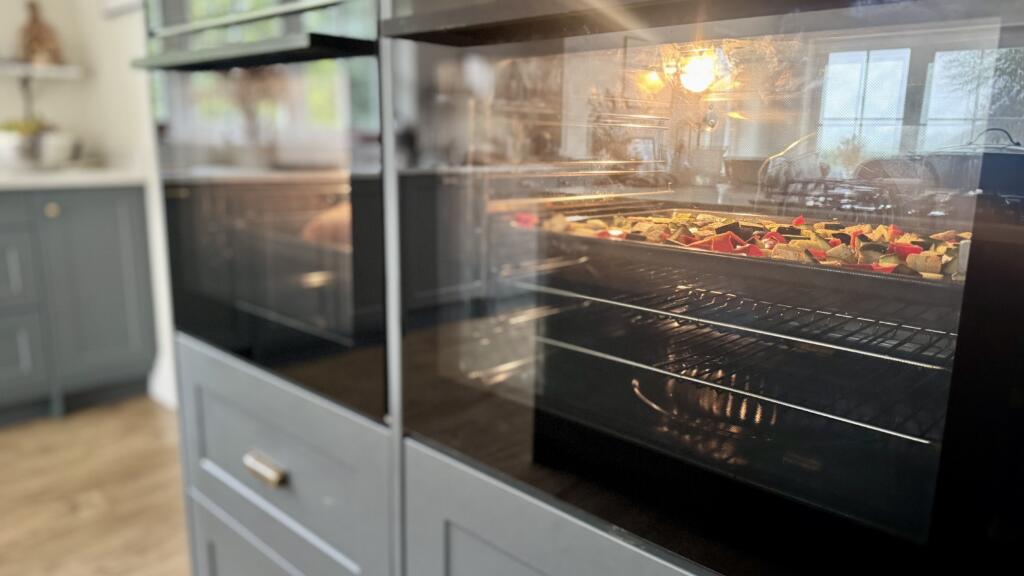
To bring every element of this recipe to life, Meliz cooked using premium AEG Kitchen Appliances, including the AEG 7000 MealAssist Oven with SteamCrisp, featured throughout the cooking videos. This innovative oven uses a combination of 25% steam and 75% heat for perfectly even cooking – ideal for slow-roasting vegetables with crisp, caramelised edges. With it’s CookSmart Touch display telescopic runners and pyrolytic self-cleaning, it offers precision, ease and outstanding performance. Also used in the kitchen setup are the AEG 8000 MealAssist Combination Oven & Microwave, known for it’s energy-saving residual heat cooking, and the sleekAEG 6000 Gas on Glass 90cm Hob, completing a modern workspace designed for flavour, efficiency and fuss-free cooking.
How to Make Slow-Roasted Vegetables, Creamy Garlic Yoghurt & Garlic Butter
This recipe is the perfect sharing dish! Instead of preparing individual starters, this vibrant platter of Mediterranean roasted vegetables, silky garlic yogurt and a rich homemade garlic butter offers maximum flavour with minimal effort. Everything can be made ahead – the roasted aubergine, courgette and pepper to the yogurt and butter – making it ideal for dinner parties, Spring lunches, or relaxed weekend gatherings.
Remember to finish with an extra pinch of Maldon Garlic Sea Salt for that perfect seasoning.
Method:
To make the garlic yoghurt, add the yoghurt, lemon zest, garlic and Maldon Garlic Sea Salt flakes to a small bowl. Halve the zested lemon, and squeeze half of it into the yoghurt mixture. Save the other half for the dressing. Stir the garlic yoghurt and refrigerate until ready to serve.
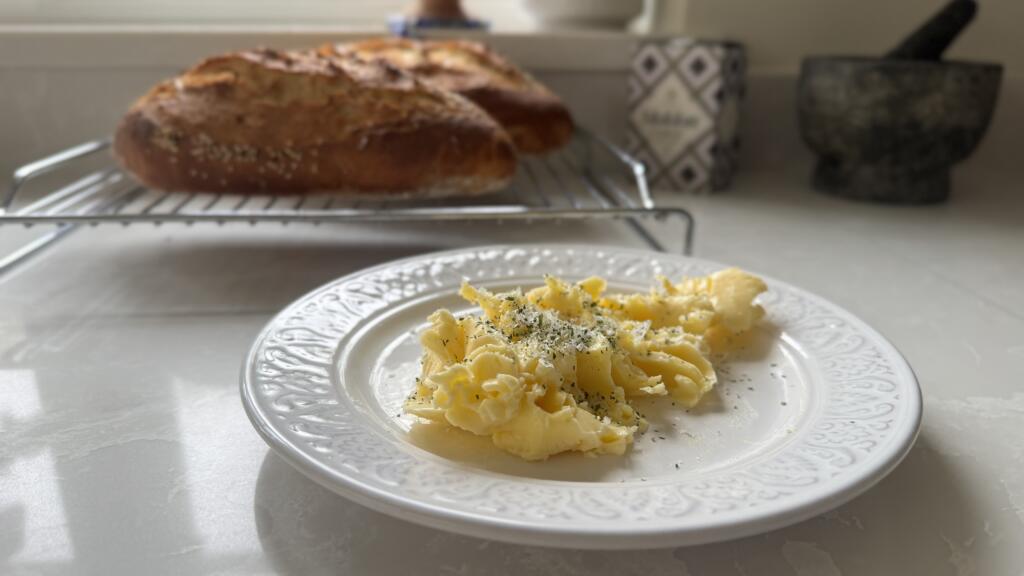
Mix together the butter and Maldon Garlic Sea Salt, spread into a small ramekin, and leave to one side. Preheat oven to 200c fan.
Add the peppers to a large bowl along with half of the olive oil. Mix well, then add the aubergines, courgettes and Maldon Garlic Sea Salt and toss well.
Brush a large shallow non-stick baking tray with the remaining olive oil, and place in the preheated oven for 10 minutes.
Carefully add all of the vegetables to the hot oiled baking tray, and place on the middle shelf of the oven for 30-35 minutes, or until the vegetables have fully softened and the skins and edges are slightly charred. Turn half way through, if necessary.
Whilst the vegetables are cooking, mix together all the dressing ingredients and add the hot, cooked vegetables straight into the dressing and toss well until they are all fully coated.
Sprinkle a little more Maldon Garlic Sea Salt over the potted butter before serving.
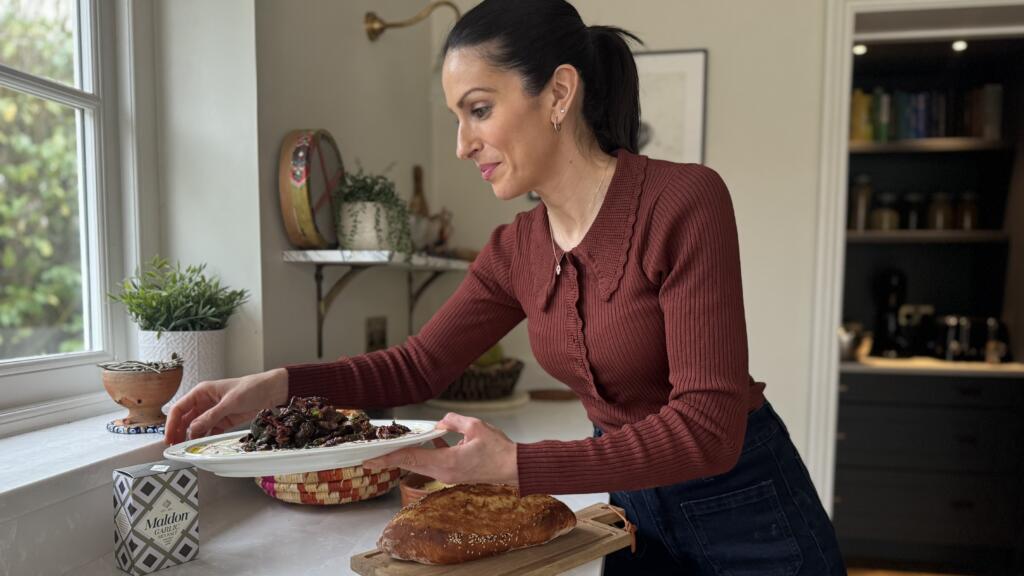
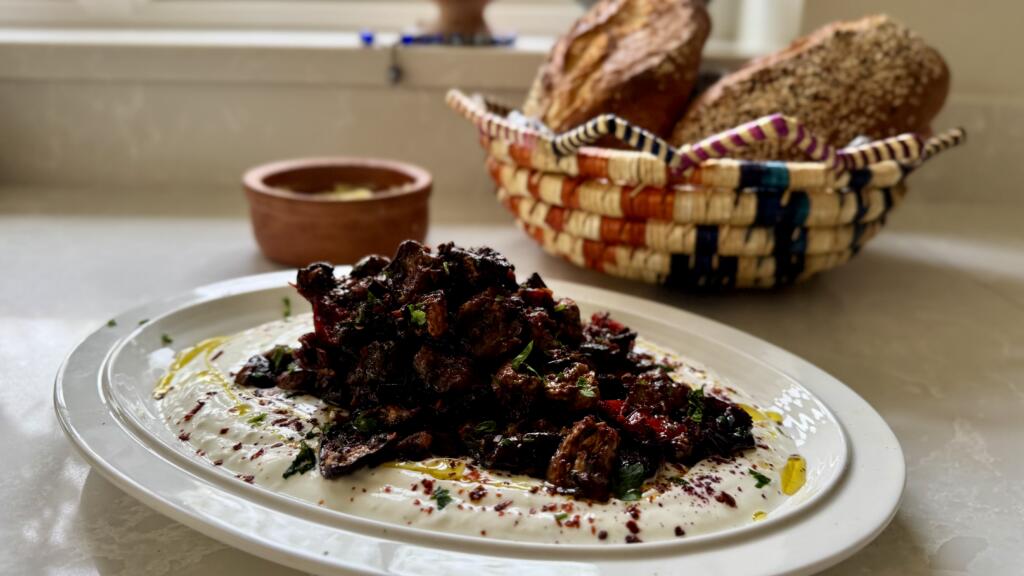
Spread the garlic yoghurt over a platter, top with the dressed vegetables, sprinkle over the remaining sumac, pul biber and parsley, drizzle over a little more extra virgin olive oil, and serve with hot crusty bread slathered in the Garlic Sea Salt butter.
Have You Tried It?
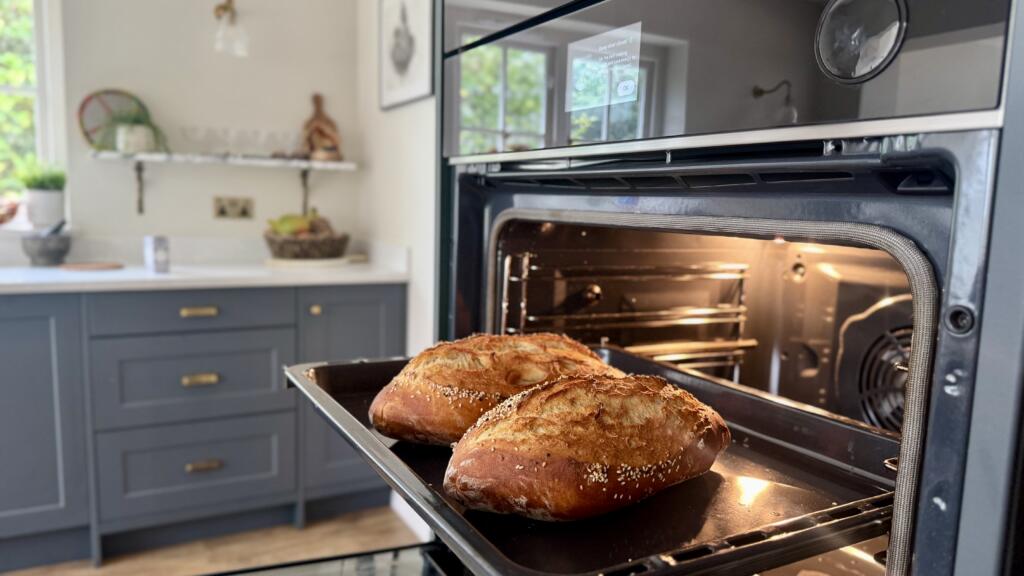
Meliz Berg seasoning the tray of vegetables with Maldon Garlic Sea SaltFresh crusty bread coming out of the AEG OvenHomemade Garlic ButterThe finished plate: Slow-roasted vegetables, creamy garlic yogurt and garlic butter
We hope you enjoyed this flavour-packed recipe as much as we loved creating it. This dish is the first in ourspecial series with Meliz Berg and AEG, where we’re be teaming up to bring you a delicious starter, main and dessert designed for the ultimate sharing menu. If you try this recipe at home, we’d love to see it – tag us in your creations so we can share your wonderful cooking with our community. And if you’re feeling inspired to upgrade your kitchen, you can explore more AEG appliances here, and discover how their innovative technology can transform your everyday cooking.
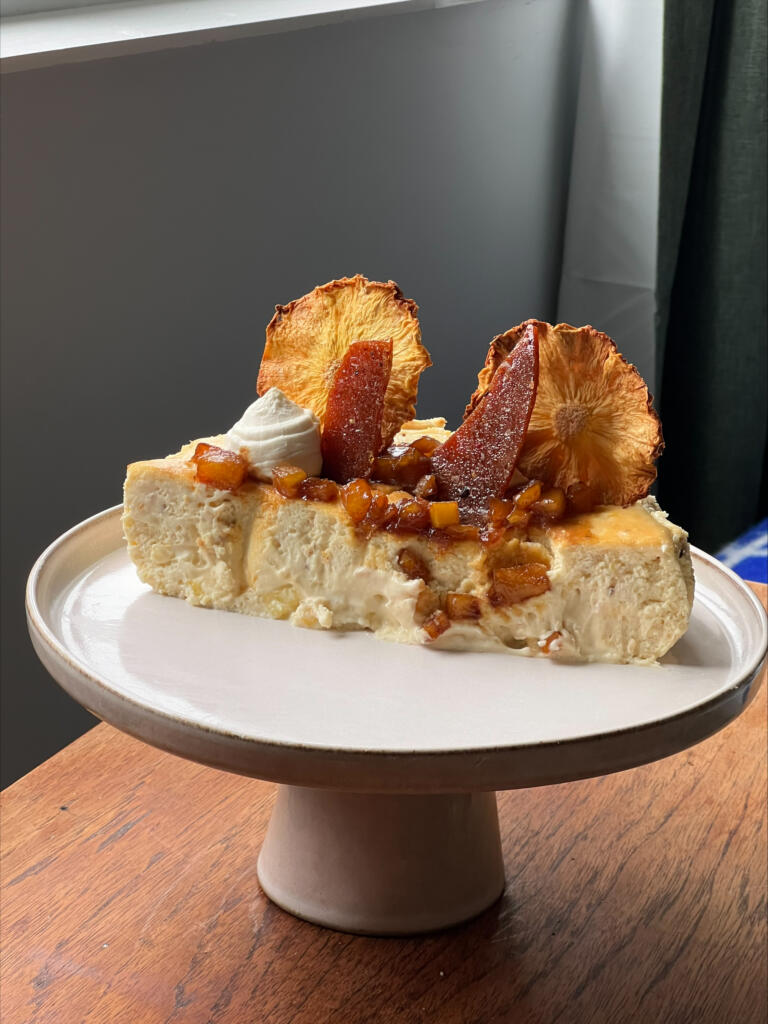
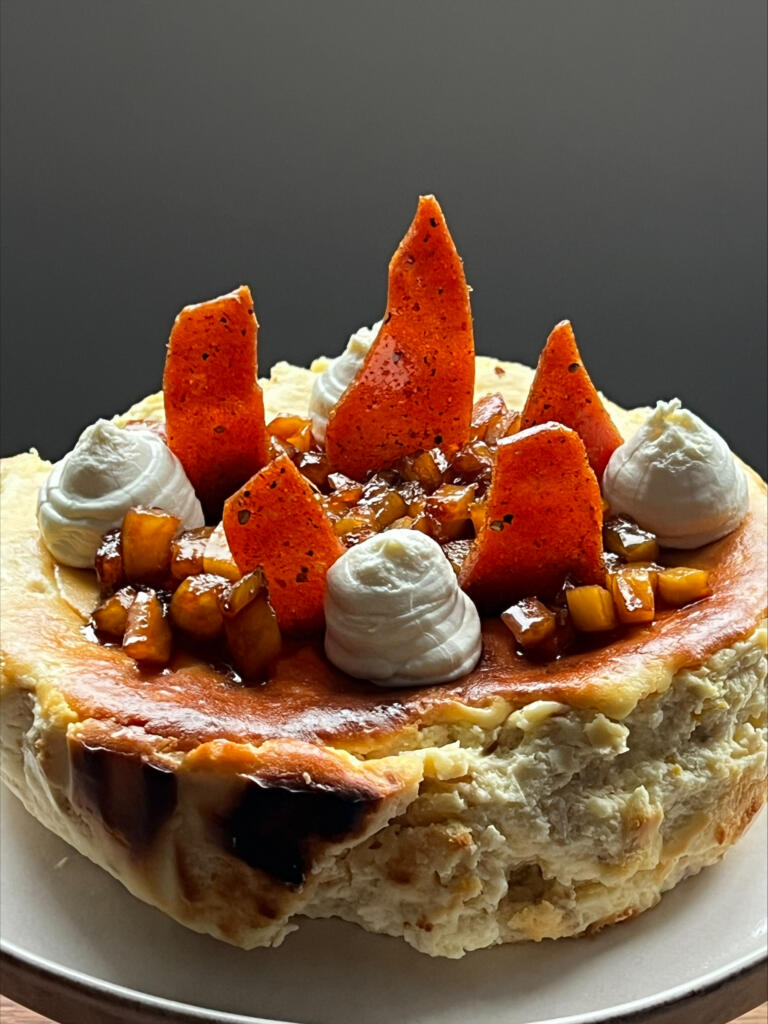
We’re excited to team up with Fiona’s Funky Food for a show-stopping dessert that blends tropical flavour with gourmet flair: a Pineapple & Coconut Basque Cheesecake infused with Maldon Smoked Sea Salt and finished with Maldon Pepper Sea Salt Caramel Shards. This unique twist on the trending Basque-style cheesecake combined creamy custard, bright pineapple, fresh lime, and toasted coconut, all elevated by the gentle smokiness of Maldon Smoked Sea Salt flakes.
The salt melts seamlessly into the batter, enhancing the natural sweetness and adding depth to every bite – a flavour upgrade that’s quickly becoming popular in modern baking, Springtime desserts, and tropical-inspired recipes.
To finish, the cheesecake is crowned with crisp Maldon Pepper Sea Salt Caramel Shards, where Pepper Sea Salt brings a subtle heat, crunchy texture, and that irresistible sweet-savoury balance food lovers crave. The result? A dessert that’s sweet, smoky, tropical, lightly spiced and packed with flavour – the perfect showcase of just how versatile Maldon Salt can be in both baking and confectionary.
Whether you’re searching for a unique Spring bake, a summer celebration dessert, or a creative cheesecake recipe, this collaboration delivers a flavour experience that’s bold, modern, and utterly unforgettable.
What is a Basque Cheese? (Everything You Need to Know About This Trending Dessert)
A Basque cheesecake, also known as a Burnt Basque Cheesecake, is an ultra-creamy, crustless cheesecake originally from San Sebastian, Spain. Unlike the classic New York-style cheesecake, the Basque version is baked at a very high temperature, creating it’s signature deeply caramelised, ‘burnt’ top, while the inside remains soft, custard-like and silky.
A traditional baked cheesecake is baked at a much lower temperature, often in a water bath to prevent cracks. It is a lot more dense, creamy, pale, and usually baked with a crumb crust at a low heat for a smooth, fully-set finish.
Not all cheesecakes are baked – and there’s a delicious science behind why some are simply chilled to set! A no-bake cheesecake relies on a different method of thickening and stabilising the filling, which creates a lighter, creamier texture compared to the dense, custard-like structure of a baked cheesecake. A no-bake cheesecake sets in the fridge because it uses stabilising ingredients like cream cheese, whipped cream, and sometimes gelatine – not eggs. Without eggs, there’s no need for baking!
How To Make a Pineapple & Coconut Basque Cheesecake
Step 1 – Prepare the Tin for the Basque Cheesecake
Preheat the oven to 220°C / 200°C fan (428°F / 392°F fan).
Line a 20cm (8-inch) springform tin with overlapping parchment sheets, ensuring the edges rise above the rim. This helps contain the high-rise Basque-style batter.
Step 2 – Make the Tropical Cheesecake Batter
Beat the cream cheese and caster sugar until smooth and lump free.
Add the eggs one at a time, mixing gently to avoid incorporating too much air.
Pour in the double cream and coconut cream and mix until silky.
Sift in the plain flour and fold lightly.
Stir in the vanilla extract, lime zest, toasted desiccated coconut, caramelised pineapple and 7-10g Maldon Smoked Sea Salt flakes.
Taste and adjust to your preference – you ideally want a soft smokiness that enhances the tropical flavours without overpowering them.
Tip – to get caramelised pineapple, you need to cook the pieces in a hot pan with butter and sugar until browned and glossy. This quick method adds a sweet, golden, caramelised flavour.
Step 3 – Bake the Basque Cheesecake
Pour the batter into the prepared tin.
Bake for 30-35 minutes, or until the top is deeply caramelised, with a slightly jiggly centre – the signature Basque look.
Cool completely at room temperature, then refrigerate for 4+ hours, ideally overnight, for the custard-like interior to set.
Step 4 – Make the Maldon Pepper Sea Salt Caramel Shards
Line a tray with parchment.
In a saucepan, heat the cater sugar and water over medium heat without stirring until it reaches a deep amber colour.
Remove the heat and quickly stir in the Maldon Pepper Sea Salt.
Pour the caramel thinly onto the parchment. Allow it to harden fully, then break into shards. These add crunch, subtle heart, and a sweet-savoury finish.
Step 5 – Assemble and Decorate
Remove the chilled cheesecake from the tin.
Insert the caramel shards vertically for height and texture.
Optional: Finish with a light sprinkle of Maldon Smoked Sea Salt for a glossy, elevated garnish.
Optional:Add dollops of cream on top with an extra serving of the diced caramelised pineapple to give the dish that ‘wow’ factor.
Have You Tried This?
Loved making this tropical Basque cheesecake? If you give this recipe a try, we’d love to see it! Tag us in your creations and show us how your cheesecake turned out.
Create a show-stopping classic beef Wellington with this simplified, step-by-step recipe, which serves up to 8 people. This easy beef Wellington features a beautifully seared beef fillet, which is brushed with Dijon mustard. wrapped in a rich mushroom duxelles made from chestnut mushrooms, layered with Parma ham (or prosciutto), then enclosed in all-butter pastry for a golden, flaky pastry finish. Careful chilling and resting of the beef Wellington ensures a medium-rare, perfectly pink centre on the beef.
Seasoned with Maldon Original Sea Salt and cracked black pepper, the beef Wellington with puff pastry pairs beautifully with creamy mashed potatoes, seasonal vegetable likes roasted carrots, and a rich red wine jus. This dish is ideal for any special occasion centrepiece; as a Easter alternative to lamb to a table show-stopper at Christmas time.
How to Make a Beef Wellington
Crafting a show-stopping beef Wellington by searing a tender beef fillet, wrapping it in mushroom duxelles and Parma ham, and baking it in golden, flaky puff pastry until perfectly pink at the centre.
Step 1 – Bring the Beef to Room Temperature
Remove the beef fillet from the fridge 1 hour before cooking so that the meat reached room temperature. This helps the meat cook more evenly, ensuring you achieve that signature pink centre without overcooking the outer layers.
Step 2 – Make the Mushroom Duxelles
Add unsalted butter and 1 tbsp olive oil to a large frying pan.
Soften the finely diced onion gently until translucent, then add the crushed garlic.
Pulse the chestnut mushrooms in a food processor until finely chopped, then cook them with the onions/garlic until all the liquid has evaporated (approx. 15 minutes). It is important to reduce the moisture from the mushroom duxelles because excess water can cause the pastry of the beef Wellington to become soggy.
Stir through thyme leaves and chopped parsley in the last 5 minutes.
Season with Maldon Original Sea Salt flakes and cracked black pepper, then cool completely, chilling in the fridge to firm up.
Step 3 – Sear the Beef Fillet
Generously season the beef fillet all over with Maldon Original Sea Salt flakes and cracked black pepper.
Heat a large frying pan over medium-high to high heat until very hot, then add 1 tbsp olive oil.
Sear the beef on all sides until well caramelised – no longer than 2 minutes total so the centre stays very rare.
Remove from the pan and rest for 30 minutes to cool slightly.
Step 4 – Wrap the Beef in Parma Ham and Duxelles
Lay out overlapping layers of clingfilm on a clean surface.
Arrange the Parma ham slices in an even layer that will fully wrap the beef.
Spread the chilled mushroom duxelles evenly over the Parma ham.
Brush the rested beef with Dijon mustard, place it on one edge, then use the clingfilm to roll everything up tightly into a firm “sausage” shape.
Twist the ends to secure and chill in the fridge for at least 1 hour (or overnight).
Step 5 – Encase in Puff Patry
Unroll the puff pastry on its parchment paper.
Remove the clingfilm from the beef log and place it in the centre of the pastry.
Wrap the pastry around the beef, sealing the edges well and ensuring the seam is on the underside.
Use beaten egg to brush and seal the pastry.
If needed, trim and use extra pastry to patch any gaps and decorate (e.g. thin strips for a lattice).
Transfer to a baking tray lined with baking paper and chill for a further hour to firm up.
Step 6 – Bake the Beef Wellington
Preheat the oven to 200°C (fan if appropriate – specify if recipe assumes fan or conventional).
Brush the Wellington all over with beaten egg for a glossy finish.
Bake for around 35 minutes, or until the pastry is deep golden brown.
You can mention indicative doneness (e.g. for medium-rare fillet, the centre should still feel slightly springy; optional note on using a thermometer if desired).
Remove from the oven and rest for 20 minutes before slicing.
Step 7 – Finish and Serve
Just before serving, sprinkle the pastry with Maldon Sea Salt flakes and a few extra thyme leaves. Seasoning your Wellington with Maldon Sea Salt flakes enhances flavour and texture by delivering clean, bright saltiness that lifts the beef, duxelles, and pastry while adding a delicate, crunchy finish.
Slice into 1-inch pieces with a sharp knife.
To Serve
A beef Wellington is ideal for Christmas, New Year’s, or any special occasion because it feels truly celebratory. It’s luxurious yet comforting, feeds a crowd with ease, and can be prepped ahead of time, making it perfect for busy kitchens. It’s classic flavour pair effortlessly with seasonal sides likes roasted carrots and red wine jus, making it just as fitting as a show-stopping alternative to lamb on Easter.
Here are a few sides that you can pair your beef Wellington:
Bring the beef fillet to room temperature for even cooking and a perfectly pink centre.
Sear the beef until golden to lock in flavour and prevent excess moisture.
Cook the mushroom duxelles thoroughly to remove moisture and avoid soggy pastry.
Wrap tightly with Parma ham (or prosciutto) to create a moisture barrier for the beef and mushroom duxelles.
Chill the beef Wellington before baking to help and pastry hold it’s shape.
Use all-butter puff pastry for the best golden, flaky finish.
Season generously with Maldon Sea Salt and cracked black pepper for an elevated flavour.
Rest the beef Wellington before slicing to keep the layers intact.
Doneness, Make-Ahead & Reheating Notes
How do I know when the beef will be done in a beef Wellington
Medium-rare is the classic level of doneness for beef Wellington. After 35 minutes at 200°C and resting, the 1lg fillet should be cooked and have a warm, perfectly pink centre with a tender texture.
Can I prepare beef Wellington in advance?
Yes, you can absolutely prepare beef Wellington in advance. You can assemble the Wellington (beef, mushroom duxelles, Parma ham, pastry), then wrap tightly in clingfilm and chill for up to 25 hours before baking.
Chilling helps the pastry stay crisp and golden and improves overall shape.
Brush with egg wash just before baking for the best finish.
Can I reheat beef Wellington?
Yes, you can reheat beef Wellington. Leftover slices can be reheated gently in the oven at 160°C (320°F) for 12-15 minutes until warmed. Make sure you use a wire rack to keep the pastry crisp.
You can also reheat in an air fryer. Set the air fryer to 150°C (300°F) and heat to 10-12 minutes, flipping halfway through for even cooking.
Avoid reheating in the microwave – it will make the pastry soggy and tough.
Please note – the beef will now stay medium-rare after reheating; it will cook further, but the flavour will remain delicious.
There are few desserts as universally loved and visually impressive as a molten chocolate fondant. Slicing through the delicate, baked sponge exterior to reveal a rich, flowing river of warm chocolate is the ultimate dinner party party trick. While they have a reputation for being difficult to master, this dark chocolate fondant recipe is surprisingly simple, requiring just 15 minutes of prep time. To cut through the richness of the dark chocolate and elevate the dessert to restaurant quality, we fold a generous pinch of Maldon Original Sea Salt flakes directly into the batter and finish the plated pudding with a final salty sprinkle.
Why You’ll Love This Dark Chocolate Fondant
The Perfect Molten Centre: Our precise baking time and temperature ensure that the outside sets into a light sponge while the inside remains delightfully gooey and liquid.
Sweet & Salty Balance: Dark chocolate and sea salt are a match made in heaven. The clean, bright salinity of Maldon Salt perfectly counteracts the bitterness of the cocoa and enhances the deep chocolate flavor.
Quick & Impressive: Despite looking incredibly complex, this molten chocolate fondant recipe comes together in under 30 minutes from start to finish.
How to Make Molten Chocolate Fondants (Step-by-Step)
Step 1 – Preheat and prepare
Preheat your oven to 200°C and place an empty baking tray onto the middle shelf to heat up. Take 2 ramekins (or dariole moulds) and grease the insides thoroughly with butter. Add the cocoa powder to one mould and tap it around to completely coat the buttery sides. Tip the excess cocoa powder into the second mould and repeat the process. Tip out any final excess cocoa powder, then set the prepared moulds aside.
Step 2 – Melt the chocolate
Place the unsalted butter and broken dark chocolate pieces into a heatproof bowl. Set the bowl over a pan of gently simmering water (a bain-marie), ensuring the base of the bowl does not touch the water. Stir continuously until the butter and chocolate have melted together into a smooth, glossy liquid. Remove the bowl from the heat and set aside to cool slightly.
Step 3 – Whisk the eggs
In a separate large bowl, add the whole egg, the 2 egg yolks, the caster sugar, and a generous pinch of Maldon Original Sea Salt flakes. Whisk the mixture vigorously until it becomes pale, thick, and fluffy.
Step 4 – Fold the batter
Pour the cooled, melted chocolate mixture into the fluffy egg mixture. Sift in the plain flour, then use a spatula to carefully fold everything together until just combined, ensuring you don’t knock the air out of the eggs.
Step 5 – Bake the fondants
Pour the fondant dark chocolate batter evenly into the prepared moulds, making sure to leave a 2cm gap at the top so they have room to rise. Carefully place the moulds onto the preheated tray in the oven and bake for exactly 10 minutes, until the tops have formed a crust and the edges are set.
Step 6 – Invest and serve
Remove the fondants from the oven and allow them to rest in their moulds for 30 seconds. Place a small dessert plate upside down on top of a mould, quickly flip it over, and carefully pull the mould away to invert the fondant. Serve immediately with a dusting of extra cocoa powder, a final sprinkle of Maldon Original Sea Salt flakes, and a scoop of vanilla ice cream.
Tips for the Perfect Gooey Centre
Do Not Skip the Cocoa Dusting: Greasing your moulds with butter and dusting them with cocoa powder is the secret to ensuring your fondants easily slip out of their ramekins without tearing and spilling their liquid centers.
Watch the Clock: Timing is everything with a molten chocolate fondant. Ovens vary, but 10 minutes at 200°C is usually the sweet spot. If you leave them in too long, they will bake all the way through and become standard chocolate cakes.
Use Quality Chocolate: Because chocolate is the star of the show here, ensure you are using a high-quality dark chocolate (ideally 70% cocoa solids or higher) for the richest, most decadent flavour.
Frequently Asked Questions
Can I prepare chocolate fondants in advance?
Yes, this is a fantastic make-ahead dessert! You can prepare the batter, pour it into the greased and dusted moulds, and keep them in the fridge for up to 24 hours. When you are ready for dessert, simply bake them straight from the fridge (you may need to add 1-2 extra minutes to the baking time since the batter is chilled).
Why didn’t my fondant melt in the middle?
If your chocolate fondant is cooked solidly all the way through, it was left in the oven for too long. Fondants continue to cook slightly from residual heat once removed from the oven, so it’s vital to pull them out as soon as the outer edges look set but the very centre still has a slight jiggle to it.
Why add sea salt to a chocolate dessert?
Salt is a natural flavour enhancer. Adding a pinch of Maldon Original Sea Salt to a rich chocolate dessert like this does not make it taste “salty.” Instead, the salt counteracts the bitterness of the cocoa, balances out the sugar, and makes the dark chocolate taste even more intense and complex.
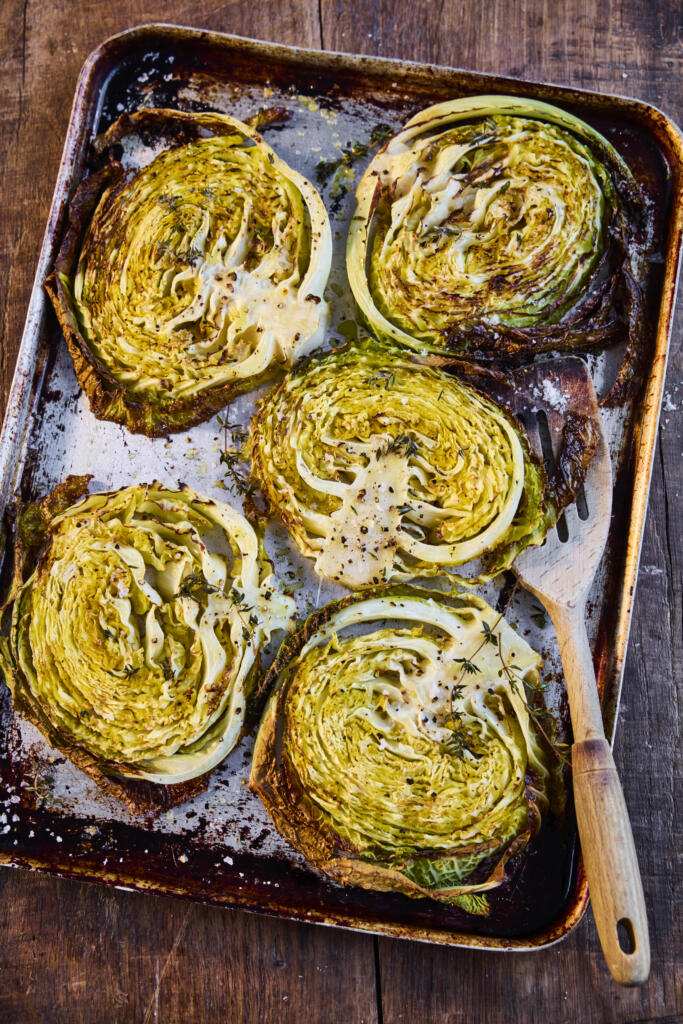
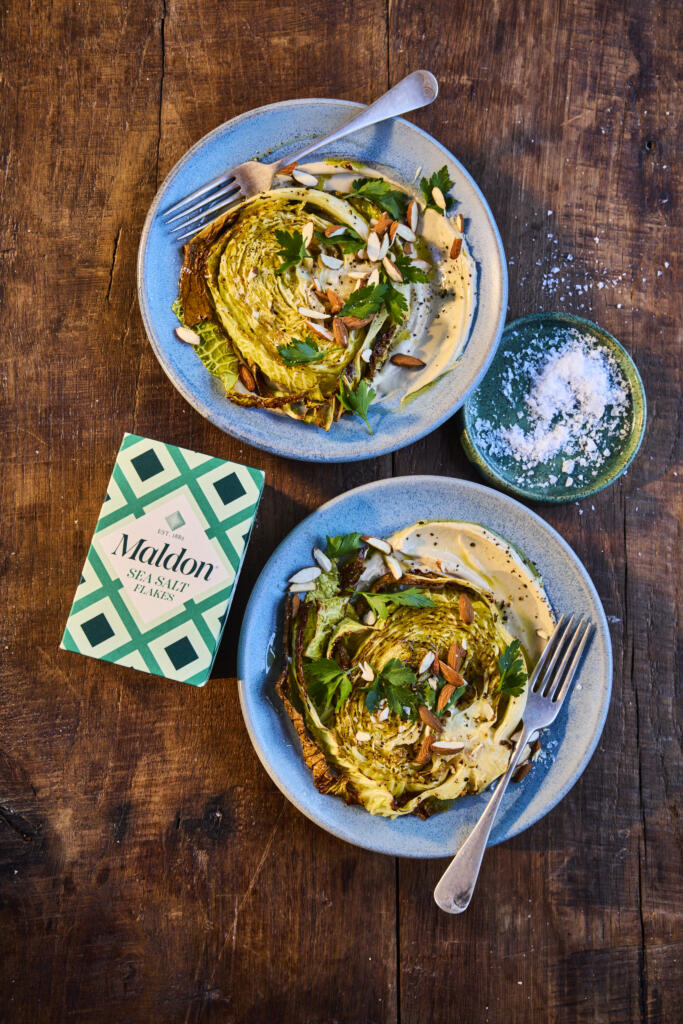
Cabbage has become one of the biggest trends in modern cooking – loved for it’s affordability, versatility, and incredible ability to transform under high heat. When roasted, Savoy cabbage turns golden at the edges, rich and buttery at the core, and the perfect canvas for bold flavours. It’s no surprise that cabbage steak recipes are trending across Instagram and TikTok as cooks rediscover this once-humble vegetable.
Why are cabbages becoming popular again in food?
Cabbage is experiencing a major comeback as one of the biggest food trends of 2026, and there are several reasons for it’s rise in popularity.
It’s highly budget-friendly – Food prices have pushed home cooks towards ingredients that are affordable, versatile, and yield a lot per purchase. Cabbage fits this perfectly, making it a hero for cost-conscious cooing.
It’s an incredibly versatile ingredient – Chefs and creators highlight that cabbage can be roasted, sautéed, braised, fermented, grilled or served raw, making it one of the most adaptable vegetables available.
Social media trends are boosting it’s appeal – Pinterest Predicts and TikTok have reported major strikes in searches for cabbage dishes – from cabbage dumplings to fermented cabbage. Home cooks are incredibly inspired by visually striking cabbage steaks and charred wedges.
It offers strong nutritional benefits – Cabbage is a nutrient-dense cruciferous vegetable rich in vitamin C, folate, and potassium. It also has anti-inflammatory and gut-supportive properties, making it a go-to ingredient for health-focused cooks.
‘Simple Ingredients Done Well’ trend = Food analysts say the cabbage trend reflects a cultural shift toward everyday ingredients that deliver comfort, flavour, and a sense of home.
How to Cook Cabbage Steaks?
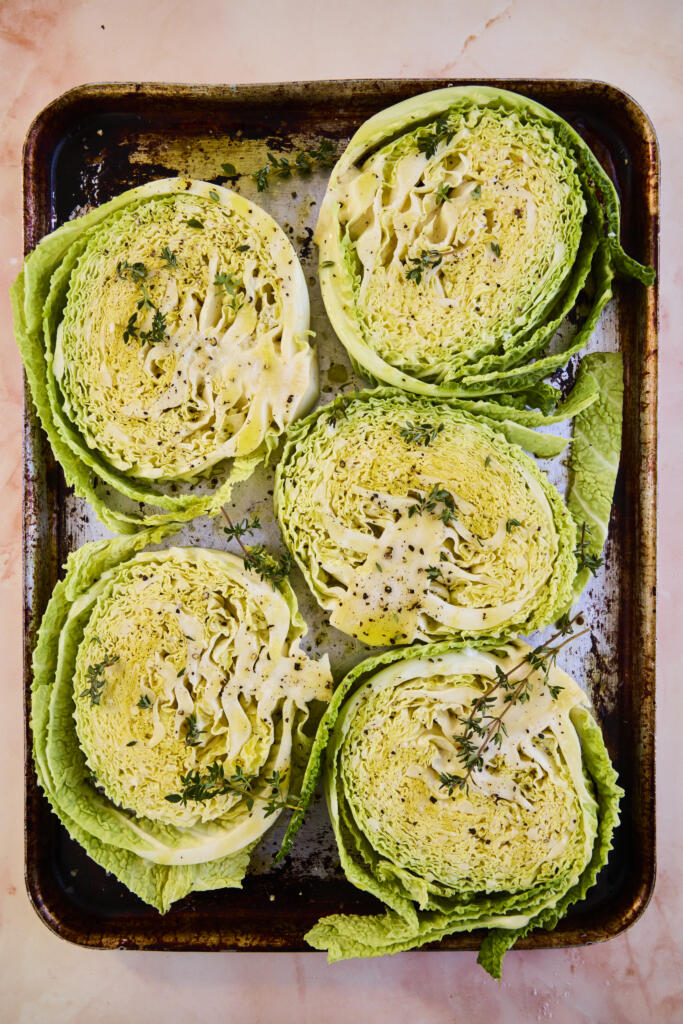
Raw Savoy cabbage steaks on a trayClose-up of the roasted edges + Maldon Sea Salt flakesFinal plated dish with tahini drizzle and toppings
This recipe brings together deeply caramelised roasted cabbage, a silky tahini sauce, and the clean, crisp finish of Maldon Original Sea Salt flakes. Topped with almonds and parsley, it’s a modern, plant-forward dish that punches fat above it’s simplicity.
Perfect as a side, centrepiece, or a hearty weeknight vegan dish – and ideal for sharing on Instagram thanks to those charred, crinkled Savoy leaves.
1. Prepare the cabbage steaks
Preheat the oven to 180c.
Take each savoy cabbage and slice into 1inch (roughly 2cm) ‘steaks’ to make 4 individual cabbage steaks. Discard the smaller pieces of cabbage from the ends – this can be used in another dish.
2. Roast until golden
Place the 4 cabbage steaks onto a baking tray and drizzle with the olive oil, some Maldon Original Sea Salt and cracked black pepper. Add some sprigs of thyme to the tray and then place into the preheated oven to roast for 25 minutes.
3. Make the tahini sauce
To make the tahini sauce, add the tahini to a mixing bowl along with the olive oil, lemon juice and Maldon Original Sea Salt flakes and pepper. It will be very thick so gradually add the water until it reaches a thick creamy consistency – you can add more water if you want it to be looser.
4. Plate and finish
To serve, place some of the creamy tahini sauce onto a place and then top with a roasted cabbage steak.
Garnish with some roasted chopped almonds and some parsley.
What to serve with cabbage steaks
A gain base: quinoa, bulgur, couscous, or wild race
Savoy cabbage works beautifully because it’s crinkled leaves roast into crisp, caramelised layers with soft centres. You can also use a classic green cabbage for a more neutral flavour. For a more vibrant, festive colour, you can use a red cabbage, but it may take slightly longer to cook and has a firmer texture.
Why are my cabbage steaks not crispy?
Make sure the steaks are well coated in oil and have space on the roasting tray – overcrowding causes steaming, not browning. More steam being produced means the cabbage is getting wet and will not get crispy.
Can I make cabbage steaks ahead of time?
You can part-roast cabbage steaks and finish just before serving. Add the tahini sauce and additional garnishes only at the end.
How do I store leftovers?
Store in an airtight container for up to 2 days. Reheat in the oven to restore crispness.
Can I make this recipe vegan and gluten-free?
This cabbage steaks recipe is naturally vegan and gluten-free – just make sure the topping (like nuts) are suitable for your guests.
How thick should I cut cabbage steaks?
We recommend cutting your cabbage steaks 2-3cm in thickness. This ensures a nice crispy edge and tender centres.
Make It, Taste It, Love It!
We’d love to see how you cabbage steaks turned out. Share your creation and tag us on Instagram at @maldonsalt so we can celebrate your seasoning mastery.