As we celebrate ‘Healthy January’, we are delighted to team up with renowned Chef Richard Buckley and share one of our favourite vegetarian-based recipes from his cookbook.
Richard Buckley is an award-winning chef and owner of The Oak in Bath (UK), a Michelin Green Star recipient.
Buckley was raised a vegetarian and, after graduating with a degree in English Literature, he set about studying vegetable cookery whilst working in a series of top vegetarian restaurants. This culminated in his five-year role as head chef for Demuth’s Restaurant where he developed and refined his plant-centric cooking style. He has a passion for sharing the knowledge and techniques that he has learnt and developed in order to increase the general standard of vegan cookery across the country.
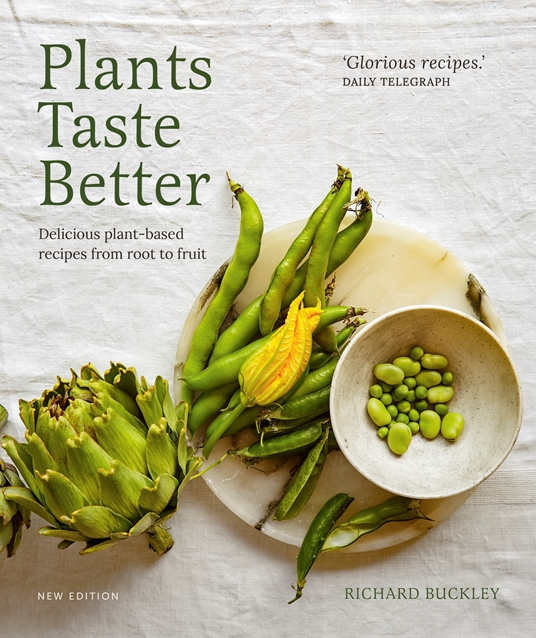
With over 15 years spent studying plants and working at top vegetarian restaurants, Richard released his cookbook: ‘Plants Taste Better’.
Plants Taste Better is a plant-based recipe book, where plants take centre stage on the dinner plate. With over 70 mouth-watering recipes, ranging from the simple to the stand-out, Plants Taste Better will guide and inspire you to get creative with vegan cookery.
This book balances the traditional with modernity to show readers how to make even the simplest ingredients shine. With delicious, thoughtful recipes and stunning images, you will be amazed what you can accomplish in your kitchen when you combine vegetables alongside a deeper understanding of the techniques requested.
Recipes include flavoursome snacks of Fritters and Squash & Hazelnut Pate, to showstopping mains of Carrot, Pea & Cardamom Tagine and Beetroot and Mushroom Casserole. If you have a sweet tooth, try getting your hands stuck into a decadent Chocolate Salted Caramel Taste, or Burnt Peaches.
On the topic of food, let’s share one of our favourite recipes from the cookbook!
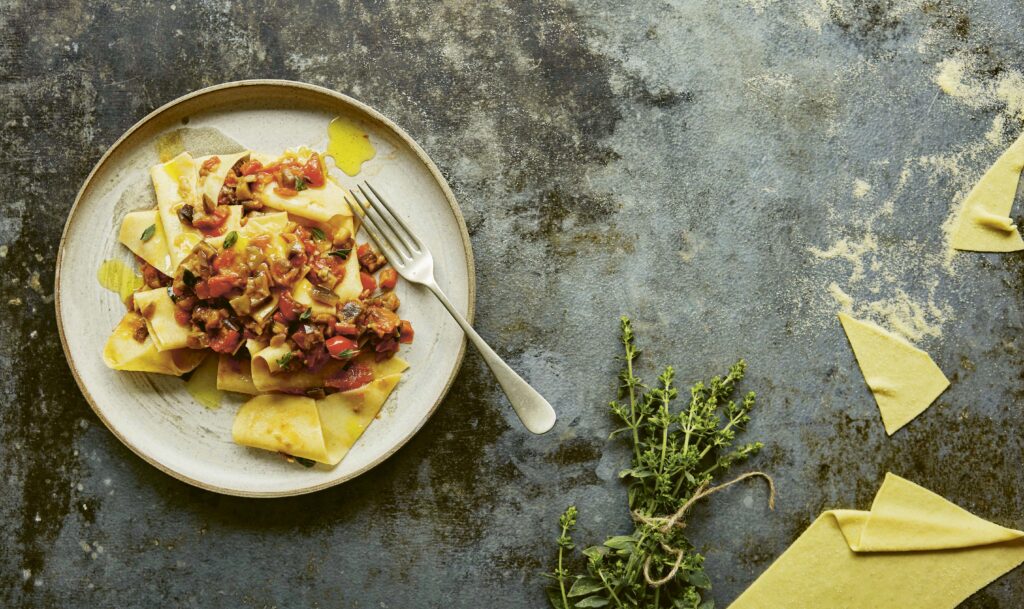
Aubergine (Eggplant) Ragu with Pangrattato and Maltagliati
This dish is a great way of making use of a couple of leftovers: the pangrattato is fried breadcrumbs from a stale loaf – a fantastic thing to have on hand to sprinkle on almost everything that needs a bit of texture – and the maltagliati is essentially pasta offcuts. When you are making a lot of pasta you get left with lots of bits that weren’t quite the right fit; let them dry out and keep them in a pile and you have a quick, easy, free lunch. Obviously, if you aren’t making a lot of pasta then you can just roll out a batch of your favourite pasta and cut it into raggedy shape or alternatively just use your favourite store-bought dried pasta or break up some dried lasagne sheets.
Serves: 4 people
Ingredients:
FOR THE PANGRATTATO:
250g (9oz) stale bread
4 cloves of garlic
extra virgin olive oil
FOR THE SEMOLINA PASTA:
400g (14oz/21/3 cups) fine semolina
235g (81/3oz) warm water
FOR THE RAGU:
75ml (2¾fl oz/1/3 cup) extra virgin
olive oil, plus a little extra if needed
2 aubergines (eggplants), cut into 1cm (1/2-inch) dice
500g (2¼lb) plum tomatoes
1 medium onion, diced
2 cloves of garlic
½ red chilli
2g marjoram leaves
Maldon Sea Salt flakes
freshly ground black pepper
Method:
To make the pangrattato, blitz your stale bread in a food processor or blender to make breadcrumbs – the bigger the crumb the more crunch you get, just remember there is a line somewhere between breadcrumb and crouton. Purée the garlic, add it to the breadcrumbs and rub it in until all the crumbs are coated. Heat a couple of tablespoons of oil in a frying pan (skillet), add the breadcrumbs and fry gently until golden and crispy. Turn onto a baking tray (sheet) to cool and store in an airtight container until needed.
To make the pasta, put the semolina in a pile on a clean work surface. Make a well in the middle and carefully pour in the water, being sure not to let any spill out. Using a fork, whisk the water around, allowing the semolina to fall into the middle slowly. When it reaches the thickness of pancake batter, swap the fork for a dough scraper and chop in the remaining semolina to form a rough dough. Using your hand, bring it together into a rough ball and knead it a couple of times until homogenous but still dimpled and not smooth. Cover with a bowl and leave for 30 minutes to rest.
Knead again; it should become very smooth and silky very quickly. Form it back into a ball, wrap in cling film (plastic wrap), and leave to rest at room temperature for at least 2 hours before using. You can keep it in the fridge overnight, but it will become sticky and harder to work.
When ready to use, either roll the dough by hand using a rolling pin on a lightly floured surface, until it is just a little thinner than a credit card, or roll through a pasta machine following the instructions on page 124. Cut it into rough pieces and leave scattered on the work surface to dry until you need them.
To make the ragu, heat the olive oil in a large saucepan over a medium heat, add the aubergine (eggplant) and cook for up to around 45 minutes until it is broken down to a mush, catching on the pan, browning and existing in the space between dice and purée: be patient, it’s the key to the flavour of this sauce. Remove the aubergine (eggplant) from the pan and set to one side in a bowl. Put the tomatoes in a food processor or blender and blitz to a rough paste. Cook the onion in the same pan as the aubergine until soft, adding a little oil if needed.
Mince the garlic and chilli together, add to the onion in the pan and cook for 30 seconds. Add the tomatoes and cook gently for about 15 minutes until the mixture is thickened and rich. Add the aubergine back in, along with the marjoram, and cook for 5 minutes to bring the flavours together. Season to taste with salt and pepper.
To serve, bring a large saucepan of water to the boil and season as for pasta water (see page 125). Heat the ragu gently in a pan next to it. Add the maltagliati to the boiling water and stir to prevent them sticking. As soon as they float to the surface, lift one out and check its doneness – we are looking for a crisp, al dente texture. If your pasta is freshly rolled this could be as fast as 20 seconds. Using a spider, quickly lift the pasta out into the ragu and stir it through. Using a ladle, add a little of the pasta cooking water to the ragu to create a glossy, creamy texture.
Lay out 4 warmed, rimmed plates or pasta bowls and split the ragu and maltagliati among them. Sprinkle generously with the pangrattato and any leftover herbs.
Purchase ‘Plants Taste Better’ Today
Move aside meat, it’s time to give plants the spotlight in the kitchen! You can purchase your very own copy through Quarto Books today. The perfect gift for your fellow veggie friend…or yourself!
Make sure you have your Maldon Salt ready for these recipes! If you are running out, please feel free to browse on our Where to Buy Page to find your nearest store in which stocks our beloved Maldon Salt.
Lastly, we LOVE seeing your creations – please tag us on Instagram using the #maldonsalt so we can share your own take on Richard’s recipes!
Elevate your mornings with a slice of homemade breakfast loaf!
This high-fibre breakfast loaf is loaded with succulent figs, sweet dates and a hint of black tea to give a delicious malty flavour. We sprinkle in a few warming spices and a pinch of Maldon Sea Salt flakes to complete the symphony of flavours and textures before baking it in the oven.
Pair the loaf with a good dollop of Greek yogurt for extra protein and a few crisp apple slices – because breakfast should be a celebration of delicious nourishment!
Mix together flour, oats, baking powder, nuts and seeds. Add soaked fruit and tea into the mix. Add in the egg and give it one last good mix.
Bake in the oven for an hour 20 minutes. At 30 minutes, cover with baking parchment or tin foil so it doesn’t brown too quickly.
Leave to cool for a couple of hours (or overnight).
Slice and serve with Greek yoghurt, apple and cinnamon. Sprinkle with Maldon Sea Salt.
The only get ahead gravy recipe you’ll need this Christmas! Prep this the day before using chicken wings and then there is no faffing with gravy making on the big day. Fennel and sherry add delicious sweetness and Unami. Make double if you have a big group! You can also freeze this in advance if you want to be really well prepped.
Preheat the oven to 200c.
Place some oil in a large roasting tray and add the 3 shallots, garlic bulb, fennel, and celery. Next add the chicken wings, bay leaf and thyme sprigs. Roast in the oven for 1 hour until everything is caramelized and golden and the vegetables are tender.
In a dry frying pan, brown the flour until it is lightly brown and smelling toasty.
When the chicken wings and vegetables are cooked, transfer the roasting tray from the oven onto the hob. Press and squeeze the chicken wings so all the juices come out, then add the browned flour and place on a low heat. Whisk in the flour to the pan juices and allow it to bubble and thicken. Then add the sherry and allow this to bubble and thicken. Then slowly add the hot chicken stock, again allowing it to bubble and thicken between each addition. Finally add some Dijon mustard, a teaspoon of apple jelly and some Maldon Salt and cracked black pepper.
Strain the gravy and then check the seasoning. Reheat when required and serve alongside your Christmas dinner and rosemary roast potatoes.
Looking for something to cook this Christmas that doesn’t involve a turkey? We’ve made a delicious slow cooked beef brisket, paired with pomegranates to add delicious sweetness to the dish.
This flavour pairing of pomegranates with meat is very common in Persian cuisine, and has been for thousands of years, where the Persian culture tends to use pomegranates for both sauces and marinades for different meats. The tartness of the pomegranate fruit and molasses gives a delightful brightness to the rich brisket, adding depth as your take your first bite.
Pomegranate molasses can be hard to find at your local grocery, however Odysea has a beautifully sweet & tart Pomegranate Molasses, made from 100% concentrated pomegranate juice.
Why this recipe is perfect for Christmas
Our slow cooked pomegranate beef brisket is perfect for the festive season. This time of the year calls for rich, hearty dishes which is everything that the beef brisket holds. The juices of pomegranate molasses seeps throughout the dish, given a delightful, festive feel. Not only this, the slow cooking of the meat produces rich and beautifully tender results, making your guests want to go in for seconds.
Most importantly, this recipe is simple and effective for Christmas. Once you have you list, prepped and assembled everything into the casserole dish/pot, you simple let it cook away for 5 hours while you go about your business. This makes it IDEAL for such a busy time of the year. Once the time is done, you are greeted with a dish that delivers both in complex flavour, achieved with simplicity.
Here is how to make festive slow cooked pomegranate brisket
Take the meat out the fridge 30 mins before cooking.
Preheat the oven to 120C.
Place a large heavy bottomed casserole pan on the hob and add the olive oil. When it has heated up, add the brisket, and sear it on all sides for approximately 10 minutes – you want the meat well browned as this adds lots of flavour.
Once the meat is nicely browned, remove from the pan and set aside on a plate. Add the onions into the pan with all the meat juices, and fry them until they are soft and starting to caramelize. Then add the garlic cloves, Maldon sea salt flakes and the spices and fry for another few minutes until smelling fragrant.
Next add the apple cider vinegar and allow it to bubble and cook off before adding the soft brown sugar and the stock. Bring the liquid up to a simmer and then add the brisket back to the pot. Place a lid on the casserole and put it into the oven for 5 hours.
Check how tender the meat is by pricking with a fork, it should pull apart and shred very easily. If it doesn’t, then return it to the oven for another 30 minutes. Baste the meat in the juices, and if it’s looking a little dry the splash in some water.
After the meat has cooked, remove from the oven, and rest it under some foil for 10 minutes.
Then shred the meat with two forks and mix into all the juices and sauce. Drizzle in the pomegranate molasses and toss through to make it sticky and unctuous. Transfer to a large platter and scatter with the pomegranate seeds and coriander leaves.
Serve this with some sides, we chose fluffy wild rice, seasonal greens, and warm flatbreads.
What sides go well with beef brisket?
Our Hasselback potatoes are a match-made-in-heaven when paired with beef brisket. The deliciously crispy outer provides an irresistible crunch that compliments the tender meat perfectly. Additionally, the fluffy centres of the potato soak up the remaining juices on the plate, leaving no waste!
If you are wanting a green vegetable, try our roasted Brussels Sprouts, peppered with bacon for a deliciously smoky taste. The earthy and smoky tones of the vegetables balances out the gentle sweetness from the beef brisket that paired with pomegranate.
A twist on the classic cranberry sauce. Homemade cranberry sauce is so worth making, it’s unbelievably simple and tastes so much better than store bought. Orange and cranberry pair brilliantly, but the addition of Maldon Chilli Sea Salt adds a hum and warmth to the sauce which is unexpected. Add a splash of port because… well, Christmas!
Place the cranberries, orange zest and juice, caster sugar and cinnamon stick in a pan and simmer gently for 10 minutes until the cranberries have begun to break down and pop.
Add the port and Maldon Chilli Sea Salt and simmer for a further 5 minutes until thickened.
Check the seasoning and then allow to cool before serving with your Christmas meal or alongside pigs in blankets.
Homemade custard is a thing of beauty, you could eat this straight with a spoon. Christmas spices such as brandy, nutmeg, cloves, cardamom, and cinnamon make this custard extra delicious and warming. A sprinkling of Maldon Sea Salt flakes in a sweet sauce always adds the perfect saltiness note. This would be great cold in a trifle, warmed on Christmas pudding or even with a mince pie.
Place the milk, cream, brandy, and spices into a saucepan and bring to a simmer (but do not boil), and gently simmer for a couple of minutes to allow the flavours to infuse. Remove from the heat.
In a large bowl whisk together the egg yolks and caster sugar until pale. Then slowly pour in the warm infused milk, through a sieve and whisk constantly. When all the milk is added and you have a smooth liquid, pour this back into a clean pan along with the vanilla bean paste and a good pinch of Maldon Sea Salt flakes.
Gently heat again, stirring continuously until the custard has thickened (it should coat the back of a spoon).
Serve the custard on top of warm Christmas pudding or cold in a Christmas trifle.
Bread sauce is a favourite at Christmas, but this one takes it to a whole new level. Using rye sourdough adds a nuttiness and malted flavour, plus Maldon Garlic Sea Salt is a wonderful addition. Lots of fresh nutmeg and crispy sage leaves elevate it from a humble sauce to a spectacular side.
Place the onion halves, garlic cloves, star anise, peppercorn, cloves, and bay leaves in a pan and pour over the milk. Bring to a boil and then reduce to a simmer for 5 minutes. Then turn the heat off and allow the milk to infuse for 1 hour or longer.
After an hour strain the milk to discard the onion and flavourings and place it back into the pan. Add the breadcrumbs and then simmer for 5 minutes until thickened. Then add the butter and double cream, stirring through. Season with Maldon Garlic Sea Salt and cracked black pepper.
In a small pan heat some olive oil and then when hot, fry the sage leaves until crispy
.Remove from the pan and scatter over the top of the bread sauce along with some of the sage oil.
This recipe is a classic to make for your family during the week!
Being a tasty cross between a roast and a stew, this traditional French dish is easy to make and can be ready to eat in under an hour!
We add Maldon Garlic Sea Salt into the stock for the chicken to really soak up the juices and have a beautiful fragrant taste of wild and roasted garlic.
Here is how to make the Garlic and Tarragon Chicken…
Start by adding the olive oil in a large, shallow cast iron pan. When the oil has heated up, add the chicken legs to the pan skin side down.
Cook the chicken legs on a medium heat until the skin has gone golden brown and crispy (it is important not to rush this step, as this adds depth of flavour to the dish and tenderises the meat). When the skin is crispy, turn the legs over and cook on the flesh side until it has browned.
When the chicken legs are browned all over, remove them from the pan and set aside on a plate or tray. Turn the heat down and add the whole garlic cloves. Cook them until they are soft and caramelized and then remove from the pan and set aside with the chicken.
Next add the unsalted butter and melt gently. When the butter is foaming, add the plain flour and mix it in quickly with a wooden spoon. Cook the flour for a couple of minutes until it is golden and smelling biscuity. Then add the stock, a ladleful at a time, whisking in each addition to make sure there are no lumps. Allow the sauce to thicken each time before adding the next ladleful.
Once all the stock has been added allow the sauce to bubble and thicken. Then add the wholegrain mustard, lemon juice and zest and double cream. Stir it in and then add the Maldon Garlic Sea Salt and some cracked black pepper.
Place the chicken legs back into the sauce along with the caramelized garlic cloves. Place the lid on the pan and gently simmer this at a very low temperature for approximately 10 minutes or until the chicken legs are cooked through. The sauce should be glossy and creamy, however if it needs loosening add a splash of water or stock.
Finally sprinkle over the tarragon and then serve with your favourite sides – we like to serve it with creamy mashed potato and greens.
Struggling for ideas on what to cook during the Christmas holidays? Why not combine all the best flavours of Christmas and wrap them under a blanket of golden puff pastry with our showstopping sausage rolls!
We use good quality pork sausages as the main component for our rolls, with bursts of sweet cranberries and chestnuts for a nutty bite!
Why add salt to sausage meat?
Adding a pinch of Maldon Sea Salt to the raw sausage meat will improve the texture and enhance the flavour of the pork, whilst also lowering the water content, resulting in a perfectly seasoned meat ready to be used for making sausage rolls!
Here is how to make our Christmas Sausage Rolls…
Start by making the filling – in a large bowl mix together the sausage meat, cranberries, chestnuts, sage, cranberry sauce, some Maldon salt and cracked black pepper.
Unroll the pastry, place half the sausage meat down the length of it on one side, and then fold the rest of the sheet over it, using the egg wash to seal it tightly. Repeat this with the second sheet of pastry. Press the seal using a fork and then place the two long sausage rolls into the fridge for 30 minutes to firm up.
Preheat the oven to 180C.
After 30 minutes, remove the sausage rolls and then cut them into 6 individual sausage rolls – so 12 in total. Place them onto a baking tray lined with parchment paper and brush them all over with egg wash. Sprinkle the tops with nigella seeds and then bake in the oven for 15 minutes. They should be golden brown and crisp on top.
Remove from the oven and allow to cool slightly before serving with extra cranberry sauce for dipping and a final sprinkle of Maldon Salt.
Can you make these vegetarian?
Absolutely! We make a delicious meat-free version of this recipe, where we use vegetarian sausages, finished off with black sesame seeds. There are many well-known brands that offer meat-free alternatives, including Richmond, Linda McCartney and Cauldron.
What to serve with sausage rolls?
Sausage rolls are the ultimate comfort food – there’s no doubt about that! So, when your are baking these for a gathering, what other tasty finger foods and side dishes could you serve?
Firstly, homemade chips. These are the perfect companion to your sausage rolls. The chip’s crispy, golden skins have the same soft interior as of the humble sausage roll, making it a match made in heaven.
If you are looking for something with a pinch of spice, try our BBQ sweetcorn, paired with a harissa and coriander butter. The smoky flavours contrast the sweet burst of cranberries in the sausage rolls, playing with that irresistible sweet and spicy flavour balance.
Our chicken noodle soup is the final recipe for using chicken three ways. We first cooked the whole chicken through spatchcocking it to create a deliciously succulent spatchcock BBQ chicken. From the leftovers, we then used roughly 100g of the chicken, shredding it to create a beautifully creamy chicken, leek and bacon pie that was topped with crispy filo pastry.
Now, with the chicken carcass left and the roughly 75g of chicken, we can make a soup full of fresh aromatics and flavours that will warm you up through the chillier days.
You can serve this soup with a side of homemade rosemary focaccia, oven baked until it is perfectly golden and crisp to mop up the final juices left in the bowl.
Here is how to make our Chicken Noodle Soup…
Begin by making your chicken broth. Make sure any remaining meat has been stripped from the chicken carcass and then place it in a large stock pot and cover with water (you want to add lots of water and then allow it to reduce down).
Add the onion, and one of the carrots roughly chopped. Then add 2 sticks of celery, roughly chopped. Add a pinch of Maldon Salt, black peppercorns and then the sprigs of parsley and thyme.
Place the pot onto the hob and bring to the boil. Once boiling reduce the temperature to a very low simmer and allow this to bubble away for 1 – 2 hours. Occasionally checking the water to make sure it hasn’t reduced to rapidly, adding more if needs be. If there is scum rising on the surface, make sure to skim this off.
After an hour or two you should be left with a wonderfully flavoursome broth or stock.
Drain the broth through a sieve and discard the carcass and vegetables. Set the clear broth aside.
To make the soup, start by cooking the angel hair pasta according to the packet instructions. Then drain, rinse off the starch, and set aside tossed in a little olive oil to stop it sticking together.
Place the clear broth back into a pan and bring to a simmer. Peel the carrot and then finely slice, along with the remaining celery. Place these into the broth and allow them to boil for a few minutes to cook. Add any leftover chicken to the broth now and the handful of kale or cavolo nero, cooking for a further minute.
Finally add the chopped parsley and check the seasoning, adding some more Maldon Salt or cracked black pepper if required.
To serve, arrange the angel hair pasta at the base of two bowls. Then ladle over the hot broth with vegetables and chicken.