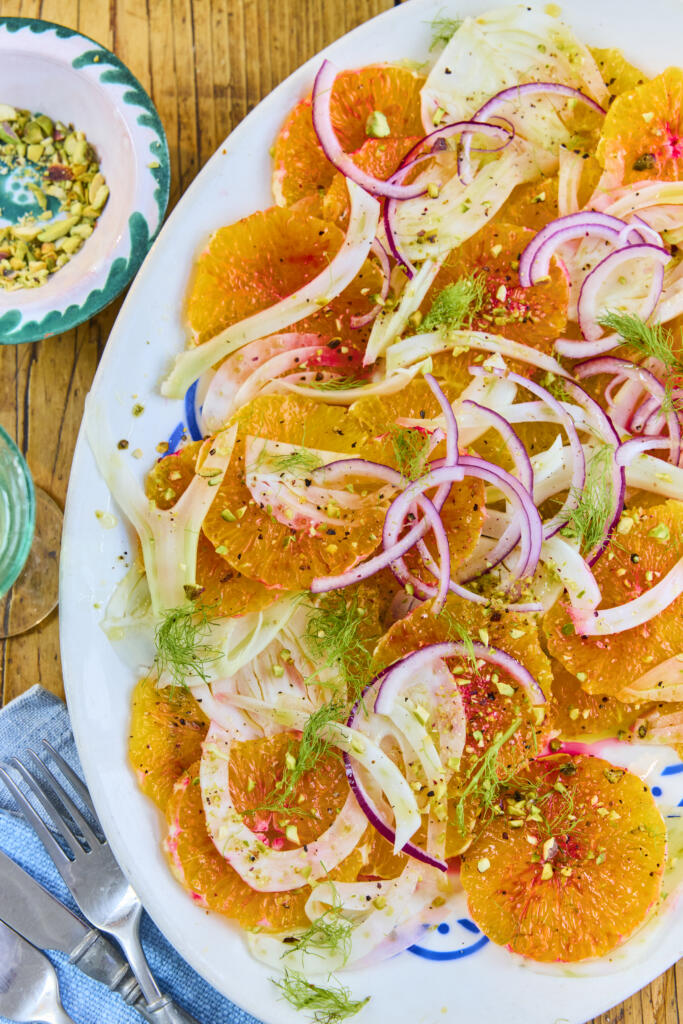
Bright, fresh and ready in minutes, this blood orange, fennel and pistachio salad is Sicilian sunshine on a plate. Juicy citrus rounds and paper-thin shaved fennel are dressed in a honey-sherry vinaigrette and finished with crunchy pistachios and a pinch of Sicilian Fine Sea Salt, Selected by Maldon. It’s an elegant no-cook starter or side that comes together with almost no effort.
Why You’ll Love This Blood Orange & Fennel Salad
No-Cook & Elegant: A genuinely impressive starter that needs nothing more than slicing, shaving and a quick whisk of dressing.
Fresh & Vibrant: Sweet citrus, aniseed fennel and earthy pistachios balance beautifully, lifted by a flake of Sicilian sea salt.
Naturally Good for You: Light, colourful and packed with fresh produce – perfect alongside richer Sicilian dishes.
How to Make Blood Orange & Fennel Salad
Prepare the blood oranges: Using a sharp knife, peel each orange so all the pith is removed and you’re left with just the juicy flesh. Slice into 1cm rounds and arrange on a platter, tipping any juices from the board into a small bowl.
Shave the fennel: Cut the top off the fennel bulb, reserving the fronds. Use a mandolin or sharp knife to shave the fennel very thinly, then arrange it across the platter with the orange slices.
Whisk the dressing: To the bowl of reserved orange juice, add the olive oil, sherry vinegar, honey, Sicilian Fine Sea Salt, Selected by Maldon and a little cracked black pepper. Whisk together into a dressing.
Dress and garnish: Drizzle the dressing all over the orange and fennel, then garnish with the finely chopped pistachios and reserved fennel fronds. Serve straight away.
Tips for the Perfect Blood Orange & Fennel Salad
Shave it paper-thin: A mandolin gives the finest, most delicate fennel slices – the thinner the better for this salad.
Save every drop of juice: Tip the juices from your chopping board into the dressing for extra citrus flavour.
Finish with the flakes: A pinch of Sicilian Fine Sea Salt, Selected by Maldon right before serving makes the sweet citrus sing.
What to Serve with Blood Orange & Fennel Salad
This salad is a fresh, palate-cleansing partner for richer Sicilian plates. Serve it alongside grilled swordfish steaks or Sicilian arancini, with sesame semolina bread to mop up the dressing. It also slots nearly into an antipasto spread. Out of blood orange season, regular oranges or a mix of citrus works just as well.
Frequently Asked Questions
Can I use regular oranges?
Yes. Blood oranges give a striking colour and a slightly berried sweetness, but regular oranges, navel or a mix of citrus work just as well when they’re out of season.
Can I make it ahead?
Slice the oranges and shave the fennel a few hours ahead and keep chilled, but dress the salad and add the pistachios just before serving so everything stays crisp and fresh.
How do I stop the fennel browning?
Toss the shaved fennel in a little of the orange juice or lemon juice if prepping ahead – the acid keeps it pale and fresh.
Fresh Burrata with Tomatoes and Maldon Chilli Sea Salt
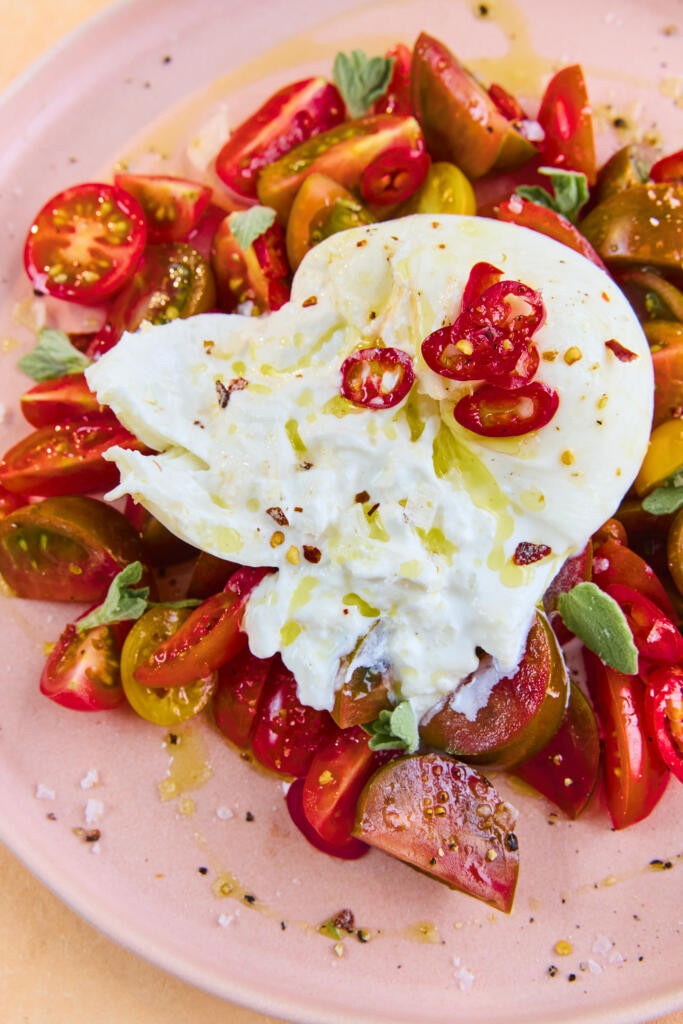
This simple burrata with tomatoes recipe is a fresh, no-cook dish perfect for summer. Creamy burrata pairs beautifully with sweet heritage tomatoes, a kick of fresh chilli, and the distinctive heat of Maldon Chilli Sea Salt. Finished with olive oil and balsamic vinegar, it’s an elegant starter or light lunch ready in minutes.
How To Make Burrata and Tomatoes Salad with Chilli Sea Salt
Pace the chopped tomatoes in a bowl and toss gently with a splash of balsamic vinegar and extra virgin olive oil.
Arrange the tomatoes on a serving plate.
Place the burrata in the centre. If vegan or diary free, we recommend using Julienne Bruno’s Burrella.
Drizzle with additional olive oil.
Garnish with oregano leaves and sliced chilli.
Finished generously with Maldon Chilli Sea Salt and cracked black pepper.
Slice into the burrata and allow the creamy centre to spill over the tomato. Servce immediatley.
Bring burrata to room temperature before serving to ensure maximum creaminess.
Add crusty bread to mop up any of the juices, or to make the dish more filling in general.
Don’t skip the Maldon Chilli Sea Salt – it adds layered heat with the Aleppo pepper and bird’s eye chilli and texture.
What Makes Maldon Chilli Sea Salt different from regular salt?
Maldon Chilli Sea Salt combines the brand’s signature pyramid-shaped sea salt flakes with Aleppo pepper and bird’s eye chilli, adding both a delicate texture and a gentle heat, ideal for finishing dishes like burrata.
Can I use Maldon Chilli Sea Salt in salads?
Yes, Maldon Chilli Sea Salt is perfect for salads. It enhances flavour while adding a subtle kick, especially in fresh dishes like tomatoes and burrata.
What goes well with burrata and tomatoes?
Burrata and tomatoes pairs well with:
Fresh herbs like oregano or basil
Olive oil and balsamic vinegar
Cracked black pepper for depth
Crusty bread or sourdough for mopping up the fresh juices
Is This Burrata Recipe Healthy?
This dish is relatively healthy, packed with fresh tomatoes and healthy fats from olive oil, though burrata is rich and best enjoyed in moderation.
Can I Make Burrata and Tomato Salad in Advance?
It’s best served immediately, but you can prepare the tomatoes ahead and assemble just before serving.
How Spicy Is Maldon Chilli Sea Salt?
It provides a mild to moderate heat, designed to enhance ingredients rather than overpowering them.
What Type of Tomatoes Are Best For Burrata?
Heritage or heirloom tomatoes are ideal as they offer varied sweetness, acidity and colour.
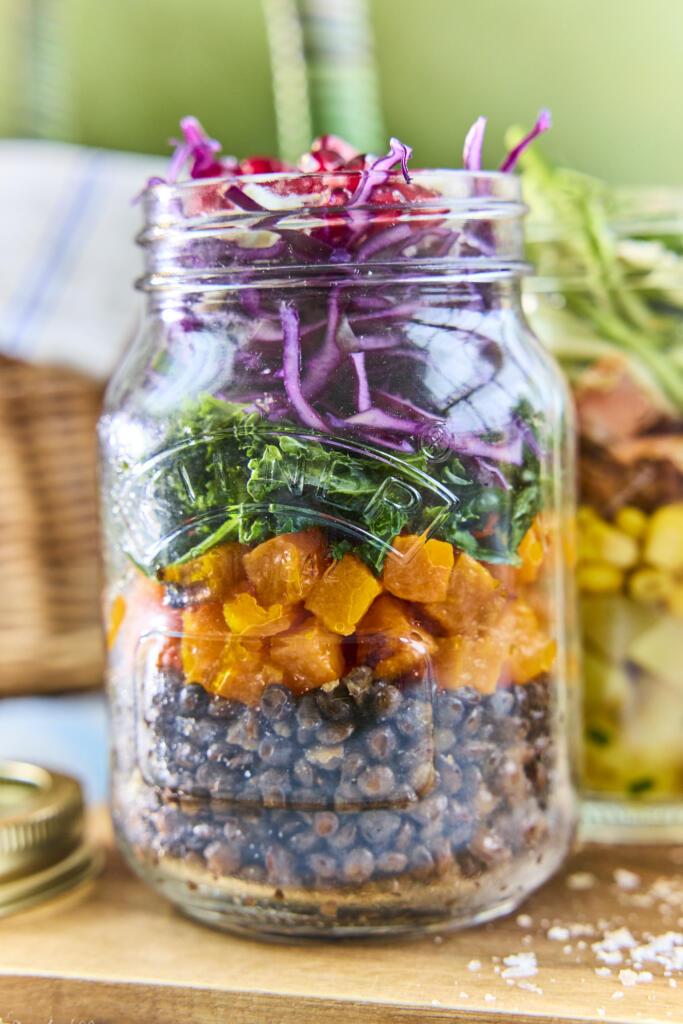
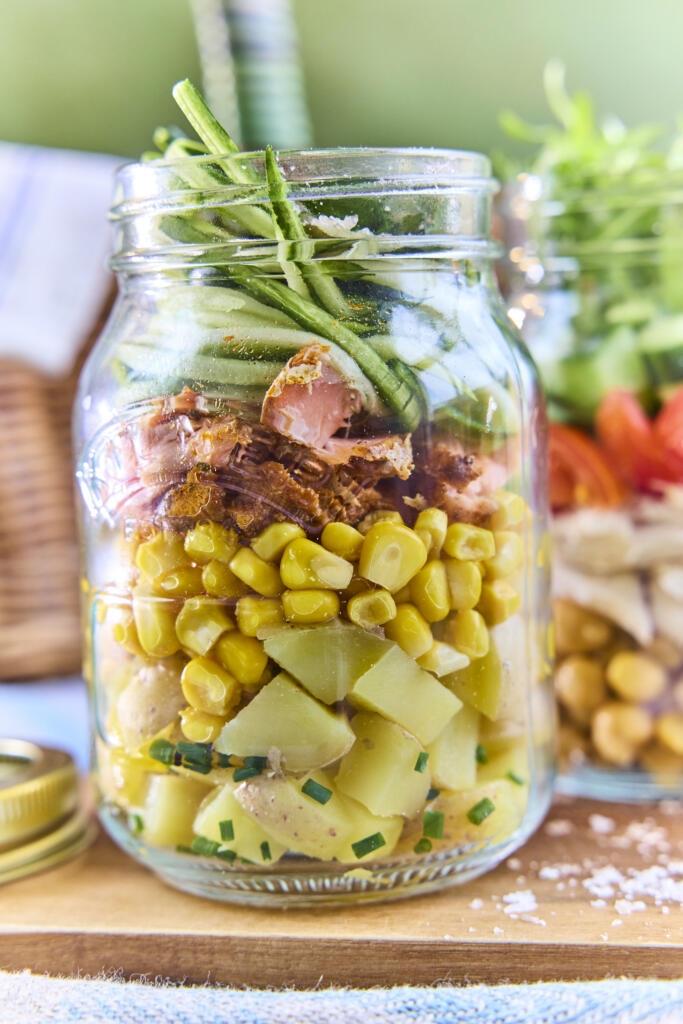
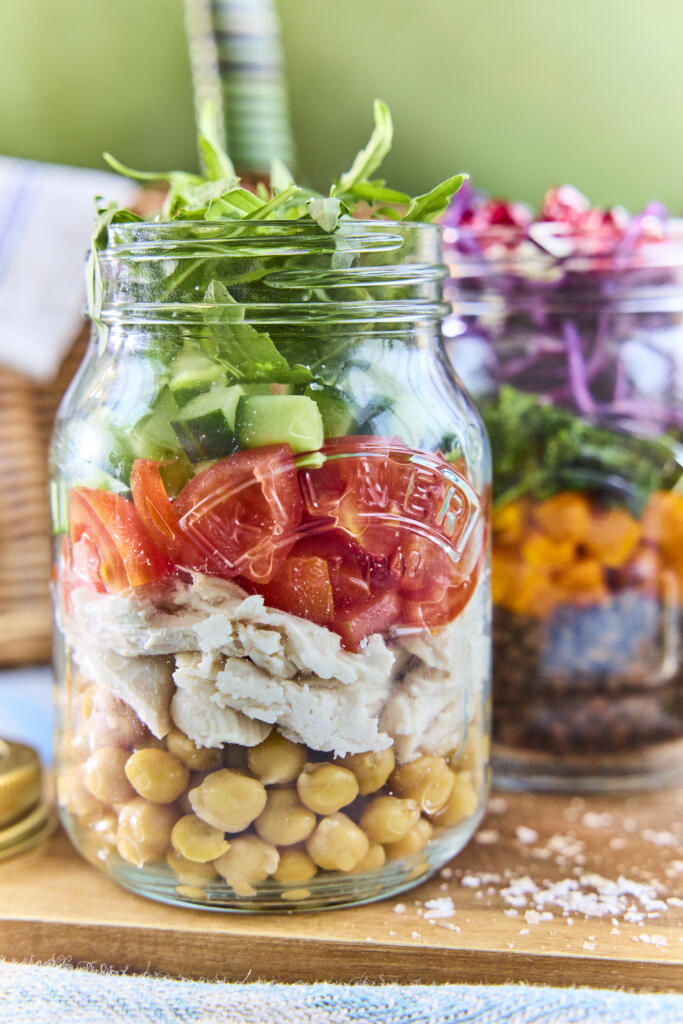
One simple method, three vibrant salads and a single versatile dressing that ties them all together. These layered summer salads – chicken and chickpea, lentil and butternut squash, and salmon and new potato – are built to be made ahead, so they’re ideal for picnics, lunchboxes and easy meal prep. A Maldon Smoked Sea Salt dressing brings the whole trio to life.
Why You’ll Love These Layered Summer Salads
Three Salads, One Dressing: Mix and match all week – every salad is dressed with the same quick, smoky Maldon vinaigrette.
Genuinely Make-Ahead: Layered in jars with the dressing kept separate, these stay crisp and fresh in the fridge for days.
Effortlessly Portable: Jars travel beautifully, making these the ultimate grab-and-go picnic or desk lunch.
How to Make Layered Summer Salads (Step-by-Step)
Prep each salad’s components: Roast the butternut squash and cook the lentils for the lentil salad; boil and cool the new potatoes for the salmon salad. Massage the kale with a pinch of Maldon Smoked Sea Salt flakes to soften it. Everything can be batch-prepped ahead to make assembly quick.
Layer up each salad: For each salad, layer the elements into a jar or container in the order they’re listed. Heavier, sturdier ingredients go at the bottom, with delicate leaves and herbs on top – keeping them away from the dressing is what keeps everything fresh.
Make the versatile dressing: Add all the dressing ingredients to a jar, screw the lid on tightly and shake well until thickened and emulsified. The Maldon Smoked Sea Salt gives a subtle depth that works across all three salads.
Store or take on the go: Keep the layered salads in the fridge or pack them up for a picnic, with the dressing in a separate jar until serving.
Dress and serve: Just before eating, drizzle over some dressing, add the lid and shake again to coat. Tip out onto a plate or eat straight from the jar.
Tips for the Perfect Layered Summer Salads
Layer in the right order: Build from sturdy to delicate so leaves and herbs never sit in the dressing until you’re ready to eat.
Dress at the last minute: Keep the dressing in its own jar and shake it through just before serving to keep everything crisp.
Batch the dressing: The Maldon Smoked Sea Salt dressing keeps for up to a week in the fridge – make double for the week ahead.
Layered salads keep well in sealed jars in the fridge for up to 3 days, as long as the dressing is kept separate and added only when you’re ready to eat.
Why layer the salad in a jar?
Layering keeps the heavier, wetter ingredients at the bottom and the leaves on top, so nothing wilts. Jars also travel upright without spilling – ideal for picnics and packed lunches.
Can I make these vegetarian or vegan?
Easily. Skip the chicken, salmon, parmesan and feta, or swap in extra roasted veg, beans and seeds. The dressing is naturally vegetarian – use maple syrup in place of honey to make it vegan.
When you need an elegant, restaurant-quality vegetable side dish but are short on time, this sauteed asparagus with mushrooms is the perfect solution. Earthy, wild mushrooms meet vibrant, tender-crisp asparagus in a hot pan, soaking up rich olive oil and aromatic crushed garlic. The entire dish comes together in under 15 minutes from prep to plate. The secret to elevating this simple pan-fry? A generous pinch of Maldon Smoked Sea Salt flakes tossed through right at the end to enhance the savoury, umami flavours of the mushrooms.
Why You’ll Love This Sautéed Asparagus Recipe
Lightning Fast: With just 5 minutes of prep and 10 minutes in the pan, this is the ultimate speedy side dish for busy weeknights or stress-free dinner parties.
Incredible Texture: Pan-frying the mushrooms on a high heat gives them a beautiful, golden-crisp edge, while the asparagus stays perfectly vibrant and tender-crisp.
Earthy & Smoky: Using a blend of wild mushrooms (like shiitake or chanterelle) paired with our signature smoked sea salt creates a deep, complex flavour profile that punches far above its simple ingredients.
How to Make Sauteed Asparagus with Mushrooms (Step-byStep)
Step 1 – Prepare the vegetables
Start by preparing your asparagus. Remove the tough, woody ends from the spears, then cut the remaining tender stems in half to create two shorter pieces per spear. Next, take your mixed mushrooms and brush them clean. Keep any smaller mushrooms whole, but cut larger varieties in half so everything cooks at the same rate.
Step 2 – Fry the mushrooms
Heat the olive oil in a large frying pan over a high heat. Add the prepared mushrooms and fry until they soften, release their moisture, and develop a nicely golden, crisp exterior.
Step 3 – Add the asparagus and garlic
Once the mushrooms are golden, toss the prepared asparagus pieces into the hot pan. Sauté the asparagus in the olive oil alongside the mushrooms for a couple of minutes until they turn bright green.
Step 4 – Finish and season
Add the crushed garlic cloves to the pan. Fry for another minute or so until the garlic becomes beautifully fragrant and the asparagus is perfectly tender. The whole cooking process should take 10 minutes or less. Remove the pan from the heat, season generously with Maldon Smoked Sea Salt flakes, and serve immediately.
Tips for the Perfect Pan-Fried Vegetables
Brush, Don’t Wash: Mushrooms are like sponges. If you rinse them under water, they will absorb it and steam in the pan rather than getting crispy. Always use a dry pastry brush or a damp piece of kitchen paper to gently brush away any dirt.
Keep the Heat High: To get that lovely golden-brown sear on the mushrooms without overcooking the asparagus, make sure your frying pan and olive oil are nice and hot before you start.
Add Garlic Last: Crushed garlic burns very quickly over high heat, turning bitter. By adding the garlic during the final minute of cooking, you infuse the dish with its fragrant flavour without risking a burnt taste.
What to Serve with Sautéed Asparagus
This garlicky, earthy side dish is incredibly versatile. It is a classic pairing for a pan-seared steak, a juicy roast chicken breast, or a thick-cut pork chop. For a vegetarian option, try serving these savoury vegetables stirred through a creamy Parmesan risotto or simply tossed with fresh pasta and an extra drizzle of good quality olive oil.
Frequently Asked Questions
Can I use butter instead of olive oil
Yes, you can absolutely use butter instead of olive oil! While our recipe calls for asparagus sautéed in olive oil for a lighter, Mediterranean finish, you can absolutely substitute it with butter. Butter will add a rich, nutty flavour that pairs beautifully with the mushrooms.
How do I know where to trim the asparagus
The easiest way to find where the tough, woody end stops and the tender stem begins is to take one spear of asparagus and gently bend it near the bottom. It will naturally snap at the exact point where it becomes tender. You can use that snapped piece as a length guide to slice the rest of your bunch with a knife.
Can I use standard button mushrooms?
You certainly can use button mushrooms instead of mixed mushrooms. However, we highly recommend using a “mixed wild” pack (containing varieties like shiitake, oyster, or chanterelle) if you can find them. They offer a much meatier texture and a deeper, more complex flavour than standard white button mushrooms.
If you have never tried cooking radishes before, you are in for a treat. While raw radishes are famous for their sharp, peppery bite, learning how to roast radishes completely transforms them. The oven mellows their heat, turning them incredibly sweet, tender, and juicy. Paired with earthy, vibrant baby rainbow carrots and a drizzle of honey, this dish is the ultimate celebration of seasonal root vegetables. We finish the whole tray with a generous pinch of Maldon Pepper Sea Salt flakes to perfectly balance the natural sweetness with a subtle, savoury, peppered flavour.
Why You’ll Love This Roasted Radishes and Rainbow Carrots Recipe
A Transformation of Flavor: Roasting radishes is a revelation, swapping their raw spice for a mellow, turnip-like sweetness that pairs flawlessly with caramelised carrots.
Visually Stunning: The mix of vibrant pinks, purples, oranges, and yellows makes this a beautiful side dish that will elevate any dinner table or Sunday roast.
Minimal Prep: With only 5 minutes of prep work required, you simply toss the vegetables on a tray and let the oven do the hard work.
How to Make Roasted Radishes and Rainbow Carrots (Step-by-Step)
Step 1 – Preheat the oven
Preheat your oven to 180°C.
Step 2 – Prepare the vegetables
Lightly scrub the rainbow carrots to remove any dirt and place them whole onto a large baking tray. Take your mixed radishes and keep the smaller ones whole, while halving any larger ones so everything cooks evenly. Add them to the tray.
Step 3 – Prepare the garlic
Cut the whole garlic bulb in half horizontally right through the middle, creating two cross-sections. Nestle both halves onto the baking tray among the vegetables.
Step 4 – Season and toss
Drizzle the carrots, radishes, and garlic generously with the olive oil. Season well with Maldon Pepper Sea Salt flakes and cracked black pepper. Give everything a light toss on the tray to ensure the vegetables are evenly coated, then place into the preheated oven.
Step 5 – Roast and garnish
Roast the vegetables for 35 minutes, or until they are fork-tender and beautifully caramelised around the edges. Remove from the oven, arrange on a serving platter, and finish with fresh thyme leaves and a sweet drizzle of honey.
Tips for the Perfect Roasted Root Vegetables
Don’t Overcrowd the Pan: Make sure your radishes and rainbow carrots have plenty of space on the baking tray. If they are piled on top of each other, they will steam instead of caramelising and getting those delicious, crispy edges.
Squeeze the Garlic: Once roasted, those halved garlic bulbs become incredibly sweet and spreadable. Squeeze the soft garlic cloves out of their papery skins directly over the vegetables before serving for an extra punch of flavor.
The Pepper Salt is Key: Because the carrots and radishes both become quite sweet in the oven—especially with the honey drizzle—the Maldon Pepper Sea Salt is vital. It cuts through the sweetness and adds a complex, savoury depth.
What to Serve with Roasted Radishes
This vibrant mix is incredibly versatile. It serves as a fantastic, colourful side dish for a classic Sunday roast chicken or beef. It also pairs beautifully with grilled fish, thick-cut pork chops, or as part of a larger vegetarian feast alongside grains like quinoa or farro.
Frequently Asked Questions
Can you roast radishes?
You can absolutely roast radishes! While often eaten raw in salads, roasting is arguably the best way to eat radishes. The heat breaks down their spicy compounds, turning them mild, juicy, and deliciously sweet.
Do I need to peel baby rainbow carrots?
No, there is no need to peel baby rainbow carrots! Their skins are very thin and hold a lot of nutrients. Simply give them a good scrub under cold water to remove any dirt before tossing them on your baking tray.
Can I use regular carrots or standard red radishes?
Yes. While the mixed colours of rainbow carrots and mixed radishes look stunning on a platter, the recipe works exactly the same with standard orange carrots and classic red globe radishes. Just ensure you cut any larger standard carrots into batons so they cook at the same rate as the radishes.
Preheat the oven to 200C fan.
Put the whole beetroots and thyme on a baking tray. Drizzle over 2 tbsp vinegar and 2 tbsp olive oil. Season with Maldon Sea Salt. Cover the tray with a layer of parchment paper, followed by a layer of foil. Tuck the foil round the edges of the tray to create a sealed environment for the beetroot to steam.
Roast for 30-45 minutes, depending on the size of the beetroots, until tender (check by inserting a knife, it should go in easily).
Once the beetroot is just cool enough to handle, cut into wedges and return to the tray with all the roasting juices. Add the remaining 2 tbsp olive oil and drizzle over the honey. Toss gently to coat and return to the oven for 20 minutes until caramelised.
Drizzle over the remaining vinegar and extra honey to serve.
Make the Caesar dressing by mixing the mayonnaise, Dijon mustard, lemon juice, Worcestershire sauce, mashed anchovies, grated garlic, and Parmesan in a bowl. Stir until smooth and season with Maldon Garlic Sea Salt and black pepper to taste. Set aside.
Butterfly the chicken breasts and flatten to about 1cm thick.
Coat each chicken breast by first dredging in Maldon Garlic Sea Salt, seasoned flour, then dipping in beaten egg, and finally pressing into the panko breadcrumbs until fully coated.
Prepare the salad base by combining the heritage and bitter leaves in a large bowl. Add the chopped anchovies but leave undressed until ready to serve.
Add the olive oil and butter to the hot griddle. Once melted, add the halved garlic bulb and thyme sprigs. Let them infuse the oil for about 20 seconds.
Place the breaded chicken onto the griddle and cook for 5–6 minutes on each side until golden, crisp, and cooked through.
Remove the chicken and let it rest for 2 minutes. Meanwhile, toss the salad leaves and anchovies with the Caesar dressing. Taste and adjust seasoning with Maldon Garlic Sea Salt.
To serve, lay each schnitzel on a plate, top with a mound of dressed salad, and finish with plenty of shaved Parmesan and a final pinch of Maldon Garlic Sea Salt.
Discover a charred broccoli salad with caramelised edges, creamy feta and fresh mint, all tossed in a zesty lemon‑garlic dressing. Roasted at high heat for maximum flavour and tender‑crisp bite, this easy broccoli salad is a vibrant side for weeknights and a standout on festive tables. Finished with a pinch of Maldon Garlic Sea Salt for clean, bright seasoning.
How to char broccoli?
Toss florets with oil and salt, spread on a hot tray in a single layer. Roast at 240°C fan for 15–20 minutes until edges are deeply browned and stems are tender‑crisp. Finish with Maldon Garlic Sea Salt flakes.
How to Make Charred Broccoli Salad with Feta, Almonds & Mint
Step 1 Roast the Broccoli
Preheat oven to 240°C fan (465–480°F) or its highest setting. Preheat the tray for extra char on the broccoli; make sure to rotate the pan halway.
Toss florets with 3 tbsp olive oil and a good pinch of Maldon Original Sea Salt.
Spread in a single layer on your largest baking tray (use two if needed so broccoli browns, not steams).
Roast 15–20 minutes until tender with deeply charred edges. Texture cue: tender‑crisp with caramelised tips.
Step 2 – Make the Lemon-Garlic Dressing
Whisk lemon zest and juice, 5 tbsp olive oil, honey, grated garlic and chilli flakes.
Season with a pinch of Maldon Garlic Sea Salt to taste.
Step 3 – Assemble and Serve
Pile warm broccoli onto a large platter.
Top with crumbled feta, toasted almonds and mint leaves.
Drizzle over half the dressing; serve the rest alongside so guests can add more. You can serve at either warm or room remperature.
Tips & FAQs:
Tips:
Dry broccoli well and cut similar‑sized florets for even charring.
Don’t overcrowd the tray—space equals char.
For extra smoky notes, finish under a hot grill/broiler for 1–2 minutes or on a BBQ.
Finish with a final pinch of Maldon Original Sea Salt at the table for crunch and clean salinity.
FAQs:
How do you char broccoli without burning it?
Use very hot oven, large tray, and oil lightly. Roast until edges caramelise (15–20 mins), then check every 2 minutes.
Can I make charred broccoli salad ahead?
Roast broccoli and make dressing up to 2 days ahead. Dress just before serving; add mint and feta last for freshness.
Can I use frozen broccoli?
Yes. Roast from frozen on a preheated tray at high heat; expect a couple of extra minutes and slightly softer texture.
How do I make it vegan or nut‑free?
Swap feta for a vegan alternative (or omit), honey for maple syrup; replace almonds with toasted seeds (pumpkin/sunflower).
Can I grill instead of roast?
Toss florets with oil and salt, thread onto skewers or use a grill basket. High heat, 8–10 minutes, turning for even char.
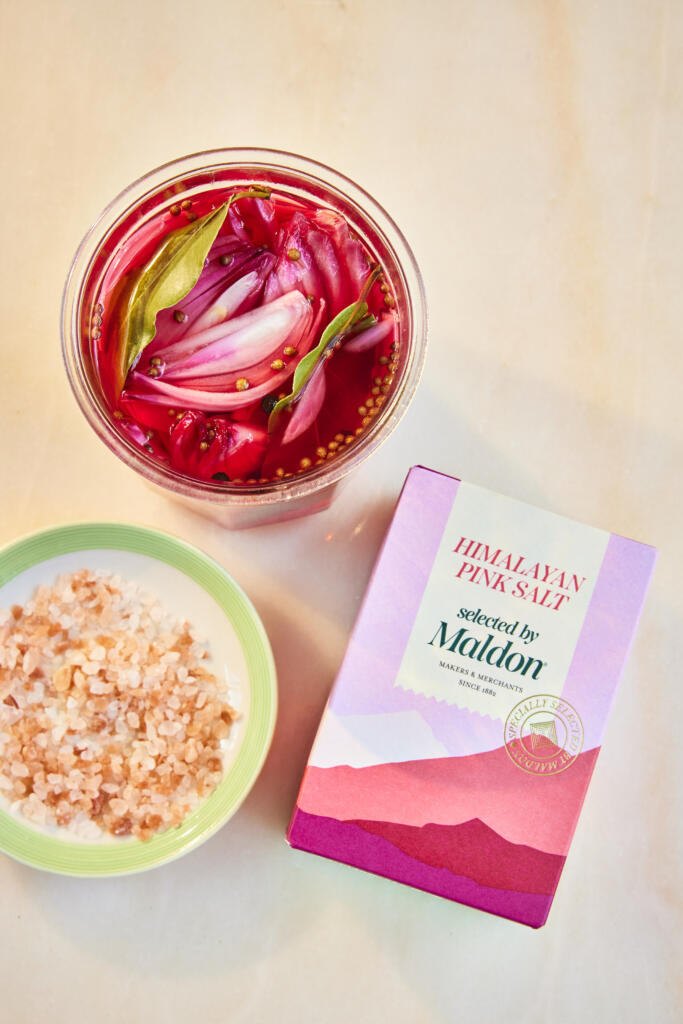
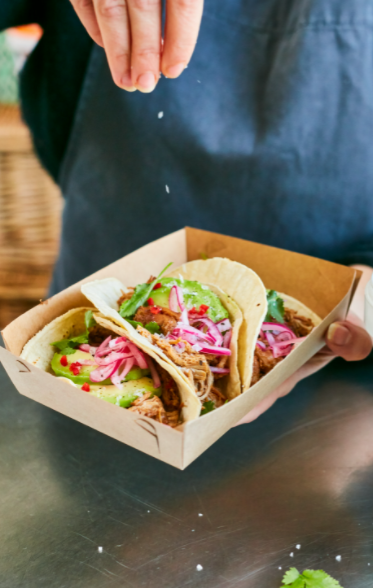
These quick pickled red onions are the easiest way to add tangy crunch and colour to everything from tacos to salads. A hot brine of apple cider vinegar, warm spices and honey is poured over thinly sliced onions, then finished with Himalayan Pink Salt, Selected by Maldon for clean, bright seasoning. They turn vivid pink in just a few hours and keep well in the fridge — an effortless, make‑ahead topping you’ll use all week.
How to Make Quick Pickled Red Onions?
Pack sliced onions in a sterilised jar.
Simmer vinegar, honey, spices and Himalayan Pink Salt, Selected by Maldon; pour over onions.
Seal, cool and refrigerate until bright pink (2–12 hours).
Keep refrigerated; use within 2 weeks.
How to Make Quick Pickled Red Onions (Detailed Version)
Step 1 – Prep the Jar & Onions
Thinly slice red onions (a mandolin helps).
Pack into a large, sterilised heatproof jar. To sterilise quickly, wash, then heat the jar in a 160°C (320°F) oven for 10 minutes; air-dry lids.
Step 2 – Make the Hot Brine
Add vinegar, honey (or sugar), coriander seeds, peppercorns, bay leaves and Himalayan Pink Salt, Selected by Sea Salt to a small pan.
Bring to a gentle simmer, stirring to dissolve, then remove from heat.
Step 3 – Pour & Seal
Immediately pour hot brine over onions to fully submerge.
Seal, cool to room temperature, then refrigerate.
Step 4 – Chill & Serve
Leave to pickle a few hours until bright pink (flavour deepens overnight).
Serve cold; keep onions submerged in brine.
Tips & FAQs
Tips
Slice evenly (1–2 mm) for fast, even pickling.
Pack tightly and submerge fully; top up with a splash more vinegar if needed.
For softer bite, blanch slices in boiling water for 10 seconds; drain before jarring.
Use caster sugar or maple syrup to make the recipe vegan.
FAQs:
How long do pickled red onions last?
Up to 2 weeks refrigerated in a clean, sealed jar. Always use clean utensils and keep onions submerged.
Can I use different vinegar?
Yes. White wine or red wine vinegar work; avoid malt vinegar for this style (overly strong).
Do I need to sterilise the jar?
Recommended for best quality. This is a refrigerator pickle (not canned); always store in the fridge.
Can I reduce the sweetness?
Yes. Adjust honey/sugar to taste; salt and acid provide the primary preservation.
When are they ready to eat?
After 1–2 hours for a quick pickle; best flavour and colour after 12–24 hours.
Can I add other flavours?
Try chilli flakes, fennel seeds, citrus peel, or garlic. Keep the basic acid‑salt ratio.
Serving Suggestions
Tacos, burritos and quesadillas
Burgers, hot dogs and pulled pork sandwiches
Grain bowls, salads and slaws
Avocado toast, fried eggs or shakshuka
Cheese and charcuterie boards (drain lightly, sprinkle Maldon flakes)
Storage & Safety
Refrigerate immediately after cooling; keep onions submerged.
Use within 14 days. Discard if cloudy, fizzy, mouldy or off‑smelling.
Always use clean utensils to avoid contamination.
Do not shelf‑store; this is not a canned product.
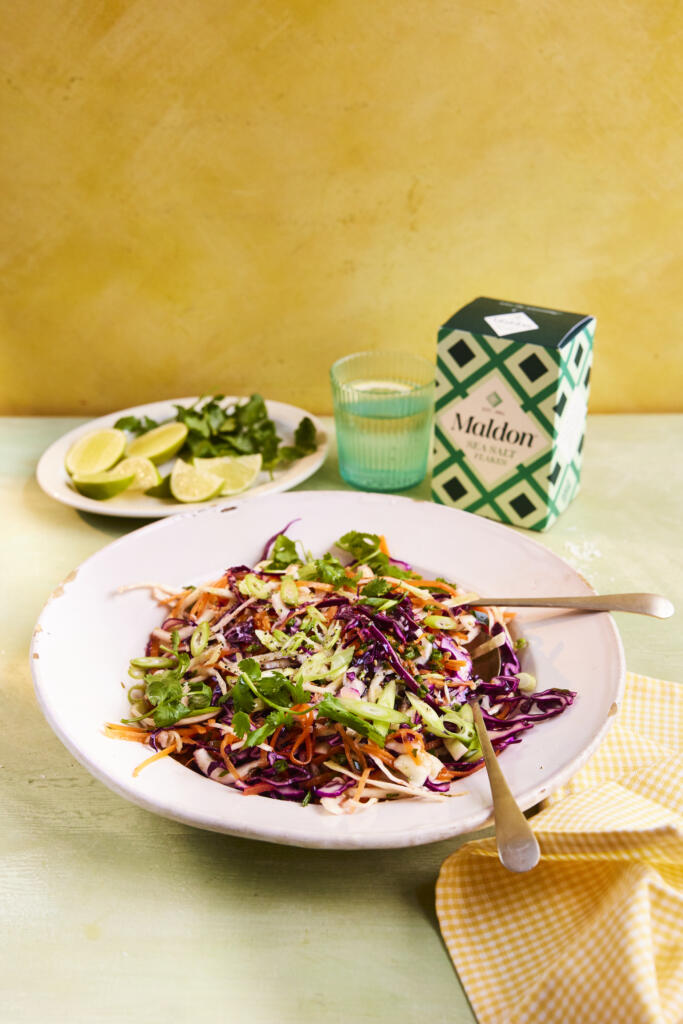
Brighten up any meal with this lime and coriander cabbage slaw! Packed with crunchy cabbage, sweet carrots, fresh coriander, and a zesty lime dressing, this healthy side dish is a perfect addition to summer picnics, BBQs, or taco nights. Quick to prepare, naturally vegan, and bursting with flavour, this easy slaw recipe will become your go-to for fresh salad ideas.
How to Make Lime and Coriander Cabbage Slaw
Step 1 – Prepare the Vegetables
Thinly slice the cabbage, julienne or grate the carrots, finely chop jalapeño, spring onions, and coriander.
Step 2 – Make the Dressing
In a small bowl, whisk together lime zest, juice, olive oil, maple syrup/honey, and sea salt.
Step 3 – Assemble and Toss
In a large bowl, combine cabbage, carrots, jalapeño, most spring onions, and coriander. Drizzle with dressing and toss to coat.
Step 4 – Serve
Scatter reserved spring onions and coriander on top before serving. Taste and adjust seasoning if needed.
Tips
Use a mix of red and white cabbage for extra colour.
For extra crunch, add toasted seeds or nuts.
Make ahead: Prep veggies and dressing separately, combine just before serving.
Can I make cabbage slaw ahead of time?
Yes, you can make cabbage slaw ahead of time. Martha Stewart actually recommends making slaw ahead of time so that the flavour intensifies. You can prep the vegetables and dressing separately for up to a day ahead, refrigerating for up to 3 hours.
How long does cabbage slaw last in the fridge?
You can store cabbage slaw in the fridge for up to 3-5 days. However, we recommend eating it within a day or two for the best results in flavour and texture. This is because it can become watery if kept for longer, making it unpleasant to eat.
Is this slaw recipe vegan and gluten-free?
Yes, this cabbage slaw recipe can be vegan and gluten-free friendly depending on the ingredients used.
The base ingredients for the slaw (the vegetables) can remain the same, however you would need to swap the honey in the dressing mix with pure maple syrup instead to make it 100% vegan. We like to use Biona Organic Pure Maple Syrup Amber Grade A 1 for this recipe.
Can I use lemon instead of lime?
Yes, you can use lemon instead of lime, but it will alter the flavour slightly. This is because lemons have a sweeter, less tart flavour than limes.
Serving Suggestions
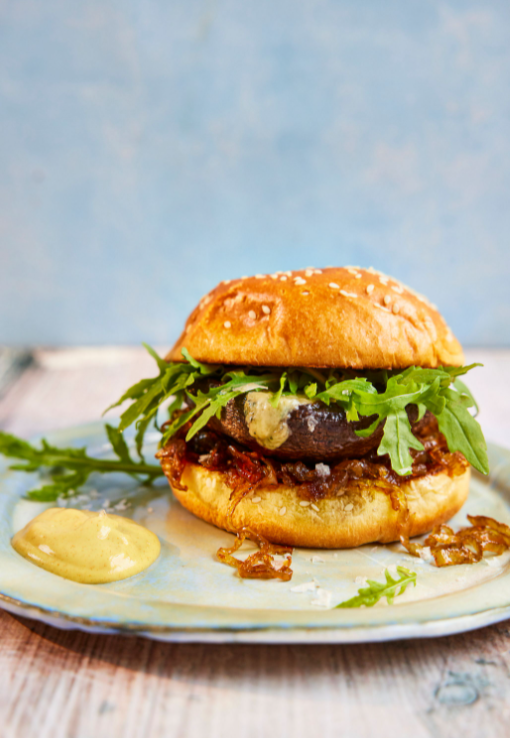
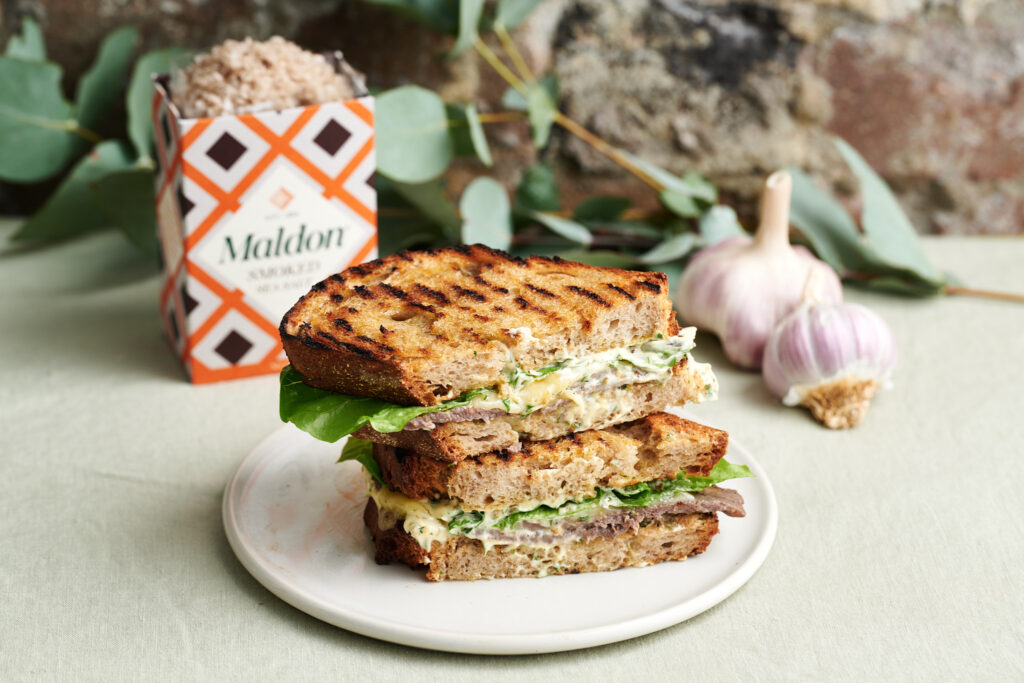
TacoMushroom BurgerClub Sandwich
Perfect with tacos, grilled meats, burgers, or as a BBQ side.
Add to wraps, sandwiches, or bowls for extra crunch and flavour.
Storage & Reheating
Store in an airtight container in the fridge for up to 3 days.
For best texture, keep dressing separate until ready to serve.
Refresh with extra lime juice if needed.
If you try this lime and coriander cabbage slaw recipe, let us know in the comments or submit your own recipe using this slaw! For more fresh salad ideas, check out our full collection.