A grazing-board hero that’s as good for you as it is moreish. This silky butterbean hummus is whipped smooth with tahini, lemon and Maldon Garlic Sea Salt, then served with homemade gluten-free seeded crackers and fresh crudités for dipping. It’s a generous, crowd-pleasing centrepiece for any picnic or summer spread, and almost entirely plant-based.
Why You’ll Love This Butterbean Hummus
Silky-Smooth Hummus: A splash of cold water at the end whips the butterbeans into the lightest, creamiest hummus.
Homemade Seeded Crackers: Crisp, seed-packed and naturally gluten-free, they’re far better than shop-bought – and easy to make.
Built for Sharing: A generous dip, crunchy crackers and colourful crudités make an effortless grazing platter.
How to Make Butterbean Hummus (Step-by-Step)
Make the cracker mix: Preheat the oven to 180°C. In a large bowl, mix the flaxseed, brown rice flour, ½ tsp Maldon Garlic Sea Salt, pumpkin seeds, sunflower seeds, hemp seeds and chia seeds. Pour over 250ml boiling water, stir together and set aside for 20 minutes to thicken as the chia and flax absorb the liquid.
Spread and bake the crackers: Line a large baking tray with parchment, tip on the mixture and smooth it right to the edges, as thin as possible. Sprinkle over the everything seasoning and fennel seeds, press them in gently, and bake for 30–40 minutes until golden and crisp. Cool completely on the tray.
Blitz the hummus: While the crackers bake, add the butterbeans, garlic, lemon juice, tahini, cumin, smoked paprika and Maldon Garlic Sea Salt to a food processor and blitz to a paste. Add the olive oil and blitz again until smooth.
Make it silky: With the motor running, drizzle in the cold water and keep blitzing until completely smooth and silky. Taste and adjust with a little more Maldon Garlic Sea Salt if needed.
Break, top and serve: Once cooled, snap the cracker sheet into rustic shards. Spoon the hummus into a bowl, drizzle with olive oil and finish with a pinch of cumin and Maldon Garlic Sea Salt. Serve with the crackers and crudités for dipping.
Tips for the Perfect Butterbean Hummus
Cold water for silk: Adding cold water at the end, with the motor running, is the trick to the smoothest, lightest hummus.
Spread the crackers thin: The thinner and more even the layer, the crisper the crackers – take them right to the edges of the tray.
Cool before breaking: Let the cracker sheet cool fully on the tray so it snaps cleanly into shards rather than bending.
The hummus keeps for up to 3 days in the fridge, and the crackers stay crisp for several days in an airtight container – making this an ideal make-ahead platter.
Why did my hummus turn out grainy?
Keep blitzing and add the cold water gradually with the motor running. The water emulsifies the tahini and beans into a smooth, silky texture – patience is key.
Are the crackers really gluten-free?
Yes – they’re bound by the chia and flaxseed rather than wheat, with brown rice flour, so they’re naturally gluten-free (do check your everything seasoning if you need them to be certified).
A Maldon Salt, Meliz Berg & AEG Collaboration
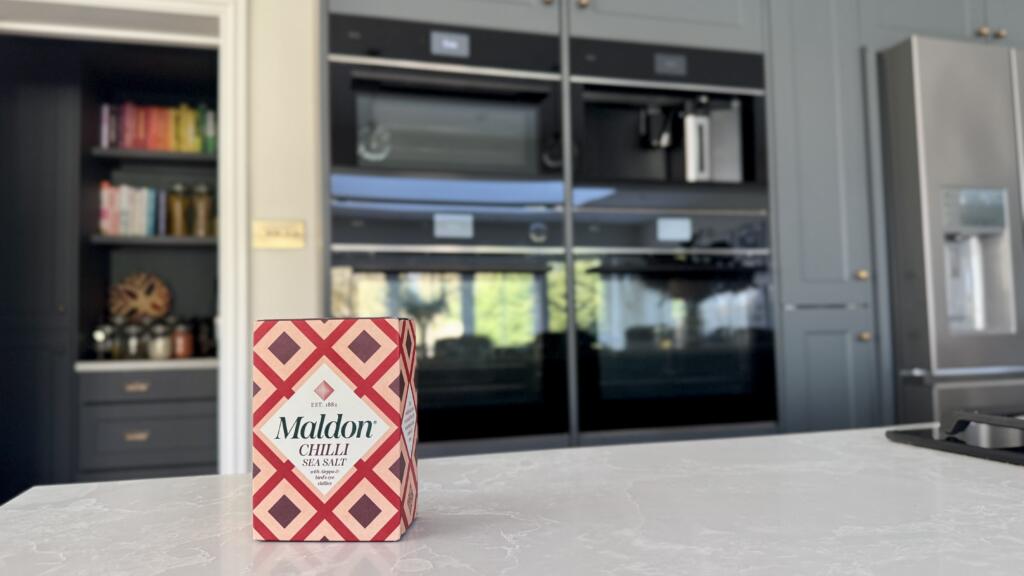
Maldon Chilli Sea Salt with AEG Kitchen Appliances
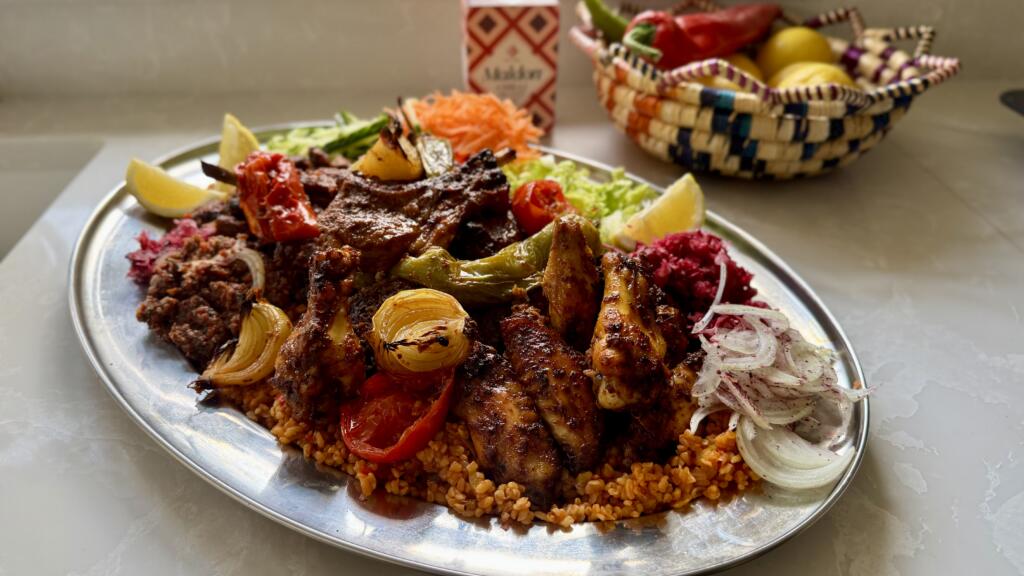
If there’s one thing that unites us all, it’s the joy of a proper ‘fakeaway’ – big flavour, minimal fuss, and the kind of pread that makes everyone crowd around the table. In collaboration with Maldon Salt, celebrated food writer Meliz Berg, and AEG Kitchen Appliances, this Ultimate Mixed Grill Platter brings together bold marinades, perfectly cooked meats and vegetables, and a pinch of Maldon Chilli Sea Salt to finish.
Why Maldon Chilli Sea Salt Makes the Difference
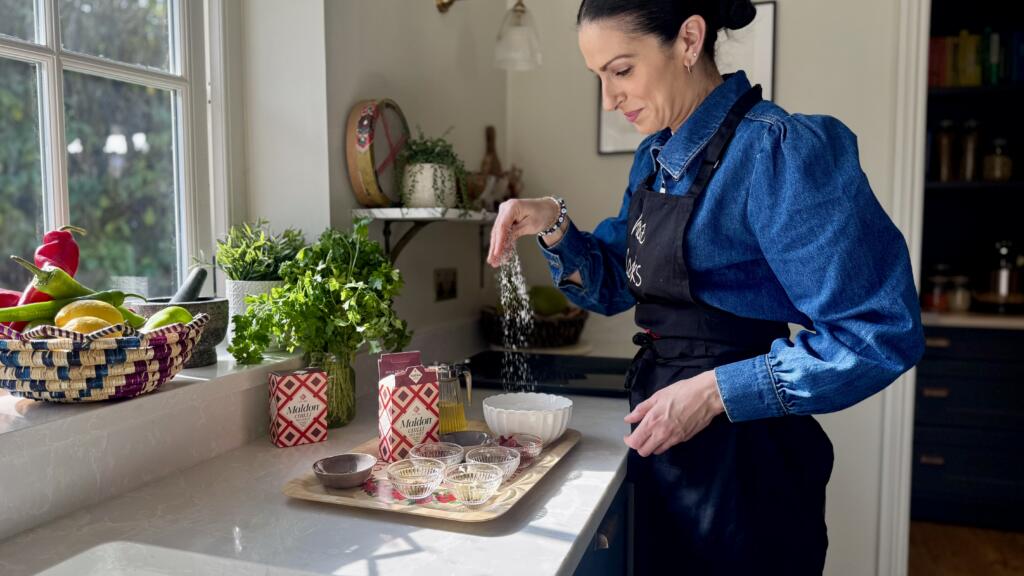
Meliz Berg seasoning with Maldon Chilli Sea Salt
A finishing salt matters – and Maldon Chilli Sea Salt delivers more than heat alone. With it’s signature pyramid flakes and gentle chilli warmth (from the infused Aleppo pepper and bird’s eye chilli), it lifts marinades, enhances caramelisation and adds crunch at the final moment, allowing each ingredient to shine without overwhelming it. Sprinkle just before cooking, it seasons with precision and personality.
About AEG: Designed for Taste
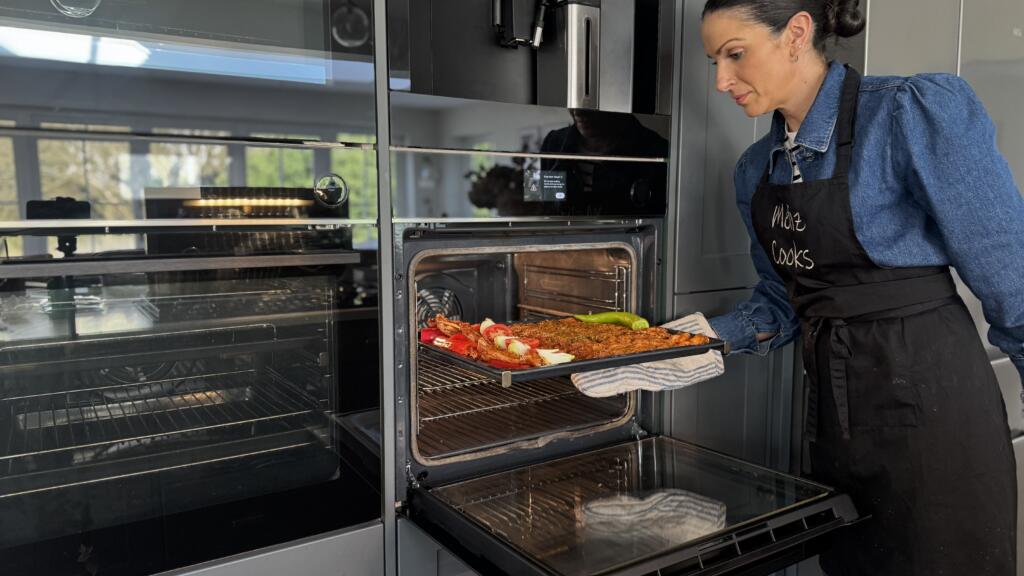
Meliz Berg with AEG Oven Setup
For oven a century, AEG has been the forefront of kitchen innovation, designing appliances that empower people to cooking with confidence. Rooted in German engineering and driven by passion for taste, AEG focuses on intelligent technology that supporting creativity rather than complicating it – from ovens that enhance flavour and texture to intuitive controls that give you precision without stress.
Cooking with Confidence: AEG in the Kitchen
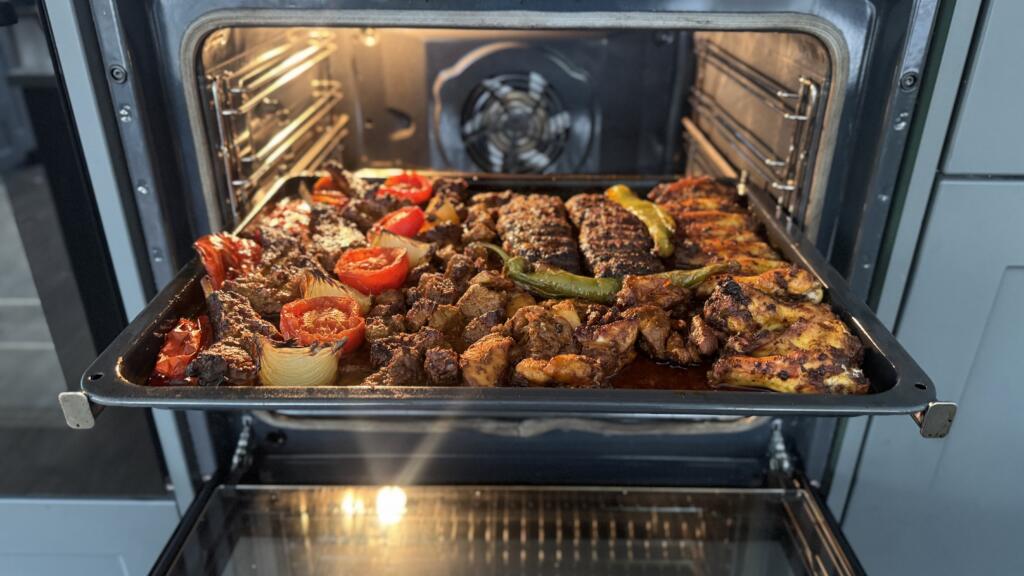
Mixed Grill Platter, cooked by AEG Oven Setup
To bring every element of this recipe to life, Meliz cooked using premium AEG Kitchen Appliances, including the AEG 7000 MealAssist Oven with SteamCrisp, featured throughout the cooking videos.
This innovative oven uses a combination of 25% steam and 75% heat for perfectly even cooking – ideal for slow-roasting vegetables with crisp, caramelised edges while keeping meats tender and juicy. With its CookSmart Touch Display, telescopic runners and pyrolytic self-cleaning, it offers precision, ease and outstanding performance.
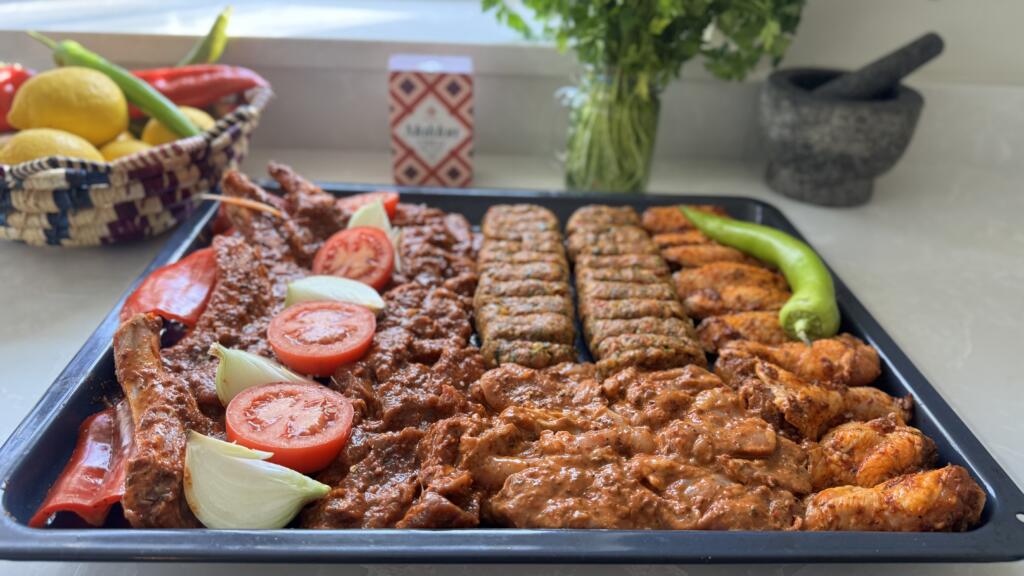
Designed for entertaining, batch-cooking or freezing ahead, this platter used one versatile base marinade that adapts beautifully across chicken wings, lamb cutlets, kofte and chicken shish – all cooked together at the same temperature for ease and consistency. It’s modern Middle Eastern-inspired cooking as its most generous, unfussy and flavour-forward.
Step 1 – Prepare the Base Marinade
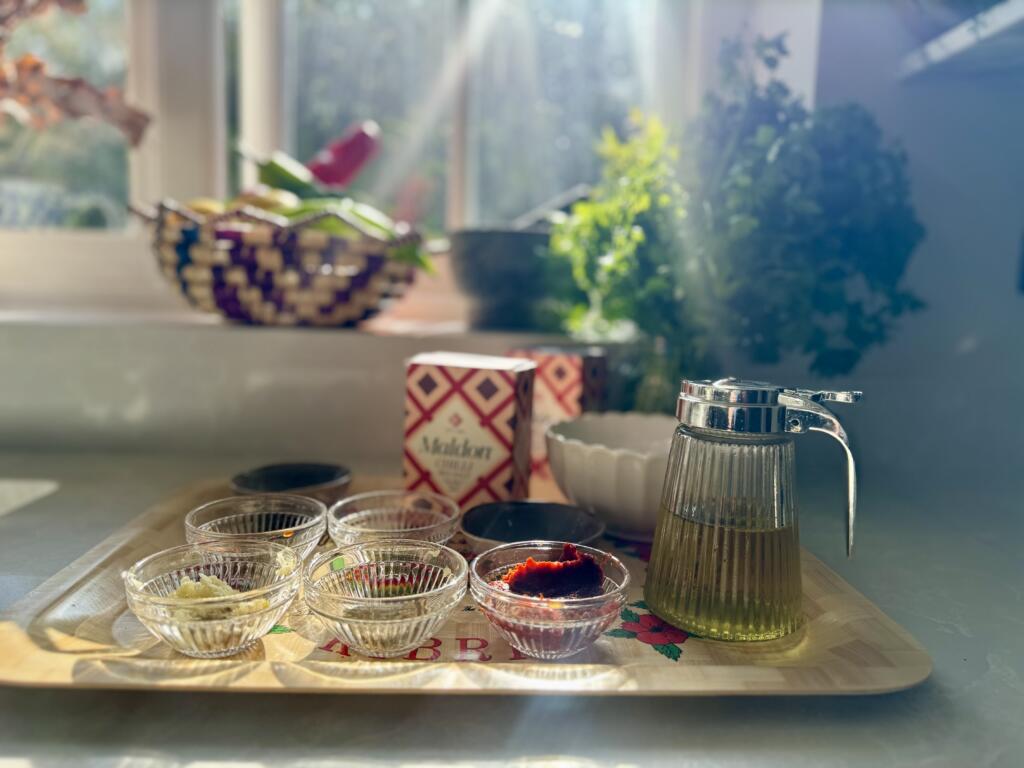
Ingredients (listed left) for the Base Marinade
Start by making the base minade – this is the backbone of the entire platter.
Mixed together the garlic, red pepper paste, olive oil, spices and oregano until you have a thick, aromatic paste. This single marinade adapts beautifully across chicken, lamb and mince, giving you flexibility without extra work.
Step 2 – Make the Chicken Wings
Add the chicken wings to the marinade and stir well. Cover and refrigerate for at least 4 hours, no longer than 24.
Preheat oven to 200c Fan.
Grease a large baking tray with the olive oil.
Take the chicken wings out of the fridge 30 minutes before cooking.
Place the oiled tray in the preheated oven to heat up for 15 minutes.
Season the marinated chicken wings with the Maldon Chilli Sea Salt, stir well, then carefully lay all the chicken wings flat on the hot, oiled baking tray.
Bake in the oven on the middle shelf for 30-35 minutes until beautifully tender and charred around the edges.
Step 3 – Make the Lamb Cutlets or Lamb Shish
Add the milk to the marinade recipe and stir well until smooth. Add the lamb to the marinade and stir well. Cover and refrigerate for at least 4 hours, no longer than 24 hours.
Preheat oven to 200c Fan.
Grease a large baking tray with the olive oil.
Take the lamb out of the fridge 30 minutes before cooking.
Place the oiled tray in the preheated oven to heat up for 15 minutes.
Season the marinated lamb with the Maldon Chilli Sea Salt, stir well, then carefully lay the lamb on the hot, oiled baking tray along with the vegetables.
Bake in the oven on the middle shelf for 30-35 minutes until beautifully tender and charred around the edges.
Step 4 – Make the Lamb or Chicken Kofte
Add the onions and peppers to a clean muslin cloth and squeeze out all the juice (keep the juice to add to the chicken shish marinade if making).
Add the drained onions, peppers to the rest of the ingredients and stir well. Cover and pop in the fridge for at least an hour but preferably overnight for all the flavours to come together.
Preheat oven to 200c Fan.
Grease a large baking tray with the olive oil.
Take the mixture out of the fridge 30 minutes before cooking.
Place the oiled tray in the preheated oven to heat up for 15 minutes.
Shape the mixture into two extra large long köfte (you can shape them into smaller sized köfte, but please note the cooking time will reduce by at least 10 minutes to ensure the smaller köfte stay as tender as possible), making ridges at 1cm intervals along the left of the köfte using a skewer dipped in water (to prevent it from sticking to the mixture).
Carefully lay the köfte on the hot, oiled baking tray along with the vegetables.
Bake in the oven on the middle shelf for 30-35 minutes until beautifully tender and charred around the edges.
Step 5 – Make the Chicken Shish
Add the yoghurt, pomegranate molasses and honey (and the reserved onion and red pepper juices, if you have them) to the marinade, and stir well until smooth.
Add the chicken to the marinade and stir well. Cover and refrigerate for at least 4 hours, no longer than 24.
Preheat oven to 200c Fan.
Grease a large shallow baking tray with the olive oil.
Take the chicken out of the fridge 30 minutes before cooking.
Place the oiled tray in the preheated oven to heat up for 15 minutes.
Season the marinated chicken with the Maldon Chilli Sea Salt, stir well, then carefully lay the chicken on the hot, oiled baking tray along with the vegetables.
Bake in the oven on the middle shelf for 30-35 minutes until beautifully tender and charred around the edges.
Have You Tried It?
Ready to be Roasted: Complete Mixed Grill Platter in Base Marinade with Maldon Chilli Sea Salt
This is the kind of food that invites people to linger – platters placed at the centre of the table, hands reaching in, conversations getting louder and the dishes empty. Guided by Meliz Berg’s bold, generous flavours, brought to life with AEG’s precision cooking, and finished with the unmistakable crunch of Maldon Chilli Sea Salt, this mixed grill is about more than what’s on the tray.
If you try this recipe at home, we’d love to see it – tag us in your creations so we can share your wonderful cooking with our community. And if you’re feeling inspired to upgrade your kitchen, you can explore more AEG appliances here, and discover how their innovative technology can transform your everyday cooking.
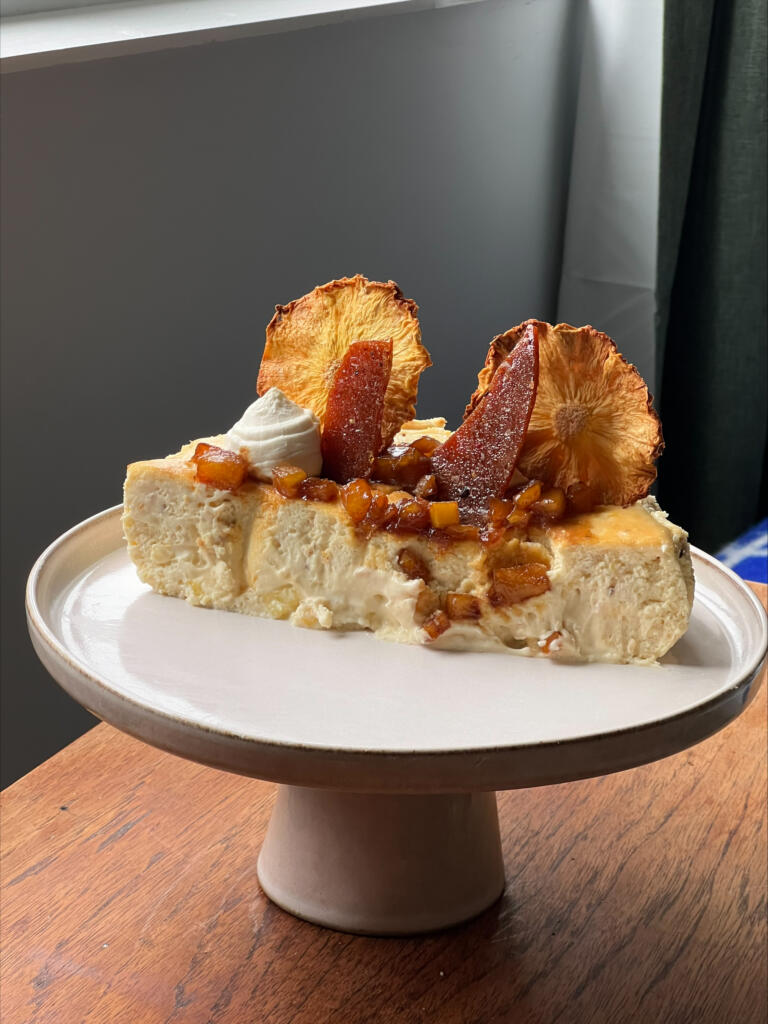
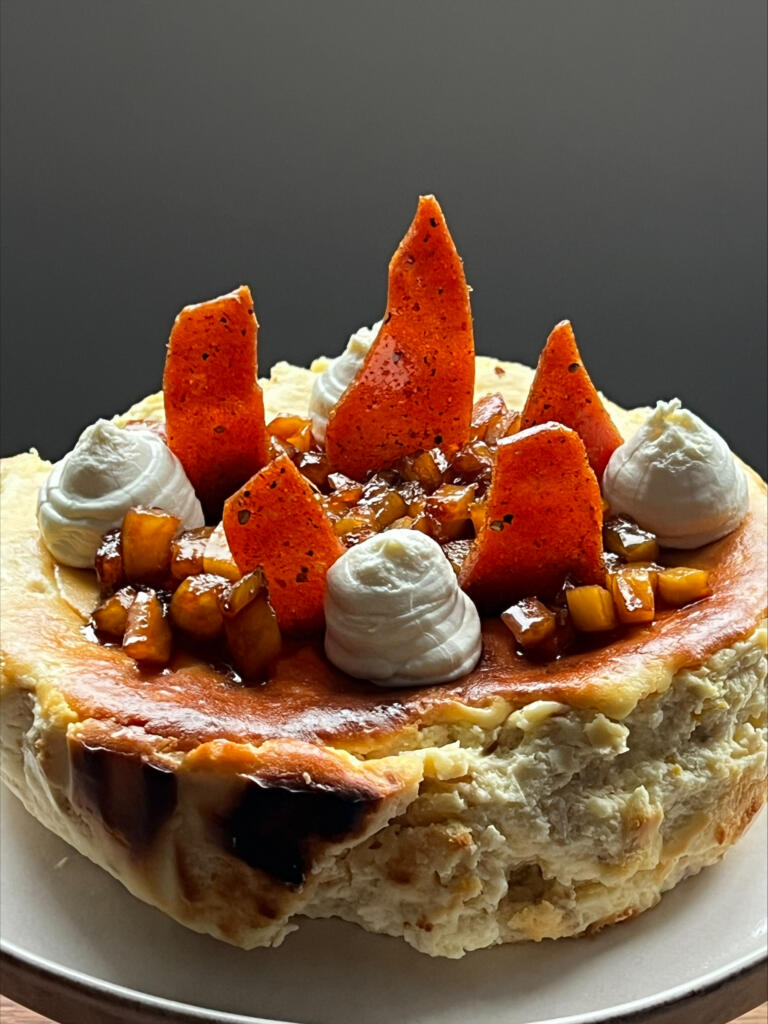
We’re excited to team up with Fiona’s Funky Food for a show-stopping dessert that blends tropical flavour with gourmet flair: a Pineapple & Coconut Basque Cheesecake infused with Maldon Smoked Sea Salt and finished with Maldon Pepper Sea Salt Caramel Shards. This unique twist on the trending Basque-style cheesecake combined creamy custard, bright pineapple, fresh lime, and toasted coconut, all elevated by the gentle smokiness of Maldon Smoked Sea Salt flakes.
The salt melts seamlessly into the batter, enhancing the natural sweetness and adding depth to every bite – a flavour upgrade that’s quickly becoming popular in modern baking, Springtime desserts, and tropical-inspired recipes.
To finish, the cheesecake is crowned with crisp Maldon Pepper Sea Salt Caramel Shards, where Pepper Sea Salt brings a subtle heat, crunchy texture, and that irresistible sweet-savoury balance food lovers crave. The result? A dessert that’s sweet, smoky, tropical, lightly spiced and packed with flavour – the perfect showcase of just how versatile Maldon Salt can be in both baking and confectionary.
Whether you’re searching for a unique Spring bake, a summer celebration dessert, or a creative cheesecake recipe, this collaboration delivers a flavour experience that’s bold, modern, and utterly unforgettable.
What is a Basque Cheese? (Everything You Need to Know About This Trending Dessert)
A Basque cheesecake, also known as a Burnt Basque Cheesecake, is an ultra-creamy, crustless cheesecake originally from San Sebastian, Spain. Unlike the classic New York-style cheesecake, the Basque version is baked at a very high temperature, creating it’s signature deeply caramelised, ‘burnt’ top, while the inside remains soft, custard-like and silky.
A traditional baked cheesecake is baked at a much lower temperature, often in a water bath to prevent cracks. It is a lot more dense, creamy, pale, and usually baked with a crumb crust at a low heat for a smooth, fully-set finish.
Not all cheesecakes are baked – and there’s a delicious science behind why some are simply chilled to set! A no-bake cheesecake relies on a different method of thickening and stabilising the filling, which creates a lighter, creamier texture compared to the dense, custard-like structure of a baked cheesecake. A no-bake cheesecake sets in the fridge because it uses stabilising ingredients like cream cheese, whipped cream, and sometimes gelatine – not eggs. Without eggs, there’s no need for baking!
How To Make a Pineapple & Coconut Basque Cheesecake
Step 1 – Prepare the Tin for the Basque Cheesecake
Preheat the oven to 220°C / 200°C fan (428°F / 392°F fan).
Line a 20cm (8-inch) springform tin with overlapping parchment sheets, ensuring the edges rise above the rim. This helps contain the high-rise Basque-style batter.
Step 2 – Make the Tropical Cheesecake Batter
Beat the cream cheese and caster sugar until smooth and lump free.
Add the eggs one at a time, mixing gently to avoid incorporating too much air.
Pour in the double cream and coconut cream and mix until silky.
Sift in the plain flour and fold lightly.
Stir in the vanilla extract, lime zest, toasted desiccated coconut, caramelised pineapple and 7-10g Maldon Smoked Sea Salt flakes.
Taste and adjust to your preference – you ideally want a soft smokiness that enhances the tropical flavours without overpowering them.
Tip – to get caramelised pineapple, you need to cook the pieces in a hot pan with butter and sugar until browned and glossy. This quick method adds a sweet, golden, caramelised flavour.
Step 3 – Bake the Basque Cheesecake
Pour the batter into the prepared tin.
Bake for 30-35 minutes, or until the top is deeply caramelised, with a slightly jiggly centre – the signature Basque look.
Cool completely at room temperature, then refrigerate for 4+ hours, ideally overnight, for the custard-like interior to set.
Step 4 – Make the Maldon Pepper Sea Salt Caramel Shards
Line a tray with parchment.
In a saucepan, heat the cater sugar and water over medium heat without stirring until it reaches a deep amber colour.
Remove the heat and quickly stir in the Maldon Pepper Sea Salt.
Pour the caramel thinly onto the parchment. Allow it to harden fully, then break into shards. These add crunch, subtle heart, and a sweet-savoury finish.
Step 5 – Assemble and Decorate
Remove the chilled cheesecake from the tin.
Insert the caramel shards vertically for height and texture.
Optional: Finish with a light sprinkle of Maldon Smoked Sea Salt for a glossy, elevated garnish.
Optional:Add dollops of cream on top with an extra serving of the diced caramelised pineapple to give the dish that ‘wow’ factor.
Have You Tried This?
Loved making this tropical Basque cheesecake? If you give this recipe a try, we’d love to see it! Tag us in your creations and show us how your cheesecake turned out.
Create a show-stopping classic beef Wellington with this simplified, step-by-step recipe, which serves up to 8 people. This easy beef Wellington features a beautifully seared beef fillet, which is brushed with Dijon mustard. wrapped in a rich mushroom duxelles made from chestnut mushrooms, layered with Parma ham (or prosciutto), then enclosed in all-butter pastry for a golden, flaky pastry finish. Careful chilling and resting of the beef Wellington ensures a medium-rare, perfectly pink centre on the beef.
Seasoned with Maldon Original Sea Salt and cracked black pepper, the beef Wellington with puff pastry pairs beautifully with creamy mashed potatoes, seasonal vegetable likes roasted carrots, and a rich red wine jus. This dish is ideal for any special occasion centrepiece; as a Easter alternative to lamb to a table show-stopper at Christmas time.
How to Make a Beef Wellington
Crafting a show-stopping beef Wellington by searing a tender beef fillet, wrapping it in mushroom duxelles and Parma ham, and baking it in golden, flaky puff pastry until perfectly pink at the centre.
Step 1 – Bring the Beef to Room Temperature
Remove the beef fillet from the fridge 1 hour before cooking so that the meat reached room temperature. This helps the meat cook more evenly, ensuring you achieve that signature pink centre without overcooking the outer layers.
Step 2 – Make the Mushroom Duxelles
Add unsalted butter and 1 tbsp olive oil to a large frying pan.
Soften the finely diced onion gently until translucent, then add the crushed garlic.
Pulse the chestnut mushrooms in a food processor until finely chopped, then cook them with the onions/garlic until all the liquid has evaporated (approx. 15 minutes). It is important to reduce the moisture from the mushroom duxelles because excess water can cause the pastry of the beef Wellington to become soggy.
Stir through thyme leaves and chopped parsley in the last 5 minutes.
Season with Maldon Original Sea Salt flakes and cracked black pepper, then cool completely, chilling in the fridge to firm up.
Step 3 – Sear the Beef Fillet
Generously season the beef fillet all over with Maldon Original Sea Salt flakes and cracked black pepper.
Heat a large frying pan over medium-high to high heat until very hot, then add 1 tbsp olive oil.
Sear the beef on all sides until well caramelised – no longer than 2 minutes total so the centre stays very rare.
Remove from the pan and rest for 30 minutes to cool slightly.
Step 4 – Wrap the Beef in Parma Ham and Duxelles
Lay out overlapping layers of clingfilm on a clean surface.
Arrange the Parma ham slices in an even layer that will fully wrap the beef.
Spread the chilled mushroom duxelles evenly over the Parma ham.
Brush the rested beef with Dijon mustard, place it on one edge, then use the clingfilm to roll everything up tightly into a firm “sausage” shape.
Twist the ends to secure and chill in the fridge for at least 1 hour (or overnight).
Step 5 – Encase in Puff Patry
Unroll the puff pastry on its parchment paper.
Remove the clingfilm from the beef log and place it in the centre of the pastry.
Wrap the pastry around the beef, sealing the edges well and ensuring the seam is on the underside.
Use beaten egg to brush and seal the pastry.
If needed, trim and use extra pastry to patch any gaps and decorate (e.g. thin strips for a lattice).
Transfer to a baking tray lined with baking paper and chill for a further hour to firm up.
Step 6 – Bake the Beef Wellington
Preheat the oven to 200°C (fan if appropriate – specify if recipe assumes fan or conventional).
Brush the Wellington all over with beaten egg for a glossy finish.
Bake for around 35 minutes, or until the pastry is deep golden brown.
You can mention indicative doneness (e.g. for medium-rare fillet, the centre should still feel slightly springy; optional note on using a thermometer if desired).
Remove from the oven and rest for 20 minutes before slicing.
Step 7 – Finish and Serve
Just before serving, sprinkle the pastry with Maldon Sea Salt flakes and a few extra thyme leaves. Seasoning your Wellington with Maldon Sea Salt flakes enhances flavour and texture by delivering clean, bright saltiness that lifts the beef, duxelles, and pastry while adding a delicate, crunchy finish.
Slice into 1-inch pieces with a sharp knife.
To Serve
A beef Wellington is ideal for Christmas, New Year’s, or any special occasion because it feels truly celebratory. It’s luxurious yet comforting, feeds a crowd with ease, and can be prepped ahead of time, making it perfect for busy kitchens. It’s classic flavour pair effortlessly with seasonal sides likes roasted carrots and red wine jus, making it just as fitting as a show-stopping alternative to lamb on Easter.
Here are a few sides that you can pair your beef Wellington:
Bring the beef fillet to room temperature for even cooking and a perfectly pink centre.
Sear the beef until golden to lock in flavour and prevent excess moisture.
Cook the mushroom duxelles thoroughly to remove moisture and avoid soggy pastry.
Wrap tightly with Parma ham (or prosciutto) to create a moisture barrier for the beef and mushroom duxelles.
Chill the beef Wellington before baking to help and pastry hold it’s shape.
Use all-butter puff pastry for the best golden, flaky finish.
Season generously with Maldon Sea Salt and cracked black pepper for an elevated flavour.
Rest the beef Wellington before slicing to keep the layers intact.
Doneness, Make-Ahead & Reheating Notes
How do I know when the beef will be done in a beef Wellington
Medium-rare is the classic level of doneness for beef Wellington. After 35 minutes at 200°C and resting, the 1lg fillet should be cooked and have a warm, perfectly pink centre with a tender texture.
Can I prepare beef Wellington in advance?
Yes, you can absolutely prepare beef Wellington in advance. You can assemble the Wellington (beef, mushroom duxelles, Parma ham, pastry), then wrap tightly in clingfilm and chill for up to 25 hours before baking.
Chilling helps the pastry stay crisp and golden and improves overall shape.
Brush with egg wash just before baking for the best finish.
Can I reheat beef Wellington?
Yes, you can reheat beef Wellington. Leftover slices can be reheated gently in the oven at 160°C (320°F) for 12-15 minutes until warmed. Make sure you use a wire rack to keep the pastry crisp.
You can also reheat in an air fryer. Set the air fryer to 150°C (300°F) and heat to 10-12 minutes, flipping halfway through for even cooking.
Avoid reheating in the microwave – it will make the pastry soggy and tough.
Please note – the beef will now stay medium-rare after reheating; it will cook further, but the flavour will remain delicious.
Wild garlic season brings one of the most anticipated flavours of the year—vibrant, aromatic, and beautifully green. When blended into creamy, high-quality softened butter, it creates an irresistible condiment that elevates everything it touches. Learning how to make wild garlic butter is incredibly simple, taking only 5 minutes and a quick blitz in a food processor. To truly bring out the punchy, earthy flavours of the foraged leaves, we season this compound butter with our signature Maldon Garlic Sea Salt flakes, adding the perfect savoury crunch and an extra layer of roasted garlic depth.
Why You’ll Love This Wild Garlic Butter Recipe
Lightning Fast: With zero cooking required, this impressive, vibrant green butter comes together in just 5 minutes of prep time.
The Ultimate Flavour Enhancer: It is incredibly versatile. Melt it over a hot steak, stir it through freshly cooked pasta, or simply spread it thickly onto warm sourdough.
Preserve the Season: Wild garlic has a notoriously short season. Making a batch of this compound butter and rolling it into a log allows you to freeze it and enjoy the taste of spring all year round.
How to Make Wild Garlic Butter (Step-by-Step)
Step 1 – Blitz the garlic and salt
Start by placing the thoroughly washed and dried wild garlic leaves and the Maldon Garlic Sea Salt flakes into a food processor. Pulse the machine a few times to break up the wild garlic until it is very finely chopped.
Step 2 – Add the butter
Add the room-temperature, softened butter to the food processor. Pulse again until the finely chopped wild garlic is evenly dispersed throughout the butter, turning the entire mixture a stunning, vibrant green colour.
Step 3 – Shape the butter
Place a large, rectangular piece of baking parchment onto your kitchen surface. Spoon the bright green butter directly into the centre of the paper.
Step 4 – Roll and chill
Fold the parchment paper over the butter and roll it to shape the mixture into a neat, tight sausage shape. Twist the ends of the parchment paper tightly to seal it (like a Christmas cracker). You can either serve the butter immediately while soft, or place it into the fridge for 1 hour to firm up into a sliceable log.
Tips for the Perfect Compound Butter
Use Softened Butter: This is the most important step! If your butter is straight from the fridge and too cold, it will not blend smoothly with the wild garlic, leaving you with unpleasant, chunky lumps. Leave the butter out on the counter for a few hours before starting.
Dry the Leaves Thoroughly: If you have washed your foraged wild garlic, ensure every drop of water is dried off (using a salad spinner or kitchen towel) before adding it to the food processor. Excess water will cause the butter to split.
Don’t Over-Process: Pulse the butter just until it turns green and is combined. If you leave the food processor running on high for too long, the friction will melt the butter completely.
What to Serve with Wild Garlic Butter
The simplest and often best way to enjoy this is sliced thickly and smeared over a warm, crusty sourdough baguette. However, it also makes an incredible “melt” for hot food. Try placing a disc of chilled wild garlic butter on top of a resting steak, stirring a spoonful into a pan of sautéed mushrooms, or tossing it through freshly boiled new potatoes.
Frequently Asked Questions
How to make garlic butter wild wild garlic without a food processor?
If you don’t have a food processor, you can easily make butter by hand. Simply use a sharp knife to mince the wild garlic leaves as finely as humanly possible. Add the minced leaves and the Maldon Garlic Sea Salt to a mixing bowl with your softened butter and beat vigorously with a wooden spoon until fully incorporated.
Can you freeze wild garlic butter?
Yes, you can absolutely freeze wild garlic butter! Freezing is the best way to extend the short wild garlic season. Keep the butter wrapped tightly in its parchment paper sausage, place it in an airtight freezer bag, and freeze for up to 3 months. You can slice off individual discs straight from frozen whenever you need them.
Where can I find wild garlic?
Wild garlic typically grows in damp, ancient woodlands across the UK from late winter until the end of spring. If you aren’t keen on foraging, you can often find bunches of it at local farmers’ markets or premium greengrocers during the peak season (March to May).
Bring bold, classic American flavours into your kitchen with our latest collaboration featuring recipe creator Chloe Hood.
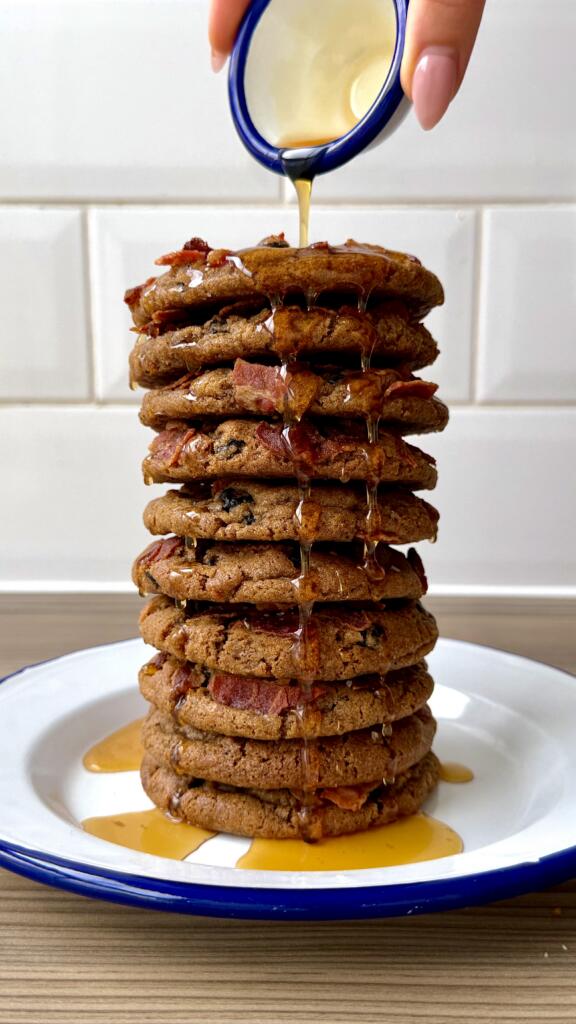
These Blueberry, Bacon & Maple Syrup Cookies are a deliciously unique twist on the sweet-and-salty (swalty) cookie trend, stacked high like an irresistible tower of pancakes and finished with a glossy drizzle of maple syrup.
Crafted with nutty brown butter, rich maple sweetness and chewy pops of dried blueberries, each cookie is studded with smoky, crispy bacon and elevated with the deep, rich flavour of Maldon Smoked Sea Salt flakes. The result is a cookie that’s decadent, surprising, and perfectly balanced – sweet, salty, smoky and buttery in every bite.
Perfect for adventurous bakers, weekend treats, or anyone craving a standout cookie recipe.
How to make Blueberry, Bacon and Maple Syrup Cookies
By Chloe Hood – A Stack of Blueberry, Bacon & Maple Syrup Cookies
Heat butter in a saucepan over a medium heat, stirring continuously, until deep brown and smelling nutty. Cool to room temperature.
Using an electric mixer, beat together browned butter, sugars and maple syrup.
Briefly mix in the egg and vanilla to combine.
In a separate bowl, combine flour, cinnamon, bicarb and Maldon Smoked Sea Salt.
Gradually, using a spatula, fold the dry mixture into the wet.
Before the dough is fully combined, fold in the dried blueberries.
Divide the dough into 10 equal balls (approximately 70g each).
Roll the top half of each dough ball in the bacon pieces.
Place on baking paper, cover and rest in the fridge overnight.
When ready to bake, preheat oven to 180°C (fan).
Space dough balls out on cold, baking paper-lined trays. Bake for 9 minutes.
Remove from the oven and bang the tray on the kitchen counter three times. Then, apply a circular motion around the cookies, using a cookie cutter.
Bake for 4 more minutes.
Repeat tray bangs and circular motion.
Whilst they’re still hot, sprinkle with Maldon Smoked Sea Salt.
Leave for 15 minutes before transferring to a wire rack to finish cooling.
Stacked them up and drizzle over maple syrup!
Made This Recipe? We Want to See!
If you recreated this recipe, don’t forget to tag @maldonsalt so we can admire your delicious stack of cookies. You can find out more details about Maldon Smoked Sea Salt flakes here.
Preheat the oven to 180c. Start by roasting the cauliflower and sweet potato. Place the cauliflower florets and the sweet potato cubes into a roasting tray and drizzle over the olive oil. Then add the turmeric, some Maldon Sea Salt and cracked black pepper. Toss this around in the tray so all the pieces are evenly coated.
Place into the preheated oven and roast for 30 – 40 minutes until soft, and lightly charred.
While the vegetables are roasting, get a small bowl and add the lime juice, rice vinegar and caster sugar. Mix until the sugar dissolves. Then add the finely sliced radishes to the bowl and toss. Set aside and allow this to pickle and turn a beautiful pink colour as you prepare the rest of the bowls.
To make the dressing, simply add all the ingredients to a bowl and whisk together. Set aside to use later.
Fry two Burford brown eggs until just set but not too crispy on the edges, adding a splash of water to the frying pan near the end of the cooking can help achieve this.
Prepare the packet rice according to the packet instructions. Then divide between the two bowls. Add some of the roasted cauliflower and sweet potato. Then top with some sliced avocado, a fried egg, some cucumber and carrot ribbons and the pickled radishes.
Drizzle over some of the ponzu dressing and then garnish with finely chopped chives and furikake.
Preheat the oven to 180c.
To make the cauliflower steaks, remove the leaves from the cauliflower and then cut into thick 1-inch slices – the end pieces won’t hold together to they need to be closer to the root. Any leftover cauliflower pieces or leaves can be saved for roasting another time!
Place the cauliflower steaks onto a roasting tray. In a small bowl mix together the olive oil, ground coriander, sumac and Maldon Chilli Sea Salt. Then use a pastry brush to brush the spiced oil across the steaks, making sure they are evenly coated. Place them into the preheated oven to roast for 40 minutes until soft and tender and starting to char on the edges.
To make the romesco sauce, place the toasted nuts into a food processor along with the roasted red peppers, crushed garlic, paprika, Maldon Chilli Sea Salt and sherry vinegar. Blitz this and then while the motor is running drizzle in the olive oil until you have a lovely smooth sauce. Set aside.
Once the cauliflower steaks are cooked, remove from the oven.
To serve, spread the romesco sauce on the base of a large platter. Then top with the cauliflower steaks and garnish with some mint leaves.
Preheat the oven to 140c.
Place the thinly sliced sweet potato on tray and spread the out in an even layer. Do the same on a separate tray for the beetroot (otherwise it will stain the other vegetables), and the carrots. Place these into the oven for about 2 – 2.5 hours, add the parsnip ribbons for the final 45 minutes. Bake the vegetables until they have dried out and gone crisp. They will go darker in the oven but make sure they don’t burn or catch too much.
While the vegetables are baking, make the beetroot dip. Place the cooked beetroot into a food processor along with the Greek yoghurt, grated garlic and Maldon Pepper Sea Salt. Then blitz until smooth and vibrant pink. Tip this into a bowl and set aside.
When the vegetable crisps are done, remove from the oven and pile into a large bowl. Sprinkle over some Maldon Pepper Sea Salt and serve alongside the beetroot dip.
Nothing says festive comfort quite like a Christmas Sticky Toffee Pudding – rich, indulgent, and full of seasonal flavour. This show-stopping dessert combines Medjool dates, Bramley apple, and a warming blend of mixed spice and nutmeg for a pudding that’s as aromatic as it is delicious. Sweetened with golden syrup and lifted by a hint of orange zest and brand, this recipe delivers a gooey centre, moist crumb, and that all-important skewer test perfection!
Perfect for your holiday table or Boxing Day feast, this pudding is a make-ahead marvel – simply reheat gently before serving. Whether you’re a seasoned bake or trying something new, this recipe guarantees festive magic with every spoonful.
How to Make Christmas Sticky Toffee Pudding with Salted Caramel Sauce
Step 1 – Prep the Basin and Oven
Butter and line the base of a 1.5‑litre pudding basin with greaseproof paper.
Heat oven to 140°C fan (160°C conventional / 320°F). Place the basin on a tray.
Tip: Lining helps the sponge release cleanly.
Step 2 – Combine Dry Ingredients
In a large bowl, whisk flour, mixed spice, grated nutmeg and 1 tsp Maldon Original Sea Salt.
Step 3 – Cream Butter and Sugar, Add Egg
In a stand mixer or with electric whisks, beat butter and light brown sugar until soft and fluffy.
Beat in eggs one at a time, mixing well after each.
Tip: If the mixture looks split, beat in 1 tbsp of the flour.
Step 4 – Fold in Fruit and Flavourings
Fold in dates, walnuts, grated Bramley apple, orange zest, then the golden syrup and brandy.
Step 5 – Add Dry Ingredients
Gently fold in the dry ingredients until just combined. Do not overmix.
Step 6 – Bake
Spoon mixture into the prepared basin, level the top.
Bake 1 hr 20 min–1 hr 30 min, until a skewer inserted into the centre comes out with just a few moist crumbs.
Cue: Top should be risen and springy; edges pull slightly from the sides.
Step 7 – Make the Salted Caramel Sauce
Add sugar, butter, double cream and 1 tsp Maldon Original Sea Salt to a medium pan.
Warm over low heat, stirring until the sugar dissolves.
Increase heat and bubble 2–3 minutes until syrupy and golden.
Tip: For a silkier finish, don’t stir once boiling; swirl the pan.
Step 8 – Serve
Turn out the pudding, pour over warm salted caramel sauce and finish with a pinch of Maldon flakes for sparkle.
Tips & FAQs
Tips
For extra moisture, don’t overbake—use the skewer cue (few crumbs).
Medjool dates give a plush texture; if using drier dates, briefly soak in hot water, then drain.
Alcohol‑free: swap brandy for orange juice or apple juice.
Nut‑free: omit walnuts and add 50g extra dates.
Make‑ahead: bake a day ahead, cool, cover and reheat; keep sauce separate until serving.
FAQs
How long to cook sticky toffee pudding?
At 140°C fan (160°C conventional / 320°F), bake for 1 hr 20–30 min until a skewer comes out with a few moist crumbs.
Can you make sticky toffee pudding ahead of time?
Yes. Bake, cool, and refrigerate for up to 3 days. Reheat slices at 160°C for 10–15 min or microwave 30–45 sec; warm the sauce gently.
Can you freeze sticky toffee pudding?
Freeze the baked pudding (without sauce) well‑wrapped for up to 3 months. Thaw overnight in the fridge, reheat as above, and add freshly warmed sauce.
Why is my caramel sauce grainy?
Ensure sugar fully dissolves before boiling. Once bubbling, avoid stirring; swirl the pan and remove from heat as soon as it’s glossy and thickened.
Storage & Reheating
Fridge: Pudding up to 3 days; sauce in a sealed jar up to 5 days.
Reheat: Oven 160°C for 10–15 min (cover loosely); microwave individual slices 30–45 sec. Warm sauce gently; if too thick, loosen with a splash of cream.