






- Dissolve the honey in the lemon and orange juice. Add a pinch of Maldon Sea Salt flakes. Then add to a shaker with the remaining ingredients apart from the ginger beer, then add some ice and shake well for 30 seconds.
- Stain this into a glass filled with ice and top with ginger beer.
- Garnish with the fresh ginger and orange and serve.
Dietary: Dairy-Free
Recipe created by Nav Gill
Dan Dan Noodles are a beloved Sichuan classic, famous for their bold, spicy and savoury flavours. This dish combines tender noodles with a rich, aromatic sauce, creating a comforting bowl that excites the taste buds. While traditionally complex, this recipe simplifies the process without sacrificing flavour. It features a luscious sauce made with sesame paste (or tahini), soy sauce, Chinese black vinegar (or white rice vinegar), sugar, sesame oil, chilli oil, ground Sichuan pepper and a pinch of Maldon Chilli Sea Salt. The pork topping is made with ground pork blended with fragrant peanut oil, minced ginger, and the vibrant heat of Maldon Chilli Sea Salt. The result is a perfect balance of spice, saltiness, and umami that coats every strand of noodle.
For the noodles, thin wheat noodles are ideal for absorbing the sauce, creating a silky and satisfying texture. A handful of choy sum (or bak choy) adds a pop of colour and a hint of freshness, complementing the rich flavours. Garnish with sliced spring onions, crushed peanuts for a nutty crunch, and an extra pinch of Maldon Chilli Sea Salt for a burst of spice to finish. This quick and easy recipe ensures you can enjoy a bowl of spicy Dan Dan noodles at home, perfect for busy weeknights or a satisfying treat anytime.
Prepare the sauce:
- In a bowl, whisk together sesame paste, soy sauce, dark soy sauce, black vinegar, sugar, sesame oil, chili oil, and ground Sichuan pepper. Adjust seasoning if necessary.
- Set aside.
Cook the pork:
- Heat peanut oil in a wok or pan over medium heat. Add minced ginger and stir-fry until fragrant.
- Add the ground pork and cook until browned, breaking it into small pieces.
- Stir in the sui mi ya cai, Shaoxing wine, soy sauce, and Maldon Chilli Sea Salt. Cook for another 2–3 minutes until well combined and aromatic.
- Set aside.
Cook the noodles and blanch the choy sum:
- Bring a pot of water to boil.
- Cook noodles according to package instructions. Blanch the choy sum for about 30 seconds until vibrant and tender.
Assemble the bowls:
- Add the sauce to the bottom of the bowl. Add the cooked noodles and toss to coat them in the sauce thoroughly.
- Top with the cooked pork mixture and blanched choy sum.
- Sprinkle with crushed peanuts, spring onions, and a light dusting of Maldon Chilli Sea Salt for an extra kick. Add more chili oil if desired.
Serve immediately

- Mix everything together in the bowl before eating for the best flavour and enjoy!
Transform your weeknight dinners with air fryer spicy Peking duck, seasoned to perfection with Maldon Chilli Sea Salt. This quick and easy dish brings the irresistible flavours of a takeaway favourite right to your kitchen. Crispy skin, tender duck and a bold chilli kick make it a satisfying and hassle-free option for busy evenings. Why settle for a delivery when you can enjoy this flavourful ‘fakeaway’ in no time?
Perfect for celebrating Lunar New Year or elevating any weeknight, this spicy Peking duck pairs beautifully with steamed pancakes, fresh cucumber and spring onions. The Maldon Chilli Sea Salt adds a fiery twist, enhancing the classic flavours while keeping preparation simple and convenient. Serve it up and impress your family or guests with this effortless, restaurant-style feast.
What is Lunar New Year?
The Lunar New Year, also known as the Chinese New Year, is a 15-day festival which begins on the first day of the first lunar month in the calendar, ending with the ‘Lantern Festival’ on the 15th day. It’s full of celebration, centred around removing the bad and the old, and welcoming the new and the good. It’s a time where many worship ancestors, exorcise evil sprits and pray for good harvest. The date of the Lunar New Year changes every year. In 2024, this will occur on the 29th January. Across many countries, including China, South Korea, North Korea, Singapore and Cambodia, each year is associated with an animal from the zodiac. For 2025, this will be the Year of the Snake. The Snake represents wisdom, transformation and renewal.
Why do you eat duck during Lunar New Year
According to Reader’s Digest, duck is one of the most popular dishes at Lunar New Year dinner. This is because duck symbolises loyalty and is a great choice for good fortune because of it’s ‘reddish hue’ – the luckiest colour in Chinese culture.
Here is how to make Air Fryer Spicy Peking Duck
- To a large pan, add the Shaoxing wine, soy sauce, soft brown sugar, spices, Maldon Chilli Sea Salt, spring onions, ginger, lemongrass, hoisin and chicken stock. Bring it up to a simmer and then add the duck legs and breast. Continue to simmer gently for 1 hour 30 minutes.
- After this time, remove the duck from the pan and pat dry using kitchen paper. Preheat the air fryer to 200c. Then place the duck into the basket and cook for 10 – 15 mins so skin goes really crispy and caramelized.
- While the duck is crisping up, mix together the rice vinegar, Maldon Sea Salt and caster sugar together in a small bowl and then add the julienned carrot. Toss it through and set aside to lightly pickle.
- When the duck is cooked, remove it from the air fryer. Slice the duck breast and shred the duck leg meat, then place it onto a serving platter. Warm through the Chinese pancakes and then serve alongside the crispy duck, hoisin sauce and the julienned spring onions, cucumber and pickled carrots. Let everyone tuck in and make their own pancakes up!
Bright, fresh and busting with vibrant flavours, this Garlicky Green Medley is a simple yet elegant side dish that pairs beautifully with roast meats or fish. A crisp combination of green beans, sugar snap peas and broad beans is tossed with crunchy blanched hazelnuts and fragrant fresh meat, creating a delightful contrast of textures and flavours. The magic touch? A generous pinch of Maldon Garlic Sea Salt flakes, enhancing every bite with a subtle garlicky depth that ties the dish together. Light, flavourful and effortlessly impressive, this medley is a must-try for any occasion.
Why this Green Medley works

The Garlicky Green Medley works well as a dish because it strikes the perfect balance of flavours, textures and freshness. Here’s why:
- Vibrant Greens & Crisp Texture – The combination of green beans, sugar snap peas and broad beans offer a satisfying crunch and a burst of natural sweetness, making the dish both refreshing and hearty!
- Nutty Depth – Blanched hazelnuts introduce a toasty richness that compliments the greens, adding both texture and a subtle buttery flavour.
- Umami & Garlick Kick – Maldon Garlic Sea Salt flakes bring a delicate garlicky warmth that enhances the natural flavours of the vegetables without overpowering them, creating a well-rounded, savoury depth.
Altogether, this dish is a perfect mix of crunch, freshness and subtle seasoning, making it a standout side for any occasion!
How to make this Garlicky Greens Medley
- Place a large pan of water on to boil. When it is simmering, add the green beans and sugar snap peas. Let them blanch for just 2 minutes then remove with a slotted spoon or tongs onto a large plate with some kitchen paper. Then add the frozen peas and broad beans to the pan of water and do the same, after 2 minutes drain them into a sieve.
- Place a large frying pan onto a medium heat and add the olive oil, once warm add the sliced garlic and let them gently fry for 1 minute. Then add the beans and sugar snap peas to the pan. Sauté them so they start to pop and char in places. If the garlic looks like its catching, then simply add a splash of water. Finally add the peas and broad beans to the pan, and sauté just until they warm back through.
- Tip all the veg onto a large serving platter and season well with Maldon Garlic Sea Salt and some cracked black pepper. Then garnish with orange zest, chopped toasted hazelnuts and some mint leaves before serving.
Variations of a Garlicky Green Medley:


- Citrus Zing – Add a squeeze of fresh lemon for a bright, tangy lift that pairs beautifully with the garlic and greens.
- Cheesy Indulgence – Crumble a few cubes of feta, parmesan shavings, or goat cheese over the medley for a creamy, salty contrast.
- Spicy Kick – toss in a pinch of Maldon Chilli Sea Salt flakes for a subtle heat that compliments the garlic flavour perfectly.
- Extra Crunch – swap the blanched hazelnuts for toasted almonds, walnuts or pine nuts for a different nutty dimension.
- Earthy Twist – Stir in sautéed mushrooms or roasted artichokes for a deeper, more umami-rich version.
Serving suggestions for a Garlicky Green Medley:
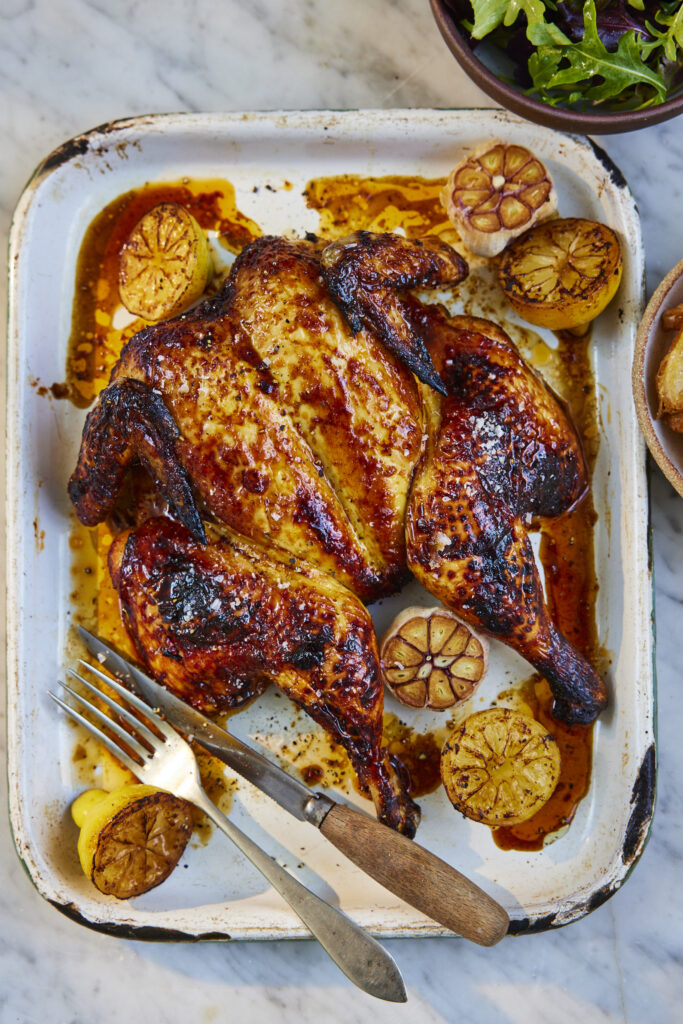
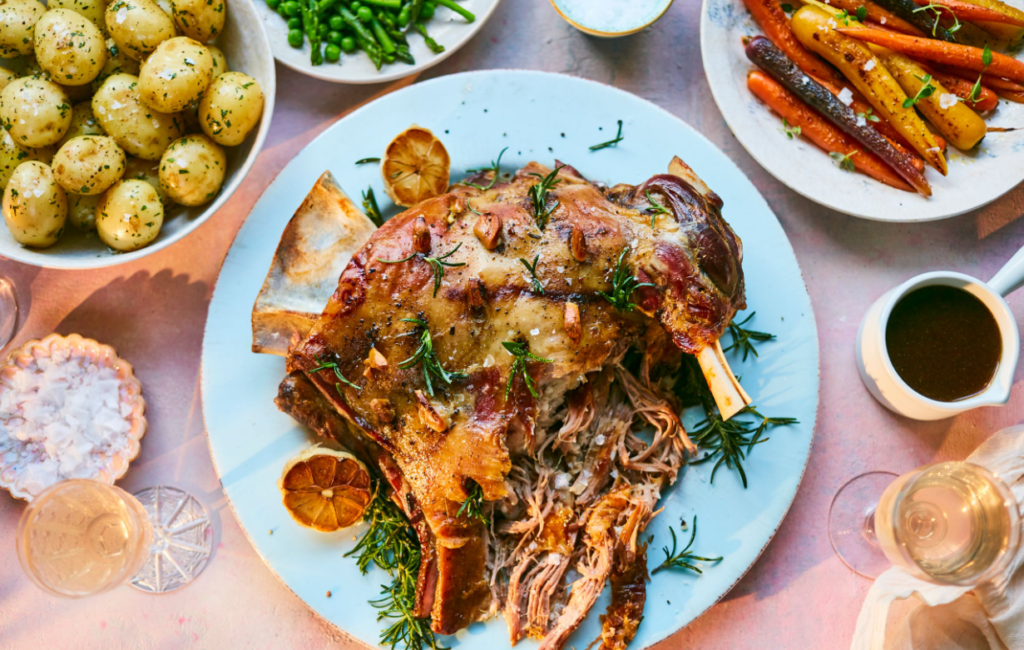
- With Roasted Meats – A perfect side for roast lamb, chicken, beef or pork, balancing the richness with fresh, crisp flavours.
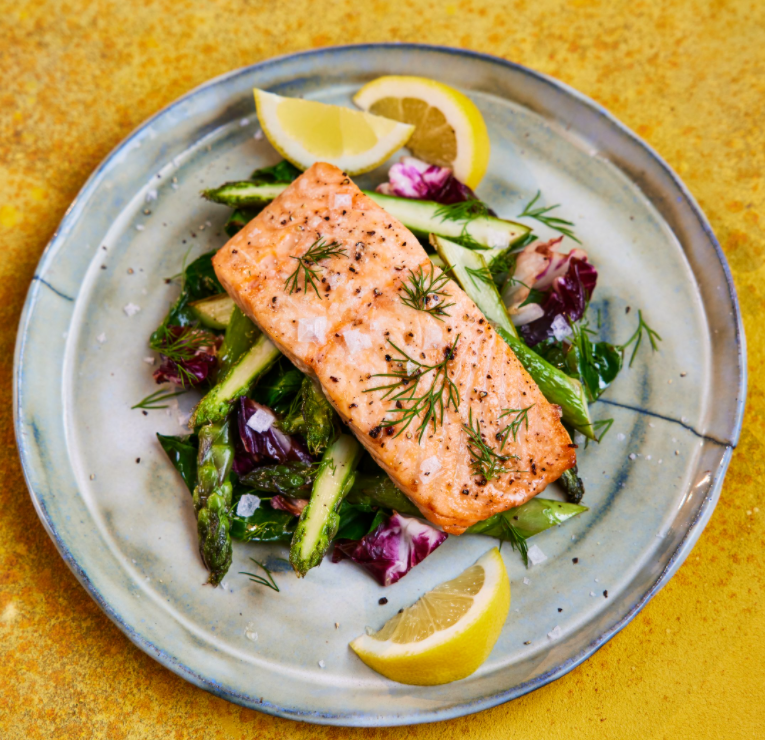
- Alongside Fish – Compliments grilled salmon, sea bass, or cod, enhancing the dish with it’s garlicky and herbaceous notes.
- Tossed in a Salad – Serve at room temperature with quinoa, couscous, or farro for a more substantial dish, turning it from a side to a main!
- As a Pasta Addition – Mix gently with cooked pasta, olive oil, and parmesan for a light yet flavourful-packed meal.
- With Poached Eggs – Top the medley with a runny poached egg for a simple but delicious brunch/lunch option.
For a quick and delicious side dish, these caramelised air fryer carrots are a game-changer. Lightly crisp on the outside, tender on the inside, and packed with natural sweetness, they’re elevated by the signature crunch of Maldon Sea Salt flakes. This effortless recipe takes 15 minutes at 200°C, making it the perfect addition to weeknight meals or special occasions.
Pair these sweet and savoury carrots with roast meats for a classic combination, or toss them into warm salads for a burst of flavour and texture. The air fryer ensures perfectly caramelised edges with minimal effort, letting the natural flavours shine with just a hint of seasoning. Simple, quick, and incredibly satisfying!
How to air-fry carrots perfectly
- Make sure the carrots are scrubbed clean and preheat the air fryer to 200c. There is a no need to peel the carrots or remove the tops.
- Place the carrots into the basket and drizzle with the olive oil and honey, then place into the air fryer for 15 minutes until they are tender and starting to caramelize on the outside.
- Remove from the air fryer and transfer onto a serving platter. Season with Maldon Sea Salt and cracked black pepper to taste and then scatter over a few thyme leaves before serving.
Recipes to make with carrots
Here are a few delicious carrot recipes to try out during the week. Each recipe brings out the natural sweetness of carrots, beautifully balance by the clean, crisp finish of Maldon Sea Salt flakes.
Lemon & Honey Roasted Carrots
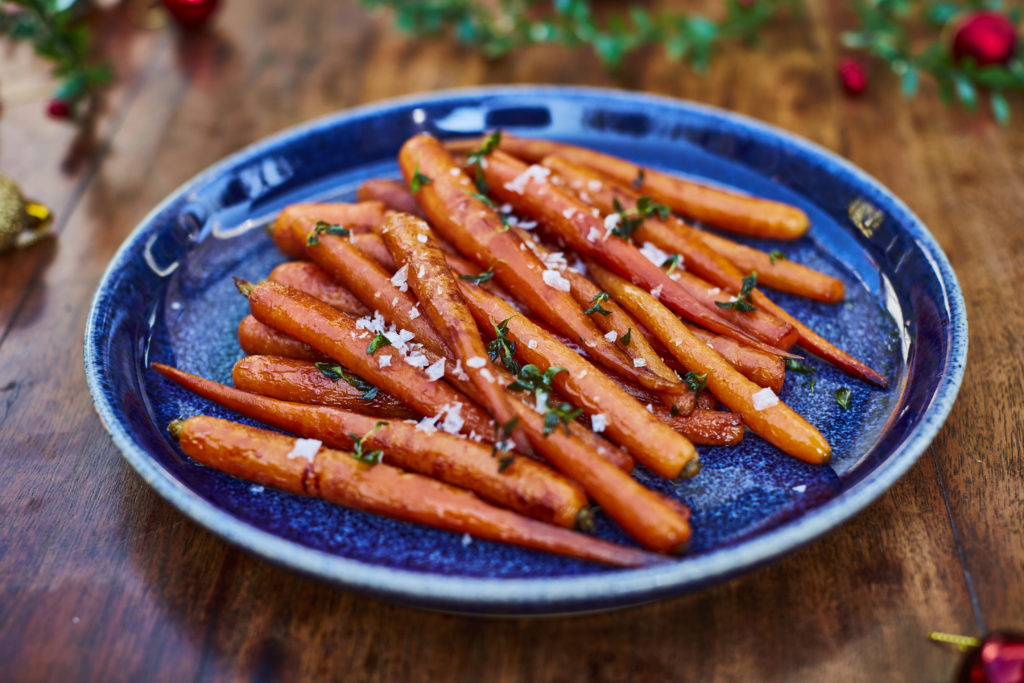
Transform your ordinary carrots with a beautiful lemon and honey glaze. When roasted, carrots give a delicious, sweet and earthy taste. When paired with lemon, it adds a tasty citrusy kick, whilst a generous smothering of honey enhances the natural sweetness of the carrots.
Spiced Roasted Carrots and Hazelnuts with Silky Butter Bean Mash

This recipe was created by Rukmini Iyer, a celebrated author and culinary innovator, known as the queen of fuss-free flavour. The dish focuses on roasting carrots with coriander seeds under foil whilst making a rich, silky butter bean mash to pair with the carrots and soak up any leftover juices.
Chickpea Salad with Baby Carrots

This versatile chickpea salad is perfect as a min dish, a side, or even for meal prep. Combining the creaminess of chickpeas with the vibrant pomegranate seeds, butternut squash and crunchy baby carrots, this dish is a flavour-packed powerhouse! A generous pinch of Maldon Garlic Sea Salt flakes elevates the flavours, making it the perfect plant-based option for any day of the week.
- Preheat the oven to 180c.
- Firstly, start with the Hasselback potatoes. The easiest way to make the cuts is to place a potato onto a chopping board and put a chopstick flat on either side. Then using a knife, carefully cut slices all the way along the potato – the chopsticks will ensure that you don’t cut fully through the potato. Repeat this with each potato.
- Place the leg of lamb onto a large roasting tray skin side up, and then nestle the prepared potatoes around it. Cut the shallots in half lengthways and add them to the tray. Cut the garlic bulbs in half, cutting through the cloves like a cross section. Add two of the halves to the tray. Use a sharp knife to insert some small cuts into the skin of the lamb, then press some of the other cut garlic cloves and small sprigs from the rosemary into the cuts. Slice the lemon in half and add this to the tray as well. Finally slot the bay leaves into some of the cuts of the potatoes.
- Drizzle the potatoes, shallots, garlic and lemons with 3 tbsp of the olive oil then drizzle the remaining two across the lamb. Season well with Maldon Sea Salt and cracked black pepper. Place into the preheated oven and roast for 1 hour 25 minutes.
- While the lamb and potatoes are cooking, make the salsa verde. Add the chopped shallot, anchovies, capers and herbs into a bowl. Add the red wine vinegar and give it a stir. Then slowly drizzle in the olive oil and give it a good mix. Season with Maldon Sea Salt and cracked black pepper to taste. Set aside.
- Once the lamb is cooked, remove it from the oven. The potatoes should be lovely and golden, and tender in the middle – but if they need a little longer, simply lift the lamb out onto a board to rest and return them to the oven for 10 minutes. Allow the lamb to rest before carving and serving with the potatoes, some greens and the salsa verde.
This quick and easy air fryer salmon recipe is the perfect way to enjoy a delicious and healthy meal without the hassle. In just a fraction of the time it takes to cook traditional salmon, the air fryer delivers perfectly crispy, golden-brown skin with tender, flaky fillets. Paired with colourful stem broccoli and seasoned with Maldon Sea Salt flakes, this salmon and veggies dish is both flavourful and nutritious. The best part? It’s all cooked in one air fryer basket, making clean-up a breeze and the cooking time quicker – ideal for busy weeknights or a light weekend dinner.
Air frying salmon and vegetables
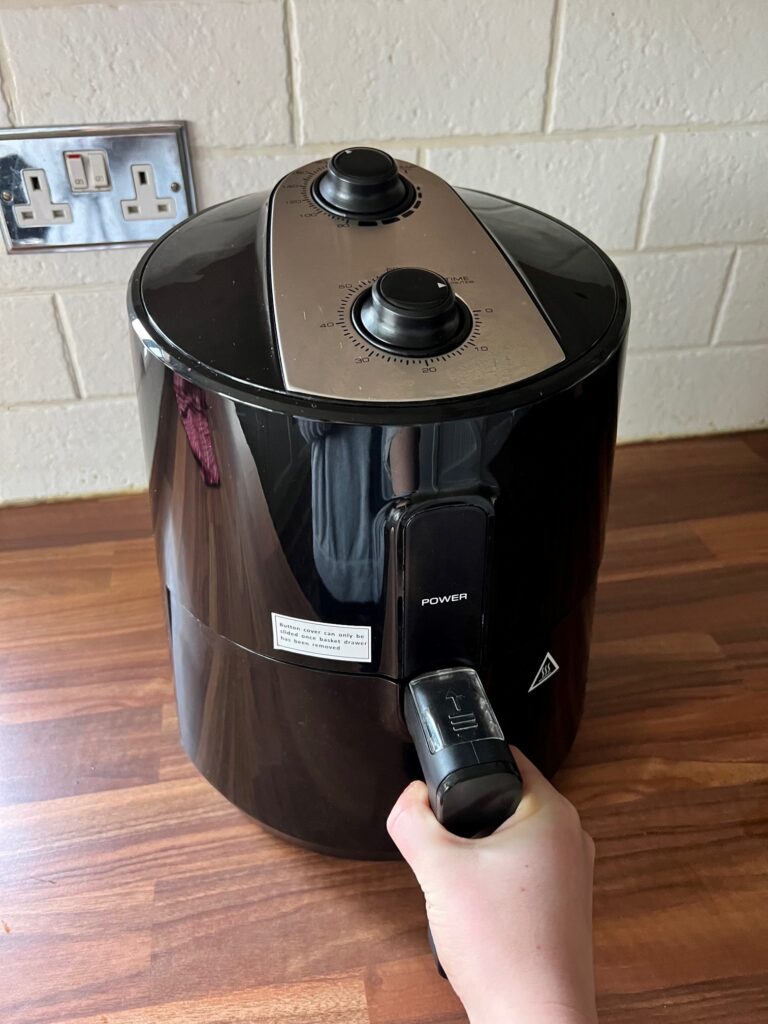
The beauty of this dish lies in it’s simplicity and speed. The air fryer ensures that the salmon achieve a perfectly flaky texture with a golden, crisp skin, while the vegetables retain their crunch and natural flavours. With minimal prep and clean up, this recipe is ideal for busy weeknights or when you want a wholesome meal without the hassle. Pair the salmon and veggies with a a packet of ready-cooked rice for a complete meal that’s both satisfying and healthy. Embrace the ease of air frying and make healthy eating in January a breeze.
How to cook salmon in an air fryer

To make this air fryer salmon and veggies, start by seasoning your salmon fillets with olive oil, Maldon Sea Salt and cracked black pepper. You can also add a pinch of garlic powder and a touch of brown sugar for subtle sweetness. Place the fillets skin-side down on a sheet of parchment paper in the air fryer basket. You can also arrange a few sliced bell peppers around the fish if you only have a one-basket air fryer. Air fry the salmon at the perfect temperature for a few minutes, ensuring the skin crisps up nicely while keeping the flesh moist and tender. After about 10-12 minutes, you can squeeze fresh lemon juice over the top, and serve your delicious fried salmon and roasted veggies right from the air fryer. With minimal prep and just a few simple ingredients, this air fryer recipe is a winning dinner choice that tastes like a gourmet meal.
Step 1
Place the salmon fillets skin-side down into the air fryer drawer.
Step 2
Brush the salmon skin with olive oil and sprinkle with a generous amount of Maldon Sea Salt flakes. Add a little black pepper and set to one side.
Step 3
In the second drawer, or alongside the salmon if you’re using a single-drawer air fryer, add the vegetables. Drizzle with olive oil, season generously with Maldon Garlic Sea Salt and a pinch of pepper, then give everything a good shake to ensure even coating. Place both drawers into the air fryer, ready to cook.
Step 4
Air fryer for 10 minutes at 200ºC, giving the vegetables a shake half way through cooking.
Step 5
Meanwhile, heat up your rice as per the packet instructions.
Step 6
Once everything is ready, share the rice between two plates, top each with a piece of perfectly cooked salmon and finish with the tasty vegetables. Make sure you eat the salmon skin, it’s the best bit!
What other vegetables can I serve with salmon?

There are many vegetables that go well with salmon such as tender asparagus spears, mild courgette slices, and sweet carrot batons, all of which are delicious when roasted or air-fried. Crisp green beans and sugar snap peas add a fresh, crunchy texture, while blistered cherry tomatoes provide juicy bursts of flavour. Hearty butternut squash cubes bring a slightly nutty depth, and a handful of spinach can be added at the end to wilt gently alongside the cooked salmon. These vibrant choices create a perfect balance of flavours, textures, and colours to complement your salmon dish.
Can you air fry frozen salmon?

Yes, you can cook frozen salmon in an air fryer. It’s a quick and convenient way to cook salmon without thawing it first. Simply preheat the air fryer to the desired temperature (around 199°C/390°F). Lightly coat the air fryer basket with oil or cooking spray to prevent sticking. Alternatively, you can use baking paper/parchment paper. Place the frozen salmon fillet in a single layer in the basket. You’re probably wondering how long does it take to air fry salmon? We recommend air frying the salmon for around 8-9 minutes, or until the salmon reaches an internal temperature of 145°F.
Is air frying salmon healthy?

Yes, air frying salmon can be a very healthy way to cook this nutrient-rich fish. The air fryer uses hot air circulation to cook food, which requires less oil than traditionally frying in a pan. This results in a lower-fat dish without sacrificing flavourful. Here are three benefits of air frying salmon, including how Maldon Sea Salt can enhance the dish.
- Lower Fat Content – Air frying reduces the amount of oil needed to cook salmon, compared to methods like deep frying or pan-frying. The hot air in the air fryer crisps up the salmon’s skin and helps lock in moisture without saturating the fish with excess fat. Since salmon already contained healthy fats (such as Omega-3 fatty acids, using minimal oil ensures that the dish stays light yet flavourful.
- Preserves Nutrients – Salmon is packed with essential nutrients, including Omega-3 fatty acids, protein, and vitamins D and B12. Air frying cooks the fish quickly and evenly, helping to retain these beneficial nutrients. The method also avoids overcooking the salmon, which can cause a loss of nutrients. The crispy skin create din the air fryer is an added bonus, as it adds a delicious texture without compromising the nutritional profile.
- Better Control Over Seasoning – When using Maldon Sea Salt in your air fryer salmon recipe, you get a better control over the seasoning. Maldon Salt is renowned for it’s delicate, flaky texture, which allows it to dissolve easily and evenly on the surface of the fish. It’s an excellent way to enhance the natural flavours of the salmon without overpowering the dish. Just a light pinch of Maldon Sea Salt after air frying gives the salmon a perfectly balances taste while also adding the mineral benefits of sea salt.
Recipe created by Air Fryer Girl
Creamy, flavourful and effortlessly quick, these Creamy Garlic Butter Beans with Spinach are a game changer for busy weeknight or anyone looking for a quick and easy vegan dish! Elevated by the rich, aromatic Maldon Garlic Sea Salt, this recipe transforms humble ingredients into a dish bursting with savoury goodness. Whether you’re embracing Veganuary or simply seeking a nourishing, plant-based meal, this is the perfect go-to option. Plus, it’s air-fryer friendly, making clean-up a breeze!
Ready in just 25 minutes, this recipe requires minimal effort, yet delivers maximum flavour. The butter beans become velvety and indulgent, while fresh baby spinach wilts beautifully, creating a perfect balance of texture and taste. The air fryer works it’s magic, infusing the dish with the deep, garlicky notes of Maldon Garlic Sea Salt as you stir every five minutes for even cooking. Pure comfort in a bowl, made easy by your air fryer.
How to cook creamy garlic butter beans with spinach using an air fryer
- Start by removing the crisper tray from the air fryer drawer.
- Place the olive oil and rosemary into the drawer and air fry for 5 minutes at 200ºC.
- Once the 5 minutes is up, pour the butter beans (including the liquid) into the air fryer drawer, along with the red wine
vinegar, a generous pinch of Maldon Garlic Sea Salt and a little pepper. Mix everything together (at this point, if the rosemary leaves have come away from the stalk you can remove the stalks). - Air fry for 15 minutes at 200ºC, stirring every 5 minutes.
- Meanwhile, prepare your tomatoes and sourdough. I like to cook the tomatoes in the air fryer for 5-6 minutes on
190ºC, until soft and heated through and the sourdough takes around 4-5 minutes to turn into perfectly crisp toast. - Once the beans have finished cooking, stir in the spinach and pop back in the air fryer for a final 4 minutes at 190ºC.
- To plate up, place your sourdough on a plate, top with the butter beans mixture, followed by the tomatoes and tuck in!
- If you like to have a bit of meat with your meals – a bit of crunchy streaky bacon goes perfectly with this dish! (air fry the bacon for 8 minutes at 190ºC).
- Enjoy!
This aubergine traybake with tahini dressing is a Middle Eastern-inspired dish that combines bold flavours with vibrant textures in a single roasting tin. Perfect for busy weeknights or effortless entertaining, this recipe transforms tender roasted aubergine into a show-stopping centrepiece. The smoky heat of rose harissa pairs beautifully with creamy tahini dressing, while a sprinkle of Maldon Sea Salt flakes enhances every bite. Ready in just 45 minutes, this dish is finished with chopped parsley, but you can also use fresh mint leaves, toasted pine nuts and a touch of lemon juice for a extra burst of freshness.
Step 1
Preheat the oven to 180c.
Step 2
Prepare the aubergine but slicing them in half lengthways, keeping the stalk on, so you have 4 halves. Then score the flesh of each half with a sharp knife in a crisscross pattern – making sure to only cut the flesh and leave the skin intact.
Step 3
Then take a large baking tray and add the chickpeas, red onion wedges and red pepper chunks to the tray. In a small bowl, mix together the harissa and olive oil. Drizzle most of this in the tray and toss so all the ingredients are well coated.
Step 4
Next add the aubergine halves on top of the other veg in the tray so the cut side is facing up and then brush with the remaining harissa paste mix. Season well with Maldon Sea Salt flakes and cracked black pepper.
Step 5
Place the tray into the preheated oven for 25 minutes until everything is starting to look charred and softened. At this stage add the cherry tomatoes on the vine and nestle them in the tray around the aubergine, drizzling with a little extra oil. Then place the tray back in the oven for an additional 20 mins.
Step 6
While the veg is cooking, prepare the tahini dressing. Simply whisk together the tahini, lemon juice and olive oil. Then add as much water as needed until you reach a drizzle consistency – start with a tablespoon at a time. Season well with Maldon Sea Salt flakes and cracked black pepper.
Step 7
When the traybake is ready, remove from the oven and drizzle over the tahini dressing and the chopped parsley. Serve alongside some charred pitta bread, if you like.
Can you keep cooked aubergine in the fridge?
Yes, you can keep cooked aubergine in the fridge. Make sure to store it in an airtight contained for up to 3-5 days, however it’s best consumed within a few days for optimal freshness.
Can you keep cooked aubergine the freezer?
Yes, you can store cooked aubergine in the freezer for up three months in an airtight container. When you are defrosting your aubergine, thaw it in the fridge for 24 hours. Make sure to drain any excess water and pat dry to prevent it from becoming mushy!
When the cold winter months roll in, a hearty yet refreshing dish like a winter chickpea salad is just what you need. This versatile chickpea salad recipe is perfect as a main dish, a side, or even for meal prep. Combining the creaminess of the chickpeas with the vibrant pomegranate seeds, butternut squash, and crunchy baby carrots, this dish is a flavour-packed powerhouse! A generous pinch of Maldon Garlic Sea Salt flakes elevates the flavours, making it the perfect addition to your Veganuary menu or a comforting plant-based option for any day of the week.
Finish the recipe with a simple tahini dressing to make the salad burst with flavour, or instead use vegan mayonnaise to drizzle on top. You can also try crumbling a few pieces of plant-based cheeses to add depth and texture to the dish. We like using Violife Non-Diary Feta Style Cheese which is great when tossed in a crispy salad.
Here’s how to make the Winter Chickpea Salad

This vibrant and healthy salad is packed with roasted butternut squash, baby carrots, crispy chickpeas, and massaged kale, all drizzled with a creamy tahini dressing. Full of nourishing ingredients, it combines sweet, savoury and earthy flavours, complimented by the crunch of pomegranate seeds and toasted mixed seeds. Easy to prepare and full of vitamins, fibre, and plant-based protein, this dish makes for a satisfying and wholesome meal. Perfect for anyone looking to enjoy a nutritious, flavour-packed meal.
Step 1:
Preheat the oven to 180°C.
Step 2:
Place the butternut squash and baby carrots onto a roasting tray. Drizzle with 1 tbsp olive oil, fennel seeds, Maldon Garlic Sea Salt, and black pepper. Roast in the preheated oven for 25 minutes until tender, golden, and slightly charred.
Step 3:
Drain the chickpeas and pat them dry with kitchen paper. We used Bold Bean Co Organic Chickpeas, but you can substitute with white beans, cannellini beans or butterbeans as they all have the same creamy texture and mild flavour. Spread them onto a second baking tray and drizzle with 1 tbsp olive oil, paprika, and ground cumin. Season well and roast in the oven for 15 minutes until crispy and golden.
Step 4:
While the vegetables and chickpeas are roasting, place the kale into a large mixing bowl. Add 1 tbsp olive oil and a big pinch of Maldon Sea Salt. Massage the kale with your hands to soften it, then set aside.
Step 5:
Prepare the tahini dressing by whisking together tahini, lemon juice, olive oil, water, and seasoning until smooth and creamy.
Step 6:
Once the vegetables and chickpeas are roasted, assemble the salad. Toss most of the tahini dressing through the kale and transfer it to a platter. Top with the roasted butternut squash, baby carrots, and crispy chickpeas.
Step 7:
Drizzle over the remaining tahini dressing and garnish with pomegranate seeds and toasted mixed seeds before serving.
What to serve with your chickpea salad?
A winter chickpea salad is versatile and pairs beautifully with a variety of dishes. Here are some great options to serve alongside it:
Warm Bread
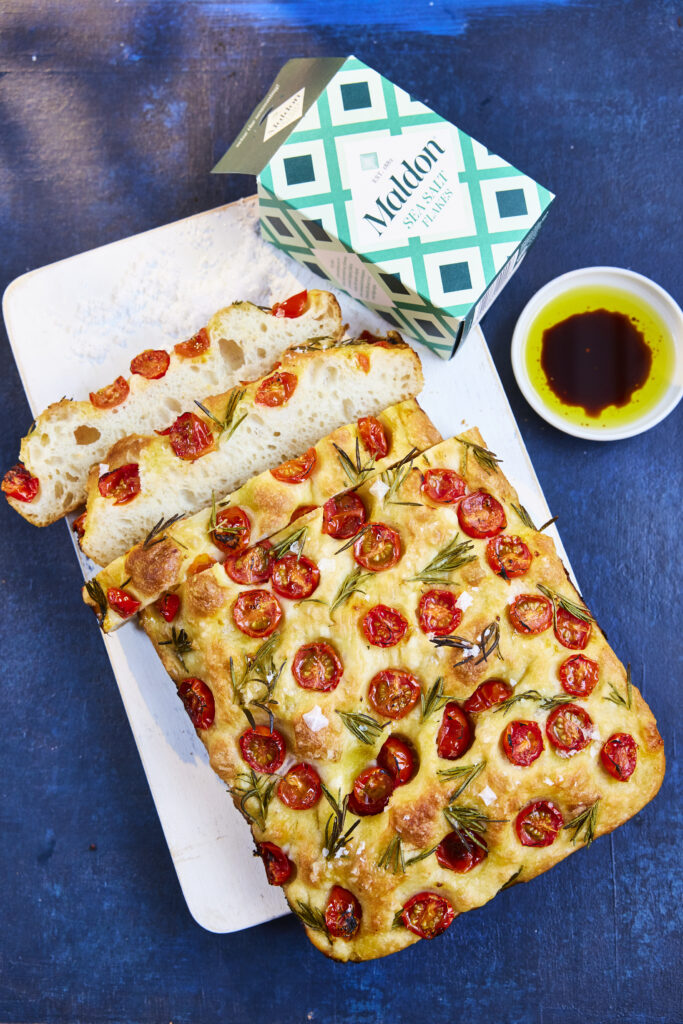
A delicious, crusty bread is perfect for scooping up the salad and soaking up it’s tangy dressing. Try making a cherry tomato and pesto focaccia which is easy to follow and packs a lot of flavour. Alternatively, pairing the salad with a warm, garlic bread add a wonderful savoury flavour to the dish, and adds a tasty crunch to your meal.
Soup
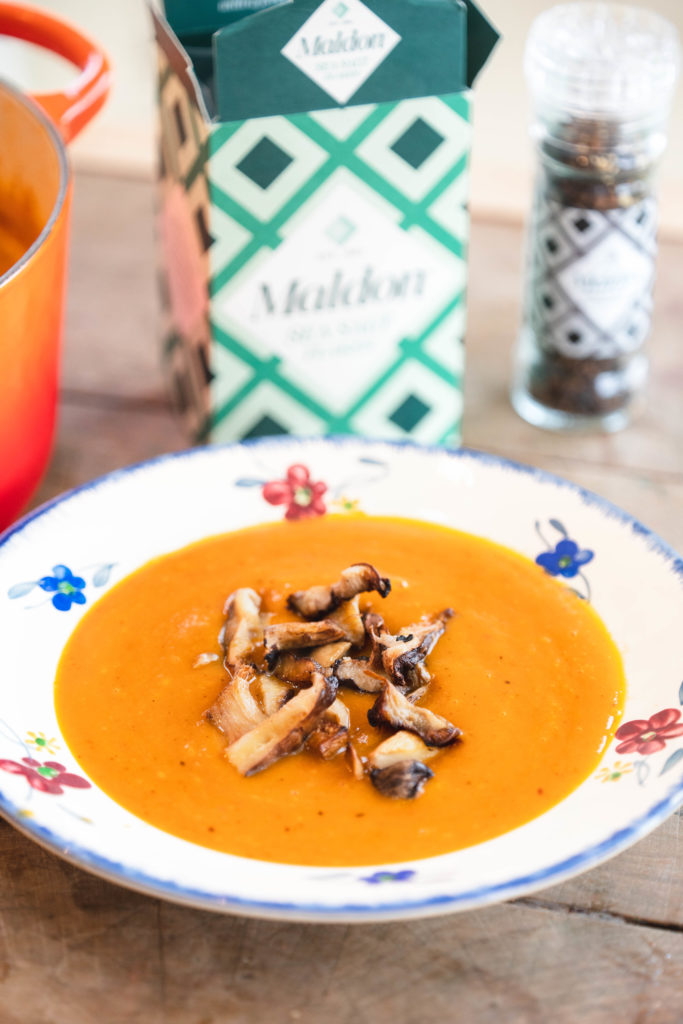
A classic butternut squash soup is hearty in flavour and compliments the fresh, tangy salad. It’s natural sweetness from the squash balances the savoury notes of the salad perfectly.
Protein
As a plant-based option, try adding a few falafel balls to make the dish more substantial and completely vegan.
For non-vegans, grilled chicken makes a hearty, protein-rich pairing. You can also try pairing the salad with baked salmon. The delicate, butter fish is a great compliment to the crunchy chickpeas, roasted squash and baby carrots.
How long will the chickpea salad last in the fridge?
You can keep the chickpea salad in the fridge for up to four day in a secure, airtight container.
Any leftover tahini dressing can be stored a glass mason jar and refrigerate for up to 14 days, however it is best to consume within 5-7 days so that you can taste the tangy flavour. After refrigeration, the dressing can become much thicker and separate, so make sure to store before using again.
Can you freeze a chickpea salad?
You can freeze a chickpea salad for up to three months, but we don’t recommend this as the texture of the salad will change and loose it’s tasty crunchiness.
Any leftover tahini dressing can be stored in an airtight container for up to 8 weeks. Make sure to leave some headspace in the container as liquids expand when freezing. When you want to use the tahini, thaw it in the fridge overnight and give it a good stir before using as it can separate.