A Taste of Sicily: Maldon Salt and Giuseppe Federici
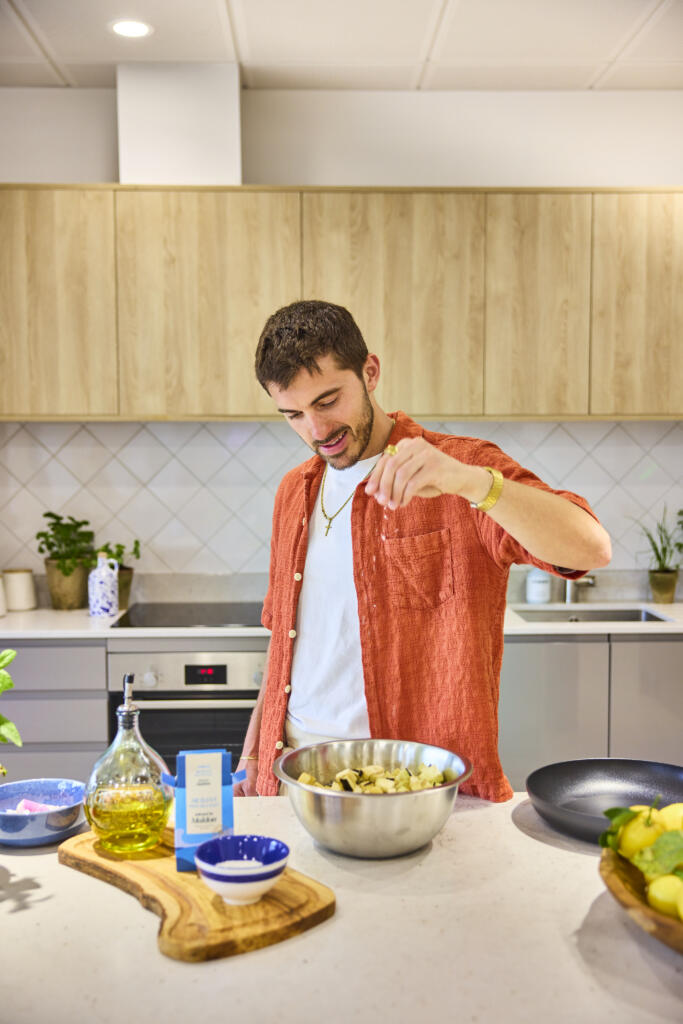
Maldon Salt has partnered with Sicilian home cook, recipe creator and bestselling author Giuseppe Federici (@sepps) to celebrate the launch of Sicilian Fine Sea Salt, Selected by Maldon. Inspired by the flavours, traditions and ingredients of Sicily, this Aubergine Caponata recipe showcases how a high-quality fine sea salt can elevate everyday cooking. Rich, vibrant and packed with Mediterranean flavour, this classic dish highlights the versatility and balanced taste of Maldon’s newest addition to the Merchants Range.
Welcoming Giuseppe Federici
Giuseppe Federici (@sepps) is a second-generation British Italian who comes from a long line of passionate food lovers, with Italian home cooking firmly at the heat of everything he does.
Today, Giuseppe has built one of the UK’s most engaged Italian food communities, sharing authentic Italian recipes, family stories and a genuine love for home cooking. Most loved of all the heart warming cooking videos he creates alongside his Nonna, which have captivated millions of viewers and inspired his first cookbook – Cooking with Nonna – a collection of of treasured Italian recipes with a plant-based twist.
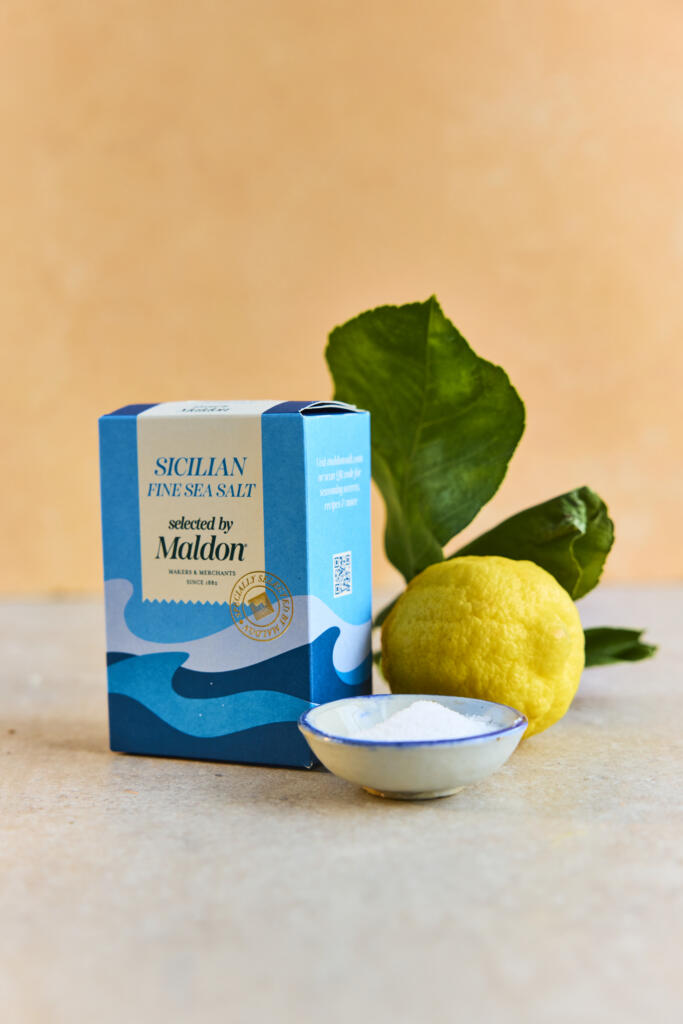
Discover Sicilian Fine Sea Salt, Selected by Maldon
Sicilian Fine Sea Salt, Selected by Maldon. 250g pack.
Harvested from the historic salt pans of Trapani on Sicily’s western coast, Sicilian Fine Sea Salt, Selected by Maldon is the latest addition to the Merchants Range. Carefully chosen by Maldon’s Master Salt Merchants, it is prized for its balanced flavour, exceptional versatility and delicate texture. Naturally dried in the Mediterranean coastal breeze, its fine crystals dissolve quickly and evenly, making it ideal for seasoning throughout the cooking process. Whether enriching sauces, seasoning vegetables, baking bread or salting pasta water, this premium fine sea salt delivers consistent flavour in every dish.
Nonna’s Aubergine Caponata Recipe
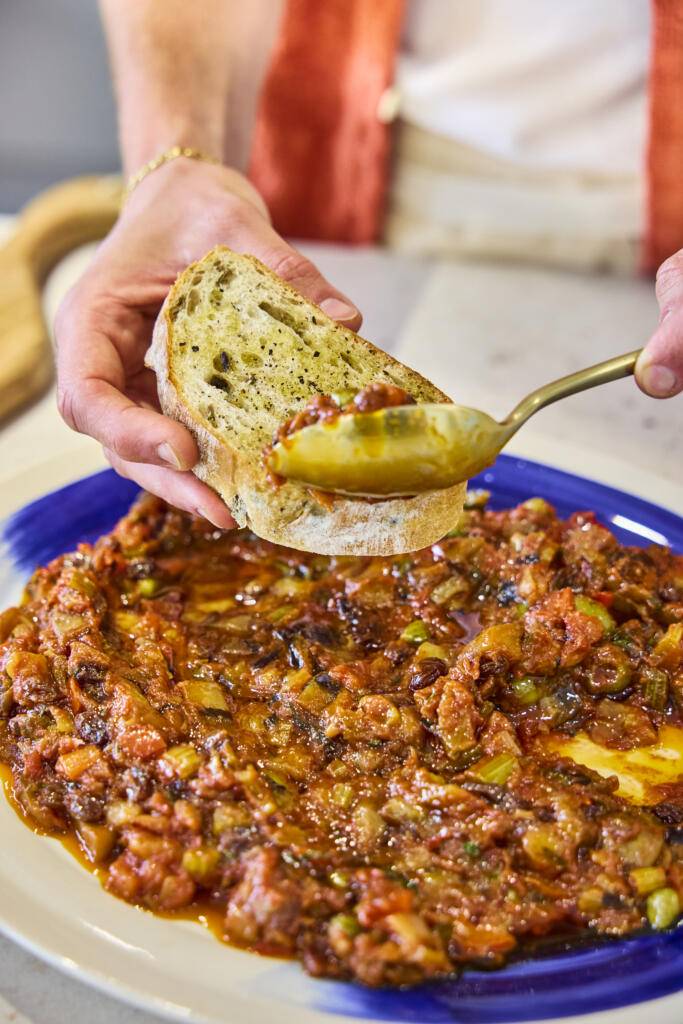
A much-loved staple of Sicilian cuisine, Caponata is a rich sweet-and-sour aubergine dish that celebrates the island’s vibrant flavours. Combining tender aubergines, briny olives and capers, sweet raisins and a tangy tomato base, this traditional recipe has been passed down through generations. In this version, Giuseppe draws inspiration from his Nonna’s cooking, creating a comforting dish that embodies the spirit of Sicilian home cooking.
The delicate texture of Sicilian Fine Sea Salt, Selected by Maldon plays an important role throughout the recipe – drawing excess moisture from the aubergines, seasoning the vegetables evenly and enhancing the balance of sweet, savoury and acidic flavours that makes Caponata so iconic.
How to Make Aubergine Caponata
Cut the aubergines into 2–3cm cubes. Place them in a large bowl, generously coat with Sicilian Fine Sea Salt, and set aside for at least 10 minutes to draw out excess moisture.
Dice the celery (slice each stalk down the middle first, then cut into 1–2cm pieces), the onion, and the red pepper.
Drain any liquid from the aubergines and pat dry. Heat a generous glug of olive oil in a large frying pan over medium heat. Fry the aubergines in batches until nicely coloured and soft, about 10 minutes. You want them soft but not mushy. Transfer to a large casserole dish.
Return the pan to the heat with 1 tbsp of olive oil. Add the celery and fry for 8–10 minutes until softened. Transfer to the casserole dish.
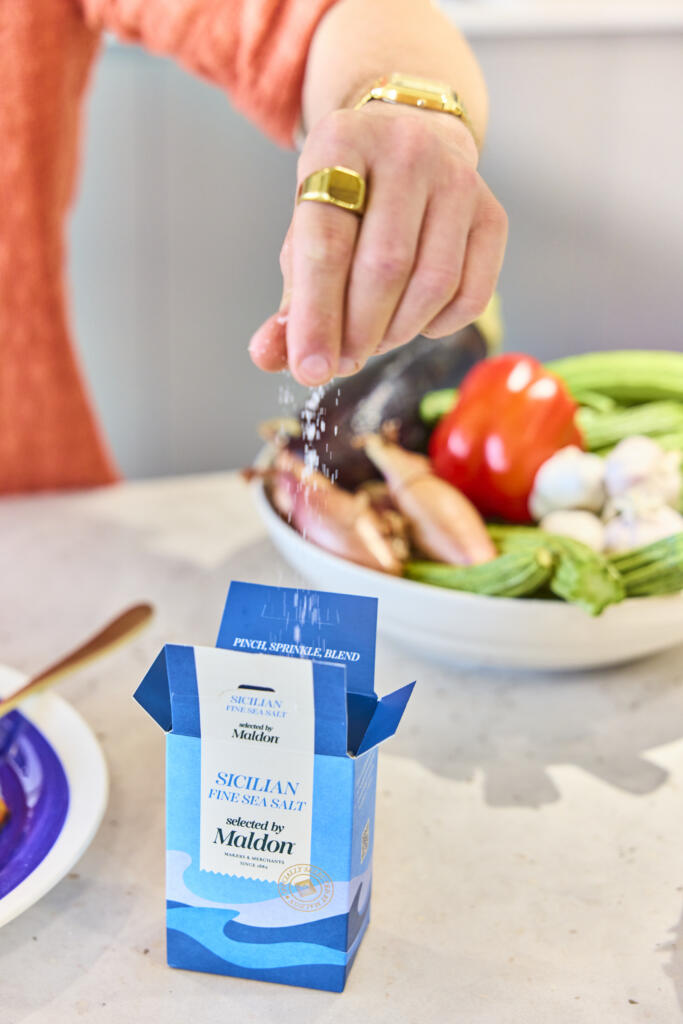
Add the onions and peppers to the pan and fry for about 5 minutes, until the onions have softened and the peppers are starting to char. Reduce the heat to low, add the red wine vinegar, and let it simmer for 1 minute so the vinegar reduces and coats the vegetables. Transfer everything to the casserole dish and season with Sicilian Fine Sea Salt, black pepper and a pinch of chilli flakes.
Top Tip: Like many traditional Italian dishes, Caponata tastes even better the next day, once the flavours have had time to fully develop.
Bring the Flavours of Sicily Home
Inspired to recreate Giuseppe’s family recipe? Sicilian Fine Sea Salt, Selected by Maldon is available now from Tesco, Sainsbury’s and Ocado. Harvested on Sicily’s western coast and selected for its balanced flavour and exceptional versatility, it’s the perfect pantry staple for everyday cooking.
For more authentic Italian recipes, explore Giuseppe Federici’s cookbook, featuring the beloved dishes, family traditions and heart-warming stories. From comforting pasta dishes to regional Italian classics, it’s your invitation to bring a little more Italy into your kitchen.
A grazing-board hero that’s as good for you as it is moreish. This silky butterbean hummus is whipped smooth with tahini, lemon and Maldon Garlic Sea Salt, then served with homemade gluten-free seeded crackers and fresh crudités for dipping. It’s a generous, crowd-pleasing centrepiece for any picnic or summer spread, and almost entirely plant-based.
Why You’ll Love This Butterbean Hummus
Silky-Smooth Hummus: A splash of cold water at the end whips the butterbeans into the lightest, creamiest hummus.
Homemade Seeded Crackers: Crisp, seed-packed and naturally gluten-free, they’re far better than shop-bought – and easy to make.
Built for Sharing: A generous dip, crunchy crackers and colourful crudités make an effortless grazing platter.
How to Make Butterbean Hummus (Step-by-Step)
Make the cracker mix: Preheat the oven to 180°C. In a large bowl, mix the flaxseed, brown rice flour, ½ tsp Maldon Garlic Sea Salt, pumpkin seeds, sunflower seeds, hemp seeds and chia seeds. Pour over 250ml boiling water, stir together and set aside for 20 minutes to thicken as the chia and flax absorb the liquid.
Spread and bake the crackers: Line a large baking tray with parchment, tip on the mixture and smooth it right to the edges, as thin as possible. Sprinkle over the everything seasoning and fennel seeds, press them in gently, and bake for 30–40 minutes until golden and crisp. Cool completely on the tray.
Blitz the hummus: While the crackers bake, add the butterbeans, garlic, lemon juice, tahini, cumin, smoked paprika and Maldon Garlic Sea Salt to a food processor and blitz to a paste. Add the olive oil and blitz again until smooth.
Make it silky: With the motor running, drizzle in the cold water and keep blitzing until completely smooth and silky. Taste and adjust with a little more Maldon Garlic Sea Salt if needed.
Break, top and serve: Once cooled, snap the cracker sheet into rustic shards. Spoon the hummus into a bowl, drizzle with olive oil and finish with a pinch of cumin and Maldon Garlic Sea Salt. Serve with the crackers and crudités for dipping.
Tips for the Perfect Butterbean Hummus
Cold water for silk: Adding cold water at the end, with the motor running, is the trick to the smoothest, lightest hummus.
Spread the crackers thin: The thinner and more even the layer, the crisper the crackers – take them right to the edges of the tray.
Cool before breaking: Let the cracker sheet cool fully on the tray so it snaps cleanly into shards rather than bending.
The hummus keeps for up to 3 days in the fridge, and the crackers stay crisp for several days in an airtight container – making this an ideal make-ahead platter.
Why did my hummus turn out grainy?
Keep blitzing and add the cold water gradually with the motor running. The water emulsifies the tahini and beans into a smooth, silky texture – patience is key.
Are the crackers really gluten-free?
Yes – they’re bound by the chia and flaxseed rather than wheat, with brown rice flour, so they’re naturally gluten-free (do check your everything seasoning if you need them to be certified).
Cabbage has become one of the biggest trends in modern cooking – loved for it’s affordability, versatility, and incredible ability to transform under high heat. When roasted, Savoy cabbage turns golden at the edges, rich and buttery at the core, and the perfect canvas for bold flavours. It’s no surprise that cabbage steak recipes are trending across Instagram and TikTok as cooks rediscover this once-humble vegetable.
Why are cabbages becoming popular again in food?
Cabbage is experiencing a major comeback as one of the biggest food trends of 2026, and there are several reasons for it’s rise in popularity.
It’s highly budget-friendly – Food prices have pushed home cooks towards ingredients that are affordable, versatile, and yield a lot per purchase. Cabbage fits this perfectly, making it a hero for cost-conscious cooing.
It’s an incredibly versatile ingredient – Chefs and creators highlight that cabbage can be roasted, sautéed, braised, fermented, grilled or served raw, making it one of the most adaptable vegetables available.
Social media trends are boosting it’s appeal – Pinterest Predicts and TikTok have reported major strikes in searches for cabbage dishes – from cabbage dumplings to fermented cabbage. Home cooks are incredibly inspired by visually striking cabbage steaks and charred wedges.
It offers strong nutritional benefits – Cabbage is a nutrient-dense cruciferous vegetable rich in vitamin C, folate, and potassium. It also has anti-inflammatory and gut-supportive properties, making it a go-to ingredient for health-focused cooks.
‘Simple Ingredients Done Well’ trend = Food analysts say the cabbage trend reflects a cultural shift toward everyday ingredients that deliver comfort, flavour, and a sense of home.
How to Cook Cabbage Steaks?
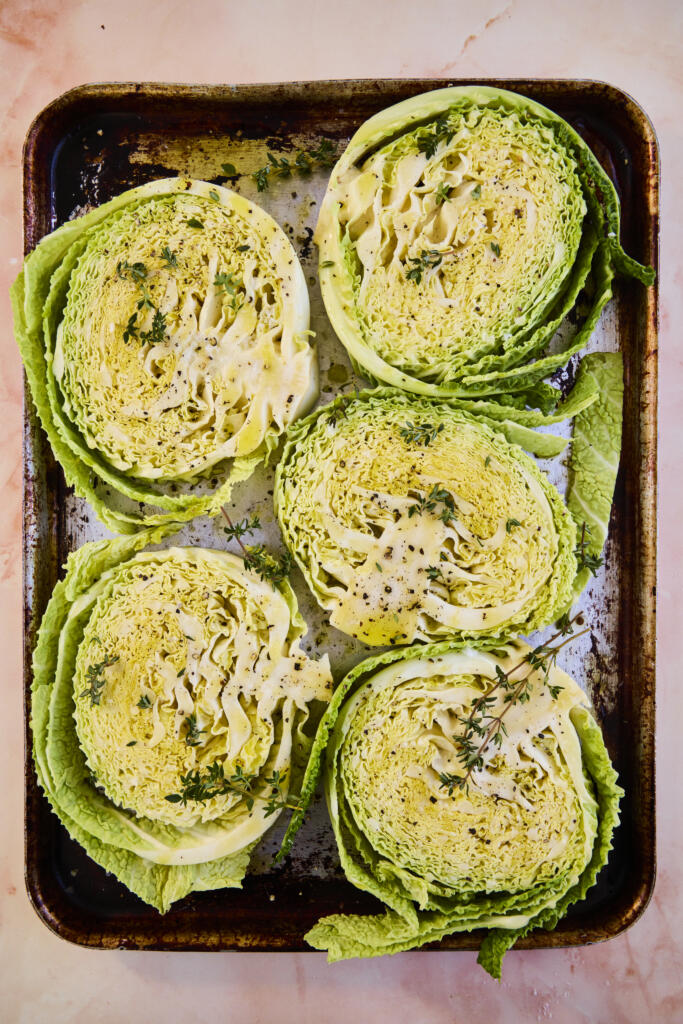
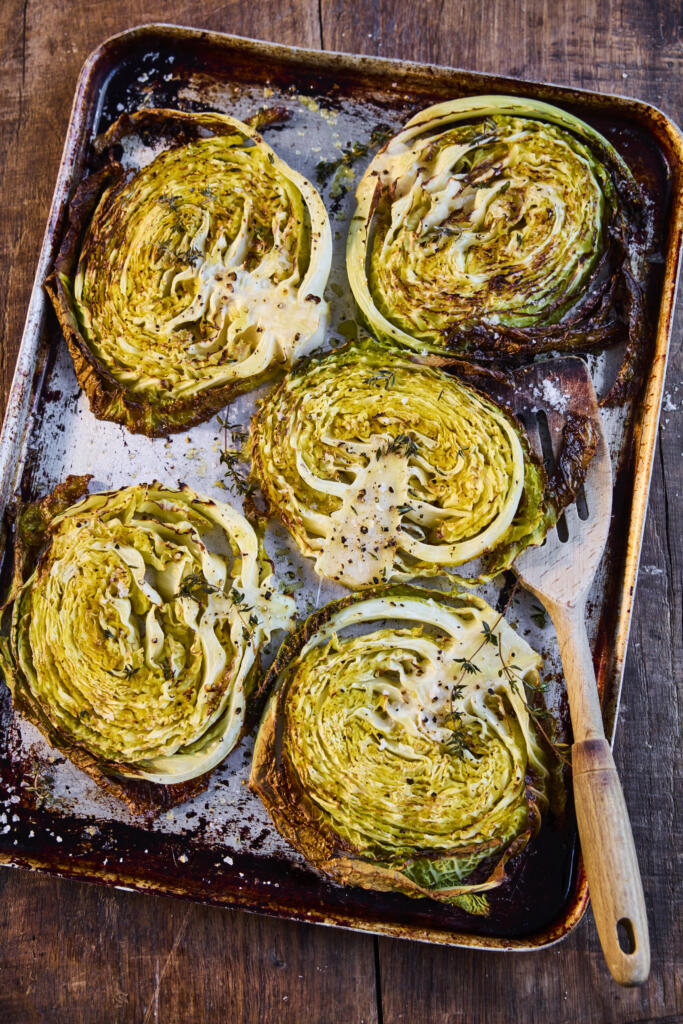
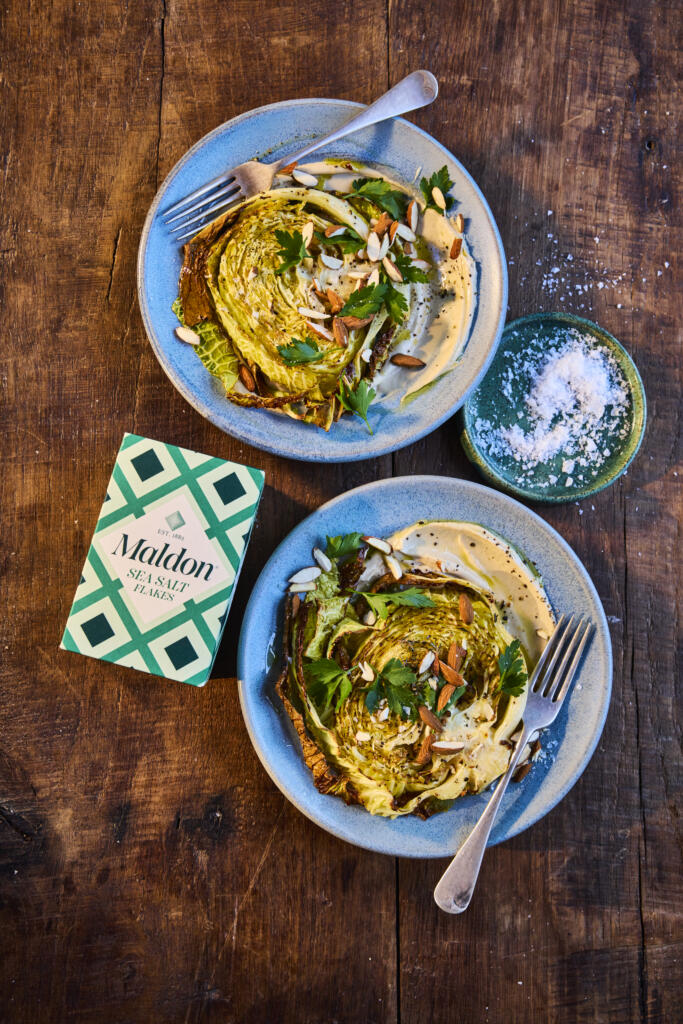
Raw Savoy cabbage steaks on a trayClose-up of the roasted edges + Maldon Sea Salt flakesFinal plated dish with tahini drizzle and toppings
This recipe brings together deeply caramelised roasted cabbage, a silky tahini sauce, and the clean, crisp finish of Maldon Original Sea Salt flakes. Topped with almonds and parsley, it’s a modern, plant-forward dish that punches fat above it’s simplicity.
Perfect as a side, centrepiece, or a hearty weeknight vegan dish – and ideal for sharing on Instagram thanks to those charred, crinkled Savoy leaves.
1. Prepare the cabbage steaks
Preheat the oven to 180c.
Take each savoy cabbage and slice into 1inch (roughly 2cm) ‘steaks’ to make 4 individual cabbage steaks. Discard the smaller pieces of cabbage from the ends – this can be used in another dish.
2. Roast until golden
Place the 4 cabbage steaks onto a baking tray and drizzle with the olive oil, some Maldon Original Sea Salt and cracked black pepper. Add some sprigs of thyme to the tray and then place into the preheated oven to roast for 25 minutes.
3. Make the tahini sauce
To make the tahini sauce, add the tahini to a mixing bowl along with the olive oil, lemon juice and Maldon Original Sea Salt flakes and pepper. It will be very thick so gradually add the water until it reaches a thick creamy consistency – you can add more water if you want it to be looser.
4. Plate and finish
To serve, place some of the creamy tahini sauce onto a place and then top with a roasted cabbage steak.
Garnish with some roasted chopped almonds and some parsley.
What to serve with cabbage steaks
A gain base: quinoa, bulgur, couscous, or wild race
Savoy cabbage works beautifully because it’s crinkled leaves roast into crisp, caramelised layers with soft centres. You can also use a classic green cabbage for a more neutral flavour. For a more vibrant, festive colour, you can use a red cabbage, but it may take slightly longer to cook and has a firmer texture.
Why are my cabbage steaks not crispy?
Make sure the steaks are well coated in oil and have space on the roasting tray – overcrowding causes steaming, not browning. More steam being produced means the cabbage is getting wet and will not get crispy.
Can I make cabbage steaks ahead of time?
You can part-roast cabbage steaks and finish just before serving. Add the tahini sauce and additional garnishes only at the end.
How do I store leftovers?
Store in an airtight container for up to 2 days. Reheat in the oven to restore crispness.
Can I make this recipe vegan and gluten-free?
This cabbage steaks recipe is naturally vegan and gluten-free – just make sure the topping (like nuts) are suitable for your guests.
How thick should I cut cabbage steaks?
We recommend cutting your cabbage steaks 2-3cm in thickness. This ensures a nice crispy edge and tender centres.
Make It, Taste It, Love It!
We’d love to see how you cabbage steaks turned out. Share your creation and tag us on Instagram at @maldonsalt so we can celebrate your seasoning mastery.
Preheat the oven to 180c.
To make the cauliflower steaks, remove the leaves from the cauliflower and then cut into thick 1-inch slices – the end pieces won’t hold together to they need to be closer to the root. Any leftover cauliflower pieces or leaves can be saved for roasting another time!
Place the cauliflower steaks onto a roasting tray. In a small bowl mix together the olive oil, ground coriander, sumac and Maldon Chilli Sea Salt. Then use a pastry brush to brush the spiced oil across the steaks, making sure they are evenly coated. Place them into the preheated oven to roast for 40 minutes until soft and tender and starting to char on the edges.
To make the romesco sauce, place the toasted nuts into a food processor along with the roasted red peppers, crushed garlic, paprika, Maldon Chilli Sea Salt and sherry vinegar. Blitz this and then while the motor is running drizzle in the olive oil until you have a lovely smooth sauce. Set aside.
Once the cauliflower steaks are cooked, remove from the oven.
To serve, spread the romesco sauce on the base of a large platter. Then top with the cauliflower steaks and garnish with some mint leaves.
Tip the flour in the bowl of a stand mixer. Put the yeast on one side of the bowl and the Maldon Sea Salt on the other (this separation prevents the salt from killing the yeast). Put the mixer on low to evenly distribute the dry ingredients.
With the motor running, pour in 3 tbsp olive oil, followed by 350-370ml water. Add the water gradually until you have a slightly sticky dough (you may not need the full 370ml).
Leave the mixer running on a medium speed to knead the dough for 7-10 minutes until the dough is coming away from the sides of the bowl and feels stretchy when pulled. Transfer the dough to a clean bowl, cover with a tea towel and leave to prove for an hour or so until doubled in volume.
Grease a rectangular, shallow tin (about 25cm x 20cm) with olive oil. Gently tip the dough into the tin and use your fingertips to stretch the dough towards the edges of the tin. Cover with the tea towel and leave to prove for another 30-45 minutes.
Preheat the oven to 200C fan. Press your fingers into the dough to make dimples, scatter with rosemary leaves and drizzle with 3 tbsp olive oil. Bake for 35-40 minutes until golden. As soon as the focaccia comes out of the oven, drizzle with a final 2-3 tbsp olive oil. Sprinkle with Maldon Sea Salt and cut into squares.
Whip up the ultimate avocado toast in minutes Piles high with creamy avocado and a zesty cherry tomato topping, this avocado on toast recipe is fresh, satisfying and finished with a pinch of crunchy Maldon Sea Salt flakes for perfect balance. Ideal for a quick breakfast, healthy brunch or light lunch.
Step 1 – Make the Tomato Topping
In a bowl, mix chopped cherry tomatoes with red wine vinegar, 1 tbsp olive oil, and a pinch of Maldon Sea Salt flakes.
Toss and leave for 5 minutes to lightly macerate; tomatoes should look glossy and juicy.
Step 2 – Toast and Top
Toast the sourdough until golden and crisp.
Fan the avocado slices over each toast. Drizzle with the remaining olive oil.
Season generously with black pepper and Maldon Sea Salt flakes.
Step 3 – Serve
Spoon the tomatoes over the avocado.
Serve immediately while the toast is still crisp.
Tips & FAQs
Tips
Ripeness: Use a ripe Hass avocado that yields slightly to gentle pressure.
Extra zing: Add a squeeze of lemon or lime to the avocado to prevent browning and boost freshness.
Texture swap: Prefer “smashed”? Lightly mash the avocado with a fork before spreading.
Bread: Sourdough gives the best crunch and structure; thick slices hold toppings well.
Finish strong: A final pinch of Maldon Sea Salt flakes enhances sweetness in the tomatoes and balances richness.
FAQs:
What’s the best bread for avocado toast?
Thick-cut sourdough or country bread—sturdy, with an open crumb that toasts crisp without getting soggy.
How do I keep avocado from browning?
Toss sliced or smashed avocado with 1–2 tsp lemon or lime juice and cover tightly until serving.
Can I make this ahead?
Assemble just before serving for crisp toast. Prep the tomato topping up to 24 hours ahead; store chilled in an airtight container.
Is avocado toast vegan?
Yes—this recipe is naturally vegan. Add-ons like poached eggs or feta make it vegetarian, not vegan.
Serving Suggestions
Add-ons: chilli flakes, basil, chives, or a drizzle of balsamic glaze.
Protein boosts: poached egg, smoked salmon, or marinated chickpeas (keep base recipe vegan).
Plate with a simple green salad or fruit for brunch.
Portioning: serve as two open-faced toasts or cut into halves/quarters for canapés.
Storage & Reheating
Best enjoyed fresh.
Tomato topping: refrigerate up to 24 hours.
Avocado: prep to order; if prepping, coat with citrus and press cling film directly on the surface.
Toast: toast just before serving; reheating softens the crumb.
Creamy, flavourful and effortlessly quick, these Creamy Garlic Butter Beans with Spinach are a game changer for busy weeknight or anyone looking for a quick and easy vegan dish! Elevated by the rich, aromatic Maldon Garlic Sea Salt, this recipe transforms humble ingredients into a dish bursting with savoury goodness. Whether you’re embracing Veganuary or simply seeking a nourishing, plant-based meal, this is the perfect go-to option. Plus, it’s air-fryer friendly, making clean-up a breeze!
Ready in just 25 minutes, this recipe requires minimal effort, yet delivers maximum flavour. The butter beans become velvety and indulgent, while fresh baby spinach wilts beautifully, creating a perfect balance of texture and taste. The air fryer works it’s magic, infusing the dish with the deep, garlicky notes of Maldon Garlic Sea Salt as you stir every five minutes for even cooking. Pure comfort in a bowl, made easy by your air fryer.
How to cook creamy garlic butter beans with spinach using an air fryer
Start by removing the crisper tray from the air fryer drawer.
Place the olive oil and rosemary into the drawer and air fry for 5 minutes at 200ºC.
Once the 5 minutes is up, pour the butter beans (including the liquid) into the air fryer drawer, along with the red wine vinegar, a generous pinch of Maldon Garlic Sea Salt and a little pepper. Mix everything together (at this point, if the rosemary leaves have come away from the stalk you can remove the stalks).
Air fry for 15 minutes at 200ºC, stirring every 5 minutes.
Meanwhile, prepare your tomatoes and sourdough. I like to cook the tomatoes in the air fryer for 5-6 minutes on 190ºC, until soft and heated through and the sourdough takes around 4-5 minutes to turn into perfectly crisp toast.
Once the beans have finished cooking, stir in the spinach and pop back in the air fryer for a final 4 minutes at 190ºC.
To plate up, place your sourdough on a plate, top with the butter beans mixture, followed by the tomatoes and tuck in!
If you like to have a bit of meat with your meals – a bit of crunchy streaky bacon goes perfectly with this dish! (air fry the bacon for 8 minutes at 190ºC).
Enjoy!
What is an old fashioned
The Old Fashioned cocktail is a timeless classic that embodies the essence of simplicity and elegance in mixology. Traditionally served in a lowball or rocks glass, this whiskey cocktail is a staple in any bartender’s repertoire!
Classic Old Fashioned cocktail
The perfect Old Fashioned consists of stirring together two ounces of bourbon, whiskey or rye, a rich simple syrup, and Angostura bitters. A handful of ice cubes is added, before the drink is gently stirred to chill and dilute to perfections. The final touch is an orange twist, or orange peel, and a cocktail cherry (Maraschino cherries), which not only adds visual appeal, but also enhances the drink’s complex flavours, adding sweetness to the bitter cocktail.
The beauty of the Old Fashioned lies in it’s versatility and balance. While rye whiskey is the traditional choice, bourbon is also popular choices for those who prefer a slightly sweeter profile. Modern variations may also use simple syrup or even maple syrup in place of the more traditional sugar cube, offering a different dimension of sweetness. Whether enjoyed a pre-dinner aperitif or a nightcap, the Old Fashioned remains a quintessential whiskey cocktail that has stood the test of time.
What is the origin of the Old Fashion?
According to Nio Cocktails, the Old Fashioned was first created in the 1800s in America. It was then known simply as the ‘Whiskey Cocktail’ which included a spirit, sugar, water and bitters. It was a standard, quick and easy cocktail to make which was enjoyed by many, and often enjoyed in the morning as a hangover cure!
However, Difford’s Guide proclaims that although the cocktail was popularised in America, the origins of a cocktail that comprise of a spirit, sweetener and bitters are English, followed by the creation of the first aromatic bitters by London apothecary, Richard Stoughton in 1690.
Why is it called an Old Fashioned?
By the 1870-1880s, bartenders began adding their on ‘twists’ to the Whiskey Cocktail, such as adding more sweeteners, garnishes and even changing the spirit from rye whiskey to bourbon. Customers began to rebel against the innovated cocktail, preferring the traditional version instead. As a result, customers would order the ‘old-fashioned whiskey cocktail’ at the bar. Eventually the name was shortened to the title we know today, ‘Old Fashioned’.
Here’s how to make and serve an old fashioned
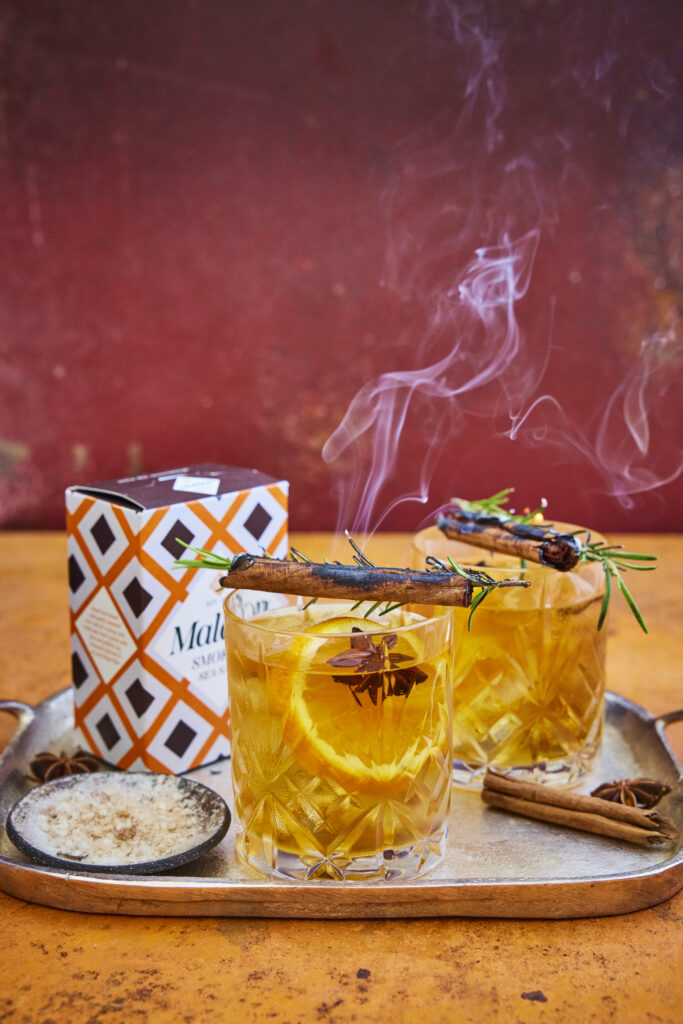
Start by soaking the rosemary and cinnamon stick in some high proof spirit for a few minutes – this will be the flaming part of the cocktail.
Take a tumbler and add the sugar, bitters and Maldon Smoked Sea Salt, stirring together. Then fill the glass with ice and add the whiskey or bourbon and stir again. Add a splash of soda water if you like and a slice of orange.
Then take the soaked rosemary and cinnamon stick and carefully balance on the rim of the drink. Use a lighter or matches to ignite them – they should flame and smoke. The smell of the smoked rosemary and cinnamon add Christmassy notes to your cocktail.
How to spice up and old fashioned
Although adding an orange twist to your classic Old Fashioned adds sweetness, it’s pretty simple! We’ve shared some of our favourite ways to elevate your Old Fashioned, with new and exciting twists to try!
Brown Butter Old Fashioned
If you’ve never tried a brown-butter Old Fashioned, then you’re missing out!
This recipe was shared by Liquor.com, where they highlight how the flavours of bourbon compliments the rich nuttiness of brown butter. Simply heat unsalted butter in a saucepan until it lightly browns and has a nutty aroma. Then, gently combine the browned butter with a bottle of bourbon. Pour the blend into a highball glass with ice, adding brown-sugar syrup and Angostura bitters before finishing with a maraschino cherry.
Honey Old Fashioned
If you have a sweet tooth, the The Glenlivet shared a delicious Honey Old Fashioned recipe. Rich, runny honey is incorporated with the bold flavours of the classic Old Fashioned mix, creating an smooth drink that’ll go down a treat with your guests.
Pumpkin Spice Old Fashioned
If are wanting something more ‘cosy’ in flavour, Liquor.com recommends the ever-so-popular pumpkin spice flavour with an Old Fashioned. You can achieve this by making a homemade syrup, adding pumpkin puree, pumpkin pie spice, brown sugar, and vanilla extract. Combine the pumpkin pie liquid mix with your bourbon and orange bitters and you will taste the delightful automanual flavours.
Old Fashioned vs. Manhattan
The Old Fashioned and The Manhattan are two of the most popular whiskey cocktails. Although the two cocktails have many similarities, the have different flavours.
What is a Manhattan?
This is a classic cocktail, comprising of whiskey (usually rye), sweet vermouth, and bitters. It’s served in a stemmed glass, and garnished with a cherry.
What is the difference between an Old Fashioned and a Manhattan?
The main difference between the Old Fashioned and Manhattan is the sweeteners used in each. The Old Fashioned traditionally uses sugar, either as a cube or in simple syrup form. In contrast, the Manhattan uses sweet vermouth, which is a type of fortified wine. The vermouth adds a earthier, spicier notes in comparison to the Old Fashioned, which is sweet yet bitter. As a result, many would say the flavour profile of the Manhattan is more in-depth and complex, whereas the Old Fashioned is more simple.
In a cocktail shaker combine all ingredients and stir the mixture thoroughly to ensure all ingredients are well-blended.
Transfer the mix into a soda stream bottle, filling it only one-third full to avoid excessive pressure build-up
Ensure the liquid is very cold before carbonating (refrigerate for several hours or use an ice bath).
Use the soda stream to carbonate the mixture, as per your machine’s instructions.
Pour 125 ml of the carbonated Pyramid Paloma mix into a coupe glass.
Float a fresh basil leaf on top of the drink.
Sprinkle Maldon Garlic Sea Salt onto the basil leaf for a salty and aromatic garnish.
To prepare the verdita: In a blender, mix fresh pineapple juice, ginger juice, simple syrup, and Bittermens Xocolatl Mole, and blend until smooth.
Add mint leaves and coriander, then blend.
Strain to remove any pulp.
Take a rocks glass and run a lime wedge along the rim.
Dip the rim into Maldon Chilli Sea Salt and coat it evenly.
In a cocktail shaker, add 50 ml of gin, 50 ml verdita, 25 ml fresh lime juice and a dash of chili bitters (optional).
Add ice cubes and shake vigorously.
Strain the mixture into the prepared rocks glass filled with cubed ice.