Looking for the ultimate make-ahead summer dessert? This Salted Caramel Ice Cream is rich, creamy, wonderfully indulgent and surprisingly easy to make. Created in collaboration with Maldon Salt and chef Margie Nomura, this no-churn recipe combines velvety homemade caramel with the distinctive crunch and flavour of Maldon’s iconic flaky sea salt.
For an extra touch of fun, we’re serving it in an iconic Maldon Original Sea Salt 570g Tub. Once cleaned and repurposed, the tub makes the perfect freezer-safe container for homemade ice cream, giving food lovers a creative way to reuse a kitchen staple while creating a showstopping dessert.
Whether you’re hosting a summer barbecue, planning a family gathering, or simply looking for an easy frozen treat on hand, this salted caramel ice cream is guaranteed to be a crowd-pleased.
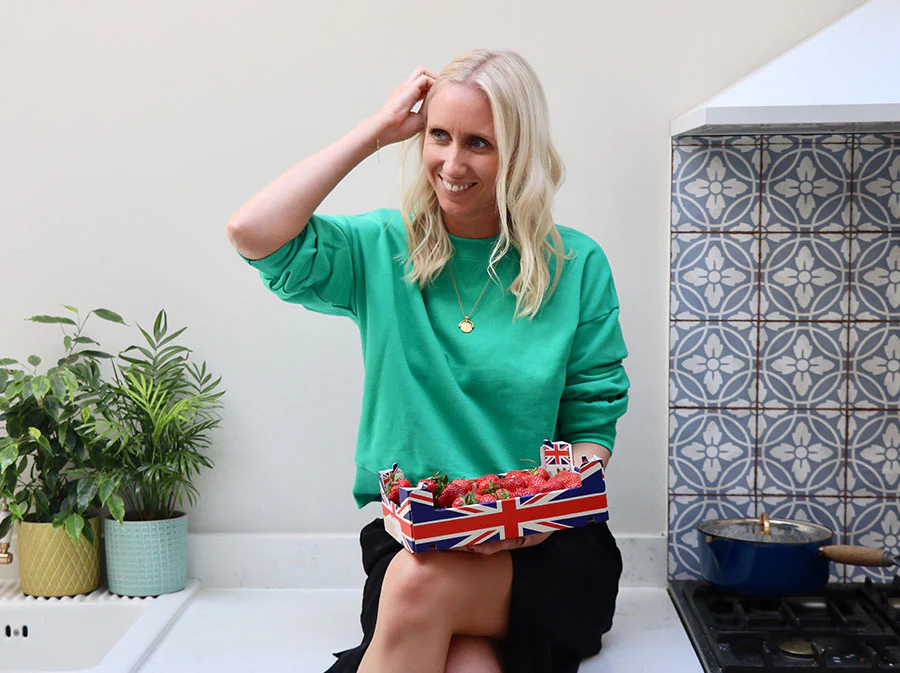
Meet Margie Nomura
Source: KITRI Spotlight: Margie Nomura
Margie Nomura is the chef, food writer and creator behind Desert Island Dishes, a hugely popular recipe platform dedicated to simple, delicious home cooking. With more than a decade of experience as a professional chef, Margie trained at the renowned Ballymaloe Cookery School and has cooked professionally around the world. She is passionate about creating recipes that deliver maximum flavour with minimal effort, helping home cooks feels confident in the kitchen.
Through Desert Island Dishes, Margie shares accessible recipes, practical cooking tips and inspiration for everyday meals, desserts and entertaining.
This Salted Caramel Ice Cream perfectly captures her cooking philosophy: simple ingredients, straightforward techniques and incredible results.
How to Make Salted Caramel Ice Cream
Rich, creamy no-churn ice cream with ribbons of homemade salted caramel running through it. The perfect make-ahead dessert.
Make the salted caramel sauce – Place the light brown sugar and butter into a saucepan over a medium heat. Stir until the butter has melted and the sugar has dissolved. Pour in the double cream and whisk until smooth. Bring to a gentle simmer and cook for 3–4 minutes until slightly thickened. Remove from the heat and stir through the Maldon Original Sea Salt flakes and vanilla extract, if using. Leave to cool completely.
Prepare the ice cream base – Whip the double cream until soft peaks form. Gently fold in the condensed milk until fully combined and smooth.
Create the caramel ripple – Fold approximately half of the cooled caramel sauce through the ice cream mixture. Avoid overmixing to keep beautiful ribbons of caramel running throughout.
Freeze – Spoon the mixture into a cleaned Maldon Original Sea Salt 570g Tub or another freezer-proof container. Swirl through a little extra caramel sauce for an even more dramatic ripple effect. Freeze for at least 6 hours, or until firm.
Serve – Scoop generously into bowls or cones, drizzle with the remaining salted caramel sauce and finish with a pinch of Maldon flaky sea salt for the ultimate sweet-and-salty finish.
Recipe Tips
Allow the ice cream to sit at room temperature for 5–10 minutes before scooping.
For extra texture, add chopped honeycomb, roasted pecans or chocolate shards before freezing.
The Maldon Sea Salt flakes provide a clean, delicate crunch that enhances the sweetness of the caramel without overpowering it.
Using a repurposed Maldon Original Sea Salt 570g Tub makes this recipe ideal for transporting to picnics, garden parties and family gatherings.
Storage
The caramel sauce will keep in an airtight container in the fridge for up to 2 weeks. Gently warm before serving if it becomes too firm. The ice cream can be stored in the freezer for up to 1 month.
The Perfect Summer Treat
Creamy, sweet, salty and irresistibly scoopable, this Salted Caramel Ice Cream is everything a summer dessert should be. Made with pantry staples, elevated by the unmistakable flavour of Maldon Sea Salt, and inspired by the effortless cooking style of Margie Nomura, it’s the kind of recipe you’ll return to all season long.
So grab your Maldon Salt tub, gather your favourite people and enjoy a homemade frozen dessert that’s guaranteed to disappear fast. One scoop is never enough.
A Fire-Cooked Dessert Collaboration Between Maldon Salt, Weber Grills and Chef Matt Burgess
When live-fire cooking meets modern outdoor grilling, desserts become something truly unforgettable. This Cloud Cake recipe by Chef Matt Burgess, also known as @matblak, is a bold collaboration celebrating texture, flavour and innovation – combining the versatility of the Weber Lumin electric grill with the delicate finishing power of Maldon Chilli Sea Salt.
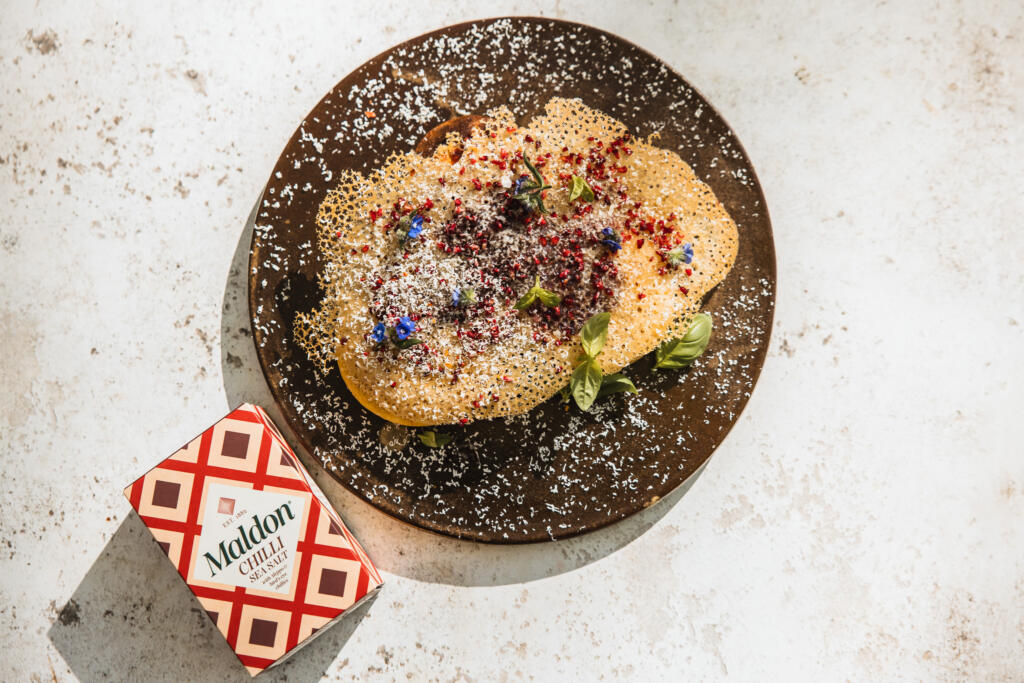
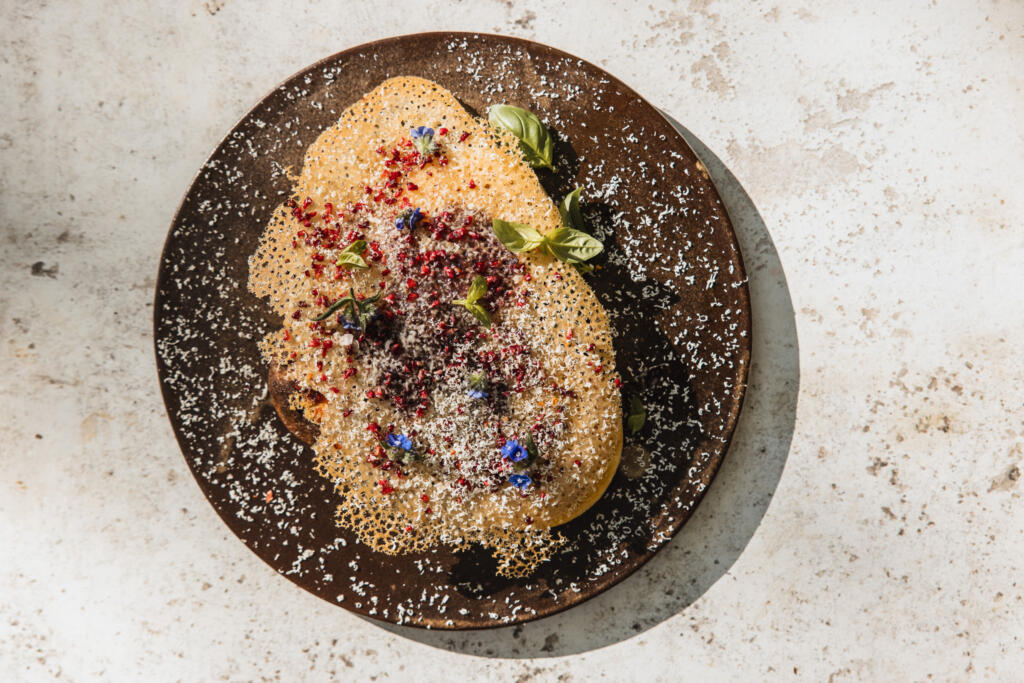
Soft, airy, and lightly steamed under the lid of the Weber Lumin, this raspberry cloud cake is balanced with bright fruit acidity, crisp raspberry coral, white chocolate and a subtle hit of chilli salt. It is restaurant-quality outdoor cooking designed to show that barbecue cooking goes far beyond meat and flame.
Whether you are cooking on a balcony, terrace or garden setup, this recipe highlights how electric grilling, live-fire inspiration and premium ingredients can create a memorable summer dessert.
Who are Weber Grills?
Weber Grills are globally recognised as one of the leading names in barbecue and outdoor cooking innovation. Known for combining performance, reliability and design, Weber has become synonymous with modern grilling culture worldwide.
The Weber Lumin electric barbecue reaches temperatures over 315°C while also offering steaming, smoking, searing and warming functions. This versatility makes it ideal for dishes like cloud cake, where controlled heat and trapped steam are essential for creating this signature soufflé-like texture.
Unlike traditional desserts cooked indoors, this recipe users the Weber Lumin pancha and lid system to gently steam and lift the batter, producing an airy cake with a caramelised outer edge and soft centre.
For urban grillers, food lovers and chefs experimenting with outdoor desserts, the Weber Lumin proves that barbecue cooking can be sophisticated, technical and creative.
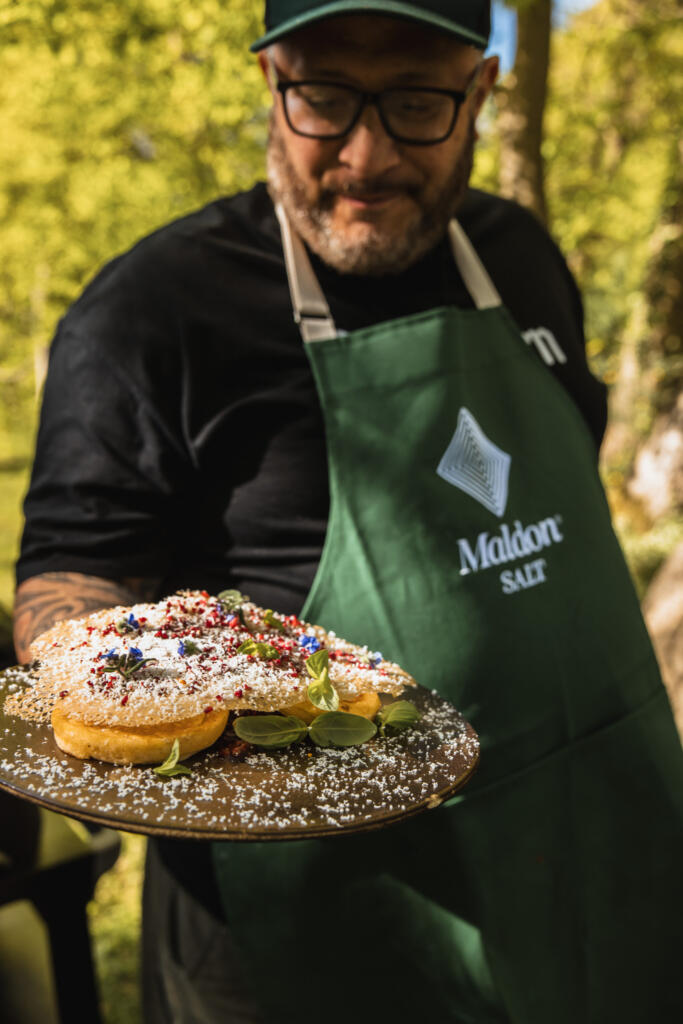
Chef Matt Burgess, widely recognised as @matblak, is a New Zealand Māori chef, live-fire specialist and founder of Kaiwhenua – Kai by Matblak. His cooking philosophy is built around fire, flavour, culture and connection.
After beginning his culinary career in Wellington, New Zealand, Matt went on to work with some of London’s most respected hospitality brands, including Soho House, Bluebird Chelsea, Gordon Ramsay’s Maze Grill, and Jamie Oliver’s Threadneedle street.
Today, through Kaiwhenua – meaning “food from the land” in Māori – Matt develops recipes, host supper clubs and creates premium condiments inspired by live-fire cooking and layered flavour. His work blends refined restaurant technique with open-fire cooking, making him one of the UK’s most exciting modern barbecue chefs.
Matt’s approach to dessert reflects the same philosophy throughout his cooking: balance, smoke, texture and restraint.
Explore Kaiwhenua and Kai by Matblak here: https://www.kaiwhenua.co.uk/
Why Maldon Chilli Sea Salt Matters in This Dish
Salt is often overlooked in desserts, but in this recipe Maldon Chilli Sea Salt plays a crucial role.
The delicate crunch of Maldon Sea Salt flakes enhances sweetness, sharpens raspberry acidity and balances the richness of white chocolate. The added chilli gives subtle warmth that lingers gently on the palate, elevating the flavour profile without overpowering the dessert.
In the cloud cake batter, the chilli salt helps heighten the fresh raspberry flavour. As a finishing touch, it creates contrast against the soft sponge, crisp coral and creamy chocolate.
This sweet-and-heat combination is what transforms the dish from a simple grilled sponge cake into a refined barbecue dessert.
What is a Cloud Cake?
A cloud cake is an ultra-light, souffle-style cake known for its airy texture and delicate rise. Inspired by Japanese souffle pancakes and steamed sponge techniques, cloud cakes rely heavily on whipped egg whites to create lift and softness.
Unlike dense sponge cakes, cloud cakes are designed to feel light, almost mousse-like in the centre, while maintaining a lightly caramelised exterior.
In this version, the Weber Lumin lid traps heat and steam during cooking, helping the cake rise gently while staying soft and moist inside.
How to Make Cloud Cake, Raspberry Coral with Chilli Sea Salt
Preheat the Weber Lumin with plancha to medium–low heat. You want gentle, even heat.
Whisk egg yolks with milk and vanilla. Add flour and baking powder. Mix smooth.
Whip egg whites with a pinch of Maldon Chilli Sea Slat to soft peaks. Add sugar gradually. Take to medium peaks.
Fold one third into the yolk mix to loosen. Fold the rest gently. Keep the air.
Fold in raspberries last.
Lightly butter the plancha. Spoon thick rounds, 2–3 cm high.
Cook undisturbed until the base sets. Close the lid to trap heat and allow the cake to rise and steam.
Flip carefully. Cook until just set. Centre stays soft. Remove and rest.
For the dressing, crush raspberries with lemon zest, juice and icing sugar. Keep it loose.
For the coral, mix all ingredients until smooth.
Pour a thin layer onto a hot section of the plancha.
Let it bubble and separate. Do not touch it.
Once dry and lightly coloured, lift carefully and cool. It will crisp as it cools.
Plate the cake. Spoon over dressing.
Add coral, micro planed white chocolate and basil.
Finish with a light pinch of Maldon Chilli Sea Salt.
Weber Lumin Cooking Tips
Always use the lid — trapped heat is essential for the signature cloud cake rise.
If the base colours too quickly, reduce the heat slightly.
Coral needs a dry, hot surface to crisp correctly.
Avoid overmixing the batter or the texture will become dense.
Cook in batches and avoid overcrowding the plancha
Explore More
Buy Weber Grills – Discover the Weber Lumin electric barbecue range and outdoor cooking accessories: https://www.weber.com/GB/en/home/
Discover Kai by Matblak – explore Matt Burgess’ recipes, sauces, live-fire cooking and flavour philosophy.
Shop Maldon Salt – Explore Maldon Sea Salt flakes and flavoured blends: https://maldonsalt.com/our-salt/
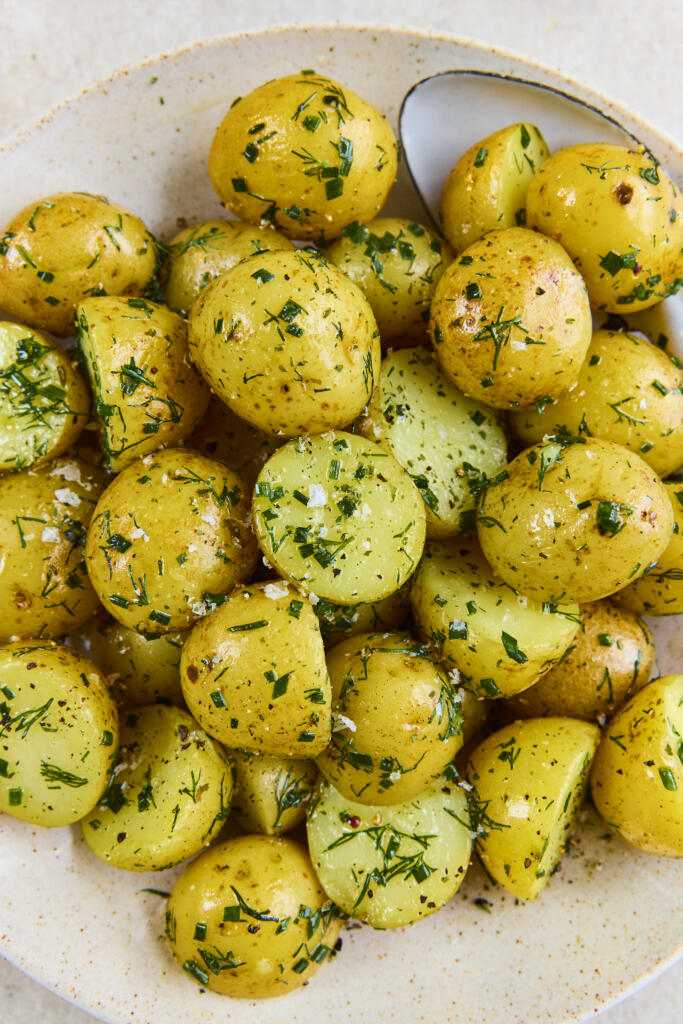
Garlic Butter New Potatoes with Fresh Herbs & Maldon Garlic Sea Salt
This garlic and herb new potatoes recipe are simple yet flavourful side dish, perfect for roasts, barbecues, or weeknight meals. Tender baby potatoes ae tossed in rich garlic butter, fresh herbs, and finished with Maldon Garlic Sea Salt flakes for a deliciously savoury depth and delicate crunch.
How to Make Garlic and Herb New Potatoes with Maldon Garlic Sea Salt
Cut any larger potatoes in half so they are a uniform size, leaving smaller ones whole.
Place the potatoes in a pan of water, bring to the boil, and simmer for 10–12 minutes until tender.
Drain and allow the potatoes to steam dry in a colander.
Melt the butter in a small saucepan over medium heat until bubbling.
Add the crushed garlic and let it gently infuse, then remove from heat.
Transfer the potatoes to a large bowl.
Pour over the garlic butter, olive oil, herbs, Maldon Garlic Sea Salt flakes, and cracked black pepper.
Toss well to coat evenly and serve immediately.
Tips for Perfect Garlic New Potatoes
Use evenly sized potatoes to ensure consistent cooking.
Let potatoes steam dry after draining for better flavour absorption.
Add garlic to butter gently to avoid burning and bitterness.
Finish with Maldon Garlic Sea Salt flakes for a balanced garlic seasoning and light crunch.
What is Maldon Garlic Sea Salt Flakes?
Maldon Garlic Sea Salt Flakes combine the brand’s signature pyramid-shaped sea salt flakes with wild and roasted garlic, creating a convenient seasoning that adds both saltiness and aromatic garlic flavour with a delicate texture.
Can I use Maldon Garlic Sea Salt instead of fresh garlic?
It can enhance the dish, but using both fresh garlic and Maldon Garlic Sea Salt flakes (as in this recipe) creates a deeper, layered flavour. It also adds layered texture with the iconic pyramid-shaped flakes.
What herbs go best with new potatoes?
Chives, dill, parsley, and rosemary all pair beautifully with new potatoes, adding freshness and aroma.
How do you keep boiled potatoes from going watery?
After draining, allow them to steam dry in a colander. This removes excess moisture and improves texture.
Can I make garlic new potatoes ahead of time?
Yes, you can boil the potatoes in advance and reheat them in garlic butter before serving.
Are garlic butter potatoes healthy?
They’re a comforting side dish with natural nutrients from potatoes, but contain butter and should be enjoyed in moderation.
Can I roast instead of boil the potatoes?
Yes, roasting adds a crispy texture. Toss the the same ingredients and roast in the oven at 200°C until golden.
What dishes go well with garlic herb potatoes?
They pair well with roast chicken, grilled meats, fish, or vegetarian mains.
Serving Suggestions
Serve the garlic and herb new potatoes with Maldon Garlic Sea Salt flakes alongside:
Vegetarian mains like grilled vegetables or salads.
Fluffy Scrambled Eggs on Sourdough with Maldon Pepper Sea Salt
This classic scrambled eggs recipe delivers soft, creamy eggs served on toasted sourdough, finished with the bold flavour of Maldon Pepper Sea Salt. Perfect for a quick breakfast or brunch, this easy dish uses simple ingredients elevated with premium seasoning for a rich, satisfying result.
How to Make Classic Scrambled Eggs with Maldon Pepper Sea Salt
Crack the eggs into a bowl and whisk gently with a fork.
Add a knob of butter to a frying pan over a medium-low heat.
Once melted and foaming, pour in the eggs.
Using a rubber spatula, gently stir the eggs, moving them slowly to prevent overcooking.
Meanwhile, toast the sourdough bread and butter it.
Cook the eggs for 3-5 minutes until soft and slightly underdone in the centre.
Remove from the heat and give a final stir.
Spoon the eggs onto the toast.
Finish with a generous pinch of Maldon Pepper Sea Salt and garnish with chopped chives. Serve immediately.
Tips for Perfect Scrambled Eggs
Cook low and slow for creamy, soft eggs.
Stir gently to avoid breaking the curds too much.
Remove from heat slightly early – residual heat will finish cooking.
Finish with Maldon Pepper Sea Salt for a balanced peppery flavour and texture.
What is Maldon Pepper Sea Salt
Maldon Pepper Sea Salt is a premium blend of Maldon’s signature pyramid-shaped flakes combined with Tellicherry and pink peppercorns, designed to enhance flavour with both seasoning and spice.
Why use Maldon Pepper Sea Salt on scrambled eggs?
It adds both texture and a perfectly balanced peppery finish, elevating simple scrambled eggs without the needs for separate salt and pepper.
How do you make scrambled eggs soft and creamy?
Cook the eggs over low heat, stir gently, and remove them before fully set so they stay soft and silky.
Are Burford brown eggs good for scrambled eggs?
Burford brown eggs are known for their rich yolks and flavour, perfect when making scrambled eggs. We like to use Clarence Court Burdford Brown eggs as they have a dense golden yolk.
Can I make scrambled eggs without butter?
Yes, but butter adds richness and helps create a creamy texture. You can substitute with olive oil if preferred.
What bread is best with scrambled eggs?
Sourdough is ideal due to its texture and slight tang, but any crusty bread works well.
Are scrambled eggs healthy?
Eggs are high in protein and nutrients. This dish is balanced but contains fats from butter and eggs, so enjoy as part of a varied diet.
Can I add extra topping to scrambled eggs?
Yes – popular toppings to scrambled eggs include smoked salmon, avocado spinach, or mushrooms.
Serving Suggestions
Serve these classic scrambled eggs with Maldon Pepper Sea Salt with:
Smoked salmon for a luxury brunch
Avocado slices for a modern twist
Grilled tomatoes or mushrooms for a full breakfast experience
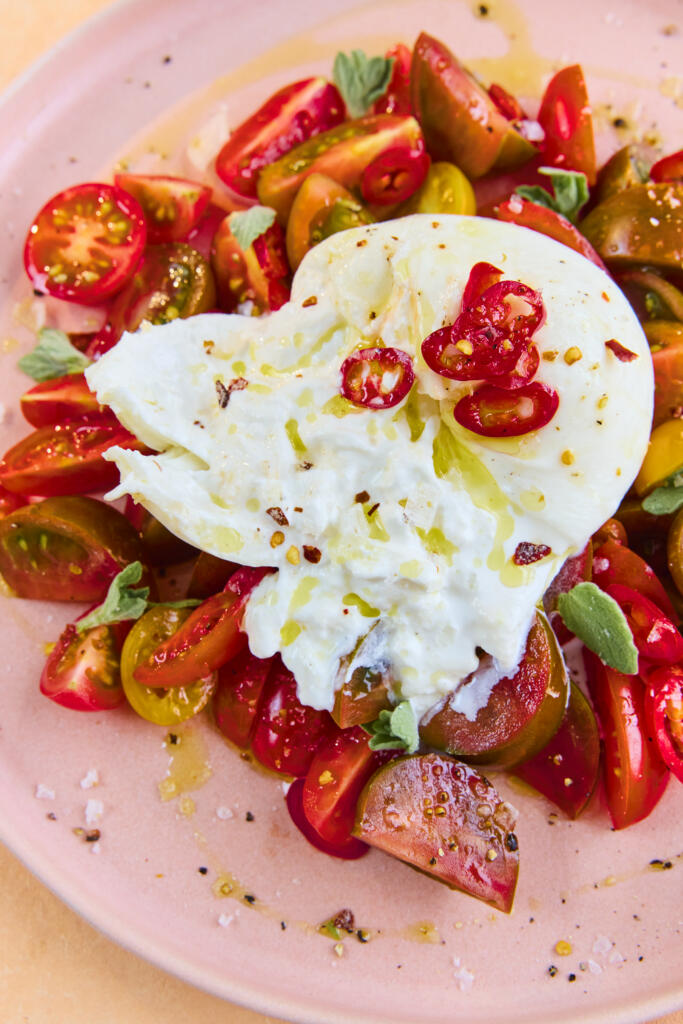
Fresh Burrata with Tomatoes and Maldon Chilli Sea Salt
This simple burrata with tomatoes recipe is a fresh, no-cook dish perfect for summer. Creamy burrata pairs beautifully with sweet heritage tomatoes, a kick of fresh chilli, and the distinctive heat of Maldon Chilli Sea Salt. Finished with olive oil and balsamic vinegar, it’s an elegant starter or light lunch ready in minutes.
How To Make Burrata and Tomatoes Salad with Chilli Sea Salt
Pace the chopped tomatoes in a bowl and toss gently with a splash of balsamic vinegar and extra virgin olive oil.
Arrange the tomatoes on a serving plate.
Place the burrata in the centre. If vegan or diary free, we recommend using Julienne Bruno’s Burrella.
Drizzle with additional olive oil.
Garnish with oregano leaves and sliced chilli.
Finished generously with Maldon Chilli Sea Salt and cracked black pepper.
Slice into the burrata and allow the creamy centre to spill over the tomato. Servce immediatley.
Bring burrata to room temperature before serving to ensure maximum creaminess.
Add crusty bread to mop up any of the juices, or to make the dish more filling in general.
Don’t skip the Maldon Chilli Sea Salt – it adds layered heat with the Aleppo pepper and bird’s eye chilli and texture.
What Makes Maldon Chilli Sea Salt different from regular salt?
Maldon Chilli Sea Salt combines the brand’s signature pyramid-shaped sea salt flakes with Aleppo pepper and bird’s eye chilli, adding both a delicate texture and a gentle heat, ideal for finishing dishes like burrata.
Can I use Maldon Chilli Sea Salt in salads?
Yes, Maldon Chilli Sea Salt is perfect for salads. It enhances flavour while adding a subtle kick, especially in fresh dishes like tomatoes and burrata.
What goes well with burrata and tomatoes?
Burrata and tomatoes pairs well with:
Fresh herbs like oregano or basil
Olive oil and balsamic vinegar
Cracked black pepper for depth
Crusty bread or sourdough for mopping up the fresh juices
Is This Burrata Recipe Healthy?
This dish is relatively healthy, packed with fresh tomatoes and healthy fats from olive oil, though burrata is rich and best enjoyed in moderation.
Can I Make Burrata and Tomato Salad in Advance?
It’s best served immediately, but you can prepare the tomatoes ahead and assemble just before serving.
How Spicy Is Maldon Chilli Sea Salt?
It provides a mild to moderate heat, designed to enhance ingredients rather than overpowering them.
What Type of Tomatoes Are Best For Burrata?
Heritage or heirloom tomatoes are ideal as they offer varied sweetness, acidity and colour.
A jewel-bright, refreshing drink to see you through the warmest days. This hibiscus and elderflower iced tea steeps dried hibiscus flowers into a deep, tart infusion, sweetened with floral elderflower cordial and balanced by a pinch of Maldon Original Sea Salt flakes. Naturally caffeine-free and easily batched for a crowd, it’s the perfect partner for picnics and garden gatherings.
Why You’ll Love This Hibiscus Iced Tea
Naturally Caffeine-Free: A vibrant, grown-up soft drink everyone can enjoy, any time of day.
Sweet, Tart & Balanced: A pinch of Maldon Original Sea Salt flakes rounds out the tart hibiscus and floral elderflower beautifully.
Easy to Batch: Steep, strain and chill ahead, then pour over ice – ideal for sharing on hot days.
How to Make Hibiscus Iced Tea (Step-by-Step)
Steep the hibiscus: Place the dried hibiscus flowers into a heatproof jug and pour over the boiling water. Leave to steep for 15–20 minutes, until the water turns a vibrant, deep colour – the longer it steeps, the deeper and more tart the flavour.
Strain and sweeten: Strain the mixture through a fine sieve into a clean jug. Stir in elderflower cordial to taste, plus a pinch of Maldon Original Sea Salt flakes to add a sweet-and-salty layer, until dissolved.
Serve over ice: Fill two glasses with ice and pour over the hibiscus tea. Garnish with lemon slices and mint sprigs and serve immediately. Alternatively, store the jug in the fridge ready to pour over ice later.
Tips for the Perfect Hibiscus Iced Tea
Steep to taste: Longer steeping deepens both the colour and the tartness, so taste as you go and strain when it’s where you want it.
Sweeten gradually: Add the elderflower cordial little by little – you can always add more, but you can’t take it back.
A pinch goes a long way: Just a pinch of Maldon Original Sea Salt flakes balances the sweet-tart flavours, much like a pinch of salt in a sorbet – don’t overdo it.
Yes – steep, strain and sweeten ahead of time and keep chilled in the fridge for up to 3 days. Add the ice and garnishes only when serving so they stay fresh.
Where can I buy dried hibiscus flowers?
Look in the tea or world-foods aisle of larger supermarkets, in health-food shops, or online. They’re sometimes labelled as ‘flor de Jamaica’.
How can I sweeten it differently?
Swap the elderflower cordial for honey or a simple sugar syrup, and add a squeeze of fresh lemon juice for extra zing if you like.
An elegant summer dessert with barely any effort. These mini strawberry, lemon and elderflower trifles layer light Madeira sponge soaked in elderflower and lemon with creamy lemon mascarpone, fresh strawberries and soft whipped cream. A final pinch of Maldon Original Sea Salt flakes heightens the fruit and balances the sweetness, making each individual glass feel that bit more special.
Why You’ll Love These Mini Trifles
No-Cook & Effortless: Just layer and chill – an impressive dessert that comes together in 15 minutes with no baking.
Perfectly Portioned: Individual glasses or jars look beautiful on the table and travel well for picnics and parties.
A Sweet-Salty Finish: A pinch of Maldon Original Sea Salt flakes lifts the strawberries and stops the dessert tasting one-note.
How to Make Mini Trifles (Step-by-Step)
Cut the sponge: Slice the Madeira sponge into 1-inch slices. Using a cookie cutter the same diameter as your glasses or jars, cut out 4 circles of sponge and set aside.
Make the elderflower lemon syrup: In a small bowl, mix together the elderflower cordial and lemon juice.
Make the lemon mascarpone: In another bowl, stir together the lemon yoghurt and mascarpone until smooth, then set aside.
Whip the cream: Add the double cream, icing sugar and vanilla bean paste to a bowl and lightly whip to soft peaks – take care not to over-whip so the topping stays light.
Assemble the trifles: Add a layer of sponge to the base of each glass and brush with the elderflower lemon syrup. Spoon over some lemon mascarpone, then a layer of chopped strawberries, and repeat the layers. Finish with a dollop of soft whipped cream and a pinch of Maldon Original Sea Salt flakes.
Tips for the Perfect Mini Trifles
Match cutter to glass: Cut the sponge to the width of your serving glass so each layer sits flush and looks neat.
Soft peaks only: Whip the cream just to soft peaks so the topping stays light and spoonable rather than stiff.
Soak, don’t drown: Brush the sponge with the syrup rather than pouring it on, so the layers stay defined and don’t collapse.
Assemble up to a few hours ahead and chill, then add the whipped cream and the final pinch of Maldon just before serving for the freshest finish.
Can I swap the strawberries?
Yes – raspberries, blueberries or any mix of summer berries work beautifully. Use whatever is freshest and in season.
How do I make these gluten-free?
Simply swap the Madeira sponge for a good gluten-free sponge cake; the rest of the recipe is naturally gluten-free.
A grazing-board hero that’s as good for you as it is moreish. This silky butterbean hummus is whipped smooth with tahini, lemon and Maldon Garlic Sea Salt, then served with homemade gluten-free seeded crackers and fresh crudités for dipping. It’s a generous, crowd-pleasing centrepiece for any picnic or summer spread, and almost entirely plant-based.
Why You’ll Love This Butterbean Hummus
Silky-Smooth Hummus: A splash of cold water at the end whips the butterbeans into the lightest, creamiest hummus.
Homemade Seeded Crackers: Crisp, seed-packed and naturally gluten-free, they’re far better than shop-bought – and easy to make.
Built for Sharing: A generous dip, crunchy crackers and colourful crudités make an effortless grazing platter.
How to Make Butterbean Hummus (Step-by-Step)
Make the cracker mix: Preheat the oven to 180°C. In a large bowl, mix the flaxseed, brown rice flour, ½ tsp Maldon Garlic Sea Salt, pumpkin seeds, sunflower seeds, hemp seeds and chia seeds. Pour over 250ml boiling water, stir together and set aside for 20 minutes to thicken as the chia and flax absorb the liquid.
Spread and bake the crackers: Line a large baking tray with parchment, tip on the mixture and smooth it right to the edges, as thin as possible. Sprinkle over the everything seasoning and fennel seeds, press them in gently, and bake for 30–40 minutes until golden and crisp. Cool completely on the tray.
Blitz the hummus: While the crackers bake, add the butterbeans, garlic, lemon juice, tahini, cumin, smoked paprika and Maldon Garlic Sea Salt to a food processor and blitz to a paste. Add the olive oil and blitz again until smooth.
Make it silky: With the motor running, drizzle in the cold water and keep blitzing until completely smooth and silky. Taste and adjust with a little more Maldon Garlic Sea Salt if needed.
Break, top and serve: Once cooled, snap the cracker sheet into rustic shards. Spoon the hummus into a bowl, drizzle with olive oil and finish with a pinch of cumin and Maldon Garlic Sea Salt. Serve with the crackers and crudités for dipping.
Tips for the Perfect Butterbean Hummus
Cold water for silk: Adding cold water at the end, with the motor running, is the trick to the smoothest, lightest hummus.
Spread the crackers thin: The thinner and more even the layer, the crisper the crackers – take them right to the edges of the tray.
Cool before breaking: Let the cracker sheet cool fully on the tray so it snaps cleanly into shards rather than bending.
The hummus keeps for up to 3 days in the fridge, and the crackers stay crisp for several days in an airtight container – making this an ideal make-ahead platter.
Why did my hummus turn out grainy?
Keep blitzing and add the cold water gradually with the motor running. The water emulsifies the tahini and beans into a smooth, silky texture – patience is key.
Are the crackers really gluten-free?
Yes – they’re bound by the chia and flaxseed rather than wheat, with brown rice flour, so they’re naturally gluten-free (do check your everything seasoning if you need them to be certified).
A showstopping plate that comes together in minutes. These chilli, lime and feta watermelon wedges char sweet, juicy watermelon on the griddle, then top it with salty feta, fresh chilli, zesty lime and cooling mint – all finished with a flake of Maldon Chilli Sea Salt. Sweet, salty, smoky and fresh all at once, it’s the easiest way to bring a wow factor to a summer BBQ or picnic spread.
Why You’ll Love These Watermelon Wedges
Sweet Meets Salty: Charred watermelon, salty feta and a flake of Maldon Chilli Sea Salt create an irresistible sweet-salty balance.
Ready in Minutes: Just 10 minutes of prep and a quick char on the griddle or BBQ – no cooking skills required.
A Real Crowd-Pleaser: Vibrant, colourful and served as easy-to-grab wedges, it’s made for sharing outdoors.
How to Make Watermelon Wedges (Step-by-Step)
Char the watermelon: Place the watermelon wedges onto a hot griddle pan or BBQ. Char for a few minutes on each side until you have clear grill marks and a lightly smoky edge – this concentrates the sweetness and adds a subtle smokiness.
Arrange and top: Arrange the charred wedges across a large platter, then scatter over the diced chilli, crumbled feta and lime zest.
Season and finish: Finish with a generous pinch of Maldon Chilli Sea Salt and the picked mint leaves. Add the lime wedges to the platter to squeeze over just before eating.
Tips for the Perfect Watermelon Wedges
Get the griddle hot: A properly hot griddle or BBQ gives clean char marks quickly, without turning the watermelon mushy.
Pat the wedges dry: Blot the cut surfaces before grilling so they char rather than steam.
Balance the heat: Maldon Chilli Sea Salt brings gentle warmth, so go easy on the fresh chilli if you’re serving a crowd.
Char the watermelon a few hours ahead and keep it chilled, then add the feta, chilli, mint and Maldon Chilli Sea Salt just before serving so nothing goes soggy.
What if I don’t have a BBQ or griddle?
A hot, dry frying pan works just as well for charring, or you can skip the char altogether for a fresh, no-cook version.
How do I pick a ripe watermelon?
Look for one that feels heavy for its size with a creamy-yellow patch where it sat in the field – a sign it ripened on the vine.
Give the classic caprese a fresh, nutty twist. This caprese sandwich layers creamy mozzarella, sweet vine tomatoes and peppery rocket onto pillowy focaccia, all lifted by a vibrant homemade pistachio pesto and a pinch of Maldon Original Sea Salt flakes. It needs no cooking and wraps up beautifully, making it the perfect no-fuss picnic lunch for warm summer days.
Why You’ll Love These Caprese Sandwiches
A Fresh Take on a Classic: Nutty pistachio pesto brings something new to the familiar tomato, mozzarella and basil combination.
No Cooking Required: Just blitz, layer and wrap – ready in 15 minutes with zero time at the stove.
Picnic-Perfect: Sturdy focaccia and a firm pesto base make this sandwich travel brilliantly without going soggy.
How to Make Caprese Sandwiches (Step-by-Step)
Blitz the pistachios: Add the pistachios and crushed garlic to a food processor and pulse a few times to break them down. Keep it coarse for texture, or blitz further for a finer pesto – it’s entirely down to preference.
Build the pesto: Add the grated parmesan and basil leaves and pulse to a thick paste. Pour in the olive oil, lemon zest and juice, a pinch of Maldon Original Sea Salt flakes and cracked black pepper, then give it a final blend, loosening with a little more oil if needed.
Slice and spread the focaccia: Slice the focaccia in half horizontally through the middle, then spread the pistachio pesto generously across the cut side of the base.
Add the filling: Layer over the sliced tomatoes and mozzarella, then add a handful of fresh rocket. Season the tomato and mozzarella with a final pinch of Maldon Original Sea Salt flakes to draw out their flavour.
Cut and wrap: Place the focaccia lid on top, then cut the whole thing in half vertically to give two sandwiches. Wrap well and they’re ready to take away for the perfect picnic lunch.
Tips for the Perfect Caprese Sandwiches
Make extra pesto: The pistachio pesto keeps for a few days in the fridge under a thin layer of oil – it’s just as good tossed through pasta or spooned over salads.
Drain the mozzarella well: Pat the slices dry before layering so the sandwich stays firm rather than soggy in transit.
Season the tomatoes: A pinch of Maldon Original Sea Salt flakes draws out the tomatoes’ natural sweetness and balances the rich cheese.
Make the pistachio pesto up to 3 days ahead and keep it chilled. Assemble the sandwiches a few hours before eating so the focaccia stays in great shape, then wrap tightly until serving.
What can I use instead of pistachios?
Classic pine nuts, walnuts or almonds all work well in the pesto if you’d prefer – each gives a slightly different flavour and texture.
How do I stop the sandwich going soggy?
Drain and pat the mozzarella dry, and spread the pesto as a barrier on the bread. Keeping the sandwich cool until serving also helps the layers hold.