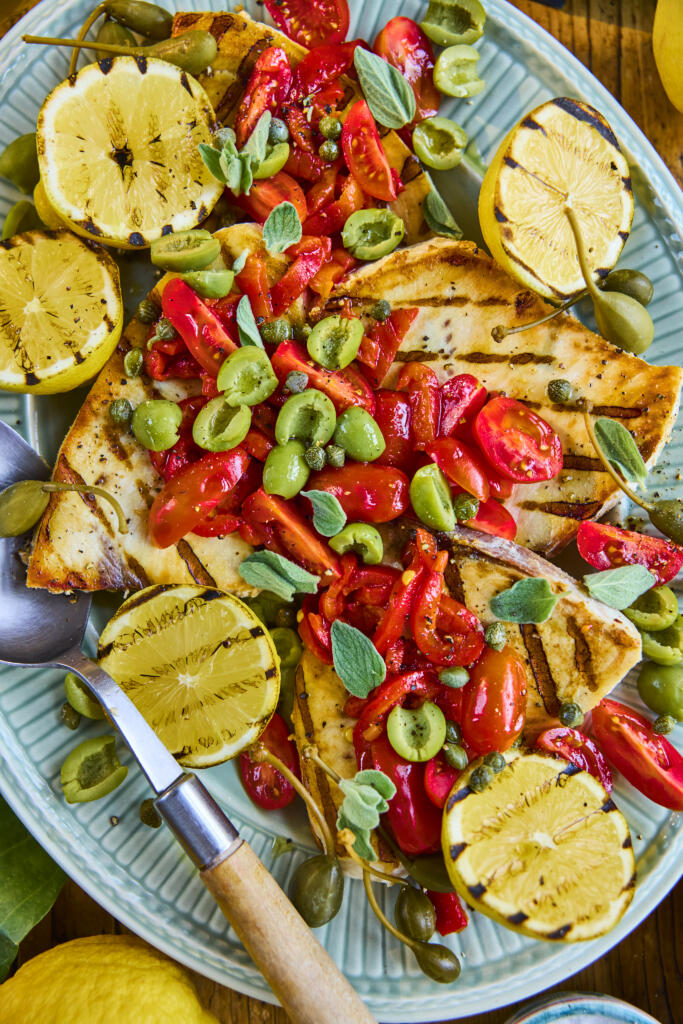
Meaty, quick-cooking and full of Sicilian sunshine, swordfish steaks are made for the griddle or BBQ. Here they’re charred for just a couple of minutes a side and topped with a bright salsa of chargrilled peppers, cherry tomatoes, green olives and capers, then finished with charred lemon and a pinch of Sicilian Fine Sea Salt, Selected by Maldon. Dinner is on the table in 15 minutes.
Why You’ll Love These Grilled Swordfish Steaks
Ready in 15 Minutes: Swordfish cooks in minutes and the no-cook salsa comes together while it grills.
Big Sicilian Flavours: Sweet peppers, briny olives and sharp capers make a punchy salsa that lifts the fish.
High-Protein & Gluten-Free: A light, healthy main that feels generous and special.
How to Make Grilled Swordfish Steaks (Step-by-Step)
Make the salsa: Cut the cherry tomatoes into quarters and add to a bowl with the extra virgin olive oil. Thinly slice the chargrilled peppers, halve the olives and add both, then drain, rinse and add the capers. Season with Sicilian Fine Sea Salt, Selected by Maldon and cracked black pepper, and set aside.
Grill the swordfish: Rub the steaks with a little olive oil and place onto a hot griddle pan or BBQ over a high heat. Swordfish cooks quickly like tuna and can easily overcook, so give it just 2 minutes on each side. Grill the lemon halves alongside.
Season and serve: As soon as the steaks are cooked, transfer to a platter and season with a good pinch of Sicilian Fine Sea Salt, Selected by Maldon and pepper. Spoon over the salsa, garnish with fresh oregano and squeeze over the charred lemon before serving.
Tips for the Perfect Grilled Swordfish Steaks
Don’t overcook it: Swordfish dries out fast – 2 minutes a side over a high heat keeps it juicy and just-cooked.
Get the griddle hot: A properly hot griddle or BBQ gives clean char marks and stops the fish sticking.
Make the salsa ahead: Mixing the salsa first lets the flavours meld while the swordfish grills.
What to Serve with Grilled Swordfish Steaks
These steaks are a complete summer dinner with garlic and herb new potatoes and a blood orange and fennel salad, with sesame semolina bread to soak up the salsa and juices. The charred lemon is essential – a good squeeze right at the end brings everything together. Tuna steaks make an easy swap if swordfish isn’t available.
Frequently Asked Questions
Can I use tuna instead of swordfish?
Yes – tuna steaks cook in a very similar way and time. Like swordfish, they’re best left a little pink in the middle and not overcooked.
Fresh or jarred peppers for the salsa?
Jarred chargrilled peppers are quick and full of flavour, but you can chargrill fresh peppers and peel them if you prefer to make your own.
How do I know when the swordfish is cooked?
It should be just opaque all the way through after about 2 minutes a side. Take it off while still juicy – it firms up as it rests.
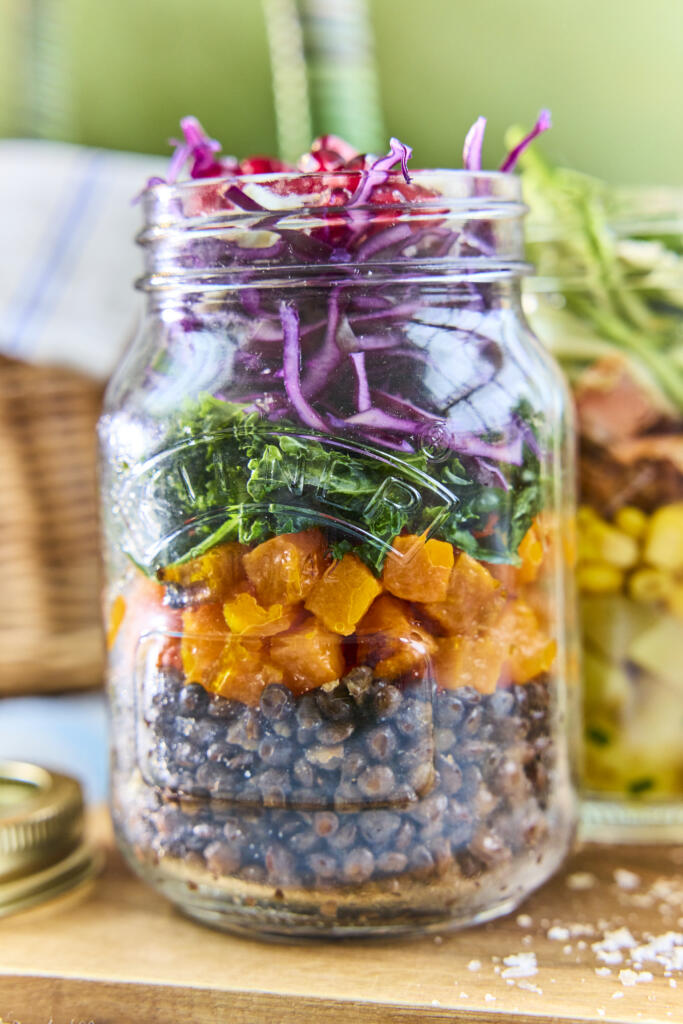
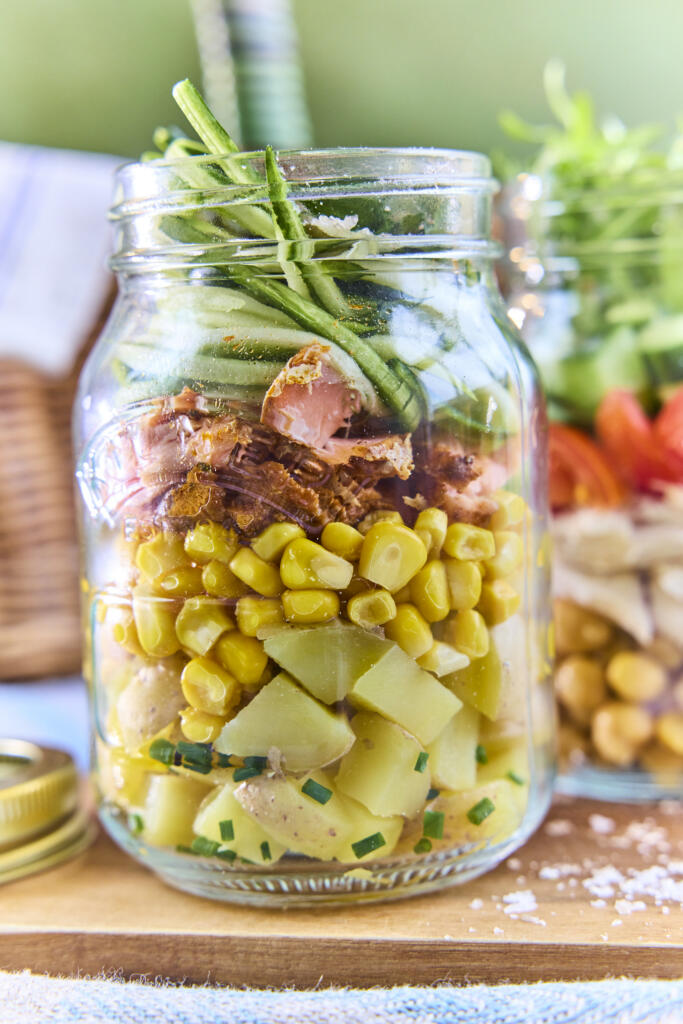
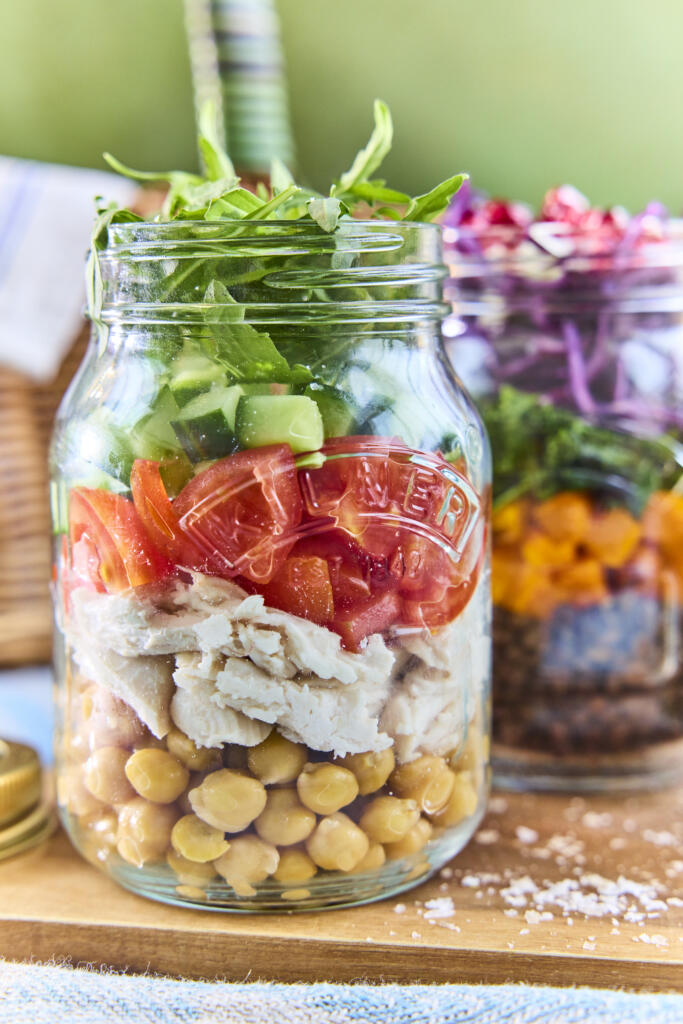
One simple method, three vibrant salads and a single versatile dressing that ties them all together. These layered summer salads – chicken and chickpea, lentil and butternut squash, and salmon and new potato – are built to be made ahead, so they’re ideal for picnics, lunchboxes and easy meal prep. A Maldon Smoked Sea Salt dressing brings the whole trio to life.
Why You’ll Love These Layered Summer Salads
Three Salads, One Dressing: Mix and match all week – every salad is dressed with the same quick, smoky Maldon vinaigrette.
Genuinely Make-Ahead: Layered in jars with the dressing kept separate, these stay crisp and fresh in the fridge for days.
Effortlessly Portable: Jars travel beautifully, making these the ultimate grab-and-go picnic or desk lunch.
How to Make Layered Summer Salads (Step-by-Step)
Prep each salad’s components: Roast the butternut squash and cook the lentils for the lentil salad; boil and cool the new potatoes for the salmon salad. Massage the kale with a pinch of Maldon Smoked Sea Salt flakes to soften it. Everything can be batch-prepped ahead to make assembly quick.
Layer up each salad: For each salad, layer the elements into a jar or container in the order they’re listed. Heavier, sturdier ingredients go at the bottom, with delicate leaves and herbs on top – keeping them away from the dressing is what keeps everything fresh.
Make the versatile dressing: Add all the dressing ingredients to a jar, screw the lid on tightly and shake well until thickened and emulsified. The Maldon Smoked Sea Salt gives a subtle depth that works across all three salads.
Store or take on the go: Keep the layered salads in the fridge or pack them up for a picnic, with the dressing in a separate jar until serving.
Dress and serve: Just before eating, drizzle over some dressing, add the lid and shake again to coat. Tip out onto a plate or eat straight from the jar.
Tips for the Perfect Layered Summer Salads
Layer in the right order: Build from sturdy to delicate so leaves and herbs never sit in the dressing until you’re ready to eat.
Dress at the last minute: Keep the dressing in its own jar and shake it through just before serving to keep everything crisp.
Batch the dressing: The Maldon Smoked Sea Salt dressing keeps for up to a week in the fridge – make double for the week ahead.
Layered salads keep well in sealed jars in the fridge for up to 3 days, as long as the dressing is kept separate and added only when you’re ready to eat.
Why layer the salad in a jar?
Layering keeps the heavier, wetter ingredients at the bottom and the leaves on top, so nothing wilts. Jars also travel upright without spilling – ideal for picnics and packed lunches.
Can I make these vegetarian or vegan?
Easily. Skip the chicken, salmon, parmesan and feta, or swap in extra roasted veg, beans and seeds. The dressing is naturally vegetarian – use maple syrup in place of honey to make it vegan.
Cut the squid into a mixture of rings or thick slices with the skin scored in a crisscross pattern. Keep the tentacles left whole or cut into two pieces. In a large bowl mix together the Shaoxing wine, soy sauce and grated ginger. Add the prepared squid to the bowl and toss it through the marinade so it is well coated. Cover the bowl in clingfilm and set aside in the fridge for 15 minutes.
In a second large bowl, mix the plain flour, cornflour and Maldon Pepper Sea Salt.
Place the vegetable oil in a deep saucepan, so it comes 3 inches up the sides. Place it on a medium heat and let the oil come up to 180c.
Take the squid out of the fridge and lift each piece out, shaking off any excess marinade and then transferring it into the flour bowl. Toss each piece well in the flour, again shaking off any excess, before dropping them into the hot oil. Do this in smaller batches so as not to overcrowd the pan.
Use a slotted spoon to lift the fried squid out of the oil when it is golden brown (after 2 – 3 minutes), and place onto a tray with some kitchen paper to absorb any excess oil.
In a small bowl mix together the mayonnaise, finely chopped coriander and dill, and lime juice.
Serve the fried squid immediately with the herbed mayonnaise and some extra Maldon Pepper Sea Salt.
Pat the cod dry with kitchen paper. Drizzle the skin side with oil and season generously with Maldon Smoked Sea Salt.
Place the cod skin side down on the grill grates. Press gently with a fish slice to ensure contact.
When the skin is crisp and lifts easily from the grill, transfer the cod flesh side down.
Move to indirect heat and cook until the fish reaches an internal temperature of 62°C.
How to make the brown butter & lime Hollandaise
In a saucepan over medium heat, brown the butter gently, stirring often to prevent burning.
Grill the lime halves, cut side down, to intensify their flavour.
In a bowl, whisk the egg yolks with the lime zest, juice, and a pinch of Maldon Sea Salt until light and frothy.
Slowly drizzle in the browned butter, whisking constantly to form a silky emulsion.
Season to taste and keep warm.
How to make Bombay potato cakes
Slice the leeks in half lengthwise and grill cut side down until tender. Let cool slightly.
Lightly crush the par-boiled potatoes. Thinly slice the grilled leeks and mix with the potatoes.
Add the garlic, nigella seeds, chilli Maldon salt, curry powder, and a drizzle of oil.
Form into thick patties and place on a cedar plank. Drizzle with oil and roast over indirect heat until golden and crisp.
How to make a tomato salad
Combine chopped cherry tomatoes (cut in half), dill, nigella seeds, lemon zest and juice, cracked pepper, Maldon Sea Salt, and olive oil.
Stir gently and let sit for 5–10 minutes before serving.
How to assemble
Spoon a little hollandaise onto each plate.
Place a Bombay potato cake in the centre.
Top with the cedar plank cod.
Spoon over the tomato salad.
Finish with a final sprinkle of Maldon Smoked Sea Salt and a squeeze of fresh lime juice.
How to Make Air Fryer Fish and Chips
There’s nothing quite like a classic British dinner of fish and chips – especially when it’s made healthier and faster in the air fryer! This easy air fryer recipe transforms flaky cod or hake fillets into irresistibly crispy air fryer fish, coated in panko breadcrumbs for that satisfying crunch. Paired with golden, homemade chips cooked to perfection in the air fryer basket, this is the ultimate quick fish dinner that doesn’t compromise on flavour or texture. Best of all, there’s no messy deep-frying required – just simply, delicious comfort food ready in under an hour!
The secret to elevating fish and chips lies in the seasoning. Each fillet and chip should be seasoned with Maldon Sea Salt flakes right after cooking. The delicate, pyramid-shaped flakes enhance the natural flavours of the fish and potatoes, adding a subtle crunch and clean salinity that ordinary table salt just can’t match. For best result, try arrange everything in a single layer in the air fryer to ensure even crisping. Serve immediately with a side of homemade mushy peas and a generous dollop of tangy tartar sauce for a truly authentic meal.
Prepare and Cook the Chips
Preheat the air fryer to 180C.
Peel the potatoes and cut the potatoes into thin batons. Toss with oil to coat and season with Maldon Sea Salt. Spread out evenly in the air fryer basket, ensuring not to overcrowd. Bake for 25-30 minutes until golden and crisp.
Bread and Air Fryer the Fish
For the fish, pat the fillets dry and season with Maldon Sea Salt. Put the flour in one shallow bowl, the beaten egg in another, and the panko breadcrumbs in another.
Coat the first fillet in flour, tap off any excess, then turn in the egg, let any excess drip off, and finally coat in the breadcrumbs. Use your hands to press the breadcrumbs onto the fillet to ensure even coverage. Repeat with the second fillet.
Drizzle the breaded fillets with a little oil then bake in the air fryer for 15 minutes until crisp on the outside and cooked through.
Make the Mushy Peas
For the mushy peas, briefly cook the peas in salted boiling water until tender. Drain, the return to the pan with the butter. Use a potato masher to crush the peas thoroughly. Season to taste with Maldon Sea Salt.
Prepare the Tartar Sauce
For the tartar sauce, simply mix all the ingredients in a bowl and season with plenty of black pepper.
Serve and Enjoy
As soon as the fish comes out of the air fryer, sprinkle with Maldon Sea Salt.
Serve the fish and chips with the mushy peas and tartar sauce.
What is the best fish for air fryer fish and chips?
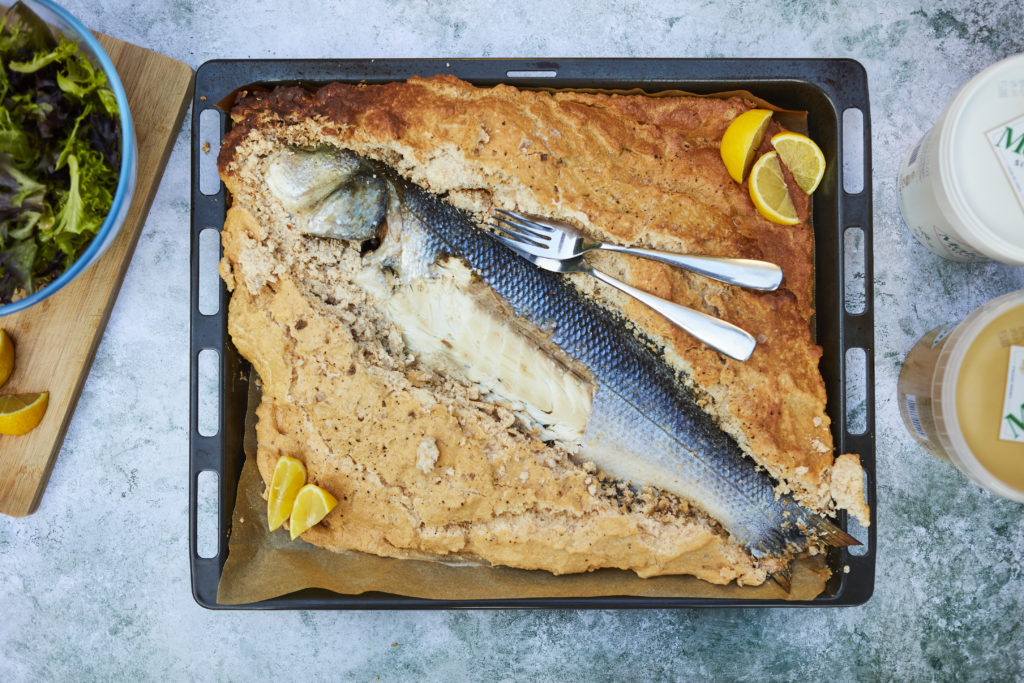
Salt-baked Sea BassSalmon
The best fish for air fryer fish and chips is white, flaky, mild-flavoured fish that holds up well during cooking. Cod is the traditional favourite for British-style fish and chips because it’s tender, flaky and mild, which makes it perfect for a crispy coating when air frying! Alternatively, you can use Haddock, Hake or Pollock, which are all soft and have a flaky texture. The worst fish to use when making fish and chips is salmon or mackerel. This is because they have a high fat content which can lead to a greasy, unpleasant texture when fried.
Can you make air fryer fish and chips ahead of time?
You can make air fryer fish and chips ahead of time, but it’s not ideal if you want to preserve that signature crispiness. Crispy air fryer fish and golden chips are best served immediately after cooking, when the coating is at it’s crunchiest and the fish is perfectly flaky and moist inside. If you reheat air fryer fish and chips, the panko coating an soften and you could dry out the flaky cod or hake fillets.
If you want to prep ahead, you can bread the fish and cut the chips in advance, then store them in the fridge separately until ready to cook.
How do you reheat air fryer fish and chips?
To reheat air fryer fish and chips, preheat your air fryer to 160-175°C, place the fish and chips in a single layer in the basket, and cook for around 7-8 minutes, flipping halfway through.
Is air fryer fish and chips healthier than traditional fish and chips?
Traditional battered fish and chips with mushy peas
Yes, air fryer fish and chips are generally ‘healthier’ than traditional deep-fried versions. This is because there is less oil, which means fewer calories. Traditional fish and chips are deep-fried in oil, which significantly increases the fat and calorie content. Air Frying requires little to no oil, reducing overall fat whilst delivering a crispy air fryer fish and golden chips. Air frying is a smarter choice for a quick fish dinner that feels indulgent but fits into a balanced diet.
Can I use frozen fish fillets when making fish and chips?
Yes, you can use frozen fish fillets when making fish and chips in the air fryer. Make sure to thaw the fillets completely before breading. This helps the panko breadcrumbs stick better and ensures the fish cooks evenly. To speed up the process, you could use pre-breaded frozen fish. This can be air-fried straight from frozen – just check that they’re cooked through and finish with a generous pinch of Maldon Sea Salt flakes before serving.
How long to cook baked potatoes in air fryer?
If you’re swapping chips for baked potatoes in your air fryer fish and chips meal, you need to preheat your air fryer to 200°C and cook directly in the air fryer basket for 35-45 minutes, turning once halfway through for even crisping. Make sure you scrub and dry the potatoes before cooking (a Russet or Maris Piper potato would be best), pricking them a few times with a fork. Rub a little oil onto the baked potato and season with Maldon Sea Salt flakes.
Serving Suggestions
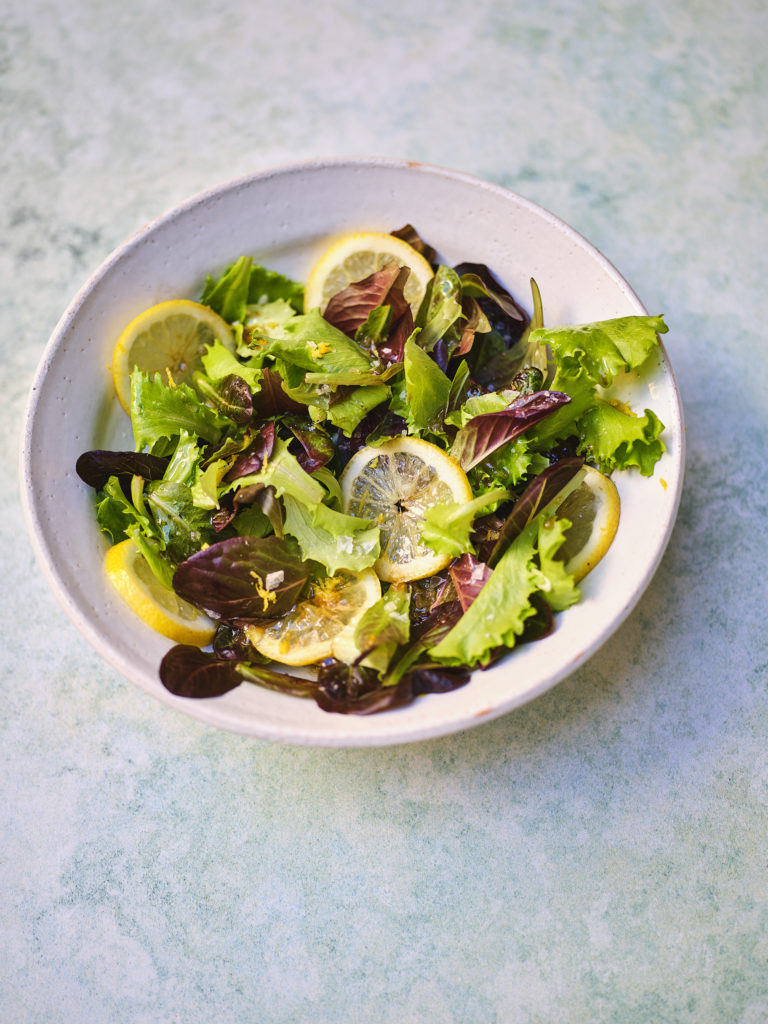
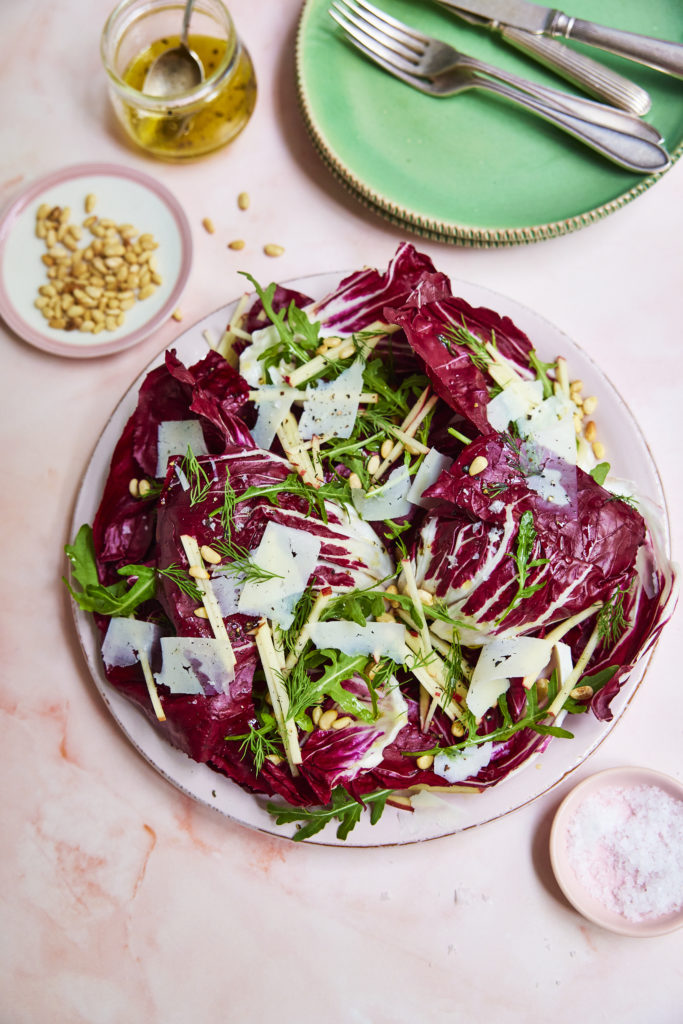
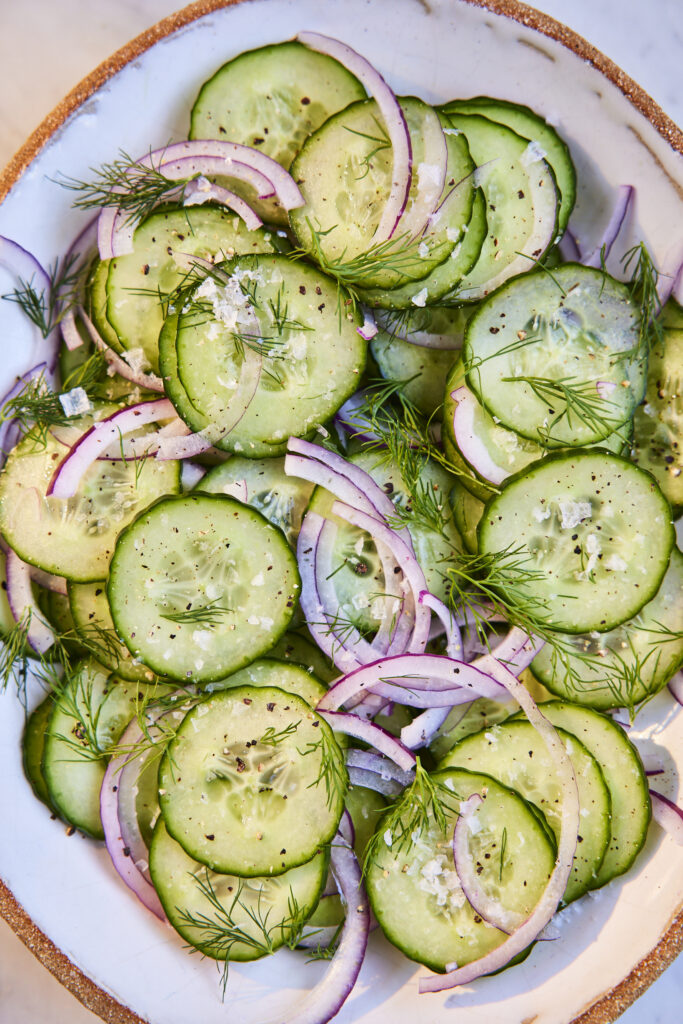
Crispy green leaf salad with lemonRadicchio salad with pine nutsCucumber Salad
Here are some delicious and well-balance pairings for air fryer fish and chips that help elevate the dish while keeping it true to it’s classic British dinner roots.
Homemade mushy peas – A must-have for fish and chips! Creamy, lightly seasoned with Maldon Sea Salt flakes and black pepper, and a perfect contrast to the crunch of crispy air fryer fish.
Tangy tartar sauce – The zing from capers, pickles and lemon cuts through the richness of the fish and adds moisture.
Lemon wedges – It may seem simple, but a fresh squeeze of a lemon brings brightness and enhances the flavour of the flaky code or hake fillets.
Pickled onions or gherkins – A sharp, vinegary bite balance the meal nicely. In London and among those in the fish and chips trade, a gherkin is also known as a ‘wally’. This originated in the late 19th century, believed to be a corruption of the word ‘olive’ and then later stuck for pickles and gherkins.
Green salad – Tossed with a light vinaigrette to add freshness and balance the heartiness of the fish and golden chips. Try pairing a radicchio salad with the air fryer fish and chips; the radicchio has a satisfying crunch that pairs beautifully with the soft, flaky fish.
Slaw – A crisp cabbage slaw with a vinegar-based dressing offers texture and tang to the air fryer fish and chips. We added jalapenos to our slaw to give a delicious spicy kick!
These serving suggestions turn a quick fish dinner into a well-rounded meal while letting the panko-breaded, crispy air fryer fish and chips shine.
Storing air fryer fish and chips
Storing and reheating air fryer fish and chips properly can help preserve the crispiness and flavour – though nothing beats enjoying them served immediately.
Storage Tips
Cool completely first – Let the crispy air fryer fish and golden chips cool to room temperature before storing to avoid steam build-up, which causes sogginess!
Store separately – Place the fish and chips in separate airtight containers, preferably lined with a paper towel to absorb moisture.
Refrigerate – Keep in the fridge for up to 2 days. Avoid freezing – especially if the fish was previously frozen before cooking.
Tried this air fryer fish and chips recipe? Let us know in the comments below! For more easy air fryer recipes, visit our full collection.
There’s nothing quite like a plate of perfectly cooked lemon sole and golden, crispy chips to celebrate the flavours of Essex. Sourced straight from the county’s shores, lemon sole is a delicate, buttery fish that deserves to be treated with the best seasoning. That’s why we’re using Maldon Garlic Sea Salt, enhancing it’s natural sweetness with a subtle garlicky depth. We wrapped our lemon sole in a copy of theEssex Chronical for that final, ‘Essex’ touch.
And what’s a fish supper without chips? Thick-cut, triple-cooked chips, also dusted with the same flavourful sea salt, brings the perfect balance of crunch and fluff. This dish is a true homage to Essex – a simple yet indulgent nod to it’s rich coastal heritage.
Here is how to make lemon sole and chips
Recipe created by Annie-Mae Herring – https://www.instagram.com/theculinarybee/
Prepare the chips – Peel the potatoes and cut them into thick batons. Rinse under cold water, then simmer in salted water for 8–10 minutes until just tender. Drain and let them steam dry.
First fry – Heat oil to 140°C. Fry the chips in batches for 5 minutes, just until they form a light crust. Drain on a rack and cool completely (this can be done ahead).
Roast the fish – Preheat the oven to 200°C. Lay the lemon sole on a lined tray, drizzle with olive oil, and season with Maldon Garlic Sea Salt and Original Sea Salt. Scatter over chopped herbs and arrange lemon slices on top. Roast for 12–15 minutes, until the flesh is just opaque and flakes easily.
Make the tartare sauce – Mix mayo, mustard, gherkins, capers, and tarragon. Squeeze in a little lemon juice and stir. It should be thick, ‘spoonable’, and packed with flavour.
Final fry – Heat oil to 180°C. Fry the chips again for 5–6 minutes, until deep golden and crispy. Drain on paper towels and toss with more Maldon Garlic Sea Salt while hot.
Serve – Pile everything onto a sheet of Essex newspaper. Fish, chips, a generous dollop of tartare. A cold cider or bitter on the side. Best eaten outdoors, fingers greasy, with a bit of salt still clinging to your lips.
This quick and easy air fryer salmon recipe is the perfect way to enjoy a delicious and healthy meal without the hassle. In just a fraction of the time it takes to cook traditional salmon, the air fryer delivers perfectly crispy, golden-brown skin with tender, flaky fillets. Paired with colourful stem broccoli and seasoned with Maldon Sea Salt flakes, this salmon and veggies dish is both flavourful and nutritious. The best part? It’s all cooked in one air fryer basket, making clean-up a breeze and the cooking time quicker – ideal for busy weeknights or a light weekend dinner.
Air frying salmon and vegetables
The beauty of this dish lies in it’s simplicity and speed. The air fryer ensures that the salmon achieve a perfectly flaky texture with a golden, crisp skin, while the vegetables retain their crunch and natural flavours. With minimal prep and clean up, this recipe is ideal for busy weeknights or when you want a wholesome meal without the hassle. Pair the salmon and veggies with a a packet of ready-cooked rice for a complete meal that’s both satisfying and healthy. Embrace the ease of air frying and make healthy eating in January a breeze.
How to cook salmon in an air fryer
To make this air fryer salmon and veggies, start by seasoning your salmon fillets with olive oil, Maldon Sea Salt and cracked black pepper. You can also add a pinch of garlic powder and a touch of brown sugar for subtle sweetness. Place the fillets skin-side down on a sheet of parchment paper in the air fryer basket. You can also arrange a few sliced bell peppers around the fish if you only have a one-basket air fryer. Air fry the salmon at the perfect temperature for a few minutes, ensuring the skin crisps up nicely while keeping the flesh moist and tender. After about 10-12 minutes, you can squeeze fresh lemon juice over the top, and serve your delicious fried salmon and roasted veggies right from the air fryer. With minimal prep and just a few simple ingredients, this air fryer recipe is a winning dinner choice that tastes like a gourmet meal.
Step 1
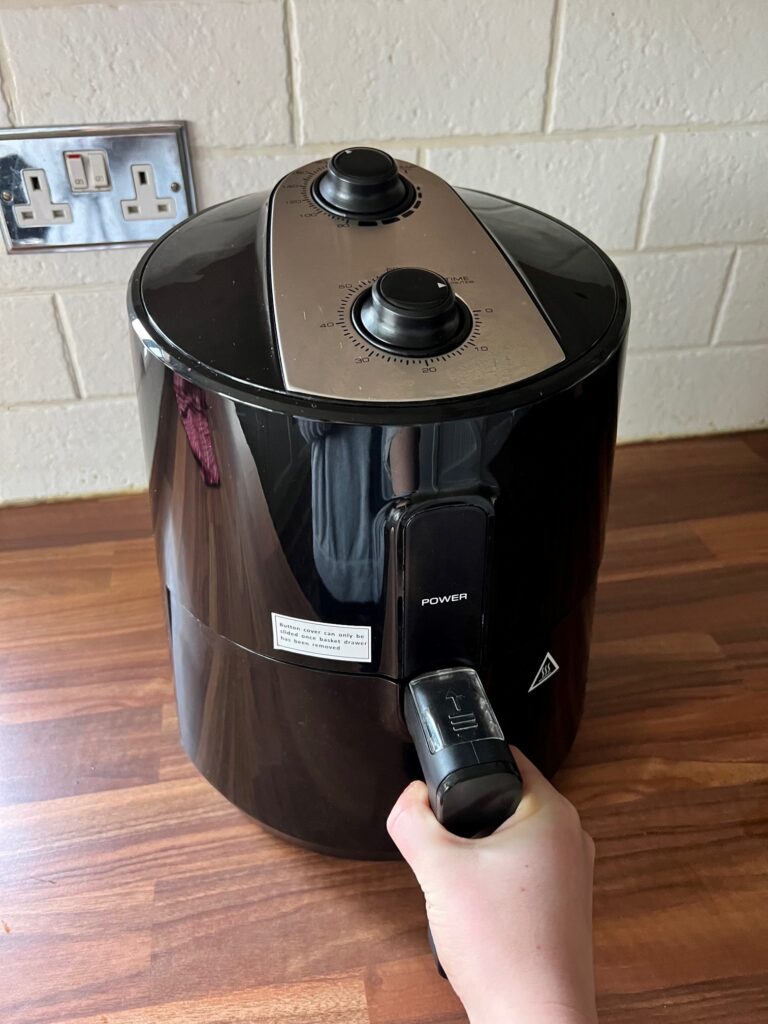
Place the salmon fillets skin-side down into the air fryer drawer.
Step 2
Brush the salmon skin with olive oil and sprinkle with a generous amount of Maldon Sea Salt flakes. Add a little black pepper and set to one side.
Step 3
In the second drawer, or alongside the salmon if you’re using a single-drawer air fryer, add the vegetables. Drizzle with olive oil, season generously with Maldon Garlic Sea Salt and a pinch of pepper, then give everything a good shake to ensure even coating. Place both drawers into the air fryer, ready to cook.
Step 4
Air fryer for 10 minutes at 200ºC, giving the vegetables a shake half way through cooking.
Step 5
Meanwhile, heat up your rice as per the packet instructions.
Step 6
Once everything is ready, share the rice between two plates, top each with a piece of perfectly cooked salmon and finish with the tasty vegetables. Make sure you eat the salmon skin, it’s the best bit!
What other vegetables can I serve with salmon?
There are many vegetables that go well with salmon such as tender asparagus spears, mild courgette slices, and sweet carrot batons, all of which are delicious when roasted or air-fried. Crisp green beans and sugar snap peas add a fresh, crunchy texture, while blistered cherry tomatoes provide juicy bursts of flavour. Hearty butternut squash cubes bring a slightly nutty depth, and a handful of spinach can be added at the end to wilt gently alongside the cooked salmon. These vibrant choices create a perfect balance of flavours, textures, and colours to complement your salmon dish.
Can you air fry frozen salmon?
Yes, you can cook frozen salmon in an air fryer. It’s a quick and convenient way to cook salmon without thawing it first. Simply preheat the air fryer to the desired temperature (around 199°C/390°F). Lightly coat the air fryer basket with oil or cooking spray to prevent sticking. Alternatively, you can use baking paper/parchment paper. Place the frozen salmon fillet in a single layer in the basket. You’re probably wondering how long does it take to air fry salmon? We recommend air frying the salmon for around 8-9 minutes, or until the salmon reaches an internal temperature of 145°F.
Is air frying salmon healthy?
Yes, air frying salmon can be a very healthy way to cook this nutrient-rich fish. The air fryer uses hot air circulation to cook food, which requires less oil than traditionally frying in a pan. This results in a lower-fat dish without sacrificing flavourful. Here are three benefits of air frying salmon, including how Maldon Sea Salt can enhance the dish.
Lower Fat Content – Air frying reduces the amount of oil needed to cook salmon, compared to methods like deep frying or pan-frying. The hot air in the air fryer crisps up the salmon’s skin and helps lock in moisture without saturating the fish with excess fat. Since salmon already contained healthy fats (such as Omega-3 fatty acids, using minimal oil ensures that the dish stays light yet flavourful.
Preserves Nutrients – Salmon is packed with essential nutrients, including Omega-3 fatty acids, protein, and vitamins D and B12. Air frying cooks the fish quickly and evenly, helping to retain these beneficial nutrients. The method also avoids overcooking the salmon, which can cause a loss of nutrients. The crispy skin create din the air fryer is an added bonus, as it adds a delicious texture without compromising the nutritional profile.
Better Control Over Seasoning – When using Maldon Sea Salt in your air fryer salmon recipe, you get a better control over the seasoning. Maldon Salt is renowned for it’s delicate, flaky texture, which allows it to dissolve easily and evenly on the surface of the fish. It’s an excellent way to enhance the natural flavours of the salmon without overpowering the dish. Just a light pinch of Maldon Sea Salt after air frying gives the salmon a perfectly balances taste while also adding the mineral benefits of sea salt.
In this cookbook, Romy shares over 70 recipes which are inspired by her beloved family, with flavours that define her childhood. From iconic dishes like Butter Chicken, which is a staple in every Indian home, to the delicious simplicity of a Masala Omelette, Romy invites cooks to savour the authentic tastes of India without a fuss! The instructions for each dish are easy to follow along with readily available ingredients. Every dish is designed with the home cook in mind, ensuring that your journey into Indian cuisine is as delightful as it is delicious!
Today we’re sharing Romy’s delicious Masala Crab, also known as Kekada Masala.
How to make masala crab
Simi, Romy’s childhood friend, and her share a bond rooted in the industrial New Town in Burnpur. Their common passions, particularly our love for culinary adventures, has bonded us forever. Countless college escapades involved outings to watch movies, then occasionally getting caught. The consequences were often chores piled up at home, but the shared laughter and memories made it worthwhile. It was during one of these movie escapades that she stumbled upon a scene portraying the joy of savouring crabs. Intrigued and captivated, the desire to taste the delicacy lingered in Romy’s mind. The opportunity finally presented itself when she had crab in England and then with Simi’s roots from Kerela she crafted the recipe infusing it with the flavours that complement the crab meat. This dish became the most loved starter in her restaurant. The creamy coconut milk, the pungent mustard seeds, the moreish curry leaves and the sourness of the tamarind elevates the dish.
Heat the oil in a pan over a high heat. Once the oil is hot, add the mustard seeds and curry leaves. As soon as the mustard seeds start to pop, add the garlic and cook for30 seconds, then add the onion and cook for 3–4 minutes.
Reduce the heat to medium then add the coconut and cook for 1 minute. Add the chilli powder, turmeric, ground coriander, Maldon Sea Salt, tamarind, sugar and coconut milk and cook, stirring, for a further 2 minutes.
Add the crab meat, mix well and cook for 3 minutes, then serve immediately. Romy enjoys it on crispy toasted sourdough bread, but you can also serve it with rice or any Indian flatbreads of your choice.
Where to buy Romy Gill’s India: Recipes From Home
You can find where to purchase Romy’s NEW cookbook here and start being creative with food and flavours in the comfort of your kitchen.
Make sure you have your Maldon Salt ready for these recipes! If you are running out, please feel free to browse on our Where to Buy Page to find your nearest store in which stocks our beloved Maldon Salt.
Lastly, we LOVE seeing your creations – please tag us on Instagram using the #maldonsalt so we can share your own take on Romy’s recipes!
What is a Loaded Bloody Mary?
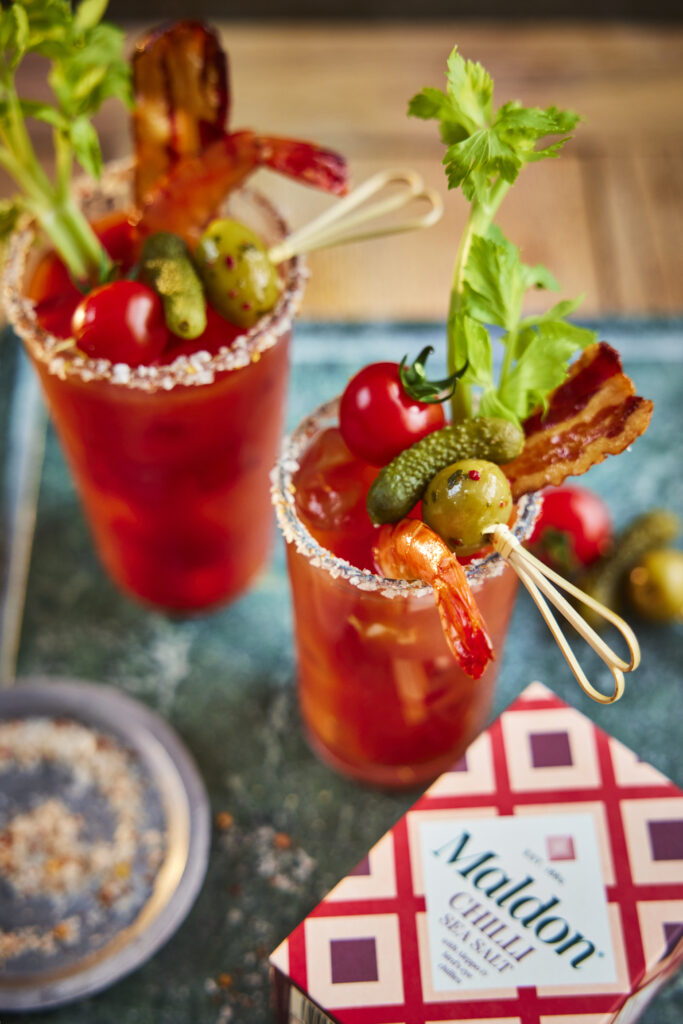
Elevate your weekend brunches with a fully loaded Bloody Mary recipe that promises a burst of flavour in every sip. A loaded Bloody Mary is an elevated version of the classic cocktail that enhances the basic blend of vodka, tomato juice, and seasonings with an array of savoury and sometimes spicy extras. Infused with Maldon Chilli Sea Salt, each glass features a tantalizing chilli sea salt rim that perfectly compliments the robust Bloody Mary mix. Garnished with crispy, candied bacon, shrimp, green olives, cornichons or pickles and a lemon wedge, this cocktail is a feast for the eyes and the palate! Get ready to impress your guests with a drink that’s as visually stunning as it is delicious.
How to Make a Fully Loaded Bloody Mary
A fully loaded Bloody Mary is an elaborate version of the classic cocktail that includes not just the standard ingredients but also a variety of garnishes and extras, making it almost a meal in itself. For a truly over-the-top brunch experience, transform your loaded Bloody Mary into a fully loaded masterpiece! You can follow the same basic steps outlined previously but with some additional flair:
Get Creative with Garnishes: Think beyond the celery stick. Consider skewers with olives, pickled vegetables, or even mini mozzarella balls. Sliders, mini quiches, or even a small grilled cheese can add a hearty touch.
Spice it Up (or Down): For a kick, add a dollop of sriracha or horseradish to the glass. Jalapeno slices or pickled peppers can also add a spicy touch. If you prefer a milder version, skip the hot sauce and opt for a squeeze of fresh lemon.
Rim it Right: Elevate the presentation with a flavoured rim. We used Maldon Chilli Sea Salt flakes for a fiery kick. You can also try a celery salt mixture, a smoky paprika dust, or even a toasted sesame seed rim for a unique twist. Remember, there are no hard and fast rules with a loaded.
Here’s how to make a Loaded Bloody Mary…
Place a large frying pan on the heat. Add the slices of streaky bacon and cook for 3 minutes on each side until crispy. Remove from the pan and set onto a plate with some kitchen paper to remove any excess oil.
Turn the heat down in the pan slightly and then add the two large prawns. Cook these for a couple of minutes on each side until bright pink and cooked through. Remove these from the pan and set aside too.
To assemble the bloody Mary’s start by creating the chilli salt rim for the glasses. Rub a little lemon juice around the top rim of each highball glass. Place some of the Maldon Chilli Sea Salt into a small plate and then turn the glass upside down onto the salt and press it in, so the salt sticks along the top.
Fill each glass with ice. Then pour in a 50ml measure of vodka into each. Next pour in the spiced tomato juice to fill up the glass. We like to splash in some tabasco and Worcestershire sauce at this stage, but this is up to your taste.
Finally garnish each glass with a stick of celery, some crispy bacon, a prawn, and a skewer with a cherry tomato, cornichon, and olive on. Drink and enjoy immediately.
What to serve with a Bloody Mary?
A cocktail is the best way to start a meal, especially if you’re having a Bloody Mary which packed full of delicious ingredients. We’ve listed below a few dishes that pair perfectly with this classic cocktail.
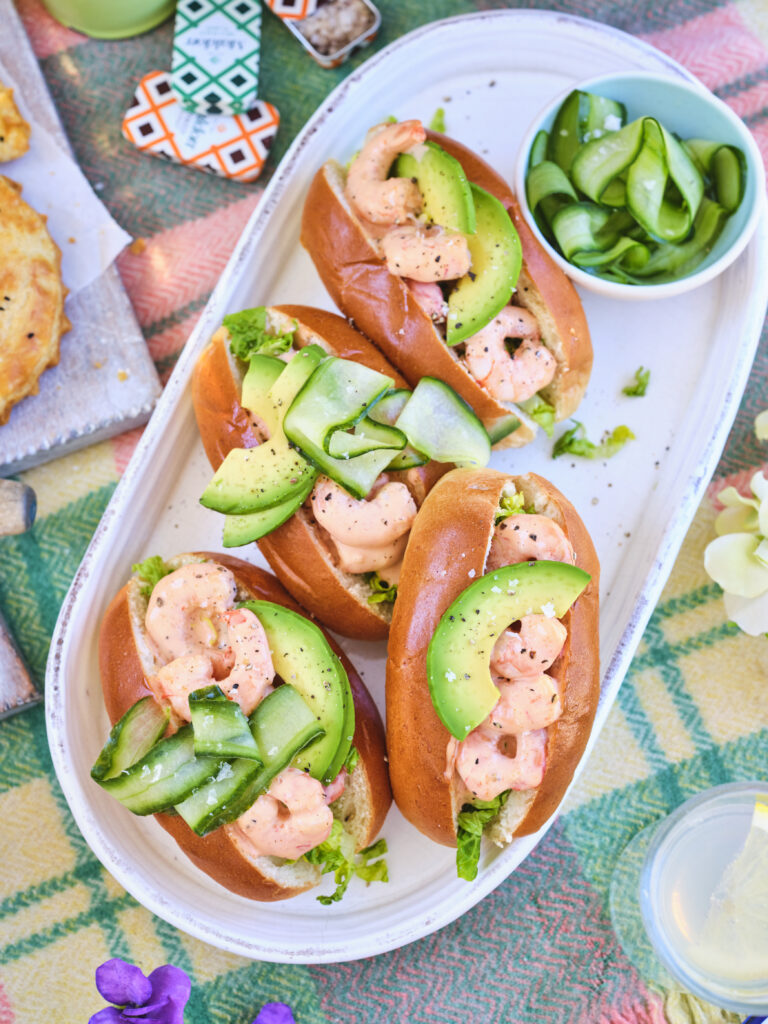
Because a Bloody Mary has a spicy kick to it, it compliments the mild, juicy prawns beautifully. The addition of the brioche bun also adds a gentle sweetness, balancing out the fiery pepperiness of the cocktail.
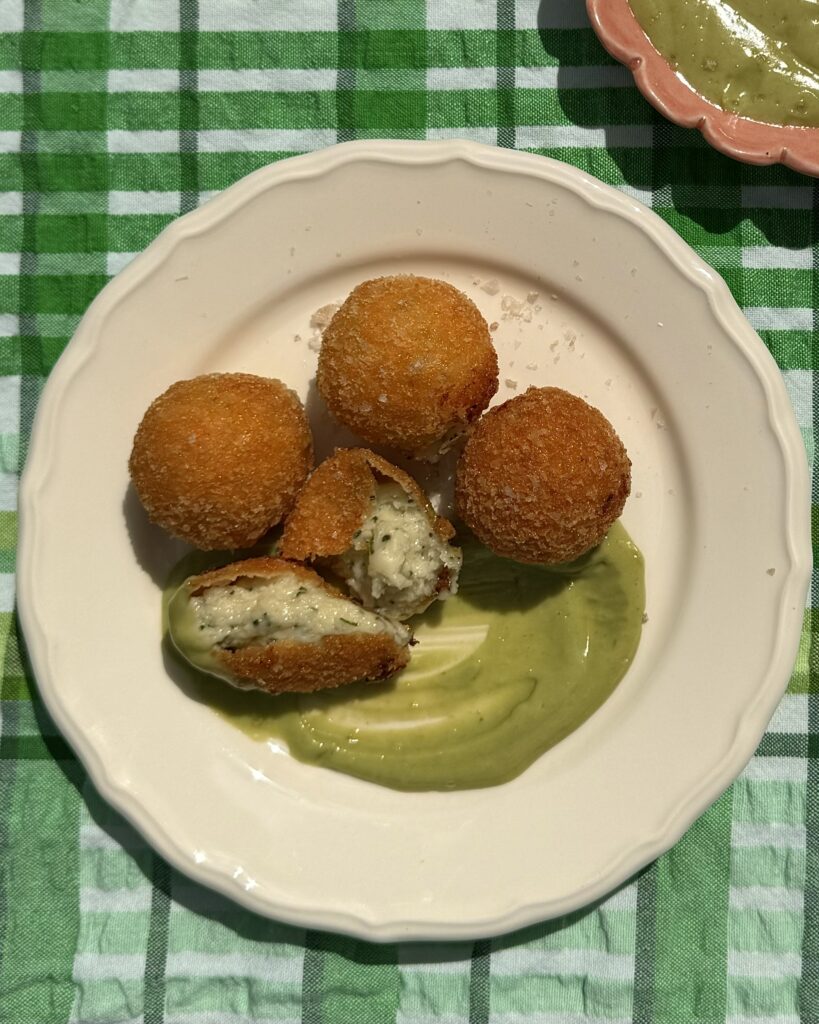
Dipping cheese in tomato sauce is a classic combination loved by many. Why don’t you transform this delicious pairing with Cheese and Chive Croquettes and a Bloody Mary mix instead. The zesty, peppery notes of the cocktail compliment the cheese and chive blend in the croquettes, made up of cheddar, greyer and mozzarella.
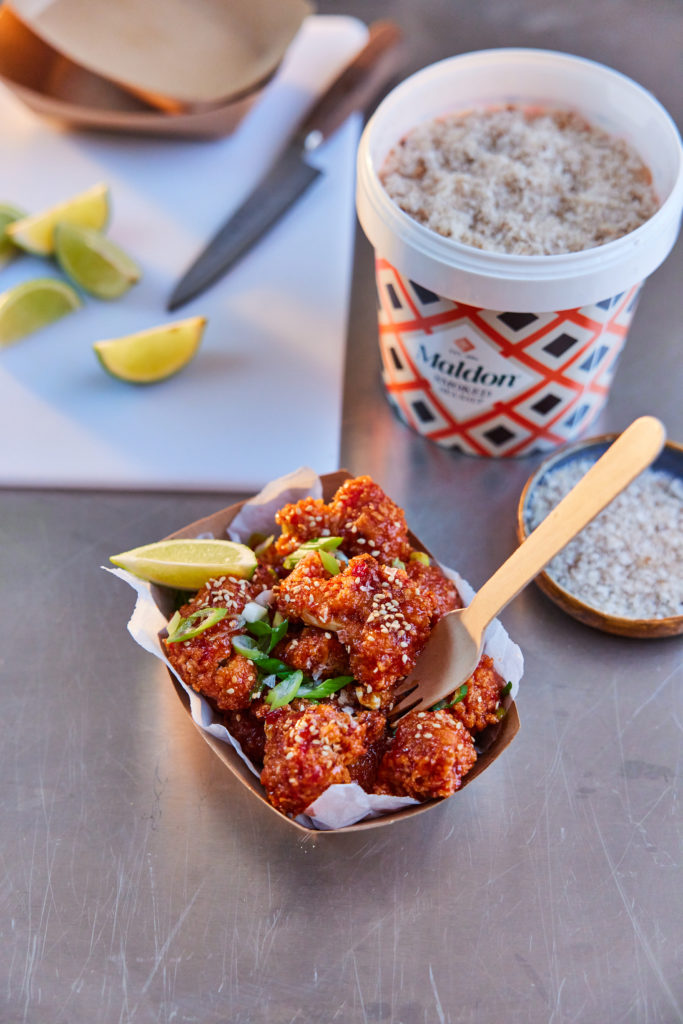
This is a great vegan and healthier alternative to cheese and chive croquettes. Cauliflower cooked bang-bang style provides a delicious crunch with every bite, which pairs with the silky smooth consistency of the Bloody Mary.
Hake has a good sturdy texture that is great as a burger – think of these as giant fish fingers in a bun – but you could use any chunky white fish here. They are best cooked in a pan over the fire as you want a good amount of oil to get the all-important crispy bread crumbs. Genevieve Taylor loves membrillo, a tart sticky paste made from slow-cooked quinces. Normally served alongside cheese, here it adds a sweet and sour note to the chutney. It’s pretty easy to find these days, definitely online, or make friends with someone who has a quince tree, as they are likely to have a tonne of the stuff.
Here is how to make the hake burgers…
For the chutney, set a small saucepan on the hob over a medium heat and pour in the olive oil. Add the tomatoes, garlic and chilli flakes, if using, and cook for a few minutes until the tomatoes have collapsed. Add the membrillo and sherry vinegar and season with a little salt and pepper. Cook for another few minutes, stirring until the membrillo has dissolved, then remove from the heat, scoop into a bowl and set aside to cool.
When you are ready to cook, fire up the barbecue ready for direct grilling. Tip the breadcrumbs into a bowl and stir through the smoked paprika and a generous grind of salt and pepper. Crack the egg into another bowl and lightly beat with a fork. Add the flour to a third bowl. Toss the fillets about in the flour to coat all over, then dip into the egg until evenly covered. Add to the bowl of breadcrumbs and flip over a couple of times so each one is evenly coated in crumbs. Line up on a plate. If your hands get unbearably messy, stop, wash and begin again.
Drizzle a little olive oil over the aubergine slices and season with Maldon Sea Salt and pepper. Set on the grill bars over the fire and grill until lightly charred all over. Slide away from the fire so they keep warm and set a flameproof frying pan over the fire to heat up. Pour in a good amount of olive oil so it coats the pan by a couple of millimetres. Once the oil is hot, add the crumbed fish and fry for a couple of minutes on each side until crisp and golden. Use a temperature probe to test the fish for doneness – it should be 60°C (140°F)deep in the centre. Slide the pan off the heat a little if the crumbs are colouring too quickly so the fish can finish cooking. Once the fish is done, split the buns open and toast briefly on the cut side. To serve, add a little rocket to the base of each bun, then add the fish and a couple of slices of aubergine.
Finish with a dollop of the chutney, top with the bun lid and tuck in.
Purchase ‘SCORCHED’ by Genevieve Taylor
Live-fire expert Genevieve Taylor covers everything you’ll ever need to know about buying and cooking all kinds of fish in her third cookbook: Scorched. From cooking whole dish, fillets, shellfish to burgers and skewers, this is the ultimate guide to barbecuing fish!
You can purchase your very own copy here, where you can become inspired with over 85 recipes and gain insight on how to set up your barbecue, sourcing your fuel and lighting your fire.