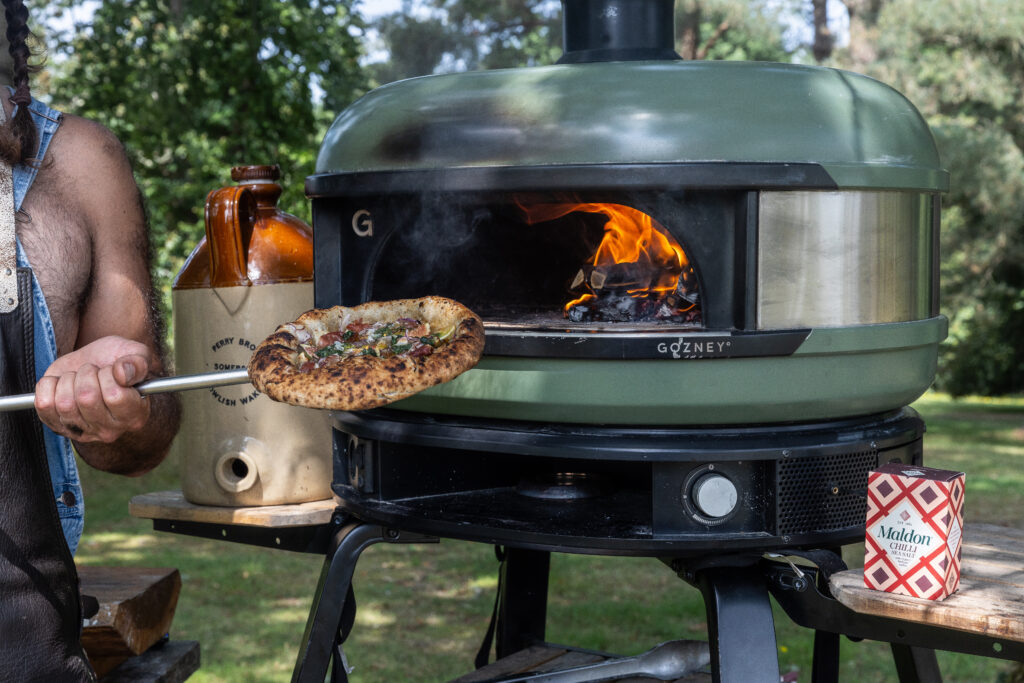
This pizza uses my aromatic nettle sourdough pizza dough and is best cooked in a Gozney Dome. There are few things as delicious as a woodfired pizza. This recipe was born in the dusty Valencian hills, I was walking with my wife, Sophie and our best friends when we came across a beautiful little village and sat down to eat at a weather beaten family restaurant. As the evening sun nestled in the surrounding trees we ate the most delicious honey, figs and goats cheese – accented with a mouth watering hit of chilli. Whenever I make this pizza I’m fixated by the bubbling brown butter and vibrant colours. Every bite takes me back to that little Spanish paradise.
It’s best to start the dough the day before for the best flavour but you can make it early in the morning if you run out of time. You will need a ripe sourdough starter but you could swap out with 3g of dried yeast if needed.
You will need your Gozney oven clean, enough fuel to keep her hot and the appropriate pizza peels – one for loading and one for turning. If you need some instruction on the basics then Gozney has a great YouTube channel that will help you.
Here is how to make the pizza…
The day before, mix your dough. Mix the water, starter and oil by hand in a large bowl until combined. Add in the flour and mix again, leave covered for 15 minutes to fully hydrate then add in the salt and knead by hand for about 10 minutes until the dough becomes smooth. Add in the sieved nettles and knead until combined. Place into an oiled bowl, cover with a cloth and leave on the worktop. After 20 mins fold the dough and leave again for another 20 mins, repeat this two more times. Shape into four balls by dividing the dough and folding each piece in on itself. Place into an oiled tray, cover with cling film and place in the fridge overnight. Make sure the fridge is running at about 5C.
Now for your spicy pizza party day! Heat up your Gozney dome with a small wood fire, move the fire to the right hand side, loosely wrap the garlic bulb in foil and roast off until soft and smokey, this should take about 20 minutes on the far left hand side of the oven. Remove and once cool, squeeze out the pulp and mix into the soft butter with a teaspoon of the Maldon Chilli Sea Salt. Taste and set aside at room temperature.
Get the topping ready and laid out and run up your pizza oven to over 450C, making sure the base is at least 350C (I use an infrared thermometer to check). Remove the dough balls from the fridge for an hour, still covered.
Clean off a smooth work surface and dust with the semolina flour. Dust the pizza balls with a little semolina, pick up a dough ball and place on the worktop with a good dusting of semolina. Gently and evenly push the dough out to a circle. Using both hands, stretch the dough out to a dinner plate size. Add two spoons of the chilli butter and evenly spread around the pizza. Top with the goats cheese, figs, Iberico ham and drizzle over with honey. Slide a pizza peel underneath the pizza and confidently slide into the oven, making sure there is a rolling flame from the wood fire. After about 30 seconds turn the pizza to give it an evenly cooked crust. Remove the pizza and place onto a cooling rack to harden up. Sprinkle over a little more Maldon Chilli Sea Salt and cut into 6 wedges.
Best eaten with an ice cold glass of spanish beer in the Valencian hills, but then again – what isn’t?
We’re delighted to review the talented Uyen Luu and her latest cookbook, Quick and Easy Vietnamese. Uyen is a Vietnamese-born, London-based food writer, cook, and photographer known for her vibrant approach to Vietnamese cuisine. Her latest cookbook, Quick and Easy Vietnamese, offers a fresh perspective on the flavours of Vietnam, presenting an array of simple yet authentic recipes that are perfect for busy home cooks!
The book is designed to make Vietnamese cooking accessible for everyone, with easy-to-follow instructions and a mindset of being resourceful with time and ingredients, maximising on flavour and never wasting a thing. There are so many simple yet delicious recipes to choose from that can all be whipped up with minimum fuss! From tasty Pork and Prawn Wontons to savoury Dill Fishcakes. If you’re craving something sweet, Uyen also shares dessert options such as Sweetcorn Rice Pudding! There is a collection of recipes that are perfect for any time of the week.
Today we’ve shared on our our favourites from the book, Char Siu Crispy Pork Belly.
Here is how to make Char Siu Crispy Pork Belly
Uyen loves Chinese char siu pork, but she loves the fatty, crispy belly even more, so this combines the two. It’s a winner at every dinner party or the perfect weekend dinner treat. Serve with Vermicelli Noodle Salad Bowlsor steamed rice and vegetables or with bánh hoi.
Bring a large saucepan of water to the boil, add the pork andsimmer for 10 minutes, then remove from the water. Rinse undercold water, then pat dry with paper towels. Stab and roughly scorethe meat side.
Combine the roast red pork seasoning mix, soy sauce and water in a small bowl, then spread the mixture evenly onto the surface of a tray (pan) or box that fits the meat. Put the pork belly on top, skin side up, and brush the marinade onto the sides of the meat. The seasoning mixture should cover the flesh side and leave the skin dry.
Rub the vinegar all over the skin and sprinkle with 1 table spoon of the salt. Marinate at room temperature, uncovered, for at least2 hours, or overnight in the refrigerator, covered, dabbing off any moisture from the skin every 30 minutes when you’re able and rubbing on the remaining salt.
When you’re ready to cook, preheat the oven to 220ÅãC fan(475ÅãF). Transfer the pork to a roasting tin lined with baking parchment. Pat the skin dry with paper towels, then roast in the oven for 1 hour 10 minutes. Remove from the oven and set aside to rest for at least 30 minutes. Slice when at room temperature.
Note:
If you can’t get hold of the roast red pork seasoning mix, use 1 teaspoon Chinese five spice, 2 tablespoons garlic powder, 2 tablespoons brown sugar, 2 tablespoons dark soy sauce, 2 tablespoons tomato ketchup and 1/4 teaspoon red food colouring.
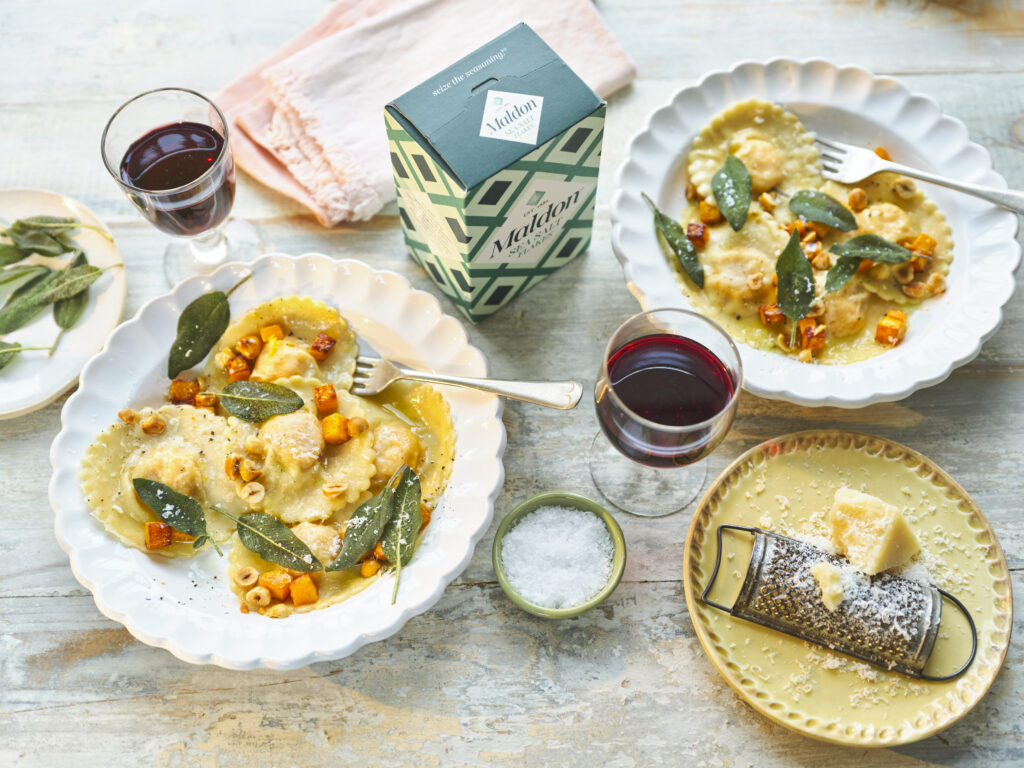
Introducing a delightful homemade butternut squash ravioli recipe that marries the sweet, nutty flavours of butternut squash with the rich, flaky goodness of Maldon Sea Salt flakes. This exquisite dish is elevated by a luscious brown butter sage sauce that compliments the creamy filling perfectly. The butternut squash filling, seasoned with salt and pepper, creates a smooth and and flavourful centre for the ravioli. We used a potato masher to puree the ingredients, but you can also use a food processor for a faster result!
Here are a few points that you need to remember when making a homemade butternut squash ravioli…
When roasting your squash, make sure to drizzle generously with olive oil and cook until beautifully tender. You then blend with a selection of creamy cheeses, a pinch of Maldon Sea Salt, pepper and a generous helping of nutmeg.
When rolling out the pasta dough using a machine, always start at the widest setting and gradually making it thinner. Lay the dough on a flat surface, placing spoonful’s of the delicious filling evenly apart, and cover with another sheet of dough. Use a ravioli cutter to assemble the ravioli, ensuring each piece is well-sealed to prevent leakage during cooking. If you don’t have a ravioli cutter, you can use a glass instead to cut out equal-sized circles. Take your filling and place into the centre of each cut-out circle, making sure there is space around the edge to close the ravioli by crimping. To save time, you can prepare the dough and filling in advance, storing them in plastic wrap in the refrigerator.
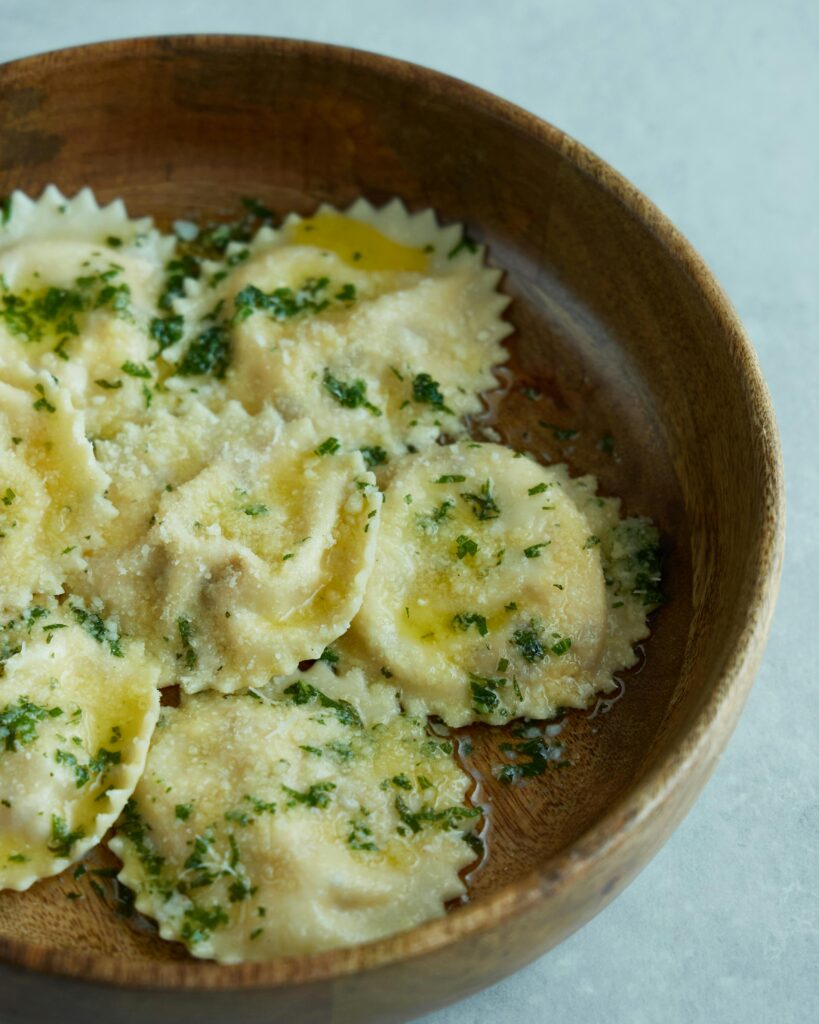
Cooking the ravioli is a breeze and takes around 3-4 minutes in boiling water, or until they float to the top. The addition of a brown butter sage sauce elevates the pasta dish further! Made up of melted butter and fresh sage leaves, cook until the butter turns a golden brown colour, emitting a nutty aroma. Transfer the ravioli tot he brown butter sauce, soaking up the rich flavours.
This homemade butternut squash ravioli recipe, infused with the distinctive taste of Maldon Sea Salt, is sure to impress with its balance of textures and flavours, making it a perfect choice for a special dinner or a cosy night in.
How to make butternut squash?
Begin by roasting the butternut squash.
Preheat the oven to 180c then place the peeled and roughly chopped butternut squash onto a roasting tray or baking sheets.
Drizzle with a little oil, cover with tin foil and then roast for 30 minutes until soft and tender, and a knife can be inserted easily. Set aside to cool.
Once the butternut squash is cooled, place it into a bowl and use a potato masher or ricer to puree it.
Then to the pureed squash add the ricotta, parmesan, a pinch of Maldon Sea Salt, cracked black pepper and a grating of nutmeg. Set aside.
How to make ravioli pasta?
While the butternut squash is roasting, make your pasta. Tip the OO pasta flour onto a clean work surface and form a circle with it.
Then in the middle make a clear well so you are left with a ring of flour. Crack the 3 eggs into the middle. Then use a fork to break the yolks and gently whisk the eggs together so they are beaten.
Once beaten, use the fork to slowly flick in little bits of flour onto the eggs, and continue to whisk them in. Keep doing this while it thickens, and when it becomes too thick discard the fork and use your hands to knead the flour and eggs. Continue to knead for 5 minutes until you have a smooth dough.
Wrap it in clingfilm and then rest it in the fridge for 30 minutes.
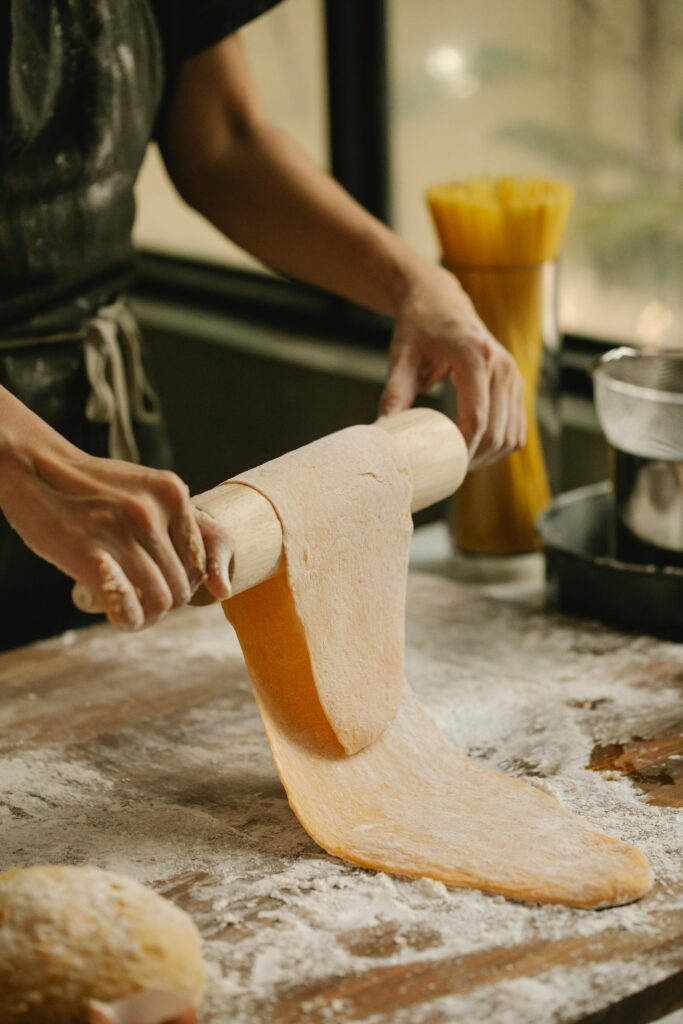
Once the dough has rested it is time to roll and shape the ravioli. Start with a smaller piece of pasta dough and flatten it out, then roll it through the widest setting of the pasta machine. Go through the widest setting again, and then continue to go down the settings until you have the thinnest pasta sheets – you should be able to see your hand through it when held to the light! Dust a tray with a little semolina and lay your pasta sheets on here to stop then sticking, whilst you continue with the rest.
When you have all your pasta sheets ready, you can shape the ravioli. Place one sheet of pasta on the work surface and use a teaspoon amount of the butternut squash filling to dot along the sheet, keeping a 3cm gap between each. Wet your finger in a small bowl of water and run this around the edge of the filling, then place a second sheet of pasta over the top and gently seal the two together – making sure there aren’t any large air pockets. Then use a cutter to stamp each ravioli out and set aside on a semolina lined tray while you do the remaining.
How to make pasta without a machine?
If you don’t have a pasta maker or machine, you can you use a rolling pin and a chef’s knife!
Lightly dust your surface with flour.
Once your dough has been in the fridge for 30 minutes, cut the dough in half.
Roll out one half the dough with a rolling pin into a rectangle around 16 inches and 8 inches wide. Make sure to continue to roll and stretch gently with your hands until the dough is as thin as you can make it.
Repeat the process for the second half of the dough.
Choose one sheet from the two, and begin spooning the butternut squash filling onto the pasta sheet, leaving around 1 inch between each ball of filling.
With a brush, gently brush water between the balls of fillings and around the outside of the sheet so that the other sheet of pasta will stick to it.
Lay the second sheet of pasta on top, pressing down gently between the filling mounds to seal the sheets together and remove any air pockets.
Cut the ravioli into rectangles using a ravioli cutter or sharp knife. Make sure to press any edges down again to ensure they’re sealed.
How to cook ravioli?
Place a large pan of salted water on to boil.
Place the ravioli in to boil, they should only take a couple of minutes. You know they are ready when they float to the surface.
How to serve butternut squash ravioli?
In a large sauté pan, add the butter and allow it to melt, when foaming add the sage leaves and let them bubble in the butter. Then add the hazelnuts and swirl them in.
As soon as your ravioli are cooked, lift them from the pan with a slotted spoon or spider and place them directly into the butter pan.
Toss them through the butter and serve immediately, with a good grating of parmesan cheese.
What goes well with butternut squash ravioli?
Butternut squash ravioli pairs wonderfully with a variety of side dishes and accompaniments that compliment it’s sweet and savoury flavours.
Salad
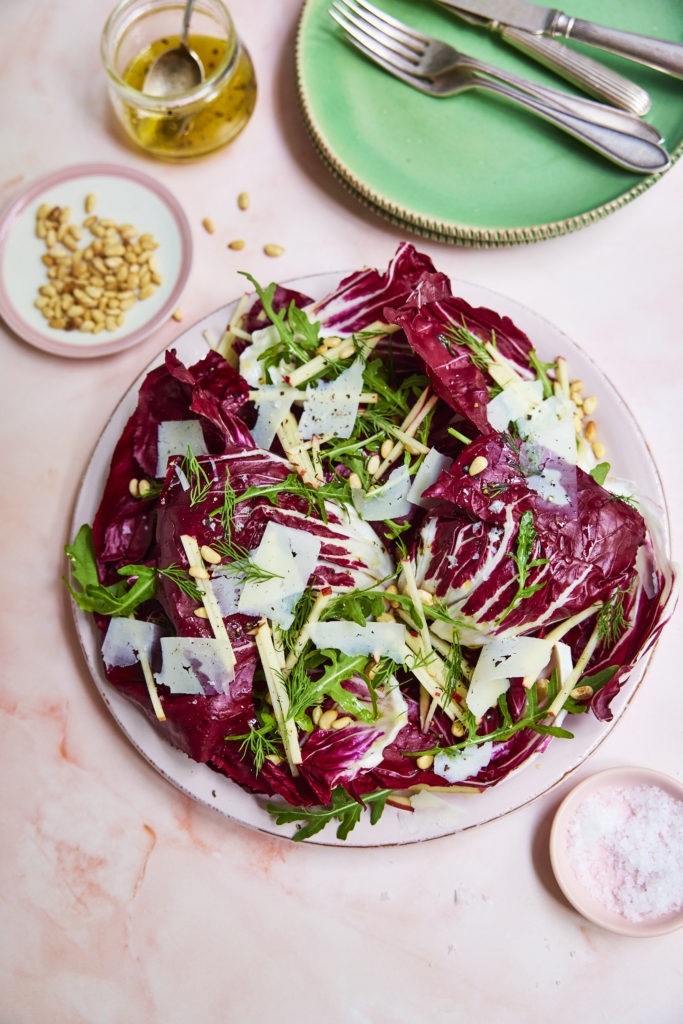
A fresh, crispy salad can balance the richness of the ravioli. Consider a delicious radicchio salad with shaved parmesan and toasted pine nuts. The peppery radicchio and the acidity of the dressing provides a delicious contrast to the sweet squash filling.
Bread
A warm, crust bread can be perfect for sopping up any leftover brown butter sage sauce. garlic bread or focaccia with rosemary and sea salt can also be a flavourful addition.
Vegetables
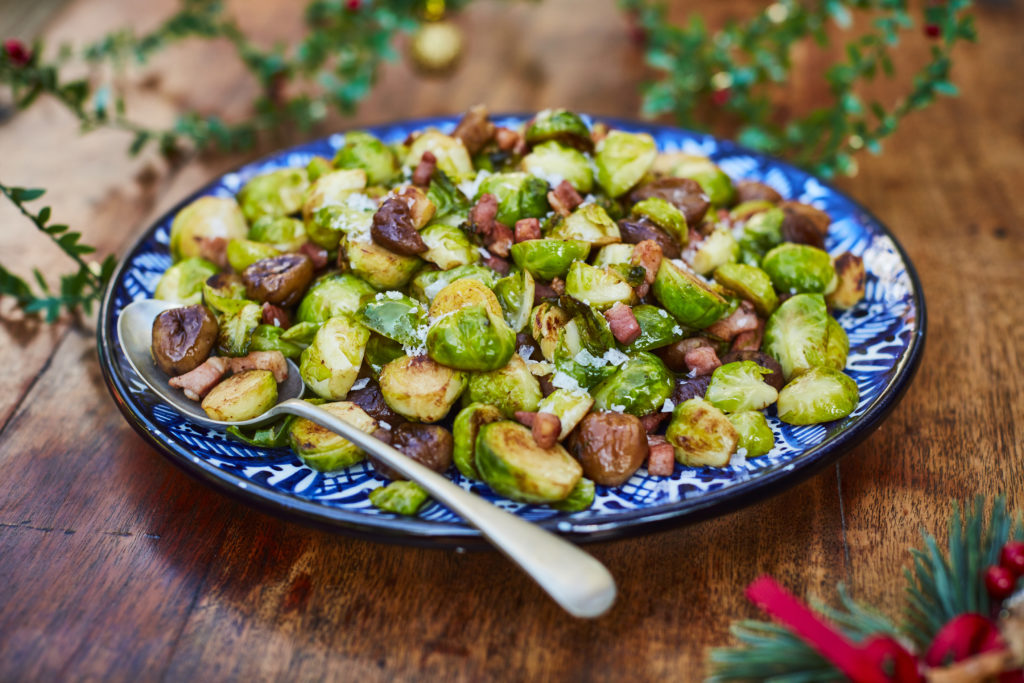
Roasted or sauteed vegetables make a great side dish. Brussels sprouts, asparagus, or green beans with a touch of olive oil and Maldon Sea Salt can add a delightful crunch and vibrancy to your meal.
These pairings can enhance the flavours of your butternut squash ravioli, creating a well-rounded and satisfying dining experience.
Can you freeze fresh pasta?
Yes, you can freeze fresh pasta, and it’s a great way to preserve it for later use! Here’s a detailed guide on how to freeze freshly cooked pasta effectively.
Cook the pasta al dente, as it will continue to cook slightly when reheated. Drain the pasta and let it cool completely.
Toss the cooled pasta with a small amount of olive oil to prevent sticking.
Divide the pasta into portions and place them in airtight containers or freezer bags. Remove as much air as possible from the bags.
Label the containers or bags with the date and freeze up to 2 months.
Reheat the pasta by dropping the frozen pasta directly into boiling water for 1-2 minutes.
Freezing fresh pasta is an excellent way to save time and reduce waste, ensuring you always have a quick and delicious meal option on hand!
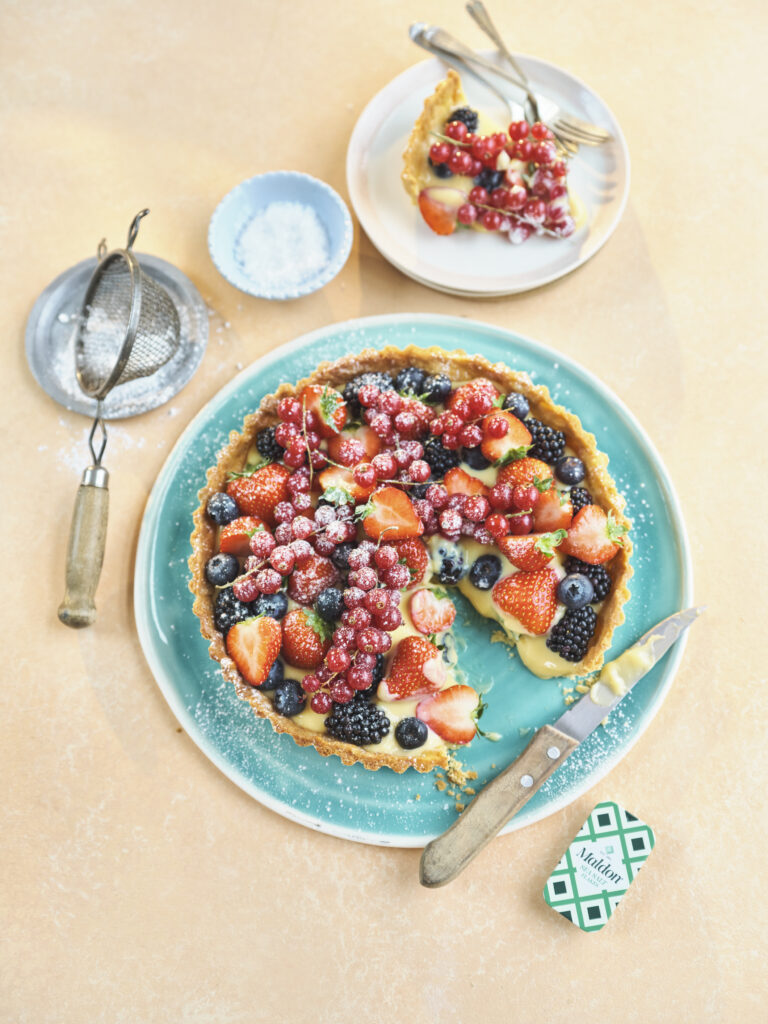
Indulge in the perfect summer dessert with this exquisite Summer Berries Custard Tart, a delightful combination of creamy vanilla custard and a vibrant array of fresh berries. This tart, featuring the renowned Maldon Sea Salt flakes, elevates a classic favourite into a gourmet experience. Whether you are hosting a backyard barbecue or a sophisticated garden party, this berry custard tart promises to be the star of your summer celebrations.
Creating this delicious dessert starts with a buttery tart shell made from all-purpose flour, unsalted butter, and a hint of Maldon Sea Salt flakes. The dough comes together effortlessly in a food processor or blender, with cold water ensuring the perfect consistency. Once baked to golden perfection, the shell is filled with a smooth and rich pastry cream, crafted from egg yolks, milk, sugar, and vanilla bean paste or extract. The crowning glory is an assortment of fresh summer berries, which not only add a burst of colour but also balance the sweetness of the custard with their natural tartness. A light dusting of icing sugar completes this show-stopping fruit tart, making it as beautiful as it is delicious.
How to make pastry for tarts
Start by making the pastry. Place the all-purpose flour and Maldon Sea Salt flakes into the food processor, and then add the cold cubed butter.
Pulse the food processor until it resembles fine breadcrumbs. Then add the caster sugar and give it one more pulse to incorporate. Then add the egg yolk and pulse again until it starts to come together and form a dough – if it looks a little dry and chalky, simply add a teaspoon of cold water and pulse again.
Once the dough is formed, remove from the food processor, and bring together with your hands so it is cohesive and smooth.
Flatten into a disc shape and wrap in cling film, then place into the fridge for 30 minutes.
Preheat the oven to 180c.
How to make custard filling for tarts
While the pastry is chilling, start making the custard. Place the milk and vanilla bean paste into a large saucepan and place onto a gentle heat. Put the egg yolks, caster sugar and cornflour into a mixing bowl and use some electric beaters to whisk until pale and fluffy.
Heat the milk until scalding point but not boiling, then remove from the heat and gradually pour it into the egg and sugar mixture very slowly, whisking all the time. Once all the milk is added, pour this mixture back into the pan and heat very gently, constantly stirring and moving it with a rubber spatula. The custard will thicken, you want to take this to quite a thick custard stage so it supports the fruit in the tart. Once thickened, remove from the heat and place into a clean bowl, and close cover with some clingfilm on the surface to stop it for getting a skin.
Set aside in the fridge to cool.
How to cook a custard tart?
After 30 minutes, remove the pastry from the fridge and on a lightly floured surface, roll it out into a circle which is a bit larger than the 23cm tart tin (you need the pastry to come up the sides and overhang slightly).
Lift it and drape into the tart tin, using your finger to lightly press it in up all the sides and corners.
Use some scrunched up baking paper in the middle and then fill with baking beans. Blind bake the pastry for 10 minutes to 15 minutes, then remove the paper and return for a further 5 until it is lightly golden and dry to the touch. Remove from the oven and use a whole beaten egg to lightly egg wash the pastry while it is still hot. This will help seal any cracks before adding the custard.
Set aside to cool slightly and then use a serrated knife to trim off the top edge neatly. Then set aside to cool fully.
How to decorate a custard tart?
Once both your pastry case and custard are cooled you are ready to assemble.
Spoon the custard into the pastry case and smooth over with a palate knife.
Assemble your summer fruits all over the top, and then dust with some icing sugar and a final pinch of Maldon Sea Salt.
Serve immediately.
Other tart decorations
If you don’t want to top your custard tart with a medley of summer berries, why not try add a drizzle of homemade lemon curd or jam instead? The sweet, silky sauce compliments the buttery pastry of the tart perfectly, giving you a sudden burst of sweetness as you take your first bite.
If it’s not the season for summer berries, try decorating with sliced apples, paired with a sprinkling of cinnamon. This flavour profile is both warming and comforting, perfect on a cosy autumnal day when you’re stuck indoors and wanting to bake something. The beautiful display of sliced apples against the creamy custard filming is also striking and a great crowd-pleaser!
What to serve with summer berries custard tart?
Now that you have a finished custard tart that’s ready to be enjoyed, let’s think of a few recipes you can serve along with this decadent dessert!
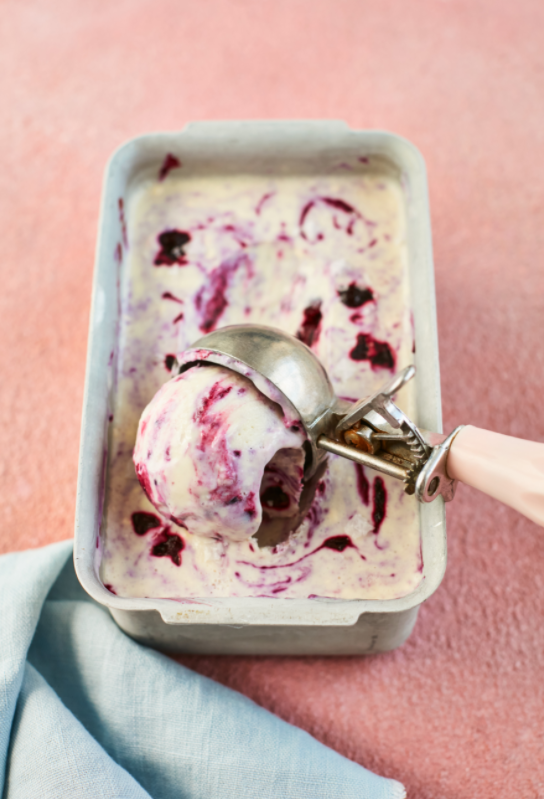
Our homemade blackcurrant ice cream is a match-made-in-heaven when paired with a custard tart. This is because the cold, soft texture of the ice cream compliments the buttery tart shell, creating a delicious symphony of textures as you take your first bite.
If you’re craving a summery tipple, we recommend whipping up a Fig Bellini. This cocktail is super quick and easy to make, infused with the flavours of sweet fig jam and a kick of zest through the use of lemon juice and prosecco, which matches the sweet burst of the summer berries on the custard tart.
Can you freeze custard tarts?
Because the custard tarts are made from eggs, cream and milk, it’s important to store any leftovers in the fridge for no longer than three days. The tarts are at their optimum taste and texture when served fresh the day of making it.
In terms of freezing your custard, you can freeze them up to 3 months if stored in an airtight container. However, please note that they may not hold their shape that well once thawed under room temperature. This is because of the moisture content in the creamy custard filling.
Light, fluffy and FULL of flavour! This recipe was created by Lara Green, who adds a delicious twist to a sourdough focaccia with Maldon Chilli Sea Salt and Maldon Garlic Sea Salt to impress your guests. It pairs perfectly with dips, pasta and antipasti, where the hints of chilli and garlic elevate it from ‘fluffy’ to fantastic.
Cold proofing overnight in the fridge makes for an extra soft, pillowy focaccia with the most delicious golden crust.
How to make chilli and garlic sourdough focaccia
Place the warm water into a bowl with the levain/sourdough starter and honey and whisk to combine. Add the flours and stir until no dry bits remain. Put a towel over the bowl and place somewhere warm.
30 minutes later, add both the Maldon Chilli Sea Salt and Maldon Garlic Sea Salt, using your fingers to pinch them into the dough. Cover the bowl with the tea towel and place back in the warm spot.
30 minutes later, perform your first set of stretch and folds: starting from the furthest edge, pull and stretch the dough up and then fold it down over itself. Turn the bowl and repeat until you have completed four stretch and folds. Set your timer for three additional sets of folds – spaced half an hour apart, leaving the covered dough to rest after each set.
Using 2 tbsp of the oil, generously grease and line a 9-inch baking dish with parchment paper, then place more oil on top of the paper. Transfer the focaccia dough to the baking dish, cover and place back in the warm spot for another 1-2 hours. Then cover with cling film and place in the fridge overnight.
The following morning, remove the focaccia from the fridge and place in the warm spot to bring it back to room temperature. You’ll know when it’s ready as the dough will have noticeably risen and look soft and pillowy on the surface (around 3-4 hours).
Preheat the oven to 215C.
Remove the cling film from the baking pan and with wet hands, massage the dough to create dimples in the surface of the focaccia. Drizzle with the remaining tbsp of oil and scatter with a pinch of both the Maldon Chilli Sea Salt and Maldon Garlic Sea Salt.
Bake in the oven for 15 minutes, then turn the pan and bake for another 10 minutes until golden brown on the surface and light and crispy on the base and edges. Allow to cool thoroughly before cutting into slices.
*If using Instant Yeast instead of a sourdough starter, simply add the yeast with the flour and mix to combine. Follow the same sequence of steps above.
Measure the milk into a small pan and gently warm over a low heat. Once it is warm but not boiling, remove from the heat and add the butter, allowing it to melt in. Set aside.
Mix the flour, yeast, sugar, Maldon Sea Salt flakes, spices, and orange zest into the bowl of your stand mixer. Make a well in the middle and pour in the warm milk and butter mixture. Then pour in the 2 beaten eggs. Use your hands or a wooden spoon to bring this together to a sticky dough. Then add the dough hook attachment and knead for 5 – 8 minutes until smooth and elastic.
Place the dough into a lightly oiled bowl and cover with clingfilm, then leave in a warm place for it to double in size. This will take approximately 1 hour.
Grease and line a 900g loaf tin with baking paper and set aside.
After an hour, take the dough use your hands to knock the air out. Tip it back into your stand mixer and add the dried fruit, then use the dough hook to knead and distribute evenly throughout the dough.
Shape into a smooth loaf and then place into the prepared loaf tin. Cover loosely with clingfilm and then set aside for 45 minutes to rise again.
Preheat the oven to 180C.
Prepare the cross by mixing the plain flour and water until you have a smooth paste. Put this into a piping bag and snip off the end. After the dough has proved, carefully pipe a cross on the top and then place into the oven for 35 – 40 minutes.
Once cooked, remove from the oven and onto a wire rack. Brush with the melted apricot jam glaze. Cool in the tin before removing, slicing, and serving toasted with plenty of butter and a sprinkle of Maldon Sea Salt.
What is a picnic pie?
As we head into Spring, many people turn to the outdoors to have a picnic. This is where you pack a meal to be enjoyed in the open air, usually in the countryside, beach or garden. It’s a brilliant way to enjoy the sunshine, socialise with friends and family, and tuck into some delicious tasting foods.
Classic picnic foods include great British bakes of sandwiches, scotch eggs, and sausage rolls, but one of the main centrepieces for a picnic is a ‘picnic pie’. The name is self explanatory, this is a decadent pie that is to be enjoyed at a picnic. It’s a classic pie dish, usually having a shortcrust pasty base due to it’s solid structure, avoiding any crumbling/wreckage whilst travelling to your desired picnic location!
The filling options for your picnic pie are endless! From classic chicken and leek; steak and ale, and coronation chicken, to vegetarian options of spinach, dark greens and even Pilau! It’s important to note that many picnic pies have distinctive layers in between fillings.
How do you make layers in a picnic pie?
The construction of layers requires the most attention when making your picnic pie. We recommend having all the layers ready and cool enough to assemble inside the pastry case. Try using a loose-bottomed spring form cake tin, as the pastry won’t stick to the tin and you can easily lift of the pie to serve without wrecking the pastry!
Your first layer should be the strongest of the layers, preferably one that has a low water content, such as potatoes, beef and peppers. You can then start adding your ‘lighter’ ingredients, such as spinach, cheese or mushroom. You can then repeat the process until you have nice, visible layers. Try using colourful ingredients to make the layers really stand out and impress your guests!
How to make a layered vegetable picnic pie
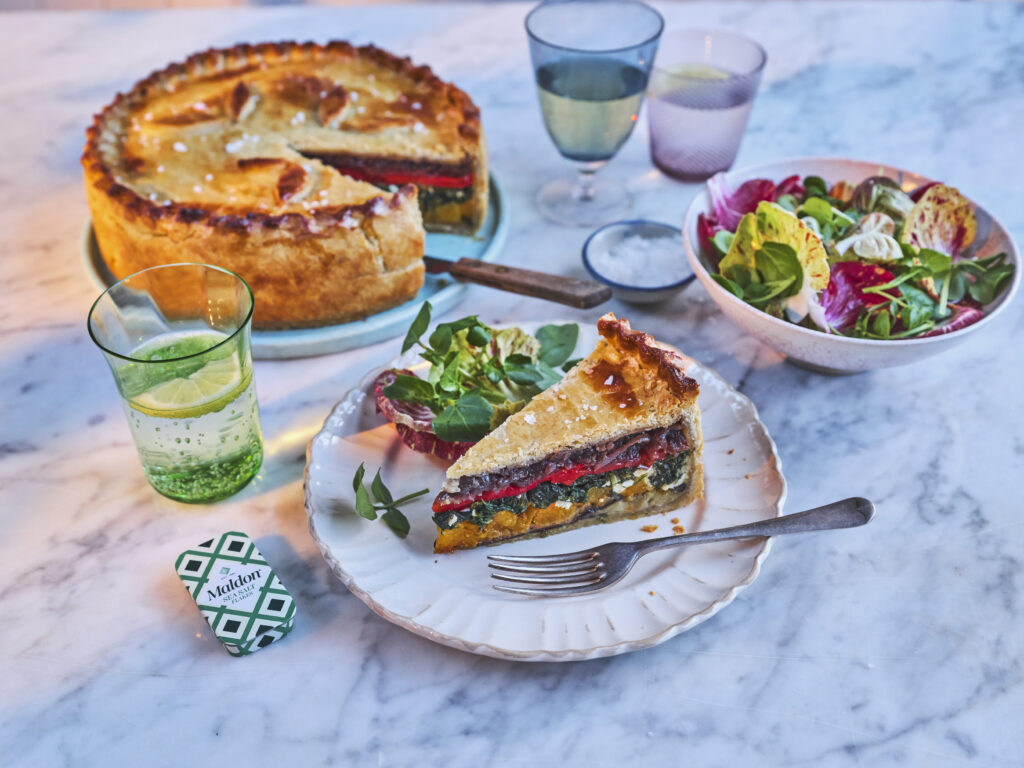
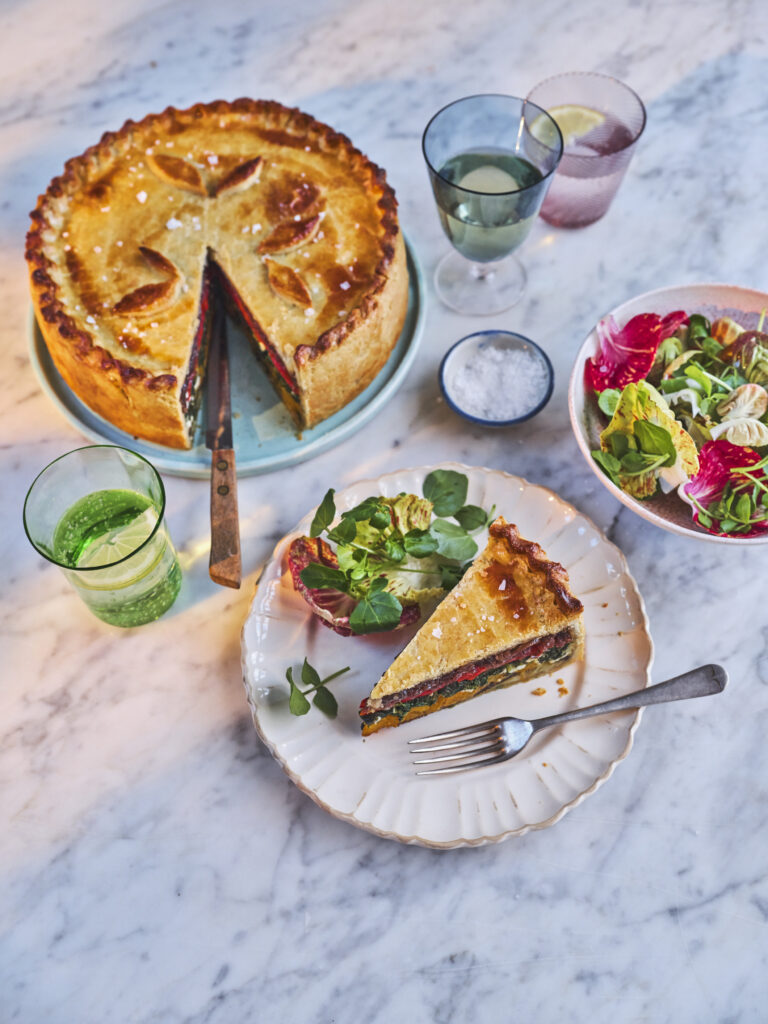
We made a showstopping layered vegetable pie, perfect for a picnic! The layers consist of butternut squash, aubergine, onions, red peppers, spinach and crumbly feta. Once compressed and assembled together, the layers are incredibly vivid – representing the beautiful colours of Springtime.
Making shortcrust pastry:
You can either do this by hand or with a food processor.
By hand, simply measure out the plain flour into a large bowl and add a generous pinch of salt. Then add the cold, cubed butter and use your fingertips to rub the butter into the flour. Keep doing this until no large lumps of butter remain and the mixture resembles fine breadcrumbs.
Add 1 beaten egg to the mix and use a metal knife to cut this through, then use your hands to gently bind the pastry together.
When it has come together as a ball simply tip onto your surface and knead very briefly so the pastry is smooth.
Flatten the ball into a disc shape and then cover in clingfilm and rest in the fridge (for at least 30 minutes) while you make the fillings.
Making the fillings for your pie:
Preheat the oven to 180c.
Peel the butternut squash and then cut into small cubes. Arrange them on a single layer in a baking tray and drizzle with olive oil, cumin seeds and a good pinch of Maldon Sea Salt flakes and some cracked black pepper. Place the butternut squash into the oven and roast for 20 – 30 minutes until the squash is soft and starting to caramelize. Remove from the oven and set aside to cool.
While the butternut squash is cooking you can also prepare the aubergine. Thinly slice both aubergine and lay them across a couple of baking trays in single layers. Drizzle with olive oil, Maldon Sea Salt flakes and then place into the oven for roughly 10 minutes on each side until they are collapsed and slightly charred on each side. Remove from the oven and set aside to cool.
For the caramelised red onions, finely slice all three onions. Heat a large frying pan on a medium low heat and drizzle in a generous amount of olive oil. Add the sliced red onions and fry gently for 10 minutes until softened. Add the crushed garlic and continue to fry for 5 minutes until everything has become soft, jammy, and caramelised. Remove the pan from the heat and allow the onions to cool.
This would be a good stage to line the cake tin with your pastry.
Lining a cake tin for your pastry crust:
Take out the chilled pastry and cut it into 2 pieces, one 2/3 and the other 1/3.
Lightly flour your work surface and then roll out the bigger piece of the pastry first, into a large circle approximately 1cm thick.
Take a 23cm cake tin and carefully lift the large pastry circle and drape into the cake tin. Then press into the base and up the sides, leaving an overhang of pastry over the edges of the cake tin. If your pastry tears or rips at any stage don’t worry, just use your fingers to carefully press the pastry hole together again. Set this in the fridge.
Next roll out the smaller 1/3 of pastry to a circle that is the same 23cm diameter as this will form the top of the pie. Place this onto a lined baking tray and pop into the fridge to chill also.
Making the layers for your pie:
Now you start preparing the fillings. We started with spinach. Place a large pan of water onto boil. Add the spinach to the water and allow it to wilt for a minute only, before immediately draining in a large colander. Run some cold water over the spinach to cool it down quickly and then use your hands to press as much liquid out as possible. Once all the liquid has been removed, tip the wilted spinach into a large bowl and crumble in the feta, the lemon zest and some Maldon Sea Salt flakes and cracked black pepper. Mix to combine and set aside.
Now let’s make the roasted red pepper layer. Simply remove four roasted red peppers from the jar and drain on some kitchen paper to remove the excess oil. Slice them open and set aside.
Remove the lined pastry tin from the fridge and start adding your vegetable layers.
We started with the roasted aubergine at the bottom of the pie.
Then added a layer of the roasted red peppers, followed by the spinach and feta mix. Next add the roasted butternut squash (pressing down gently on each layer so it is well compacted and even) and finished with a layer of the caramelised red onion.
Concealing with a pie lid:
Now take the pastry pie lid from the fridge and cut it to the correct size. Place this on top of the pie to enclose the fillings.
Use the second beaten egg as the egg wash and then fold the pastry overhang to tuck into the lid – use your fingers to create a crimping pattern around the edges to ensure that everything is tightly sealed.
Any extra pastry can be cut off and used to make patterns such as leaves for the top. Use the remaining egg wash to brush all over the pie top.
Cooking the layered picnic pie:
Place it into the oven in the middle shelf for 40 – 45 minutes until golden brown all over.
Remove from the oven and let it stand for 10 minutes before removing from the cake tin.
This can be cooled completely or served warm alongside fresh green salad.
Can you freeze picnic pie?
Once cooked, you can freeze the pie whole or pre-portioned up to 3 months. Make sure that the pie, or individually slices are wrapped well to avoid freezer burn.
What is freeze burn?
Freeze burn is when foods are exposed to cold air, dehydrating the outer layer as moisture is lost. This can make your foods have dry spots once defrosted. You can tell if your frozen foods have freeze burn as ice crystals will appear.
As we celebrate ‘Healthy January’, we are delighted to team up with renowned Chef Richard Buckley and share one of our favourite vegetarian-based recipes from his cookbook.
Richard Buckley is an award-winning chef and owner of The Oak in Bath (UK), a Michelin Green Star recipient.
Buckley was raised a vegetarian and, after graduating with a degree in English Literature, he set about studying vegetable cookery whilst working in a series of top vegetarian restaurants. This culminated in his five-year role as head chef for Demuth’s Restaurant where he developed and refined his plant-centric cooking style. He has a passion for sharing the knowledge and techniques that he has learnt and developed in order to increase the general standard of vegan cookery across the country.
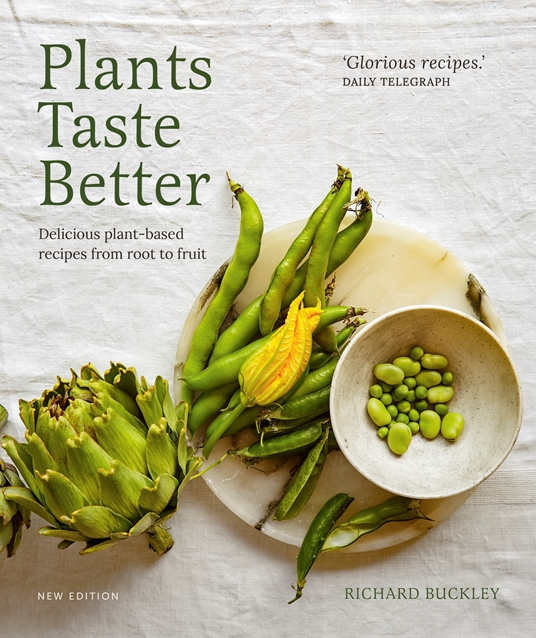
With over 15 years spent studying plants and working at top vegetarian restaurants, Richard released his cookbook: ‘Plants Taste Better’.
Plants Taste Better is a plant-based recipe book, where plants take centre stage on the dinner plate. With over 70 mouth-watering recipes, ranging from the simple to the stand-out, Plants Taste Better will guide and inspire you to get creative with vegan cookery.
This book balances the traditional with modernity to show readers how to make even the simplest ingredients shine. With delicious, thoughtful recipes and stunning images, you will be amazed what you can accomplish in your kitchen when you combine vegetables alongside a deeper understanding of the techniques requested.
Recipes include flavoursome snacks of Fritters and Squash & Hazelnut Pate, to showstopping mains of Carrot, Pea & Cardamom Tagine and Beetroot and Mushroom Casserole. If you have a sweet tooth, try getting your hands stuck into a decadent Chocolate Salted Caramel Taste, or Burnt Peaches.
On the topic of food, let’s share one of our favourite recipes from the cookbook!
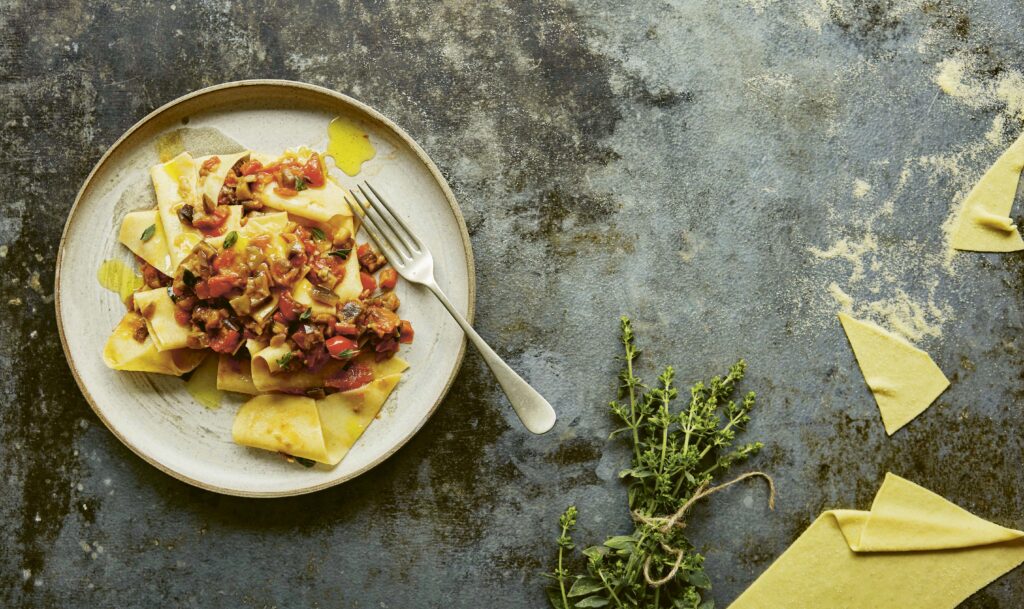
Aubergine (Eggplant) Ragu with Pangrattato and Maltagliati
This dish is a great way of making use of a couple of leftovers: the pangrattato is fried breadcrumbs from a stale loaf – a fantastic thing to have on hand to sprinkle on almost everything that needs a bit of texture – and the maltagliati is essentially pasta offcuts. When you are making a lot of pasta you get left with lots of bits that weren’t quite the right fit; let them dry out and keep them in a pile and you have a quick, easy, free lunch. Obviously, if you aren’t making a lot of pasta then you can just roll out a batch of your favourite pasta and cut it into raggedy shape or alternatively just use your favourite store-bought dried pasta or break up some dried lasagne sheets.
Serves: 4 people
Ingredients:
FOR THE PANGRATTATO:
250g (9oz) stale bread
4 cloves of garlic
extra virgin olive oil
FOR THE SEMOLINA PASTA:
400g (14oz/21/3 cups) fine semolina
235g (81/3oz) warm water
FOR THE RAGU:
75ml (2¾fl oz/1/3 cup) extra virgin
olive oil, plus a little extra if needed
2 aubergines (eggplants), cut into 1cm (1/2-inch) dice
500g (2¼lb) plum tomatoes
1 medium onion, diced
2 cloves of garlic
½ red chilli
2g marjoram leaves
Maldon Sea Salt flakes
freshly ground black pepper
Method:
To make the pangrattato, blitz your stale bread in a food processor or blender to make breadcrumbs – the bigger the crumb the more crunch you get, just remember there is a line somewhere between breadcrumb and crouton. Purée the garlic, add it to the breadcrumbs and rub it in until all the crumbs are coated. Heat a couple of tablespoons of oil in a frying pan (skillet), add the breadcrumbs and fry gently until golden and crispy. Turn onto a baking tray (sheet) to cool and store in an airtight container until needed.
To make the pasta, put the semolina in a pile on a clean work surface. Make a well in the middle and carefully pour in the water, being sure not to let any spill out. Using a fork, whisk the water around, allowing the semolina to fall into the middle slowly. When it reaches the thickness of pancake batter, swap the fork for a dough scraper and chop in the remaining semolina to form a rough dough. Using your hand, bring it together into a rough ball and knead it a couple of times until homogenous but still dimpled and not smooth. Cover with a bowl and leave for 30 minutes to rest.
Knead again; it should become very smooth and silky very quickly. Form it back into a ball, wrap in cling film (plastic wrap), and leave to rest at room temperature for at least 2 hours before using. You can keep it in the fridge overnight, but it will become sticky and harder to work.
When ready to use, either roll the dough by hand using a rolling pin on a lightly floured surface, until it is just a little thinner than a credit card, or roll through a pasta machine following the instructions on page 124. Cut it into rough pieces and leave scattered on the work surface to dry until you need them.
To make the ragu, heat the olive oil in a large saucepan over a medium heat, add the aubergine (eggplant) and cook for up to around 45 minutes until it is broken down to a mush, catching on the pan, browning and existing in the space between dice and purée: be patient, it’s the key to the flavour of this sauce. Remove the aubergine (eggplant) from the pan and set to one side in a bowl. Put the tomatoes in a food processor or blender and blitz to a rough paste. Cook the onion in the same pan as the aubergine until soft, adding a little oil if needed.
Mince the garlic and chilli together, add to the onion in the pan and cook for 30 seconds. Add the tomatoes and cook gently for about 15 minutes until the mixture is thickened and rich. Add the aubergine back in, along with the marjoram, and cook for 5 minutes to bring the flavours together. Season to taste with salt and pepper.
To serve, bring a large saucepan of water to the boil and season as for pasta water (see page 125). Heat the ragu gently in a pan next to it. Add the maltagliati to the boiling water and stir to prevent them sticking. As soon as they float to the surface, lift one out and check its doneness – we are looking for a crisp, al dente texture. If your pasta is freshly rolled this could be as fast as 20 seconds. Using a spider, quickly lift the pasta out into the ragu and stir it through. Using a ladle, add a little of the pasta cooking water to the ragu to create a glossy, creamy texture.
Lay out 4 warmed, rimmed plates or pasta bowls and split the ragu and maltagliati among them. Sprinkle generously with the pangrattato and any leftover herbs.
Purchase ‘Plants Taste Better’ Today
Move aside meat, it’s time to give plants the spotlight in the kitchen! You can purchase your very own copy through Quarto Books today. The perfect gift for your fellow veggie friend…or yourself!
Make sure you have your Maldon Salt ready for these recipes! If you are running out, please feel free to browse on our Where to Buy Page to find your nearest store in which stocks our beloved Maldon Salt.
Lastly, we LOVE seeing your creations – please tag us on Instagram using the #maldonsalt so we can share your own take on Richard’s recipes!
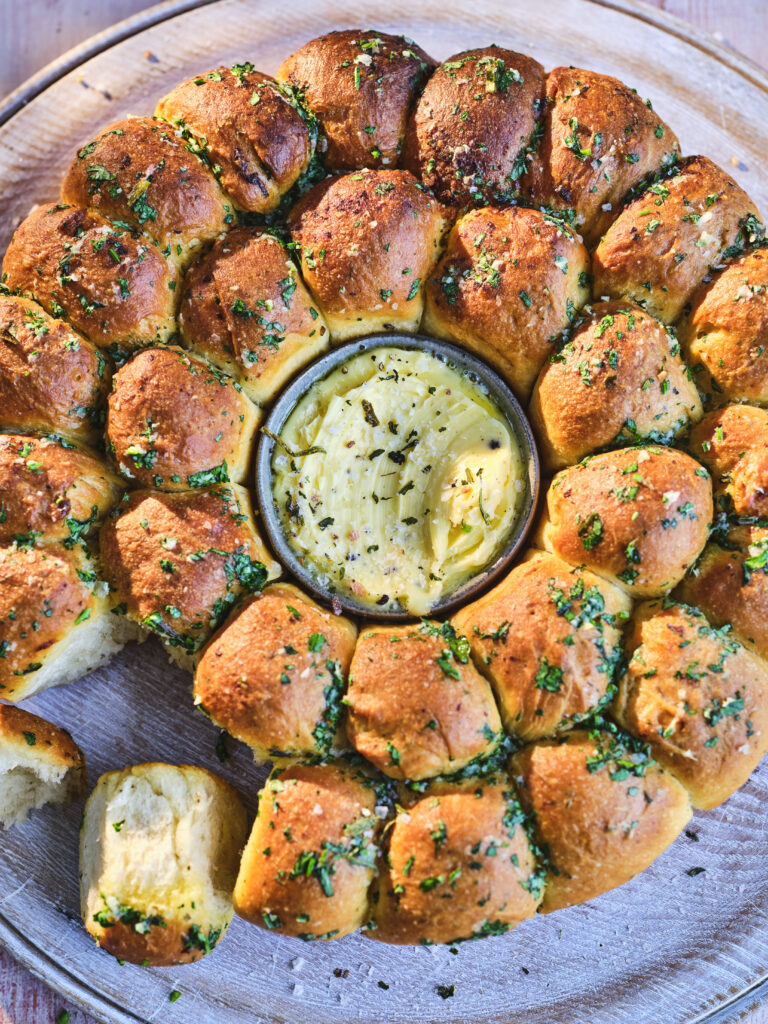
What’s not to love about a freshly baked garlic bread?! Deliciously golden and crispy with an irresistibly soft and spongy centre. This super easy garlic and herb tear and share bread is made using Maldon Garlic Sea Salt; where the flavours of both wild and roasted garlic hugs you as you take your first bite.
What is a tear and share?
A tear and share bread is baked by rolling balls of dough so that they almost take on the form of mini bread rolls. With each corner of the roll, you are allowing a delicious pool of juices to occur, perfect for dipping and soaking up all those tasty, garlic flavours.
A tear and share bread is ideal for dinner party if you are wanting to make a show-stopping dish for your friends and family. You can pair the bread with other dips, including hummus, salsa verde or a herb butter & siracha mayonnaise which all pair nicely with the dough balls.
Garlic bread toppings
We topped our garlic bread with extra garlic cloves and parsley to give a kick of pepperiness to the bread.
Another topping you could do for your garlic bread could be adding shreds of creamy mozzarella, which will transform your garlic bread into a sensational ‘cheesy’ garlic bread. Make sure to melt the cheese under a high temperature to elevate those mild, milky notes of the cheese and really nail that ‘Instagram-worthy’ cheese pull!
If you want to impress your guests, why not transform your garlic bread into a bruschetta. Keep the base of the recipe the same, whilst adding the elements that you would normally find within a classic bruschetta; tomato, onion and anchovy fillets! The flavour combinations are are a match-made-in-heaven with the garlicy undertones.
Here is how to make our tear and share garlic bread recipe…
Lightly oil a 26cm round cake tin.
Place the flour, yeast, salt, sugar, and dried herbs in the bowl of your stand mixer and mix together so it is fully combined. Next place the water, butter and milk into a small pan and gently heat. You want the butter to melt and the liquid to be just tepid – if it is too hot, leave it for a few minutes to allow it to cool slightly. Then pour this liquid into the flour bowl and mix together.
Add the dough hook attachment and knead the dough on a medium speed for about 5 minutes until the dough is smooth and elastic.
Cover the bowl with clingfilm and leave in a warm place for 45mins – 1 hour or until it has doubled in size.
Once the dough has doubled in size, knock all the air out of it and then shape into 30 small, equal sized balls. Place an ovenproof ramekin in the middle of the cake tin and then arrange the balls around the ramekin in circles. Cover the cake tin loosely with clingfilm and then set aside again for approximately 30 mins or until it has doubled in size again.
Preheat the oven to 200C.
Once the bread has had its second prove, it is ready to bake. Place in the preheated oven for 30 minutes until golden brown all over and cooked through. When it comes out the oven brush it all over with a little of the softened butter and sprinkle with the chopped parsley and a pinch of Maldon Garlic Sea Salt.
With the remaining softened butter, mix in the 2 crushed garlic cloves. When it has cooled slightly, remove the bread from the cake tin and place on a serving board. Put the garlicky softened butter in the ramekin in the middle gather round to tear the bread balls and dunk in the garlicky butter! Delicious.
What meals go well with garlic bread?
It goes without saying that garlic bread and pasta is a sensational food pairing. It’s a classic main-and-side dish combo that has been going around for years!Take a delicious rigatoni, infused with smoked aubergine and harissa to give a fiery kick to the dish. Garlic bread will mop up those juices in no time, which giving you that comforting taste of garlic cloves.
If you are looking for something on the lighter side, try pairing your garlic bread with soup. Dipping your garlic bread into a bowl of soup feels like a warm hug on a winter’s day, whilst the flavours from the garlic bread elevate the simple dish even further.
A pairing you should try with your garlic bread is with a bowl of freshly sauteed mussels. The natural broth that is released from when the mussels are steamed allows the perfect amount of dipping and soaking for your garlic bread.
This is the dish to make if you want to really impress your guests this evening. Paired with fresh cucumber, pickle and dill, your taste buds will be singing as you serve up this dish.
Do you need ideas for a main course? Try Lisa’s delicious Harissa Spiced Sticky Lamb Belly, which is paired with a creamy whipped fetta and topped with pockets of pomegranate and almond flakes.
Salt cure:
Begin making the salt cure by blending all the ingredients until combined. Set aside.
Warm cured salmon:
Next, begin making the warm cured salmon.
Evenly cover the salmon loin with the salt cure, then wrap in clingfilm.
Leave to rest for about 40 minutes to let it cure.
Remove from the clingfilm and wash off the salt cure from the salmon, patting dry with a jay cloth.
Re-roll the salmon in clingfilm tight.
Cook on 38°c steam for 30 minutes.
Chill immediately, then cut in to 4 even portions.
To reheat, place back in the steamer or drop into a bath of olive oil and lemon at 52°c for 5/6 minutes.
Remove and plate on a dish.
Champagne sauce:
To make the champagne sauce, sweat the shallots in the butter for 3-4 minutes until soft, no colour.
Add the champagne and reduce until it forms a jam-like consistency. The liquid should start to coat the shallots.
Once reduce, add the crème fraiche, butter and fish stock.
Bring to the boil. Once boiled, place into a blender and blend until smooth. Pass through a fine sieve and season with Maldon Salt.
Finish with a splash of champagne to serve.
Dill Oil:
Chop through the dill with a knife before putting in a thermomixer with the sunflower oil and spinach. Blend at speed 6 for 6 minutes at 70c.
Hang in a tammy cloth over a bowl to drip clear.
Once finished, pour into a small bowl. Add into the diced cucumber and gherkins to to the oil. Mix together gently and season with a little pinch of Maldon Salt.
To plate:
Put a good spoon full of the dill oil mixture into the centre of the bowl.
Place the warm salmon on top.
Foam and spoon around with the hot Champagne sauce.