This recipe was created by Nomadic Dinners, who run immersive woodland feasts as an alternative way of dining. Nomadic welcome you all to dine amongst ancient oak trees, starlit skies and a roaming wildfire in a hidden woodland setting unlike any other. It’s an opportunity to explore a connection with the world around us; where new friendships are foraged around a shared table.
Their ethos remains the same: using food and nature as a catalyst to bring people close together.
You can book a seat for one of their many Woodland Feasts today! Join in to experience a restaurant without walls and no boundaries, where food is a universal language and the story of their Woodland is shown through the dishes that they serve you.
Smoky Cedar Planked Trout Recipe
Cedar planked trout is one of Nomadic’s favourite springtime recipes to grill outdoors at Nomadic Dinners and is a real showstopper if you are looking to up your barbeque game to the next level.
This particular version has a springtime twist using bright green fresh nettle tips to layer over the cedar that combined with Maldon Smoked Sea Salt create a deep earthy flavour and the unmistakable aroma of the great outdoors.
Soak your cedar plank overnight ensuring it is fully immersed. If you can’t be bothered or forget, give it a good soak an hour before. This stops it catching fire and creates more smoke for the fish when it cooks
Blanch nettles in water to get rid of the stingers and layer on top of the board. Layer your trout over the top. Add sliced lemon. Nail in down end to end so it doesn’t flop over. Massage with olive oil, add Maldon Smoked Sea Salt flakes.
Place the cedar plank on the BBQ at a 45 degree angle set far back from the flame so it cooks slowly and wait for the translucent skin to gradually change colour to a beautiful rose colour. Remember to cook to temperature not to time. It will become apparent when the trout is ready (don’t worry about burnt ends, these are delicious).
Nomadic serves this trout dish with a simple foragers salad of hairy bittercress, sorrel, chicory and young spinach leaves, freshly grated horseradish and bonfire potatoes in wild garlic but this fish is so versatile it can pair with almost anything.
What is a picnic pie?
As we head into Spring, many people turn to the outdoors to have a picnic. This is where you pack a meal to be enjoyed in the open air, usually in the countryside, beach or garden. It’s a brilliant way to enjoy the sunshine, socialise with friends and family, and tuck into some delicious tasting foods.
Classic picnic foods include great British bakes of sandwiches, scotch eggs, and sausage rolls, but one of the main centrepieces for a picnic is a ‘picnic pie’. The name is self explanatory, this is a decadent pie that is to be enjoyed at a picnic. It’s a classic pie dish, usually having a shortcrust pasty base due to it’s solid structure, avoiding any crumbling/wreckage whilst travelling to your desired picnic location!
The filling options for your picnic pie are endless! From classic chicken and leek; steak and ale, and coronation chicken, to vegetarian options of spinach, dark greens and even Pilau! It’s important to note that many picnic pies have distinctive layers in between fillings.
How do you make layers in a picnic pie?
The construction of layers requires the most attention when making your picnic pie. We recommend having all the layers ready and cool enough to assemble inside the pastry case. Try using a loose-bottomed spring form cake tin, as the pastry won’t stick to the tin and you can easily lift of the pie to serve without wrecking the pastry!
Your first layer should be the strongest of the layers, preferably one that has a low water content, such as potatoes, beef and peppers. You can then start adding your ‘lighter’ ingredients, such as spinach, cheese or mushroom. You can then repeat the process until you have nice, visible layers. Try using colourful ingredients to make the layers really stand out and impress your guests!
How to make a layered vegetable picnic pie
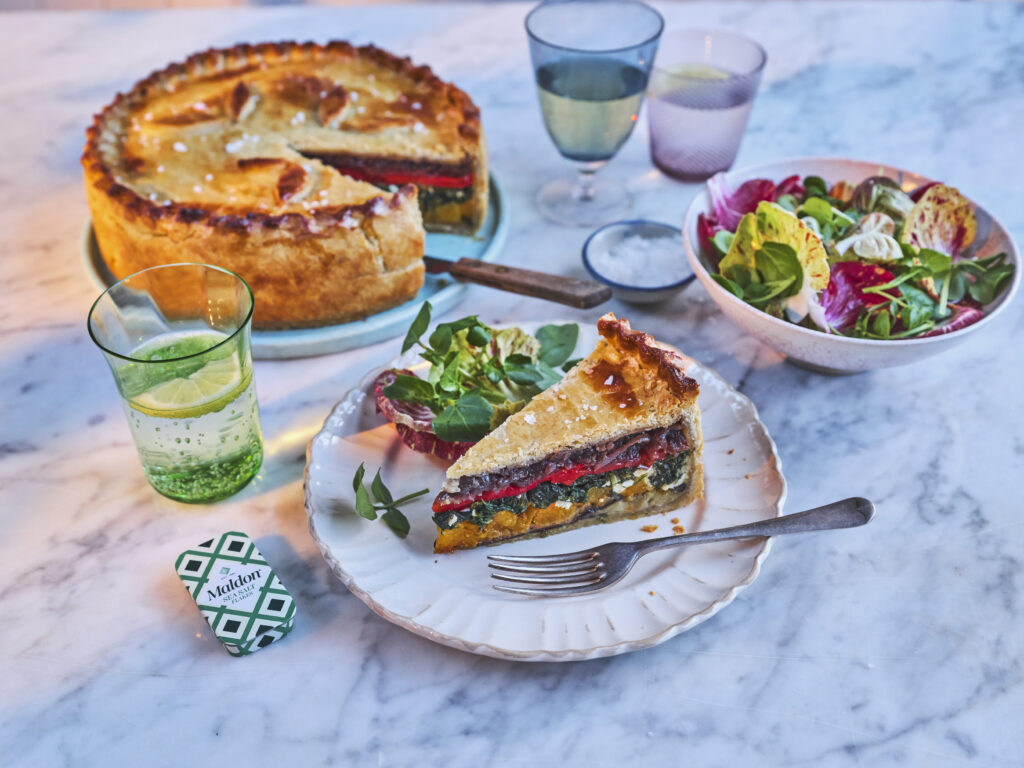
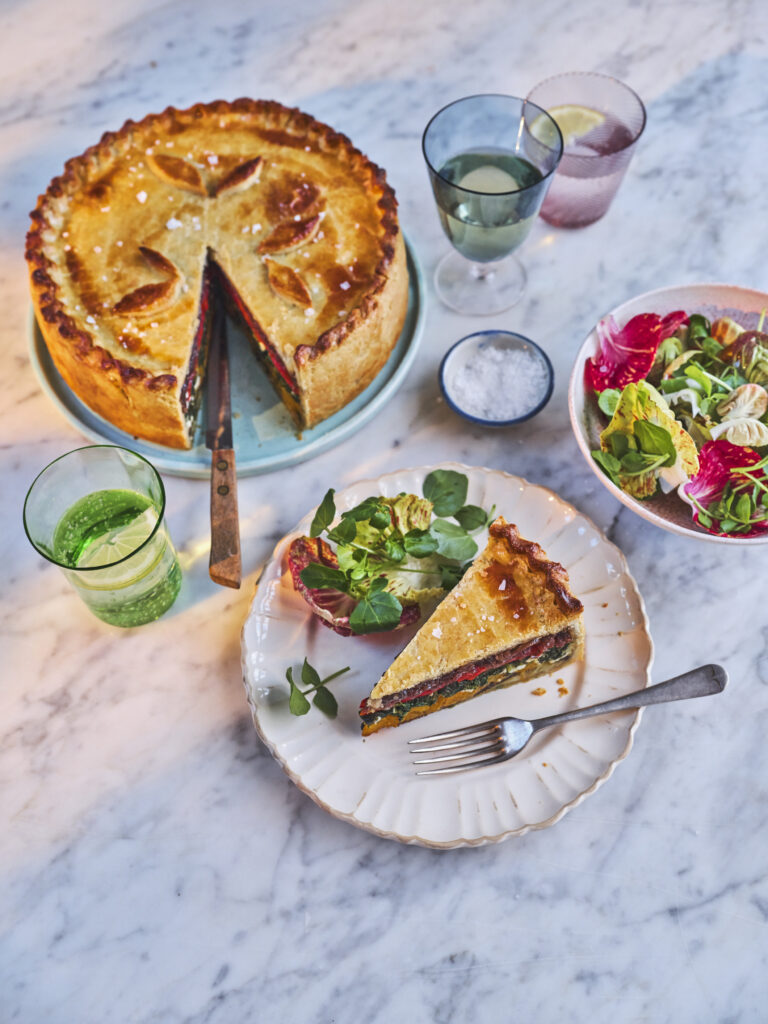
We made a showstopping layered vegetable pie, perfect for a picnic! The layers consist of butternut squash, aubergine, onions, red peppers, spinach and crumbly feta. Once compressed and assembled together, the layers are incredibly vivid – representing the beautiful colours of Springtime.
Making shortcrust pastry:
You can either do this by hand or with a food processor.
By hand, simply measure out the plain flour into a large bowl and add a generous pinch of salt. Then add the cold, cubed butter and use your fingertips to rub the butter into the flour. Keep doing this until no large lumps of butter remain and the mixture resembles fine breadcrumbs.
Add 1 beaten egg to the mix and use a metal knife to cut this through, then use your hands to gently bind the pastry together.
When it has come together as a ball simply tip onto your surface and knead very briefly so the pastry is smooth.
Flatten the ball into a disc shape and then cover in clingfilm and rest in the fridge (for at least 30 minutes) while you make the fillings.
Making the fillings for your pie:
Preheat the oven to 180c.
Peel the butternut squash and then cut into small cubes. Arrange them on a single layer in a baking tray and drizzle with olive oil, cumin seeds and a good pinch of Maldon Sea Salt flakes and some cracked black pepper. Place the butternut squash into the oven and roast for 20 – 30 minutes until the squash is soft and starting to caramelize. Remove from the oven and set aside to cool.
While the butternut squash is cooking you can also prepare the aubergine. Thinly slice both aubergine and lay them across a couple of baking trays in single layers. Drizzle with olive oil, Maldon Sea Salt flakes and then place into the oven for roughly 10 minutes on each side until they are collapsed and slightly charred on each side. Remove from the oven and set aside to cool.
For the caramelised red onions, finely slice all three onions. Heat a large frying pan on a medium low heat and drizzle in a generous amount of olive oil. Add the sliced red onions and fry gently for 10 minutes until softened. Add the crushed garlic and continue to fry for 5 minutes until everything has become soft, jammy, and caramelised. Remove the pan from the heat and allow the onions to cool.
This would be a good stage to line the cake tin with your pastry.
Lining a cake tin for your pastry crust:
Take out the chilled pastry and cut it into 2 pieces, one 2/3 and the other 1/3.
Lightly flour your work surface and then roll out the bigger piece of the pastry first, into a large circle approximately 1cm thick.
Take a 23cm cake tin and carefully lift the large pastry circle and drape into the cake tin. Then press into the base and up the sides, leaving an overhang of pastry over the edges of the cake tin. If your pastry tears or rips at any stage don’t worry, just use your fingers to carefully press the pastry hole together again. Set this in the fridge.
Next roll out the smaller 1/3 of pastry to a circle that is the same 23cm diameter as this will form the top of the pie. Place this onto a lined baking tray and pop into the fridge to chill also.
Making the layers for your pie:
Now you start preparing the fillings. We started with spinach. Place a large pan of water onto boil. Add the spinach to the water and allow it to wilt for a minute only, before immediately draining in a large colander. Run some cold water over the spinach to cool it down quickly and then use your hands to press as much liquid out as possible. Once all the liquid has been removed, tip the wilted spinach into a large bowl and crumble in the feta, the lemon zest and some Maldon Sea Salt flakes and cracked black pepper. Mix to combine and set aside.
Now let’s make the roasted red pepper layer. Simply remove four roasted red peppers from the jar and drain on some kitchen paper to remove the excess oil. Slice them open and set aside.
Remove the lined pastry tin from the fridge and start adding your vegetable layers.
We started with the roasted aubergine at the bottom of the pie.
Then added a layer of the roasted red peppers, followed by the spinach and feta mix. Next add the roasted butternut squash (pressing down gently on each layer so it is well compacted and even) and finished with a layer of the caramelised red onion.
Concealing with a pie lid:
Now take the pastry pie lid from the fridge and cut it to the correct size. Place this on top of the pie to enclose the fillings.
Use the second beaten egg as the egg wash and then fold the pastry overhang to tuck into the lid – use your fingers to create a crimping pattern around the edges to ensure that everything is tightly sealed.
Any extra pastry can be cut off and used to make patterns such as leaves for the top. Use the remaining egg wash to brush all over the pie top.
Cooking the layered picnic pie:
Place it into the oven in the middle shelf for 40 – 45 minutes until golden brown all over.
Remove from the oven and let it stand for 10 minutes before removing from the cake tin.
This can be cooled completely or served warm alongside fresh green salad.
Can you freeze picnic pie?
Once cooked, you can freeze the pie whole or pre-portioned up to 3 months. Make sure that the pie, or individually slices are wrapped well to avoid freezer burn.
What is freeze burn?
Freeze burn is when foods are exposed to cold air, dehydrating the outer layer as moisture is lost. This can make your foods have dry spots once defrosted. You can tell if your frozen foods have freeze burn as ice crystals will appear.
Photo by Min An: https://www.pexels.com/photo/two-person-standing-near-assorted-color-paper-lanterns-1313814/
What is the Lunar New Year?
The Lunar New Year is one of the most celebrated holidays in Chinese culture. It marks the first day of the year in the Lunar Calendar, where celebrations generally run for 15 days. With each day comes a special meaning and traditions to honour, but this can vary between regions and cultures.
It’s important to note that the date of the Lunar New Year changes every year. For 2024, this will occur from 10th February until the 15th Day.
On the first day, many families will visit other family members, starting with the most senior members first. Firecrackers, dragon and lion dances occur to chase away the evil monsters, named Nian.
The remaining days are filled to the brim with festivities; families will visit relatives, friends and temples, whilst eating certain types of dishes in the hopes of a prosperous and hopeful new year. On the final fifteenth day, we end with the Lantern Festival, where people hang glowing lanterns in temples or carry them during a night time parade , marking the first full moon after the Lunar New Year, completing the celebrations.
Photo by RDNE Stock project: https://www.pexels.com/photo/wood-man-red-love-6691853/
The Chinese Zodiac Calendar
For many cultures, each year is associated with an animal from the Chinese Zodiac calendar. There are 12 animals in the Chinese Zodiac calendar, which are the following:
Rat
Ox
Tiger
Hare
Dragon
Snake
Horse
Sheep
Monkey
Rooster
Dog
Pig
Here is the below list for the animals associated with the upcoming years:
10th February, 2024 – Year of the Dragon
29th January, 2025 – Year of the Snake
17th February, 2026 – Year of the Horse
The Year of the Dragon is associated with bravery, strength and luck. As a result, this Lunar New Year will be a time to celebrate Chinese traditions, eating rich cuisine and making wishes for a joyous new year.
Lunar New Year and Dumplings
Dumplings symbolise longevity and wealthy. This is because dumplings look like money pouches, which represent fortune and prosperity for the coming year. More so, dumplings are a great way to spend time with your family, as they are mixed by hand for a certain amount of time to ensure the meat is succulent and juicy. As a result, you can enjoy getting creative in the kitchen with relatives, sharing your appreciation for delectable foods and festivities to come.
In this recipe, we take on the classic Chinese dumplings with a ‘fiery‘ twist to represent the Year of the Dragon. We do this by using Maldon Chilli Sea Salt flakes, which provide a deliciously spicy, aromatic taste that works perfect with the pork meat.
If you like the ‘spicy‘ things in life, we recommend cooking up a few Chicken momos, paired with a beautiful tomato chilli chutney. However, if you are not too keen on the heat, why not whip up our pulled pork bao buns – they buns are so soft and fluffy.
If you are a vegetarian, you can swap out the pulled pork for sticky miso roasted aubergine that mimics the taste and texture of meat.
Recipe created by: https://www.instagram.com/ugcwithnav/
How to make Chinese dumplings
Mix all sauce ingredients (except oil) in a bowl. Heat neutral oil to its smoking point – watch closely, it smokes quickly! – then drizzle sizzling oil over the sauce for a fiery kick.
For the dumpling filling, place the pork, egg, chicken stock, cornflour, Maldon Chilli Sea Salt, sesame oil, shiitake mushrooms, birds-eye chilli and Chinese garlic chives in a large bowl. Mix vigorously for 2-3 minutes.
Place a small teaspoon of filling into the centre of a dumpling wrapper, dab the edges with water and fold the wrapper over the filling. Pinch in the sides and squeeze to create pleats for a classic dumpling look.
Then it’s up to you if you’d like to steam some or pan fry some but we’re doing both!
Place your dumplings in a steamer. On high heat, add 2 cups of boiling water to a wok. Place your dumplings in the steamer, ensure they’re not overcrowded and steam for about 10-15 minutes on medium heat until they look glossy and cooked through.
For that irresistible crispy bottom, heat a teaspoon of neutral oil in a non-stick pan, place your dumplings in the sizzling oil. Ensure not to overcrowd the pan. Once the bottoms are browned (takes 3-4 minutes), add the cornstarch slurry, cover with a lid (10-15 minutes) and cook until they’re cooked through.
Once done, serve up your gorgeous spicy dumplings. Add a final pinch of Maldon Chilli Sea Salt and pair them with your spicy sizzling dumpling sauce!
Happy Lunar New Year!
Recipe created by: https://www.instagram.com/ugcwithnav/
What to serve with Chinese dumplings
A great dish to serve with Chinese dumplings is a hearty chicken noodle soup. The soup is full of a rich, flavourful both and soft noodles that compliments the succulent dumplings perfectly. It’s the perfect way to turn your dumplings from an appetizer to a full meal!
Pairing your dumplings with a refreshing cucumber salad is a match made in heaven! The crispness from the cucumbers provides a wonderful contrast to the soft, warm dumplings.
Why not try using a delicious Chinese Curry sauce to drizzle on top of your dumplings. This sauce is very rich with a bundle of aromatic spices which offer a warm, slightly spicy flavour. You can find most pre-mixed brands in the best retailers, including Goldfish Chinese Curry Sauce.
Can I cook dumplings in an air fryer?
You can air-fry frozen dumplings very easily. Make sure to add an oil spray on top of the frozen dumplings so that they cook crispy and not come out dry. You want to make sure the outside stays nice and golden and cooked perfectly on the inside.
All air fryers cook differently, but we recommend a base time of 6-8 minutes on 380°F/193°C. Flip the dumplings over and continue to cook for another 2-6 minutes until crispy.
If you are wanting to cook Chinese dumplings in the air fryer from scratch, you will need to make sure that the dumpling’s filling is cooked first, especially if you are using meats like pork, chicken or beef. After you have cooked the filling, you can then proceed to making the dumplings following the above recipe, but instead of frying them, pop them in the air fryer for 6-8 minutes, turning them over and cooking for an additional 2-6 minutes until nice and golden.
Can you freeze Chinese dumplings?
According to Expondo, you can freeze dumplings depending on how you prepared them.
Raw dumplings can be stored in the freeze for up to 3 months, whereas cooked dumplings can only be stored in the freeze for 4 weeks. It’s important to note that the dumplings, raw or cooked, should not be touching each other. If they are touching, the dumplings will stick together into a large clump, and once thawed, will rip the dough – ruining the perfect parcel you have created.
As we celebrate ‘Healthy January’, we are delighted to team up with renowned Chef Richard Buckley and share one of our favourite vegetarian-based recipes from his cookbook.
Richard Buckley is an award-winning chef and owner of The Oak in Bath (UK), a Michelin Green Star recipient.
Buckley was raised a vegetarian and, after graduating with a degree in English Literature, he set about studying vegetable cookery whilst working in a series of top vegetarian restaurants. This culminated in his five-year role as head chef for Demuth’s Restaurant where he developed and refined his plant-centric cooking style. He has a passion for sharing the knowledge and techniques that he has learnt and developed in order to increase the general standard of vegan cookery across the country.
With over 15 years spent studying plants and working at top vegetarian restaurants, Richard released his cookbook: ‘Plants Taste Better’.
Plants Taste Better is a plant-based recipe book, where plants take centre stage on the dinner plate. With over 70 mouth-watering recipes, ranging from the simple to the stand-out, Plants Taste Better will guide and inspire you to get creative with vegan cookery.
This book balances the traditional with modernity to show readers how to make even the simplest ingredients shine. With delicious, thoughtful recipes and stunning images, you will be amazed what you can accomplish in your kitchen when you combine vegetables alongside a deeper understanding of the techniques requested.
Recipes include flavoursome snacks of Fritters and Squash & Hazelnut Pate, to showstopping mains of Carrot, Pea & Cardamom Tagine and Beetroot and Mushroom Casserole. If you have a sweet tooth, try getting your hands stuck into a decadent Chocolate Salted Caramel Taste, or Burnt Peaches.
On the topic of food, let’s share one of our favourite recipes from the cookbook!
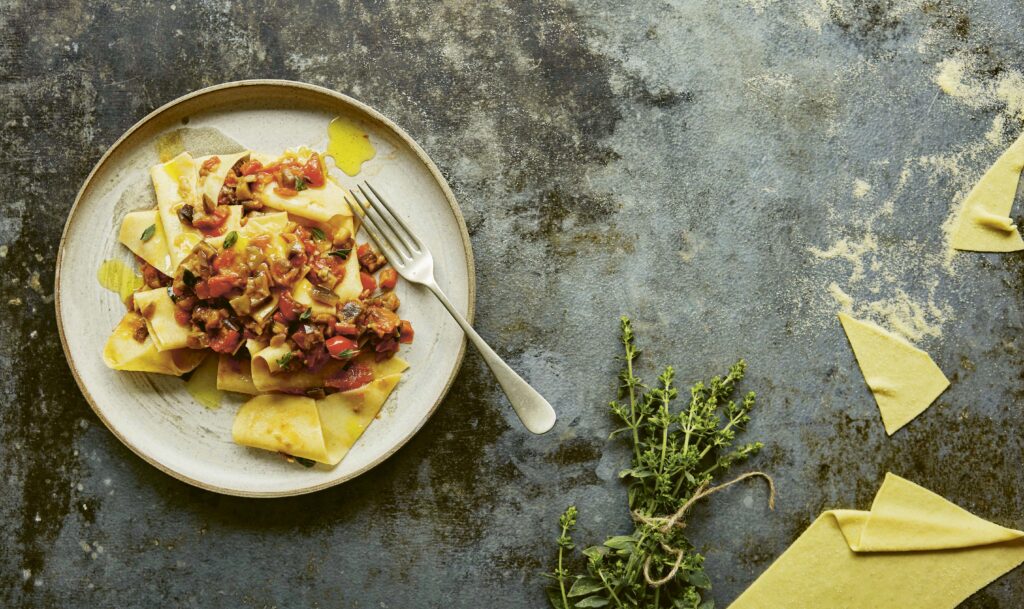
Aubergine (Eggplant) Ragu with Pangrattato and Maltagliati
This dish is a great way of making use of a couple of leftovers: the pangrattato is fried breadcrumbs from a stale loaf – a fantastic thing to have on hand to sprinkle on almost everything that needs a bit of texture – and the maltagliati is essentially pasta offcuts. When you are making a lot of pasta you get left with lots of bits that weren’t quite the right fit; let them dry out and keep them in a pile and you have a quick, easy, free lunch. Obviously, if you aren’t making a lot of pasta then you can just roll out a batch of your favourite pasta and cut it into raggedy shape or alternatively just use your favourite store-bought dried pasta or break up some dried lasagne sheets.
Serves: 4 people
Ingredients:
FOR THE PANGRATTATO:
250g (9oz) stale bread
4 cloves of garlic
extra virgin olive oil
FOR THE SEMOLINA PASTA:
400g (14oz/21/3 cups) fine semolina
235g (81/3oz) warm water
FOR THE RAGU:
75ml (2¾fl oz/1/3 cup) extra virgin
olive oil, plus a little extra if needed
2 aubergines (eggplants), cut into 1cm (1/2-inch) dice
500g (2¼lb) plum tomatoes
1 medium onion, diced
2 cloves of garlic
½ red chilli
2g marjoram leaves
Maldon Sea Salt flakes
freshly ground black pepper
Method:
To make the pangrattato, blitz your stale bread in a food processor or blender to make breadcrumbs – the bigger the crumb the more crunch you get, just remember there is a line somewhere between breadcrumb and crouton. Purée the garlic, add it to the breadcrumbs and rub it in until all the crumbs are coated. Heat a couple of tablespoons of oil in a frying pan (skillet), add the breadcrumbs and fry gently until golden and crispy. Turn onto a baking tray (sheet) to cool and store in an airtight container until needed.
To make the pasta, put the semolina in a pile on a clean work surface. Make a well in the middle and carefully pour in the water, being sure not to let any spill out. Using a fork, whisk the water around, allowing the semolina to fall into the middle slowly. When it reaches the thickness of pancake batter, swap the fork for a dough scraper and chop in the remaining semolina to form a rough dough. Using your hand, bring it together into a rough ball and knead it a couple of times until homogenous but still dimpled and not smooth. Cover with a bowl and leave for 30 minutes to rest.
Knead again; it should become very smooth and silky very quickly. Form it back into a ball, wrap in cling film (plastic wrap), and leave to rest at room temperature for at least 2 hours before using. You can keep it in the fridge overnight, but it will become sticky and harder to work.
When ready to use, either roll the dough by hand using a rolling pin on a lightly floured surface, until it is just a little thinner than a credit card, or roll through a pasta machine following the instructions on page 124. Cut it into rough pieces and leave scattered on the work surface to dry until you need them.
To make the ragu, heat the olive oil in a large saucepan over a medium heat, add the aubergine (eggplant) and cook for up to around 45 minutes until it is broken down to a mush, catching on the pan, browning and existing in the space between dice and purée: be patient, it’s the key to the flavour of this sauce. Remove the aubergine (eggplant) from the pan and set to one side in a bowl. Put the tomatoes in a food processor or blender and blitz to a rough paste. Cook the onion in the same pan as the aubergine until soft, adding a little oil if needed.
Mince the garlic and chilli together, add to the onion in the pan and cook for 30 seconds. Add the tomatoes and cook gently for about 15 minutes until the mixture is thickened and rich. Add the aubergine back in, along with the marjoram, and cook for 5 minutes to bring the flavours together. Season to taste with salt and pepper.
To serve, bring a large saucepan of water to the boil and season as for pasta water (see page 125). Heat the ragu gently in a pan next to it. Add the maltagliati to the boiling water and stir to prevent them sticking. As soon as they float to the surface, lift one out and check its doneness – we are looking for a crisp, al dente texture. If your pasta is freshly rolled this could be as fast as 20 seconds. Using a spider, quickly lift the pasta out into the ragu and stir it through. Using a ladle, add a little of the pasta cooking water to the ragu to create a glossy, creamy texture.
Lay out 4 warmed, rimmed plates or pasta bowls and split the ragu and maltagliati among them. Sprinkle generously with the pangrattato and any leftover herbs.
Purchase ‘Plants Taste Better’ Today
Move aside meat, it’s time to give plants the spotlight in the kitchen! You can purchase your very own copy through Quarto Books today. The perfect gift for your fellow veggie friend…or yourself!
Make sure you have your Maldon Salt ready for these recipes! If you are running out, please feel free to browse on our Where to Buy Page to find your nearest store in which stocks our beloved Maldon Salt.
Lastly, we LOVE seeing your creations – please tag us on Instagram using the #maldonsalt so we can share your own take on Richard’s recipes!
Looking for something to cook this Christmas that doesn’t involve a turkey? We’ve made a delicious slow cooked beef brisket, paired with pomegranates to add delicious sweetness to the dish.
This flavour pairing of pomegranates with meat is very common in Persian cuisine, and has been for thousands of years, where the Persian culture tends to use pomegranates for both sauces and marinades for different meats. The tartness of the pomegranate fruit and molasses gives a delightful brightness to the rich brisket, adding depth as your take your first bite.
Pomegranate molasses can be hard to find at your local grocery, however Odysea has a beautifully sweet & tart Pomegranate Molasses, made from 100% concentrated pomegranate juice.
Why this recipe is perfect for Christmas
Our slow cooked pomegranate beef brisket is perfect for the festive season. This time of the year calls for rich, hearty dishes which is everything that the beef brisket holds. The juices of pomegranate molasses seeps throughout the dish, given a delightful, festive feel. Not only this, the slow cooking of the meat produces rich and beautifully tender results, making your guests want to go in for seconds.
Most importantly, this recipe is simple and effective for Christmas. Once you have you list, prepped and assembled everything into the casserole dish/pot, you simple let it cook away for 5 hours while you go about your business. This makes it IDEAL for such a busy time of the year. Once the time is done, you are greeted with a dish that delivers both in complex flavour, achieved with simplicity.
Here is how to make festive slow cooked pomegranate brisket
Take the meat out the fridge 30 mins before cooking.
Preheat the oven to 120C.
Place a large heavy bottomed casserole pan on the hob and add the olive oil. When it has heated up, add the brisket, and sear it on all sides for approximately 10 minutes – you want the meat well browned as this adds lots of flavour.
Once the meat is nicely browned, remove from the pan and set aside on a plate. Add the onions into the pan with all the meat juices, and fry them until they are soft and starting to caramelize. Then add the garlic cloves, Maldon sea salt flakes and the spices and fry for another few minutes until smelling fragrant.
Next add the apple cider vinegar and allow it to bubble and cook off before adding the soft brown sugar and the stock. Bring the liquid up to a simmer and then add the brisket back to the pot. Place a lid on the casserole and put it into the oven for 5 hours.
Check how tender the meat is by pricking with a fork, it should pull apart and shred very easily. If it doesn’t, then return it to the oven for another 30 minutes. Baste the meat in the juices, and if it’s looking a little dry the splash in some water.
After the meat has cooked, remove from the oven, and rest it under some foil for 10 minutes.
Then shred the meat with two forks and mix into all the juices and sauce. Drizzle in the pomegranate molasses and toss through to make it sticky and unctuous. Transfer to a large platter and scatter with the pomegranate seeds and coriander leaves.
Serve this with some sides, we chose fluffy wild rice, seasonal greens, and warm flatbreads.
What sides go well with beef brisket?
Our Hasselback potatoes are a match-made-in-heaven when paired with beef brisket. The deliciously crispy outer provides an irresistible crunch that compliments the tender meat perfectly. Additionally, the fluffy centres of the potato soak up the remaining juices on the plate, leaving no waste!
If you are wanting a green vegetable, try our roasted Brussels Sprouts, peppered with bacon for a deliciously smoky taste. The earthy and smoky tones of the vegetables balances out the gentle sweetness from the beef brisket that paired with pomegranate.
Lobster, prawns and crayfish are often considered delicacies for a special occasion, so this BBQ recipe with smoky siracha mayonnaise and herbed butter is perfect for a showstopping Christmas feast.
Begin by mixing together the herb butter for your seafood. In a small bowl mix together the softened butter with Maldon Garlic Sea Salt, cracked black pepper, the chopped parsley and coriander. Set aside.
The perfect way to cook your seafood is on a hot BBQ, however if you don’t have one then a griddle pan will work too. Make sure it has reached a medium to high temperate, and start by grilling your lobster halves. Cook flesh side down on the griddle until the meat has turned pink and has some lovely charring on it. The shells will turn orangey pink too, and this is when you know your lobster are cooked. Do the same with the king prawns and crayfish, although these will take less time to cook.
While your seafood is cooking, it is also nice to griddle some lemon to serve alongside. Simply add your lemon halves cut side down onto the grill and allow them to cook and char for 3 minutes.
Once your seafood is all cooked, pile onto a large serving platter and using a pastry brush, brush all across the flesh with your delicious herb butter – letting it melt in. Place your griddled lemon onto the serving platter too.
In a small bowl mix together the mayonnaise and siracha. Serve this alongside the platter of BBQ seafood and allow everyone to tuck in!
This recipe is a classic to make for your family during the week!
Being a tasty cross between a roast and a stew, this traditional French dish is easy to make and can be ready to eat in under an hour!
We add Maldon Garlic Sea Salt into the stock for the chicken to really soak up the juices and have a beautiful fragrant taste of wild and roasted garlic.
Here is how to make the Garlic and Tarragon Chicken…
Start by adding the olive oil in a large, shallow cast iron pan. When the oil has heated up, add the chicken legs to the pan skin side down.
Cook the chicken legs on a medium heat until the skin has gone golden brown and crispy (it is important not to rush this step, as this adds depth of flavour to the dish and tenderises the meat). When the skin is crispy, turn the legs over and cook on the flesh side until it has browned.
When the chicken legs are browned all over, remove them from the pan and set aside on a plate or tray. Turn the heat down and add the whole garlic cloves. Cook them until they are soft and caramelized and then remove from the pan and set aside with the chicken.
Next add the unsalted butter and melt gently. When the butter is foaming, add the plain flour and mix it in quickly with a wooden spoon. Cook the flour for a couple of minutes until it is golden and smelling biscuity. Then add the stock, a ladleful at a time, whisking in each addition to make sure there are no lumps. Allow the sauce to thicken each time before adding the next ladleful.
Once all the stock has been added allow the sauce to bubble and thicken. Then add the wholegrain mustard, lemon juice and zest and double cream. Stir it in and then add the Maldon Garlic Sea Salt and some cracked black pepper.
Place the chicken legs back into the sauce along with the caramelized garlic cloves. Place the lid on the pan and gently simmer this at a very low temperature for approximately 10 minutes or until the chicken legs are cooked through. The sauce should be glossy and creamy, however if it needs loosening add a splash of water or stock.
Finally sprinkle over the tarragon and then serve with your favourite sides – we like to serve it with creamy mashed potato and greens.
Joe Woodhouse; talented Food & Drink Photographer and Cookbook author of ‘More Daily Veg‘ brings us the comforting dish of whole baked baby squash – perfect with a cold, damp autumn day.
When Joe visited Wilding Cider in Chew Magna, North Somerset, run by Beccy and Sam Leach, Sam made this vegetarian dish for their supper. The pair used to run the restaurant Birch in Bristol before setting their sights on cider making.
This simple but warming dish is a perfect foil to coming in from a cold and drizzly day in an orchard. They sat in the barn, swapping ciders and wines for everyone to taste with a roasting fire going in the wood burner.
Joe added a green sauce to cut the richness a bit, but if you get a good-quality sharp Cheddar, it doesn’t need it!
Here is how to make the whole baked baby squash…
Preheat the oven to 200C (400F), Gas Mark 6. With a small knife, cut the tops off the squash in a circular motion to form caps. Scoop out and compost the seeds.
Mix together the cheese, crème fraiche and oats, and add a good couple of pinches of Maldon Salt and a healthy few grinds of black pepper.
Fill the squash with the oat mixture. Replace their lids. Rub each all over with a tablespoon of oil, place on a tray and bake for 25–35 minutes until a knife pierces the flesh easily.
Meanwhile, blend all the sauce ingredients together with salt and pepper. For a coarser sauce, hand chop everything and mix with the oil, which is equally as good, if not better.
Serve the squash with a salad, maybe a few potatoes to make it into a main. Add the sauce on the side and a good bottle of cider, from Wilding preferably!
Joe Woodhouse could happily eat this pie dish every week!
This recipes takes inspiration from spanakopita, which is classic, savoury Greek pie dish made from filo pastry and filled with spinach and creamy feta cheese. It’s the perfect dish that the whole family is happy to eat at any time of the year.
Joe adds sesame seeds to the dough to create an irresistible crunch, but you can also include toasted nuts to the filling, such as pine nuts or pistachios.
Here is how to make the spinach pie…
Heat the oil in a pan over a medium heat. Add the onions with a pinch of salt and cook for 10–12 minutes until soft and starting to colour. They still want to have texture but be at that stage when they go sweet and soft. Add to a large mixing bowl with the rest of the filling ingredients except the spinach.
In the same pan if it is big enough, add the spinach a couple of handfuls at a time and stir to wilt. Repeat until all the spinach is wilted. Remove to a sieve over a bowl and press out as much liquid as you can. Removing and draining in batches is also fine –whatever makes it most manageable.
Preheat the oven to 180C (350F), Gas Mark 4.
Roughly chop through the spinach and add to the rest of the filling. Mix well, taste for seasoning and add more Maldon Salt and black pepper as needed.
Brush your baking tin with butter. Add a sheet of filo and brush with butter. Repeat this for four more sheets. Then add the filling. Fold the overhanging filo sheets over the filling. Then brush the final two sheets with butter and lay on top of each other. Trim these fit the tin exactly. Put the trimmings in the middle of the tin to cover any exposed filling. Lay the final sheets on top. Score the top into six sections. Add the sesame seeds in an even layer. Bake for 45–55minutes. Remove from the oven and allow to sit for 10 –15 minutes before serving.
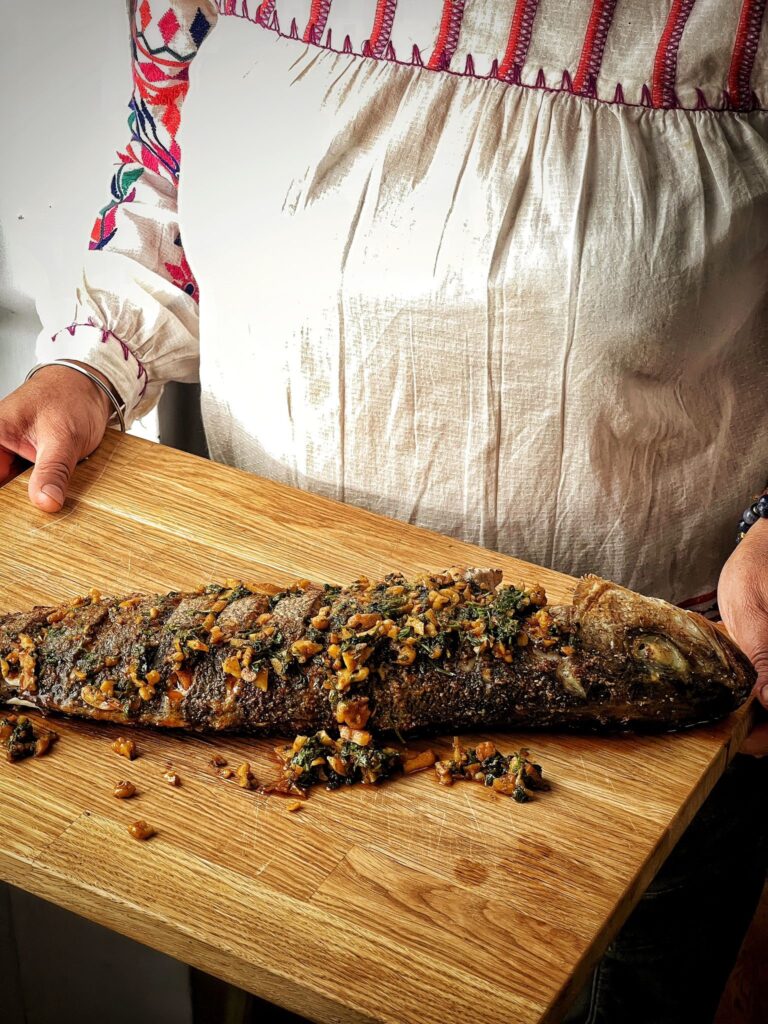
There is something very special about serving a whole fish at the table amongst friends and family, and this recipe will certainly not disappoint! The delicate flavour of sea bass is only elevated further through the spices that Romy infuses within the dish, where a handful of chopped walnuts is added to give an irresistible crunch to the succulent, flakiness of the cooked fish.
Why buy line-caught Cornish sea bass
Cornish sea bass is relatively low-fat fish with a great source of protein. When purchasing your sea bass for this recipe, make sure that it is line caught in local waters.
Line-caught sea bass is a sustainable, traditional fishing method of a simple hook and a line. This method of fishing has minimal environmental impact due to being small scale and not over-fishing., meaning there is no waste fishing. If small fish are caught, they are returned back to the water immediately.
The quality and taste of line-caught fish is of a much higher quality compared to fish farms. It is believed to have a fresh taste as they are not exposed to pollution and debris.
Photography by: Matt Inwood
Here is how to make Romy Gill’s Cornish sea bass recipe…
Chef Romy Gill has used her inspirations as a British/Indian chef and food/travel writer to create a gorgeous sea bass dish, paired with a spice blend that incorporates Himalayan Pink Salt, carefully selected by Maldon Salt’s master salt merchants. Along with the Himalayan salt, Romy infuses the spices of cumin, fennel, coriander seeds and black peppercorns to give a warmth and smokiness to the fish.
How to make the spice blend
To make the spice blend, add all of the spices together with Himalayan Pink Salt, Selected by Maldon, and blend for a few seconds until well combined.
Make 6-7 good slits in the fish in order to rub the spice blend over the surface and into the flesh of the fish.
Marinate the fish both sides with the spice blend, setting aside 1 teaspoon for later.
Rub well, and then drizzle over olive oil and the juice of one lemon.
Once the fish is evenly covered, leave in the fridge for one hour before cooking.
Cooking and dressing for the sea bass
To cook the fish, pre-heat the oven to 200C and cook the fish for 15-20 minutes.
While the fish is cooking, make a dressing. Chop six large cloves of garlic, then 20g of walnuts and finally a large handful of coriander.
Heat a saucepan and add 2 tsp olive oil and then the chopped garlic. Add 1 tsp ghee, cook for a minute, then add the chopped walnuts, stir some more and then add the chopped coriander. Add 2 tsp of paprika and the reserved tsp of your spice blend and combine everything together well.
Finally, add 1 tsp of olive oil and take off the heat.
When the fish is cooked, remove from the oven and place onto plate or board. Immediately spoon the dressing all over the top of the fish and serve straight away and enjoy!
What can you serve with sea bass?
Romy created a dish of roasted stem broccoli, served on a bed of creamy feta that pairs perfectly well with sea bass. The tasty, green crunch of the stem broccoli compliments the succulent, light flakiness of the fish that makes your taste buds sing! When served with feta cheese, it will a subtle burst of creaminess and silkiness as you take your first bite.
If you are looking for a lighter option, you can serve your cooked sea bass along with a simple cucumber salad. Easy, refreshing and bursting with flavour, adding cucumber to the dish will actually help elevate the flavours of the sea bass, making a deliciously balanced dinner.
Romy Gill and Maldon Salt
If you enjoy Romy’s culinary creations as much as we do, then get ready to ‘feast’ your eyes on other delicious recipes that Romy has made using Maldon Salt. From sensational Moong Bean Dal’s to a showstopping Orange and Cocoa Cake, the options are endless!
Plus, we also had the opportunity to do a Q&A with Romy about her heritage and her top food recommendations when celebrating Diwali. Pour yourself a cup of tea and get seated for a wonderful read.