Turn a handful of fresh, summery ingredients into the ultimate sharing dish. These crispy pork lettuce cups pile sticky, glazed pork belly, soft rice noodles and crunchy julienned veg into cool little gem leaves, all brought together with a finishing pinch of Maldon Original Sea Salt flakes. Light, fresh and endlessly moreish, they’re made for picnics, alfresco lunches and lazy summer grazing.
Why You’ll Love These Crispy Pork Lettuce Cups
Made for Sharing: A help-yourself platter that’s as fun to build as it is to eat – perfect for picnics and outdoor entertaining.
Fresh Meets Crispy: Sticky, golden pork belly against cool lettuce, soft noodles and a zingy lime finish hits every texture in one bite.
Quick to Pull Together: Just 20 minutes of prep and a single pan for the pork means minimal fuss for maximum reward.
How to Make Crispy Pork Lettuce Cups (Step-by-Step)
Crisp the pork belly: Cut the pork belly slices into small, bite-sized pieces. Fry in a dry pan over a medium heat for 10–15 minutes, letting the fat render until the pieces turn beautifully golden and crisp – no oil needed.
Glaze until sticky: For the last few minutes, add 1 tbsp soy sauce and 1 tbsp honey to the pan. Let it bubble and reduce to a glossy glaze that coats every piece, then season with a pinch of Maldon Original Sea Salt flakes.
Prepare the noodles: Cook the vermicelli rice noodles to packet instructions, then drain and refresh under cold water to stop them cooking. Toss with the sesame oil so they don’t stick, and set aside.
Mix the dipping sauce: Combine the grated ginger, sriracha, remaining 1 tbsp honey, 1 tbsp soy sauce and the sesame oil in a small bowl. Add a pinch of Maldon Original Sea Salt flakes, then taste and adjust the seasoning.
Assemble the cups: Lay the little gem leaves across a platter and load each one with noodles, carrot and cucumber, then the sticky pork. Drizzle over the sauce, scatter with sesame seeds and herbs, and finish with a final pinch of Maldon and lime wedges to squeeze over.
Tips for the Perfect Crispy Pork Lettuce Cups
Dry-fry for maximum crunch: Render the pork in a dry pan – its own fat does all the work, so there’s no need for extra oil.
Glaze at the very end: Add the honey and soy only in the final few minutes so the sugars turn sticky rather than catching and burning.
Season in layers: A pinch of Maldon Original Sea Salt flakes on the pork, in the sauce and at the finish builds deep, rounded flavour.
Yes. Cook and glaze the pork up to a day ahead and gently reheat to re-crisp, or serve at room temperature. Prep the noodles and veg in advance, but pack everything separately and assemble on arrival so the lettuce stays crunchy.
How do I stop the lettuce cups going soggy?
Keep the components apart until serving and only drizzle over the sauce when you’re ready to eat. Patting the veg dry first also stops excess moisture collecting in the leaves.
Can I adjust the spice level?
Absolutely. Reduce the sriracha for a milder sauce, or serve it on the side so everyone can dress their own cups to taste.
Bring bold, classic American flavours into your kitchen with our latest collaboration featuring recipe creator Chloe Hood.
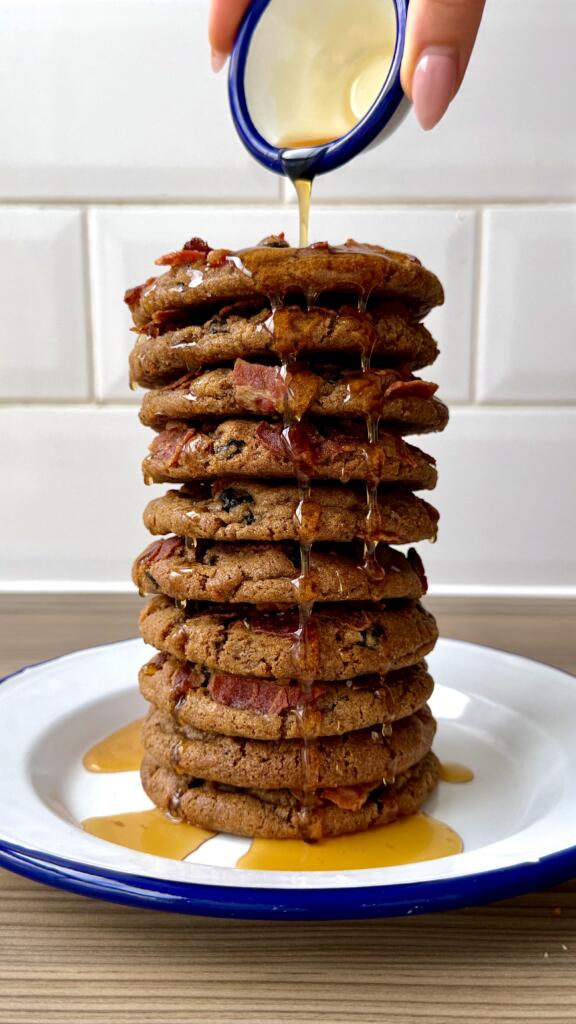
These Blueberry, Bacon & Maple Syrup Cookies are a deliciously unique twist on the sweet-and-salty (swalty) cookie trend, stacked high like an irresistible tower of pancakes and finished with a glossy drizzle of maple syrup.
Crafted with nutty brown butter, rich maple sweetness and chewy pops of dried blueberries, each cookie is studded with smoky, crispy bacon and elevated with the deep, rich flavour of Maldon Smoked Sea Salt flakes. The result is a cookie that’s decadent, surprising, and perfectly balanced – sweet, salty, smoky and buttery in every bite.
Perfect for adventurous bakers, weekend treats, or anyone craving a standout cookie recipe.
How to make Blueberry, Bacon and Maple Syrup Cookies
By Chloe Hood – A Stack of Blueberry, Bacon & Maple Syrup Cookies
Heat butter in a saucepan over a medium heat, stirring continuously, until deep brown and smelling nutty. Cool to room temperature.
Using an electric mixer, beat together browned butter, sugars and maple syrup.
Briefly mix in the egg and vanilla to combine.
In a separate bowl, combine flour, cinnamon, bicarb and Maldon Smoked Sea Salt.
Gradually, using a spatula, fold the dry mixture into the wet.
Before the dough is fully combined, fold in the dried blueberries.
Divide the dough into 10 equal balls (approximately 70g each).
Roll the top half of each dough ball in the bacon pieces.
Place on baking paper, cover and rest in the fridge overnight.
When ready to bake, preheat oven to 180°C (fan).
Space dough balls out on cold, baking paper-lined trays. Bake for 9 minutes.
Remove from the oven and bang the tray on the kitchen counter three times. Then, apply a circular motion around the cookies, using a cookie cutter.
Bake for 4 more minutes.
Repeat tray bangs and circular motion.
Whilst they’re still hot, sprinkle with Maldon Smoked Sea Salt.
Leave for 15 minutes before transferring to a wire rack to finish cooling.
Stacked them up and drizzle over maple syrup!
Made This Recipe? We Want to See!
If you recreated this recipe, don’t forget to tag @maldonsalt so we can admire your delicious stack of cookies. You can find out more details about Maldon Smoked Sea Salt flakes here.
Take your festive favourite to the next level with these irresistible pigs in blankets, glazed in sweet heat and finished with a pinch of Maldon Chilli Sea Salt flakes. Imagine smoky sausages wrapped in crisp bacon, roasted until deeply golden with crisp edges, then coated in a sticky glaze of warm honey infused with a pinch of fiery chilli sea salt…pretty delicious, right?
Always start by lining a roasting tray with parchment for easy clean-up, then roast until sizzling. While they cook, gently dissolve the chilli sea salt into the honey for a fiery-sweet drizzle that clings beautifully as you baste the sausages wrapped in bacon.
Pile these beauties high on a buffet, or make them your make-ahead hero – they freeze and reheat like a dream. Whether it’s Christmas, game day, or a casual gathering with friends and family, these pigs in blankets deliver bold flavour in every bite.
How to Make Pigs in Blankets with Hot Honey
Step 1 – Heat the Oven and Wrap
Heat oven to 180°C fan (200°C conventional / 400°F).
Wrap each chipolata with a rasher of streaky bacon; place seam‑side down on a lined roasting tray.
Tip: Use parchment for easy clean-up and to prevent sticking.
Step 2 – Roast Until Golden
Roast 25–30 minutes until the bacon is deeply golden and sausages are cooked through (juices run clear; 74°C/165°F internal).
Step 3 – Make the Hot Honey
Add honey, Aleppo pepper and Maldon Chilli Sea Salt to a small saucepan.
Warm gently, stirring until the salt dissolves and the honey smells fragrant. Remove from heat; stir in the vinegar. Cool slightly to thicken.
Step 4 – Finish and Serve
Drizzle 2–3 tbsp hot honey over the pigs in blankets. Serve the rest alongside so people can add extra heat.
Tips & FAQs
Tips
For extra crispness, elevate sausages on a rack set over the tray.
Like it hotter? Add a pinch more Maldon Chilli Sea Salt or a dash of chilli flakes.
Mild version: reduce Aleppo pepper by half and add 1 tsp smoked paprika.
Batch cooking: use two trays and rotate halfway for even browning.
FAQs
How long to cook pigs in blankets?
Roast at 180°C fan (200°C / 400°F) for 25–30 minutes until deeply golden and cooked through (74°C/165°F internal).
Can you make pigs in blankets ahead of time?
Yes. Wrap up to 24 hours ahead and refrigerate. Or freeze raw on a tray, then bag for up to 3 months; cook from frozen at 180°C fan, 30–35 minutes.
How do you reheat pigs in blankets?
Oven at 180°C fan (350–400°F) for 8–10 minutes until sizzling. Re‑drizzle with warm hot honey to refresh.
Can I air‑fry pigs in blankets?
Yes. Air fry at 190°C/375°F for 12–15 minutes, shaking once; check doneness, then drizzle with hot honey.
Serving Suggestions
Add to Christmas dinner plates, grazing boards or canapé platters.
Pair with mustard mayo, garlicky yogurt, or cranberry dip.
Garnish with finely chopped chives or parsley; finish with a pinch of Maldon Chilli Sea Salt flakes for sparkle.
Storage & Reheating
Fridge: Cool and refrigerate within 2 hours; store up to 3 days. Keep hot honey in a sealed jar up to 2 weeks.
Freeze: Raw (preferred) up to 3 months. Cooked up to 1 month.
Reheat: Oven 180°C fan (350–400°F) until piping hot (74°C/165°F). Warm the honey gently before drizzling.
Accessibility & Dietary Notes
Contains pork; not suitable for halal/kosher. Contains honey (not for infants under 1). Gluten content depends on sausages used. If vegetarian, ready-made options from brands include Beyond Meat and Quorn. If Vegan, ready-made options from brands include Richmondand Linda McCartney.
Tried this recipe?
Rate it and share your tips in the comments. For more easy Christmas canapés and sides, browse our festive collection.
Preheat the oven to 180C fan.
Toss the sausages, squash wedges, onion wedges, leek chunks, apples, oregano and olive oil in your largest roasting tray. Season with Maldon Sea Salt and lay the sausages on top of the vegetables.
Roast for 25 minutes then remove from the oven and add the stock to the base of the tray. Return to the oven for a further 25 minutes until the sausages are well browned and cooked through.
Meanwhile, for the mash, put the potatoes and parsnips in a large pot of cold salted water. Bring to the boil and cook for 10-15 minutes until the potatoes and parsnips fall off an inserted fork. Drain and leave to steam dry in the colander for a few minutes then return to the pot and mash with the butter. Once at your preferred consistency, stir in the sour cream and season to taste with Maldon Garlic Sea Salt and black pepper.
Scatter the chives over the mash and serve the sausages and vegetables straight from the tray.
If you’re after a quick, crowd-pleasing side or the perfect party snack, these air fryer mini baked potatoes are your new go-to. Made with mall new potatoes, tossed in olive oil and cooked until golden and crispy in the air fryer, they delivery big flavour in bite-sized form. Fork-tender on the inside with irresistibly crispy skins on the outer, each potato is then split and stuffed with cool sour cream, finely chopped chives and crispy bacon piece. A final pinch of Maldon Smoked Sea Salt adds a rich, bold finish that takes these humble spuds to the next level.
How to Make Air Fryer Mini Baked Potatoes with Sour Cream, Chives & Crispy Bacon
Using the air fryer means no fuss and no long oven times – just line the basket with parchments paper, cook the potatoes in a single layer, and in minutes you’ll have perfectly crispy air fryer potatoes ready to serve.
This quick potato recipe is ideal for parties, BBQs, or even a fun side dish for weeknight dinners. They’re also a smart way to use up leftover potatoes – simply reheat and top before serving. Whether you’re entertaining a crowd or treating yourself – these mini loaded baked potatoes are guaranteed to disappear fast!
Prepare and Cook the Potatoes
Preheat the air fryer to 200C. Line the air fryer basket with parchment paper for easy clean-up.
Toss the new potatoes with 2 tbsp olive oil and a pinch of Maldon Smoked Sea Salt. Add the potatoes to the air fryer basket and cook for 15-20 minutes until the potatoes are crisp and fork-tender.
Cook the Bacon
Set the potatoes aside to cool slightly as you add the lardons to the air fryer basket, this time lined with parchment paper. Cook for 5-7 minutes until crisp. Transfer to a plate lined with kitchen paper to soak up any excess oil.
Assemble and Serve
Cut slits on the tops of the potatoes. Dollop each potato with a little sour cream. Scatter over the lardons and chives. Finish with Maldon Smoked Sea Salt and lots of freshly ground black pepper.
Tips
What’s the best potato for this recipe?
The best potato for air fryer mini baked potatoes is a waxy, small variety, such as baby new potatoes, Charlotte potatoes and baby Yukon Golds. This is because these types of potatoes hold their shape well, have a creamy texture inside and create a beautifully crispy skin in the air fryer. Make sure to look for potatoes that are evenly sized for consistent cooking, and avoid starchy varieties like russets that can dry out and crumble when cooked small.
Can this be made vegetarian or vegan?
Yes, this air fryer mini baked potatoes recipes can be easily adapted for a vegetarian or vegan. For the vegetarian version, instead of using bacon, try swapping to a vegetarian bacon alternative. such as Richmond Meat Free Bacon Rashers or THIS Isn’t Bacon Plant Based Rashers. To make this suitable for a vegan, swap sour cream with a plant-based alternative, such as Greenvie Vegan Sour Cream or cashew-based cream.
Can you make air fryer mini baked potatoes ahead of time?
Yes, you can make this recipe ahead of time.
Cook the potatoes in advance. Air fry the mini potatoes until fork-tender and crispy. Store in an airtight container in the fridge for up to 2 days.
Prep the toppings. Chop the chives, cook the bacon (or vegan alternative) and mix the sour cream ahead of time. Keep topping stored separately in the fridge.
Reheat before serving. Reheat the mini potatoes in the air fryer at 180/200C for 5-8 minutes, until hot and re-crisped. Slice, stuff and season just before serving for best texture and taste.
These methods make this recipe ideal for party prep or hosting a dinner party, so you can enjoy the moment without rushing around in the kitchen.
Serving Suggestions
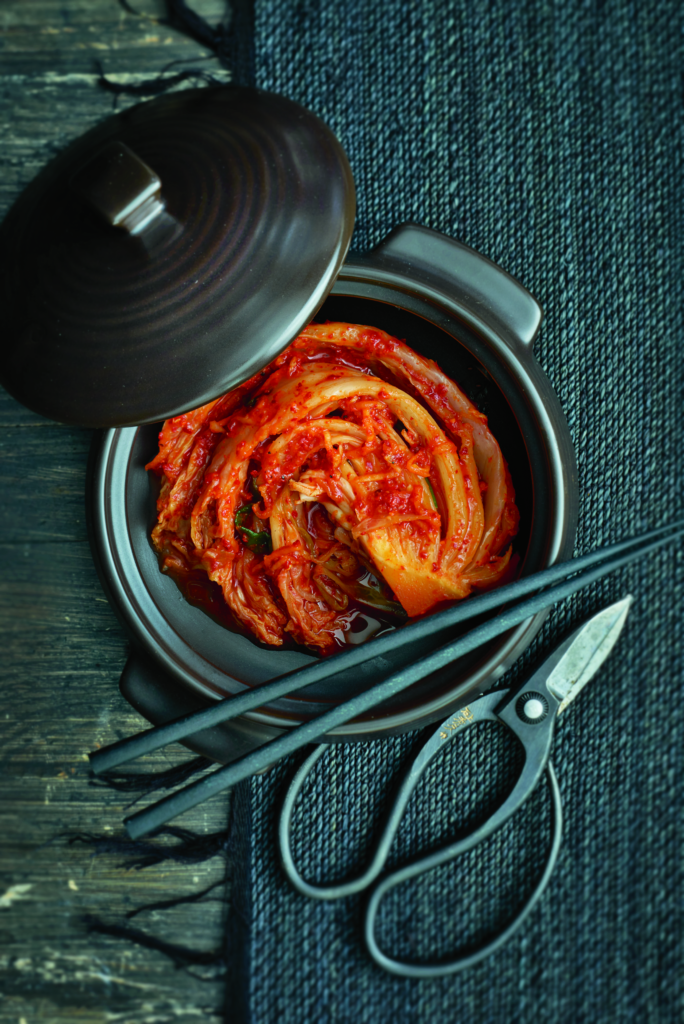
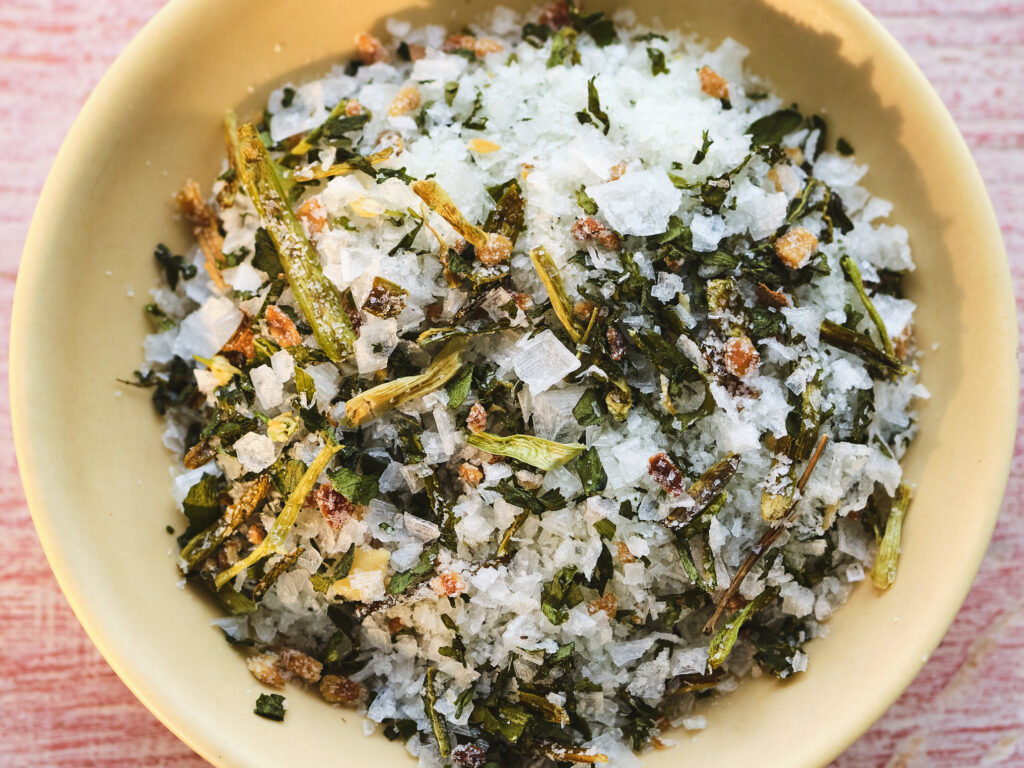
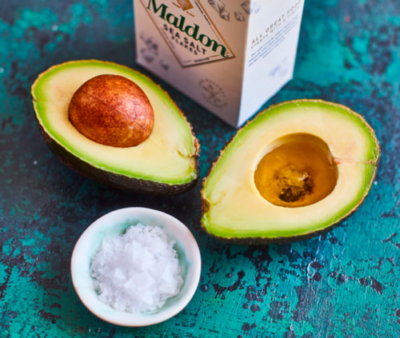
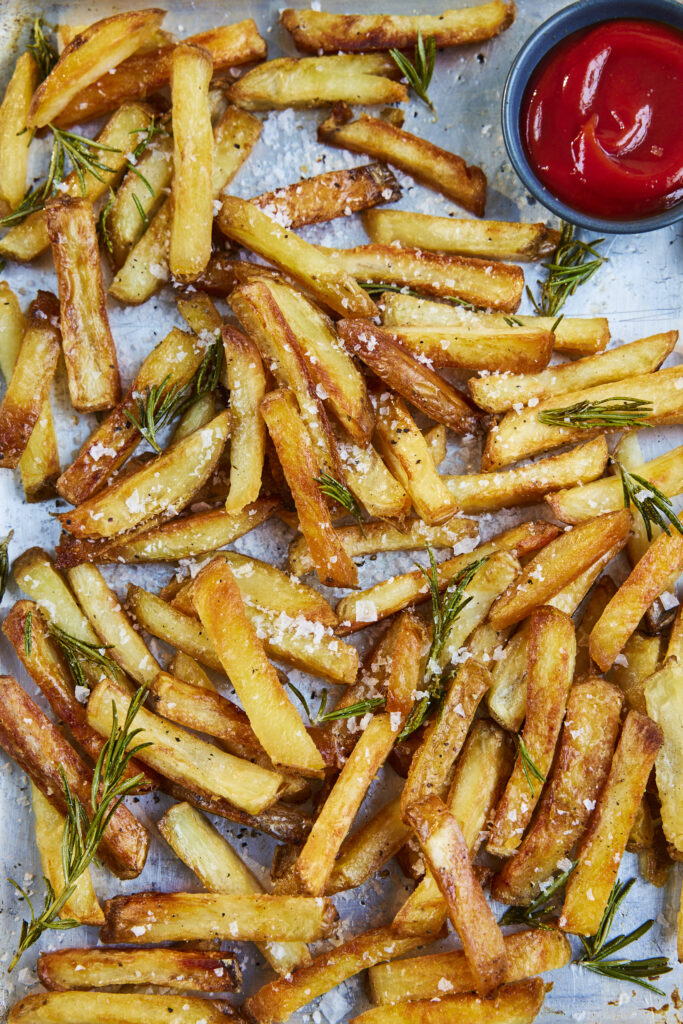
KimchiMaldon Garlic Sea SaltAvocado
Here are some delicious and versatile serving suggestions for mini baked potatoes – perfect as party bites, sides, or even a fun main course!
Let the mini baked potatoes cool completely. Store in an airtight container lined with paper towel to absorb moisture. Store in the fridge for up to 3-4 days. When reheating, pop into the air fryer at 180/200C for 5-8 minutes.
How to store mini baked potatoes in the freezer
Place the mini baked potatoes on a tray lined with parchment and freeze until solid (roughly 1-2 hours). Transfer to a freezer-safe bag or container and store for up to 3 months. When reheating, pop into the air fryer at 180/200C for 12-15 minutes. To speed things up, thaw in the fridge overnight to speed up the reheating time.
If you try this recipe, let us know in the comments! For more easy air fryer recipes, browse our full collection.
There’s something about slow-cooked pork…its deep, smoky sweetness, the way it falls apart under the lightest touch. This one, kissed by Essex oak and cider, is worth the wait.
Annie-Mae Herring’s smoked Essex pork shoulder with a cider BBQ sauce is a true homage to Essex, celebrating it’s rich flavours and local ingredients. Seasoned with Maldon Chilli Sea Salt for a touch of heat and slow-smoked to perfection, this tender pork is finished with a tangy, cider-infused BBQ sauce made from the finest Essex cider. Perfect for gatherings, it’s best piled into soft buns for the ultimate BBQ feast!
Here is how to make smoked Essex pork shoulder
Photography by https://www.instagram.com/theculinarybee/
Rub the pork—massage in the Maldon Chilli Sea Salt, sugar, spices, a splash of oil. Let it sit while the barbecue comes to life.
Set for indirect cooking, low and slow, around 120°C. A tray of water beneath keeps things gentle.
Smoke for 6–8 hours, topping up the wood as needed. Mop with a little cider now and then.
Make the sauce—simmer everything until rich and glossy. Taste. Adjust.
When the pork pulls apart with ease, rest, shred, mix with sauce. Pile into buns, let it drip onto fingers, eat outside with the smell of wood smoke still clinging to your clothes. Essex on a plate.
Indulge in a delicious twist on a brunch classic with these Savoury Eggs Benedict Pancakes with Crispy Bacon, made from scratch. Fluffy, parmesan-infused pancakes replace traditional English muffins, creating the perfect base for layers of crispy streaky bacon, perfectly poached eggs, and a rich, velvety hollandaise sauce. With a hint of chives and a touch of cayenne for added flavour, this dish is a showstopper for any breakfast or brunch occasion. Whether you’re treating yourself to a leisurely weekend meal or impressing guests, this easy-to-make from-scratch pancake recipe delivers a satisfying balance of savoury, creamy, and crispy textures in every bite.
Here’s how to make the savoury eggs benedict pancakes with crispy bacon
Step 1
Start by making the pancake batter. In a large bowl, mix together the self-raising flour and Maldon Sea Salt. In a small jug, combine the milk and beaten egg. Create a well in the centre of the flour, then gradually add the milk mixture, whisking thoroughly after each addition to prevent lumps.
Step 2
Once all the milk and egg have been incorporated and you have a smooth batter, add the grated parmesan and finely chopped chives. Whisk again, then set aside.
Step 3
Preheat the oven to 180°C.
Step 4
Next, prepare the hollandaise sauce. Choose a small glass bowl that fits comfortably over a saucepan without touching the water. Fill the pan with approximately 1 inch of water and bring it to a gentle simmer. In the glass bowl, combine the egg yolks, vinegar, and one cube of butter. Place the bowl over the pan and whisk continuously until the egg yolks thicken slightly.
Step 5
Add the remaining butter, one cube at a time, whisking constantly to ensure each piece is fully incorporated before adding the next. Once all the butter has been added, the sauce should be thick and creamy. Squeeze in the lemon juice, season with Maldon Sea Salt and cracked black pepper, then taste and adjust as needed. Turn off the heat, but leave the bowl over the pan to keep the sauce warm. Whisk occasionally to prevent splitting while you prepare the rest of the dish.
Step 6
Place the streaky bacon on a tray and cook in the preheated oven for roughly 15 minutes, or until it reaches your desired level of crispiness.
Step 7
While the bacon is cooking, heat a medium non-stick frying pan over a medium-low heat. Melt a little butter in the pan, then spoon in some batter to form pancakes approximately 12cm in diameter. Cook for 2 minutes on one side, then flip and cook for another 2 minutes until golden and fluffy. Transfer the pancakes to a plate and repeat with the remaining batter.
Step 8
As you cook the pancakes, bring a pan of water to the boil. Reduce the heat to a gentle simmer, then poach two eggs. Adding a splash of white wine vinegar and swirling the water before dropping in the eggs helps create a neater shape.
Step 9
To serve, stack 3 or 4 pancakes on each plate, then top with crispy streaky bacon and a perfectly poached egg. Finish with a generous spoonful of hollandaise sauce, a pinch of cayenne pepper, and some finely chopped chives. Serve immediately.
How to perfectly poach eggs
Poaching the perfect egg with Maldon Sea Salt is all about precision and technique. Here’s how to achieve it:
Fill saucepan with 2-3 cups of water. Bring to a gentle simmer (not a rolling boil). Small bubbles should rise, but not break aggressively.
Crack each egg into a small bowl first. This prevents shell pieces and makes for an easier transfer.
Stir the water with a spoon to create a vortex/swirling of water. This helps wrap the egg whites around the yolk for a neater shape.
Gently slide the egg into the water. Let it cook for 3-4 minutes for a runny yolk, or 5-6 minutes for a firmer one.
Use a slotted spoon to lift the egg out. Place it on a paper towel to absorb excess water.
Sprinkle Maldon Sea Salt flakes generously over the egg. The delicate crunch and clean taste will elevate the dish. You can also add cracked black pepper and a drizzle of olive oil.
You can try adding your perfectly poached eggs on avocado toast, a salad, or paired with dishes like smoked haddock, sea bass or kedgeree.
Serving suggestions and variations for Eggs Benedict Pancakes with Crispy Bacon
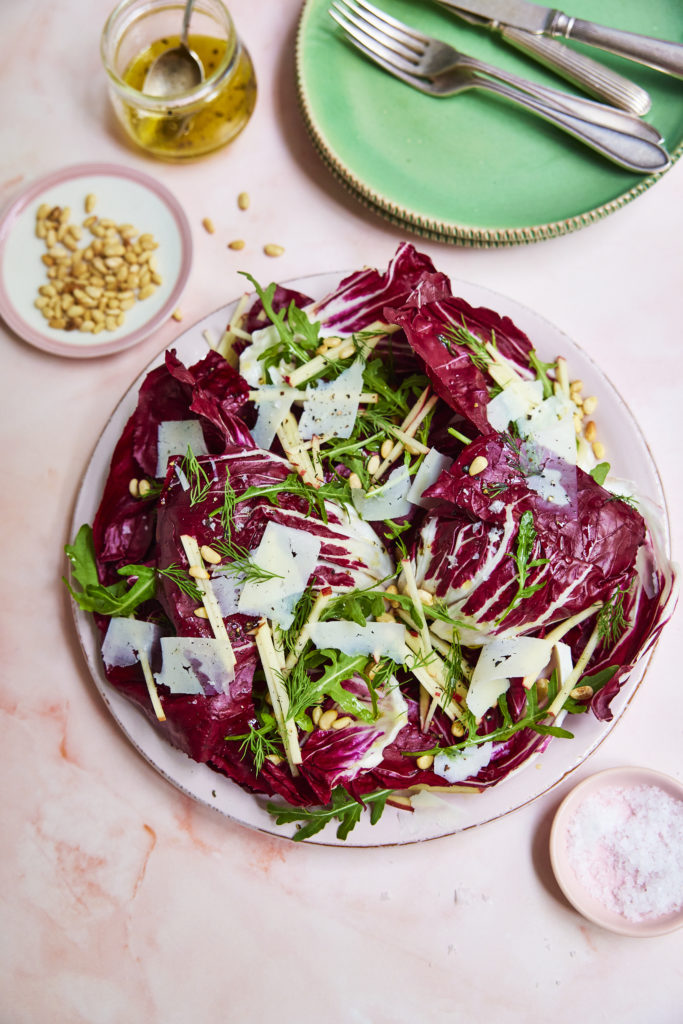
Homemade ‘chunky’ chipsRadicchio salad with pine nuts
Eggs Benedict Pancakes with Crispy Bacon is already an indulgent and delicious dish, buy you can take it to the next level with these following serving suggestions and variations:
Serving suggestions:
Garnishes – Add a touch of freshly cracked black pepper or Maldon Chilli Sea Salt flakes for heat. You can also add chopped chives, parsley or microgreens for freshness.
Drizzles & Sauces – Swap up the classic Hollandaise sauce with a drizzle of maple syrup for that sweet-savoury contrast with the crispy bacon. Additionally, a spoonsful of truffle-infused hollandaise adds a gourmet touch to the dish.
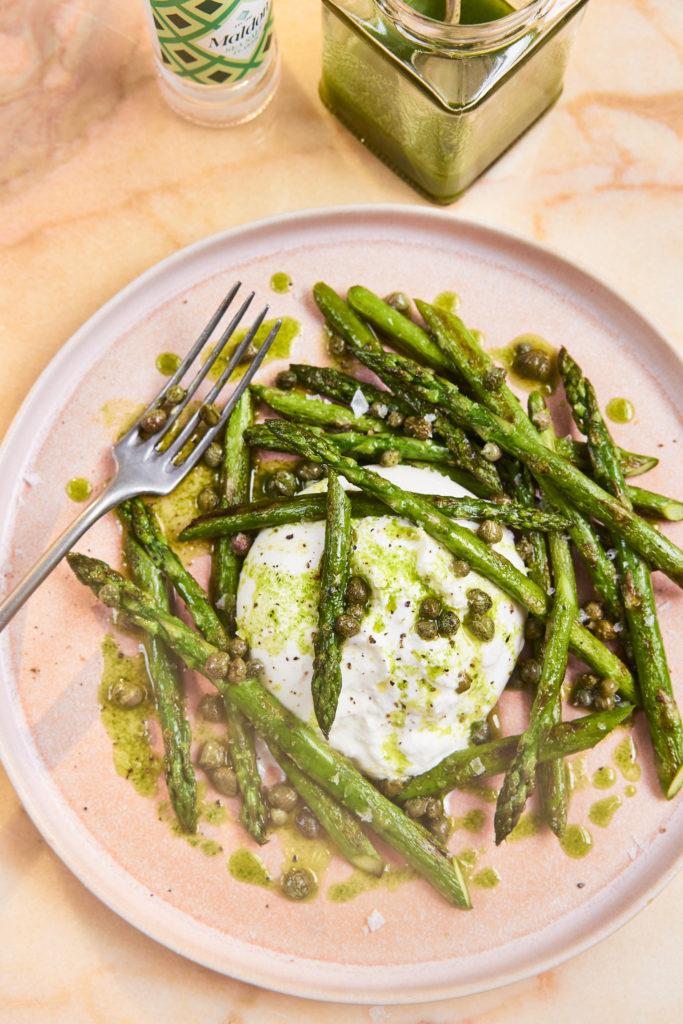
Sides Dishes – Add a few has browns or homemade chips for extra crunch. If you’re wanting to balance the richness, pair the dish with a fresh salad with a lemon vinaigrette. You could also add a handful of grilled asparagus or sautéed spinach for a veggie boost.
Variations:
Smoked Salmon Twist – Swap the bacon for smoked salmon for a more refined, lighter dish. You can also add capers and red onion for extra depth.
Southern-Style Benedict – Use buttermilk pancakes and top with crispy fried chicken instead of bacon. You can drizzle with hot honey for a bold flavour.
Yes, you can make pancakes with plain flour! While many recipes, such as our pancake stack with caramelised apples, requires self-raising flour for fluffier pancakes, plain flour works just as well – you just need to add a raising agent like baking powder to help them rise.
Our iconic blueberry pancakes recipe uses plain flour instead of self-raising flour, and they are delicious!
Method:
In a bowl, whisk together plain flour, baking powder, sugar and salt.
In a separate bowl, whisk the egg, milk and melted butter.
Gradually pour the wet ingredients into the dry, whisking until smooth.
Heat a non-stick pan over medium heat, lightly greased with butter. Pour in small amounts of batter, flip and cook when bubbles form on the surface.
Stack your pancakes with syrup, fresh fruit, or even crispy bacon.
Can you use bread flour for pancakes?
Yes, you can use bread flour for pancakes, but it will change the texture.
What happens when you use bread flour?
Bread flour has a higher protein content (more gluten), which makes pancakes slightly chewier rather than light and fluffy.
If you prefer denser, hearty pancakes, bread flour works well, especially for American-style pancakes.
To keep pancakes soft, you can mix bread flour with plain flour or a bit of corn flour for balance.
How to use bread flour in pancakes
Add a bit more liquid (milk or water) to loosen the batter.
Let the batter rest for 10-15 minutes to relax the gluten, making the pancakes softer.
Use baking powder to help with the fluffiness.
Can you make pancakes without flour?
Believe it or not, you can actually make pancakes without flour! Here are a few flourless pancake options.
Banana Pancakes
1 ripe banana
2 eggs
Optional: cinnamon, vanilla or baking powder for fluffiness
Instructions:
Mash the banana with a fork and mix with the eggs.
Cook on a greased pan over medium heat for about 2 minutes per side.
Oatmeal Pancakes
1 cup of rolled oats, blended into oat flour
1 egg
1/2 cup milk, or nut-milk alternative
1/2 tsp baking powder
1/2 tsp vanilla
Optional: sweetener, cinnamon.
Instructions
Blend oats into flour, then mix with other ingredients.
Cook on a greased pan over medium heat for about 2 minutes per side.
Can you make pancakes without milk?
Yes, you can make pancakes without milk by using water or a milk substitute.
Instead of milk, you can use:
Water – leaves a neutral taste and slightly less rich pancakes.
Almond milk – makes light and slightly nutty pancakes .
Oat milk – makes creamy and slightly sweet pancakes.
Coconut milk – makes rich and flavourful pancakes.
Soy milk – adds protein and richness to your pancakes.
Can you make pancakes with corn flour?
Yes, you can make pancakes with corn flour. They turn out light and slightly sweet. Corn flour pancakes can also gluten free and dairy free.
Ingredients:
1 cup corn flour
1 tsp baking powder
1 tbsp sugar (optional)
1/4 tsp sea salt
1 egg
3/4 cup milk (or water for dairy-free)
1 tbsp melted butter or oil
Instructions:
In a bowl, whisk together all the dry ingredients; corn flour, baking powder, sugar and sea salt.
Stir in the egg, milk, melted butter. Mix until smooth.
Heat a greased pan over medium heat. Pour small amounts of batter.
When bubbles form, gently flip and cook until golden. Make sure to flip carefully, corn flour pancakes can be delicate.
Can you make pancakes with coconut flour?
Yes, you can make pancakes with coconut flour, but since it absorbs a lot of liquid, you’ll need more eggs and moisture than regular flour. Coconut flour pancakes are fluffy, slightly sweet and low in carbs.
Ingredients:
1/4 cup coconut flour
2 eggs
1/4 cup milk
1/2 tsp baking powder
1 tbsp melted butter, or oil
A pinch of sea salt
Instructions:
Mix the dry ingredients into a bowl.
Stir in eggs, milk and melted butter. Let it sit for a minute so that coconut flour absorbs the moisture.
Heat a greased pan over medium-low heat. Pour small amounts of batter in.
Flip carefully once bubbles start to form. Cook until golden brown.
Can you make pancakes with gluten free flour?
Yes, you can make pancakes using gluten free flour. Simply add the total amount of flour called for in the recipe, and use that amount of the gluten free flour instead. We like to use Freee Gluten Free Plain White Flour when making gluten free, American-style pancakes.
How long can you keep pancake batter?
How long you can keep pancake batter depends on the ingredients and storage method.
We do not recommend keeping pancake better stored at room temperature for longer than 1-2 hours after it’s been made. This is because batter contains eggs and dairy, which can grow bacteria and cause illness.
You can store in the refrigerator for up to 2 days in a airtight container. If the batter contains baking soda or baking powder, pancakes may be less fluffy overtime.
Can you freeze pancake batter?
Yes, you can freeze pancake batter for later us. Pour the batter into freezer-safe bags or airtight containers. Store in the freezer for up to 1-2 months, laying the bag flat to save space.
When you want to use the frozen pancake batter, make sure to thaw the mixture overnight in the fridge, or placing the sealed bag/container in warm water for quicker defrosting. Stir before using to re-incorporate any separated ingredients. Cook as usual on a greased pan.
Dan Dan Noodles are a beloved Sichuan classic, famous for their bold, spicy and savoury flavours. This dish combines tender noodles with a rich, aromatic sauce, creating a comforting bowl that excites the taste buds. While traditionally complex, this recipe simplifies the process without sacrificing flavour. It features a luscious sauce made with sesame paste (or tahini), soy sauce, Chinese black vinegar (or white rice vinegar), sugar, sesame oil, chilli oil, ground Sichuan pepper and a pinch of Maldon Chilli Sea Salt. The pork topping is made with ground pork blended with fragrant peanut oil, minced ginger, and the vibrant heat of Maldon Chilli Sea Salt. The result is a perfect balance of spice, saltiness, and umami that coats every strand of noodle.
For the noodles, thin wheat noodles are ideal for absorbing the sauce, creating a silky and satisfying texture. A handful of choy sum (or bak choy) adds a pop of colour and a hint of freshness, complementing the rich flavours. Garnish with sliced spring onions, crushed peanuts for a nutty crunch, and an extra pinch of Maldon Chilli Sea Salt for a burst of spice to finish. This quick and easy recipe ensures you can enjoy a bowl of spicy Dan Dan noodles at home, perfect for busy weeknights or a satisfying treat anytime.
Prepare the sauce:
In a bowl, whisk together sesame paste, soy sauce, dark soy sauce, black vinegar, sugar, sesame oil, chili oil, and ground Sichuan pepper. Adjust seasoning if necessary.
Set aside.
Cook the pork:
Heat peanut oil in a wok or pan over medium heat. Add minced ginger and stir-fry until fragrant.
Add the ground pork and cook until browned, breaking it into small pieces.
Stir in the sui mi ya cai, Shaoxing wine, soy sauce, and Maldon Chilli Sea Salt. Cook for another 2–3 minutes until well combined and aromatic.
Set aside.
Cook the noodles and blanch the choy sum:
Bring a pot of water to boil.
Cook noodles according to package instructions. Blanch the choy sum for about 30 seconds until vibrant and tender.
Assemble the bowls:
Add the sauce to the bottom of the bowl. Add the cooked noodles and toss to coat them in the sauce thoroughly.
Top with the cooked pork mixture and blanched choy sum.
Sprinkle with crushed peanuts, spring onions, and a light dusting of Maldon Chilli Sea Salt for an extra kick. Add more chili oil if desired.
Serve immediately
Mix everything together in the bowl before eating for the best flavour and enjoy!
Looking for a hearty and satisfying meal to warm up those cold evenings? This comforting chorizo and butter bean stew is the perfect solution, brimming with bold flavours and velvety texture. Whether you’re embracing Veganuary or simply craving a wholesome plant-based dish, this easy butterbean stew recipe is sure to become a family favourite. Infused with the smoky warmth of smoked paprika, tender butter beans and a hint of Maldon Sea Salt flakes, this stew pairs beautifully with a slice of crusty bread for the ultimate cosy dinning experience.
Here’s how to make a chorizo and butterbean stew
This butter bean stew is a delicious and hearty dish that’s perfect for any time of year. Packed with vibrant flavours from rosemary, garlic, and chorizo, it’s both comforting and nourishing.
Step 1:
Start by taking a large shallow pan and placing on a medium heat.
Step 2:
Melt the olive oil before adding the sliced onions and a pinch of Maldon Sea Salt flakes. Cook these gently for 2-3 minutes until softened.
Step 3:
Add the sliced garlic, rosemary, smoked paprika and chorizo and fry for another 5 minutes until the garlic smells fragrant and the chorizo begins to crisp.
Step 4:
Add the tinned tomatoes, followed by the butterbeans. (We used Bold Beans butter beans, but you can use lima beans or white beans if preferred). Stir well and allow the mix to bubble and thicken for 5 minutes. You should have a rich tomato base to create the perfect balance of flavours.
Step 5:
Stir the spinach and allow it to wilt into the sauce. Zest the lemon into the pan and season with more Maldon Sea Salt flakes and cracked black pepper.
Step 6:
Serve the stew sprinkled with parsley, crumbled feta (or vegan alternative ), and some toasted sourdough for dunking and soaking up the last of the juices!
How long can you keep the chorizo and butter bean stew in the fridge?
Once your stew is cooked, you can store it in the fridge for up to three to four days. You need to make sure that the stew is packed in a secure, airtight container before refrigerating it within two hours of cooking.
Please note that stews made with fish or shellfish should only be refrigerated for no more than a day.
Can you freeze cooked chorizo and butter bean stew?
You can freeze the chorizo and butter bean stew for up to three months once cooked. We recommend not eating it after three months because although it would still be safe to eat, it might not taste as good!
Make sure to store the stew in a secure, airtight container. When you are ready to eat the stew, place the frozen stew in the refrigerator to thaw slightly for at least 24 hours but no more than 2 days before reheating. You can reheat the stew by placing it in a saucepan on the stovetop over low heat, stirring occasionally until heated through.
Alternatively, you can reheat it in the oven at a low temperature, ensuring you stir periodically to prevent burning and ensure even heating throughout.
If you want to reheat the stew in a microwave, you need to make sure that the stew is covered with a microwave-safe lid or plastic wrap. This will trap steam and keep the stew nice and moist. Microwave on high for 1-2 minutes, or until the stew is warmed through.
Easy, butter bean recipes
If you’re looking for more easy butter bean recipes to make during the week, why not try a few of our favourites from our friends at Maldon Salt.
This is Rukimini Iyer’s butterbean recipe from ‘The Green Cookbook’. She roasts carrots with coriander seeds under foil, while the rich, silky butter bean mash takes just 10 minutes to put together. This recipe is a substantial, flavour-packed dish which is incidentally vegan!
Scorched by Genevieve Taylor (6th-7th September 2023)
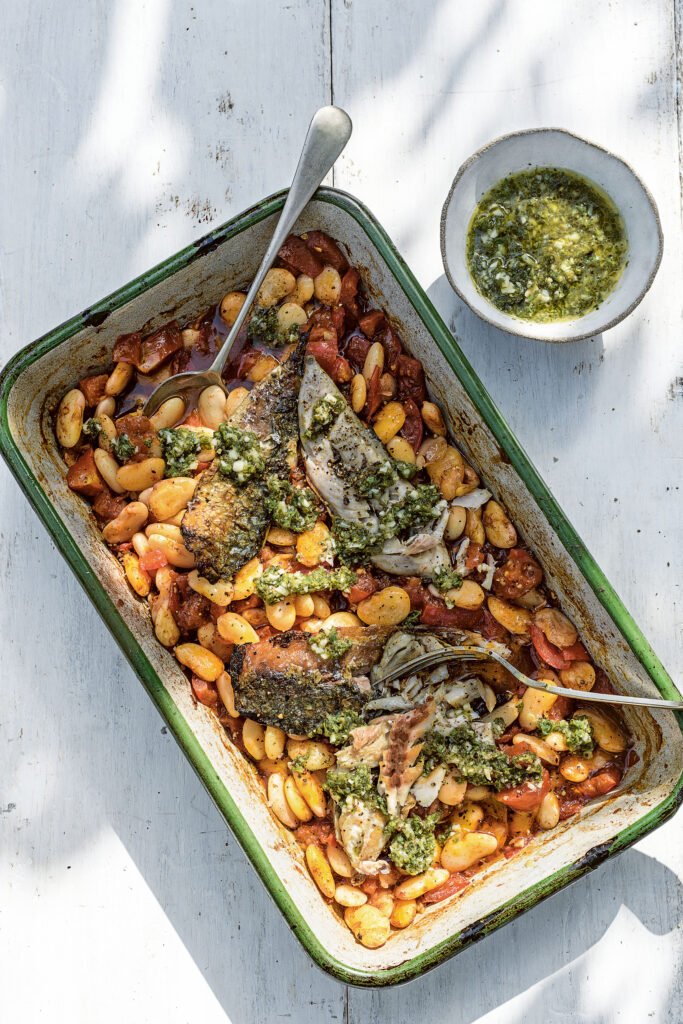
Genevieve Taylor loves fish and meat proteins, but she also adores pulses and tries to eat them several times a week! Cheap and cheerful, a bowlful of beans is an excellent way of making your mackerel go a little further. Fresh oregano is one of Gen’s favourite herbs, giving a slightly floral note to the pesto-style dressing.
Although white beans are not the same as butter beans, they are both types of white beans. White beans have a creamy, mild taste and can often be used interchangeably in recipes. This recipe, we used Bold Bean & Co’s Organic White Beans (haricot beans), which are perfect to use for this dish as their bean’s are slow-cooked which allows them to hold their shape when simmering in a stew, creating the perfect, buttery and smooth flavour.
Start by assembling your toasted sandwich. Take each slice of sourdough bread and spread the outside of each with mayonnaise. Then fill by spreading a tsp of Dijon mustard, followed by the leftover turkey meat – this is a good point to season the toastie with a pinch of Maldon Chilli Sea Salt and some black pepper. Top this with the sliced up leftover stuffing and pigs in blankets. Then top with slices of brie. Finally finish with a generous amount of cranberry sauce then sandwich the top slice of bread on top.
Place a heavy bottomed pan on a medium heat and add the knob of butter. When melted add your sandwich, then use a heavy weight to press it down. Allow this to cook on one side for approximately 3 – 5 minutes before lifting the weight and carefully flipping the sandwich. The other side should be golden and crisp on the bottom. Add the weight back on and cook the other side for the same time.
As soon as the toastie is done, remove it from the pan and cut in half. The cheese should be oozy, and you can serve it with a cornichon and cocktail stick in the top. It is delicious served with warm leftover gravy for dunking.