Peel the potatoes and cut them into 3 or 4 pieces, then rinse them.
Place the potatoes in a large pan, cover with water and add 1 teaspoon of Maldon Salt. Bring to the boil and simmer for 10 minutes or until the potatoes are almost cooked.
Drain the potatoes in a colander, and leave them in it; give them a good shake. The potatoes need to be shaken up to give them a rough exterior without breaking them up, as this will give them a crispy outside when cooked.
Melt the goosefat in a pan. Place the potatoes in a heavy roasting pan and cover them with the fat. Add the sprigs of herbs and garlic and roast for 40 minutes or until golden brown.
How to create:
Run the lime wedge around your cocktail glasses and dip into the Maldon Salt. Combine all the parts in a cocktail shaker with ice.
Shake well and strain into your prepared glasses. Garnish with the frozen berries and a sprig of Rosemary.
How to create:
Cook the brussels in boiling water for 5 minutes, drain and leave until they cool.
Heat the bacon in bite size pieces until golden for 10 minutes.
Add the Brussels sprouts to the pan with a splash of water, then cover and finish cooking over a medium heat for about 5 minutes.
Uncover, turn up the heat, then add the 50g butter to the sprouts and cook for 2 minutes more until glossy.
Season generously with Maldon salt and pepper to serve.
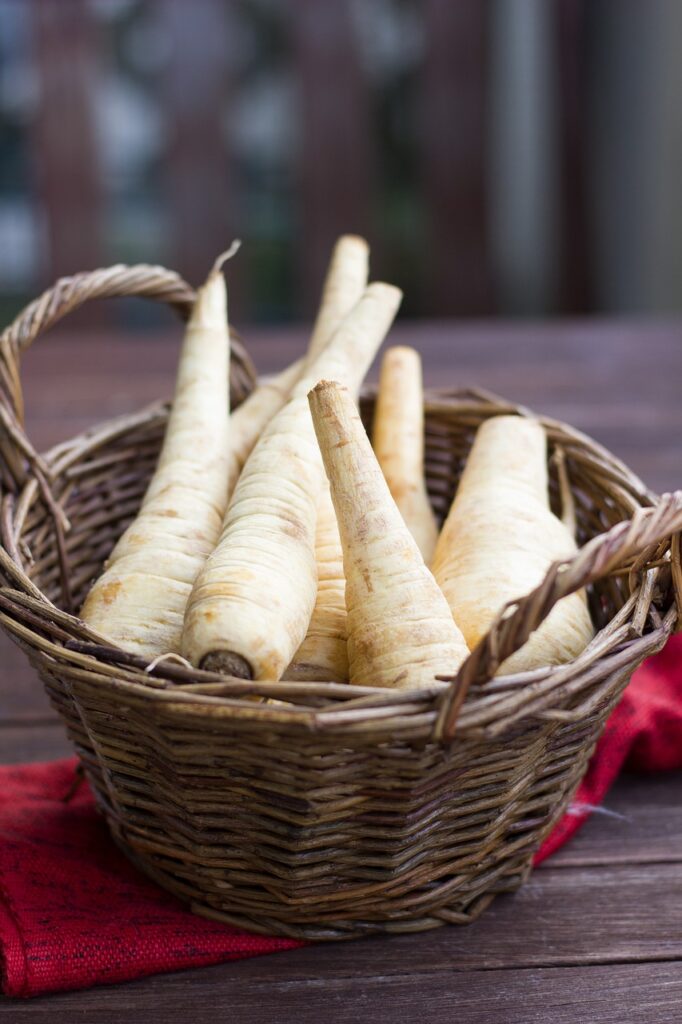
Honey roasted parsnips are the ultimate side dish, combining natural sweetness with the savoury crunch of Maldon Sea Salt flakes. Perfect for Sunday roasts, holiday meals, or as a comforting addition to any dinner, this easy recipe will have your parsnips golden and caramelized in no time.
This classic recipe combines the earthy flavour of parsnips with the delightful sweetness of runny honey, enhanced by a pinch of Maldon Sea Salt and a dash of freshly ground black pepper. Simple yet sophisticated, these roasted parsnips are an irresistible addition to your holiday feast.
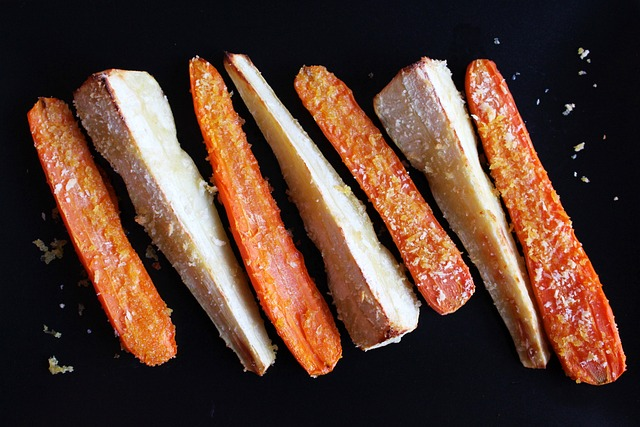
The secret to achieving perfectly roasted parsnips lies in the balance of flavours and textures. Tossing the parsnips in olive oil ensures a golden, crisp exterior, while the honey adds a glossy finish and subtle sweetness. The use of Maldon Sea Salt, with it’s distinctive flaky texture, elevates the dish with burst of savoury delight, and the freshly ground black pepper provided just the right amount of warmth and depth. Whether paired with a hearty roast duck or a vegetarian main, these honey roasted parsnips are a guaranteed crowd-pleaser, making them a must-have for any Christmas celebration.
How to make honey roasted parsnips
Preheat the oven to 200C.
Top and tail the parsnips and cut into wedges.
Drizzle over the honey and olive oil along with a good pinch of Maldon Sea Salt and some freshly ground black pepper.
Give the parsnips a good mix up and roast for about 40 minutes, or until the parsnips are golden and tender.
Remember to turn them halfway through cooking.
Tips for the best honey roasted parsnips
Here are some tips to ensure your honey roasted parsnips are absolutely perfect!
Choose the right parsnips
Look for firm, medium-sized parsnips with smooth skin. You should avoid overly large ones as they can be woody in the centre and not soft, which is what you want when roasting.
2. Parboil for extra tenderness
You can parboil parsnips in a pan of hot water for 3-4 minutes before roasting. This step helps softens the centres, ensuring a creamy interior while achieving a crisp exterior in the oven.
3. Use high-quality ingredients
Use extra virgin olive oil, runny honey, and Maldon Sea Salt flakes for the best flavour. High-quality ingredients make a noticeable difference.
4. Don’t overcrowd the baking tray or roasting tray
Arrange the parsnips in a single layer with some space between each piece. Overcrowding the parsnips traps steam, making them less crispy!
5. Garnish for extra appeal
Just before serving, consider garnishing with fresh herbs like thyme or rosemary for a pop of colour and an aromatic boost.
Why Maldon Salt enhances honey roasted parsnips
Maldon Sea Salt enhances honey roasted parsnips by adding both texture and flavour that elevate the dish to a new level. Here’s why it works so well:
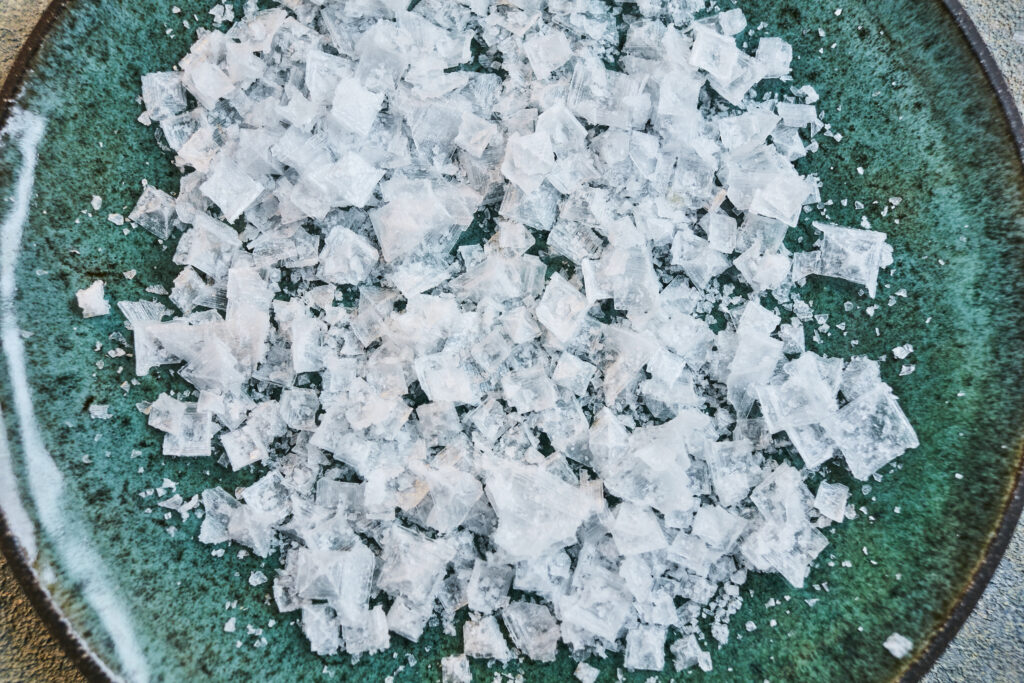
Flaky texture
Maldon Sea Salt’s distinctive pyramid-shaped flakes provide a delightful crunch that contrasts beautifully with the soft interior and caramelized exterior of the roasted parsnips. This textural balance makes each bite more satisfying.
2. Bright, clean flavour
Unlike table salt, Maldon Salt has a clean, pure salinity that doesn’t overpower. It’s gentle saltiness accentuates the natural sweetness of the honey and the earth flavour of the parsnips without masking them.
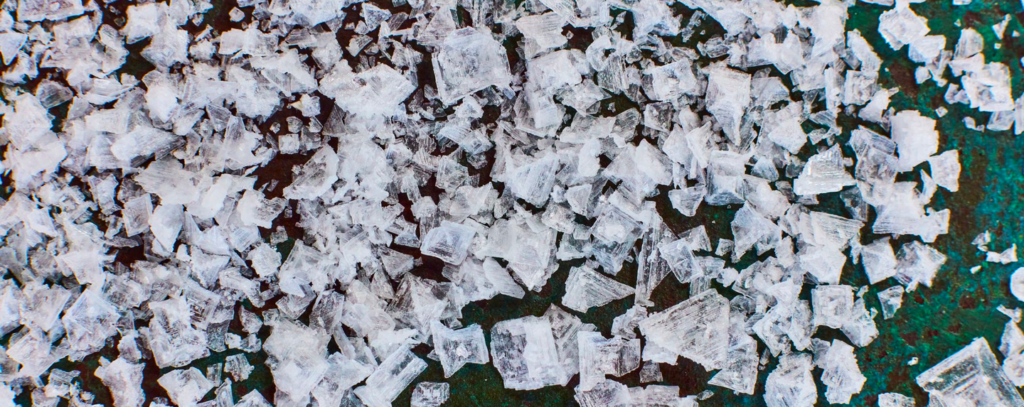
3. Pops of flavour
Because of it’s flaky structure, Maldon Salt dissolves slowly. This creates ‘pops’ of saltiness that amplify the flavour of the honey and olive oil glaze, making the dish more dynamic and exciting.
Preheat the oven to 200C.
Place on a baking tray and add the olive oil and a generous pinch of Maldon salt and pepper, cook for 20 minutes.
Take the tin out of the oven and drizzle over the honey and lemon mixture. Add the sprigs of thyme. Toss lightly and return to the oven for a further 10 minutes.
How to create:
Fry the sausages until nicely brown, but don’t overcook them. Set aside to cool.
Roll out your pastry and cut into six squares. Wrap each square around one vegetarian sausage and lay on a baking tray with the fold down.
Brush with your egg mixture and sprinkle over the parmesan and Maldon Salt.
Bake in the oven at 180C fan for around 25 minutes or golden.
How to create:
Break the chocolate into pieces and place in a glass bowl over hot water until it has melted.
Once the chocolate is completely melted add the almonds and mix well, pour the contents into a silicon mould and allow to cool.
After 4 hours or so of setting it should be ready to eat!
How to create:
Cut 185g unsalted butter into small cubes and tip into a bowl. Break 185g dark chocolate into small pieces and drop into the bowl.
Fill a small saucepan about a quarter full with hot water, then sit the bowl on top so it rests on the rim of the pan, not touching the water. Put over a low heat until the butter and chocolate have melted, stirring occasionally to mix them.
Remove the bowl from the pan. Leave the melted mixture to cool to room temperature.
While you wait for the chocolate to cool, position a shelf in the middle of your oven and turn the oven on to 180C/160C fan/gas 4.
Using a shallow 20cm square tin, cut out a square of non-stick baking parchment to line the base. Tip 85g plain flour and 40g cocoa powder into a sieve held over a medium bowl. Tap and shake the sieve so they run through together and you get rid of any lumps.
Chop 50g white chocolate and 50g milk chocolate into chunks on a board.
Break 3 large eggs into a large bowl and tip in 275g golden caster sugar. With an electric mixer on maximum speed, whisk the eggs and sugar. They will look thick and creamy, like a milk shake. This can take 3-8 minutes, depending on how powerful your mixer is. You’ll know it’s ready when the mixture becomes really pale and about double its original volume. Another check is to turn off the mixer, lift out the beaters and wiggle them from side to side. If the mixture that runs off the beaters leaves a trail on the surface of the mixture in the bowl for a second or two, you’re there.
Pour the cooled chocolate mixture over the eggy mousse, then gently fold together with a rubber spatula. Plunge the spatula in at one side, take it underneath and bring it up the opposite side and in again at the middle. Continue going under and over in a figure of eight, moving the bowl round after each folding so you can get at it from all sides, until the two mixtures are one and the colour is a mottled dark brown. The idea is to marry them without knocking out the air, so be as gentle and slow as you like.
Hold the sieve over the bowl of eggy chocolate mixture and resift the cocoa and flour mixture, shaking the sieve from side to side, to cover the top evenly.
Gently fold in this powder using the same figure of eight action as before. The mixture will look dry and dusty at first, and a bit unpromising, but keep going very gently and patiently. Stop just before you feel you should, as you don’t want to overdo this mixing.
Finally, stir in the white and milk chocolate chunks until they’re dotted throughout.
Pour the mixture into the prepared tin, scraping every bit out of the bowl with the spatula. Gently ease the mixture into the corners of the tin and paddle the spatula from side to side across the top to level it. Sprinkle with Maldon Salt.
Put in the oven and set your timer for 25 mins. When the buzzer goes, open the oven, pull the shelf out a bit and gently shake the tin. If the cake wobbles in the middle, it’s not quite done, so slide it back in and bake for another 5 minutes until the top has a shiny, papery crust and the sides are just beginning to come away from the tin. Take out of the oven.
Leave the whole thing in the tin until completely cold, then lift out the cake with the foil. Cut into quarters, then cut each quarter into four squares.
Mix the flour and sugar in a bowl until evenly combined. Add the butter and run it in until the mix resembles breadcrumbs.
Mix the egg and water in a jug until combined, pour into the dry ingredients in the bowl and knead gently to a smooth dough. Wrap in clingfilm and leave to rest in the fridge for an hour before using.
For the tart
Bring cream to the boil. In a separate bowl, combine egg yolks and 150g sugar.
Pour the cream over eggs and sugar. Place 1 Litre of this mixture into bowl and add the Maldon salt.
In a separate pan, over a low heat, bring 280g sugar to a dark caramel. Once a dark caramel forms, slowly incorporate this into the custard mix in the bowl, whisking continually. Combine this with any remaining custard and pass through a fine sieve.
Remove the skin and large bubbles off of the mixture and cover with cling film to contact. Leave standing for 5 minutes before removing the cling film, taking the small bubbles with it.
Pour into two in 10 inch x 3 inch blind baked tart rings and bake at 130 C fan 2 for 40-50 minutes or until set.
Leave to stand for an hour before slicing and enjoy with pouring cream
Salt hake brandade with piquillo, thyme and orange oil
A familiar dish on the Andalucian tapa circuit- smokey piquillo peppers stuffed with salted and whipped fish- it’s a classic and doused in the vibrant orange oil-thyme oil its given a real hit of sunshine.
Hake is fast becoming my go to white, meaty fish. Its still underused in the UK but the clever, fish focused Spaniards have been championing it for decades. It mainly has all the attributes of cod (I’d say it’s sweeter and perhaps a little less firm) and is one of the most sustainable fish on the planet.
First make the oil. heat the oil in a saucepan to warm (don’t boil) add the zest and continue to warm for 10 minutes before transferring to a jar or lidded container and then adding the thyme.
Cover and then leave to steep for at least
4 hours. This will make more than you need for this recipe but can be used for dressing many things such as salads, vegetables and fish.
Place the cod in a bowl, pour over the salt and massage into the fish.
Leave to “salt” for 3 hours in the fridge, turning once and then desalinate-by washing off the salt for a few minutes under cold, running water.
Pat the fish dry and then place in a sauce pan with the milk, garlic, anise and bay.
Bring to a boil, then simmer for 8 minutes to cook everything through before turning off the heat.
Leave everything to cool before removing the fish and garlic and placing in a bowl.
Take off the fish skin and mash the flesh and garlic together with a fork, adding some of the milk as you go to moisten (only a few splashes, you don’t want it too wet) now slowly pour in the olive oil, stirring quickly as you go to emulsify the paste and oil to create the brandada.
Season with black pepper and lemon juice and then stuff the brandada into the pepper cavities- to completely fill.
Chill the stuffed peppers in the fridge for 30 minutes before serving, drizzled with the orange-thyme oil and a sprinkle of fresh thyme leaves.
50g quality smoked streaky bacon, cut into lardons
1 rosemary stalk- leaves picked and chopped
30g unsalted butter
1 tablespoon of red wine vinegar
Olive oil, sea salt and black pepper for cooking
Preparation
Hispi cabbages are all the rage – the conical shaped brassica are packed with nutrients and are deliciously sweet.
Lightly charring the leaves with the addition of crunchy sea is really interesting way of preparing the cabbages and adds a nice foil to the sweetness.
I like to do this over a BBQ for some real smokiness but a griddle pan will do the job just fine.
Heat a BBQ or griddle pan to a medium heat.
Quarter the hispi cabbage lengthwise and remove the hard, internal core with a sharp knife.
Peel off the layers of the leaves and toss them with a little olive and season well with Maldon salt and black pepper
Workings in batches throw the leaves onto the grill and cook them briskly until lightly charred. This will be a quick process and you need to stay with the cabbage, turning with tongs to stop over burning.
Reserve the leaves in a serving bowl and cover with cling film.
Heat a small sauté pan over a medium heat and add a lug of olive oil.
Sweat the pancetta and rosemary until lightly browned, add the butter and cook until it turns light brown and foamy.
Stir in the vinegar, season well and then pour over the cabbage.