- Place a medium pan of water on to boil. When it comes up to a boil, then reduce to heat to a gently simmer – you want a few bubbles coming from the bottom of the pan.
- Lower the egg carefully into the water using a slotted spoon and then set a timer for 6 ½ minutes. Pop some bread into the toaster to toast.
- Place some ice cubes into a large bowl and then add cold water – this ice bath will help the egg to stop cooking immediately after taking it out of the boiling water.
- After 6 ½ minutes, lift the egg with the slotted spoon and place it into the iced water. Leave it for a couple of minutes until it is cool enough to handle. Then carefully peel off the shell.
- Slice the egg in half to reveal the ‘jammy’ centre and serve on top of buttered toast.
- Sprinkle over some Maldon Pepper Sea Salt and enjoy.
Category: Uncategorized
OPA! A Celebration of Greek Taverna Culture
When you hear the word ‘OPA!’ in Greece, it’s more than just an exclamation – it’s a feeling. A joyful expression of celebration, connection, and the simple pleasures of life. For Greeks, food is never just about eating; it’s about gathering, sharing stories, and creating memories around a table where time slows down and every bite brings people closer together.
This spirit of togetherness is at the heart of the Greek taverna. From sun-soaked coastal villages to mountain hideaway, tavernas are where locals and travellers alike experience the essence of Greek hospitality – warm welcomes, seasonal dishes, and recipes passed down through generations. It’s a place where the aroma of grilled seafood mingles with laughter, and where every meal feels like a feast.
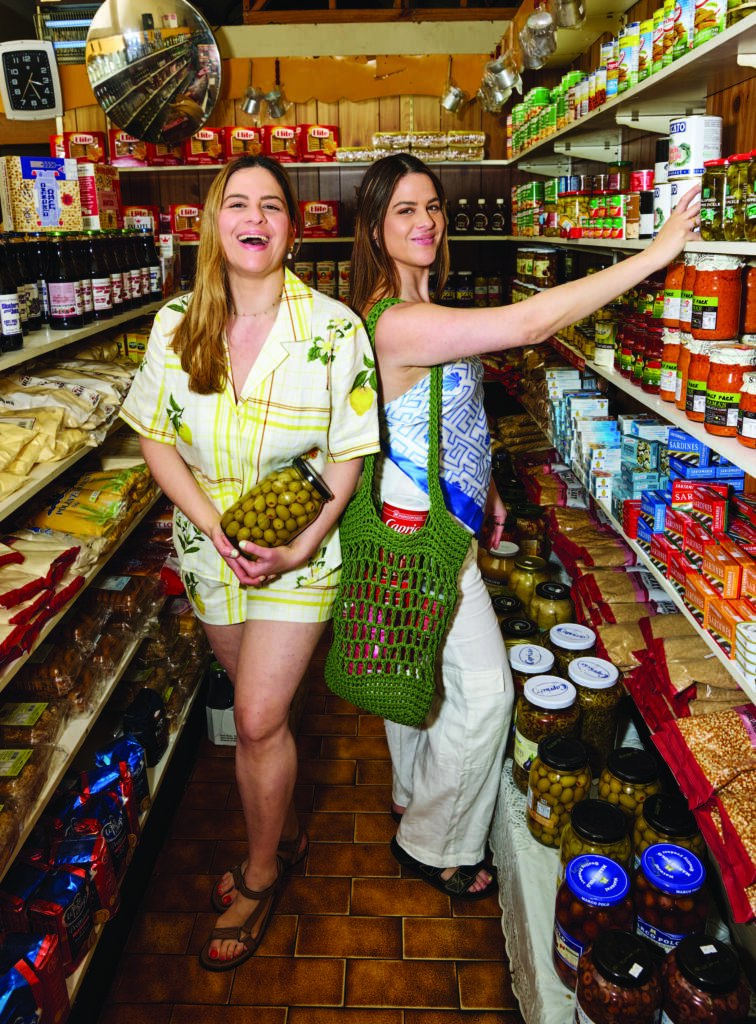
In OPA!: Recipes Inspired by Greek Tavernas, twin sisters Helena and Vikki Moursellas invite you to experience this magic at home. Inspired by their travels across Greece and childhood memories of summers spent in Halkidiki, they’ve created over 80 recipes that celebrate the flavours and traditions of taverna dining. Think crisp chickpea fritters, smoky grilled calamari, succulent pork chops, hearty oven-baked beans, and honey-soaked walnut cake – all designed to bring the convivial spirit of Greece to your table.
With stunning photography, stories from beloved tavernas, and tips for stocking your Greek pantry, OPA! is more than a cookbook – it’s an invitation to embrace the joy of cooking, sharing, and saying OPA! in your own kithchen.
In Conversation with Helena & Vikki Moursellas
Helena and Vikki – we are loving OPA! so much here at Maldon. Tell us about the title – what this word mean to you, and how does it capture the essence of Greek cooking and hospitality?
OPA! is more than just a word! It’s a feeling to us, it captures the joy and warmth that are at the heart of Greek culture. It’s a celebration of life. The word can be used in many ways, like smashing plates, which is what a lot of people know it for, but it’s also used to express excitement, encouragement and joy around the table. Every taverna has its own charm, shaped by the people who run it and the recipes they’ve passed down through generations.
The book is filled with taverna classics and new favourites – which recipe do you think best represents the spirit of a Greek taverna, and why?
This one is a hard one because there are so many dishes that capture the spirit of a Greek taverna. But for us, it has to be the lamb kleftiko. It represents everything a taverna stands for slow cooking, comfort, generosity, and the kind of food that brings people together.
There’s something so special about kleftiko. When you unwrap the baking paper and foil, the aromas just fill the room, oregano, lemon, garlic and suddenly everyone gathers around the table.
For home cooks outside of Greece, what are your top tips for bringing authentic Greek flavours to the table?
Focus on good quality ingredients, we love using olive oil from Greece and cooking with the seasons. Greek food is all about letting simple, beautiful produce shine. Use plenty of lemon, fresh herbs and a good pinch of sea salt, and don’t be shy with the olive oil, it brings everything together. Keep your pantry stocked with staples like Greek oregano, feta, olives and capers, and taste as you go.
Food and storytelling are deeply intertwined in OPA! Can you share a memorable story or personal connection behind one of the recipes in the book?
Beef pastitsio is our childhood favourite and still is as adults. Pappou (grandfather) would collect us from school, and the first question we’d ask was what Yiayia had made for dinner? She always knew pastitsio was all we ever wanted. Our friends would always ask if there was enough for them.
Helena & Vikki – What does a normal day in the life look like for you both?
We start the day with coffee, of course! Both of us work in recipe writing and on food shoots, but our days are a little different. Vikki balances her time between being a mum to her beautiful daughter Billie and working as a freelance food chef, while I’ve been living and working in London over the past year as a freelance food stylist and recipe developer. Even though our days can look quite different, food is always at the centre of what we do, whether it’s creating new recipes, styling dishes, or sharing
meals with family and friends. The love for food and storytelling keeps us connected, no matter where we are.
Name three things in the kitchen you can’t live without!
Olive oil, salt and a Microplane
Do you have a current favourite cookbook that you’re reading?
Soutzoukakia – Pork and Beef Meatballs in Tomato Sauce Recipe
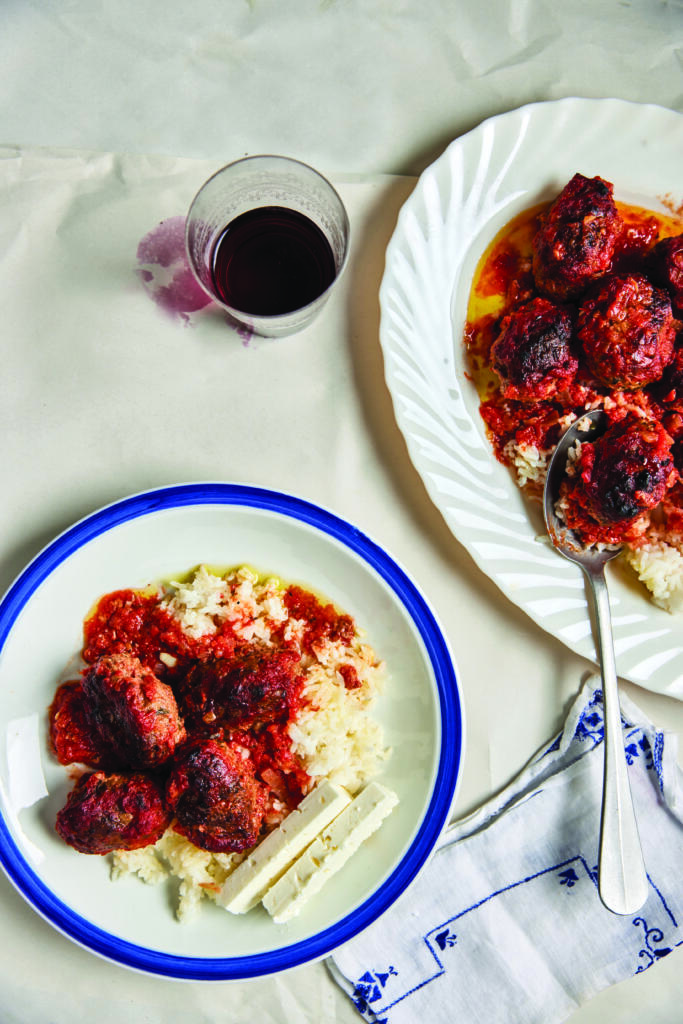
This classic dish is enjoyed in many Greek and Turkish homes and is perfect on a wintry day – it’s a comforting recipe when we are feeling a bit homesick. The cumin and cinnamon add warmth to the soutzoukakia, along with fresh herbs, and it is often served with fluffy, buttery rice or roasted potatoes. Be sure not to use lean minced meat here, as this will make the soutzoukakia dry. Our yiayia would always use a mix of pork and beef together, as they both have a good amount of fat.
Feeds: 4-6 people
Ingredients:
- 500 g (1 lb 2 oz) minced (ground) pork
- 500 g (1 lb 2 oz) minced (ground) beef
- 1 white onion, grated
- 2 garlic cloves, crushed
- small handful of chopped fresh
- oregano leaves
- 1 teaspoon dried Greek oregano
- 1 teaspoon ground cumin
- ½ teaspoon ground cinnamon
- 80 g (1 cup) fresh breadcrumbs
- 1 egg, lightly beaten
- 1 tablespoon olive oil, plus extra to serve
- Maldon Sea Salt flakes
- freshly cracked black pepper
- fluffy, buttery white rice, to serve
- 100 g (3½ oz) Greek feta, cut into 1 cm (½ in) thick slices
TOMATO SAUCE:
- 1 tablespoon olive oil
- 1 brown onion, roughly chopped
- 1 garlic clove, crushed
- 1 tablespoon chopped fresh
- oregano leaves
- 800 g (1 lb 12 oz) tinned crushed tomatoes
Method:
- Preheat the oven to 200°C (400°F). Lightly grease a large baking dish.
- To make the tomato sauce, heat the olive oil in a saucepan over medium heat and cook the onion for 8 minutes, or until softened. Stir in the garlic, oregano, crushed tomatoes and water. Reduce the heat to low and simmer for 20 minutes, or until reduced and thickened.
- Meanwhile, in a large bowl, combine the pork, beef, onion, garlic, fresh and dried oregano, cumin, cinnamon, breadcrumbs, egg and olive oil. Season with salt flakes and cracked pepper. Knead the mixture for 2–3 minutes, until well combined. Using 2 tablespoons of the mixture at a time, roll the mixture into oblong-shaped meatballs.
- Arrange the meatballs in the baking dish in two single layers. Pour the tomato sauce evenly over the top. Bake for 35–40 minutes, until the meatballs are cooked through and golden brown.
- Serve the meatballs and tomato sauce on a bed of rice (see note below), drizzled with a little extra olive oil and with feta slices on the side.
A NOTE ON PREP
The meatballs and tomato sauce can both be made the day before and kept covered in the fridge. Remove the meatball mixture from the fridge 30 minutes before cooking.
SERVE ME WITH
Fluffy, buttery white rice, like our yiayia would make it.
- Rinse 300 g (1½ cups) medium-grain white rice until the water runs clear. Melt 70g (2½ oz) salted butter in a saucepan with a lid over low heat, then add the rice and toast for 5 minutes, stirring frequently. Pour in 750 ml (3 cups) chicken broth or vegetable stock and bring to the boil.
- Reduce the heat to low, cover with a lid and simmer for 15 minutes, being sure not to remove the lid during the cooking time. Turn the heat off and allow the rice to sit for 20 minutes, then fluff the grains up with a fork and serve.
Where to Buy OPA!

You can buy OPA! here, and start being creating with food and flavours in the comfort of your kitchen.
Make sure you have your Maldon Salt ready for these recipes! If you are running out, please feel free to browse on our Where to Buy Page to find your nearest store in which stocks our beloved Maldon Salt.
Lastly, we LOVE seeing your creations – please tag us on Instagram using the #maldonsalt so we can share your own take on Helena & Vikki’s recipes!
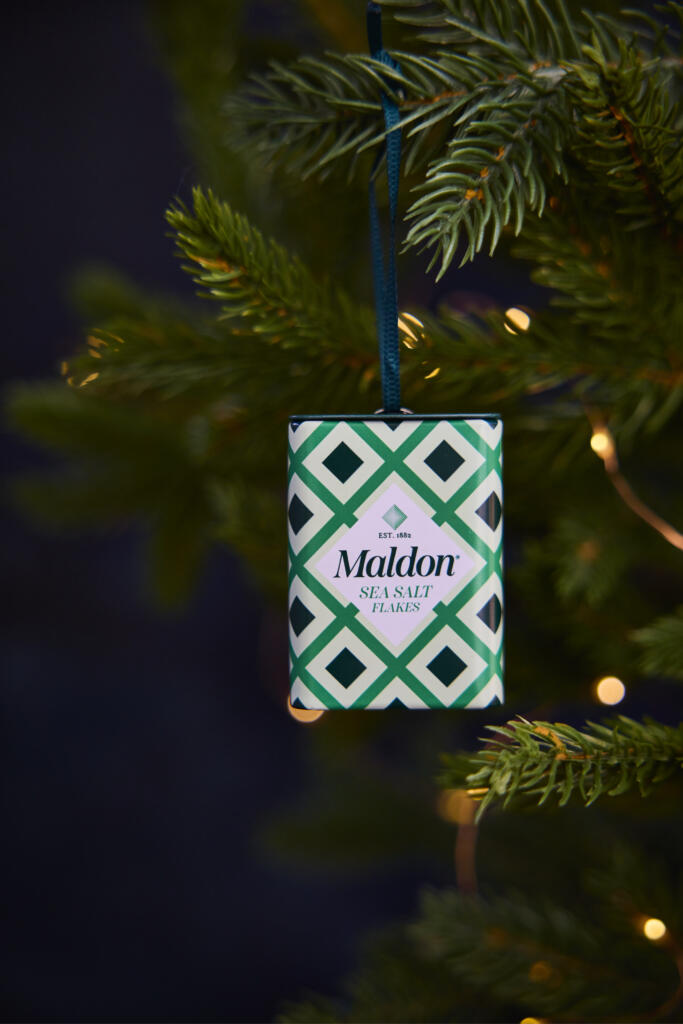
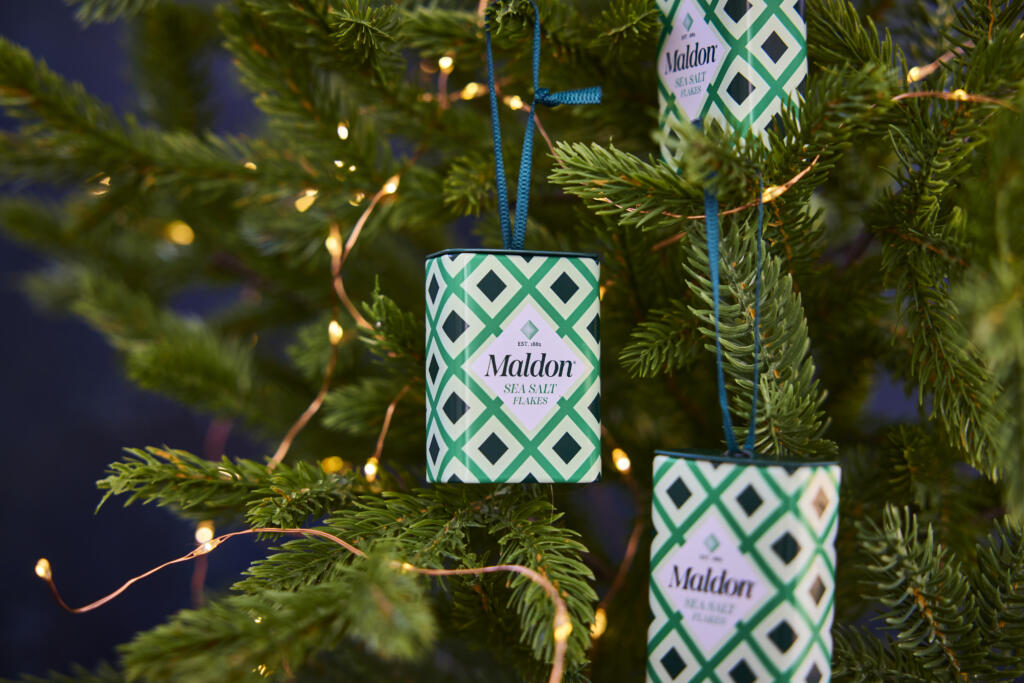
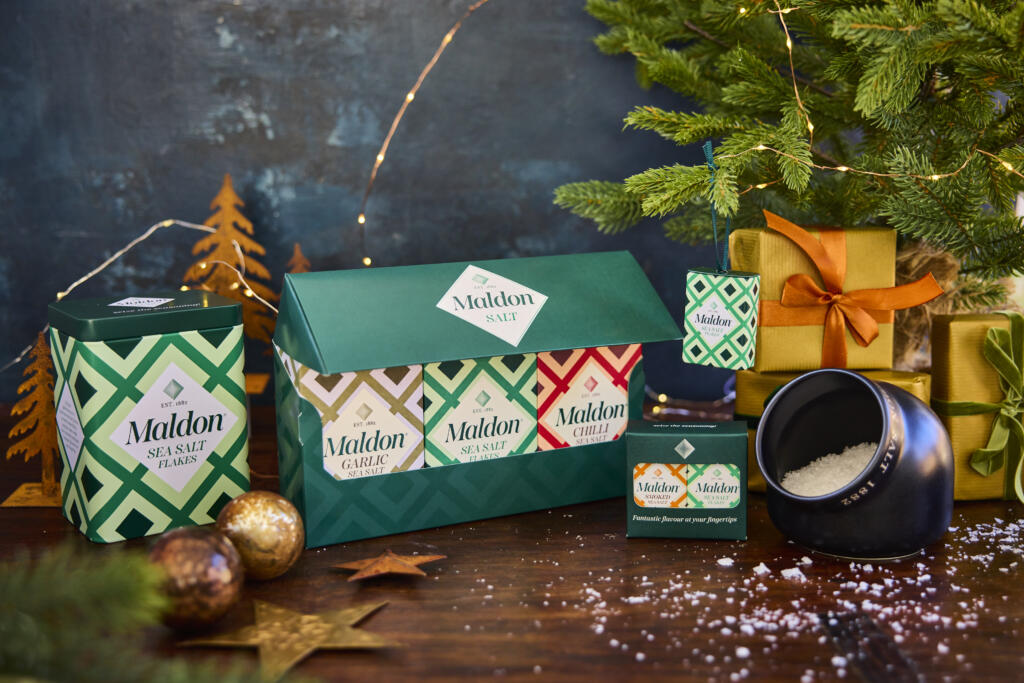
Looking for the perfect foodie Christmas gift? Maldon Salt has launched it’s first-ever Christmas decoration – a limited-edition bauble that’s as stylish as it is unique. Available exclusively on Amazon UK, this collectible ornament is the ultimate festive treat for food lovers.
Why You’ll Love It
- Premium design – crafted from high-quality tin, featuring Maldon’s iconic green branding for a festive feel.
- Perfect Size: 55mm x 46mm x 27mm – ideal for your tree, garland, wreath or mantlepiece.
- Thoughtful Details: Includes a green ribbon and a festive message on the back – ‘Have Yourself a Merry Little Maldon’.
- Gift-Ready: Comes in premium packaging, making it a great stocking filler, Secret Santa gift, or host present.
Join the Trend
Christmas decorations have evolved beyond the traditional tinsel and glass balls. This years’ festive trend is all about personalisation and passion, with consumers crafting their Christmas trees to reflect their lifestyle and favourite brands. Why?
- Personal Connection – these ornaments showcase individuality, turning a basic Christmas tree into a reflection or personal taste interests.
- Giftability – miniature food and drink decorations make perfect presents for the foodie in your life!
Miniature versions of food and drink brands is becoming a firm favourite for foodies and home cooks. Maldon’s bauble is the perfect way to celebrate your love for flavour.
Complete Your Maldon Christmas Collection
If you’re looking for Christmas gifts for food lovers, Maldon Salt has curated a collection that combines style, flavour, and festive charm. These gifts are perfect for tablescapers, home chefs, and anyone who loves to add a pinch of gourmet to their celebrations.
- Maldon Salt Gift Tin – refillable tin, includes a 250g pack of Maldon Sea Salt flakes inside.
- Maldon Pinch Tin Set – four refillable tins, perfect for on-the-go seasoning. Pop into your purse or pocket and have Maldon always by your side.
- Maldon Salt Gift Pack – three expectational sea salt flavours: Original, Chilli and Garlic, ready to season your festive feasts.
- Maldon Salt Pigs – high-quality ceramic, perfect for storing your favourite sea salt flakes. Available in cream or black.
These gifts are thoughtful, practical and beautifully designed, making them ideal for gifting foodie friends and family members this year. With Maldon Salt’s heritage of craftmanship and quality since 1882, you’ve giving more than a present – you’re giving the gift of flavour.
Although it’s pretty easy to make your own puff pastry, shop-bought is a good vehicle for piling high with an assortment of delicious toppings, and you can get it in most supermarkets. A tart made with this is also a great snack or starter for when you have friends around as you can make something relatively easy but impressive. Just cut it up into smaller wedges and serve it. I don’t know why, I always want puff pastry to be cold before cooking it, as this will give you the best puff, so leave it in the refrigerator until just before you need it.
How to Make Wild Mushroom, Ricotta and Caramelised Onion Tart
Preheat the oven to 200°C (400°F) and line a baking sheet with baking parchment (use a drizzle of oil under the parchment to secure it).
Put 2 tablespoons of the oil, the balsamic vinegar and onions into a frying pan over a low heat, season with salt and cook for 20–30 minutes until very soft and sweet. The key is to keep your heat low as the onions will want to catch and burn. If the onions start to burn, add about 1 tablespoon of water and give them a stir.
While the onions are cooking, clean, trim and slice the mushrooms into halves or thirds – you want to keep the mushrooms quite big to give the tart some body and texture. Put the remaining 2 tablespoons of oil into a heavy-based frying pan over a medium heat along with the garlic, mushrooms and wine vinegar. Season with sea salt and pepper, then cook for around 10 minutes until the mushrooms have softened and reduced in size.
Once everything is ready, lightly flour a surface and roll out the pastry slightly, just one roll on all four sides. Slide the pastry onto the prepared baking sheet, then spread the ricotta onto the pastry, leaving a border of about 3cm (1¼ inches) on all sides. Score a border of about 1cm. Top the ricotta with the caramelised onions, followed by the mushrooms. Season with salt and pepper. Brush the beaten egg onto the scored pastry borders, then bake the tart in the oven for 10–15 minutes, or until the pastry is golden brown. Slice and serve immediately.
Nothing says festive comfort quite like a Christmas Sticky Toffee Pudding – rich, indulgent, and full of seasonal flavour. This show-stopping dessert combines Medjool dates, Bramley apple, and a warming blend of mixed spice and nutmeg for a pudding that’s as aromatic as it is delicious. Sweetened with golden syrup and lifted by a hint of orange zest and brand, this recipe delivers a gooey centre, moist crumb, and that all-important skewer test perfection!
Perfect for your holiday table or Boxing Day feast, this pudding is a make-ahead marvel – simply reheat gently before serving. Whether you’re a seasoned bake or trying something new, this recipe guarantees festive magic with every spoonful.
How to Make Christmas Sticky Toffee Pudding with Salted Caramel Sauce
Step 1 – Prep the Basin and Oven
- Butter and line the base of a 1.5‑litre pudding basin with greaseproof paper.
- Heat oven to 140°C fan (160°C conventional / 320°F). Place the basin on a tray.
- Tip: Lining helps the sponge release cleanly.
Step 2 – Combine Dry Ingredients
- In a large bowl, whisk flour, mixed spice, grated nutmeg and 1 tsp Maldon Original Sea Salt.
Step 3 – Cream Butter and Sugar, Add Egg
- In a stand mixer or with electric whisks, beat butter and light brown sugar until soft and fluffy.
- Beat in eggs one at a time, mixing well after each.
- Tip: If the mixture looks split, beat in 1 tbsp of the flour.
Step 4 – Fold in Fruit and Flavourings
- Fold in dates, walnuts, grated Bramley apple, orange zest, then the golden syrup and brandy.
Step 5 – Add Dry Ingredients
- Gently fold in the dry ingredients until just combined. Do not overmix.
Step 6 – Bake
- Spoon mixture into the prepared basin, level the top.
- Bake 1 hr 20 min–1 hr 30 min, until a skewer inserted into the centre comes out with just a few moist crumbs.
- Cue: Top should be risen and springy; edges pull slightly from the sides.
Step 7 – Make the Salted Caramel Sauce
- Add sugar, butter, double cream and 1 tsp Maldon Original Sea Salt to a medium pan.
- Warm over low heat, stirring until the sugar dissolves.
- Increase heat and bubble 2–3 minutes until syrupy and golden.
Tip: For a silkier finish, don’t stir once boiling; swirl the pan.
Step 8 – Serve
- Turn out the pudding, pour over warm salted caramel sauce and finish with a pinch of Maldon flakes for sparkle.
Tips & FAQs
Tips
- For extra moisture, don’t overbake—use the skewer cue (few crumbs).
- Medjool dates give a plush texture; if using drier dates, briefly soak in hot water, then drain.
- Alcohol‑free: swap brandy for orange juice or apple juice.
- Nut‑free: omit walnuts and add 50g extra dates.
- Make‑ahead: bake a day ahead, cool, cover and reheat; keep sauce separate until serving.
FAQs
- How long to cook sticky toffee pudding?
- At 140°C fan (160°C conventional / 320°F), bake for 1 hr 20–30 min until a skewer comes out with a few moist crumbs.
- Can you make sticky toffee pudding ahead of time?
- Yes. Bake, cool, and refrigerate for up to 3 days. Reheat slices at 160°C for 10–15 min or microwave 30–45 sec; warm the sauce gently.
- Can you freeze sticky toffee pudding?
- Freeze the baked pudding (without sauce) well‑wrapped for up to 3 months. Thaw overnight in the fridge, reheat as above, and add freshly warmed sauce.
- Why is my caramel sauce grainy?
- Ensure sugar fully dissolves before boiling. Once bubbling, avoid stirring; swirl the pan and remove from heat as soon as it’s glossy and thickened.
Storage & Reheating
- Fridge: Pudding up to 3 days; sauce in a sealed jar up to 5 days.
- Reheat: Oven 160°C for 10–15 min (cover loosely); microwave individual slices 30–45 sec. Warm sauce gently; if too thick, loosen with a splash of cream.
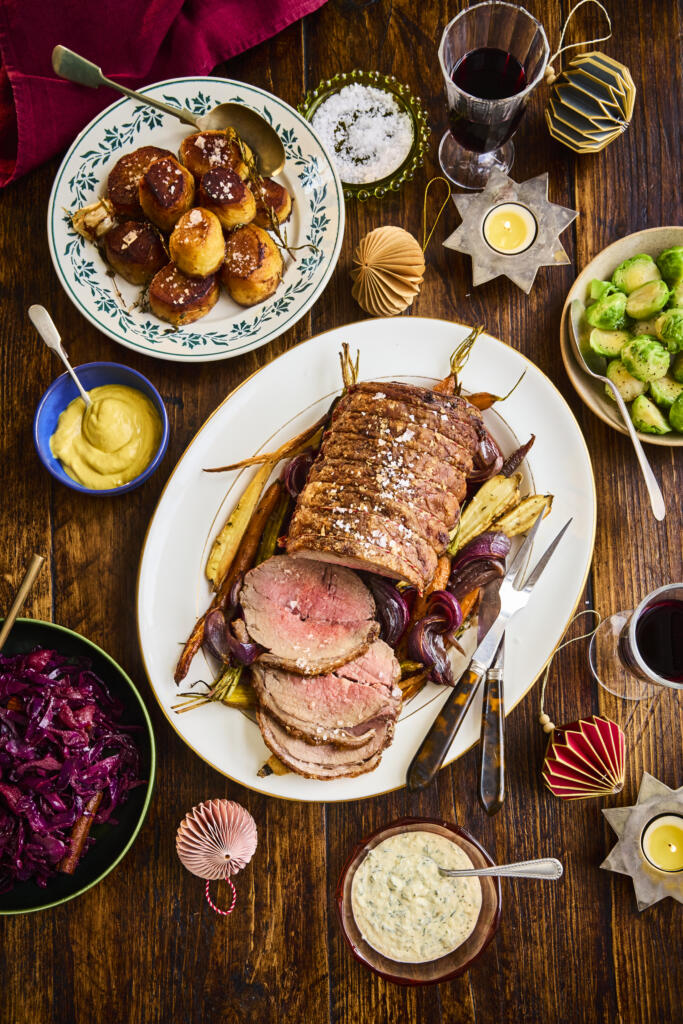
Make Christmas roast beef the easy way. A 2kg sirloin roasting joint is seared for a flavourful crust, then roasted over a tray of carrots, parsnips and onions. Finished with a quick red wine jus and seasoned with Maldon Sea Salt, this roast beef recipe delivers tender, medium‑rare slices and caramelised vegetables—perfect for a show‑stopping festive main.
How to Make Christmas Roast Beef with Easy Veg Medley
Step 1 – Temper and Season the Beef
- Remove the beef from the fridge 2 hours before cooking. Pat dry and season all over with Maldon Sea Salt. Drying is important as it allows the meat to brown faster; salting in advance can also help with creating a crispier crust.
Step 2 – Preheat and start the Vegetables
- Preheat the oven to 180°C fan (200°C conventional/392°F).
- Toss onions, carrots, parsnips and thyme with 2 tbsp olive oil; season with Maldon Sea Salt and black pepper. Spread on a large roasting tray and roast 5–10 minutes while you sear the beef.
Step 3 – Sear the Beef
- Heat a large frying pan over high heat with oil or beef fat. Sear the beef on all sides until well browned.
Step 4 – Roast Over the Vegetables
- Set the browned beef on top of the vegetables, pour in the glass of red wine.
- Roast for about 20 minutes per kilo at 180°C fan (≈9 minutes per lb) — around 40 minutes for a 2kg joint — turning the tray halfway for even cooking.
Step 5 – Check Temperature and Rest
- For best accuracy, use a meat thermometer in the centre of the thickest part:
- Rare: remove at 48-50°C (118–122°F)
- Medium-rare: remove at 51–53°C (124–127°F)
2. Temperatures rise during resting to ~51–53°C (124–127°F) rare or 54–56°C (129–133°F) medium‑rare.
3. Transfer beef to a warm plate, tent loosely with foil and rest 20 minutes. Keep veg warm in the oven if needed.
Step 6 – Serve
Slice against the grain. Serve with the roasted vegetables, creamed horseradish and mustard. Spoon over the red wine pan juices.
Tips & FAQs
- Best cut for Christmas roast beef? Sirloin roasting joint is tender with a good fat cap; ribeye or rump also work.
- How long to cook a 2kg sirloin at 180°C fan? Approximately 40 minutes after searing, or until thermometer hits 51–53°C (124–127°F) for medium‑rare.
- Do I need to cover the beef? No. Roast uncovered for a better crust; tent with foil during the 20‑minute rest.
- Can I make this ahead? Roast up to doneness −5°C (−9°F), rest and cool. Reheat slices gently in hot pan juices or gravy to serve.
- How do I get a great crust? Pat very dry, salt early, sear in a hot pan, and avoid over‑crowding the tray so veg can caramelise.
- Gravy vs jus? Deglaze the tray with extra wine/stock; simmer to reduce. Season with Maldon Sea Salt to finish.
Serving Suggestions
- Add Yorkshire puddings and crispy roast potatoes; a green like buttered sprouts or steamed greens with lemon.
- Festive extras: homemade red wine gravy, cranberry relish, or a drizzle of horseradish cream over slices.
- Scale up: For 10–12 guests, use a 3kg joint (increase roast time to ~60 minutes; monitor with thermometer).
Storage & Reheating
- Leftover beef: Cool quickly, refrigerate in an airtight container up to 3–4 days. Reheat slices gently in simmering pan juices or covered in a 160°C/320°F oven until just warm.
- Roasted vegetables: Refrigerate up to 3 days; reheat on a hot tray at 200°C/392°F to re‑crisp.
- Freezing: Sliced beef and veg can be frozen up to 1 month; thaw overnight in the fridge before reheating.
Have You Tried this Christmas Roast Beef?
Share your tips in the comments and tag #MaldonSalt. For more festive mains and sides, browse our Christmas recipes collection.
Nothing says Christmas quite like a tray of Spiced Orange Mince Pies, their buttery shortcrust pastry baked to flaky, crisp edges and dusted with a whisper of icing sugar. These festive treats combine sweet citrus and warm spice with a hint of grated apple for extra juiciness, all tucked beneath star lids or elegant diamond lids for that classic holiday look. A pinch of Maldon Smoked Sea Salt flakes creates a subtle depth that balances the sweetness beautifully.
You can serve these warm with brandy butter or brandy cream. These pies are a make-ahead marvel – they freeze and reheat like a dream, making them ideal for stress-free entertaining. Glossy, spiced and utterly irresistible, they’re the ultimate festive treat.
How to Make Spiced Orange Mince Pies
Step 1 – Make and Chill the Pastry
- In a processor, pulse flour, icing sugar and Maldon Original Sea Salt to combine.
- Add butter; pulse to fine breadcrumbs.
- Add egg and ice water; pulse just until the dough clumps.
- Shape into a disc, wrap and chill 1 hour.
- By hand: rub butter into dry ingredients, then “cut in” egg and water with a knife; bring together gently and chill.
Step 2 – Prepare Cases and Lids
- Roll pastry on a lightly floured surface to pound‑coin thickness (≈3 mm).
- Cut 12 rounds slightly larger than the bun‑tin holes; press in gently.
- Cut lids (smaller rounds, stars, or a Maldon diamond).
Step 3 – Mix the Filling
In a bowl, combine mincemeat, grated apple, orange zest and Maldon Smoked Sea Salt.
Step 4 – Fill and Seal
- Spoon a heaped teaspoon of filling into each case.
- Brush lid undersides with egg; position and press edges to seal. Chill 30 minutes.
Step 5 – Bake
- Heat oven to 170°C fan (190°C conventional / 375°F).
- Brush tops with egg, sprinkle with demerara; bake 25–30 minutes until golden brown and crisp.
Step 6 – Cool and Serve
- Cool 10 minutes in the tin, then transfer to a rack. Serve warm with brandy butter or brandy cream; dust with icing sugar if you like.
Tips & FAQs
Tips
- Keep everything cold for flaky pastry; chill twice to prevent shrinkage.
- Don’t overfill—leave a small headspace to avoid leaks.
- For extra citrus, add 1–2 tsp orange juice to the filling; if mincemeat is very wet, stir in 1–2 tsp fine breadcrumbs.
- Prevent sticking by lightly greasing or using a non‑stick bun tin.
FAQs
- How long to bake mince pies?
- 25–30 minutes at 170°C fan (190°C / 375°F) until the pastry is golden and crisp.
- Can you freeze mince pies?
- Yes. Freeze unbaked, assembled pies on a tray, then bag for up to 3 months; bake from frozen at the same temperature for 28–32 minutes. Or freeze baked pies and reheat 8–10 minutes.
- Can I make mince pies ahead?
- Make pastry up to 2 days ahead; store chilled. Assembled pies can be chilled 24 hours before baking. Baked pies keep 3–4 days in an airtight tin.
- Are mince pies vegetarian?
- Use vegetarian mincemeat (made with vegetable suet) and serve with your preferred cream or dairy‑free alternative.
Serving Suggestions
- Serve warm with brandy butter, brandy cream, clotted cream or vanilla ice cream.
- Finish with a light dusting of icing sugar and a pinch of Maldon Smoked Sea Salt flakes for a sweet‑salty contrast.
- Add to festive dessert boards with clementines and chocolate truffles.
Storage & Reheating
- Room temperature: Store baked pies in an airtight tin up to 3–4 days.
- Fridge: Up to 5 days if you prefer; rewarm before serving.
- Reheat: 160°C fan (180°C / 350°F) for 6–8 minutes until just warm and crisp.
- Freeze: See FAQs; always reheat from chilled/frozen until piping hot.
Baked These Already?
Rate the recipe and share your tips in the comments. For more Christmas baking ideas, browse our festive collection.
Take your festive favourite to the next level with these irresistible pigs in blankets, glazed in sweet heat and finished with a pinch of Maldon Chilli Sea Salt flakes. Imagine smoky sausages wrapped in crisp bacon, roasted until deeply golden with crisp edges, then coated in a sticky glaze of warm honey infused with a pinch of fiery chilli sea salt…pretty delicious, right?
Always start by lining a roasting tray with parchment for easy clean-up, then roast until sizzling. While they cook, gently dissolve the chilli sea salt into the honey for a fiery-sweet drizzle that clings beautifully as you baste the sausages wrapped in bacon.
Pile these beauties high on a buffet, or make them your make-ahead hero – they freeze and reheat like a dream. Whether it’s Christmas, game day, or a casual gathering with friends and family, these pigs in blankets deliver bold flavour in every bite.
How to Make Pigs in Blankets with Hot Honey
Step 1 – Heat the Oven and Wrap
- Heat oven to 180°C fan (200°C conventional / 400°F).
- Wrap each chipolata with a rasher of streaky bacon; place seam‑side down on a lined roasting tray.
- Tip: Use parchment for easy clean-up and to prevent sticking.
Step 2 – Roast Until Golden
Roast 25–30 minutes until the bacon is deeply golden and sausages are cooked through (juices run clear; 74°C/165°F internal).
Step 3 – Make the Hot Honey
- Add honey, Aleppo pepper and Maldon Chilli Sea Salt to a small saucepan.
- Warm gently, stirring until the salt dissolves and the honey smells fragrant. Remove from heat; stir in the vinegar. Cool slightly to thicken.
Step 4 – Finish and Serve
Drizzle 2–3 tbsp hot honey over the pigs in blankets. Serve the rest alongside so people can add extra heat.
Tips & FAQs
Tips
- For extra crispness, elevate sausages on a rack set over the tray.
- Like it hotter? Add a pinch more Maldon Chilli Sea Salt or a dash of chilli flakes.
- Mild version: reduce Aleppo pepper by half and add 1 tsp smoked paprika.
- Batch cooking: use two trays and rotate halfway for even browning.
FAQs
- How long to cook pigs in blankets?
- Roast at 180°C fan (200°C / 400°F) for 25–30 minutes until deeply golden and cooked through (74°C/165°F internal).
- Can you make pigs in blankets ahead of time?
- Yes. Wrap up to 24 hours ahead and refrigerate. Or freeze raw on a tray, then bag for up to 3 months; cook from frozen at 180°C fan, 30–35 minutes.
- How do you reheat pigs in blankets?
- Oven at 180°C fan (350–400°F) for 8–10 minutes until sizzling. Re‑drizzle with warm hot honey to refresh.
- Can I air‑fry pigs in blankets?
- Yes. Air fry at 190°C/375°F for 12–15 minutes, shaking once; check doneness, then drizzle with hot honey.
Serving Suggestions
- Add to Christmas dinner plates, grazing boards or canapé platters.
- Pair with mustard mayo, garlicky yogurt, or cranberry dip.
- Garnish with finely chopped chives or parsley; finish with a pinch of Maldon Chilli Sea Salt flakes for sparkle.
Storage & Reheating
- Fridge: Cool and refrigerate within 2 hours; store up to 3 days. Keep hot honey in a sealed jar up to 2 weeks.
- Freeze: Raw (preferred) up to 3 months. Cooked up to 1 month.
- Reheat: Oven 180°C fan (350–400°F) until piping hot (74°C/165°F). Warm the honey gently before drizzling.
Accessibility & Dietary Notes
Contains pork; not suitable for halal/kosher. Contains honey (not for infants under 1). Gluten content depends on sausages used. If vegetarian, ready-made options from brands include Beyond Meat and Quorn. If Vegan, ready-made options from brands include Richmondand Linda McCartney.
Tried this recipe?
Rate it and share your tips in the comments. For more easy Christmas canapés and sides, browse our festive collection.
Celebrate winter flavours in style with this stunning vegetable pithivier, a French-inspired centrepiece that’s as beautiful as it is delicious. It’s essentially a doomed filling of sweet caramelised onions, earthy cooked chestnuts, and vibrant winter veg – think tender butternut squash slices, jewel-toned beetroot slices and wilted spinach with grated nutmeg. All encased in buttery puff pastry lid and base, baked until golden and crisp with flaky layers.
The recipe is all about low and slow, caramelising onions in a heavy-based pot, layering in vegetables for depth and colour. Season generously with Maldon Original Sea Salt flakes for a delicious crunch. Once assembled, you can score the pastry with a lattice or spiral pattern, crush with egg wash for that irresistible shine, and bake on a preheated tray in a fan oven until the pastry in bronzed nicely.
Serve warm with a dollop of horseradish crème fraiche and a sprinkle of fresh dill for brightness. Perfect for a festive table or an elegant vegetarian main.
How to Make a Vegetable Pithivier
Equipment needed:
Heavy‑based pot, 2 large roasting trays, large frying pan or wide pot with lid, pastry brush, sharp knife for scoring, baking sheet (preferably preheated), 30 cm and 25 cm guides/plates for cutting circles, parchment
Step 1 – Caramelise the Onions
- Heat 2 tbsp olive oil in a heavy‑based pot over medium‑low.
- Add onions and a generous pinch of Maldon Sea Salt; cook 40–50 minutes, stirring occasionally, until deeply caramelised.
- Stir in butter, caraway seeds and chestnuts; cook 5 minutes until fragrant and lightly browned. Cool.
Step 2 – Roast the Root Vegetables
- Heat oven to 200°C fan (220°C conventional / 425°F).
- Arrange squash on one tray, beetroot on another. Drizzle with olive oil, season with Maldon Sea Salt, and roast 30–35 minutes until tender and golden. Cool.
Step 3 – Wild and Season the Spinach
- In a large pan over medium heat, add washed spinach (with residual water). Cook until just wilted and bright.
- Cool, squeeze out excess liquid thoroughly, then season with grated nutmeg, black pepper and Maldon Sea Salt.
Step 4 – Cut the Pastry
Roll pastry sheets to ~2 mm thick. Cut one 25 cm circle (base) and one 30 cm circle (lid).
Step 5 – Build the Dome
- Place the 25 cm base on parchment. Spread onion‑chestnut mixture inside, leaving a 2 cm border.
- Layer squash, then beetroot, then spinach, shaping into a compact dome.
Step 6 – Enclose, Score and Chill
- Brush border with beaten egg. Drape the 30 cm lid over the filling, smoothing to encase with no air pockets.
- Seal edges firmly; trim neatly.
- Lightly score from top to edge in curved lines to create the classic spiral. Chill 20 minutes while you heat oven to 180°C fan (200°C conventional / 400°F).
Step 7 – Bake and Serve
- Brush all over with egg wash. Bake 40–45 minutes until deep golden and crisp.
- Mix horseradish, crème fraîche, dill and black pepper. Slice and serve with the dill horseradish crème.
- Texture/Doneness cues: Pastry is richly golden with defined layers; base is crisp; filling hot throughout.
Tips & FAQs
Tips:
- Keep fillings cool and relatively dry to avoid a soggy base—squeeze spinach well and cool onions/veg completely.
- Build a stable dome: heavier veg (onion/chestnut, squash, beetroot) beneath, drier spinach on top.
- For extra shine and lift, egg‑wash twice: once before chilling and again just before baking.
- Bake on a preheated tray or baking steel for a crisp bottom.
FAQs:
- What is a pithiver?
- A pithivier is a round, enclosed pie made with puff pastry and filled with either sweet almond cream (frangipane) or savoury ingredients. It’s signature look comes from the domed shape and decorative scoring on top, which helps the pastry rise beautifully and give it that elegant, spiral finish.
- What did the pithivier originate from?
- The pithivier originates from France, specifically from the town of Pithiviers in the Loiret region. The pie was a way to showcase rich fillings and buttery pastry for special occasion, which is why it’s often associated with festive or celebratory meals.
- What pastry is best for a pithivier?
- All‑butter puff pastry gives superior lift and flavour. Roll to ~2 mm for clean layers without blow‑outs.
- How do I prevent a soggy bottom?
- Cool fillings fully, squeeze spinach dry, seal edges well, and bake on a preheated tray at 180°C fan.
- Can I make this ahead?
- Cook onions and roast veg up to 1 day ahead. Assemble and chill the unbaked pithivier for up to 24 hours, then bake fresh.
- Can I freeze a pithivier?
- Yes. Freeze assembled but unbaked on a tray, then wrap. Bake from frozen at 180°C fan, adding 10–15 minutes; tent with foil if over‑browning.
- How long does it take to bake?
- 40–45 minutes at 180°C fan (200°C / 400°F), until deep golden and piping hot.
Serving Suggestions
- Serve as a vegetarian centrepiece with braised red cabbage, roasted carrots or a crisp winter salad.
- Pair with the dill horseradish crème or a light gravy.
- Finish slices with a pinch of Maldon flakes for sparkle and seasoning at the table.
Storage & Reheating
- Fridge: Cool, then refrigerate slices up to 3 days.
- Reheat: 170°C fan (190°C / 375°F) 12–15 minutes on a tray until hot and crisp.
- Freeze: See FAQ; reheat from frozen until pastry is crisp and centre is steaming.
Made This Already?
Rate the recipe and share your tips in the comments. For more festive vegetarian mains, browse our Christmas collection.
Indulge in the ultimate festive sharing experience with this stunning baked Camembert with a cheese bread wreath – a show-stopping party centrepiece perfect for your Christmas Canape spread or grazing board. A bubbly cheese centre is surrounded by golden pull-apart rolls made from strong white bread flour, shaped into dough balls, brushed with egg wash, and seasoned with fragrant Maldon Garlic Sea Salt flakes, garlic slices, and thyme sprigs. Proved in a warm place to rise and baked to perfection, these golden rolls are ideal for dipping bread into the molten Camembert, especially when paired with chive butter, chutney, or relish.
How to Make Baked Camembert with Sharing Bread
Step 1 – Make the Dough
- Add flour, yeast, Maldon Garlic Sea Salt, thyme leaves, olive oil and warm water to a stand mixer bowl.
- Mix on low with a dough hook until combined, then medium for 5–7 minutes until smooth and stretchy. You know the dough is ready when it’s elastic and passes a gentle ‘windowpane’ test.
Step 2 – First Rise
- Transfer to a lightly oiled bowl, cover with a tea towel and prove in a warm place for 1–1.5 hours, until doubled. The dough should feel pillowy and leave a slight indent when pressed.
Step 3 – Shape the Sharing Bread
- Knock back the dough briefly. Divide into 20 balls (about 40–45g each) for even baking.
Step 4 – Arrange and Second Prove
- Line a large baking sheet with parchment. Place a heatproof bowl in the centre (a few cm wider than the camembert).
- Arrange dough balls around the bowl with a little space between each. Cover and prove 30 minutes, until puffed.
Step 5 – Bake the Rolls
- Preheat oven to 200°C fan. Brush dough with beaten egg.
- Bake 25–30 minutes until risen and golden on top and underneath. Cool slightly on the tray. The baked rolls should sound hollow when tapped on the base.
Step 6 – Bake the Camembert
- Unwrap the camembert and place back in its (oven‑safe) wooden box, lid off. Score the top and insert garlic slices and thyme. You should only bake in a wooden box that states it’s oven-safe; remove all plastic/foil.
- Place on a small tray and bake 10–15 minutes until the centre is melted and oozy.
Step 7 – Make the Chive Butter
- Melt butter in a small pan. Stir through chives and a pinch of Maldon Garlic Sea Salt.
Step 8 – Finish and Serve
- Brush warm rolls with chive butter. Set the baked camembert in the middle and serve immediately with chutney or relish for dipping.
Tips & FAQs
Tips
- Keep the Camembert in the box. Bake the Camembert in it’s wooden cheese box (without the plastic wrap) to help it hold it’s shape and contain the melted cheese. Make sure that the box is marked oven-safe.
- Score the top of the Camembert. Lightly score the top of the cheese and insert garlic slices and thyme sprigs for extra flavour.
- Egg wash your rolls for shine. Brush the rolls with egg wash before baking to get that beautiful golden roll finish.
- Season the rolls generously. Sprinkle Maldon Garlic Sea Salt flakes over the dough before baking for a punch of flavour and crunch.
FAQs
- Best cheese for baked camembert? Use a 250g camembert in a wooden, oven‑safe box. Brie works, but camembert melts more evenly and has a stronger aroma.
- What temperature and how long to bake camembert? Bake at 200°C fan for 10–15 minutes until the centre is soft; timing varies by brand and fridge temperature.
- Can you bake camembert in the box? Yes, if it’s a wooden box marked oven‑safe. Otherwise, place the cheese in a small ovenproof dish.
- Make‑ahead options? Shape the dough balls, cover and refrigerate up to 12 hours. Bring to room temp, then prove 30–45 minutes before baking. Rolls can also be baked earlier in the day and rewarmed.
- Freezing the bread? Freeze baked, cooled rolls up to 1 month. Reheat from frozen at 180°C for 8–10 minutes.
- How to keep the centre gooey for longer? Serve immediately, pre‑warm the serving plate, and keep the camembert on a small tray to retain heat.
Serving Suggestions
- Pile onto a large board with chutney, cornichons, grapes and cured meats for a party centrepiece.
- Add roasted garlic cloves, honey‑roasted nuts or a drizzle of hot honey over the camembert.
- Scale up: Bake two wheels of camembert in separate boxes and double the dough for larger gatherings.
Storage & Reheating
- Bread rolls: Store in an airtight container at room temperature for 1–2 days. Reheat at 180°C for 5–7 minutes until warm and crisp.
- Leftover camembert: Best enjoyed fresh. If needed, cool quickly, refrigerate up to 2 days and reheat gently until molten. Always follow food safety best practice.
Have You Tried This Festive Baked Camembert with Sharing Bread?
Tell us how it went in the comments and tag your creations with #MaldonSalt. For more crowd‑pleasing party starters, browse our Christmas recipes collection.