Sweetcorn is sweet and nutty and one of my favourite vegetables. You can’t go wrong with a buttery corn on the cob in the summer but here I’m combining them with courgette and feta, to make the most delicious and moreish fritters. Topped with a crispy egg and a fragrant zhoug butter they make a seriously nice brunch.
Start by making the fritters – grate the courgette and then squeeze out any excess liquid in a tea towel, pop these into a large bowl. Add the sweetcorn, crumbled feta, chopped coriander, 1 beaten egg, self-raising flour and cumin seeds. Mix well to form a batter and season well.
Heat some oil in a pan and spoon in the fritter mix to make patties. Fry them for 3 minutes on each side until golden. Remove and place on a plate in the oven to keep warm.
To make the zhoug butter place chopped coriander, parsley, garlic and green chilli into a food processor. Add some cumin, a good pinch of Maldon Salt, lemon juice and olive oil and blitz until it forms a paste. Next add the softened butter and plenty of seasoning and blitz again. Set aside.
In a small frying pan heat some oil and fry off the eggs, you want the oil to be nice and hot so the edges of the egg go nice and crispy. Once the egg is nearly cooked, add some of the zhoug butter to the pan and baste the egg in it.
Plate up – serve 2 or 3 fritters piled up on a plate with a crispy fried egg and drizzle over the zhoug butter from the frying pan. Sprinkle over some coriander leaves and serve.
Start this recipe the day before you want to eat as the steak needs overnight brining. Up to 24 hours ahead is fine. You can also cook this steak in the oven and on the hob if you don’t have access to a barbecue.
When it comes to cooking the steak, you apply the same principles as below, but take the low part of the cooking in the oven – around 100C in a fan oven for as long as it takes to get to the temperature you are looking for. See the numbers you need within the recipe. The sear part can happen in a very very hot frying pan, just flipping and turning to get maximum Maillard reactions until it is cooked how you like to eat it. Again, whether to rest or not is a personal preference.
Begin by dry-brining the ribeyes. Please do it, it really makes the biggest difference (see more detail on why below) . Simply sprinkle Maldon Salt over both sides of the steaks, place on a rack set over a tray and slide into the fridge for 12-24 hours. The rack allows the air to circulate so the steak doesn’t swim in its own juices. Allow a good tablespoon or so of Maldon Salt per kilo of meat. Don’t cover the tray, you want the surface to dry out a little but do make sure the tray is on the bottom shelf of the fridge and not touching any other food.
When you are ready to cook, fire up your barbecue ready for slow indirect cooking, aiming for a gentle temperature of around 120°C.
Set the steak, always straight from the fridge, onto the grill bars far away from the fire, and shut the lid. Cook using very gentle convection heat, take the steak up to a temperature 10°C below the temperature you want to eat it at. A temperature probe is essential here. No need to turn or rotate, just let it very gently do its thing. It will look dry and unappetising at this point, never fear. The drying of the surface is going to work in your favour, allowing for the Maillard crust to build up during the sear.
Whilst the steak is having the low and slow treatment, get everything else ready.
To make the walnut and tarragon pesto, tip the walnuts into a small fireproof frying pan and toast over a medium heat on the hob for a couple of minutes. Add to a food processor along with the tarragon, garlic, olive oil and white wine vinegar and blend to a smooth paste. Season to taste with Maldon Salt and freshly ground black pepper and scoop into a bowl. Set aside.
Prepare the salad by chopping up the tomatoes and dividing onto a plates or a serving platter. Scatter over herbs and drizzle with a really generous glug of extra virgin olive oil. Season well with sprinkles of Maldon Salt to taste. Set aside at room temperature for maximum flavour.
Back to the steak – once it’s reached your chosen temperature you want get your barbecue really good and hot, so get those coals glowing red. I often start another little chimney of charcoal at this point if I feel it needs more heat. And get those bottom vents open wide – remember that more air means a hotter fire. Don’t worry about the top vents as you sear with the lid up.
When your fire is hot, get the steak directly on the hot grill bars over the fire. Sear it hot and fast, flipping every 30 seconds or so with the lid up. Every time you turn, try to place it back on a slightly different bit of the grill bars to get maximum heat.
Once the steak has a deep, mahogany brown crust on both sides and has reached your desired eating temperature, get it off and slice up to share, serving the salad and pesto alongside.
Top TipsBy Genevieve Taylor:
Brining is the number one trick to boost meat tenderness
Salt is amazing: a little water-soluble molecule (sodium chloride or NaCl if you’re a bit of a science nerd like me) that has the ability to amplify the flavour of everything. Salt makes things taste better – your roast pork more porky, your ribeye steak more beefy or your curry more deliciously spicy – but it also has rather more miraculous properties than just enhancing flavour.
All meat benefits from the application of salt to increase juiciness and I have got into the habit of salting, or brining, all my meat before I cook it, regardless of the cut or species. It is, however, especially effective when you want to cook the perfect steak. Good steak is a treat and it really pays to cook it as well as you can.
With dry-brining, when you sprinkle salt over meat it quickly draws out a little water from the muscle cells, creating a really concentrated salty brine on the surface. Over time this salty brine soaks back into the meat by a process called diffusion. Nature always wants to seek equilibrium – so the more salty outside diffuses into the less salty inside, doing its darnedest to make things equal. When you salt meat, it physically breaks the protein bonds that hold the muscle cells together in a tight bundle so over time the tight bundle becomes a much looser bundle. By disrupting the bonds between muscle fibres they cannot physically contract up as much once that meat hits the heat, so less of the water inside gets squeezed out. The result? Juicer meat with the flavour ramped up to the max.
How to dry-brine
Dry-brining is ridiculously easy and quick. Simply sprinkle Maldon Salt all over the meat and set the onto a rack hung over a tray, slide into the fridge, uncovered, and leave undisturbed while the salt does it magic. The rack allows air to circulate and prevents the meat from resting in its own juices. A rough rule of thumb is to use a level tablespoon of Maldon Salt per kilo of meat. I try to leave the meat brining for 12-24 hours as standard, but even a couple of hours is worth doing if you are short of time. There’s no need to wash the salt off after brining. In fact I would encourage you not to as the salt will have slightly dried out the surface and a dry surface results in more effective Maillard reactions.
Maillard reaction, and why we don’t want perfect grill bar marks
The Maillard, or browning, reaction is a chemical chain reaction sequence that creates hundreds of new flavour molecules. It is why steak with a glorious crisply seared crust will always taste infinitely better than steak that is floppy, pale and grey-looking. While we may have been led to believe that perfect grill bar marks on our steak are the end goal, if evidence of the Maillard reactions is shown by browning on the surface, it almost goes without saying that grill marks are 100% not the aim here. You are only allowing the browning reaction to happen where the marks are, all the unmarked bits don’t get the insane flavour boost Maillard gives you. The more browning, the more flavour and an evenly browned crusty outer is the goal rather than the neat parallel lines mirroring your grill bars. Constant turning and flipping your steaks over a very high heat is the way to get an even crust.
Why reverse sear?
I prefer to cook thick steaks to share; it’s easier to nail the internal temperature vs crust conundrum, i.e. max sear on the outside, minimal chance of overcooking the inside. And I like the spirit of generosity it’s served in; a sharing dish always feels like a more friendly way of eating, offering an edible gift to those I love. Sharing steaks are always best cooked used a brilliantly failsafe technique called ‘reverse sear’. The weight of steak is irrelevant as you are cooking to temperature and so this technique is identical whether you are cooking a 500-600g steak for two or a 1-1.2kg steak for four. You do need an instant read thermometer, such as a Thermapen, for this technique but they are such useful things for all meat cooking I think they are a worthwhile investment.
With the reverse sear technique you flip the traditional way of cooking steak on its head, so instead of searing hot and fast, then moving to a cooler spot to finish cooking, you start very cool and finish very, very hot indeed. The result is a steak cooked to equal perfection from the outside to the centre, with a glorious deep brown crust all over.
Heat energy from the fire of your barbecue excites the molecules on the outside of the steak and those molecules transfer the heat into the centre of the meat. By starting your cook very slowly that heat transfer happens evenly, so your steak will be the exact same temperature on the outside as it is in the middle. Call it the fire cook’s equivalent of sous vide, if you like. The danger with starting high and finishing cooler is that you overdo the outside while trying to get the inside done as you like it, so the outside layer of a steak can be dry and overcooked. Reverse sear gives you, the cook, the chance for gentle equilibrium from top to bottom, resulting in a juicer steak with a better crust.
What temperature to cook to?
Ribeye steaks have a generous nugget of tasty fat in the centre, and whilst I like rare steak, the ribeye is a good cut to take a little further, perhaps to medium rare or medium to render the fat melting and succulent. But by all means eat it rare if you prefer.
With the reverse sear method you cook the steak low and slow to 10C below the final eating temperature, then to sear it very hot and fast until you have the temperature you want to eat it at.
Follow these temperatures when cooking:
Rare – cook to 42C low and slow, then take to 52C with a hot and fast sear
Medium rare – 46c initially, then 56C to eat
Medium – 50C followed by 60C
Why I don’t bother to rest steak
I always prefer to cook steak to the temperature I want to each it at and eat it as quickly as possible after getting it off the grill. The reason being that meat carries on cooking once off the heat and resting, but the rate of carryover cooking is rather variable – is it a hot summers day, or rather cool and chilly, or a humid damp day? These things have a big impact on carryover cooking meaning it can be impossible to judge when to remove it from the grill. The good news is, with dry brining, I guarantee your steak will be juicy and succulent straight from the grill.
Genevieve Taylor: Seared – The Ultimate Guide to Barbecuing Meat
Buttery chilli roasted nuts dressed broccoli…I mean, it sounds as good as it tastes! The crunchy almonds and well-cooked broccoli are a perfect match. It’s great to put down on the table as part of a meal, or equally served as a main. I like to eat this with plain boiled brown rice, not very heavily seasoned, as all the flavour and punch come from the buttered almonds. It is also really quick to bring together if you are pressed for time.
Trim about 2-3cm off the tough woody end of the stalks and quarter the broccoli heads through the stalks. Heat the oil in a large frying or sauté pan with a lid. Or use a baking tray to cover. Place the broccoli, cut-side down, in the pan and sprinkle in a good pinch of Maldon Salt. Cover and cook for 5 minutes over a medium-high heat. Alternatively, roast the broccoli in the oven. Place on a baking tray and roast for 10-15 minutes at 220C.
When the broccoli has started to brown, turn on the other cut side and cook, covered, for a further 5 minutes or so.
Turn on the final floret side and cook, covered, for a further 5 minutes. A knife should easily pierce the stalks at this stage. If not keep cooking, rotating the sides until done. Remove the broccoli and set aside.
Wipe any excess oil from the pan with kitchen paper. Melt the butter in the pan until foaming. Add the almonds and cook, continuously stirring, over a medium heat for 5 minutes until golden. Add the parsley and chilli flakes and cook for 1 minute, stirring constantly. Remove from the heat. Add a good sprinkle of Maldon Salt.
You can cut each broccoli segment into three or four smaller chunks, or leave as they are. Place in a bowl and spoon over most of the almond mix. Toss to coat well. Place on a platter and finish with the remaining buttery almond mix.
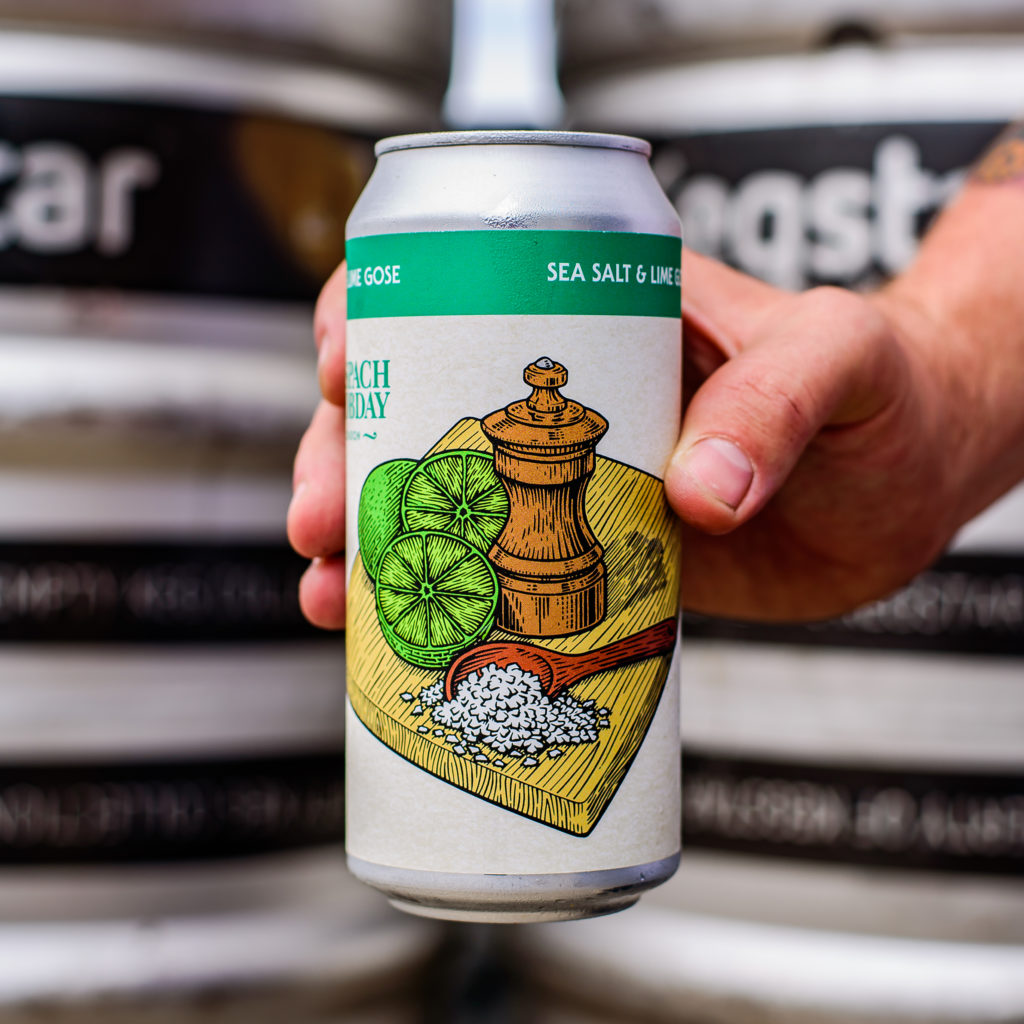
We’re delighted to have partnered with South London based brewery, Anspach & Hobday for a unique collaboration in celebration of our 140th birthday.
The team at A&H, led by co-founders Jack Hobday and Paul Anspach, have been creating new wave, craft beer since 2013. Alongside their classic core range, they create pleasing experimental beers and bespoke collaborations, pouring quality into everything they do. This month sees the launch of their Sea Salt & Lime Gose brewed with Maldon Salt.
As we enjoy a wonderfully warm summer season in the UK, the talented team at Anspach & Hobday decided to focus on citrus and sour flavour notes to create a refreshing drink. Using their learnings from the last few years, they added lime zest and lime juice towards the end of the fermentation, producing a high acidity with the beautiful flavour of lime brought to the fore by Maldon’s salt.
Fermented with Philly Sour yeast, this brilliant dual-purpose yeast produces a fantastic soft sour during fermentation eliminating the need for kettle sour and delivering a wonderful balance.
“We’ve always enjoyed using salt in beer,” says Paul Anspach, Co-Founder and Head of Production at A&H: “Whether in styles where you would typically expect it such as Goses or in experimental and progressive styles such as chilli & chocolate Stouts. As well as adding salinity, salt can really enhance the other flavours of a beer, as indeed it does when used in food.
Obviously when one thinks of high-quality sea salt only one name comes to mind, and the Maldon Salt used in this beer really helps the sharp, citrusy notes of the lime to punch through.”
Cauliflower is a wonderfully versatile vegetable, which often gets overlooked in my opinion. It has a delicate earthiness to it which marries really well with fragrant spices. These koftas are packed full of flavour, and when piled up in a soft flatbread with the creamy herbed yoghurt, pickled red cabbage salad, zesty pomegranate and mint it’s a pretty exciting mouthful.
Start by making your koftas – preheat the oven and then whack in the cauliflower florets drizzled with oil to roast. Once they are roasted, allow them to cool slightly before adding them to the food processor along with chickpeas, halloumi, parsley, coriander, cumin, paprika and cinnamon and a generous pinch of Maldon Salt. Season them well. Blitz until they form a rough paste.
Shape the kofta mix into small balls and place onto a tray or plate in the fridge to firm up until you are ready to fry them.
To pickle the red cabbage – finely shred the cabbage and place in a large bowl. In small pan add the water, Maldon Salt, sugar, spices, vinegar and lime juice. Gently heat the pickle brine until the sugar and salt have dissolved. Pour this over the cabbage and then set aside. You can do this a day ahead and leave covered in the fridge.
Mix up the herbed yoghurt – yoghurt, mint, dill and Maldon salt. Set aside.
Make the flatbreads – mix the self-raising flour, baking powder, yoghurt, 1 tsp salt and the nigella seeds to make a rough dough. Gently knead it to make it smooth. Break off small pieces and roll them on a lightly floured surface with a rolling pin. Heat a frying pan or griddle pan and fry off the flatbreads on each side until slightly charred in spots and cooked through. Brush them with oil and then wrap them in foil and keep warm in the oven while you make the rest.
Heat 2cm high of vegetable oil in a high sided sauté pan. When the oil is hot, fry off the koftas until they are golden brown on all sides. Remove from the hot onto a try lined with kitchen roll to soak up any excess oil.
Serve up! Take a warm flatbread and spread with the herbed yoghurt. Pile on some pickled red cabbage and then the koftas on top. Finish with some mint leaves, pomegranate seeds and a drizzle of pomegranate molasses.
Whether you use a pestle and mortar in this recipe or a hand blender – Maldon Salt flakes will help grind down the herbs and butter into a beautiful paste. This is a big ratio of herbs to butter and that’s how I love it. You can add the garlic or leave it out, as chives give a nice hit of allium. If you can’t grind sorrel, add watercress or spinach and a gentle spritz of lemon. This is good with grilled chicken and also with simple barbecued vegetables.
Put the potatoes into cold water and add a half of the Maldon Salt. Boil for 10-15 minutes or until a knife can easily go through.
Meanwhile pound or blitz the herbs, butter, garlic (if using) and the remaining Maldon Salt. You will have this amazing emerald l-green buttery herb paste.
Drain the potatoes and dress in the buttery herbs while still hot. Serve immediately.
Squashing the chicken with a weight while cooked on a plancha or a cast iron pan is a Georgian technique, yet basting it with lots of honeyed and spiced kefir is my Ukrainian dad’s technique. It cooks rather quickly and is so delicious. Salting the chicken a little in advance ensures tender flesh and crispy skin. Watch the flames if you are cooking it over fire, they shouldn’t be too fierce, but a bit of char is of course welcome.
To spatchcock the chicken, simply cut along the backbone with some scissors or cut with a meat knife. Press on the breast to flatten it.
Rub 2/3rds of Maldon Salt into the chicken’s skin, then rub in the oil and leave for 15 minutes to an hour. If your chicken was in the fridge it should come to room temp in that time.
Mix the kefir with the rest of the Maldon Salt salt and paprika.
Heat the fire pit or barbecue or otherwise lightly oil a large cast iron frying pan or even an oiled baking tray which you can place on the bottom shelf of a 200C preheated oven.
Start cooking the chicken cut side down, for about 7 minutes, then turn the it skin-side down and place a pan and a weight on (be careful that this is all stable enough and does not collapse) and cook for about 10 minutes. Check that the skin is not becoming too black, if it is lower the flames (by pushing coals to the side if doing it over fire), and cook on cut side down under a weight for another 5 minutes. Your small chicken will likely need a further 5 under a weight and another 5 minutes when you baste the chicken with the kefir marinade.
To check that the chicken is done, pull away at the leg (it should pull away from the joint easily) and pierce the thigh and breast, then pressing on it to see if the juices run clear.
Serve with the green potatoes and a simple lettuce salad.
Pork and apple is a classic combination. Any variety of sharp apple will do here, but the red ones add a beautiful splash of colour to your kebabs.
Cut the pork steaks into 3cm (1 ¼ inch) cubes, dropping them into a mixing bowl as you go. Add the mustard, olive oil and a good pinch of Maldon Salt and freshly ground black pepper. Stir well to coat the meat in the marinade, cover, then transfer to the fridge to marinate for 2 hours, or overnight if you have time.
When you are ready to cook, light the barbecue and set up the fire for direct cooking.
Chop the apples into quarters, remove the cores, then cut each piece in half – you should have 16 wedges. Add the apple to the pork and stir to coat in the marinade. Thread alternating pieces of pork and apple onto the skewers.
Once the barbecue is hot, lay the skewers onto the grill bars a little away from the fire – you want to cook over a moderate heat. Shut the lid and cook for 20 minutes, or until the pork is cooked through; the internal temperature should read 63c (145 F) for medium or 71c (160 F) for well done on a digital thermometer.
Serve with salad leaves and mustard on the side if you like.
Dredging clumps of crispy green beans through chilli sauce spiced mayonnaise is rather awonderful way to eat. This pairs well with a cold beer and friends. I like to pile the lightly coated green beans to encourage a bit of clumping. But do still cook in manageable batches. Draining each in-between piling on to a plate. Then you can tear away sections that way you eat form a perfect dredging apparatus.
In terms of adding chilli to the mayonnaise, play with your favourite sauce options. Gowith a hot sauce for a more vinegar led kick. For a spicy funk, try XO sauce or chilli rayu.
In a large bowl, beat the egg whites until fluffy with soft peaks. Whisk in the flour and sparkling water.
Heat the oil in a wide, deep pan until about 180C or when a little bit of batter fries well in contact with the oil.
Meanwhile mix together the chilli sauce and the mayonnaise.
Dredge the beans through the batter, allowing any excess to fall off. Gently lay the batter-covered beans in the pan, crisscrossing the beans to form tangled masses. Fry in batches for 3 minutes, turning once to cook evenly. Drain on kitchen paper and repeat until the beans are cooked. Add a generous pinch of Maldon Salt to each batch you make.
Arrange on a platter with the chilli mayonnaise in a deep dipping bowl. Take great pleasure in dredging chunks of green beans through the chilli mayonnaise.
This is the perfect time for asparagus, and we grow some of the best here in the UK. This creamy orzo dish is a sort of hybrid between a risotto and a pasta – perfectly indulgent yet fresh with the spring vegetables and lemon zest. ‘Pangrattato’ literally translates as ‘poor man’s parmesan’ in Italian, and these fried, crunchy breadcrumbs are used in the place of parmesan across an array of Italian dishes.
Start by heating up a big glug of olive oil in your pan and then add the shallot and fry until soft and translucent. Then add the garlic and fry for another couple of minutes.
Next add your orzo and fry in the shallot and garlic for a couple of minutes before adding a glass of nice white wine. Let the alcohol bubble off and liquid evaporate before adding the stock. Let the orzo gently cook in the stock.
While the orzo is cooking you can make the pangratatto – blitz some stale sourdough in the food processor to make breadcrumbs. Then heat some oil in a pan and add the breadcrumbs, garlic, and chilli flakes. Fry gently until the breadcrumbs go golden and toasted. Then take off the heat and add the lemon zest.
Once your orzo is nearly cooked you can add your vegetables – chopped asparagus, peas and the finely chopped pistachios. Let these cook for 2- 3 minutes until just tender. If the orzo is looking a little dry then add a splash more water.
Take the orzo off the heat and stir through the mascarpone, a knob of butter and the grated pecorino. Add a generous pinch of Maldon Salt and cracked black pepper to finish.
Spoon the orzo into bowls and scatter over the pangratatto.