Learn how to create the classic Chelsea Bun, infused with the flavours of sweet and spicy from the Chai tea, paired with cardamom to give warmth to the dessert.
Start by making the dough:
In a small pan add the milk and butter and gently heat until the butter is melted. Take off the heat and allow to cool slightly, you want it to be lukewarm. In a stand mixer add the strong white flour, yeast, caster sugar, cardamom, and Maldon salt, mix this together so the sugar and spices are mixed well in the flour. Then make a well in the middle of the flour mixture and add the beaten egg along with the milk and butter mixture. Then turn the stand mixer onto low and mix. Using the dough hook attachment on the stand mixer, continue to mix and knead the dough for 5 – 10 minutes until smooth, supple and elastic.
Cover the bowl in cling film and leave the bowl in warm place for approximately 1 hour, or until the dough has doubled in size.
While the dough is proving, you can make the filling:
In a large bowl mix together the softened butter with the light brown sugar, cinnamon, and cardamom. Grease a 20 x 30cm baking tin with some of the softened butter.
When the dough has doubled in size, knock the air out with your first. Then, tip the dough onto a lightly floured surface and roll it out till its roughly 30 x 50cm. Leaving a space along one of the long edges to start your rolling, spread the spiced butter filling across the rest of the dough and smooth it out. Then sprinkle evenly across the top of this with the currants and dried cranberries, using your hands to press them in slightly to the dough.
Using the long board you have kept clean, tightly tuck this under and roll the dough until you have a neat spiral with the filling. Once rolled, use a sharp knife to trim off the messy ends, and then cut into 12 equal rolls. Then place the rolls, spiral side up, in the greased baking tin with a 1cm gap between them. Loosely cover the tray with cling film and allow them to prove for a second time in a warm place for 30 minutes until well risen again.
Whilst the buns are proving preheat the oven to 180c.
When the buns have risen and doubled again, they are ready to bake. Place them in the middle of the oven and bake for 20 – 25 minutes until golden brown and baked through. While they are baking, place the 2 tbsp golden caster in a small bowl and add a tbsp of boiling water, stir until the sugar has dissolved and then set aside to cool. Remove from the oven and then brush all over with the caster sugar syrup, then allow the buns to cool.
For the final icing garnish, mix together the icing sugar with the spices. Then add 2 – 3 tbsp of water until it is smooth but with a good drizzle consistency. Place the icing into a small piping bag and snip off the end. Pipe and drizzle the buns with the icing in a zig zag pattern.
A decadent, light Victoria sponge with a generous filling of strawberry jam and cream – gently rolled up to form a perfect swiss roll.
Preheat the oven to 180c.
Grease a 33 x 23cm swiss roll tin with a little vegetable oil and then line base with baking paper. Grease this again with some oil and then sprinkle some caster sugar into the tin and move it around to make sure it evenly covers the base and sides of the tin. Tap out any excess.
Place the sugar and eggs into a large bowl and use and electric whisk to beat for approximately 10 minutes until the mixture has volumized considerably and it is pale in colour. This is when you can test it has reached ‘ribbon stage’ – when the whisk is lifted out the mixture and you run it across the top, it will leave a trail of mixture that sits on top, like a ribbon.
Carefully sift the flour into the mixture in stages, folding it in after each addition. Take time to do this as it is important to keep the mixture light, fluffy and aerated. Add a pinch of Maldon Salt within the mixture.
Once all the flour has been incorporated, pour it into the prepared tin and smooth over the top. Place the tin into the preheated oven for 10 – 12 minutes until well risen, golden and baked throughout.
While the sponge is baking, place a piece of baking paper slightly larger than your swiss roll tin onto the kitchen surface. Sprinkle this liberally with some more caster sugar.
Once the sponge has baked, remove it from the oven. Run a knife carefully around the edges to make sure it isn’t stuck and then tip and invert it onto the sugar-coated baking paper. Using a knife, draw a small cut line roughly 1cm from the edge of one of the long sides. Then starting here, carefully roll the sponge, making sure to tight the edge in tightly to create a neat spiral. Once it is rolled, keep it like this with the paper surrounding it, until the sponge has cooled.
While the sponge is cooling prepare the fillings. In a large bowl add the double cream and icing sugar, then whisk until it forms soft peaks. In a separate bowl add some strawberry jam, along with 1 tbsp water and mix so it is easier to spread. Finally, roughly chop some strawberries for the filling, leaving some whole for the top.
Once the sponge has cooled, carefully unroll it. Start by spreading a layer of the strawberry jam, then sprinkle across some of the chopped strawberries. Top this with a layer of the softly whipped cream. Make sure not to make the layers too thick as it will be difficult to roll again. Once all the layers are added, carefully re roll the sponge.
Using a sharp serrated knife, trim off the ends so you have a neat sponge. Decorate the top with some of the cream and fresh strawberries.
This recipe shows you how tomatoes are packed full of flavour when roasted, causing it to be a delectable addition to any meal. The roasting process really does intensify the sweetness of the tomato, whilst also creating undertones of depth when they begin to char slightly.
Preheat the oven to 180c.
Slice the tomatoes into rounds and then place them into a large bowl with the olive oil, sugar, and plenty of cracked black pepper. Toss the tomatoes so they are well coated.
Place the dressed tomatoes onto a baking tray and place into the oven for 30 minutes, turning them from time to time to ensure they don’t burn.
They are ready when they are fully roasted and beginning to char. These are delicious when simply served with some olive oil and a pinch of Maldon salt.
Make the British cult-favourite but vegan style! This recipe shows how to make the decadent, soft pudding combining the flavours of sweet fruits and the rich toffee sauce.
Grease a 25 x 20cm oven proof baking dish with dairy free butter and preheat the oven to 180c.
Start by making the sponge mixture. Roughly chop the dates and place in a heatproof bowl along with the bicarbonate of soda. Add the oat or almond milk to a pan and onto the heat, gently bring up it to scalding point. Pour the hot milk over the dates and allow it to steam and soften the dates for 10 minutes. Once the dates have softened and the mixture has cooled, add them along with the milk mixture into a food processor or blender and mix until smooth.
In a large bowl, beat together the dairy free butter and the soft brown sugar until light and fluffy and well incorporated. Next add the date and milk puree and mix through. Finally add the self-raising flour and spices, along with the Maldon salt. Fold this through the wet mixture so it smooth but making sure not to overmix the batter.
Tip the batter into the greased baking dish and smooth over the top. Place into the middle of the preheated oven and bake for 40 minutes until well risen and a skewer comes out clean in the middle. Remove from the oven and set aside.
While the sponge is baking you can make the sticky toffee sauce. In a small saucepan add the dark brown sugar and dairy free butter and melt together, then lower the temperate and cook together for 5 – 10 minutes until smooth and syrupy. Remove this from the heat and add the dairy free cream, stirring it in.
Once the sponge has come out of the oven, pour most of the sticky toffee sauce over the pudding – but leave some for extra drizzling! Sprinkle the top of the pudding with Maldon salt.
Serve the pudding while it is still warm with some dairy free ice cream and an extra drizzle of sticky toffee sauce.
What could be any more of a British classic than scones, clotted cream and strawberry jam! This recipe delves into how to create the perfect centre piece for any tea-party…the only debate to be had is if it is cream first or jam.
Line two baking trays with baking paper and preheat the oven to 200c.
Add the flour, sugar, pinch of Maldon salt and baking powder into a food processor and then add the butter in small pieces. Pulse the mixture until it resembles fine breadcrumbs but be careful not to over mix. Alternately if you do not have a food processor you can rub the butter in by hand.
In a small bowl beat together the two eggs and add the whole milk. Slowly add this to the breadcrumb flour mixture, incorporating each time as you may not need all the liquid, until you have a soft dough with no dry patches.
Tip the dough onto a lightly floured surface and knead gently to make the dough smooth. Then use a rolling pin to roll the dough out until it is roughly 2cm thick.
Use a 6cm fluted cutter to stamp out as many scones as you can, and then place them onto the lined baking trays with a little room between them. Once you are left with the offcuts, you can knead them lightly back together and re roll the dough and repeat the stamping until you have as many as the dough makes (ours made 18).
Brush the tops of the scones with a little milk and then place the trays into the preheated oven for 15 minutes. They should be well risen and lightly golden on top. Remove the trays from the oven when baked and allow the scones to cool.
Serve the scones with Rodda’s clotted clean and Tiptree strawberry jam – and a big pot of tea!
This drizzle cake recipe explores the flavours of zest from the lemon and the natural piney, sweetness from the pistachio nuts.
Grease a 900g loaf tin with some butter and line with a strip of baking paper. Preheat your oven to 180c.
Place the pistachios into a food processor or blender and blitz them until they resemble a fine crumb – like ground almonds. In a large bowl whisk together the butter and sugar with an electric whisk until light and fluffy. Next add the blitzed pistachios, natural yoghurt, eggs, flour, baking powder, pinch of Maldon salt and the zest of the two lemons. Whisk together until smooth.
Use a rubber spatula to tip the cake mixture into the prepared loaf tin, then smooth over the top. Place into the oven on the middle shelf and bake for 45 minutes until risen and a metal skewer comes out clean.
Remove from the oven and allow to cool before lifting out of the tin. Place onto a wire rack to cool fully. Meanwhile, make the icing.
In bowl add the icing sugar and then squeeze the juice of the lemons into a separate bowl, making sure to remove any pips. Add a tsp of lemon juice at a time to the icing and mix after each addition until you have a smooth drizzle icing. Spoon the icing over the cooled cake and allow it to drip down the sides. Decorate with some more chopped pistachios and some sugared lemon zest.
A classic Battenberg cake with a twist! Celebrating the colours of Maldon Salt with green and orange accents – it’s sure to be a delicious treat for any dinner party.
Preheat the oven to 180c. Grease a 20cm square tin.
Cut a sheet of baking paper into a 40cm x 20cm rectangle, then fold this rectangle in half (short side to short side). Hold the fold in the middle of the tin and then press down each side so you create a divide across the middle of the tin. To make sure the divide is sturdy, you can use some foil along the fold also. Your tin now has two equal halves.
Using an electric whisk, beat together the butter and sugar in a large bowl until it is pale and fluffy. Add the eggs and whisk in. Add the self-raising flour and a pinch of Maldon Salt and gently fold in the mixture.
Split this mixture into two equal parts and spoon the other half into a separate bowl. To this bowl add the ground pistachios, green food colouring and 2 tbsp of milk. Mix together until it is smooth and has a good dropping consistency (add a splash more milk if needed).
To the original bowl add the ground almonds, orange food colouring, orange zest and 2 tbsp of milk. Mix and check the consistency to match that of the other bowl.
Spoon each flavour mixture into each half of the cake tin and smooth over the top. Place into the preheated oven for 30 minutes until baked and a skewer comes out clean. Set the cake on a wire rack to cool completely.
Once cool, remove from the tin and use a serrated knife to trim off the tops and edges. Then slice both flavours in half lengthways so you have two long pieces of cake of each flavour. Check to make sure the pieces are the same size and trim any if necessary.
Dust your work surface with icing sugar and then roll out the marzipan until it is a large rectangle roughly 20 x 35cm in size.
Use the apricot jam to brush the edges of cake slices and then place them in the middle of the marzipan with a green piece next to an orange piece and then alternating on top. Brush the excess marzipan around the cake with apricot jam and then lift it up around the cake to tightly enclose it. Trim off any excess marzipan and then seal it together. Flip the cake so the seal is at the bottom. Trim off both ends of the cake neatly with the serrated knife and then serve in slices to your guests.
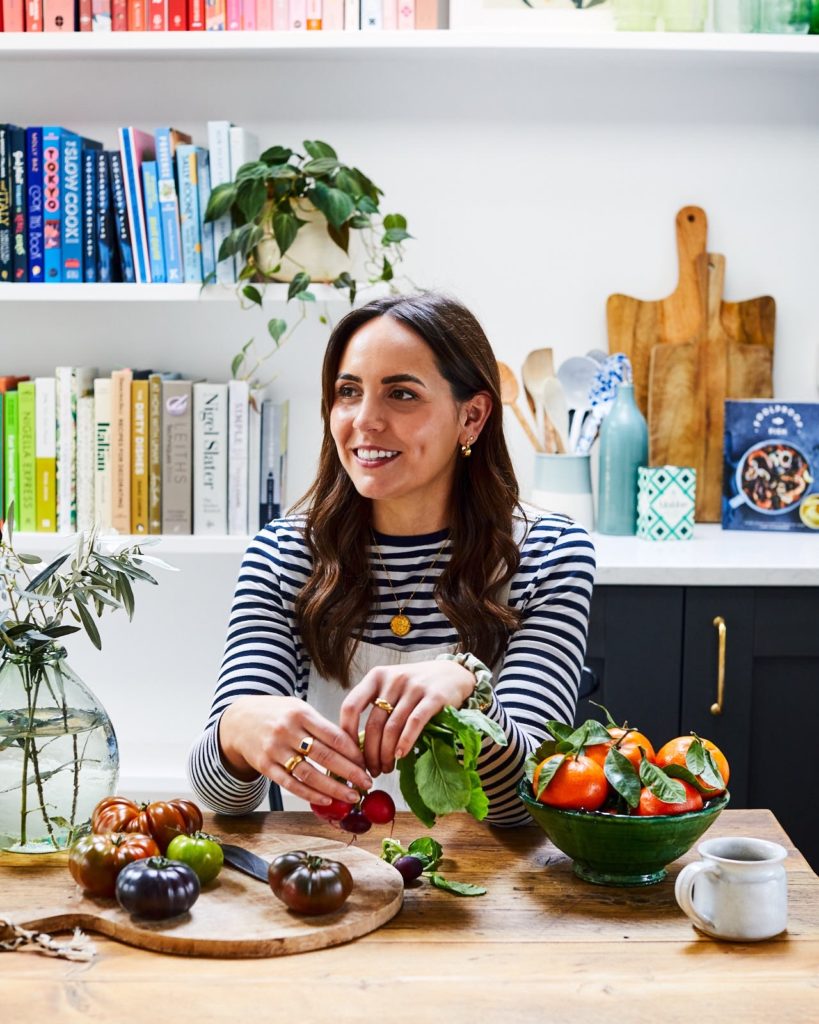
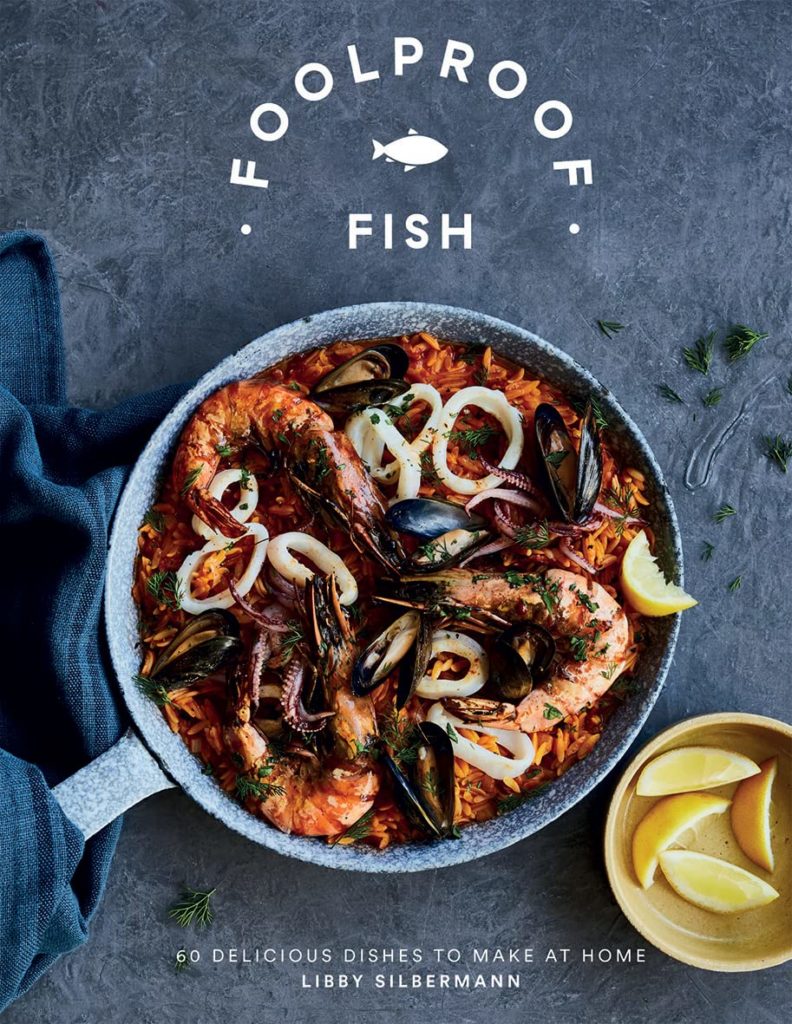
Starting her culinary career at Leiths, Libby Silbermann is the face behind our Maldon Salt recipes. Excitingly, Libby has just released her second book ‘Foolproof Fish’. This Q&A sets the scene at her at home, where we talk about what it is like to work as a Food Stylist & Recipe Creator and where she draws inspiration from.
When did you know you wanted to work doing what you do?
I’ve always loved cooking from a young age. I was equally creative at school too and nearly went to art school, but I never realised there could be a career which combined the two. I first had a taste of Food Styling and gained an insight into how shoots work when I assisted at Jamie Oliver’s with his in-house food team, and I was hooked. I then went on to study at Leith’s with the end goal of styling and writing.
Is there a favourite project you’ve worked on to date?
‘Foolproof Fish’ (my most recent cookbook) has been a real highlight. It was so lovely to fully focus on Fish and Seafood – which are some of my favourite ingredients to cook with. Seeing people post about cooking your recipes is both surreal and exciting!
What is your favourite way to enjoy a pinch of Maldon Salt?
Maldon salt is a fundamental ingredient to nearly all my cooking and recipes – salt is key to enhancing and balancing flavours. I love a good pinch across a simple tomato salad, on top of a dark chocolate cookie or brownie and across a well toasted, (very) well buttered piece of toast.
Any meal, anywhere, what is it?
I love Asian flavours and dishes and so that salty, savoury Unami is often what I crave. Dumplings with crispy chilli oil, steaming chilli chicken ramen and some garlicky soy greens and I’m sold.
Is there a favourite recipe in your new book Foolproof Fish?
I love the crab linguine – it has crab, chilli, tomatoes, and lemon but instead of parmesan it is topped with a garlicky sourdough pangrattato which is common in Italian cooking. The crunchy topping alongside the silky pasta is a must try!
Do you have a favourite cuisine?
I really do love all food cuisines but probably Italian or maybe Sri Lankan.
What does a Friday night in look like?
In my 30s I seem to have adopted a new rule of ‘Saturday nights out, Friday nights in’ (or vice versa). Usually, I’ll cook whatever I have been craving that week and normally it’s a little of a fridge forage situation – often, it’s pasta.
Libby’s new book ‘Foolproof Fish’ is now available to buy, where you can also enjoy all of her recipes available on our blog.
To mark 140 years of salt crasftmanship, we are delighted to unveil details of our 140th birthday celebrations which include a 140th limited-edition celebratory pack and a series of exciting birthday festivities which honour our heritage and are set to inspire foodies everywhere to ‘seize the seasoning’ and celebrate great taste!
Maldon Salt is hand crafted with the same time-honoured techniques that were used when it first began back in 1882. Now run by the fourth generation of the Osborne family, the business has gone from strength to strength. This year will be a nostalgic celebration of 140 years of craftsmanship.
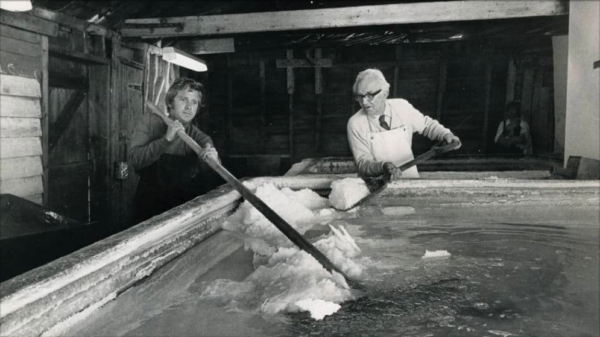
Picture shows current MD Steve Osborne’s Father (Clive) & Grandfather (Cyril) in the original salt works which are still operational today.
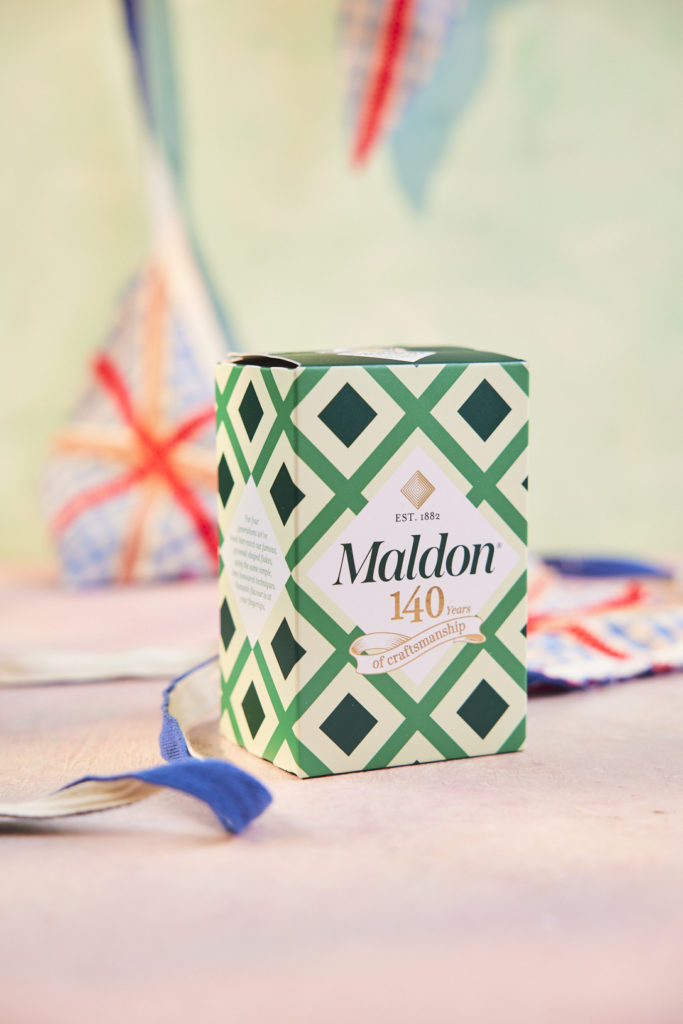
Available from June, our Limited Edition140th Anniversary Original Sea Salt pack (250g) will be available in retailers nationwide. Featuring a golden ‘140 years of craftsmanship’ logo, it is a must-have for many millions of loyal fans who want to join in the celebrations and grab themselves a special commemorative pack. Be quick as when they’re gone, they’re gone!
140th Anniversary Edition: 250g Original Sea Salt Flakes
Celebrating the Queen’s Platinum Jubilee
Maldon Salt is not the only one celebrating a major milestone this year. Coincidently its 140th Anniversary falls in the same year as Her Majesty the Queen celebrates her Platinum Jubilee. The Queen first visited Maldon’s salt works in 2010 and it was just two years later, that we were granted a Royal Warrant which stands to this day, as the official purveyors of sea salt. This is something which we are enormously proud and honoured about. Interestingly a special commemorative book: ‘Her Majesty the Queen’ Inside the Official Platinum Jubilee album,’ is due to be published soon and features 250 royal images, including some images of Maldon Salt.
To help people celebrate the Queen’s Platinum Jubilee and create extraordinary food for friends, family and loved ones to enjoy, we have created a series of jubilee-inspired nostalgic puddings which will be available on our website blog very soon. Just like Maldon Salt itself these puddings are traditional, but they also have a wonderfully modern and contemporary twist. Recipes include Orange & Pistachio Battenberg, Chai Chelsea Buns, and a delicious Eton Messwith a twist, all made with Maldon Salt.
And the birthday celebratory events and activities don’t stop there! We are really getting the party started with events including another link up withMob; social media activities including ‘Salt Stories’ showcasing some of the extraordinary chefs, People and Brands that use and love Maldon Salt and ‘Foodie‘ influencer partnerships to inspire people to use Maldon Salt to elevate their dishes. We even have an exciting competition to win VIP places at Maldon Salt’s Extraordinary 140th Birthday Party. Please check out Maldon Salt socials for more details on all this excitement, coming soon.
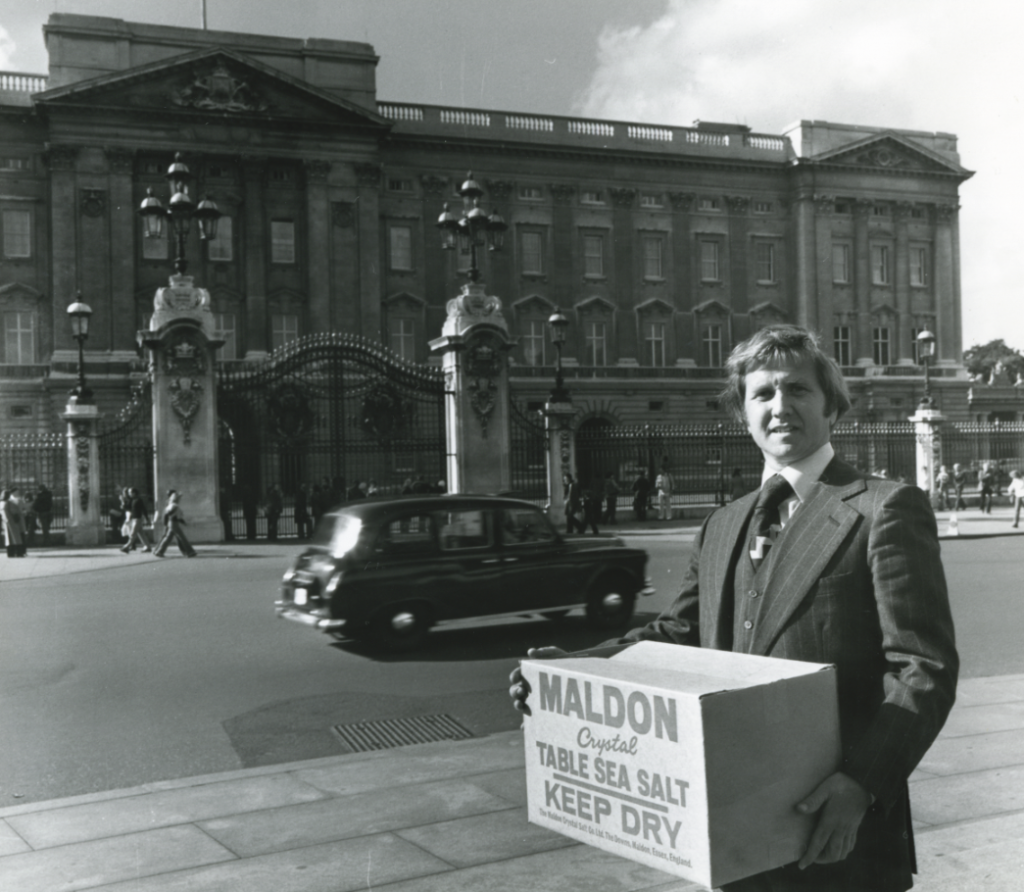
Maldon Salt’s Clive Osbourne visiting Buckingham Palace in 1977
And now a final word from our Commercial Director, Robert La Francesca…
“Maldon Salt has a wonderful and rich history of traditional quality craftmanship and in our 140th anniversary year we really wanted to celebrate this fact and pay tribute to the four generations of the Osborne family and all our fantastic people and loyal consumers who have played such an important role in helping us to become the world-renowned culinary brand that we are today. From our 140th anniversary logo which appears on our exciting new limited edition celebration pack, right through to all the exciting consumer activations and fun birthday festivities we have planned, we are saying a big thank you to everyone who has been part of our history and inspiring current and future generations of people to seize the seasoning and celebrate great taste.”.
What is Eton Mess?
Eton Mess is a classic British dessert, consisting of meringue, whipped cream, and fresh strawberries or strawberry sauce. The elements are layered and served together before resembling a delicious ‘mess recipe’. This dessert is ideal for serving when strawberries are in season in the UK (April – July) and is typically known for being a relatively easy dessert to make for your dinner guests.
Eton Mess origin
The classic Eton Mess supposed origin dates back to 1893 from Eton College. This is where a decadent strawberry pavlova was made to celebrate a cricket match against the opposing Harrow School. However, it’s believed there was an accident and the pudding was crushed! However, the students didn’t care about the mess that was made, and thus the famed ‘Eton Mess’ was born from that day onwards.
Conversely, the first written mention of an Eton Mess was found in 1893 when Queen Victoria attended a party for her eldest son, and was served a dish called Eton Mess aux fraises which translates to ‘Eton Mess of strawberries‘.
How to make Eton Mess
Preheat the oven to 100C.
Begin by making the meringues. Add the egg whites to the bowl of a stand mixer and turn the whisk attachment on to high. Whip the egg whites until they form stiff peaks and then turn the speed down to medium-low. Slowly add the caster sugar, a teaspoon at a time, allowing each addition to be properly incorporated before adding the next. You can also add a few drops of vanilla extract for a gentle sweetness. You need to make sure the caster sugar is dissolved after each addition. The best way to check this is by rubbing a little bit of the meringue between your thumb and forefinger. The mixture should feel smooth and not grainy. If it is still grainy then continue to whisk until smooth and all the sugar has been added.
The meringue should now form stiff peaks, be voluminous, and glossy. Add the tablespoon of lemon juice and whisk again to incorporate. The lemon juice helps to stabilise the meringue.
Alternatively, you can buy store brought meringue from various UK supermarkets, however homemade meringue tastes much better and fresher!
Once you have made your meringues, line two large baking sheets with baking sheets or parchment paper, and use a little of the meringue mixture on the corner of the baking sheets to stick it to the pan / tray. With our recipe we have chosen to bake some large meringues to crumble throughout the Eton Mess but also some smaller, meringue kisses to decorate the top – but this is optional.
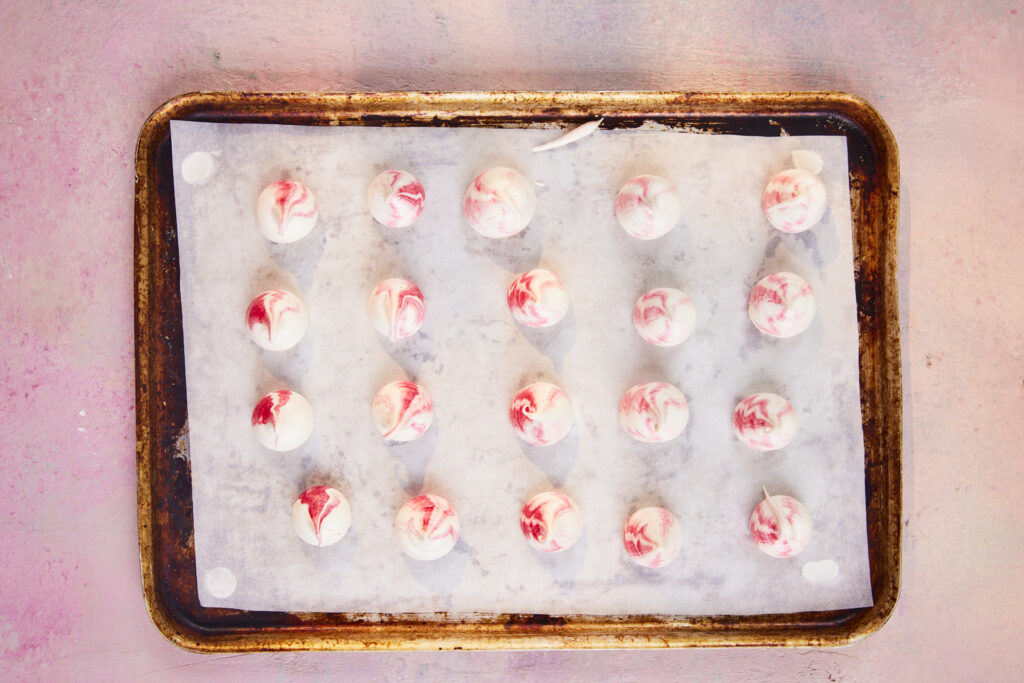
To make the pink and white meringue kisses, use a a piping bag with a small nozzle attached, then paint pink gel food colouring up the inside of the piping bag with a food safe brush. Then, simply spoon some meringue mixture into the piping bag and pipe small kisses onto the baking tray. These small kisses take roughly 45 minutes to bake.
With the larger meringues, you can simply spoon these straight onto the baking sheet. We left some of ours white. Then with the remaining meringue mixture we marbled some pink through by folding pink food colouring through, stopping before it was fully mixed. Then we spooned this onto the baking sheet in the same way. These larger meringues take approximately 1 hour to bake. The best way to tell if the meringue is baked is if they lift very easily off the baking sheet or parchment paper.
Once all the meringues are baked, remove from the oven, and allow to cool. Once the meringues are cooled you can assemble the Eton Mess. Lightly crush the large meringues and leave the kisses to garnish.
Pour the double cream into a clean bowl and add the icing sugar. Use an electric whisk to beat this to soft peaks. You can whisk this by hand, it just takes longer and a little more elbow grease! Finally add the vanilla extract (or vanilla bean paste), and Maldon Sea Salt flakes before folding through gently. Adding Maldon Sea Salt is both a delicious and vital element as it helps cut through the sweetness of the dessert and enhances the flavours of the strawberries and vanilla.
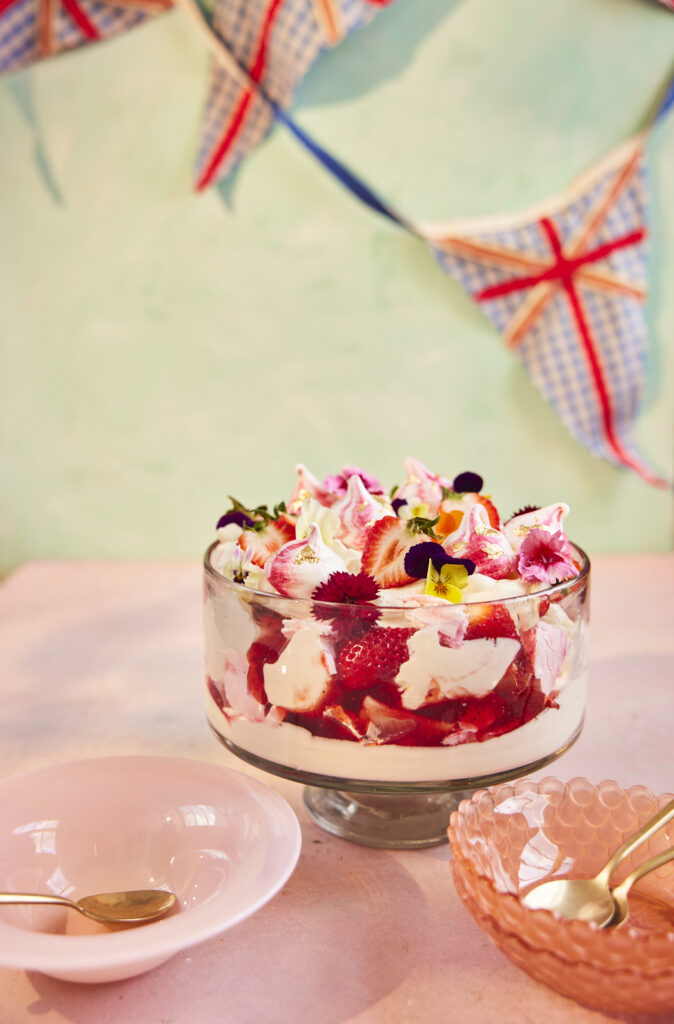
In a large trifle dish, you want to start layering up – there is no correct way to do this, hence why it’s named a ‘Mess‘. Simply alternate between layering the softly whipped cream, strawberries, crushed meringues pieces, and strawberry sauce. If you want to make your own sauce, try our delicious homemade fig jam that works perfectly with the sweetness of the meringue. Finish the top of the layers with some soft peaks of the whipped cream.
Finally, garnish with the meringue kisses (we decorated ours with little flecks of gold leaf), strawberry halves and edible flowers. Serve immediately.
Can you freeze Eton Mess?
Yes, you can freeze Eton Mess! Make sure you store the Eton Mess in an air-tight container before placing in the freezer. You can freeze for up to 1 month.
However, you must be very careful when defrosting Eton Mess as you do not want the dessert to absorb any moisture as this will soften the outside the meringue, ruining it’s delicious crispness! To thaw or defrost the pudding, remove from the air-tight container and put it onto a wire rack. It shouldn’t take more than one hour to completely thaw and should be consumed immediately after!
How long does Eton mess keep in the fridge?
Although Eton Mess is best served immediately after assembling, we recommend storing the dessert in the fridge for up to 2 days. After the second day, the meringue will start to soften and the fresh strawberries will start to go squishy and unpleasant.
How far in advance can you make Eton Mess?
You can certainly make a Eton Mess in advance! For example, the cream can be whipped an hour earlier and stored in the fridge. Additionally, if you made your own strawberry sauce or coulis instead of store bought, then making the sauce from scratch can be made up to two days in advance, ensuring it’s covered in the fridge!
What is the difference between Eton Mess and Pavlova?
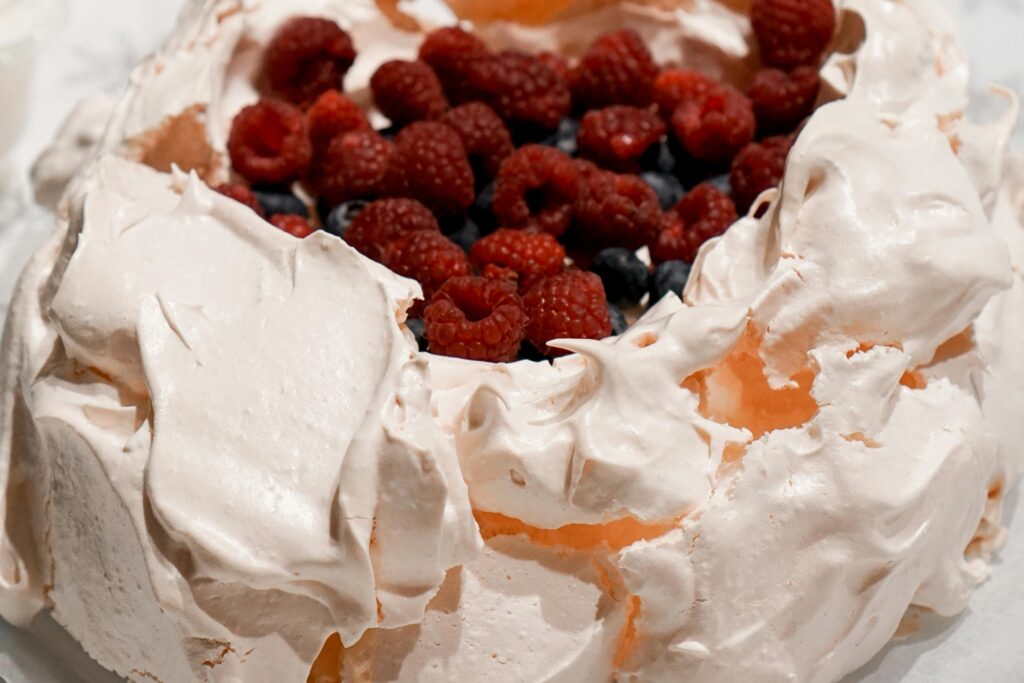
Although both puddings have a meringue base, whipped cream and topped with fruits or a sweet sauce, the main difference between an Eton Mess and pavlova is how they are presented. Eton Mess is assembled in a way that resembles a ‘mess‘ (pun intended!). It has broken pieces of meringue, folded up or mixed altogether before being presented in a glass. In contrast, a pavlova is an unbroken meringue, topped gently with whipped cream and fresh fruits.
What is the origin of the Pavlova?
The meringue-based dessert originates from either Australia or New Zealand in the early 20th century, with the two countries still debating to this day where it’s true origin came from. The name ‘pavlova’ derives from the Russian ballet dancer Anna Pavlova, who toured in Australia in the 1920s, in which the country is believed to have celebrated her through patisserie. However, Helen Leach of the University of Otago revealed a paper stating the a recipe for pavlova appeared in New Zealand in 1929.