






- Fire up the barbecue ready for indirect smoking with a temperature of about 140-150C.
- Drizzle a little oil over the mushrooms and season with Maldon Chilli Sea Salt. Smoke for 40 minutes and then remove.
- Open up the air vents of the barbecue to increase the temperature to around 180C.
- Drizzle a little more oil over the squash and season generously with Maldon Garlic Sea Salt, roast indirectly until tender and lightly charred at the edges – 45 minutes or so.
- Soften the onions in oil over a medium heat, on the BBQ or on the hob. Then add the garlic, sage and thyme and stir for a couple of minutes.
- Chop the smoked mushrooms and add to the pan of onions along with the chopped chestnuts. Pour in the cream, allowing it to bubble and thicken. Leave to cool.
- Mash the squash with the butter, smoked paprika and nutmeg. Leave to cool.
- Unroll the pastry, roll out very slightly thinner, lift onto a baking tray.
- Spread the squash over the pastry leaving 3cm border.
- Spoon the mushroom mix in a line down the centre.
- Brush a little beaten egg on the pastry border then roll up the pastry so it looks like a fat sausage roll. Snip a pattern in the top with scissors. Brush the egg all over and sprinkle generously with Maldon Garlic Sea Salt.
- Bake indirect, between two fires, at about 200C for as long as it takes to cook the pastry to crisp and golden brown, perhaps 45-55 minutes.
Category: Uncategorized
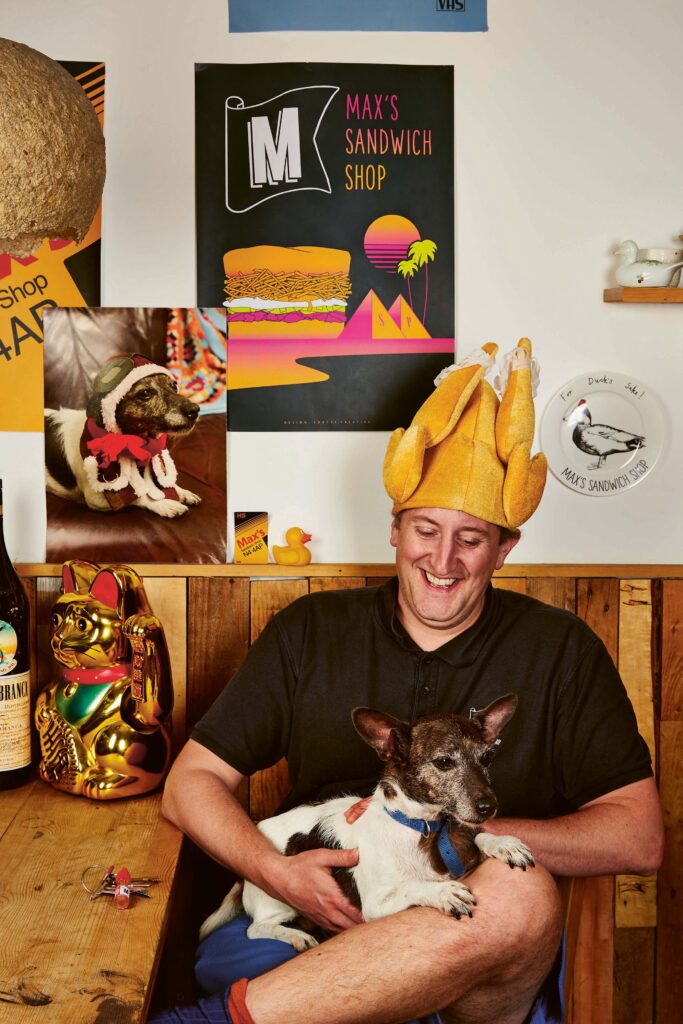
Max’s World of Sandwiches is the ultimate guide to transforming the humble sandwich into a culinary masterpiece. Created by Max Halley, the globally celebrated ‘Sandwich King’, this book celebrates sandwiches in all their glorious diversity. Max’s Sandwich Shop in London has earned international acclaim for reimagining what a sandwich can be, along with his media appearances on shows like MasterChef, Sunday Brunch, and Top Chef to spread the love around sandwiches. With contributions to The Guardian and The Evening Standard, Max shares his passion for the art of sandwich-making with audiences everywhere. Whether it’s buns, wraps, bao, or even kebabs, Max’s book promises a world of delicious possibilities.
At the heart of the the book lies a two-part structure: sandwiches and their essential components. The first section is packed with inventive sandwich recipes that marry flavours, textures, and creative inspiration, transforming everyday ingredients into unforgettable meals. The second section dives deep into the element that define a great sandwich: fresh bread, sauces, bold fillings and toppings such as crunchy crisps. By combining both sections, readers are empowered to craft sandwiches that are as exciting to make as they are to eat.
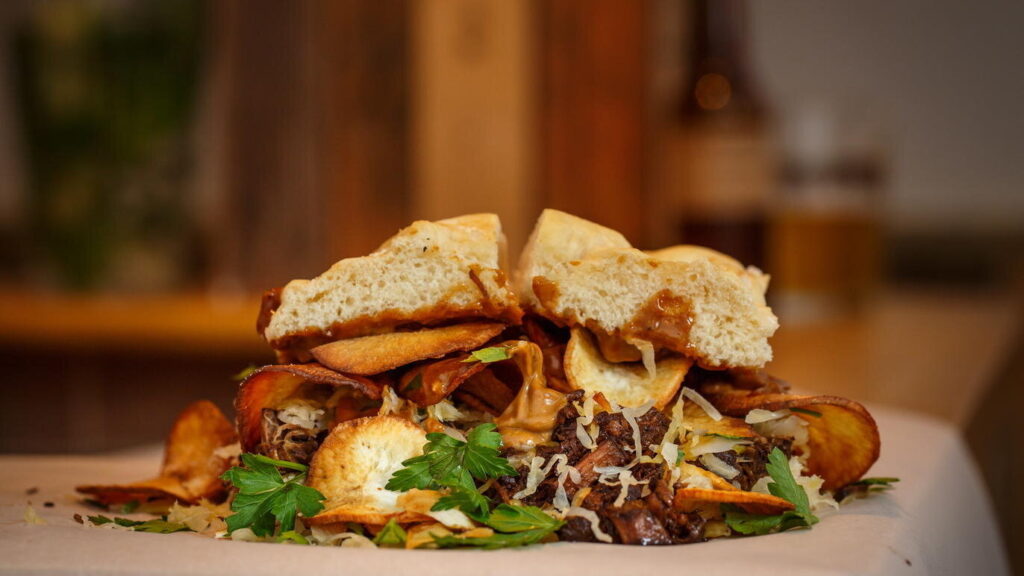
The recipes in the book range from deliciously simple to spectacularly unique creations, offering something for every occasion. Quick and easy options include the Prawn Cocktail Sandwich, and the Supermarket Rotisserie Chicken Sandwich, perfect meals on the go. For those looking to elevate their sandwich game, try more intricate creations like the Porchetta Sandwich or Coronation Fried Chicken Sandwich. There’s even room for dessert, with indulgent ideas like a Hot Cross Bun Sandwich with Salted Caramel Ice Cream.
Whether you’re a novice or a seasoned sandwich enthusiast, Max’s guide ensures there’s always something new to discover.
In Conversation with Max Halley
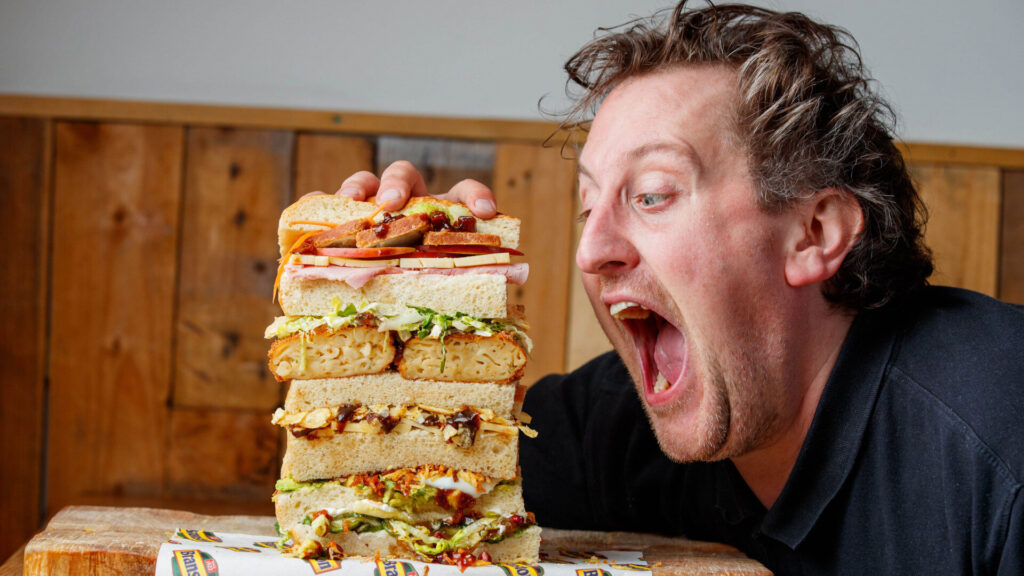
Max, your approach to sandwiches is both iconic and (seriously) inventive. What inspired you to create ‘Max’s World of Sandwiches’, and what do you hope readers take away from it?
I wanted to try and help as many people as possible think differently about what might can be put between two bits of bread, and to reconsider what might constitute a sandwich – I hope readers of the book will be freed from the (delicious, of course) tyranny of deli meats and mozzarella and develop a more liberal attitude to mayonnaise.
The book is split into ‘sandwiches’ and ‘components’. Why did you decide on this structure, and how do you think it changes the way readers might think about building a sandwich?
I wanted to give everyone some really wonderful examples of all the mad stuff you can make sandwiches with ( a HOW-TO sandwich I guess) and then give them TONNES of recipes to come up with brilliant things of their own. I also love the idea of sneaking a surprisingly serious cookbook on people whilst pretending to have written a silly book about sandwiches.
You’ve got some wonderfully innovative recipes in this book, from a Chicken Schnitzel Sandwich to a Hot Cross Bun Sandwich with Salted Caramel Ice Cream. What’s your process for coming up with these unique flavour combinations?
Everything begins with deliciousness. When I eat something I think is delicious, I think one of two things: ‘How could I turn that into a sandwich?’ Or, ‘is that basically a sandwich?’ Life’s a joy I tell you.
Come on, we’re dying to ask…what would be your favourite recipe in the book?!
All my children are beautiful hahahahaha. The chimichurri recipe is JUST INCREDIBLE and as good with a Sunday roast as it is with a piece of grilled fish or in any sandwich !!!!
For sandwich novices, what would be your top tips for building a simple yet unforgettable sandwich?
Never forget crunch – the missing element of most sandwiches. And lettuce isn’t crunchy, it’s fresh, crisps are crunchy. You should always put more mayonnaise in too. If you want to know how much mayo to put in a sandwich, keep putting it in until you feel a little intimidated. Then you’re there. Oh, yes, you’d also be AMAZED at what you can blend up and mix into mayonnaise. My wife always jokes that there’s no point asking me to try food she’s cooking because she knows I’m going to say ‘more salt and more acid’, so always think about that too. As you well know, a pinch of salt can make a huge difference to nearly everything, as can a squeeze of lemon or drop of nice vinegar.
Name three things in the kitchen you can’t live without!
An enquiring mind, a willingness to experiment and a large glass of wine.
Your passion for sandwiches shines through in every recipe! What’s next for you and for Max’s Sandwich Shop? Any future plans you can share for what’s coming up in the world of Max Halley?
My Sandwich Shop just turned ten, so at the moment we’re refurbishing it to get it ready for the next ten years!!! Other than that, I’m just trying to find new things to blend up and mix into mayonnaise and spread a bit of joy in the world. Long live Max’s Sandwich Shop, Long live sandwiches and long live each and every one of us.
Steak Tartare Sandwich Recipe
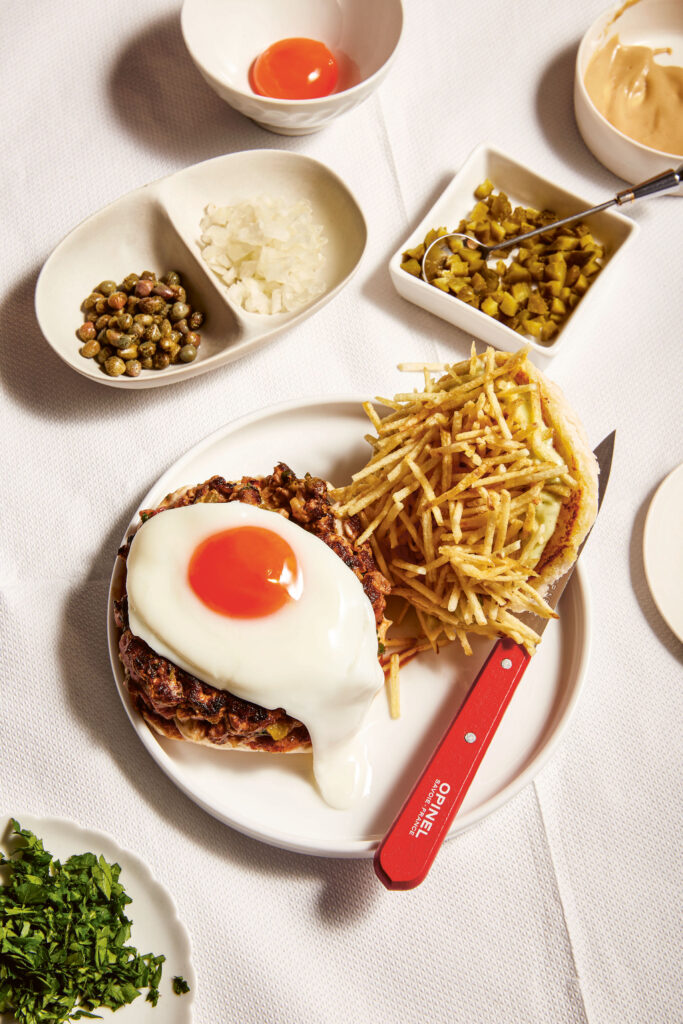
Is a burger a sandwich? Is it stuff between two bits of bread? Max used to have a girlfriend who lived down the road from one of London’s (the world’s?) greatest restaurants: Otto’s French Restaurant.They often went to have steak tartare there because it’s just so damn good! She could only ever eat half, so they’d take hers home and the next day, devil that Max is, he’d fry it in a patty and have it as a burger for his lunch. Half travesty, half brilliant.
At Otto’s they, and if you are lucky, the man himself, will mix your steak tartare at the table in a wonderful piece of restaurant theatre. Max cannot recommend it enough. They’ll also squash you a whole duck, lobster or pigeon, but we’ll let you find out about that for yourself.
Have a read of the fried egg chat in Max’s new book. Soft, floppy fried eggs are just so, so good in the right sandwiches. And don’t worry, you don’t need to make shoestring fries like Max does at the Sarnie Shop (unless you want to, of course). The internet sells these wonderful Portuguese crisps called Dalimar Potato Sticks (Batata-Palha) which you can use instead. Some supermarkets sell their own brand potato sticks, but they’re often made of reconstituted potato and are consequently very dry and tend to be too thick anyway. As Max says in the recipe, you can always just crush up some ready salted crisps.
Begin by making the steak tartare
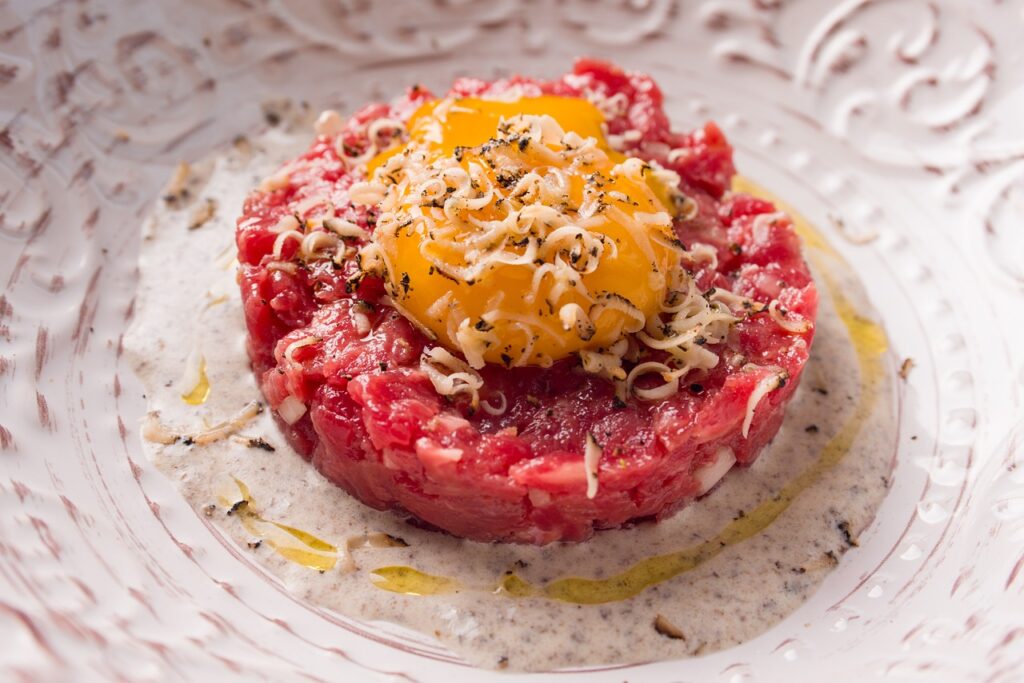
Ideally use fillet, talk to the butcher – sirloin is also very nice, just don’t use the hard white fat across the top of the steak. This recipe Makes enough for 4 burgers/ servings, or could feed 8–10 as a little nibble, in Baby Gem lettuce cups if you’re feeling ‘bougie’.
- 500 g (1 lb 2 oz) very good, lean beef, ideally fillet
- 2 squash-ball-sized shallots, very finely diced
- 1 tablespoon capers, drained and chopped (if salted, soaked in cold water for 10 minutes, then drained and chopped) (if you can buy those tiny capers, some times called Lilliput Capers, just leave them whole)
- 1/2 teaspoon freshly ground black pepper
- ½ teaspoon Maldon Salt
- 1 teaspoon lemon juice
- 1 tablespoon Dijon mustard
- A good few dashes of Tabasco sauce
- 2 large free-range egg yolks
- 1 tablespoon ketchup
- Small handful of finely chopped parsley
- A good few dashes of Worcestershire sauce
Method:
- Cut the steak into strips, then cut the strips into half lengthways, or even into three if the steak is very thick. Cut those strips into little chunks. This will be even easier if you use your sharpest knife and your meat is refrigerator cold.
- Once all the beef is cut into nice small bits, add it to a bowl and add everything else. Mix to combine and serve in whatever fashion you intend, which could well be with a few mates and some chips, roast potatoes or crisps. If this is for the burger, then mix everything, form into tight patties and refrigerate on a plate for at least 2 hours.
Prepare the Tarragon Mayonnaise
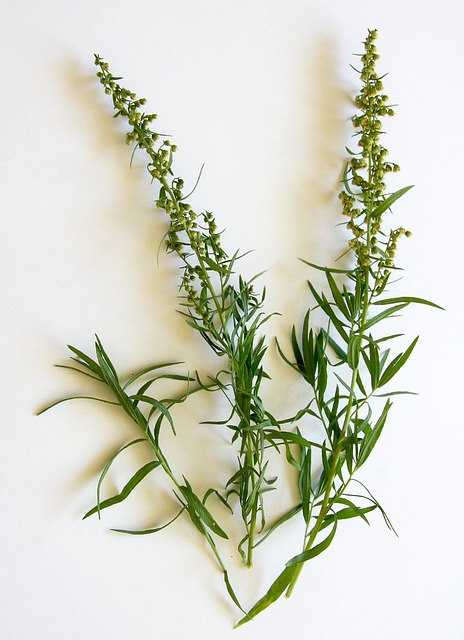
This is great with any soft herb- basil, chervil, coriander (cilantro), parsley, etc. Just the leaves though – no stalks! Makes enough for 5–10 sandwiches depending on how much you like mayonnaise.
- 1 batch of mayonnaise, or 250 g (9 oz) store-bought ( like Hellmann’s)
- 50 g (2 oz) fresh tarragon, leaves picked
- 2 teaspoons capers, washed and finely chopped
- 1 tablespoon tarragon vinegar (if you have it, white wine vinegar if not)
- 3 tablespoons extra virgin olive oil
- Big pinch of Maldon Salt
- 1 teaspoon of Dijon mustard (optional)
- If you’re making the mayo from scratch, get that done now. In a separate bowl or container, blend (for a full 20 seconds), the fresh tarragon with the capers, vinegar and olive oil. If you’ve had enough blending for some reason, you could just hand chop the tarragon leaves and capers as finely as you can manage.
- Bang the mayo and remaining ingredients, into a small bowl and whisk everything together. If your mayo feels too thick with all the gear mixed in, thin it out with a teaspoon of water.
- This will keep very well for at least 2 days in the refrigerator in an airtight container.
Make the steak tartare sandwich:
Ingredients:
- 1 x 150-g (5 ½ -oz) steak tartare patty*, the same diameter as your bun and about 2.5 cm (1 in) thick
- 1 egg
- Vegetable oil, for frying
- 1 floury bap or any nice bread roll, cut in half
- 1 teaspoon Dijon mustard (Max likes French’s mustard too), mixed with a touch of mayonnaise to make it easier to spread
- 1 tablespoon Tarragon Mayonnaise*
- Handful of Shoestring Fries, Dalimar Potato Sticks or crushed ready salted crisps
Method:
- Make the tartare into a nice, tight patty in your hands. Make a ball first, then shape into a puck and squeeze it all together relatively tightly. Slap the puck a bit on both sides to get the air out. Do this 2 hours before you want to cook because it needs to sit in the refrigerator for that long first. This will make it less likely to fall apart and make sure it’s really cold, so you have more time to get it crisp and crusty on the outside without overcooking it as a whole.
- Now to the cooking. Take the patty straight from the refrigerator and into one side of a super-hot frying pan (skillet) with a good splash of veg oil in it – it should be literally smoking hot when the patty goes in. Fry the inside top and bottom of the bun in the pan with the patty until toasted. Squish the patty down gently with the spatula and flip it (really carefully) only once so a nice crust and some colour can build up – about 2 minutes. Give it another little squish and cook it for the same time as the first side, pushing it back together a bit if necessary. Don’t move it about or touch it at all. Because it isn’t minced, as burgers normally are, it will fall apart if you try to move it about. You could cook it inside a metal pastry ring if you’ve got one.
- Spread the mustard mayo on the bottom of the bun. Remember you eat tartare raw, so don’t overcook it. Using your spatula, carefully pick it up and put it straight on the bottom of the bun.
- Fry yourself an egg however you normally do it while the burger is resting.
- Spread the tarragon mayo on the inside top of the bun, then sprinkle the shoestring fries/ crisps all over it.
- Fried egg on top of the burger. Lid on. GO, GO, GO.
Adaptations to the sandwich
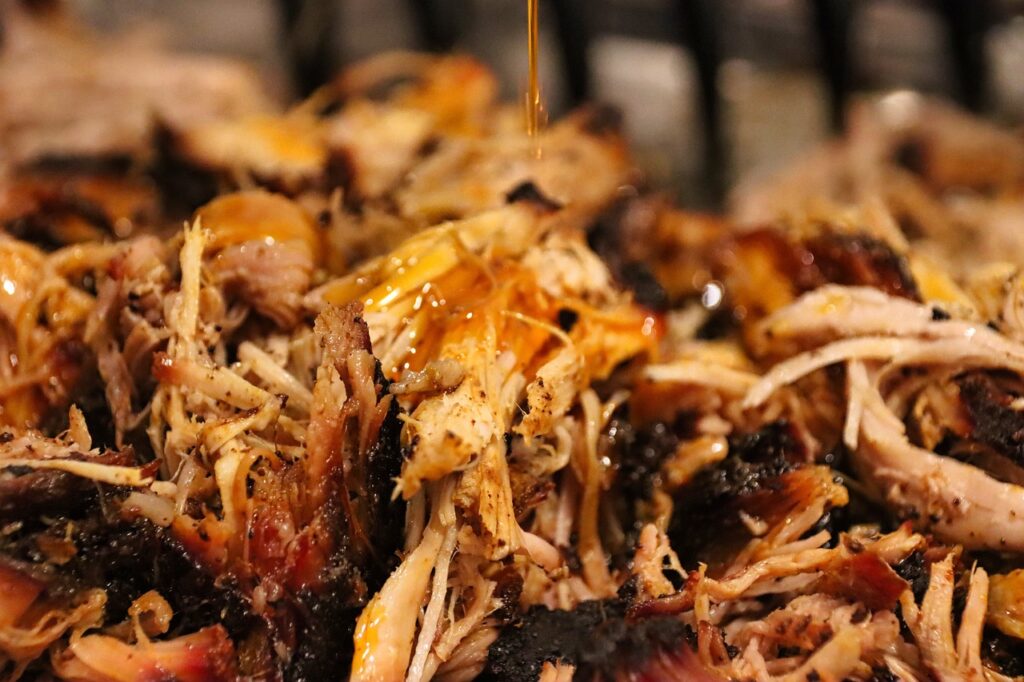
Don’t worry too much if the patty does fall apart a bit, as my friend Dan from Seattle’s exemplary Mean Sandwich well knows: a steak tartare sandwich is still a lovely thing.
A few cursory lettuce leaves (romaine or baby gem) might be nice. Some chopped raw onion would be great. Different flavour crisps are worth a go also!
You could use veal, or if you’re really bougie, fresh Ibérico pork for the tartare, instead of beef. You could melt cheese on the burger?! Try it with different mayonnaises, hot sauce or different mustards. You could add ketchup to the sandwich, it’s in the tartare anyway. Put caviar in there if you want (the cheap, refrigerated lumpfish roe from the supermarket would be perfect).
Where to buy ‘Max’s World of Sandwiches’?
You can find where to purchase Max’s NEW cookbook here and start being creative with food and flavours in the comfort of your kitchen.
Make sure you have your Maldon Salt ready for these recipes! If you are running out, please feel free to browse on our Where to Buy Page to find your nearest store in which stocks our beloved Maldon Salt.
Lastly, we LOVE seeing your creations – please tag us on Instagram using the #maldonsalt so we can share your own take on Max’s recipes!
This recipe was created by Isobel Keane.
- Preheat oven to 180c degrees. Grease 2 x 24-hole mini muffin tins.
- Make pastry by blitzing together flour, ground almonds, butter, Maldon Salt, orange zest and water. Blitz for 20 seconds until pastry forms a ball. Leave to chill in fridge while you make your crumble.
- Make crumble by pulsing together flour, sugar, Maldon Salt, ground almonds and butter. Once the mixture looks like breadcrumbs.
- Mix marzipan into crumble mixture.
- Roll out pastry to a pound’s thickness and use a cookie cutter to cut out circles. Press into mini muffin tin.
- Scoop a teaspoon of mince meat into each pastry case. Evenly top pies with crumble mixture.
- Bake in the oven for 20 minutes, until golden brown.
- Allow to cool for 10 minutes. Serve with icing sugar and clotted cream or brandy butter.
Transform your festive leftovers into a decadent treat!
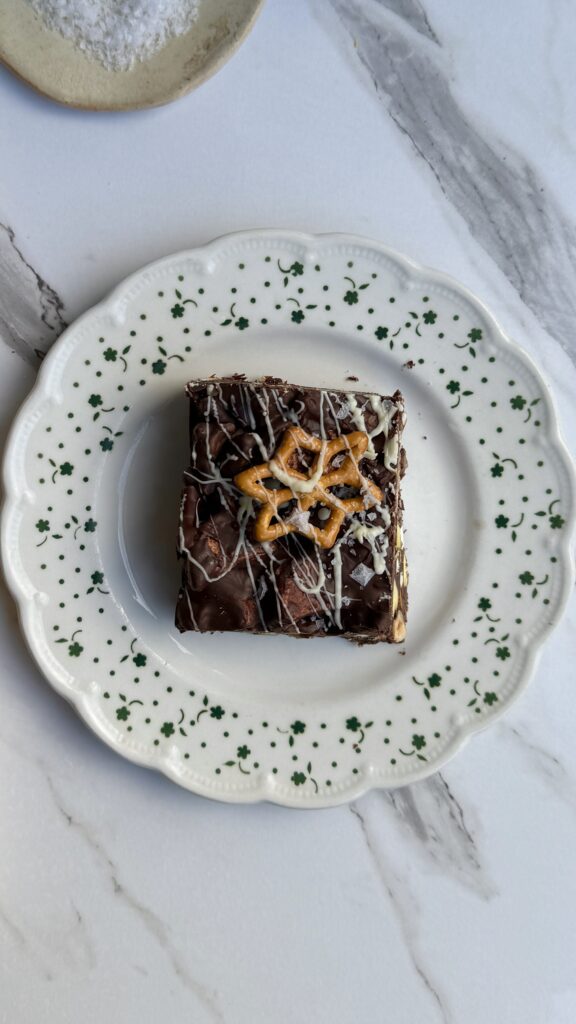
Don’t let your Christmas chocolate go to waste! Elevate your leftovers with a recipe that’s as indulgent as it is simple: Festive Rocky Road, featuring the perfect balance of sweetness and Maldon Sea Salt’s signature flaky finish. This no-bake delight combines rich layers of dark, milk and Christmas chocolate for a holiday-inspired twist, creating a treat that’s ideal for sharing – or keeping all to yourself!
This Rocky Road is packed with festive charm. Crunchy pretzels bring a satisfying texture, while gooey marshmallows and sweet glace cherries add pops of softness and colour. A mix of nuts – think pistachios, almonds, hazelnuts or pecans – offer warm and depth, enhanced by zest of orange for a hint of citrusy brightness. Drizzle with white chocolate and finish with a pinch of Maldon Sea Salt flakes to create a show-stopping treat that’s perfectly balanced: sweet, salty, and oh-so-delicious!
Here is how to make the Festive Rocky Road
- Line a 9×9-inch (or similar) square baking tin with parchment paper.
- In a heatproof bowl, combine the dark chocolate, milk chocolate, butter, and golden syrup. Melt the mixture over a pot of simmering water, stirring occasionally until smooth. Remove from heat.
- To the melted chocolate mixture, add crushed pretzels, marshmallows, leftover Christmas chocolate, glacé cherries, mixed nuts, and orange zest. Stir until all ingredients are well coated with the chocolate mixture.
- Pour the mixture into the prepared tin, spreading it evenly with a spatula. Press it down lightly to ensure all ingredients are packed in well.
- Drizzle the melted white chocolate over the rocky road mixture, using a spoon or fork for a decorative effect. Place a few extra pretzels on top and finish with a good sprinkle of Maldon Sea Salt.
- Place the tin in the fridge for at least 2 hours, or until the rocky road is set.
- Once firm, remove from the tin and cut into squares or bars. Serve immediately, or store in an airtight container in the fridge for up to a week.
- Enjoy your festive treat!
Recipe created by @laoisecooks
These roast potatoes will be the star of the festive season! They might even steal the spotlight on the big day. Thanks to Maldon Garlic Sea Salt, these epic roast potatoes have a double layer of seasoning. Use the Maldon Garlic Sea Salt when parboiling the potatoes and then again after roasting to layer the flavour. Resulting in the crispiest roast potatoes with fluffy insides. If that’s not delicious enough, they’re served with a sticky garlicky glaze, made with honey and balsamic vinegar, plus a sprinkle of Maldon Garlic Sea Salt of course.
Here is how to make garlic roast potatoes
- Preheat the oven to 200°C/180°C fan/gas mark 6 .
- Peel and slice the potatoes in half.
- Put the potatoes in a pan of cold salted water, season the water with a generous pinch of Maldon Garlic Sea Salt. Bring to the boil then simmer gently for around 6 – 8 minutes until they are about half cooked.
- Drain and shake them hard in a colander so that you rough up the edges – this gives you super crunchy potatoes. Leave them to steam cool in the colander.
- Add the oil to a deep roasting tray. You can also use duck or goose fat depending on what you prefer. The tray should be big enough so the potatoes are in a single layer. Pop the tray in the hot oven for 5 minutes or until the oil is smoking hot.
- Remove the tray and carefully spoon the potatoes into the tray and baste with the hot oil, season well with Maldon Garlic Sea Salt.
- Roast for 45 – 55 minutes, turning halfway through, until they are crunchy on the outside and fluffy inside.
- Meanwhile, make the glaze. In a small pan heat the honey on a medium heat, when it starts to bubble, stir in the balsamic vinegar and a generous pinch of Maldon Garlic Sea Salt. Simmer for a few minutes until it starts to thicken.
- Plate up the roast potatoes and pour over the glaze. Enjoy!
Celebrate the holidays in style with a Christmas Spiced Orange Roast Duck recipe that is sure to become the star of your Christmas dinner. This elegance dish features succulent duck roasted to golden brown perfection, infused with festive flavours and aromatic spices. The tender meat is beautifully complimented by a rich orange glaze, offering a citrusy brightness that balances the deep, savoury notes of the duck. With crispy skin seasoned with Maldon Sea Salt flakes and a warming blend of Christmas spices, this roast duck promises a memorable dining experience, perfect for special occasions!
The combination of orange and spices elevates the natural richness of the dusk, creating a dish that’s both indulgent and full of holiday spirit. You can make the glaze with freshly squeezed oranges (we used clementines), caramelized shallots, and a hit of cinnamon to enhance the duck’s succulent meat, while the crispy skin adds an irresistible crunch. Try adding a pinch of star anise to bring a sophisticated flavour to the dish! Whether you’re hosting a family gathering or a festive dinner party, this spiced roast duck recipe is a showstopping centrepiece that captures the warmth and comfort of Christmas in every bite.
How to Roast Duck Perfectly
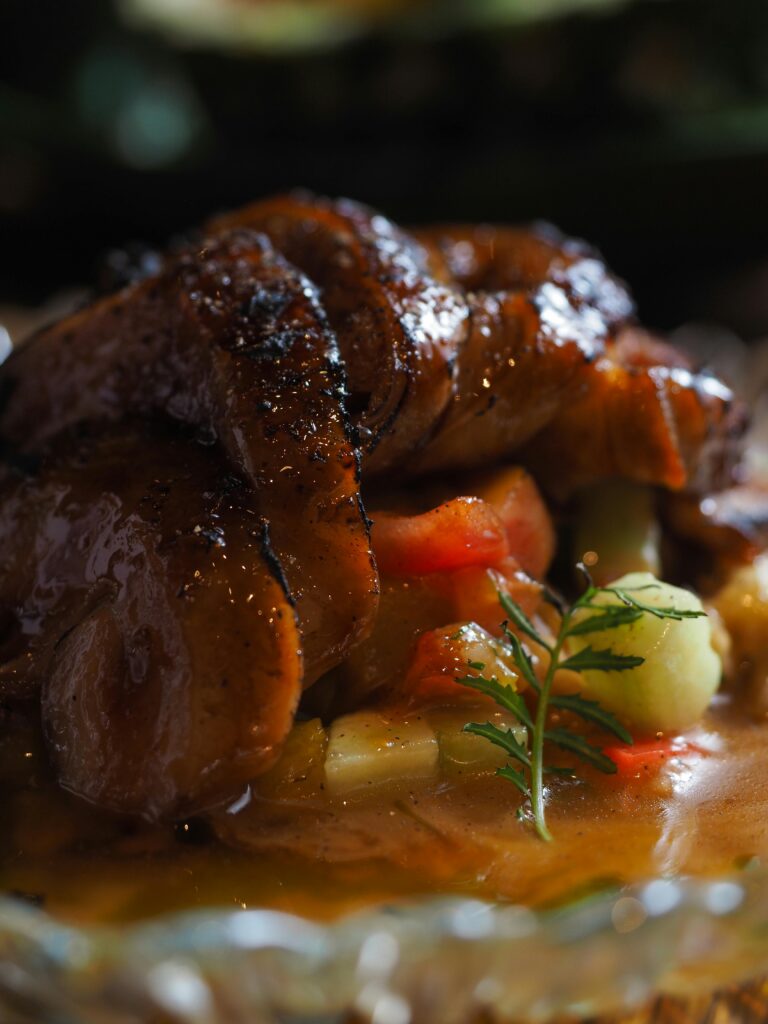
Roasting duck perfectly involves ensuring the skin is crispy while keeping the meat
tender and succulent. Start by patting the skin dry and rubbing Maldon Smoked Sea Salt
into it. Place the duck breast side down initially to allow the fat to render out, ensuring a
crispy skin as it roasts evenly. Always keep an eye on it and baste regularly to maintain
moisture.
Making the Christmas Spiced Orange Roast Duck
Prepare the Ingredients:
Preheat your oven to 180°C. Pat dry the skin of the duck and rub 1 tsp of Maldon
Smoked Sea Salt into it. Peel and halve the banana shallots and set aside. Halve the
clementines and prepare your potatoes for roasting.
Roast the Duck:
Place the duck breast side down in a roasting tin with the shallots and roast for 1 hour.
While the duck is roasting, boil the potatoes until tender and set aside to steam and
fluff.
Turn and Season the Duck:
After 1 hour, drain off the fat (reserving for the potatoes). Carefully turn the duck breast
side up, surround it with 3 halved clementines, a cinnamon stick, and bay leaves.
Continue roasting for another hour, basting occasionally.
Crispy the Potatoes:
In a separate roasting tin, roast the potatoes in the reserved duck fat, seasoning with
Maldon Smoked Sea Salt. Ensure they are crispy and golden brown.
Create the Glaze:
In the final stages of cooking the duck, reduce the juice of the remaining 3 clementines
in a small pan. Add honey and Seville orange marmalade and simmer until it forms a
sticky glaze. Brush this over the duck and roast for the final 10 minutes.
How to Make Christmas Spiced Orange Roast Duck

- Preheat oven to 180C. Pat the skin of the duck dry and rub 1tsp of the Maldon Sea Salt into the skin. Place the bird breast side down in a roasting tin with the shallots and roast for 1 hour.
- While this is roasting, peel and halve any large potatoes. Place them in a pan of water and boil them for 8 minutes, or until a knife can be inserted. Then tip the potatoes into a colander in the sink and allow them to steam. Shake the colander a little to fluff up the potatoes and then set aside.
- After 1 hour, drain off all the fat reserving it to cook your potatoes in! Then carefully lift and turn the duck in the tray. Surround it with 3 clementines, halved, the cinnamon and bay and return to the oven for a further one hour (keep watching and basting).
- Meanwhile, roast the potatoes in the duck fat adding a good pinch of Maldon Sea Salt.
- Before the end of the cooking, add the juice of the 3 remaining clementines to a small pan and simmer until reduced by half, then add the honey and marmalade. Brush the duck with the sticky glaze and return to the oven for the final 10 minutes.
- Serve the duck with the roast potatoes, braised red cabbage and sprouts.
Can You Freeze Cooked Duck?
Yes, you can freeze cooked duck. Once fully cooled, wrap the duck tightly in foil or
plastic wrap and then place it in a freezer-safe bag. It can be stored in the freezer for up
to 3 months. Thaw in the refrigerator before reheating.
Marmalade Glaze for Duck
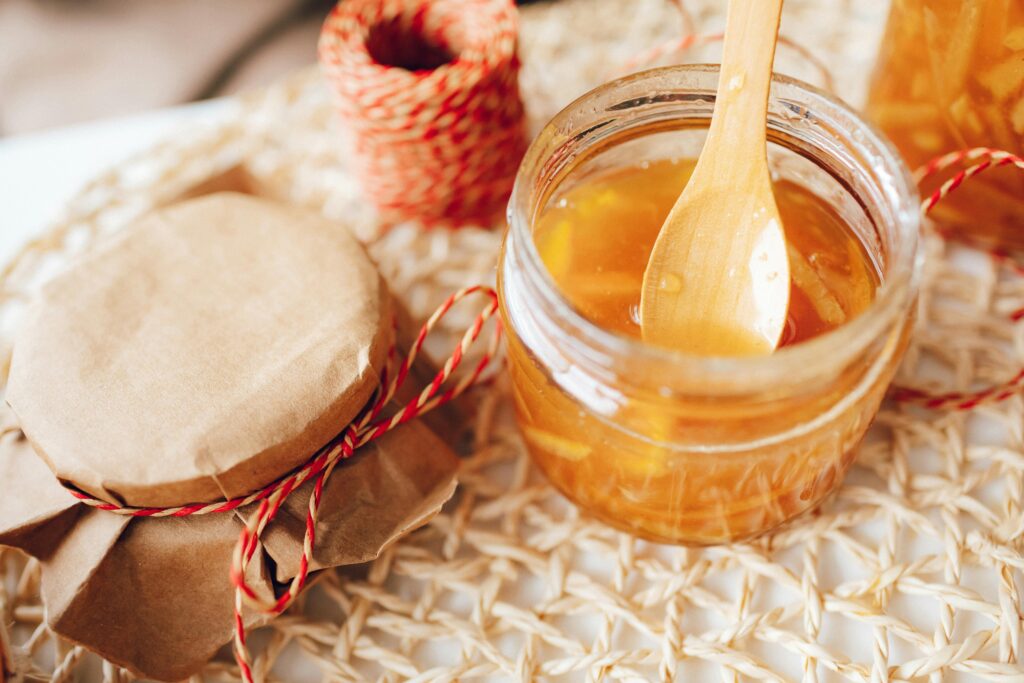
A marmalade glaze adds a sweet and tangy dimension to roast duck. Reduce the
clementine juice until it thickens slightly, then stir in honey and Seville orange
marmalade. Brush over the duck in the final stages of roasting for a glossy and
flavourful finish.
Create a showstopping festive centrepiece this Christmas with a mouth-watering mushroom, butternut squash, chestnut and caramelised onion wreath. Golden brown and packed with seasonal ingredients, this dish is the perfect vegetarian main for your holiday table. Made with a sheet of light, flaky puff pastry and filled with savoury roasted vegetables, this wreath is sure to impress both vegetarians and meat-lovers alike! The combination of earth mushrooms, sweet caramelised onions and nutty chestnuts brings together the flavours of winter, while the Maldon Sea Salt flakes adds the perfect finishing touch.
This recipe is great addition to your collection of vegetarian puffy pastry recipes and is ideal for those looking for an easy yet stunning main course for Christmas!
How to caramelise onions

Caramelising onions is a slow cooking process that draws out the natural sugars,
resulting in sweet, golden brown onions perfect for adding depth to recipes. Start by
heating olive oil and butter in a pan over low heat. Add finely sliced onions and a pinch
of Maldon Sea Salt flakes and cook for at least 10 minutes until soft and translucent. Add soft brown sugar and continue cooking until onions are sticky and caramelised, usually
another 5 minutes. If you have any leftover, you can use them as a filling for a delicious portobello mushroom and stilton burger, paired with rocket in a sweet brioche bun.
Making the Mushroom, Butternut Squash, Chestnut and Caramelised Onion Wreath
Prepare the Ingredients:
Preheat your oven to 200°C. Slice the red onions finely and prepare the butternut
squash by peeling and dicing into 2cm cubes. Tear the mixed mushrooms into pieces
and crumble the chestnuts.
Roast the Vegetables:
Place the mushrooms and butternut squash on a baking tray. Drizzle with olive oil and
season with Maldon Sea Salt and pepper. Roast for 25 minutes until the squash is
tender and mushrooms are golden brown. Allow to cool.
Make the Filling:
In a large bowl, combine the roasted vegetables, caramelised onions, crumbled
chestnuts, shredded sage leaves, grated nutmeg, and dried cranberries. Season with a
pinch of Maldon Garlic Sea Salt.
Assemble the Wreath:
Unroll the puff pastry sheet onto a baking tray. Pile the vegetable filling down the
middle of the pastry. Roll the pastry over to encase the filling, sealing the edges with an
egg or milk wash. Shape into a wreath, sealing the ends together. Use leftover pastry for
decorations if desired. Chill in the fridge for 30 minutes.
Bake the Wreath:
Once chilled, bake in the preheated oven for 35-40 minutes or until the pastry is golden
and crisp. Allow to cool slightly before serving warm or cold.
Mushroom, Butternut Squash, Chestnut and Caramelised Onion Wreath Recipe

- Preheat the oven to 200c.
- Start by making the caramelised onions. To a frying pan add 1 tbsp of olive olive plus a knob of butter and allow it to melt. When foaming, add the sliced onions and a pinch of Maldon Sea Salt. Fry these on a low heat for at least 10 minutes until they are soft and translucent. Then add the soft brown sugar and continue to cook for another 5 minutes until the onions have gone sticky, soft and caramelized. Set aside to cool.
- Place all the mushrooms onto a baking tray along with the diced butternut squash. Then drizzle with the remaining olive oil and some salt and pepper. Place into the hot oven and roast for 25 minutes until the squash is tender and the mushrooms are golden. Set the tray aside to cool.
- Once the vegetables have cooled you can make the filling. Simply mix in a bowl with the caramelized onions, chestnuts, sage, nutmeg, dried cranberries and Maldon Garlic Sea Salt.
- Unroll the pastry onto a baking tray and then pile the filling down the middle in a line. Then roll the pastry over to seal it, as though making a large sausage roll. Use the egg wash to seal it down, and then take the two open ends and join them together, sealing them as well. Any excess pastry can be cut off and used to decorate the wreath, if desired. Egg wash the whole outside of the wreath and then place into the fridge for 30 minutes.
- Once the wreath has chilled, place it into the preheated oven and bake for 35 – 40 minutes until it is golden and crisp on the outside. Cool slightly before serving – can be served warm or cold.
Can You Freeze Butternut Squash?

Yes, you can freeze butternut squash. Peel and dice the squash into cubes, blanch in
boiling water for 3-5 minutes, then cool in ice water. Drain and pat dry before placing in
a single layer on a baking tray to freeze. Once frozen, transfer to a freezer bag for
long-term storage.
Side Dishes to Serve
A delicious flaky mushroom wreath is the epitome of comfort food. However, now you need the perfect sides to make the ultimate festive feast! Here are a few tasty side dishes you can serve with your mushroom wreath.
Roasted Potatoes with Rosemary & Thyme
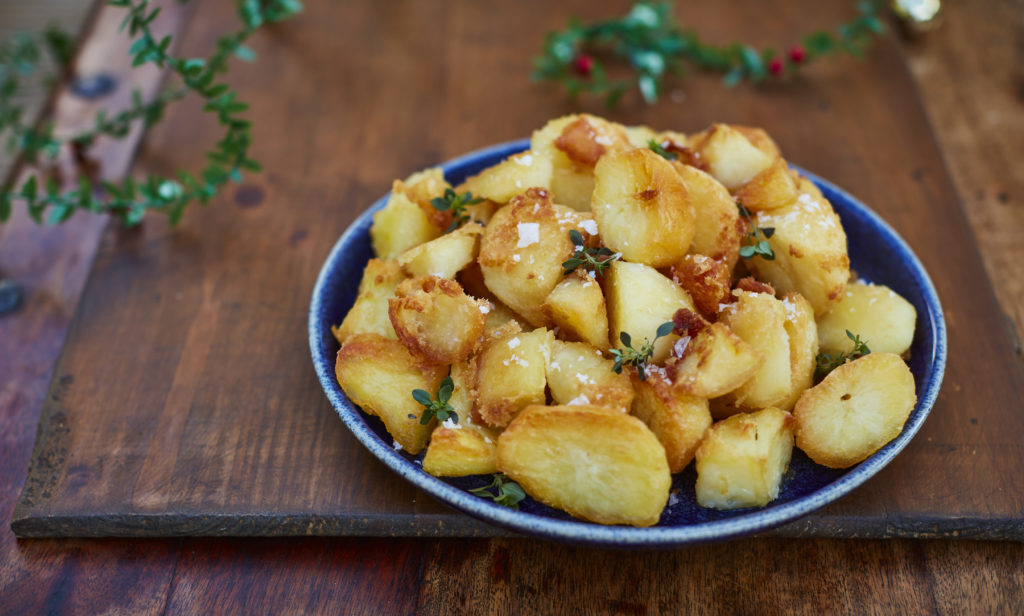
The ideal accompaniment for this recipe – the classic roast potato. Crispy on the outside and heavenly fluffy on the inside. Normally you can season your ‘tatties’ with salt and pepper, but we’ve added a twist by infusing rosemary and thyme to give a delightful flavour and an addictive crunch.
Carrots with Honey & Lemon

Oh-so-sweet and tender! These carrots are cooked in a delicious honey and lemon glaze that offers a sweetness and and touch of colour to your dinner plate.
Brussels Sprouts with Smoked Bacon
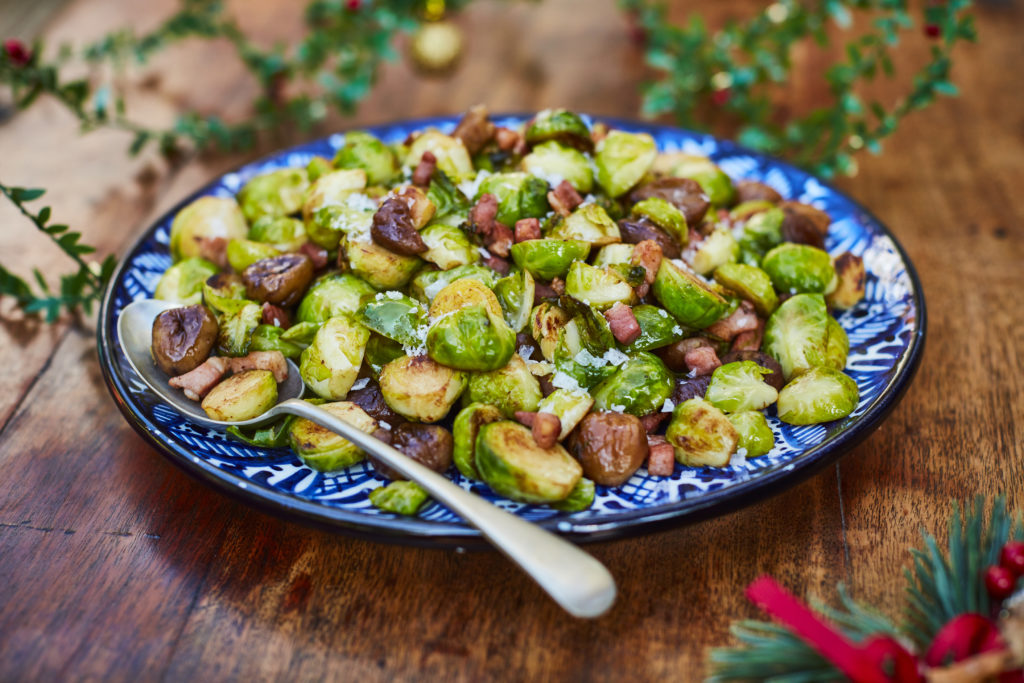
Add smoked bacon to your humble brussels sprouts to give a crispy, savoury element to the dish. It compliments the wreath’s mushroom and caramelised onions beautifully!
If you’re looking for a snack that’s both simple and sophisticated, charred Brussels sprouts on toast with ricotta and parmesan is your go-to festive treat! This delightful combination of crispy, oven-roasted Brussels sprouts, creamy ricotta, and tangy parmesan creates a mouth-watering appetizer, perfect for holiday gatherings. Nestled atop toasted sourdough, and finished with a sprinkle of Maldon Sea Salt, cracked black pepper, and a hint of lemon zest, this dish is packed with vibrant flavours and textures. For an added crunch, hazelnuts round out the recipe, making it a memorable dish that highlight seasonal product while keeping things easy and delicious!
Brussels sprouts, when charred to perfection, bring out their natural sweetness with a smoky edge that pairs beautifully with the creamy ricotta base. Tossed in olive oil, roasted to a golden crispy, and layered on slices of freshly toasted sourdough, these sprouts create an irresistible contrast between the crunch of the bread and their tender interior. The parmesan adds a sharp, salty bite, while the bright lemon zest and crunchy hazelnuts elevate the snack into something truly special.
Ideal as a light starter, festive canape, or even a creative side dish, this easy Brussels sprouts recipe is a delicious way to celebrate the season with wholesome, bold flavours.
Best Way to Roast Brussel Sprouts
Roasting Brussel sprouts to perfection involves coating them evenly with olive oil and
seasoning them generously with Maldon Sea Salt and cracked black pepper. Spread
them out on a large baking tray to ensure they roast evenly without steaming, making
sure to check them halfway through roasting.
Making Charred Brussel Sprouts on Toast with Ricotta and Parmesan
Prepare the Ingredients:
Preheat your oven to 180°C. Halve the Brussel sprouts and place them on a large baking
tray. Drizzle with olive oil and season with a pinch of Maldon Sea Salt and cracked black
pepper.
Roast the Brussel Sprouts:
Place the tray in the oven and roast for 15-20 minutes until the Brussel sprouts are
tender and charred in places, giving them a deep, roasted flavour.
Prepare the Toast and Ricotta Spread:
Toast the two slices of sourdough bread to your preference. In a small bowl, mix
together the ricotta with the zest of half a lemon, adding a pinch of Maldon Sea Salt and
black pepper to taste. Spread this ricotta mixture onto each piece of toast.
Assemble the Toast:
Roughly chop the toasted hazelnuts and have the finely grated parmesan ready. Top
each slice of toast with the charred Brussel sprouts, followed by a scattering of toasted
hazelnuts and a generous amount of grated parmesan. Serve immediately for a
delightful crunch and creamy texture.
How to Make Charred Brussel Sprouts on Toast with Ricotta and Parmesan
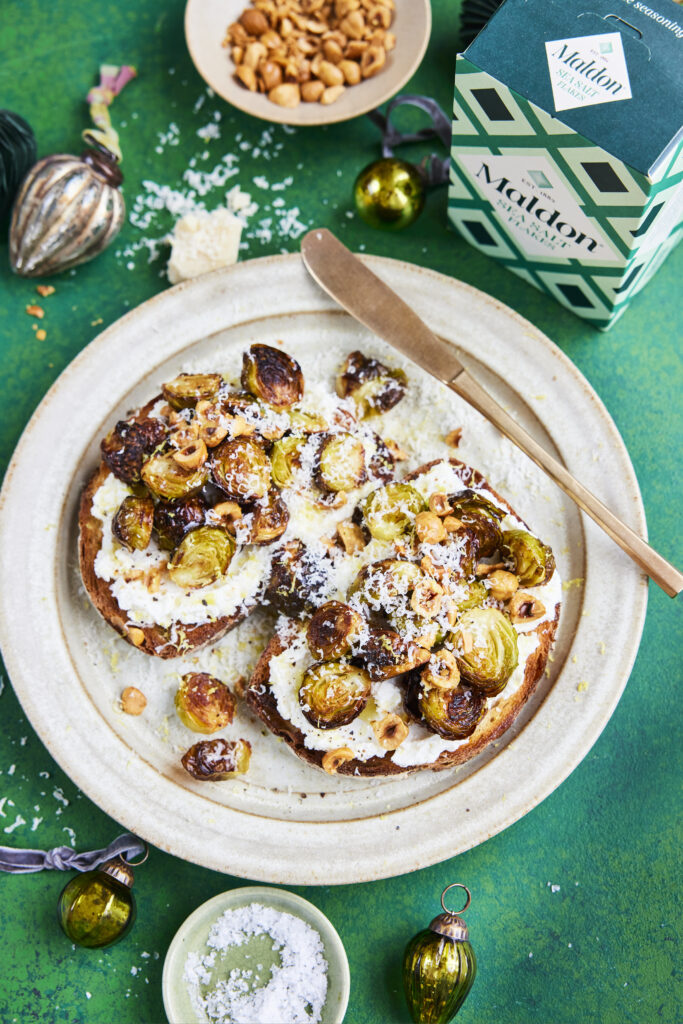
- Preheat the oven to 180c.
- Place the Brussel sprouts onto a large baking tray and drizzle with the olive oil, then season with Maldon Sea Salt and black pepper. Place into the oven and roast for 15 – 20 minutes until charred in places.
- Toast the two pieces of sourdough bread. In a small bowl mix together the ricotta and lemon zest along with some Maldon Sea Salt and black pepper. Then spread the ricotta mixture on top of each toast. Roughly chop the toasted hazelnuts.
- Top each toast with the charred Brussel sprouts, a scattering of toasted hazelnuts and some grated parmesan cheese. Serve immediately.
Can You Freeze Roasted Brussel Sprouts?
Yes, you can freeze roasted Brussel sprouts. Once cooled, place them in a single layer
on a baking tray to freeze. Once frozen, transfer to an airtight container or freezer bag.
They can be stored in the freezer for up to 3 months. Reheat in the oven to maintain
their crispiness.
Healthy Brussel Sprouts Recipe
This recipe features healthy Brussel sprouts roasted to perfection, paired with creamy
ricotta, crunchy hazelnuts, and tangy parmesan on sourdough toast. This dish is not
only delicious but also packed with nutrients, making it an ideal vegetarian option for
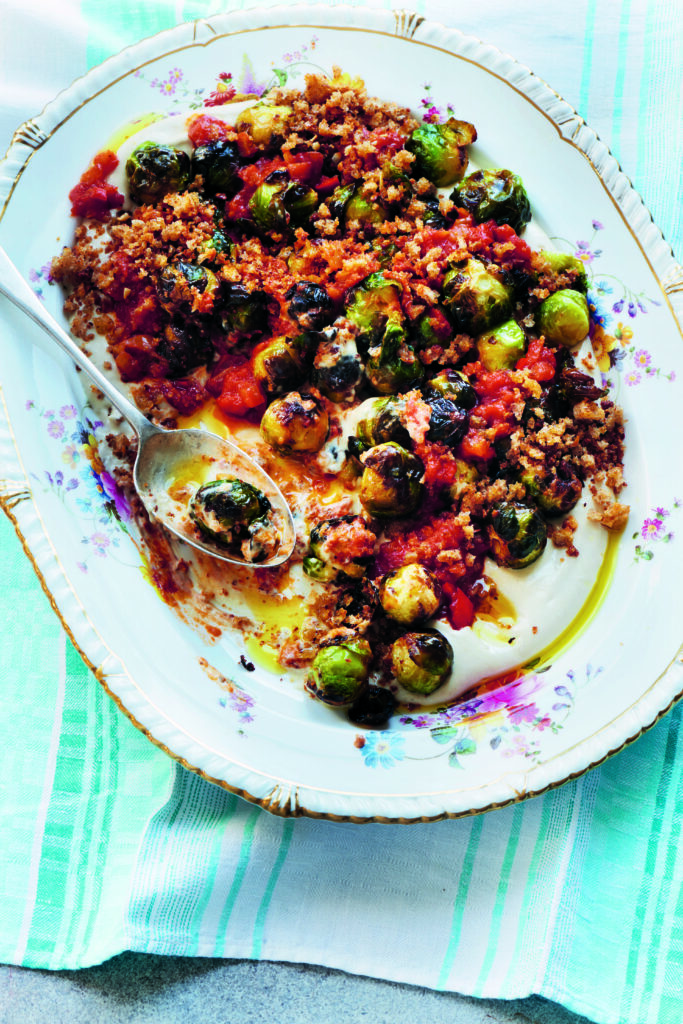
any meal. If you are craving something a little different, why not try Joe Woodhouse’s delicious roast Brussels sprouts with whipped tahini, paid with a spicy tomato chutney and a gorgeous crouton crumb.
What is an old fashioned
The Old Fashioned cocktail is a timeless classic that embodies the essence of simplicity and elegance in mixology. Traditionally served in a lowball or rocks glass, this whiskey cocktail is a staple in any bartender’s repertoire!

Classic Old Fashioned cocktail
The perfect Old Fashioned consists of stirring together two ounces of bourbon, whiskey or rye, a rich simple syrup, and Angostura bitters. A handful of ice cubes is added, before the drink is gently stirred to chill and dilute to perfections. The final touch is an orange twist, or orange peel, and a cocktail cherry (Maraschino cherries), which not only adds visual appeal, but also enhances the drink’s complex flavours, adding sweetness to the bitter cocktail.
The beauty of the Old Fashioned lies in it’s versatility and balance. While rye whiskey is the traditional choice, bourbon is also popular choices for those who prefer a slightly sweeter profile. Modern variations may also use simple syrup or even maple syrup in place of the more traditional sugar cube, offering a different dimension of sweetness. Whether enjoyed a pre-dinner aperitif or a nightcap, the Old Fashioned remains a quintessential whiskey cocktail that has stood the test of time.
What is the origin of the Old Fashion?
According to Nio Cocktails, the Old Fashioned was first created in the 1800s in America. It was then known simply as the ‘Whiskey Cocktail’ which included a spirit, sugar, water and bitters. It was a standard, quick and easy cocktail to make which was enjoyed by many, and often enjoyed in the morning as a hangover cure!
However, Difford’s Guide proclaims that although the cocktail was popularised in America, the origins of a cocktail that comprise of a spirit, sweetener and bitters are English, followed by the creation of the first aromatic bitters by London apothecary, Richard Stoughton in 1690.
Why is it called an Old Fashioned?
By the 1870-1880s, bartenders began adding their on ‘twists’ to the Whiskey Cocktail, such as adding more sweeteners, garnishes and even changing the spirit from rye whiskey to bourbon. Customers began to rebel against the innovated cocktail, preferring the traditional version instead. As a result, customers would order the ‘old-fashioned whiskey cocktail’ at the bar. Eventually the name was shortened to the title we know today, ‘Old Fashioned’.
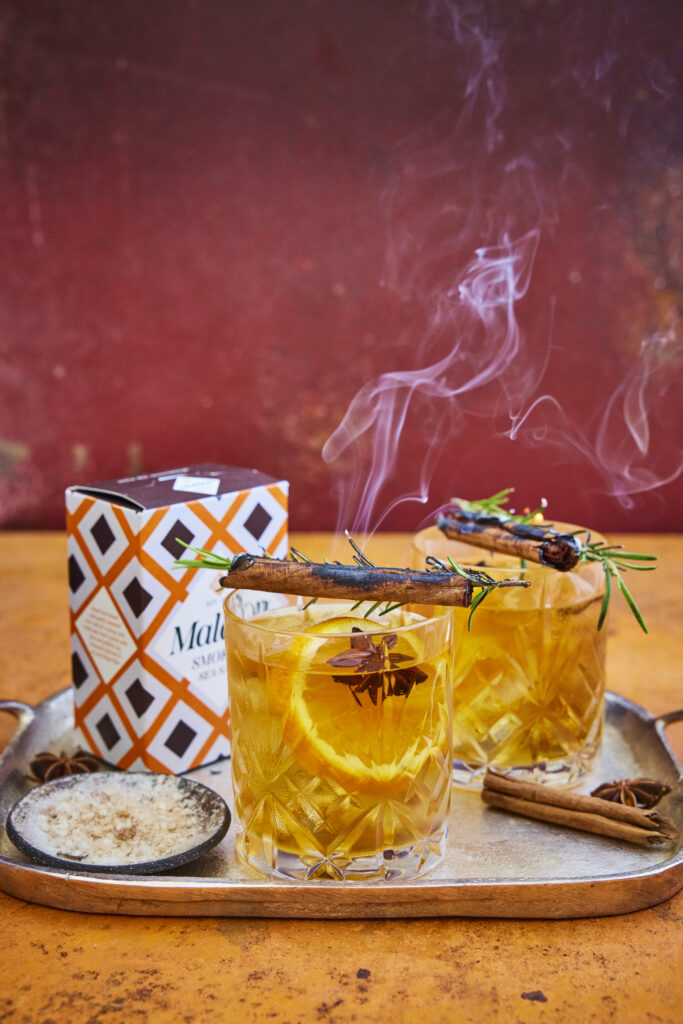
Here’s how to make and serve an old fashioned
- Start by soaking the rosemary and cinnamon stick in some high proof spirit for a few minutes – this will be the flaming part of the cocktail.
- Take a tumbler and add the sugar, bitters and Maldon Smoked Sea Salt, stirring together. Then fill the glass with ice and add the whiskey or bourbon and stir again. Add a splash of soda water if you like and a slice of orange.
- Then take the soaked rosemary and cinnamon stick and carefully balance on the rim of the drink. Use a lighter or matches to ignite them – they should flame and smoke. The smell of the smoked rosemary and cinnamon add Christmassy notes to your cocktail.
How to spice up and old fashioned

Although adding an orange twist to your classic Old Fashioned adds sweetness, it’s pretty simple! We’ve shared some of our favourite ways to elevate your Old Fashioned, with new and exciting twists to try!
Brown Butter Old Fashioned
If you’ve never tried a brown-butter Old Fashioned, then you’re missing out!
This recipe was shared by Liquor.com, where they highlight how the flavours of bourbon compliments the rich nuttiness of brown butter. Simply heat unsalted butter in a saucepan until it lightly browns and has a nutty aroma. Then, gently combine the browned butter with a bottle of bourbon. Pour the blend into a highball glass with ice, adding brown-sugar syrup and Angostura bitters before finishing with a maraschino cherry.
Honey Old Fashioned
If you have a sweet tooth, the The Glenlivet shared a delicious Honey Old Fashioned recipe. Rich, runny honey is incorporated with the bold flavours of the classic Old Fashioned mix, creating an smooth drink that’ll go down a treat with your guests.
Pumpkin Spice Old Fashioned
If are wanting something more ‘cosy’ in flavour, Liquor.com recommends the ever-so-popular pumpkin spice flavour with an Old Fashioned. You can achieve this by making a homemade syrup, adding pumpkin puree, pumpkin pie spice, brown sugar, and vanilla extract. Combine the pumpkin pie liquid mix with your bourbon and orange bitters and you will taste the delightful automanual flavours.
Old Fashioned vs. Manhattan
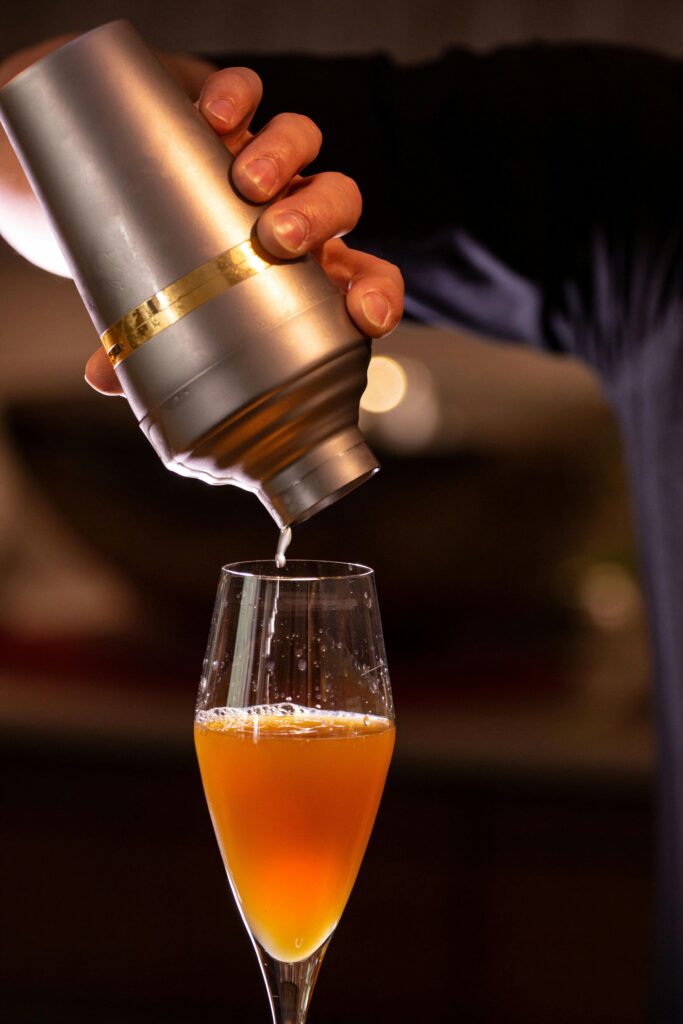
The Old Fashioned and The Manhattan are two of the most popular whiskey cocktails. Although the two cocktails have many similarities, the have different flavours.
What is a Manhattan?
This is a classic cocktail, comprising of whiskey (usually rye), sweet vermouth, and bitters. It’s served in a stemmed glass, and garnished with a cherry.
What is the difference between an Old Fashioned and a Manhattan?
The main difference between the Old Fashioned and Manhattan is the sweeteners used in each. The Old Fashioned traditionally uses sugar, either as a cube or in simple syrup form. In contrast, the Manhattan uses sweet vermouth, which is a type of fortified wine. The vermouth adds a earthier, spicier notes in comparison to the Old Fashioned, which is sweet yet bitter. As a result, many would say the flavour profile of the Manhattan is more in-depth and complex, whereas the Old Fashioned is more simple.
- Start by assembling your toasted sandwich. Take each slice of sourdough bread and spread the outside of each with mayonnaise. Then fill by spreading a tsp of Dijon mustard, followed by the leftover turkey meat – this is a good point to season the toastie with a pinch of Maldon Chilli Sea Salt and some black pepper. Top this with the sliced up leftover stuffing and pigs in blankets. Then top with slices of brie. Finally finish with a generous amount of cranberry sauce then sandwich the top slice of bread on top.
- Place a heavy bottomed pan on a medium heat and add the knob of butter. When melted add your sandwich, then use a heavy weight to press it down. Allow this to cook on one side for approximately 3 – 5 minutes before lifting the weight and carefully flipping the sandwich. The other side should be golden and crisp on the bottom. Add the weight back on and cook the other side for the same time.
- As soon as the toastie is done, remove it from the pan and cut in half. The cheese should be oozy, and you can serve it with a cornichon and cocktail stick in the top. It is delicious served with warm leftover gravy for dunking.