Wild garlic season brings one of the most anticipated flavours of the year—vibrant, aromatic, and beautifully green. When blended into creamy, high-quality softened butter, it creates an irresistible condiment that elevates everything it touches. Learning how to make wild garlic butter is incredibly simple, taking only 5 minutes and a quick blitz in a food processor. To truly bring out the punchy, earthy flavours of the foraged leaves, we season this compound butter with our signature Maldon Garlic Sea Salt flakes, adding the perfect savoury crunch and an extra layer of roasted garlic depth.
Why You’ll Love This Wild Garlic Butter Recipe
Lightning Fast: With zero cooking required, this impressive, vibrant green butter comes together in just 5 minutes of prep time.
The Ultimate Flavour Enhancer: It is incredibly versatile. Melt it over a hot steak, stir it through freshly cooked pasta, or simply spread it thickly onto warm sourdough.
Preserve the Season: Wild garlic has a notoriously short season. Making a batch of this compound butter and rolling it into a log allows you to freeze it and enjoy the taste of spring all year round.
How to Make Wild Garlic Butter (Step-by-Step)
Step 1 – Blitz the garlic and salt
Start by placing the thoroughly washed and dried wild garlic leaves and the Maldon Garlic Sea Salt flakes into a food processor. Pulse the machine a few times to break up the wild garlic until it is very finely chopped.
Step 2 – Add the butter
Add the room-temperature, softened butter to the food processor. Pulse again until the finely chopped wild garlic is evenly dispersed throughout the butter, turning the entire mixture a stunning, vibrant green colour.
Step 3 – Shape the butter
Place a large, rectangular piece of baking parchment onto your kitchen surface. Spoon the bright green butter directly into the centre of the paper.
Step 4 – Roll and chill
Fold the parchment paper over the butter and roll it to shape the mixture into a neat, tight sausage shape. Twist the ends of the parchment paper tightly to seal it (like a Christmas cracker). You can either serve the butter immediately while soft, or place it into the fridge for 1 hour to firm up into a sliceable log.
Tips for the Perfect Compound Butter
Use Softened Butter: This is the most important step! If your butter is straight from the fridge and too cold, it will not blend smoothly with the wild garlic, leaving you with unpleasant, chunky lumps. Leave the butter out on the counter for a few hours before starting.
Dry the Leaves Thoroughly: If you have washed your foraged wild garlic, ensure every drop of water is dried off (using a salad spinner or kitchen towel) before adding it to the food processor. Excess water will cause the butter to split.
Don’t Over-Process: Pulse the butter just until it turns green and is combined. If you leave the food processor running on high for too long, the friction will melt the butter completely.
What to Serve with Wild Garlic Butter
The simplest and often best way to enjoy this is sliced thickly and smeared over a warm, crusty sourdough baguette. However, it also makes an incredible “melt” for hot food. Try placing a disc of chilled wild garlic butter on top of a resting steak, stirring a spoonful into a pan of sautéed mushrooms, or tossing it through freshly boiled new potatoes.
Frequently Asked Questions
How to make garlic butter wild wild garlic without a food processor?
If you don’t have a food processor, you can easily make butter by hand. Simply use a sharp knife to mince the wild garlic leaves as finely as humanly possible. Add the minced leaves and the Maldon Garlic Sea Salt to a mixing bowl with your softened butter and beat vigorously with a wooden spoon until fully incorporated.
Can you freeze wild garlic butter?
Yes, you can absolutely freeze wild garlic butter! Freezing is the best way to extend the short wild garlic season. Keep the butter wrapped tightly in its parchment paper sausage, place it in an airtight freezer bag, and freeze for up to 3 months. You can slice off individual discs straight from frozen whenever you need them.
Where can I find wild garlic?
Wild garlic typically grows in damp, ancient woodlands across the UK from late winter until the end of spring. If you aren’t keen on foraging, you can often find bunches of it at local farmers’ markets or premium greengrocers during the peak season (March to May).
When you need an elegant, restaurant-quality vegetable side dish but are short on time, this sauteed asparagus with mushrooms is the perfect solution. Earthy, wild mushrooms meet vibrant, tender-crisp asparagus in a hot pan, soaking up rich olive oil and aromatic crushed garlic. The entire dish comes together in under 15 minutes from prep to plate. The secret to elevating this simple pan-fry? A generous pinch of Maldon Smoked Sea Salt flakes tossed through right at the end to enhance the savoury, umami flavours of the mushrooms.
Why You’ll Love This Sautéed Asparagus Recipe
Lightning Fast: With just 5 minutes of prep and 10 minutes in the pan, this is the ultimate speedy side dish for busy weeknights or stress-free dinner parties.
Incredible Texture: Pan-frying the mushrooms on a high heat gives them a beautiful, golden-crisp edge, while the asparagus stays perfectly vibrant and tender-crisp.
Earthy & Smoky: Using a blend of wild mushrooms (like shiitake or chanterelle) paired with our signature smoked sea salt creates a deep, complex flavour profile that punches far above its simple ingredients.
How to Make Sauteed Asparagus with Mushrooms (Step-byStep)
Step 1 – Prepare the vegetables
Start by preparing your asparagus. Remove the tough, woody ends from the spears, then cut the remaining tender stems in half to create two shorter pieces per spear. Next, take your mixed mushrooms and brush them clean. Keep any smaller mushrooms whole, but cut larger varieties in half so everything cooks at the same rate.
Step 2 – Fry the mushrooms
Heat the olive oil in a large frying pan over a high heat. Add the prepared mushrooms and fry until they soften, release their moisture, and develop a nicely golden, crisp exterior.
Step 3 – Add the asparagus and garlic
Once the mushrooms are golden, toss the prepared asparagus pieces into the hot pan. Sauté the asparagus in the olive oil alongside the mushrooms for a couple of minutes until they turn bright green.
Step 4 – Finish and season
Add the crushed garlic cloves to the pan. Fry for another minute or so until the garlic becomes beautifully fragrant and the asparagus is perfectly tender. The whole cooking process should take 10 minutes or less. Remove the pan from the heat, season generously with Maldon Smoked Sea Salt flakes, and serve immediately.
Tips for the Perfect Pan-Fried Vegetables
Brush, Don’t Wash: Mushrooms are like sponges. If you rinse them under water, they will absorb it and steam in the pan rather than getting crispy. Always use a dry pastry brush or a damp piece of kitchen paper to gently brush away any dirt.
Keep the Heat High: To get that lovely golden-brown sear on the mushrooms without overcooking the asparagus, make sure your frying pan and olive oil are nice and hot before you start.
Add Garlic Last: Crushed garlic burns very quickly over high heat, turning bitter. By adding the garlic during the final minute of cooking, you infuse the dish with its fragrant flavour without risking a burnt taste.
What to Serve with Sautéed Asparagus
This garlicky, earthy side dish is incredibly versatile. It is a classic pairing for a pan-seared steak, a juicy roast chicken breast, or a thick-cut pork chop. For a vegetarian option, try serving these savoury vegetables stirred through a creamy Parmesan risotto or simply tossed with fresh pasta and an extra drizzle of good quality olive oil.
Frequently Asked Questions
Can I use butter instead of olive oil
Yes, you can absolutely use butter instead of olive oil! While our recipe calls for asparagus sautéed in olive oil for a lighter, Mediterranean finish, you can absolutely substitute it with butter. Butter will add a rich, nutty flavour that pairs beautifully with the mushrooms.
How do I know where to trim the asparagus
The easiest way to find where the tough, woody end stops and the tender stem begins is to take one spear of asparagus and gently bend it near the bottom. It will naturally snap at the exact point where it becomes tender. You can use that snapped piece as a length guide to slice the rest of your bunch with a knife.
Can I use standard button mushrooms?
You certainly can use button mushrooms instead of mixed mushrooms. However, we highly recommend using a “mixed wild” pack (containing varieties like shiitake, oyster, or chanterelle) if you can find them. They offer a much meatier texture and a deeper, more complex flavour than standard white button mushrooms.
If you have never tried cooking radishes before, you are in for a treat. While raw radishes are famous for their sharp, peppery bite, learning how to roast radishes completely transforms them. The oven mellows their heat, turning them incredibly sweet, tender, and juicy. Paired with earthy, vibrant baby rainbow carrots and a drizzle of honey, this dish is the ultimate celebration of seasonal root vegetables. We finish the whole tray with a generous pinch of Maldon Pepper Sea Salt flakes to perfectly balance the natural sweetness with a subtle, savoury, peppered flavour.
Why You’ll Love This Roasted Radishes and Rainbow Carrots Recipe
A Transformation of Flavor: Roasting radishes is a revelation, swapping their raw spice for a mellow, turnip-like sweetness that pairs flawlessly with caramelised carrots.
Visually Stunning: The mix of vibrant pinks, purples, oranges, and yellows makes this a beautiful side dish that will elevate any dinner table or Sunday roast.
Minimal Prep: With only 5 minutes of prep work required, you simply toss the vegetables on a tray and let the oven do the hard work.
How to Make Roasted Radishes and Rainbow Carrots (Step-by-Step)
Step 1 – Preheat the oven
Preheat your oven to 180°C.
Step 2 – Prepare the vegetables
Lightly scrub the rainbow carrots to remove any dirt and place them whole onto a large baking tray. Take your mixed radishes and keep the smaller ones whole, while halving any larger ones so everything cooks evenly. Add them to the tray.
Step 3 – Prepare the garlic
Cut the whole garlic bulb in half horizontally right through the middle, creating two cross-sections. Nestle both halves onto the baking tray among the vegetables.
Step 4 – Season and toss
Drizzle the carrots, radishes, and garlic generously with the olive oil. Season well with Maldon Pepper Sea Salt flakes and cracked black pepper. Give everything a light toss on the tray to ensure the vegetables are evenly coated, then place into the preheated oven.
Step 5 – Roast and garnish
Roast the vegetables for 35 minutes, or until they are fork-tender and beautifully caramelised around the edges. Remove from the oven, arrange on a serving platter, and finish with fresh thyme leaves and a sweet drizzle of honey.
Tips for the Perfect Roasted Root Vegetables
Don’t Overcrowd the Pan: Make sure your radishes and rainbow carrots have plenty of space on the baking tray. If they are piled on top of each other, they will steam instead of caramelising and getting those delicious, crispy edges.
Squeeze the Garlic: Once roasted, those halved garlic bulbs become incredibly sweet and spreadable. Squeeze the soft garlic cloves out of their papery skins directly over the vegetables before serving for an extra punch of flavor.
The Pepper Salt is Key: Because the carrots and radishes both become quite sweet in the oven—especially with the honey drizzle—the Maldon Pepper Sea Salt is vital. It cuts through the sweetness and adds a complex, savoury depth.
What to Serve with Roasted Radishes
This vibrant mix is incredibly versatile. It serves as a fantastic, colourful side dish for a classic Sunday roast chicken or beef. It also pairs beautifully with grilled fish, thick-cut pork chops, or as part of a larger vegetarian feast alongside grains like quinoa or farro.
Frequently Asked Questions
Can you roast radishes?
You can absolutely roast radishes! While often eaten raw in salads, roasting is arguably the best way to eat radishes. The heat breaks down their spicy compounds, turning them mild, juicy, and deliciously sweet.
Do I need to peel baby rainbow carrots?
No, there is no need to peel baby rainbow carrots! Their skins are very thin and hold a lot of nutrients. Simply give them a good scrub under cold water to remove any dirt before tossing them on your baking tray.
Can I use regular carrots or standard red radishes?
Yes. While the mixed colours of rainbow carrots and mixed radishes look stunning on a platter, the recipe works exactly the same with standard orange carrots and classic red globe radishes. Just ensure you cut any larger standard carrots into batons so they cook at the same rate as the radishes.
Bring bold, classic American flavours into your kitchen with our latest collaboration featuring recipe creator Chloe Hood.
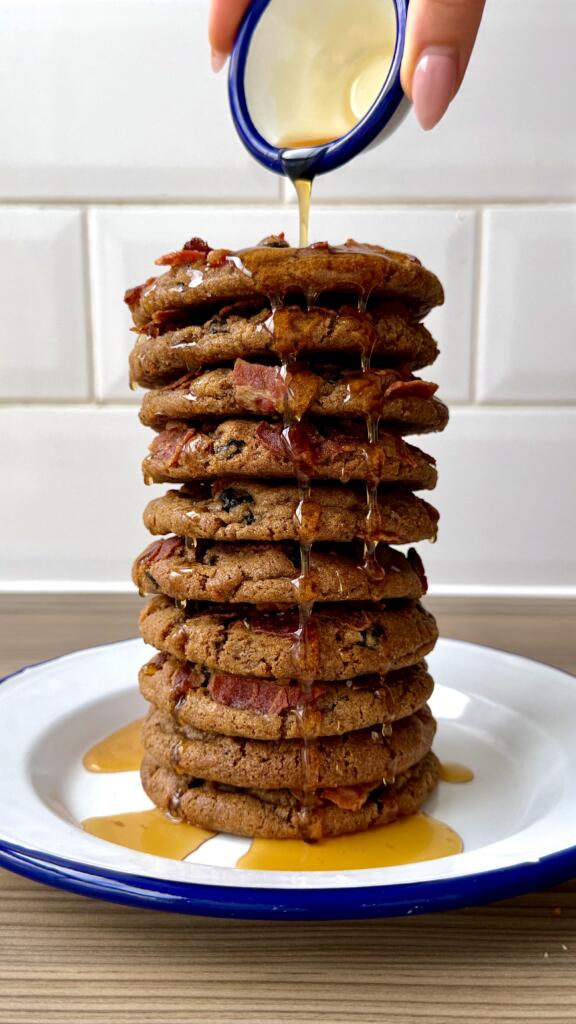
These Blueberry, Bacon & Maple Syrup Cookies are a deliciously unique twist on the sweet-and-salty (swalty) cookie trend, stacked high like an irresistible tower of pancakes and finished with a glossy drizzle of maple syrup.
Crafted with nutty brown butter, rich maple sweetness and chewy pops of dried blueberries, each cookie is studded with smoky, crispy bacon and elevated with the deep, rich flavour of Maldon Smoked Sea Salt flakes. The result is a cookie that’s decadent, surprising, and perfectly balanced – sweet, salty, smoky and buttery in every bite.
Perfect for adventurous bakers, weekend treats, or anyone craving a standout cookie recipe.
How to make Blueberry, Bacon and Maple Syrup Cookies
By Chloe Hood – A Stack of Blueberry, Bacon & Maple Syrup Cookies
Heat butter in a saucepan over a medium heat, stirring continuously, until deep brown and smelling nutty. Cool to room temperature.
Using an electric mixer, beat together browned butter, sugars and maple syrup.
Briefly mix in the egg and vanilla to combine.
In a separate bowl, combine flour, cinnamon, bicarb and Maldon Smoked Sea Salt.
Gradually, using a spatula, fold the dry mixture into the wet.
Before the dough is fully combined, fold in the dried blueberries.
Divide the dough into 10 equal balls (approximately 70g each).
Roll the top half of each dough ball in the bacon pieces.
Place on baking paper, cover and rest in the fridge overnight.
When ready to bake, preheat oven to 180°C (fan).
Space dough balls out on cold, baking paper-lined trays. Bake for 9 minutes.
Remove from the oven and bang the tray on the kitchen counter three times. Then, apply a circular motion around the cookies, using a cookie cutter.
Bake for 4 more minutes.
Repeat tray bangs and circular motion.
Whilst they’re still hot, sprinkle with Maldon Smoked Sea Salt.
Leave for 15 minutes before transferring to a wire rack to finish cooling.
Stacked them up and drizzle over maple syrup!
Made This Recipe? We Want to See!
If you recreated this recipe, don’t forget to tag @maldonsalt so we can admire your delicious stack of cookies. You can find out more details about Maldon Smoked Sea Salt flakes here.
Preheat the oven to 180c. Start by roasting the cauliflower and sweet potato. Place the cauliflower florets and the sweet potato cubes into a roasting tray and drizzle over the olive oil. Then add the turmeric, some Maldon Sea Salt and cracked black pepper. Toss this around in the tray so all the pieces are evenly coated.
Place into the preheated oven and roast for 30 – 40 minutes until soft, and lightly charred.
While the vegetables are roasting, get a small bowl and add the lime juice, rice vinegar and caster sugar. Mix until the sugar dissolves. Then add the finely sliced radishes to the bowl and toss. Set aside and allow this to pickle and turn a beautiful pink colour as you prepare the rest of the bowls.
To make the dressing, simply add all the ingredients to a bowl and whisk together. Set aside to use later.
Fry two Burford brown eggs until just set but not too crispy on the edges, adding a splash of water to the frying pan near the end of the cooking can help achieve this.
Prepare the packet rice according to the packet instructions. Then divide between the two bowls. Add some of the roasted cauliflower and sweet potato. Then top with some sliced avocado, a fried egg, some cucumber and carrot ribbons and the pickled radishes.
Drizzle over some of the ponzu dressing and then garnish with finely chopped chives and furikake.
Cut the squid into a mixture of rings or thick slices with the skin scored in a crisscross pattern. Keep the tentacles left whole or cut into two pieces. In a large bowl mix together the Shaoxing wine, soy sauce and grated ginger. Add the prepared squid to the bowl and toss it through the marinade so it is well coated. Cover the bowl in clingfilm and set aside in the fridge for 15 minutes.
In a second large bowl, mix the plain flour, cornflour and Maldon Pepper Sea Salt.
Place the vegetable oil in a deep saucepan, so it comes 3 inches up the sides. Place it on a medium heat and let the oil come up to 180c.
Take the squid out of the fridge and lift each piece out, shaking off any excess marinade and then transferring it into the flour bowl. Toss each piece well in the flour, again shaking off any excess, before dropping them into the hot oil. Do this in smaller batches so as not to overcrowd the pan.
Use a slotted spoon to lift the fried squid out of the oil when it is golden brown (after 2 – 3 minutes), and place onto a tray with some kitchen paper to absorb any excess oil.
In a small bowl mix together the mayonnaise, finely chopped coriander and dill, and lime juice.
Serve the fried squid immediately with the herbed mayonnaise and some extra Maldon Pepper Sea Salt.
Preheat the oven to 180c.
Cut the butternut squash down the middle from the stem to base. Scoop out the seeds using a spoon. Then use a sharp knife to score the butternut squash flesh in a crisscross pattern. Place each half into a roasting tray with the flesh facing up, and drizzle both with half of the olive oil. Season with Maldon Garlic Sea Salt, black pepper and the smoked paprika. Then place into the oven for 40 minutes until soft and tender but still holding its shape.
While the squash is roasting, prepare the rice filling. Start by adding the remaining olive oil to a small frying pan, and place onto a medium heat to heat up. Then add the sliced red onion and fry for 8 – 10 minutes, stirring consistently until the onions are very soft and starting to caramelise. Remove from the heat and set aside.
Prepare the rice according to the packet instructions and then tip into a large bowl.
Add the finely chopped dill and the caramelized onions and stir through. Then season with Maldon Garlic Sea Salt and black pepper. When the butternut squash has cooked, remove it from the oven and divide the rice between the two halves, pressing the rice into the cavity. Then top with some crumbled feta, pomegranate seeds and chopped pistachios. Drizzle over a little pomegranate molasses and a final sprinkle of Maldon Garlic Sea Salt.
Preheat the oven to 180c.
To make the cauliflower steaks, remove the leaves from the cauliflower and then cut into thick 1-inch slices – the end pieces won’t hold together to they need to be closer to the root. Any leftover cauliflower pieces or leaves can be saved for roasting another time!
Place the cauliflower steaks onto a roasting tray. In a small bowl mix together the olive oil, ground coriander, sumac and Maldon Chilli Sea Salt. Then use a pastry brush to brush the spiced oil across the steaks, making sure they are evenly coated. Place them into the preheated oven to roast for 40 minutes until soft and tender and starting to char on the edges.
To make the romesco sauce, place the toasted nuts into a food processor along with the roasted red peppers, crushed garlic, paprika, Maldon Chilli Sea Salt and sherry vinegar. Blitz this and then while the motor is running drizzle in the olive oil until you have a lovely smooth sauce. Set aside.
Once the cauliflower steaks are cooked, remove from the oven.
To serve, spread the romesco sauce on the base of a large platter. Then top with the cauliflower steaks and garnish with some mint leaves.
Start by placing the pistachios into a food processor and blitzing until they are very finely ground. Tip these into a shallow bowl and set aside. Wipe out the excess from the food processor, but there is no need to clean it.
Then add the walnuts to the food processor and pulse these until finely ground. Then add the medjool dates, flaxseed, chia seeds, Maldon Smoked Sea Salt, cocoa powder and orange zest and juice. Blitz this until everything is well ground and mixed to a thick paste.
With slightly damp hands, roll out small golf ball sized balls of the mixture. Then roll each ball in the ground pistachios from earlier. Set these onto a tray and into the fridge for 15 minutes to firm up.
Remove from the fridge when you are ready to enjoy them.
Preheat the oven to 140c.
Place the thinly sliced sweet potato on tray and spread the out in an even layer. Do the same on a separate tray for the beetroot (otherwise it will stain the other vegetables), and the carrots. Place these into the oven for about 2 – 2.5 hours, add the parsnip ribbons for the final 45 minutes. Bake the vegetables until they have dried out and gone crisp. They will go darker in the oven but make sure they don’t burn or catch too much.
While the vegetables are baking, make the beetroot dip. Place the cooked beetroot into a food processor along with the Greek yoghurt, grated garlic and Maldon Pepper Sea Salt. Then blitz until smooth and vibrant pink. Tip this into a bowl and set aside.
When the vegetable crisps are done, remove from the oven and pile into a large bowl. Sprinkle over some Maldon Pepper Sea Salt and serve alongside the beetroot dip.