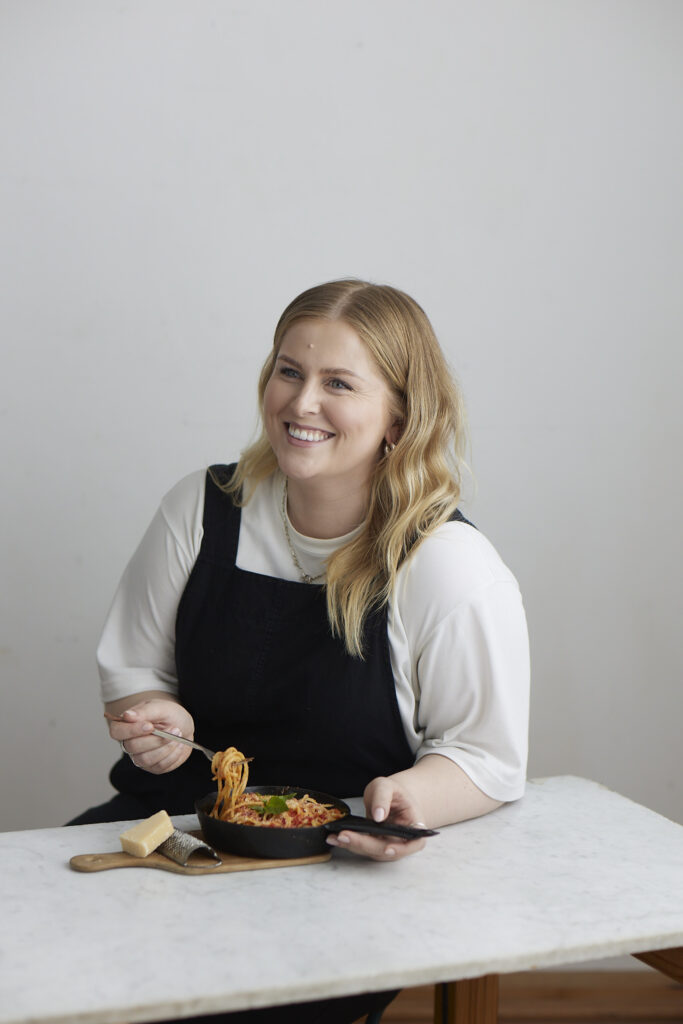
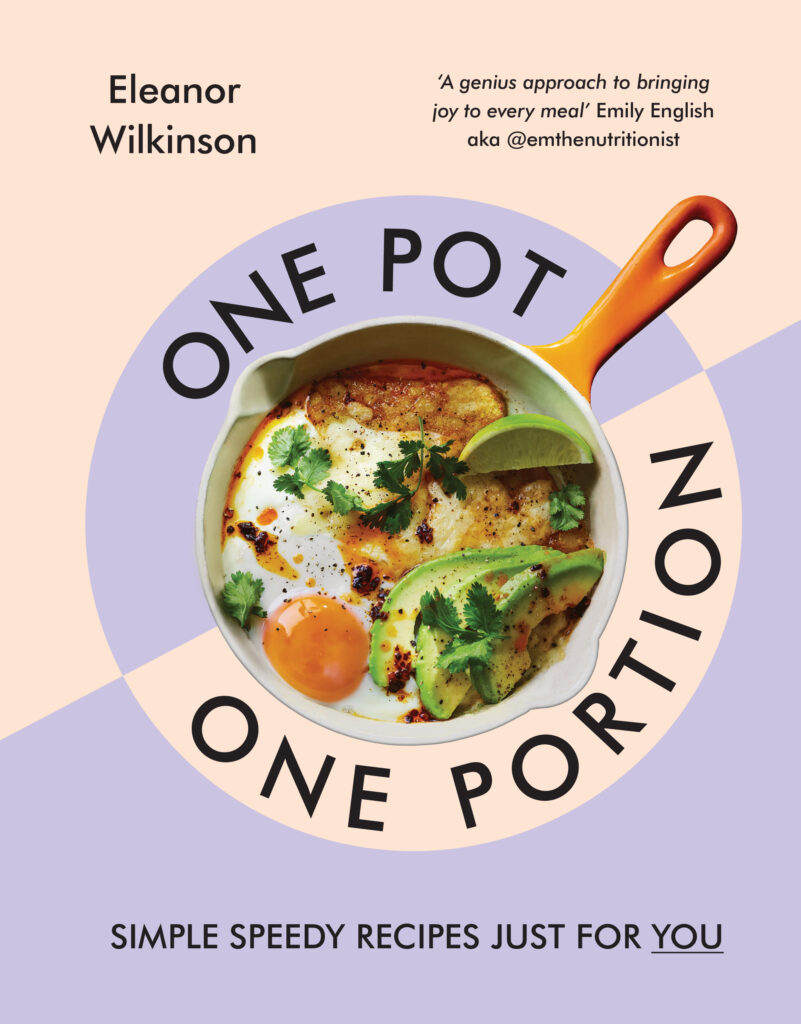
Eleanor Wilkinson, a culinary enthusiast and social media sensation with over 600k Instagram followers has captured the hearts of solo cooks everywhere with her innovative cookbook, One Pot, One Portion. This collection of recipes is tailored specifically for the 8.3 million Brits who live alone, offering simple, one-dish meals that cater for both convenience and flavour.
After the end of a long-term relationship, Eleanor found herself cooking for one, which inspired her viral Instagram series, One Pot, One Portion. The series instantly became a massive hit with her followers, which led to her finally publishing her favourite recipes in a book. Her book is a testament to her journey, providing solo cooks with delicious, easy-to-make meals that minimize food waste and maximize satisfaction.
In One Pot, One Portion, Eleanor emphasizes the importance of self-care through cooking, showcasing how preparing meals for oneself can be a profound act of love. The book features ‘partner recipes’ that cleverly use the same ingredients across different meals, such as splitting an avocado between Peanut Noodles and a Breakfast Skillet.
Organized into chapters based on mood—Comfort, Fresh, Simple, Special, Sweet—the cookbook ensures that there is something for every craving and occasion. With highlights like Risotto Carbonara, Gyoza Stir Fry, Chicken Pot Pie, Gnocchi Con Tomate, and Sticky Toffee Pudding, this cookbook proves that solo dining can be both indulgent and effortless.
In conversation with Eleanor Wilkinson…
Eleanor, your cookbook ‘One Pot, One Portion’ has resonated with so many people living alone. What inspired you to create this book specifically for solo cooks?
Initially I created this series for myself! When I began living alone for the first time ever I realised how uninspiring it can be to not only cook dinner for yourself (and often be faced with several containers full of leftovers) but then to have to tackle the washing up alone too. Once I started the series I realised how many people felt like this too, not just those living alone, but anyone who spends some of their meals cooking for one. It’s something that’s relevant to millions of people and yet is so rarely talked about or catered to. I hope that this book can bridge the gap between ease and variety and of course, bring the joy back to solo cooking!
The chapters in your book are divided into different moods like comfort, fresh, simple, special, and sweet. How did you decide on these categories, and why are they important?
One of my favourite things about cooking for one is that you have the privilege of selfish choice! You don’t have to worry about other people’s tastes or requirements and can just something that you fancy. These chapters make perfect sense to me as they’re the meal types I crave most! You can ask yourself what you fancy eating that day, then flick through the chapter that most aligns with that feeling and find a recipe that brings you what you need, whether that be warmth, energy, more time, peace or joy. The personalisation of food is so powerful, and I think that’s especially true when cooking for one.
The concept of ‘partner recipes’ is brilliant for reducing food waste and making the most of fresh ingredients. Can you tell us more about how you developed this idea and give an example of a pair of partner recipes from the book?
For me one of the biggest barriers to cooking single portions is the leftovers you have at the end. Ingredients aren’t always packaged to cater for solo cooks, so you’re almost always left with something at the end. I wanted to remove this barrier and ensure people had easy options for how to use those leftovers, plus tackle the issue of food waste which is so important! One of my favourite recipe partnerships is making my risotto carbonara, which uses an egg yolk, then using the leftover egg white to make my single serve chocolate brownie- a pretty perfect weekend meal if you ask me!
Cooking for yourself is described as the ultimate act of self-care in your book. What would be your top tips for people wanting to get into cooking?
It definitely feels like a form of self-care for me as it’s something we do so often that can impact our life in a huge way. I’d say my top tips are to have fun with it, don’t worry about making mistakes or cooking something you don’t like. That’s the joy of cooking for one, it doesn’t matter! Start with ingredients you know you enjoy and pick a recipe that uses them, maybe something from the ‘simple’ chapter of my book to get you started, and then gradually introduce new flavours or techniques. The more you do it, the easier it gets so enjoy the process!
With so many delicious recipes to choose from, you MUST have a favourite?!
I couldn’t possibly pick one! So I’ll give you one from each chapter to compromise. From ‘comfort’ it has to be the iconic lasagne, then I make the herby chicken and rice salad from ‘fresh’ all the time. The croque madame pastry from ‘simple’ is a weekend winner for me and I have a very soft spot for the steak and crisp sandwich with chimichurri from ‘special’. Finally, my favourite recipe from ‘sweet’ is maybe the baked peaches with caramel sauce. Now I feel guilty towards all my other recipes- I love them all!!
What does a normal day in the life look life for you, Eleanor?
Each day can look quite different, which makes my job a lot of fun! Typically though it always starts with a cup of tea (ideally in bed, while I solve my daily NYT puzzles) then it’s a combination of testing, filming and editing recipes for my social media- there’s almost always a trip to the supermarket involved- then it might be answering emails about the book, or writing my newsletter or meal plans. If it’s a particularly fun day I might have a foodie event in the evening and if not, it might be a boxing class or a night on the sofa with a delicious dinner.
Name three things in the kitchen you simply can’t live without!
Ok I think everyone should own a microplane grater! They’re life changing. Chopping garlic and ginger is one of those jobs I hate, and grating them makes everything so much easier. Also a citrus squeezer, because you get so much more juice out of your lemons and limes, and it doesn’t end up all over your hands. Finally. I’d say a set of scales, especially when cooking for one. Not only can it save on washing up when you weigh directly into your pan, but it also adds more accuracy than other ways of measuring, which is important when working with smaller quantities of ingredients.
Gnocchi Con Tomate Recipe
If you’re going to make one recipe from this book, make it this one! Well, actually, make them all, but definitely include this one. It. Is. Divine. It may seem simple, and it most definitely is, but it is mighty. The crisp bounce of the gnocchi replaces the bread traditionally used in Spanish ‘pan con tomate’ and takes it from a light lunch to a more substantial meal. Good quality tomatoes are essential here, as well as generous seasoning, as that’s where most of the flavour comes from.
Prep Time: 5 minutes
Cook Time: 5 minutes
Ingredients:
2 good-quality large vine tomatoes
1 garlic clove, grated
flaky sea salt
extra virgin olive oil
150g gnocchi
5g fresh basil leaves, torn if large
Method:
Start by grating your tomatoes onto your serving bowl or plate. Use the large hole of the grater and grate until you are left with the skin of the tomato, which you can discard. Add the garlic to the tomato and mix together. Season with salt and a good drizzle of olive oil.
Heat a frying pan over a medium-high heat and add another good drizzle of olive oil to the pan. Add in the gnocchi and fry for 4–5 minutes until golden and crispy. Season with salt then spoon over the tomato mixture. Scatter the basil over the top before serving.
Buy ‘One Pot, One Portion’ and Recreate a Recipe Today!
You can find where to purchase Eleanor’s NEW cookbook here and start being creative with food and flavours in the comfort of your kitchen.
Make sure you have your Maldon Salt ready for these recipes! If you are running out, please feel free to browse on our Where to Buy Page to find your nearest store in which stocks our beloved Maldon Salt.
Lastly, we LOVE seeing your creations – please tag us on Instagram using the #maldonsalt so we can share your own take on Eleanor’s recipes!
This recipe was created by Caitlin Carrick-Varty (@cake.onmyface), who is an artist, baker and storyteller. She wrote a blog, Cake On My face, of baking recipes in letters to her brother from 2018-2024. Now, she is writing about what she is baking in her kitchen on her substack.
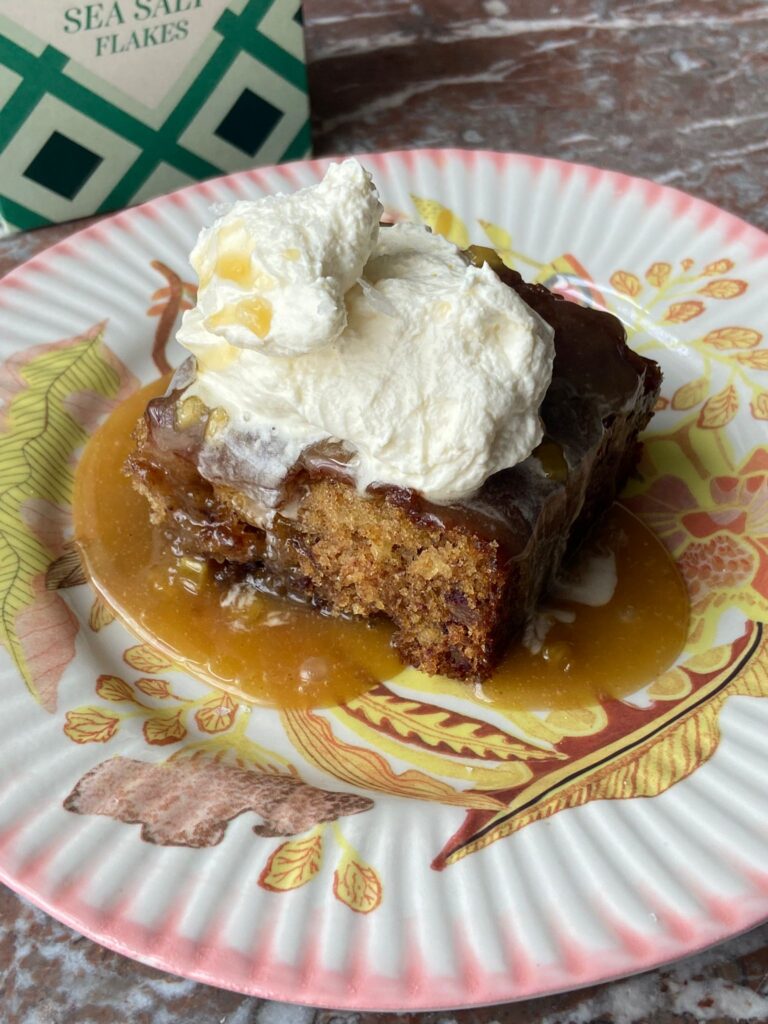
We’ve teamed up with Caitlin to make a delicious salted date cake, paired with a delicious ginger toffee sauce.
This cake is a meeting of salted caramel, sticky toffee pudding, and the fluffy, damp kind of ginger cake from English lineage. There is nothing – actually nothing – more joyful than toffee sauce and warm, dark cake. Sea salt is key in this, amongst all that sweetness, and helps the small amount of cardamom sing through. Caitlin adds ginger too, for a little heat under the salted and caramelised sauce – she’s got a tub of the stuff in her fridge and knowing that, makes her feel slightly more prepared for life!
Here is how to make her salted date cake with ginger toffee sauce
Preheat the oven to 180 / 160 fan.
Add the dates, water, and bicarb to a bowl and stir once or twice, cover with a plate and set aside.
Grease and line, with baking paper, a 9-inch square baking tin. You can use a slightly different size tin, just keep an eye on the baking time.
In a large bowl, cream the butter, sugar and vanilla extract until the mix is lighter and fluffed up around the sides of the bowl. A wooden spoon will work, electric beaters will be quicker. Beat in one egg until fully combined, then the other.
Take the bowl of dates and use a fork to mash them up a bit in the water. Pour the whole lot into the butter mixer, along with the flour, baking powder, Maldon salt, and cardamom. Mix until a liquid batter forms.
Pour into the prepared tin and bake for 30 mins, or until a skewer inserted into the cake comes out with just a few crumbs attached.
When the cake is out of the oven you can whip up the sauce, it’s quick-quick. Melt all the sauce ingredients, except the cream and ground ginger, in a saucepan over medium heat. Stir with a spatula to help it on its way. Allow to simmer for 2 mins, this is to cook the ginger and get a darker colour to the sauce. Take the pan off the heat, stir in the cream and ground ginger, and put back on the heat to bubble for a further minute or so.
Prick the cake all over with a toothpick or skewer, and pour over about a third of the hot sauce. If you can wait, allow the cake to sit like this, in the tin, for 15 mins.
Slice into big wedges and serve with double cream if you want, whipped or poured straight out the tub, and some of the extra sauce for good measure.
Notes – You can make the sauce in advance and heat up as and when you need it (what a sentence). Cool completely at room temp before storing in an airtight container in the fridge for up to 3 days.
Indulge in the irresistible allure of homemade tomato and pesto focaccia, a bread that not only delights the senses but also brings people together. This recipe elevates the classic focaccia with the exquisite touch of Kalahari Desert Salt, Selected by Maldon, known for its pure, delicate flavour. Ideal for tearing and sharing, this focaccia will make any gathering memorable, as its perfectly balanced taste and delightful texture invite guests to savour every bite.
The magic of this focaccia lies in the Kalahari Desert Salt, which is carefully integrated into the dough mixture. This exceptional salt enhances the natural flavours of the ingredients, creating a robust and well-rounded taste profile. The fresh pesto, made from vibrant basil leaves, toasted pine nuts, finely grated parmesan cheese, high-quality olive oil, zesty lemon, and aromatic garlic cloves, is further enriched by a pinch of Kalahari Desert Salt. This combination ensures that every piece of focaccia is bursting with flavor, making it the perfect centerpiece for any occasion.
How to a tomato and pesto focaccia
In a large bowl, combine lukewarm water, olive oil, honey, and yeast. Whisk these together until well blended.
Add the bread flour and mix using a large spoon until the mixture is thoroughly combined and hydrated. Then, incorporate the ground Kalahari Desert Salt, Selected by Maldon. Scrape down the sides of the bowl, cover, and let it rest for 30 minutes – 1 hr until doubled in size.
Perform stretch and fold technique with wet hands every 30 minutes, repeating this process three times.
After the final fold, leave the dough to proof for 1 hour at room temperature, or in the fridge overnight.
Transfer the dough to an oiled baking tray, give it a final fold and allow it to proof for an additional 1 – 2 hours until doubled in size. If you proved it in the fridge overnight this may take an extra hour.
Preheat the oven to 220°C (390°F).
Using oiled fingers, create dimples in the dough, press in the cherry tomato halves, and drizzle the entire surface with olive oil. Sprinkle with the Kalahari Desert Salt, Selected by Maldon.
Bake for 20-25 minutes or until the bread is beautifully golden brown.
While the bread bakes, prepare the pesto. In a food processor, blend together fresh basil leaves, toasted pine nuts, Parmesan cheese, olive oil, lemon zest and juice, garlic cloves, and a pinch of Kalahari Desert Salt until smooth and well combined.
Drizzle the freshly baked bread with the fragrant homemade pesto.
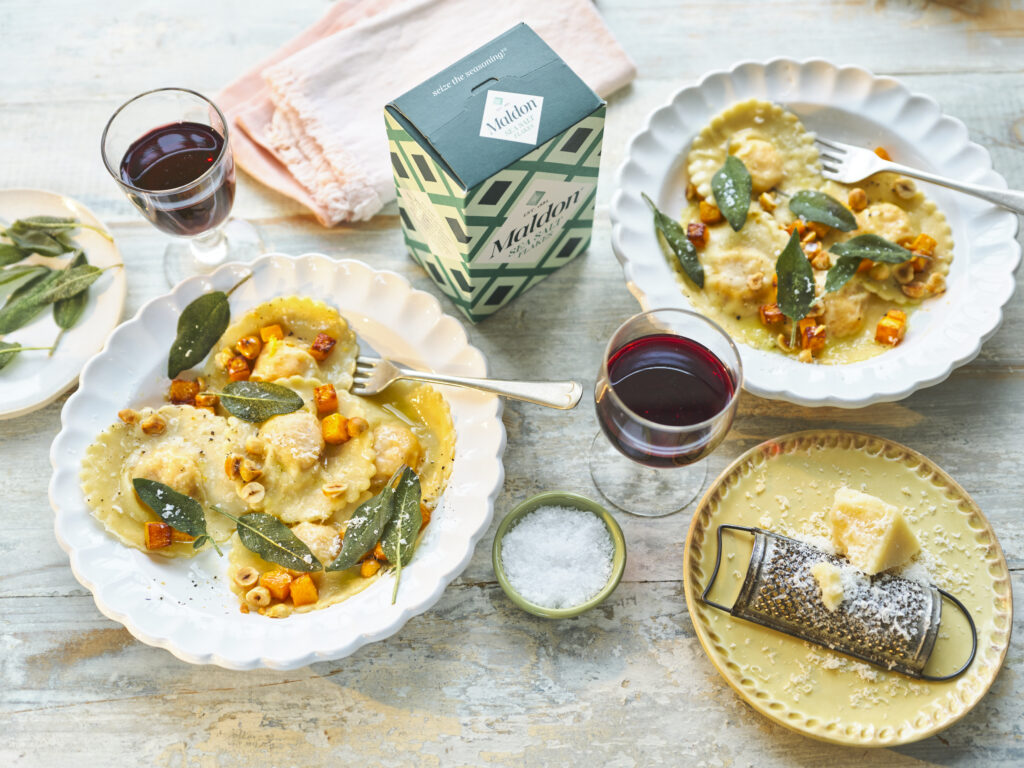
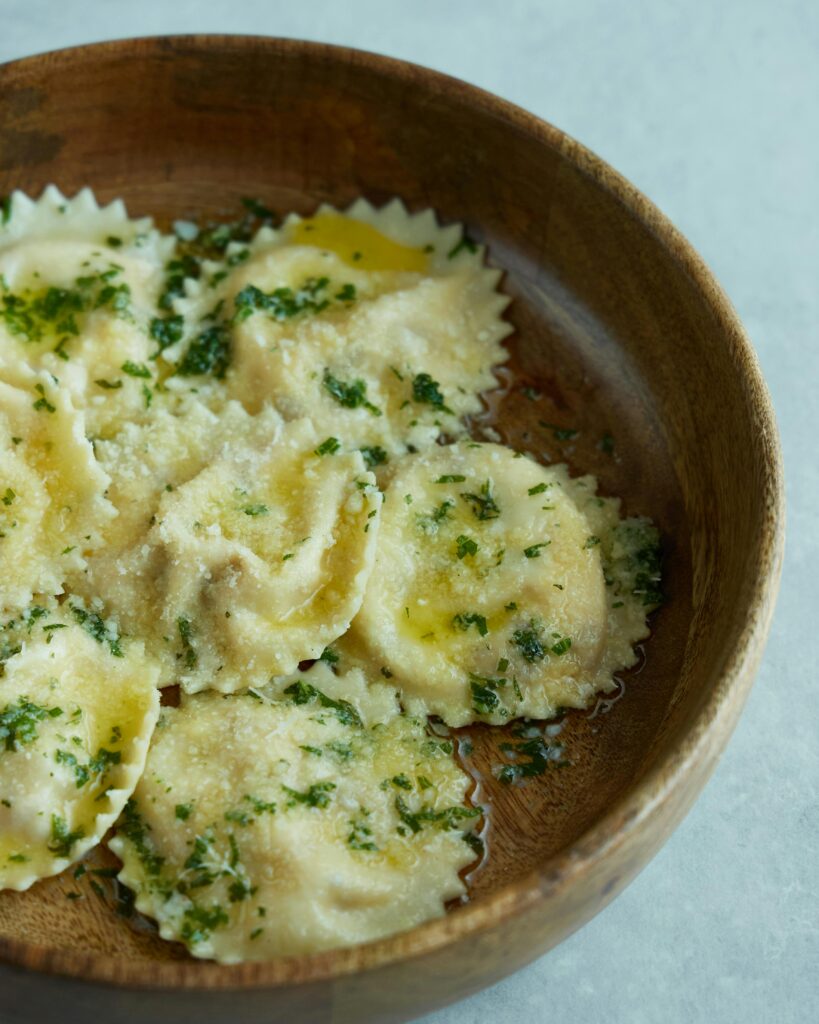
Introducing a delightful homemade butternut squash ravioli recipe that marries the sweet, nutty flavours of butternut squash with the rich, flaky goodness of Maldon Sea Salt flakes. This exquisite dish is elevated by a luscious brown butter sage sauce that compliments the creamy filling perfectly. The butternut squash filling, seasoned with salt and pepper, creates a smooth and and flavourful centre for the ravioli. We used a potato masher to puree the ingredients, but you can also use a food processor for a faster result!
Here are a few points that you need to remember when making a homemade butternut squash ravioli…
When roasting your squash, make sure to drizzle generously with olive oil and cook until beautifully tender. You then blend with a selection of creamy cheeses, a pinch of Maldon Sea Salt, pepper and a generous helping of nutmeg.
When rolling out the pasta dough using a machine, always start at the widest setting and gradually making it thinner. Lay the dough on a flat surface, placing spoonful’s of the delicious filling evenly apart, and cover with another sheet of dough. Use a ravioli cutter to assemble the ravioli, ensuring each piece is well-sealed to prevent leakage during cooking. If you don’t have a ravioli cutter, you can use a glass instead to cut out equal-sized circles. Take your filling and place into the centre of each cut-out circle, making sure there is space around the edge to close the ravioli by crimping. To save time, you can prepare the dough and filling in advance, storing them in plastic wrap in the refrigerator.
Cooking the ravioli is a breeze and takes around 3-4 minutes in boiling water, or until they float to the top. The addition of a brown butter sage sauce elevates the pasta dish further! Made up of melted butter and fresh sage leaves, cook until the butter turns a golden brown colour, emitting a nutty aroma. Transfer the ravioli tot he brown butter sauce, soaking up the rich flavours.
This homemade butternut squash ravioli recipe, infused with the distinctive taste of Maldon Sea Salt, is sure to impress with its balance of textures and flavours, making it a perfect choice for a special dinner or a cosy night in.
How to make butternut squash?
Begin by roasting the butternut squash.
Preheat the oven to 180c then place the peeled and roughly chopped butternut squash onto a roasting tray or baking sheets.
Drizzle with a little oil, cover with tin foil and then roast for 30 minutes until soft and tender, and a knife can be inserted easily. Set aside to cool.
Once the butternut squash is cooled, place it into a bowl and use a potato masher or ricer to puree it.
Then to the pureed squash add the ricotta, parmesan, a pinch of Maldon Sea Salt, cracked black pepper and a grating of nutmeg. Set aside.
How to make ravioli pasta?
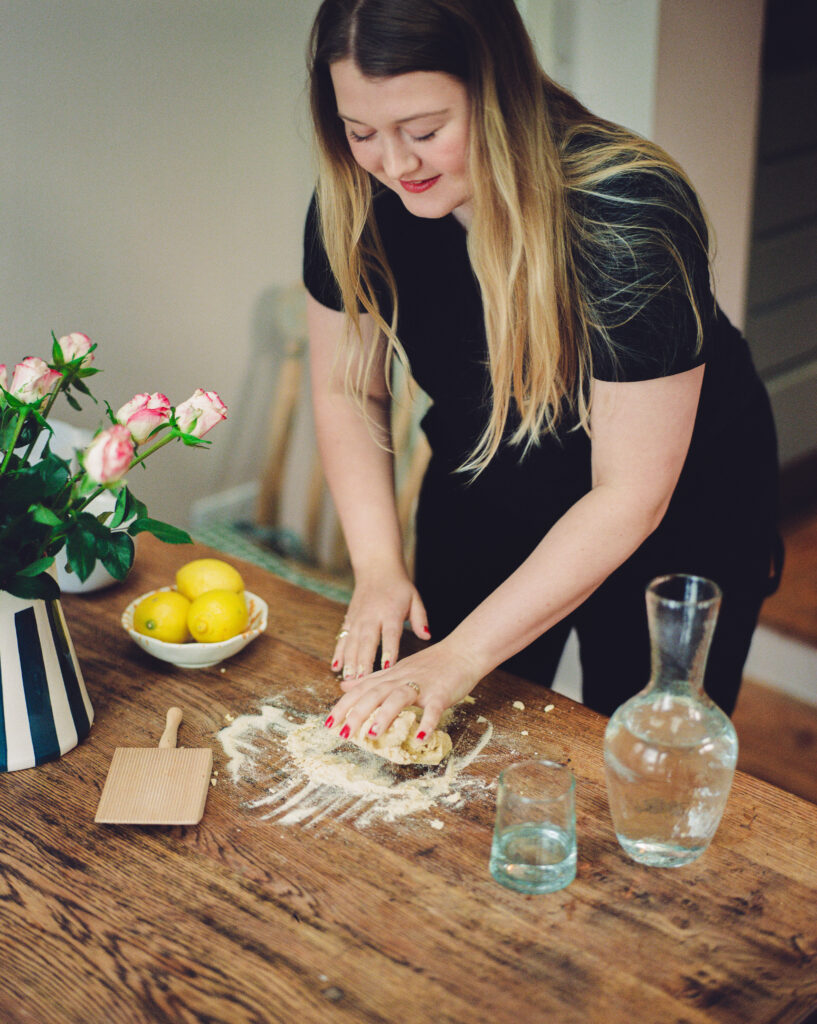
While the butternut squash is roasting, make your pasta. Tip the OO pasta flour onto a clean work surface and form a circle with it.
Then in the middle make a clear well so you are left with a ring of flour. Crack the 3 eggs into the middle. Then use a fork to break the yolks and gently whisk the eggs together so they are beaten.
Once beaten, use the fork to slowly flick in little bits of flour onto the eggs, and continue to whisk them in. Keep doing this while it thickens, and when it becomes too thick discard the fork and use your hands to knead the flour and eggs. Continue to knead for 5 minutes until you have a smooth dough.
Wrap it in clingfilm and then rest it in the fridge for 30 minutes.
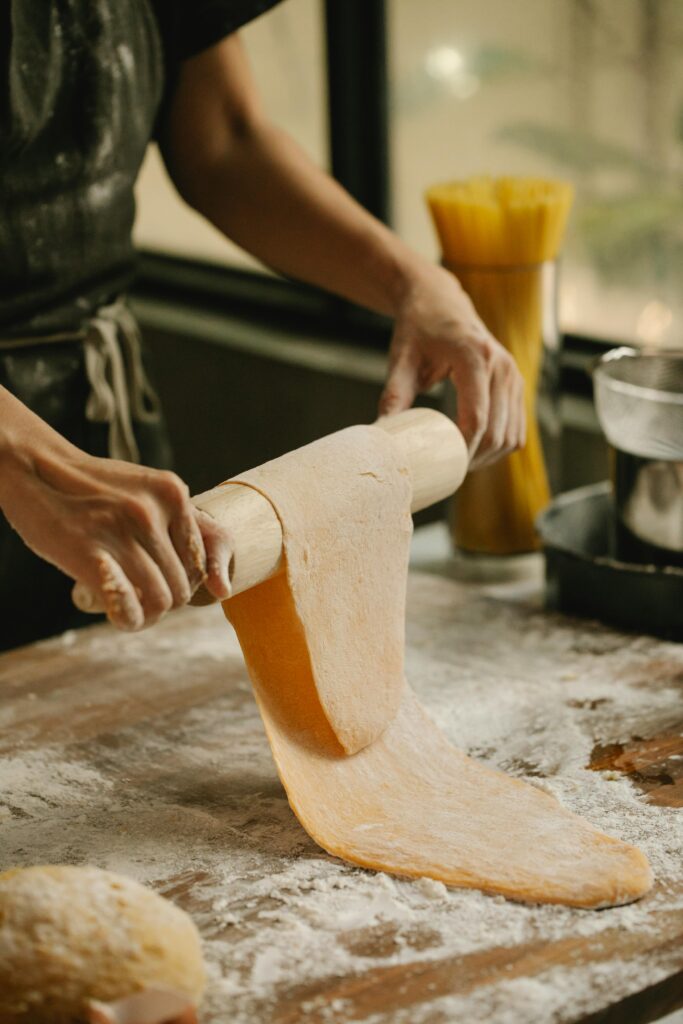
Once the dough has rested it is time to roll and shape the ravioli. Start with a smaller piece of pasta dough and flatten it out, then roll it through the widest setting of the pasta machine. Go through the widest setting again, and then continue to go down the settings until you have the thinnest pasta sheets – you should be able to see your hand through it when held to the light! Dust a tray with a little semolina and lay your pasta sheets on here to stop then sticking, whilst you continue with the rest.
When you have all your pasta sheets ready, you can shape the ravioli. Place one sheet of pasta on the work surface and use a teaspoon amount of the butternut squash filling to dot along the sheet, keeping a 3cm gap between each. Wet your finger in a small bowl of water and run this around the edge of the filling, then place a second sheet of pasta over the top and gently seal the two together – making sure there aren’t any large air pockets. Then use a cutter to stamp each ravioli out and set aside on a semolina lined tray while you do the remaining.
How to make pasta without a machine?
If you don’t have a pasta maker or machine, you can you use a rolling pin and a chef’s knife!
Lightly dust your surface with flour.
Once your dough has been in the fridge for 30 minutes, cut the dough in half.
Roll out one half the dough with a rolling pin into a rectangle around 16 inches and 8 inches wide. Make sure to continue to roll and stretch gently with your hands until the dough is as thin as you can make it.
Repeat the process for the second half of the dough.
Choose one sheet from the two, and begin spooning the butternut squash filling onto the pasta sheet, leaving around 1 inch between each ball of filling.
With a brush, gently brush water between the balls of fillings and around the outside of the sheet so that the other sheet of pasta will stick to it.
Lay the second sheet of pasta on top, pressing down gently between the filling mounds to seal the sheets together and remove any air pockets.
Cut the ravioli into rectangles using a ravioli cutter or sharp knife. Make sure to press any edges down again to ensure they’re sealed.
How to cook ravioli?
Place a large pan of salted water on to boil.
Place the ravioli in to boil, they should only take a couple of minutes. You know they are ready when they float to the surface.
How to serve butternut squash ravioli?
In a large sauté pan, add the butter and allow it to melt, when foaming add the sage leaves and let them bubble in the butter. Then add the hazelnuts and swirl them in.
As soon as your ravioli are cooked, lift them from the pan with a slotted spoon or spider and place them directly into the butter pan.
Toss them through the butter and serve immediately, with a good grating of parmesan cheese.
What goes well with butternut squash ravioli?
Butternut squash ravioli pairs wonderfully with a variety of side dishes and accompaniments that compliment it’s sweet and savoury flavours.
Salad
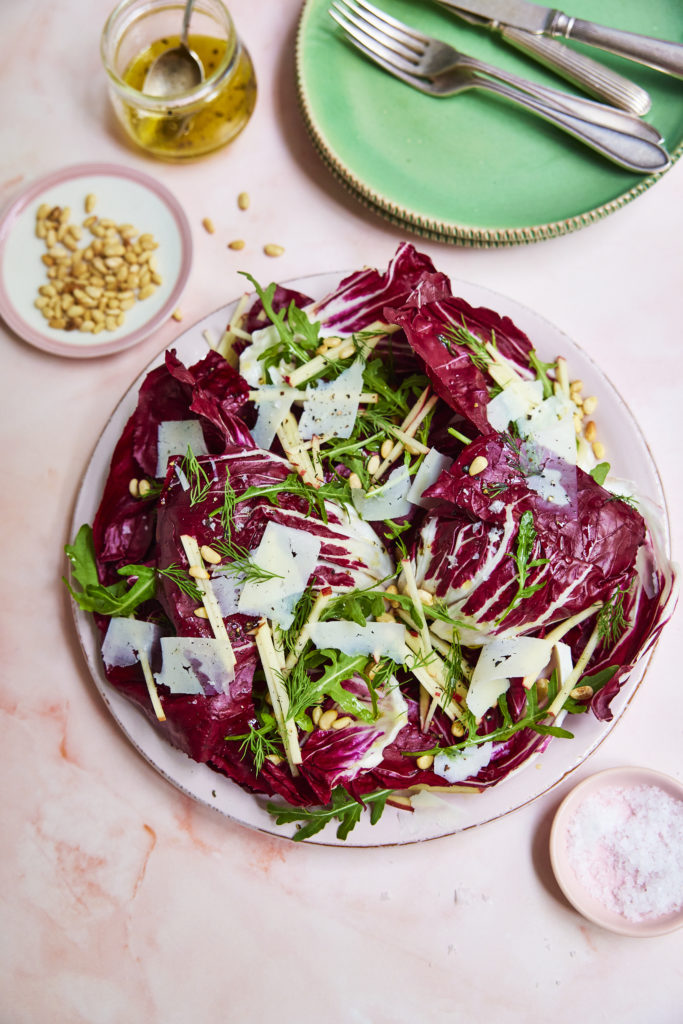
A fresh, crispy salad can balance the richness of the ravioli. Consider a delicious radicchio salad with shaved parmesan and toasted pine nuts. The peppery radicchio and the acidity of the dressing provides a delicious contrast to the sweet squash filling.
Bread
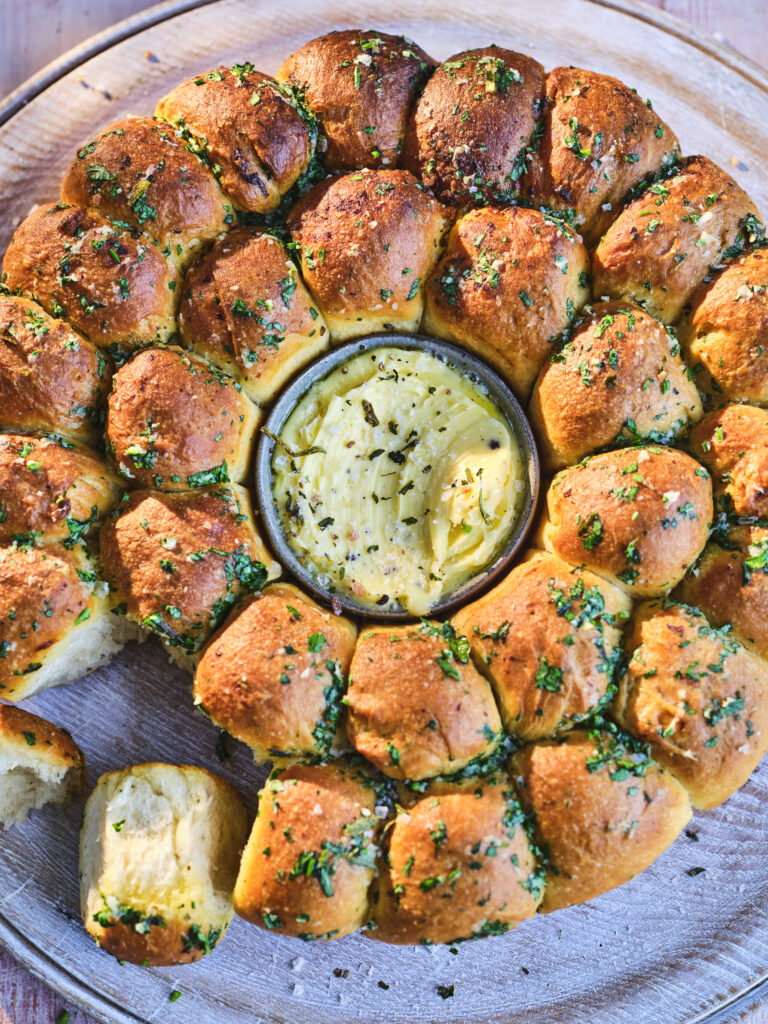
A warm, crust bread can be perfect for sopping up any leftover brown butter sage sauce. garlic bread or focaccia with rosemary and sea salt can also be a flavourful addition.
Vegetables
Roasted or sauteed vegetables make a great side dish. Brussels sprouts, asparagus, or green beans with a touch of olive oil and Maldon Sea Salt can add a delightful crunch and vibrancy to your meal.
These pairings can enhance the flavours of your butternut squash ravioli, creating a well-rounded and satisfying dining experience.
Can you freeze fresh pasta?
Yes, you can freeze fresh pasta, and it’s a great way to preserve it for later use! Here’s a detailed guide on how to freeze freshly cooked pasta effectively.
Cook the pasta al dente, as it will continue to cook slightly when reheated. Drain the pasta and let it cool completely.
Toss the cooled pasta with a small amount of olive oil to prevent sticking.
Divide the pasta into portions and place them in airtight containers or freezer bags. Remove as much air as possible from the bags.
Label the containers or bags with the date and freeze up to 2 months.
Reheat the pasta by dropping the frozen pasta directly into boiling water for 1-2 minutes.
Freezing fresh pasta is an excellent way to save time and reduce waste, ensuring you always have a quick and delicious meal option on hand!
Transform your next meal with a delectable Potato Gratin recipe that promises creamy, flavourful potatoes in every bite. Infused with Maldon Garlic Sea Salt flakes, this dish takes the classic comfort food to new heights! Perfect as a side dish, these au gratin potatoes are made with King Edwards or Maris Pipers for the ideal balance of fluffiness and flavour. Whether you’re hosting a dinner party or enjoying a family meal, this gratin dish will leave everyone asking for seconds.
What is potato gratin?
Potatoes au Gratin, also known as Dauphinoise Potatoes, is a classic French dish. It was first served during a state dinner held by Charles-Henri in France 1788 and his companions. Consisting of potatoes, thinly sliced but thicker than a penny, it’s then cooked in a cream sauce in a shallow baking dish with butter and garlic.
In contrast, Scalloped Potatoes are made with roux consisting of flour, butter and milk, whereas Potatoes au Gratin are made with cream and butter and sometimes cheese. However, purists would argue that a gratin doesn’t have to include cheese. This is because the French word for ‘gratin’ translates to ‘crust’. This delicious crust can be achieved not only from cheese, but with breadcrumbs, egg or butter.
How to make potato gratin?
Begin by preheating the oven to 160Fan °C / 350°F / Gas Mark 4.
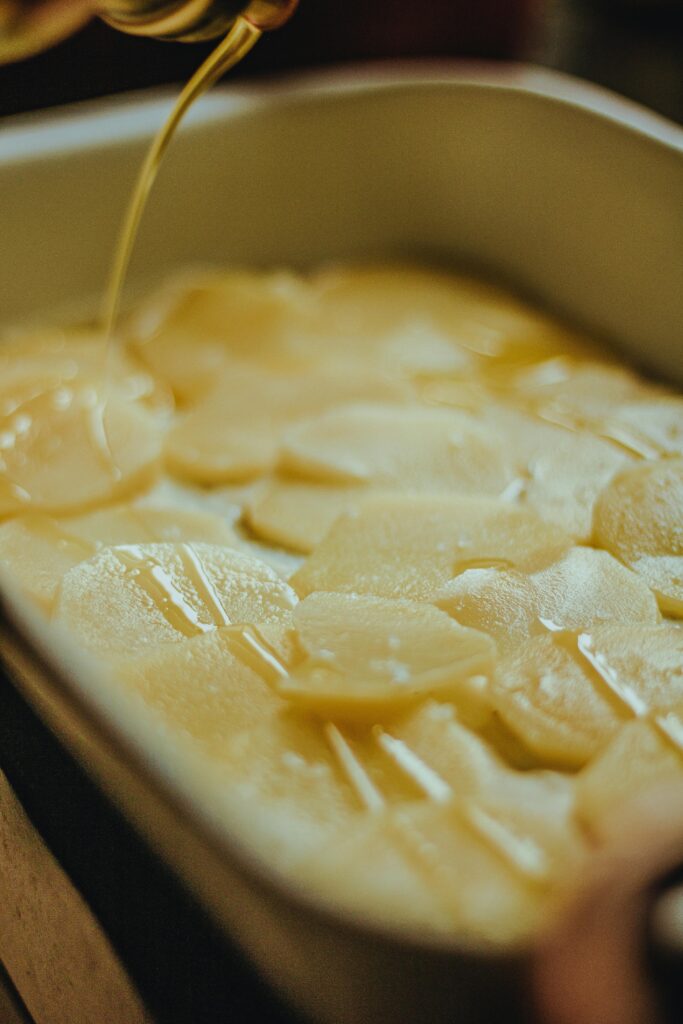
Take a large shallow cast iron dish, gratin dish or baking tray and rub it all over with some butter. Then prepare the potatoes by thinly slicing them, or using a mandolin. We have kept the skins on in this recipe, but you can peel the potatoes if you like.
Once you have thinly sliced potatoes, carefully lay them in a spiral shape in the pan or dish so they fan out in circles.
In a saucepan add the double cream, crushed garlic cloves, fresh thyme leaves, Maldon Garlic Sea Salt and cracked black pepper. Place this on a gently heat and then bring up to scalding point. Take off the heat and then carefully pour all over the potatoes. This will create a irresistibly creamy texture.
Finely grate a little parmesan over the top and cover with foil. Place into the preheated oven to bake for 1 hour 30 minutes until the potatoes are tender. Remove the foil and bake for additional 10 to 15 minutes to achieves a golden, bubbly top.
Serve immediately. This simple yet elegant dish dish pairs beautifully with any main course, offering a rich and comforting additional to your dinner party.
How to cook potato gratin in the air fryer?
If you’re looking for a quicker way to cook your potato gratin, then try cooking it in an air fryer! Usually in the oven it takes over an hour, but using a standard air fryer can take half the time!
Slice the potatoes into thin, 1/8 rounds using a sharp knife of mandolin.
Combine the cream, milk, garlic, thyme and pepper in a heat-proof mug. Microwave for 2 – 3 minutes, allowing the flavours to blend together.
Grease your baking dish with butter to avoid the creamy potatoes from sticking to the base.
Arrange the potatoes slices into the dish, creating layers.
Pour the cream mixture over the potatoes, ensuing they are evenly coated.
Transfer the baking dish into the air fryer basket, covering with foil. Air Fryer at 200C for 25-45 minutes, or until the potatoes are tender. You should be able to pass through the potatoes to the bottom when using a knife.
Add a sprinkling of parmesan cheese or breadcrumbs on top and cook for additional 4 to 5 minutes. This will create a beautiful, crunchy crust.
Once golden and bubbling at the top, remove the dish from the air fryer basket, cooling for at least 10 minutes before serving.
What to serve with potato gratin?
Now that you’ve made the deliciously creamy au gratin potatoes, you’re probably wondering what you can serve with them?
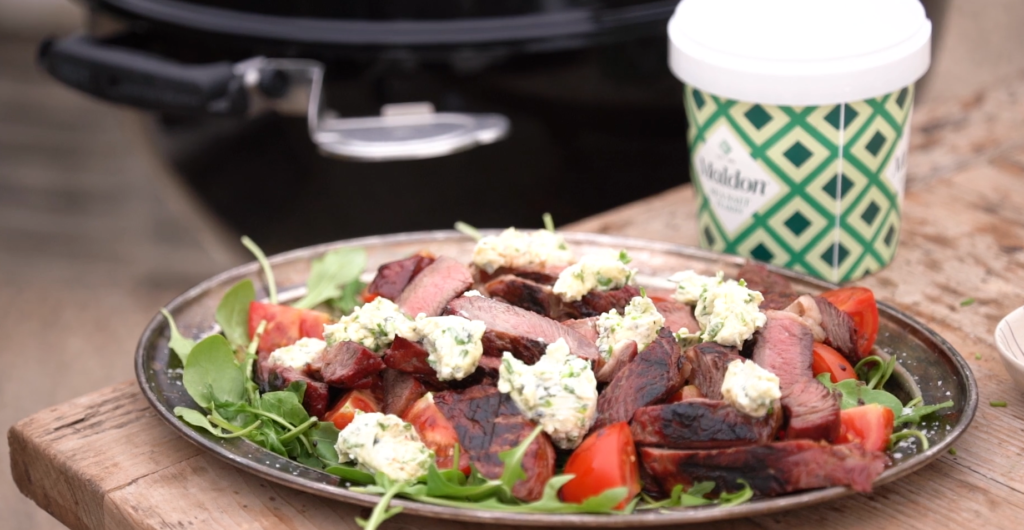
Meat and potatoes is a classic pairing. This is because the textures and flavours compliment each other so well. The fluffy texture of the potatoes combines beautifully with the meat’s chewy consistency. Potatoes also have a mildness to them which pairs well with the sweeter, bolder flavours of steak and it’s juices.
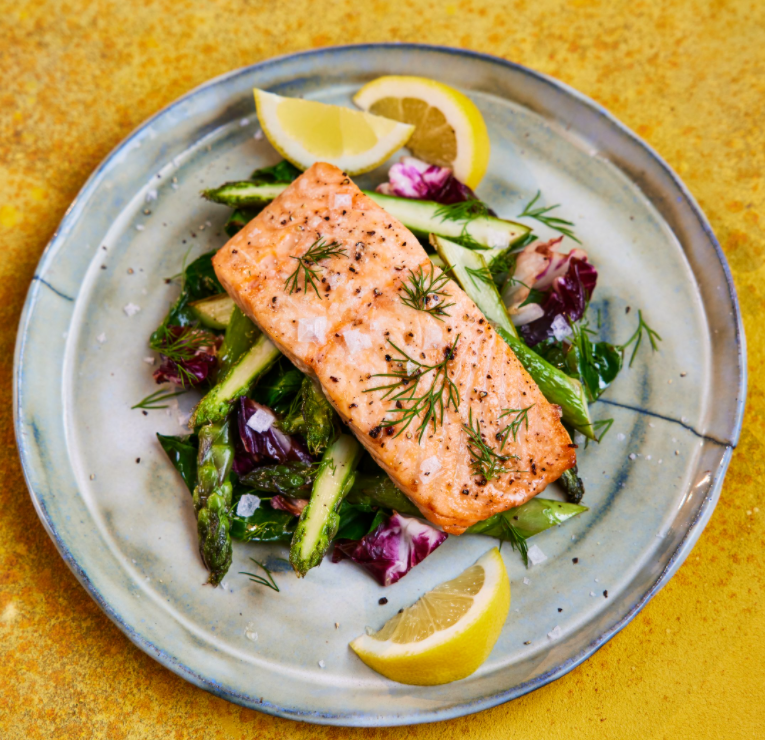
Grilled salmon is beautifully tender, complimenting the crispy exterior of gratin potatoes. We pair our salmon with fried greens and asparagus greens for a fresh, crips bite which harmonizes the creaminess of the potatoes.
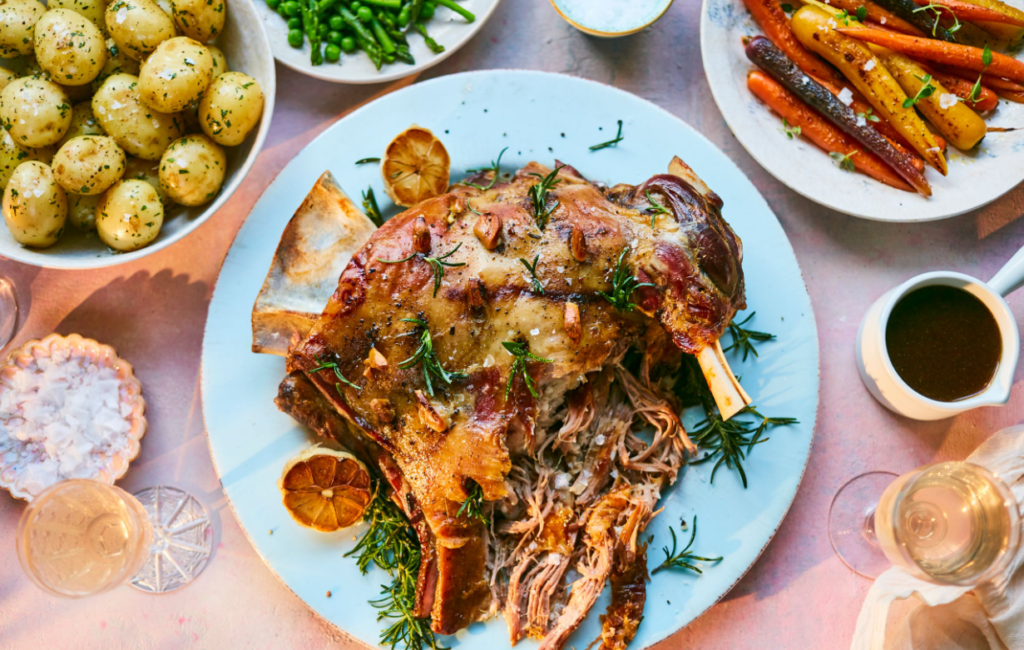
This is one of our favourite flavour combinations. The lamb roast has a rich, deep aroma that pairs perfectly with creamy potatoes. Because lamb also holds a gamey flavour, it brings out the natural earthiness of the potatoes, making it an indulgent feast.
Can you freeze potato gratin?
We wouldn’t recommend freezing gratin au potatoes, as it’s extremely rich in diary. Dairy products, such as milk and cheese, will separate during the freezing and thawing process, leaving you with a stodgy, very wet gratin.
However, you can store leftovers in the refrigerator for up to 3 days if kept in an airtight container. The oils from the cream and butter may separate once reheated but the taste will still be delicious.
Spicy cucumber salad is a quick and easy dish that bursts with flavour, making it the perfect addition to any summer feast. This vibrant dish features baby cucumbers, also known as Persian cucumbers, sliced Hasselback style into delightful spirals. We tossed them in a mouth-watering mix of sesame oil, soy sauce, rice vinegar, crispy chilli oil, and a touch of honey for sweetness achieving the perfect balance between sweet and spicy. A pinch of Maldon Chilli Sea Salt adds a fiery kick, while a sprinkle of sesame seeds provides a nutty crunch. Finished with a handful of fresh coriander, this vibrant salad is sure to impress.
Here is how to make a spicy cucumber salad
Start by cutting the cucumbers into spirals. In a similar method to Hasselback potatoes, place your cucumber between two chopsticks on your board, then use your knife to make small cuts all the way down in one direction. Next, turn the cucumber over and repeat the cuts again but in the other direction.
Alternatively, if you don’t want to spiralise the cucumbers like this, you can cut the cucumbers into a rough chucks.
Into a bowl, mix the sesame oil, soy sauce, rice vinegar, crispy chilli oil, honey, Maldon Chilli Sea Salt and toasted sesame seeds. Then toss the cucumbers throughout so they are evenly coated.
Set aside for them to absorb the flavours and oils for a minimum of 10 minutes before serving.
Sophie Wyburd is a cook, recipe writer and presenter from South London. With an incredible varied career life in food, Sophie has been a restaurant chef, food stylist and also headed up the food team at the iconic Mob. She now brings simple, comforting home cooking to the masses via social media and her newsletter, Feeder. You can also see her whipping up delicious dishes at supper clubs across London, as well as co-hosting I’ll Have What She’s Having and A Bit of a Mouthful podcasts – she’s certainly keeping busy!
With her main passion being simple, hearty recipes, what better what to celebrate this than publishing a cookbook FULL of comforting dishes.
Tucking In is all about good food not having to be complicated. It could be a bowl of something warming on a Tuesday night, or a weekend feast for friend. All that matters is that it’s comforting, filling, and flavour-packed.
Sophie has created these recipes to make cooking non-stressful. From everyday dishes including Harissa Braised Cod and Chipotle Vodka Gnocchi Bake, to more ‘fancier’ plates when you’re feeling a little more adventurous in the kitchen, such as Curried Chicken Legs with Cheesy Polenta.
In conversation with Sophie Wyburd…
Sophie! HUGE congratulations on the launch of ‘Tucking In’ ! Can you tell us what inspired you to write this cookbook?
Thank you! I love having my friends and family round to eat, and so I’ve always wanted to write a book that gives people generous, comforting, simple recipes so that they can do the same. It isn’t overly complicated food that is going to stress you out – it is easy, hearty stuff that hopefully everyone will love.
Your career in food has been incredibly varied, from working as a restaurant chef to food styling and leading Mob’s food team. How have these experiences influenced the recipes in your cookbook?
All the different places I’ve worked have informed the ways that I cook, and how I develop recipes. It’s about using classic techniques to make food as accessible as possible, whilst also being delicious. Accessibility is key to creating recipes that lots of people will actually use, and this is a skill I definitely practised whilst working at Mob.
‘Tucking In’ hosts a bundle a simple, hearty, comforting meals. Come on, you MUST have a favourite recipe?!
It’s like choosing a favourite child! But gun to my head, I think I’d go with the spicy lemongrass sausage smashburgers. Think lots of fish sauce, chilli and lemongrass in sausage patties, with american cheese and carrot pickle.
Good food doesn’t have to be complicated – what are some key tips or techniques you can share for home cooks to make delicious yet simple meals?
Cooking an onion properly is the main technique that I think takes an average meal to a good one. Onions take about 15-20 minutes to cook properly normally – get them on a low heat with lots of fat (olive oil or butter), and occasionally splash water into the pan if it looks like it is sticking. The foundation of flavour an onion lays is very important!
Your strong social media presence and newsletter have been great platforms for sharing your recipes. How do you see the role of digital platforms in shaping modern home cooking?
Social media has absolutely changed the way that we consume food media, and has democratised the landscape of who gets to write recipes. It means we have so many more recipes and inspiration at our fingertips at any one time, which is obviously great for home cooks to consume.
Are there any current food trends / techniques that you’re LOVING at the moment?
I really like how many restaurants give the option for a big sharing portion these days – dishes to share between 2/3/4 people. It’s really nice to eat the same things as whoever you go out to eat with, and really feel like you are sharing the experience.
What does a normal day in the life look like for you, Sophie?
A normal day normally looks like checking my emails, then heading to the shops to pick up ingredients for recipe testing and filming. I might film a recipe, then eat it for my lunch, and crack on with some recipe writing and planning in the afternoon. I’ll often test another recipe to have for my dinner, then get cosy on the sofa and watch some reality TV.
Name three things in the kitchen you simply can’t live without!
My little Victorinox tomato knife and an OXO speed peeler are such used items in my kitchen, and they also happen to be very affordable! I also couldn’t be without my big shallow Le Creuset casserole dish. I must use it about 5 times a week.
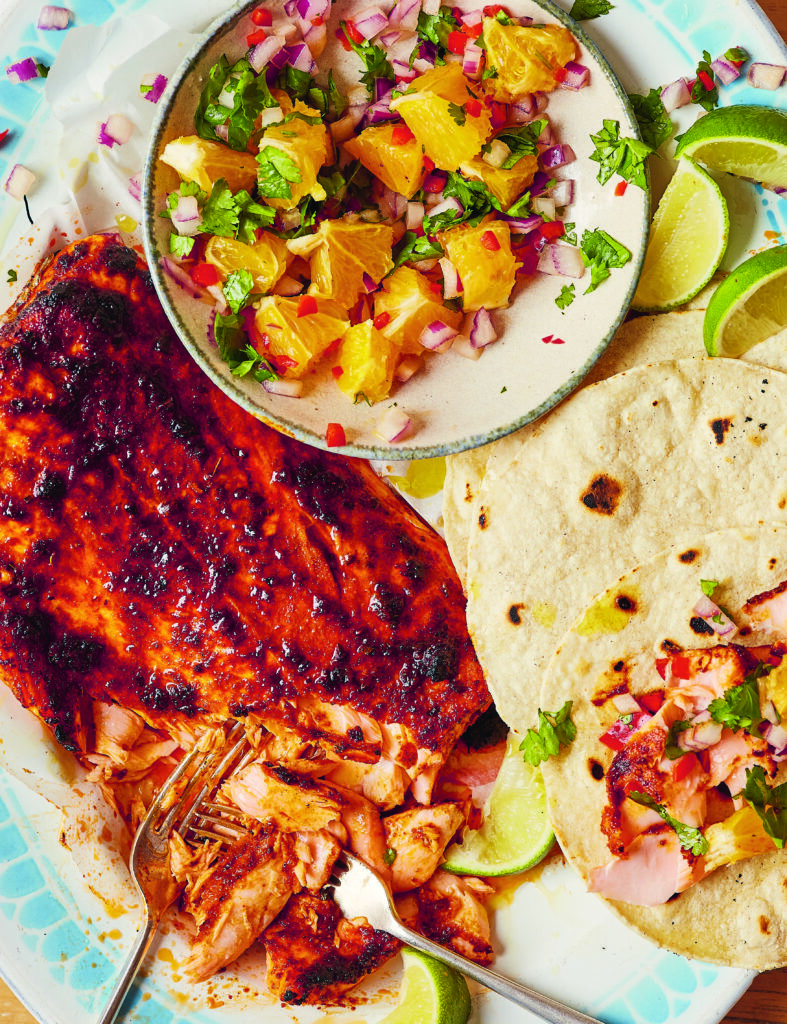
Spiced Blackened Salmon Taco with Orange Salsa
There is a reason why fajita night had every family in a chokehold in the 2000s, and it is because it is a really fun way to eat. Popping lots of things in the middle of a table and getting people to help themselves is relaxed, a little chaotic, and ultimately communal – the way I like all my meals to be. These tacos look much fancier than they are, but in reality this meal involves very little cooking; all you need to do is make a zingy salsa, and grill chunky sides of salmon in spices until the flesh is charred. It would make a brilliant dinner on a weekend, but is also easy to bang together on a Wednesday night after work.
Serves: 8 people
Allergie: Gluten Free and Dairy Free
Cook Time: 45 minutes
Ingredients:
2 tbsp sweet smoked paprika
2 tsp ground cumin
1½ tsp cayenne pepper
1 tsp dried oregano
2 tsp soft light brown sugar
2 × 600g sides of salmon
24 corn tortillas
For the salsa:
1 red onion
2 red chillies
small bunch of coriander
6 oranges
Maldon Sea Salt
olive oil
Method:
Spoon the paprika, cumin, cayenne pepper, dried oregano and soft brown sugar into a bowl, along with 2 teaspoons of Maldon Salt and 4 tablespoons of olive oil. Mix until you have a paste.
Place your sides of salmon in a large baking tray, skin-sides down, and rub the spice paste all over the flesh.
Preheat your grill to high.
To make the salsa, peel and finely dice the red onion, and finely chop the red chillies. Mix together in a bowl. Roughly chop the coriander, and set it aside. Slice the top and bottom ends off the oranges so that you can stand them up flat, then work your knife around them to peel off the skin. Cut the flesh into 2cm rounds, then dice them into 1cm chunks.
Add the diced oranges to the bowl with the onion and chilli, along with any juices, then give it all a good mix to combine.
Place your salmon under the hot grill and cook for 7–8 minutes – the top will char and get a beautiful crust, while the flesh will stay tender and soft.
While your salmon cooks, heat your tortillas. Turn a small burner on your hob to high and place your tortillas one at a time on the grate above the flame. Cook for a few seconds on each side, turning them over with metal tongs. Keep them warm by wrapping them in a clean tea towel while you cook the rest. Alternatively, cook them for about 20 seconds on each side in a hot, dry frying pan.
Stir the coriander into the salsa. Pop your tortillas onto plates, and bring the salmon and salsa to the table, then let everyone serve themselves by flaking off the salmon, and adding it to their tortillas with a spoonful of salsa.
Buy ‘Tucking In’ and Recreate a Recipe Today!
You can find where to purchase Sophie’s NEW cookbook here and start being creative with food and flavours in the comfort of your kitchen.
Make sure you have your Maldon Salt ready for these recipes! If you are running out, please feel free to browse on our Where to Buy Page to find your nearest store in which stocks our beloved Maldon Salt.
Lastly, we LOVE seeing your creations – please tag us on Instagram using the #maldonsalt so we can share your own take on Sophie’s recipes!
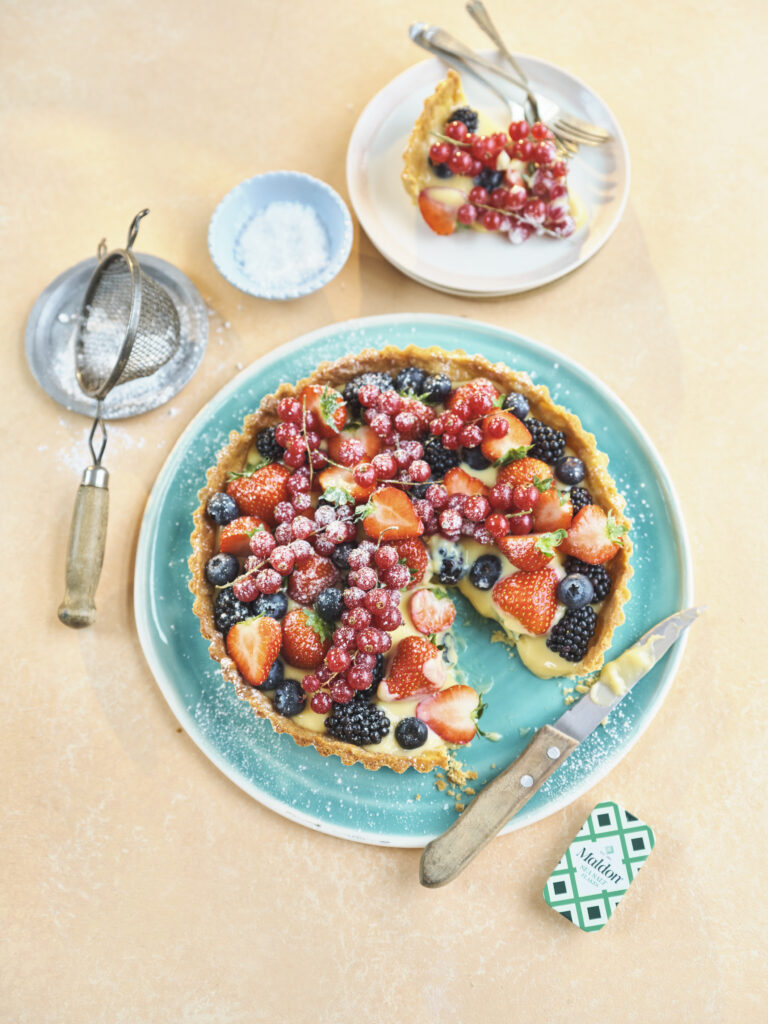
Indulge in the perfect summer dessert with this exquisite Summer Berries Custard Tart, a delightful combination of creamy vanilla custard and a vibrant array of fresh berries. This tart, featuring the renowned Maldon Sea Salt flakes, elevates a classic favourite into a gourmet experience. Whether you are hosting a backyard barbecue or a sophisticated garden party, this berry custard tart promises to be the star of your summer celebrations.
Creating this delicious dessert starts with a buttery tart shell made from all-purpose flour, unsalted butter, and a hint of Maldon Sea Salt flakes. The dough comes together effortlessly in a food processor or blender, with cold water ensuring the perfect consistency. Once baked to golden perfection, the shell is filled with a smooth and rich pastry cream, crafted from egg yolks, milk, sugar, and vanilla bean paste or extract. The crowning glory is an assortment of fresh summer berries, which not only add a burst of colour but also balance the sweetness of the custard with their natural tartness. A light dusting of icing sugar completes this show-stopping fruit tart, making it as beautiful as it is delicious.
How to make pastry for tarts
Start by making the pastry. Place the all-purpose flour and Maldon Sea Salt flakes into the food processor, and then add the cold cubed butter.
Pulse the food processor until it resembles fine breadcrumbs. Then add the caster sugar and give it one more pulse to incorporate. Then add the egg yolk and pulse again until it starts to come together and form a dough – if it looks a little dry and chalky, simply add a teaspoon of cold water and pulse again.
Once the dough is formed, remove from the food processor, and bring together with your hands so it is cohesive and smooth.
Flatten into a disc shape and wrap in cling film, then place into the fridge for 30 minutes.
Preheat the oven to 180c.
How to make custard filling for tarts
While the pastry is chilling, start making the custard. Place the milk and vanilla bean paste into a large saucepan and place onto a gentle heat. Put the egg yolks, caster sugar and cornflour into a mixing bowl and use some electric beaters to whisk until pale and fluffy.
Heat the milk until scalding point but not boiling, then remove from the heat and gradually pour it into the egg and sugar mixture very slowly, whisking all the time. Once all the milk is added, pour this mixture back into the pan and heat very gently, constantly stirring and moving it with a rubber spatula. The custard will thicken, you want to take this to quite a thick custard stage so it supports the fruit in the tart. Once thickened, remove from the heat and place into a clean bowl, and close cover with some clingfilm on the surface to stop it for getting a skin.
Set aside in the fridge to cool.
How to cook a custard tart?
After 30 minutes, remove the pastry from the fridge and on a lightly floured surface, roll it out into a circle which is a bit larger than the 23cm tart tin (you need the pastry to come up the sides and overhang slightly).
Lift it and drape into the tart tin, using your finger to lightly press it in up all the sides and corners.
Use some scrunched up baking paper in the middle and then fill with baking beans. Blind bake the pastry for 10 minutes to 15 minutes, then remove the paper and return for a further 5 until it is lightly golden and dry to the touch. Remove from the oven and use a whole beaten egg to lightly egg wash the pastry while it is still hot. This will help seal any cracks before adding the custard.
Set aside to cool slightly and then use a serrated knife to trim off the top edge neatly. Then set aside to cool fully.
How to decorate a custard tart?
Once both your pastry case and custard are cooled you are ready to assemble.
Spoon the custard into the pastry case and smooth over with a palate knife.
Assemble your summer fruits all over the top, and then dust with some icing sugar and a final pinch of Maldon Sea Salt.
Serve immediately.
Other tart decorations
If you don’t want to top your custard tart with a medley of summer berries, why not try add a drizzle of homemade lemon curd or jam instead? The sweet, silky sauce compliments the buttery pastry of the tart perfectly, giving you a sudden burst of sweetness as you take your first bite.
If it’s not the season for summer berries, try decorating with sliced apples, paired with a sprinkling of cinnamon. This flavour profile is both warming and comforting, perfect on a cosy autumnal day when you’re stuck indoors and wanting to bake something. The beautiful display of sliced apples against the creamy custard filming is also striking and a great crowd-pleaser!
What to serve with summer berries custard tart?
Now that you have a finished custard tart that’s ready to be enjoyed, let’s think of a few recipes you can serve along with this decadent dessert!
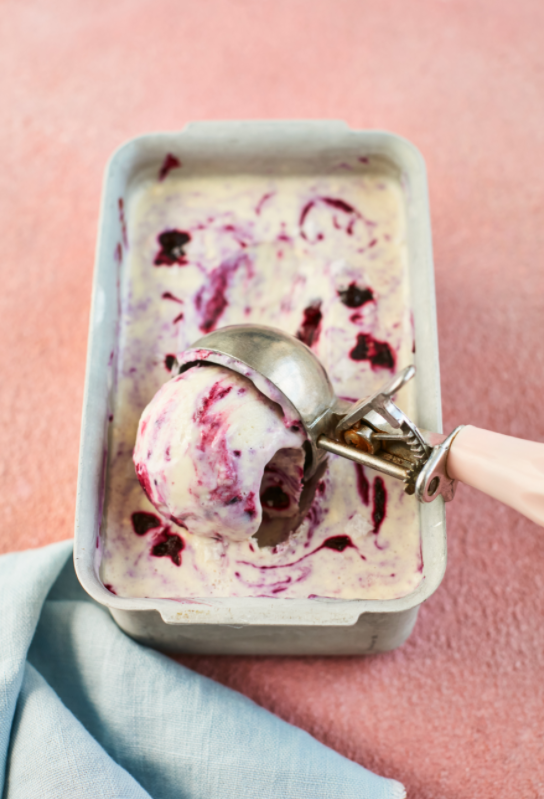
Our homemade blackcurrant ice cream is a match-made-in-heaven when paired with a custard tart. This is because the cold, soft texture of the ice cream compliments the buttery tart shell, creating a delicious symphony of textures as you take your first bite.
If you’re craving a summery tipple, we recommend whipping up a Fig Bellini. This cocktail is super quick and easy to make, infused with the flavours of sweet fig jam and a kick of zest through the use of lemon juice and prosecco, which matches the sweet burst of the summer berries on the custard tart.
Can you freeze custard tarts?
Because the custard tarts are made from eggs, cream and milk, it’s important to store any leftovers in the fridge for no longer than three days. The tarts are at their optimum taste and texture when served fresh the day of making it.
In terms of freezing your custard, you can freeze them up to 3 months if stored in an airtight container. However, please note that they may not hold their shape that well once thawed under room temperature. This is because of the moisture content in the creamy custard filling.
The talented Rukmini Iyer is a celebrated author and culinary innovator, known as the queen of fuss-free flavour. In her latest cookbook, ‘The Green Cookbook’, Iyer continues her mission to simplify delicious home-cooked meals. This vibrant collection features 75 brand-new recipes designed to help you get a delectable dinner on the table every day of the week with minimum hassle and maximum flavour. Whether you’re a ‘seasoned’ vegan, a dedicated vegetarian, or simply looking to incorporate more plant-based meals into your diet, ‘The Green Cookbook’ offers a treasure trove of inspiration!
Here is how to make all-in-one orzo with baked feta, tomatoes and olives…
This is an update on one of Rukmini’s favourite Green Roasting Tin recipes, a really simple dish of baked orzo with fresh cherry tomatoes. Here, she adds in a big square of feta to bake on top of the pasta, along with olives for a briny hit of flavour – all your food groups in one go. It’s perfect for a light dinner on a summer evening.
Preheat the oven to 180°C fan/200°C/gas 6.
Put the orzo into a medium roasting tin, pour over the boiling stock and stir, then top with the tomatoes and olives.
Place the block of feta cheese in the middle of the dish, then drizzle over the olive oil, a scatter of fresh basil leaves (reserve some for later) and a good grind of freshly ground black pepper. Transfer to the oven to bake for 25 minutes.
Carefully remove the baked feta with a fish slice and give the orzo a good mix with a wooden spoon before serving, then replace the feta as pictured. Scatter over the reserved basil leaves and top with a drizzle of extra virgin olive oil and a scatter of chilli flakes. Once cooked, let the dish stand for a few minutes before serving hot.
Buy ‘The Green Cookbook’ Today!
Whether you’re preparing a quick meal for yourself or entertaining guests, her innovative and accessible recipes are sure to become staples in your kitchen. From 15-minutes pasta dishes that are perfect for those hectic weeknights to budget-friendly batch cooking that ensures you have a hearty meal ready to go, Iyer’s recipes are crafted with real-life demands in mind. Buy a copy from here and embrace the simplicity and joy of fuss-free cooking!
Make sure you have your Maldon Salt ready for these recipes! If you are running out, please feel free to browse on our Where to Buy Page to find your nearest store in which stocks our beloved Maldon Salt.
Lastly, we LOVE seeing your creations – please tag us on Instagram using the #maldonsalt so we can share your own take on Rukmini’s recipes!
The talented Rukmini Iyer is a celebrated author and culinary innovator, known as the queen of fuss-free flavour. In her latest cookbook, ‘The Green Cookbook’, Iyer continues her mission to simplify delicious home-cooked meals. This vibrant collection features 75 brand-new recipes designed to help you get a delectable dinner on the table every day of the week with minimum hassle and maximum flavour. Whether you’re a ‘seasoned’ vegan, a dedicated vegetarian, or simply looking to incorporate more plant-based meals into your diet, ‘The Green Cookbook’ offers a treasure trove of inspiration!
Here is how to make miso barley mushroom with coriander pesto…
This is one of Rukmini’s favourite recipes in the book. The combination of miso, barley and mushrooms is inspired by Niki Segnit’s Flavour Thesaurus: More Flavours, while the incredibly moreish coriander pesto is her version of Noor Murad’s from Ottolenghi Test Kitchen: Extra Good Things – a happy melange of inspiration where the pearl barley and mushrooms look after themselves in the oven, leaving you to just blitz the pesto (and bask in the admiration of your dinner guests when they take their first bite).
Preheat the oven to 180°C fan/200°C/gas 6. Put the pearl barley, boiling water, miso paste, onion, black pepper and diced shiitake mushrooms in a lidded casserole dish or medium roasting tin, then cover with the lid or foil and roast in the oven for 1 hour.
Put the mushrooms and red onion into another large roasting tin with the garlic, olive oil, haricot beans and a pinch of sea salt. Stir, then pop into the oven for 25–30 minutes until the mushrooms are cooked through.
Blitz the coriander leaves and stems, coriander seeds, pine nuts, olive oil, sea salt and lemon juice in a high-speed blender or small food process or until smooth. Taste and adjust the salt and lemon juice, then set aside.
Stir 2 tablespoons of the pesto through the hot pearl barley, then divide between four plates. Top with the mushrooms and remaining pesto and serve hot.
Buy ‘The Green Cookbook’ Today!
Whether you’re preparing a quick meal for yourself or entertaining guests, her innovative and accessible recipes are sure to become staples in your kitchen. From 15-minutes pasta dishes that are perfect for those hectic weeknights to budget-friendly batch cooking that ensures you have a hearty meal ready to go, Iyer’s recipes are crafted with real-life demands in mind. Buy a copy from here and embrace the simplicity and joy of fuss-free cooking!
Make sure you have your Maldon Salt ready for these recipes! If you are running out, please feel free to browse on our Where to Buy Page to find your nearest store in which stocks our beloved Maldon Salt.
Lastly, we LOVE seeing your creations – please tag us on Instagram using the #maldonsalt so we can share your own take on Rukmini’s recipes!