The talented Rukmini Iyer is a celebrated author and culinary innovator, known as the queen of fuss-free flavour. In her latest cookbook, ‘The Green Cookbook’, Iyer continues her mission to simplify delicious home-cooked meals. This vibrant collection features 75 brand-new recipes designed to help you get a delectable dinner on the table every day of the week with minimum hassle and maximum flavour. Whether you’re a ‘seasoned’ vegan, a dedicated vegetarian, or simply looking to incorporate more plant-based meals into your diet, ‘The Green Cookbook’ offers a treasure trove of inspiration!
Here is how to make spiced roasted carrots and hazelnuts with silky butterbean mash…
Rukmini could eat an entire bowl of this in front of the television, but it’s really too nice not to share with friends! The carrots roast beautifully with coriander seeds under foil, while the rich, silky butterbean mash takes just 10 minutes to put together. A substantial, flavour-packed dish which is, as her friend Alex Dorgan would say, incidentally vegan!
Preheat the oven to 180°C fan/200°C/gas 6.Lightly grind the coriander seeds and black peppercorns in a pestle and mortar, then add them to a medium roasting tin along with the carrots, olive oil, water and ½ teaspoon Maldon Sea Salt. Cover with foil, then roast in the oven for 40 minutes.
After 40 minutes, remove the foil, drizzle the carrots with the agave or maple syrup, then return to the oven for a further 15 minutes to reduce the liquid and get some colour on the carrots. Put the hazelnuts on a small baking tray and pop them into the oven at the same time to toast.
Meanwhile, put the olive oil, lemon zest, coriander seeds, spring onions and garlic into a small frying pan and warm through over a low heat for 5 minutes – you’re not aiming to get any colour on the garlic, so keep the heat down.
Put the butterbeans and the infused oil, spring onions, etc. into a high-speed blender or food processor and blitz until very smooth. Adda squeeze of lemon juice, then taste and adjust the Maldon Sea Salt if needed. Warm the mash and spoon into shallow bowls, topped with the roasted carrots. Scatter the carrots with a little Maldon Sea Salt, the toasted hazelnuts and flat-leaf parsley and serve warm.
Buy ‘The Green Cookbook’ Today!
Whether you’re preparing a quick meal for yourself or entertaining guests, her innovative and accessible recipes are sure to become staples in your kitchen. From 15-minutes pasta dishes that are perfect for those hectic weeknights to budget-friendly batch cooking that ensures you have a hearty meal ready to go, Iyer’s recipes are crafted with real-life demands in mind. Buy a copy from here and embrace the simplicity and joy of fuss-free cooking!
Make sure you have your Maldon Salt ready for these recipes! If you are running out, please feel free to browse on our Where to Buy Page to find your nearest store in which stocks our beloved Maldon Salt.
Lastly, we LOVE seeing your creations – please tag us on Instagram using the #maldonsalt so we can share your own take on Rukmini’s recipes!
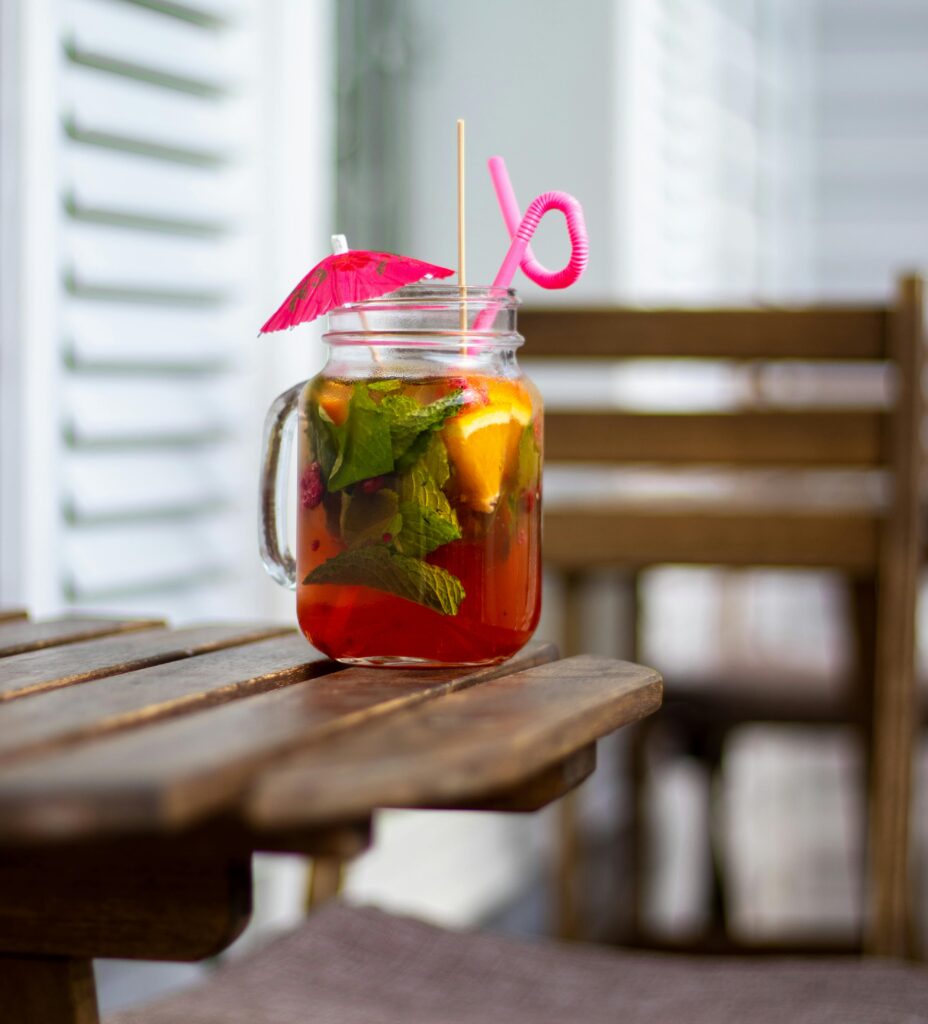
Elevate your cocktail hour with a refreshing grapefruit Paloma, perfectly complimented by a Himalayan Pink Salt rim, Selected by Maldon. This tequila cocktail combines equal parts blanco tequila, pink grapefruit juice, club soda for fizz and a touch of agave for sweetness, resulting in a harmonious blend of flavours. The finishing touch of the salt rim not only elevates the presentation, but also perfectly balances the citrusy tang and smooth tequila notes, making this Paloma cocktail and unforgettable tipple!
What is in a paloma cocktail?
A classic paloma cocktail consists of tequila, lime juice, grapefruit and soda with salt being added to the rim of the glass as an added option. Paloma translates to ‘dove’ in Spanish, with the cocktails true origins unknown, although it is believed to have dated back to the 1950s. The legend Don Javier Delgado Corona, who was the former bartender and owner of La Capilla in Tequila, Mexico, is known to be the Paloma’s original creator. He wanted to create a cocktail that’s both sweet and sour, a little bitter and salty with plenty of bubbles and ice. What’s not to love about a refreshing Paloma!
How to make a paloma cocktail
There are many paloma cocktail recipes that have their own ‘tasty‘ twist to the original. Our recipe includes club soda, fresh pink grapefruit juice, blanco tequila and lime juice. We also include a salt rim using Himalayan Pink Salt, Selected by Maldon. This pink coarse rock salt is selected by our seasoned experts, from the foothill of the Himalayas and has been prized for centuries. It’s perfect for rimming the glass of your paloma as the the salt with counteract the bitterness from tequila, and elevate the sweetness of the grapefruit and lime. Additionally, is also adds texture to the drink, building up a pleasurable experience as you take your first sip.
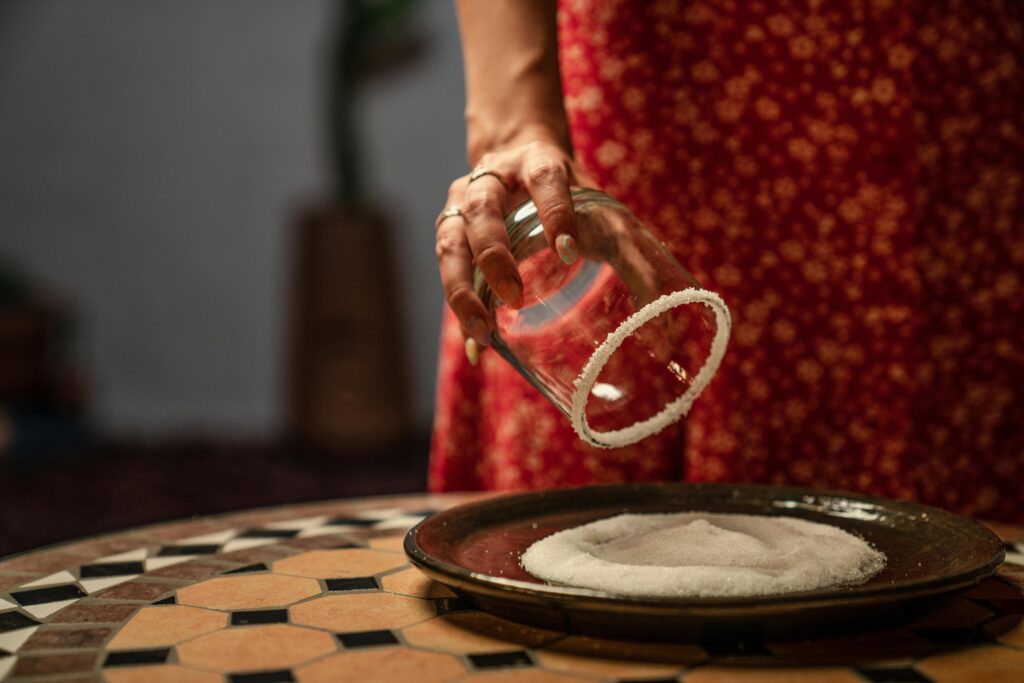
Start by rimming the glass with salt. Lightly crush the Himalayan Pink Salt, Selected by Maldon, then place onto a small plate.
Take the glass and rub a little lime juice, grapefruit juice or agave around the rim of the glass.
Then, invert it onto the plate and press the salt onto the rim firmly.
In a cocktail shaker, add the blanco tequila , fresh pink grapefruit juice, lime juice and agave.
Add a few ice cubes and then give it a shake until the outside feels cold.
Add some ice cubes to the prepared glass with the rim and begin pouring in the cocktail mixture.
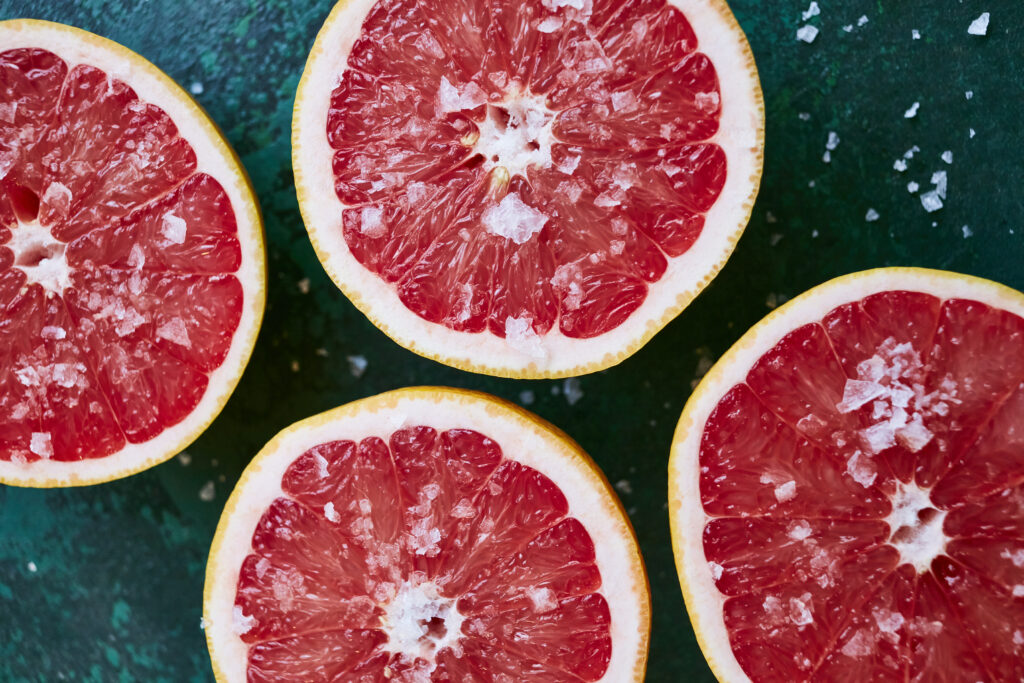
Top up with club soda and then garnish with some pink grapefruit slices before serving.
How to slice a grapefruit?
This is the fastest, simplest and mess-free way of slicing a grapefruit.
Place the grapefruit on a cutting board. Using a sharp chef’s knife, begin slicing off a half inch off the top and bottom of the fruit.
Stand the grapefruit upright so the flesh is exposed and begin to cut the skin off. Make sure you are following the contour of the grapefruit and the white pith.
Repeat the peeling technique.
Using a sharp paring knife, hold the grapefruit in your hand, and begin to cut downward between the membrane and the segment.
Once you have reached the centre of the grapefruit, stop and make a second angled cut. The segment should then pop out.
Repeat until all segments have been removed.
How to use a cocktail shaker?
We used a two-piece cocktail shaker to make our paloma cocktail. These are also known as Boston or French Shaker. They comprise of two flat-bottomed cones, one larger than the other. The large cone is made of stainless steel usually, while the smaller cone can be glass, stainless or plastic.
Start by combining your ingredients in the glass (the smaller cone).
Fill the large cone with ice and quickly up-end over the smaller cone, quickly to avoid spilling any ice! Gently tap the top of with your palm to create a secure seal between the two parts.
Begin lifting the shaker with one hand on the top and the other gripping the base.
Shake quickly and vigorously to ensure the mix is blended well.
After shaking for around 12 second, the large cone will start to feel cold to the touch. This is when you know it’s ready to serve. Hold the larger cone in one hand and break the seal by tapping the base with your palm.
Before you pour your cocktail, place a strainer over the top of the cone and strain the mixture into the glass, leaving the ice behind. The ice that we used for shaking should be removed.
What to use instead of a cocktail shaker?
Creating a cocktail shaker alternative is very easy and you only need a few objects that can be found in your home. If you have a mason jar, or any other glass with with secure lid, it will make an effective cocktail shaker.
Clean your mason jar thoroughly before using, ensuring it’s clean and safe to use.
Add your cocktail ingredients into the jar.
Add your ice cubes.
Close the lid, fastening it on securely.
Shake vigorously.
Take the lid off and pour cocktail mix into your glass.
How to rim a glass with salt?
If you’re wanting to make a classic salt rim for a cocktail such as a margarita, we recommend starting of with a lime.
Begin by cutting a lime in half, and then again until it forms a quarter or wedge.
Cut a notch in the lime wedge, making sure to not cut all the way through. Near enough in the centre will do.
Run the notch all around the glass until it’s the rim of the glass is completely wet from the lime juice.
Add some Himalayan Pink Salt into a small dish that’s bigger than the diameter of your glass.
Tip the glass over into the salt, almost like a cookie cutter going into the dough.
Hold the glass up and you will find a perfect salt rim around your glass.
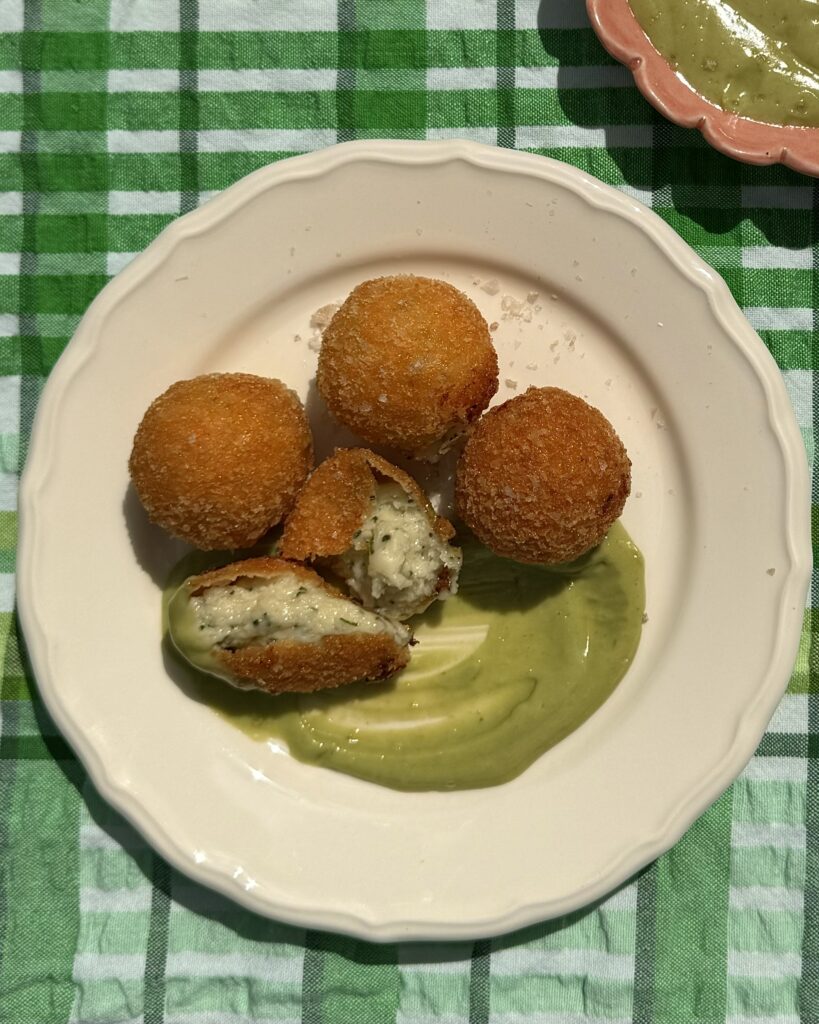
Elevate your summer dinner party with our irresistible Cheese and Chives Croquettes featuring a tantalizing twist of Maldon Smoked Sea Salt.
Blended with three creamy cheese to create a beautiful bechamel sauce (cheddar, mozzarella and Gruyere), these croquettes are a burst of rich flavour in every bite. Fresh chopped chives and a generous pinch of Maldon Smoked Sea Salt is added for an extra burst of flavour. Each croquette is coated in crunchy panko breadcrumbs and fries to golden perfection, making them seriously crispy on the outside and melt-in-your-mouth delicious on the inside!
We pair these croquettes with a vibrant green aioli sauce for the ultimate side dish that will leave your guests craving more! Whether you’re hosting an intimate gathering or a fabulous feast, these croquettes are guaranteed to impress!
How is how to make cheese and chive croquettes…
In a saucepan, heat the milk until it’s warm but not boiling (about 50°C).
In another saucepan, melt the butter over medium heat. Once melted, add the 60g flour and whisk continuously to form a smooth paste forms.. Cook for about 2 minutes, stirring constantly.
Gradually pour the warm milk into the roux, whisking constantly to avoid lumps. Continue cooking and stirring until the sauce thickens, about 5-7 minutes.
Grate the cheddar, gruyere and mozzarella cheese.
Add the cheddar, gruyere and mozzarella cheeses to the sauce and stir until it melts and incorporates completely.
Stir in the chopped chives and season with the Maldon Smoked Sea Salt and pepper to taste. Remove from heat and let the mixture cool completely.
Once the béchamel mixture has cooled, use your hands to shape it into small cylinders or balls, about 3.5cm in diameter.
Place the 75g flour, breadcrumbs and beaten eggs in separate shallow bowls.
Dip each croquette first into the flour, then beaten eggs, then coat evenly with breadcrumbs. Place the coated croquettes on a plate.
In a deep pan or fat fryer, heat oil to 180°C over medium heat.
Carefully place a few croquetas at a time into the hot oil.
Fry the croquettes until they are golden brown and crispy on all sides, about 2-3 minutes per side. Drain and sprinkle with more Maldon Smoked Sea Salt.
For the cheats aioli, bring a pan of water to the boil and add the parsley. Blanch for 1-2 minutes then drain the parsley and cool down in iced water. Once the parsley has cooled, drain it again and squeeze out any excess water. in a food processor or blender, combine the mayonnaise, minced garlic, lemon juice, pinch of smoked salt and parsley. Blitz until smooth and then serve alongside your warm croquettes.
This recipe is created by Nomadic Dinners, who run immersive woodland feats as an alternative way of dining.
One thing for certain is that when peaches are in season, they are delicious. At Nomadic Dinners, they use them as soon as they are ripe. This recipe is ridiculously simple and is humble enough to place the star ingredient centre stage.
Wash and halve the peaches removing the pits.
Dust your peach halves with equal parts of Maldon Sea Salt flakes and sugar.
Stick a skillet or small paella pan on the fire at a medium heat adding the stick of butter until it has melted completely. Don’t worry if the butter burns a bit.
Once the butter has fully melted, gently place the peach halves face down and cook for a few minutes until they have caramelised and there is an unmistakable ambrosial smell and colour.
Arrange the peach halves on serving plates. Add vanilla ice cream and a sprig of mint for colour
This dessert satisfies even the most discerning of taste buds. A perfect combination of sweet, salty and fruity.
What is a Loaded Bloody Mary?
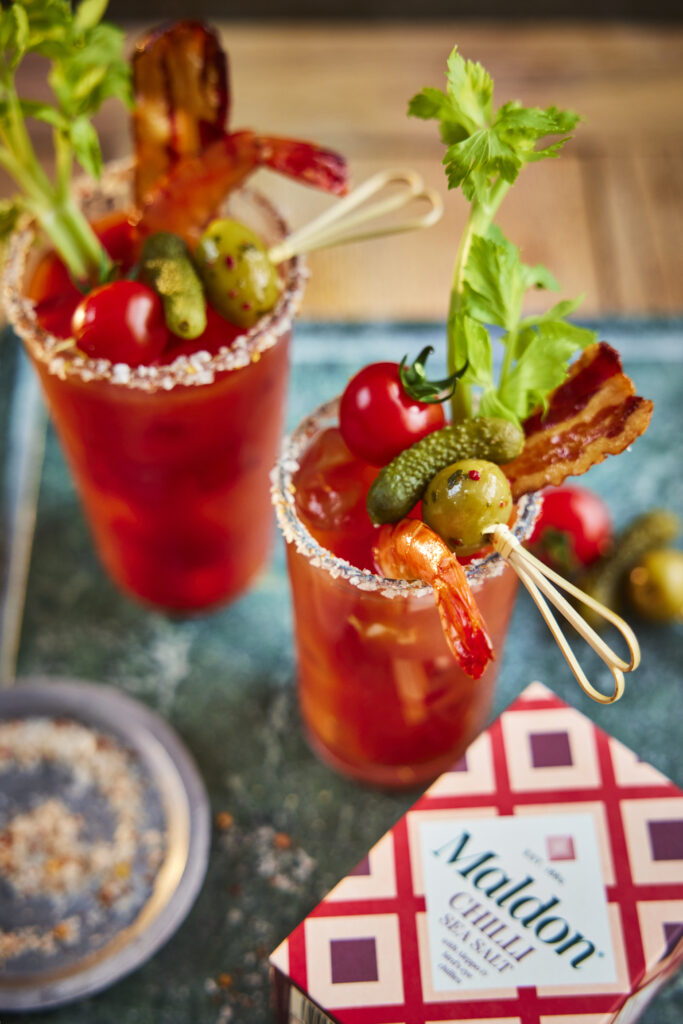
Elevate your weekend brunches with a fully loaded Bloody Mary recipe that promises a burst of flavour in every sip. A loaded Bloody Mary is an elevated version of the classic cocktail that enhances the basic blend of vodka, tomato juice, and seasonings with an array of savoury and sometimes spicy extras. Infused with Maldon Chilli Sea Salt, each glass features a tantalizing chilli sea salt rim that perfectly compliments the robust Bloody Mary mix. Garnished with crispy, candied bacon, shrimp, green olives, cornichons or pickles and a lemon wedge, this cocktail is a feast for the eyes and the palate! Get ready to impress your guests with a drink that’s as visually stunning as it is delicious.
How to Make a Fully Loaded Bloody Mary
A fully loaded Bloody Mary is an elaborate version of the classic cocktail that includes not just the standard ingredients but also a variety of garnishes and extras, making it almost a meal in itself. For a truly over-the-top brunch experience, transform your loaded Bloody Mary into a fully loaded masterpiece! You can follow the same basic steps outlined previously but with some additional flair:
Get Creative with Garnishes: Think beyond the celery stick. Consider skewers with olives, pickled vegetables, or even mini mozzarella balls. Sliders, mini quiches, or even a small grilled cheese can add a hearty touch.
Spice it Up (or Down): For a kick, add a dollop of sriracha or horseradish to the glass. Jalapeno slices or pickled peppers can also add a spicy touch. If you prefer a milder version, skip the hot sauce and opt for a squeeze of fresh lemon.
Rim it Right: Elevate the presentation with a flavoured rim. We used Maldon Chilli Sea Salt flakes for a fiery kick. You can also try a celery salt mixture, a smoky paprika dust, or even a toasted sesame seed rim for a unique twist. Remember, there are no hard and fast rules with a loaded.
Here’s how to make a Loaded Bloody Mary…
Place a large frying pan on the heat. Add the slices of streaky bacon and cook for 3 minutes on each side until crispy. Remove from the pan and set onto a plate with some kitchen paper to remove any excess oil.
Turn the heat down in the pan slightly and then add the two large prawns. Cook these for a couple of minutes on each side until bright pink and cooked through. Remove these from the pan and set aside too.
To assemble the bloody Mary’s start by creating the chilli salt rim for the glasses. Rub a little lemon juice around the top rim of each highball glass. Place some of the Maldon Chilli Sea Salt into a small plate and then turn the glass upside down onto the salt and press it in, so the salt sticks along the top.
Fill each glass with ice. Then pour in a 50ml measure of vodka into each. Next pour in the spiced tomato juice to fill up the glass. We like to splash in some tabasco and Worcestershire sauce at this stage, but this is up to your taste.
Finally garnish each glass with a stick of celery, some crispy bacon, a prawn, and a skewer with a cherry tomato, cornichon, and olive on. Drink and enjoy immediately.
What to serve with a Bloody Mary?
A cocktail is the best way to start a meal, especially if you’re having a Bloody Mary which packed full of delicious ingredients. We’ve listed below a few dishes that pair perfectly with this classic cocktail.
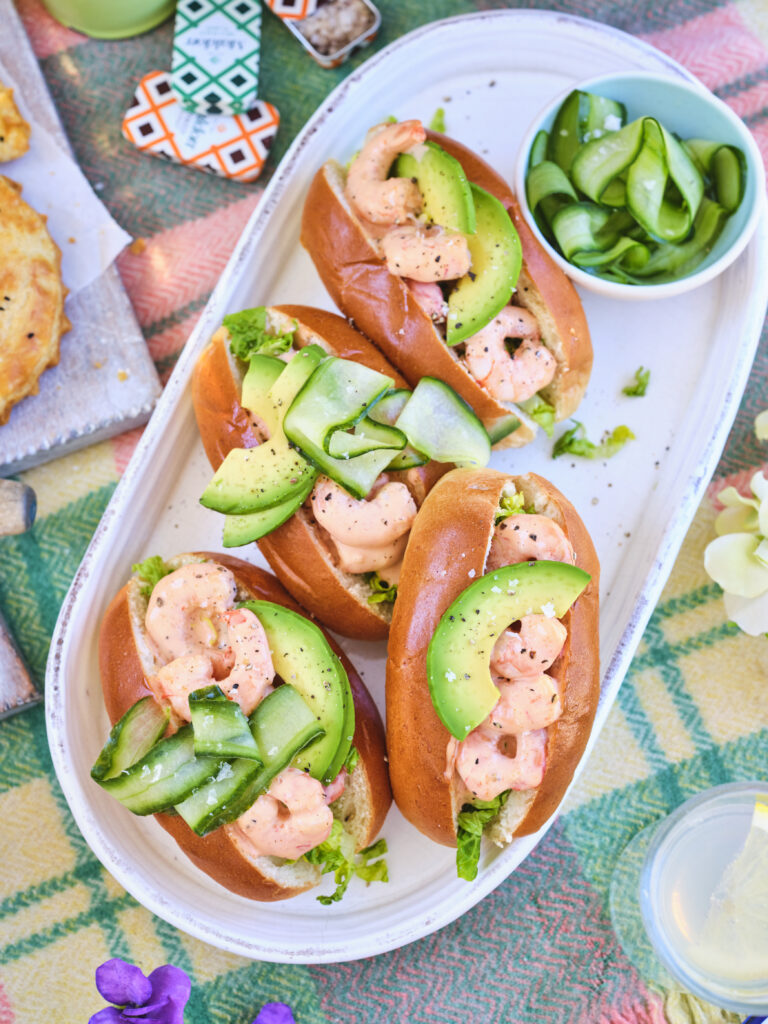
Because a Bloody Mary has a spicy kick to it, it compliments the mild, juicy prawns beautifully. The addition of the brioche bun also adds a gentle sweetness, balancing out the fiery pepperiness of the cocktail.
Dipping cheese in tomato sauce is a classic combination loved by many. Why don’t you transform this delicious pairing with Cheese and Chive Croquettes and a Bloody Mary mix instead. The zesty, peppery notes of the cocktail compliment the cheese and chive blend in the croquettes, made up of cheddar, greyer and mozzarella.
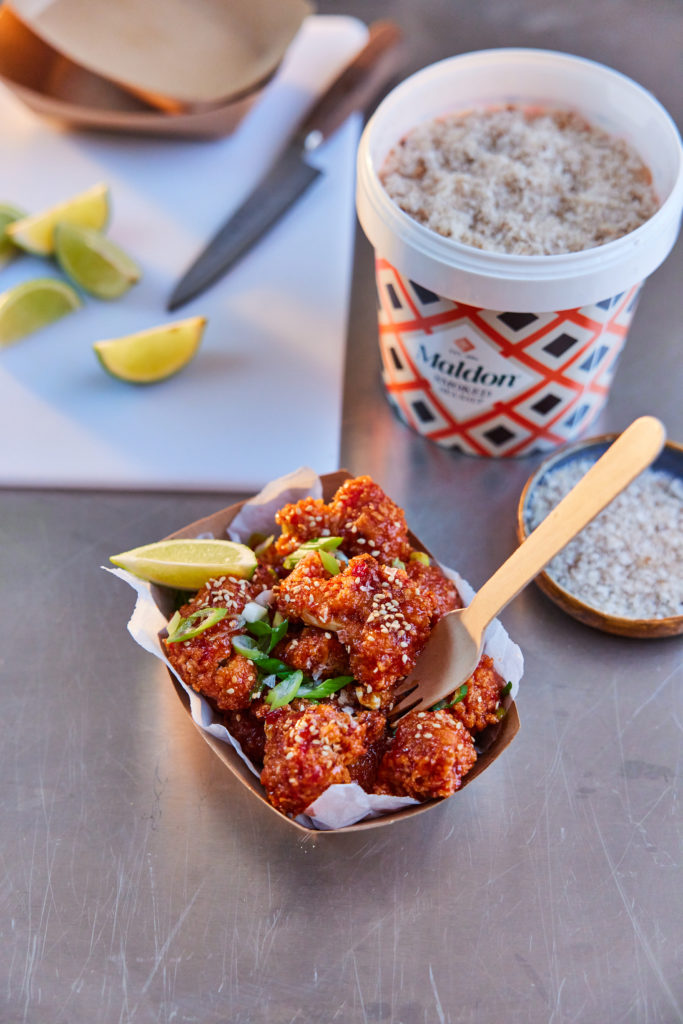
This is a great vegan and healthier alternative to cheese and chive croquettes. Cauliflower cooked bang-bang style provides a delicious crunch with every bite, which pairs with the silky smooth consistency of the Bloody Mary.
Transform your summer barbecues with BBQ Corn Ribs, infused with the rich, smoky flavor of Maldon Smoked Sea Salt flakes. These corn ribs are grilled to perfection, delivering a delightful combination of sweetness and charred goodness.
Topped with a drizzle of spicy Sriracha mayo, they offer a tantalizing kick that complements the smokiness beautifully. Perfect as a side dish or a standout appetizer, these BBQ Corn Ribs are sure to be a hit at any summer gathering, adding a gourmet twist to your seasonal fare.
Here is how to make BBQ corn ribs with Sriracha mayo…
Start by carefully cutting each corn on cob into ribs. The safest way to do this is to place the flat bottom on the board so the corn is standing upright and then using a sharp knife, bash it down through the core – being careful of your hands and fingers!
Preheat the oven to 200c.
Once you have your 16 ribs, place them into a large baking tray. Then in a small bowl mix together the olive oil, smoked paprika, cumin, garlic powder, harissa paste and Maldon Smoked Sea Salt. Drizzle this all over the ribs and then use your hands to rub it in so each one is evenly coated. Place into the preheated oven and cook for 25 minutes, turning halfway. The ribs should curl as they cook. You can equally cook these in the air fryer or on a BBQ.
Mix the mayonnaise and the siracha and serve alongside the corn ribs for people to dip into. Scatter over some chopped coriander and some lime wedges for squeezing and they are ready to enjoy.
This summer, elevate your cookouts with vegan loaded hot dogs, perfectly seasoned with Maldon Sea Salt flakes. These plant-based delights are bursting with flavour, topped with vibrant mix of fresh vegetables, savoury sauces, and a touch of smoky goodness.
Each bite offers a satisfying crunch and a delightful blend of textures, making them the ultimate crowd-pleaser for any sunny day gathering. Whether you’re a seasoned vegan or simply exploring plant-based options, these loaded hot dogs promise to be a delicious highlight of your summer feasts.
Here is how to make loaded vegan hot dogs…
Start by making some pink pickled onions to serve with the hot dogs.
Place the finely sliced red onion into a small bowl and add the Maldon Sea Salt, then use your fingers to scrunch it in and help soften the onions. Next add the vinegar and the caster sugar and then stir to dissolve. Set the onions aside to pickle as you prepare the hot dogs.
Heat a griddle pan and add the vegan sausages, cooking on each side until charred and cooked through.
Slice open the hot dog buns and add the slice of smoked cheese, then the warm sausage – allowing the cheese to melt underneath. Then top the hot dogs however you like, we chose a drizzle of American mustard, sliced jalapenos, the pickled red onions, some crispy onions, and some finely chopped chives.
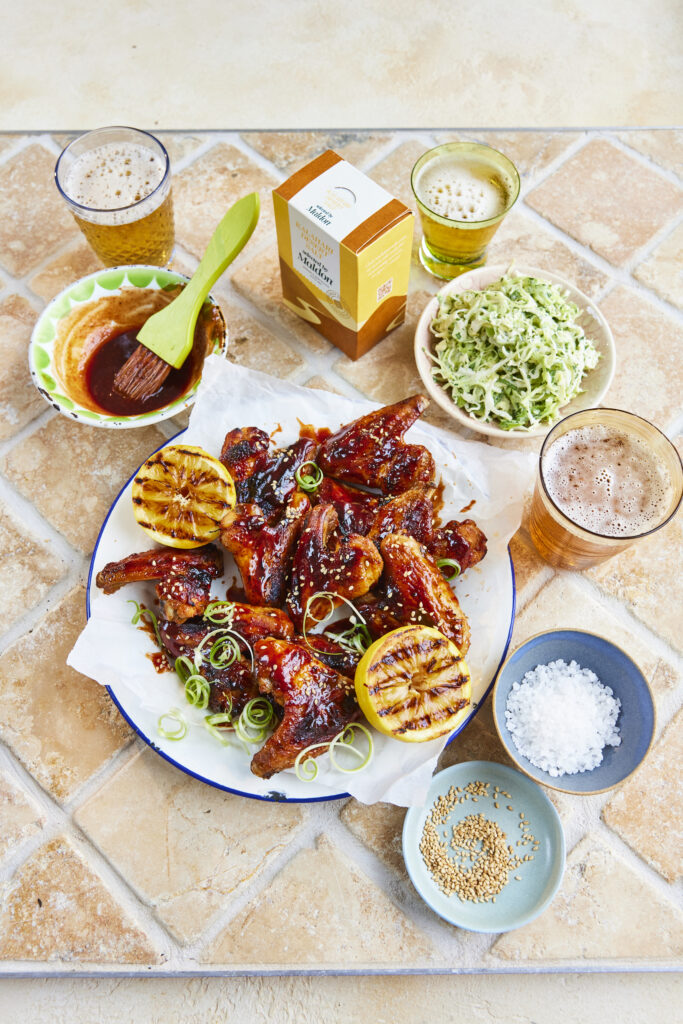
Indulge in the perfect game day with our sticky BBQ chicken wings recipe, featuring Kalahari Desert Salt, Selected by Maldon. This chicken wing recipe is a savoury delight, marinated in a mouth-watering blend of honey, a cup of brown sugar, garlic cloves (or garlic powder if cheating!), cayenne pepper, ketchup, soy sauce and a teaspoons of Kalahari Desert Salt. This naturally coarse salt was selected by our seasoned experts, harvested from the vast desert plains of the Kalahari, South Africa. It has a delicate taste that’s perfect for grilled meats like BBQ chicken wings, when boosting the flavours of meat dishes is elevated.
With the ultimate sticky, sweet and spicy marinade that you made, toss the chicken wings in it, let the marination work it’s magic and prepare for a flavour-packed experience that will be the start of any gathering!
How to prepare BBQ chicken wings
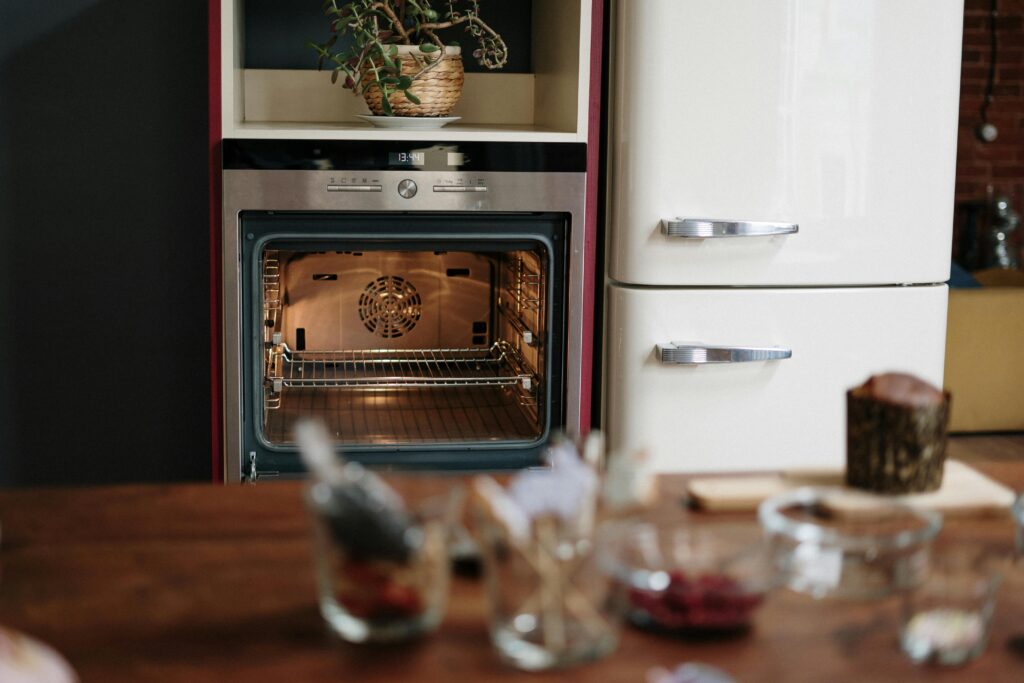
If you are choosing to cook your chicken wings on the BBQ, make sure it is warm and ready to go – alternatively, if you want to cook these in the oven preheat it to 200C.
How to season chicken wings for BBQ
In a small bowl mix together the honey, dark brown sugar, crushed Kalahari Desert Salt, garlic cloves, cayenne, ketchup and soy sauce.
Place the chicken wings into a baking tray and drizzle half of this sauce over them, then use your hands to rub it in and make sure they are fully coated.
Place the coated chicken wings onto a baking tray.
How do you cook BBQ chicken wings on the BBQ?
If your barbecue has a lid similar to a classic Charcoal BBQ, then the chicken wings should be cooked between 20-25 minutes.
On the other hand, if you are using the barbecue to cook other things, such as burgers or sweetcorn, you can start gently cooking the wings in the preheated oven and finish on the barbecue for a delicious charred flavour.
How long to cook BBQ chicken wings in the oven?
Once the oven has preheated to a desired temperature around 200C/180C Fan/Gas 6, you can then pop the chicken wings in.
Cook the wings in the oven for 35 minutes, turning halfway, until they are cooked through, charred, and deliciously sticky.
What to eat with BBQ chicken wings?
While the wings are cooking you can make a delicious and easy slaw recipe to go with it. Finely shred the cabbage and add this to a large bowl along with the diced green chilli and parsley. Then add the crème fraiche, Dijon mustard and juice of ½ a lemon. Mix well until everything is coated and creamy. Set aside.
Finely julienne the spring onions and then place them in a small bowl with iced water. Putting them with iced water will make them curl which makes a pretty garnish.
When the chicken wings are ready, remove from the oven or barbecue and toss in the toasted sesame seeds.
Serve with the remaining sticky glaze to drizzle over, with the curled spring onions scattered, paired with the creamy slaw and griddled lemons for squeezing.
Serve immediately.
What to serve with BBQ chicken wings?
With our delicious sticky BBQ chicken wings being the star of the show, what side dishes would complete the menu for your summer party?
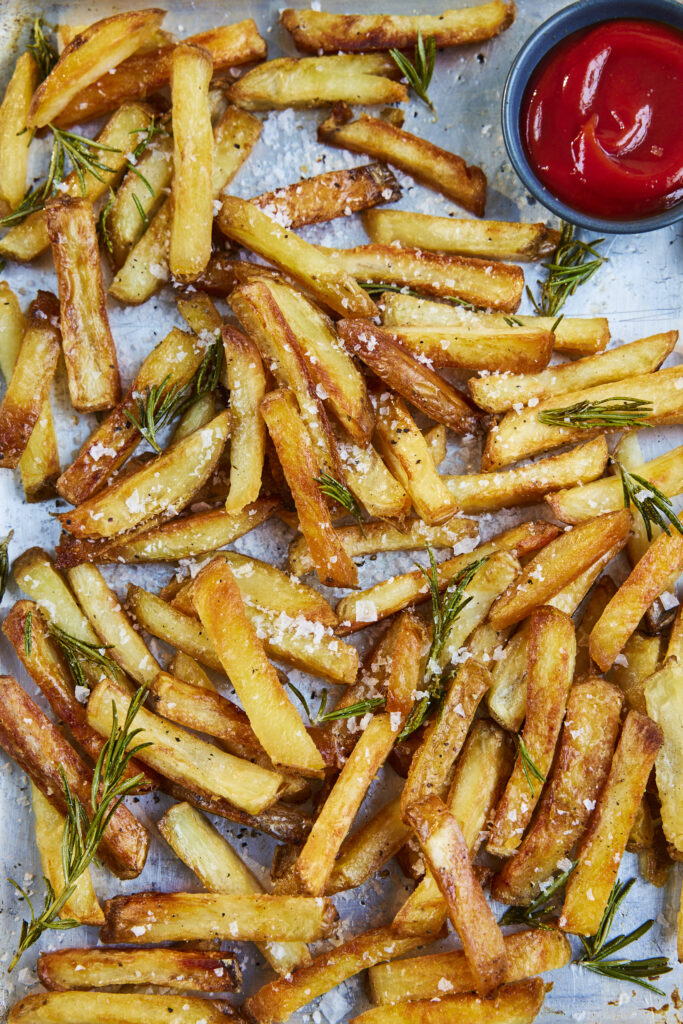
Deliciously golden and crispy on the outside and soft and fluffy in the inside. Our homemade chips (or fries) are perfect with the sticky, honey BBQ sauce that’s coated on the BBQ chicken wings. You can choose the classic potato chip, or alternatively choose baked turnip chips if you’re wanting extra crispiness!
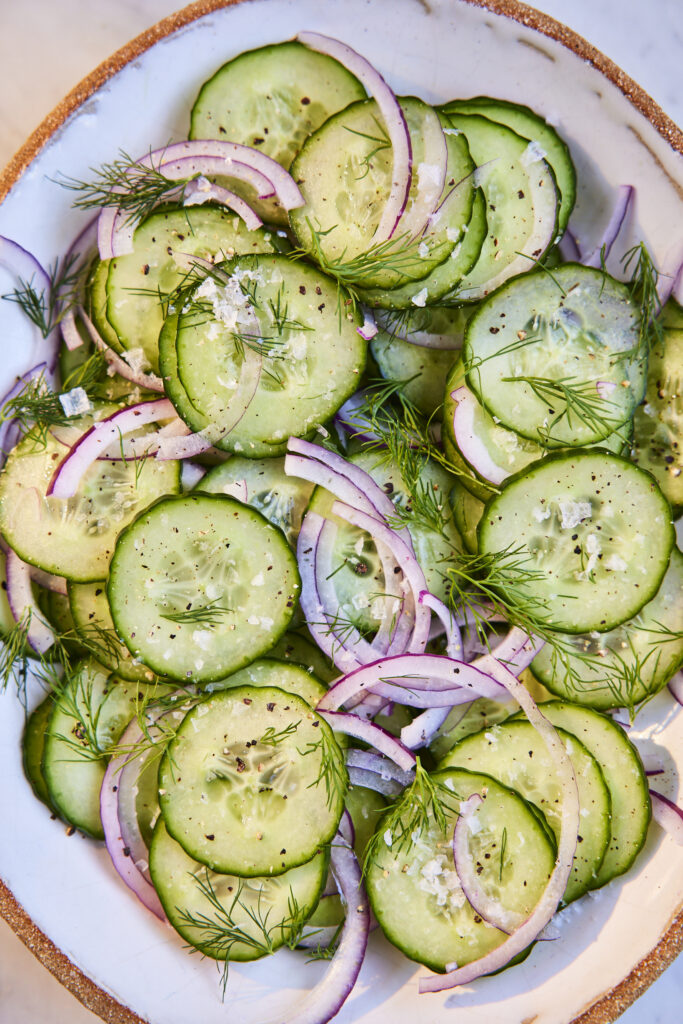
With the rich, sticky sauce ingredients that’s used in the marinade for the chicken wings, it nice to pair this with something fresh, and what could be better than refreshing cucumber salad. Super quick and easy to make, the cooling flavours of the cucumbers compliments the rich, bold flavours of the chicken wings.
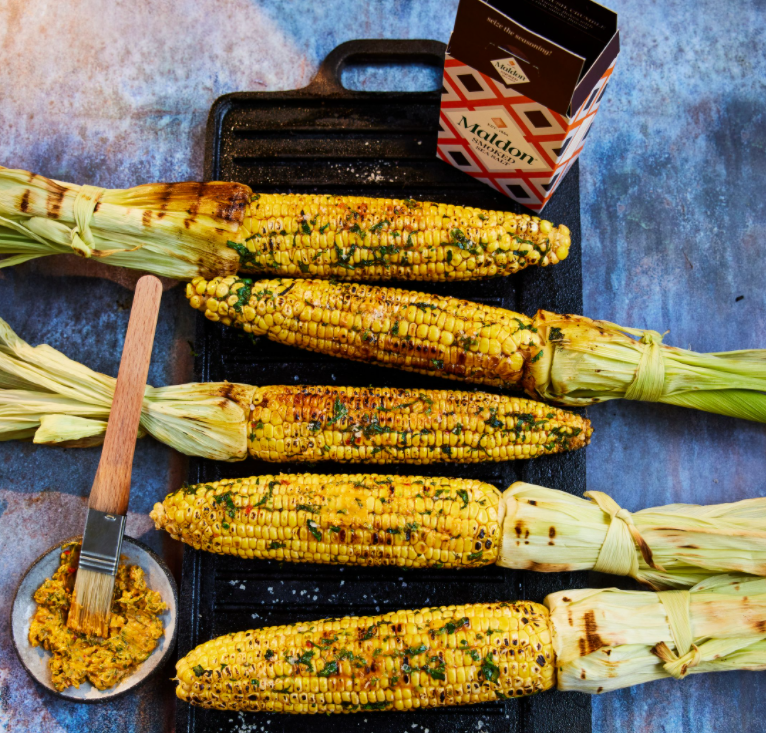
Fresh corn on the cob, grilled to perfection and coated in butter that’s uniquely blended with harissa and coriander. It’s a flavour explosion that matches the honey element of the chicken wings’ marinade perfectly. This side dish is sure to make you want to bring to any dinner party!
Can you BBQ frozen chicken wings?
Yes, you can barbecue frozen chicken wings without thawing them, but it will take much longer to cook. We recommend grilling to a medium-high heat around 190 – 200C from frozen. This will allow them to cook thoroughly without burning the outside. It will typically take around 30-40 minutes to cook fully from frozen, but it depends on the size and thickness of your chicken wings. It’s highly important to note that the internal temperature of the chicken wings should be around 165F / 74C.
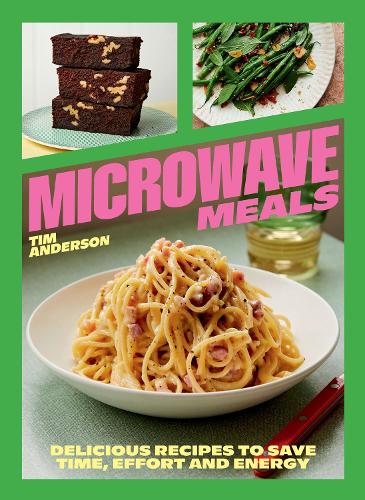
As a celebrated chef, writer, restaurateur, and MasterChef Winner, Anderson’s expertise shines through his eighth cookbook, Microwave Meals, offering a delightful blend of convenience and culinary excellence.
So long slow cookers and air fryers! This cookbook revolutionizes the way we view microwave cooking. With the microwave celebrating over five decades of existence, Tim ingeniously elevates it’s potential with over 60 delectable recipes designed to save time, effort and energy. From tantalising Pork with Miso and Stem Ginger Syrup to the comforting Spaghetti Carbonara, each dish is crafted to perfection using only the microwave, eliminating the need for additional cooking equipment. You can also indulge in the delights like Crab and Artichoke Gratin, or whip up an Emergency Mixing Bowl Cookie Cake for a quick sweet fix!
Beyond recipes, Anderson imparts essential microwave skills, including cooking rice, steaming vegetables and crafting stocks from scratch, making this cookbook an indispensable kitchen companion.
In conversation with Tim Anderson…
Tim, what a fun and creative cookbook you’ve made! Tell us, what inspired you to create a cookbook that focuses on microwaves meals?
I started cooking with my microwave as a result of my research for Japaneasy Bowls and Bento, which is all about how to make Japanese meals every day, for every meal of the day. I started following a lot of Japanese home cooking accounts on Instagram and was reminded of how important microwaves are in Japanese kitchens, which tend to be more compact and rarely have ovens. The many helpful ways that microwaves are used in Japan inspired me to cook with my own microwave more, which ultimately led to me pitching this book!
With over 60 recipes in your cookbook, are there any standout favourites that you think everyone should try?!
The crème pat method is so good and so easy I now never make it any other way. Cooking pasta in the microwave is also a game changer, especially in one-pot meals like the sausage and peppers with penne. But for me the most useful thing to cook in the microwave are simple vegetable side dishes, and my favourites among those are the buttery butter beans and the devilled mushrooms with Marmite and Boursin.
Could you share some tips for maximizing flavour and texture when cooking in the microwave, especially for those new to this method of cooking?
The microwave is generally very good at retaining flavour because it doesn’t break down aroma compounds as much as other heat sources, so then it’s just a matter of seasoning properly. This can be as simple as a pinch of salt, but why stop there? We have a whole arsenal of global flavours at our disposal now, available at any supermarket. This can be anything from ras el hanout to miso to oyster sauce to anchovies. The same stuff you’d use for any type of cooking, really. The microwave is also good at preserving texture, especially in vegetables because they can be cooked so precisely. If you want some extra crunch in your food you can always top it with things like crispy onions, nuts, seeds, or actual crisps.
What does a normal day in the life look like for you, Tim?
Mostly wrangling my children with some writing and cooking in between, interspersed with frequent and prolonged daydreaming about being somewhere that isn’t Lewisham. Usually Tokyo, Hokkaido, Los Angeles, or Malta.
Your ultimate comfort food dish?
Ramen. Kumamoto-style tonkotsu ramen in particular.
Name three things in the kitchen you can’t live without!
A sharp knife, MSG, and a jug of unsweetened iced tea in the fridge.
Do you have a current favourite cookbook that you’re reading?
Yes! Modern Pressure Cooking by Catherine Phipps. This book is incredible, and it’s convinced me that the pressure cooker is likely the only piece of kitchen equipment that can rival the microwave for versatility and efficiency. Thanks to Catherine I now use my pressure cooker almost as often as my microwave. They are perfect partners.
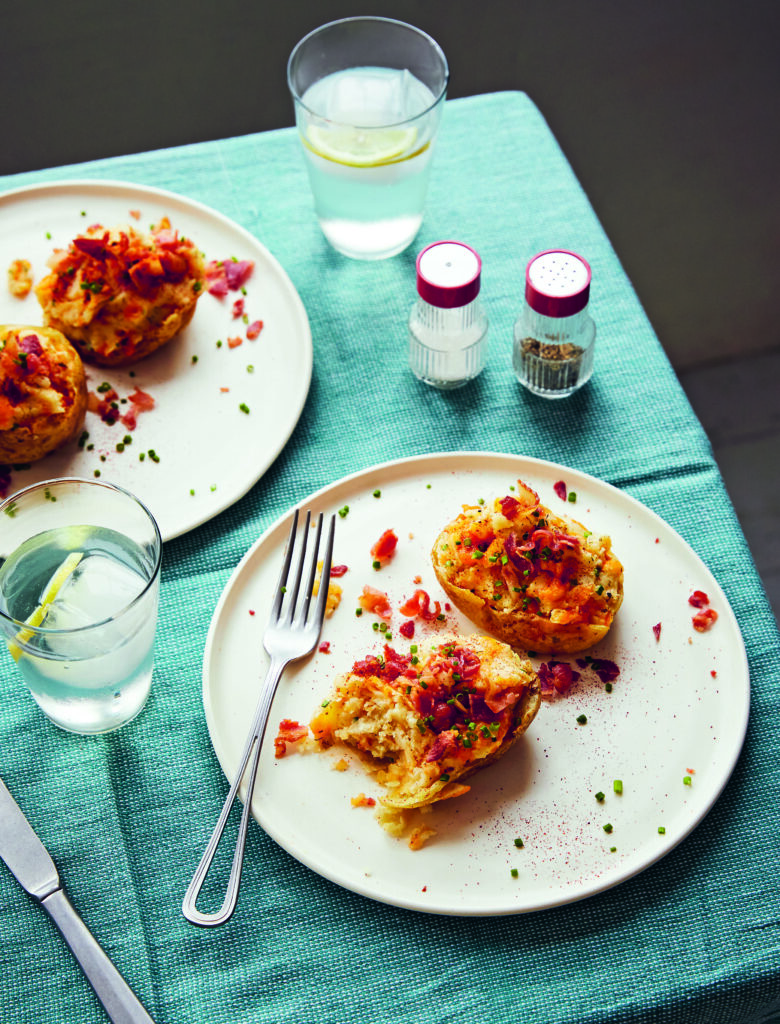
Loaded Twice-Baked Potatoes
Tim associates this dish with American sports bars and family restaurant chains. But with the help of his microwave, he can now enjoy this delicious and versatile side without having to leave his home!
Serves: 2 – 4 people
Ingredients:
4 slices of streaky bacon
2 baking potatoes, of average size
Olive oil, as needed
Maldon Sea Salt, as needed
2 shakes of garlic granules
black pepper, to taste
1/4 teaspoons dried dill
50g sour cream
1 teaspoon wholegrain or Dijon mustard
1 dash of Worcestershire sauce and Tabasco sauce (both optional)
a handful of chives, finely chopped
a few pinches of paprika, plus extra for garnish
Method:
Lay the bacon out flat on a plate and cook, uncovered, on power level 6 for 4 minutes in the microwave. Make sure you turn the bacon and move it around the plate halfway through. Drape a piece of paper towel loosely over the top of the bacon, and continue to cook in 1-minute intervals until the bacon is crisped and browned to your liking – about 6 minutes in total.
Leave to cool, then coarsely chop.
Rub the potatoes all over with olive oil and Maldon Sea Salt, and prick them several times with a fork. Place them on the same plate you used to cook the bacon, then cook for 10-12 minutes, turning them halfway through, until soft throughout. Leave to cook completely.
Cut the cooled potatoes in half and scoop them out into a bowl, so you have four little potato skin ‘boats’ and a bowlful of soft, cooked potato. Mash the potato with all the remaining ingredients, but save a few pinches of chives to garnish. Taste and adjust seasoning as you like with Maldon Sea Salt. Spoon the mashed potato mixture back into the skins, then put them on a plate and cook, uncovered, for 7 minutes. To serve, garnish with the chopped bacon, chives and a pinch or two of paprika.
Buy ‘Microwave Meals’ and Recreate a Recipe Today!
You can find where to purchase Tim’s NEW cookbook here and start being creative with food and flavours in the comfort of your kitchen.
Make sure you have your Maldon Salt ready for these recipes! If you are running out, please feel free to browse on our Where to Buy Page to find your nearest store in which stocks our beloved Maldon Salt.
Lastly, we LOVE seeing your creations – please tag us on Instagram using the #maldonsalt so we can share your own take on Tim’s recipes!
We like them crispy, EXTRA spicy and oh-so delicious!