What’s not to love about a freshly baked garlic bread?! Deliciously golden and crispy with an irresistibly soft and spongy centre. This super easy garlic and herb tear and share bread is made using Maldon Garlic Sea Salt; where the flavours of both wild and roasted garlic hugs you as you take your first bite.
What is a tear and share?
A tear and share bread is baked by rolling balls of dough so that they almost take on the form of mini bread rolls. With each corner of the roll, you are allowing a delicious pool of juices to occur, perfect for dipping and soaking up all those tasty, garlic flavours.
A tear and share bread is ideal for dinner party if you are wanting to make a show-stopping dish for your friends and family. You can pair the bread with other dips, including hummus, salsa verde or a herb butter & siracha mayonnaise which all pair nicely with the dough balls.
Garlic bread toppings
We topped our garlic bread with extra garlic cloves and parsley to give a kick of pepperiness to the bread.
Another topping you could do for your garlic bread could be adding shreds of creamy mozzarella, which will transform your garlic bread into a sensational ‘cheesy’ garlic bread. Make sure to melt the cheese under a high temperature to elevate those mild, milky notes of the cheese and really nail that ‘Instagram-worthy’ cheese pull!
If you want to impress your guests, why not transform your garlic bread into a bruschetta. Keep the base of the recipe the same, whilst adding the elements that you would normally find within a classic bruschetta; tomato, onion and anchovy fillets! The flavour combinations are are a match-made-in-heaven with the garlicy undertones.
Here is how to make our tear and share garlic bread recipe…
Lightly oil a 26cm round cake tin.
Place the flour, yeast, salt, sugar, and dried herbs in the bowl of your stand mixer and mix together so it is fully combined. Next place the water, butter and milk into a small pan and gently heat. You want the butter to melt and the liquid to be just tepid – if it is too hot, leave it for a few minutes to allow it to cool slightly. Then pour this liquid into the flour bowl and mix together.
Add the dough hook attachment and knead the dough on a medium speed for about 5 minutes until the dough is smooth and elastic.
Cover the bowl with clingfilm and leave in a warm place for 45mins – 1 hour or until it has doubled in size.
Once the dough has doubled in size, knock all the air out of it and then shape into 30 small, equal sized balls. Place an ovenproof ramekin in the middle of the cake tin and then arrange the balls around the ramekin in circles. Cover the cake tin loosely with clingfilm and then set aside again for approximately 30 mins or until it has doubled in size again.
Preheat the oven to 200C.
Once the bread has had its second prove, it is ready to bake. Place in the preheated oven for 30 minutes until golden brown all over and cooked through. When it comes out the oven brush it all over with a little of the softened butter and sprinkle with the chopped parsley and a pinch of Maldon Garlic Sea Salt.
With the remaining softened butter, mix in the 2 crushed garlic cloves. When it has cooled slightly, remove the bread from the cake tin and place on a serving board. Put the garlicky softened butter in the ramekin in the middle gather round to tear the bread balls and dunk in the garlicky butter! Delicious.
What meals go well with garlic bread?
It goes without saying that garlic bread and pasta is a sensational food pairing. It’s a classic main-and-side dish combo that has been going around for years!Take a delicious rigatoni, infused with smoked aubergine and harissa to give a fiery kick to the dish. Garlic bread will mop up those juices in no time, which giving you that comforting taste of garlic cloves.
If you are looking for something on the lighter side, try pairing your garlic bread with soup. Dipping your garlic bread into a bowl of soup feels like a warm hug on a winter’s day, whilst the flavours from the garlic bread elevate the simple dish even further.
A pairing you should try with your garlic bread is with a bowl of freshly sauteed mussels. The natural broth that is released from when the mussels are steamed allows the perfect amount of dipping and soaking for your garlic bread.
Within this article, we will take you on a journey of learning everything you need to know about smoked salt and how to use it.
We first explore the basic composition and characteristics of smoked salt, before deep-diving into how the flavoured salt can enhance profiles of dishes and the many ways you can use the condiment in your cooking, baking and drinks!
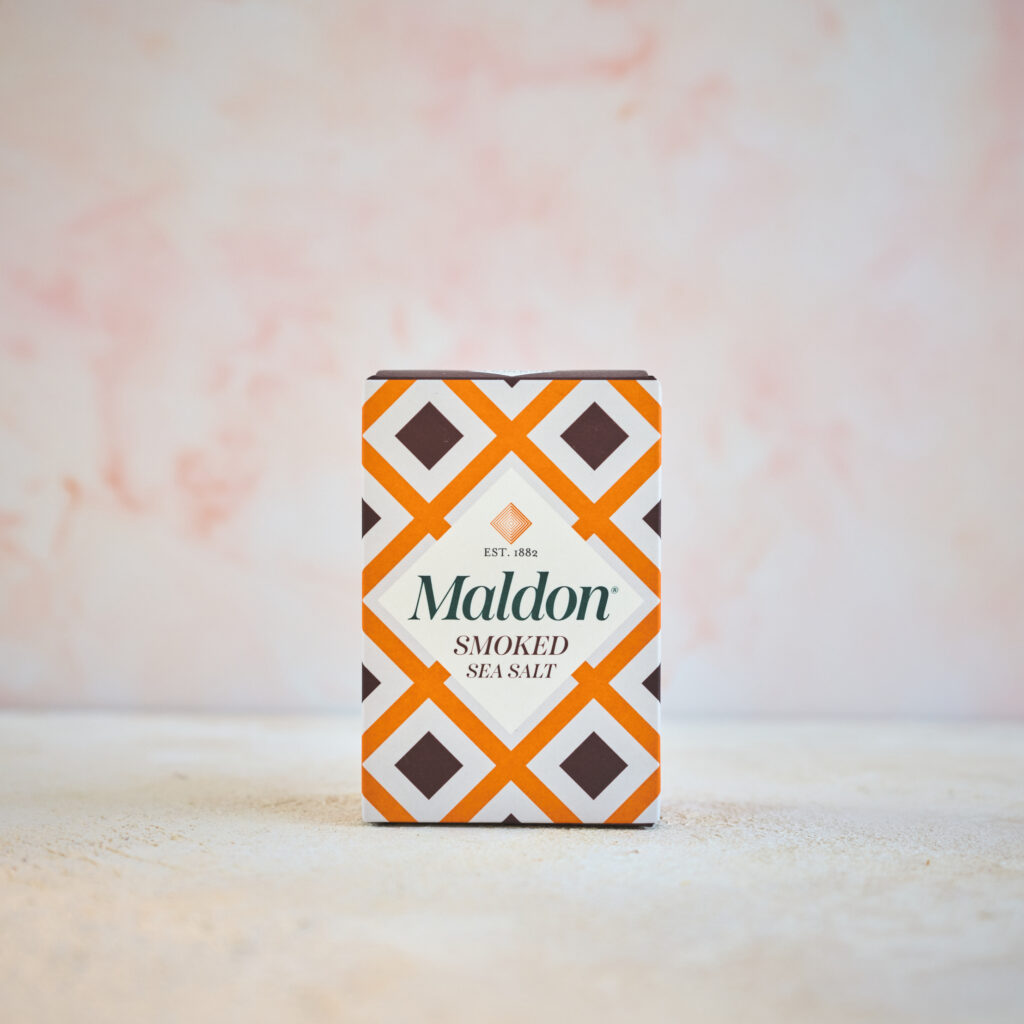
Maldon Smoked Sea Salt 125g Pack
What is smoked salt?
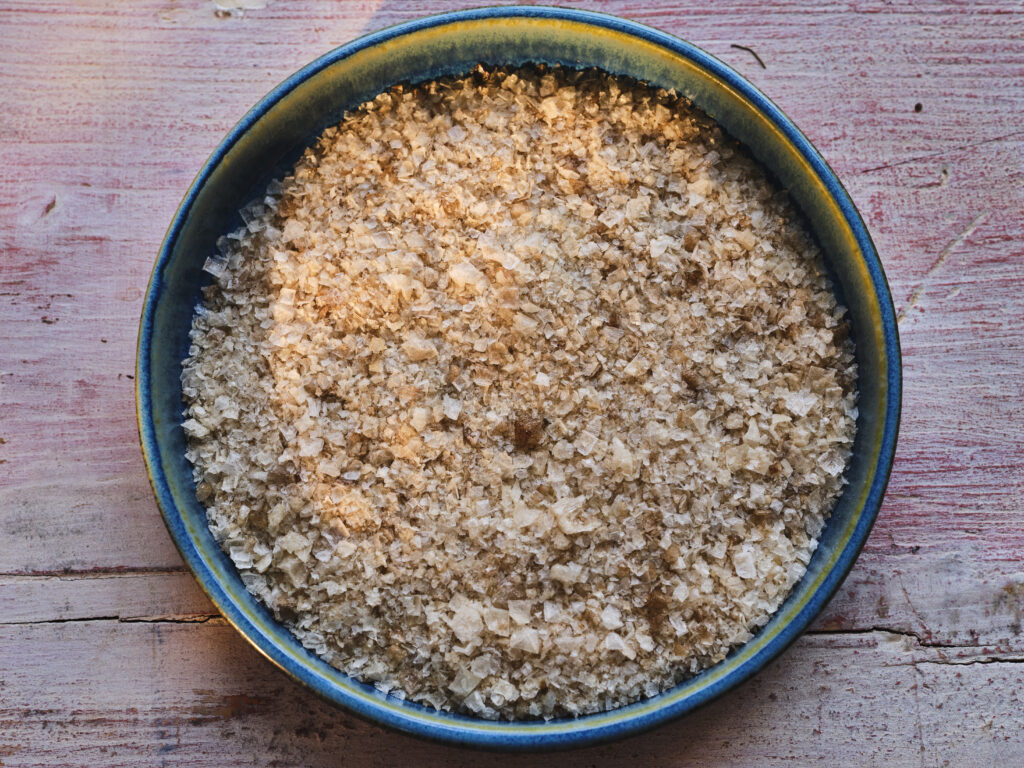
Our Maldon Smoked Sea Salt flakes is created through hand-harvesting our pyramid-shaped flakes and gently smoking over oak for a distinctively deep, rich and bold taste. Due to the way it is smoked over the wood, the sea salt flakes have a slightly brown/beige colourisation, holding a deliciously smoky flavour that is perfect for fish and grilled vegetables.
Smoked salt is suitable for vegetarians and often acts as a great alternative to bacon crumble/bits. The salt is a natural product, being completely different from a smoke-flavoured salt, as this would contain an additive, which is not natural.
Maldon Smoked Sea Salt Flakes
Maldon Salt offers two formats of the Smoked Sea Salt:
Smoked Sea Salt 125g packet is the perfect size for everyday use in households. Available to purchase at Sainsburys.
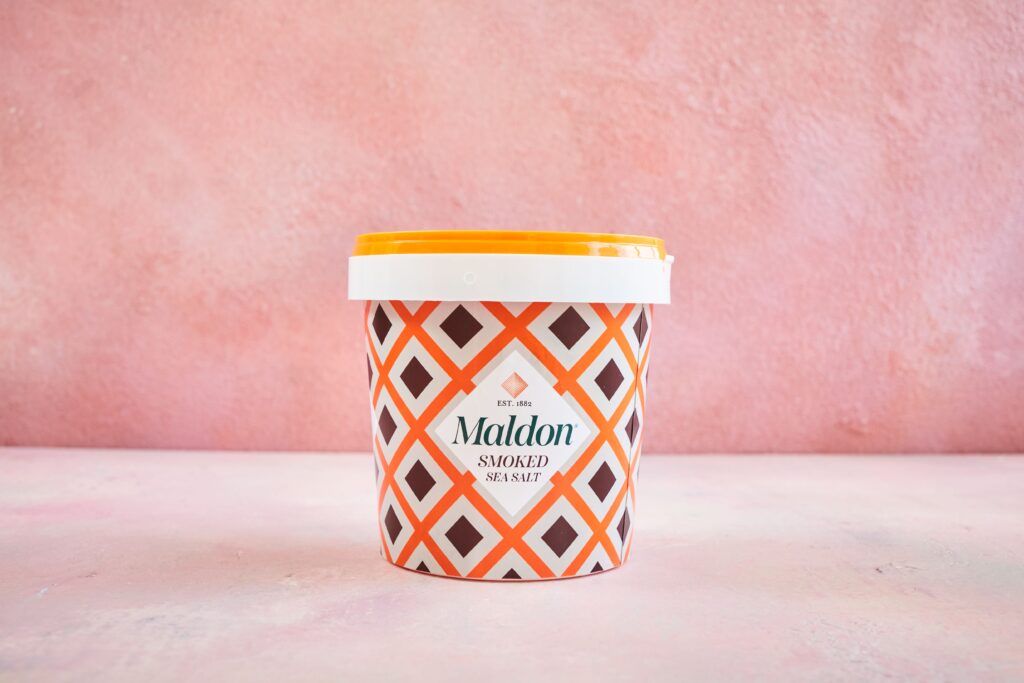
Smoked Sea Salt 500g tub is a larger size, making it ideal for kitchens and cafes. Available to purchase via Wholesale only. Please get in touch for stocklists.
Maldon Smoked Sea Salt 125g Maldon Smoked Sea Salt 500g tub
How to use smoked salt?
Maldon Smoked Sea Salt holds a signature, smoky flavour where a delicate blend of fresh sea salt flakes is hit with a balanced smokiness from the oak wood. Because it is our much-loved sea salt that is used and nothing else, the flakes allow a beautiful, textural crunch as you bite into your food, whilst obtaining that delicious grilled flavour – without having the need to grill!
Cooking with smoked salt
Sprinkled over griddled meat and vegetables, smoked salt elevates the food to add a richer, wood-smoked flavour that is perfect for both summer and winter dishes when you need a ‘smoky’ kick to warm yourself up!
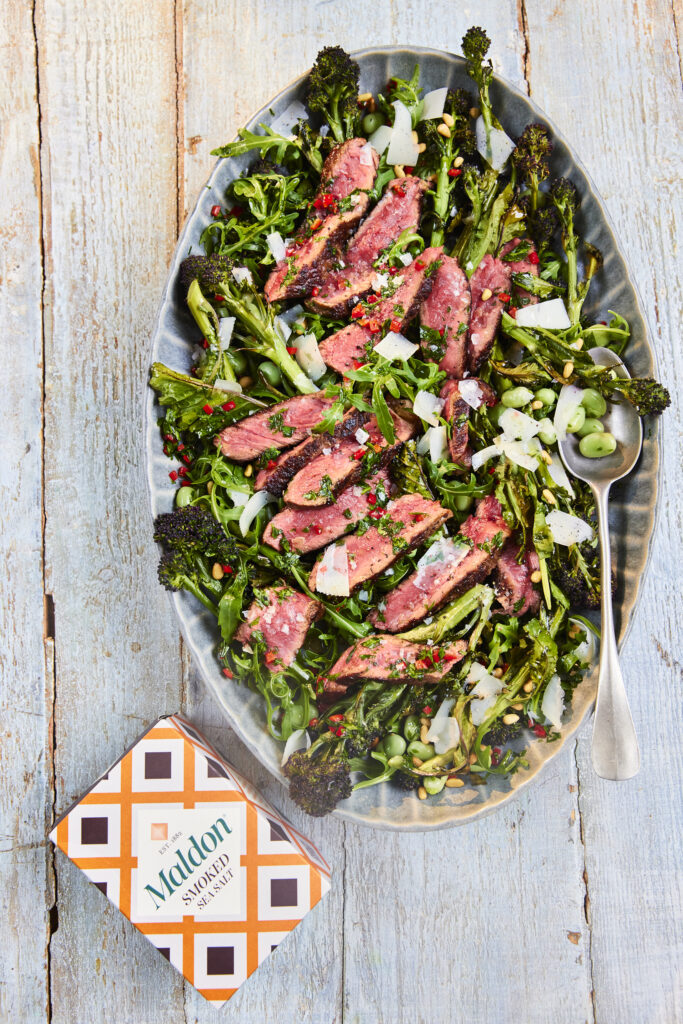
Steak Salad with Purple Broccoli, Parmesan and Chilli & Herb Dressing
Meats
Our beautiful seared steak recipe uses Maldon Smoked Sea Salt to elevate the flame-grilled flavour further. If you are craving the smoky flavour profile, but do not have a griddled pan to achieve this, sprinkle a good pinch of smoked salt before serving and you wouldn’t be able to tell the difference! We pair the juicy steak with purple sprouting broccoli and broad beans to give some earthy goodness to the dish.
Additionally, a delicious chilli & herb dressing is drizzled over the the dish, where smoked sea salt flakes is used to elevate the red chillies and herbs (parsley and coriander).
Padron Peppers
Vegetables
To make vegetables taste like they have been grilled over a smoky BBQ, make sure to generously sprinkle them with smoked sea salt straight after pulling them out of the oven. Our padron peppers showcase just how easy it can be to achieve a smoky flavour profile without having to grill/bbq the vegetables. Super easy and a great crowd-pleasing appetizer for a dinner party.
Gingerbread Loaf
Baking with smoked salt
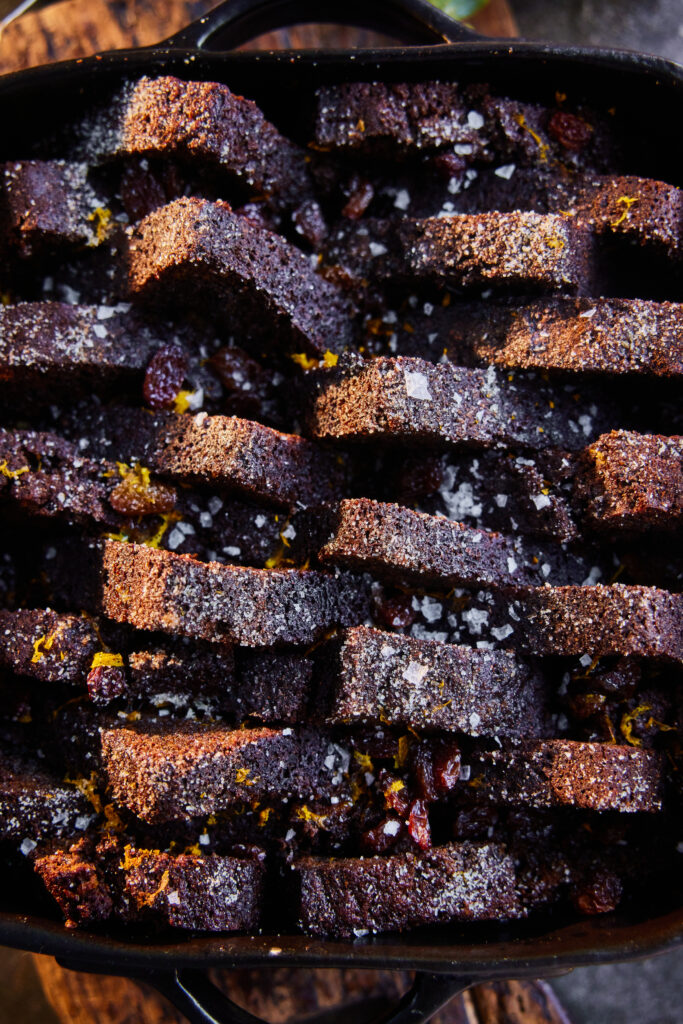
Did you know that smoked flavours work wonders with baked goods? Sprinkling a good handful of smoked sea salt into the mixture for a gingerbread loaf will make your taste buds sing as the smoky flavours compliment the spicy ginger notes perfectly!
To give chocolate a gentle smokiness, we also recommend adding a pinch of the smoked salt to fudgy brownies, both in the mixture and topped before serving. The smoky notes from the salt balances out the sweet, richness from the chocolate, creating the ultimate flavour sensation.
Bloody Mary
Drinks made with smoked salt
For a fun twist, try adding smoked salt to the rim of a glass to your classic margarita. Our refreshing mango and jalapeno margarita uses a blend of smoked salt and chilli powder to give a fiery kick to the drink, adding a perfect balance of sweet and spicy from the fresh mango juice.
If you prefer the tangy aroma of tomato juice, try our Bloody Mary recipe, where we incorporate a smoked salt rim to the glass to elevate the smoky notes of the drink further.
Get the grilled flavour without having to grill…
This article has explored the delicious flavour profile of Maldon Smoked Sea Salt and the many ways it can be used in your kitchens, whether that be cooking, baking or making drinks!
Make sure you have your Maldon Salt ready when making any of these recipes! If you are running out, please feel free to browse on our Where to Buy Page to find your nearest store in which stocks our beloved Maldon Salt.
Lastly, we LOVE seeing your creations – please tag us on Instagram using the #maldonsalt so we can share your own culinary masterpieces!
Joe Woodhouse; talented Food & Drink Photographer and Cookbook author of ‘More Daily Veg‘ brings us the comforting dish of whole baked baby squash – perfect with a cold, damp autumn day.
When Joe visited Wilding Cider in Chew Magna, North Somerset, run by Beccy and Sam Leach, Sam made this vegetarian dish for their supper. The pair used to run the restaurant Birch in Bristol before setting their sights on cider making.
This simple but warming dish is a perfect foil to coming in from a cold and drizzly day in an orchard. They sat in the barn, swapping ciders and wines for everyone to taste with a roasting fire going in the wood burner.
Joe added a green sauce to cut the richness a bit, but if you get a good-quality sharp Cheddar, it doesn’t need it!
Here is how to make the whole baked baby squash…
Preheat the oven to 200C (400F), Gas Mark 6. With a small knife, cut the tops off the squash in a circular motion to form caps. Scoop out and compost the seeds.
Mix together the cheese, crème fraiche and oats, and add a good couple of pinches of Maldon Salt and a healthy few grinds of black pepper.
Fill the squash with the oat mixture. Replace their lids. Rub each all over with a tablespoon of oil, place on a tray and bake for 25–35 minutes until a knife pierces the flesh easily.
Meanwhile, blend all the sauce ingredients together with salt and pepper. For a coarser sauce, hand chop everything and mix with the oil, which is equally as good, if not better.
Serve the squash with a salad, maybe a few potatoes to make it into a main. Add the sauce on the side and a good bottle of cider, from Wilding preferably!
Creamy, crunchy, spicy and caramalized.
Food & Drink Photographer and Cookbook author, Joe Woodhouse created a sensational dish which holds the perfect balance of textures and flavours to elevate the humble Brussels sprouts.
All elements can be prepped ahead and then assembled when you are ready to serve. The Brussels take no time to cook. Joe loves to roast the vegetable to create a lovely crispy and caramelized outer, with soft, steamed centres. You can undercook the onion and chilli in the chutney so it retains a crunch and a freshness, cooked through but not fully softened.
Here is how to make the roast brussels sprouts…
Preheat the oven to 200.C (400.F), Gas Mark 6.Toss the bread in 2–3 tablespoons of oil. Add to a baking tray and toast in the oven for 10–12 minutes until golden. Blitz to crumbs in a blender, or leave whole or hand cut if you prefer.
Meanwhile, add 2 tablespoons of oil to a medium pan over a medium heat. Add the onion, celery and chillies with a pinch of Maldon Salt and cook for 5–7 minutes. Add the tomatoes. Half-fill the can with water and add to the pan. Bring to a simmer and bubble away for 15minutes until thickened. It still wants to be loose but not watery. Add the honey and check if it needs more Maldon Salt. Set aside.
Increase the oven temperature to 220.C (425.F),Gas Mark 7. Using the same tray as the croutons, brushout any remaining crumbs and add the Brussels with 3 tablespoons of oil and a good pinch of salt. Roast for 12 minutes. You want to roast them quickly, getting colour on the outside and cooking through without going overly soft in the middle. If they need a bit more, keep them in a minute or two longer. Feel free to give the tray a shake once or twice to aid them in cooking evenly.
Meanwhile, mix the lemon juice with the tahini and trickle in a few tablespoons of cold water. Keep working it with a whisk and adding water until you get a smooth consistency which holds its shape. If it gets too loose, just add a spoon or two of tahini and combine it to help firm up the mix.
Spoon the tahini mixture onto plates or a serving dish, followed by the Brussels sprouts. Then dot around the tomato chutney. You made not need it all, see how you go. Finish with the crouton crumbs and a drizzle of oil.
Joe Woodhouse could happily eat this pie dish every week!
This recipes takes inspiration from spanakopita, which is classic, savoury Greek pie dish made from filo pastry and filled with spinach and creamy feta cheese. It’s the perfect dish that the whole family is happy to eat at any time of the year.
Joe adds sesame seeds to the dough to create an irresistible crunch, but you can also include toasted nuts to the filling, such as pine nuts or pistachios.
Here is how to make the spinach pie…
Heat the oil in a pan over a medium heat. Add the onions with a pinch of salt and cook for 10–12 minutes until soft and starting to colour. They still want to have texture but be at that stage when they go sweet and soft. Add to a large mixing bowl with the rest of the filling ingredients except the spinach.
In the same pan if it is big enough, add the spinach a couple of handfuls at a time and stir to wilt. Repeat until all the spinach is wilted. Remove to a sieve over a bowl and press out as much liquid as you can. Removing and draining in batches is also fine –whatever makes it most manageable.
Preheat the oven to 180C (350F), Gas Mark 4.
Roughly chop through the spinach and add to the rest of the filling. Mix well, taste for seasoning and add more Maldon Salt and black pepper as needed.
Brush your baking tin with butter. Add a sheet of filo and brush with butter. Repeat this for four more sheets. Then add the filling. Fold the overhanging filo sheets over the filling. Then brush the final two sheets with butter and lay on top of each other. Trim these fit the tin exactly. Put the trimmings in the middle of the tin to cover any exposed filling. Lay the final sheets on top. Score the top into six sections. Add the sesame seeds in an even layer. Bake for 45–55minutes. Remove from the oven and allow to sit for 10 –15 minutes before serving.
If you’re the head chef in your household, you deserve a kitchen that works as hard as you do – a space that’s both beautiful and brilliantly practical. Naked Kitchens make bespoke kitchens that are made to be used, loved and admired – and built for real life. In this special guest post, we invited them to share their expert tips on creating the perfect home cook’s kitchen…
Even if you’re not a keen cook, the kitchen is still the heart of the home – the place where conversations happen, homework gets done, and guests always seem to gather. But if cooking is your thing – if you take pride in a slow-cooked ragu, plan your week around Sunday roasts, or dream about hosting a perfectly timed dinner party – then a well-designed kitchen can transform your everyday life.
A space that flows effortlessly, where ingredients and utensils are exactly where you need them, where classic design meets modern convenience – that’s the cook’s kitchen dream! It doesn’t need to be vast or flashy – it just needs to work for you. So if you’re planning a new kitchen, here are six expert tips for creating one that’s as timeless as it is practical – and an absolute joy to cook in…
1) Start with how you cook
It’s easy to fall for the dream – scrolling through perfectly styled kitchens on Instagram, all gleaming surfaces and artfully placed lemons. But a real kitchen isn’t just for looking at. It’s for living in – and cooking in, day after day.
So instead of starting with how you want it to look, begin with how you actually use it. What do you cook most often? Which tools, pans or ingredients do you reach for without thinking? Where do you prep, stir, wash up, serve?
A great cook’s kitchen is one that’s designed around your routines. That might mean deeper drawers by the hob, spice racks near the prep zone, or storing oils and Maldon Salt right beside the cooker. Layout matters too – especially how your sink, oven and fridge relate to one another in the classic kitchen ‘work triangle’ – and how your different kitchen zones work together.
When all of that flows intuitively, the kitchen becomes a place of calm efficiency – where nothing jars and everything is to hand. (There’s a name for this: kitchen ergonomics. And yes, it really does make cooking feel easier and more enjoyable.)
An efficient, ergonomic kitchen can also be stunningly beautiful. Image: Naked Kitchens
2) Design for the home you actually live in
A lot of ‘dream kitchens’ look beautiful in brochures but wouldn’t work for a moment in real life. They’re designed for photoshoots – vast, empty, and usually staged in showrooms. But your kitchen needs to fit your home, your life, and your cooking habits.
That’s where true bespoke design comes into its own. Whether your kitchen is in a Georgian townhouse, a Victorian terrace or a 1930s semi, a made-to-measure approach can make every inch work harder – and look better. We take awkward corners, chimney breasts, low ceilings or uneven floors and turn them into assets, not obstacles.
Our designers will often start not with the cabinetry, but with the architectural character of the space – using it to guide layout, proportions, and the finer details. The result is a kitchen that feels not just practical, but beautifully in tune with its surroundings.
A bespoke pantry cupboard can be designed for what and how you cook. Image: Naked Kitchens
3) Go for bespoke and beautiful kitchen storage
There’s something wonderfully reassuring about a well-organised kitchen – where dry goods, herbs and oils are always within reach, and everything has its place. That’s why we design bespoke storage that’s not just practical, but pleasing to look at and use.
Take the classic pantry or larder cupboard: a mainstay of traditional kitchens, it’s the ideal place to store everything from pulses to preserves, spice jars to Maldon Salt. We can build yours to suit exactly what you cook with, how you store food, and how you like to move around the space.
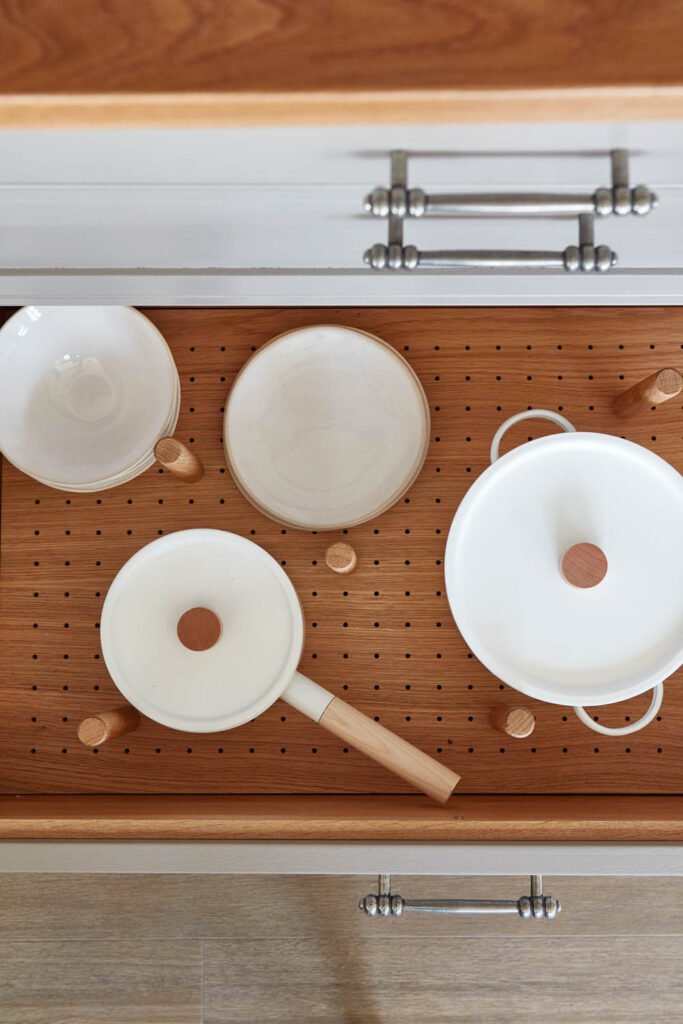
Traditional joinery details – like dovetailed drawers, framed doors and classic shelving – don’t just look beautiful, they also help the kitchen feel calm, composed and built to last. And whether it’s a walk-in pantry, a butler’s cupboard, or pegboard drawers for pans, these storage features are designed to make cooking easier and more joyful.
A bespoke pegboard kitchen drawer: no more fighting to dig out your pots and pans. Image: Naked Kitchens
4) Choose timeless, quality materials that will stand the test of time
A proper cook’s kitchen takes a beating – all that chopping, stirring, boiling, baking, plate-stacking, drawer-opening and fridge-foraging. That’s why materials matter.
High-quality timber cabinets in oak or walnut veneer finishes, and worktops of solid timber, quartz or marble are great investments for the long term, while hand-finished drawers and precision-made doors with well-made handles will survive all that endless opening and closing.
Every home cook has their quirks, preferences and rituals – and a kitchen should reflect that. From the colour of your cabinets to the type of handles you choose, every detail is an opportunity to express your style.
Don’t be afraid to think outside the box: for example, traditional styles can be bold and unique. A Shaker kitchen in a strong heritage colour, paired with brass taps or patterned tiles, can feel just as expressive as a contemporary space. The trick is to combine lasting elegance with thoughtful details – perhaps a deep Belfast sink or a freestanding painted pantry cupboard.
These elements give the kitchen depth and narrative – a sense that it belongs to you, and to the house it’s in. It’s why so many of our clients mix classic styling with their own distinctive twist. (For more tips on style, check out Choosing colours for your kitchen – an expert guide.)
6) Make room for a touch of magic
Finally, every kitchen deserves a moment of joy – an unexpected bespoke feature that lifts your spirits whenever you see it.
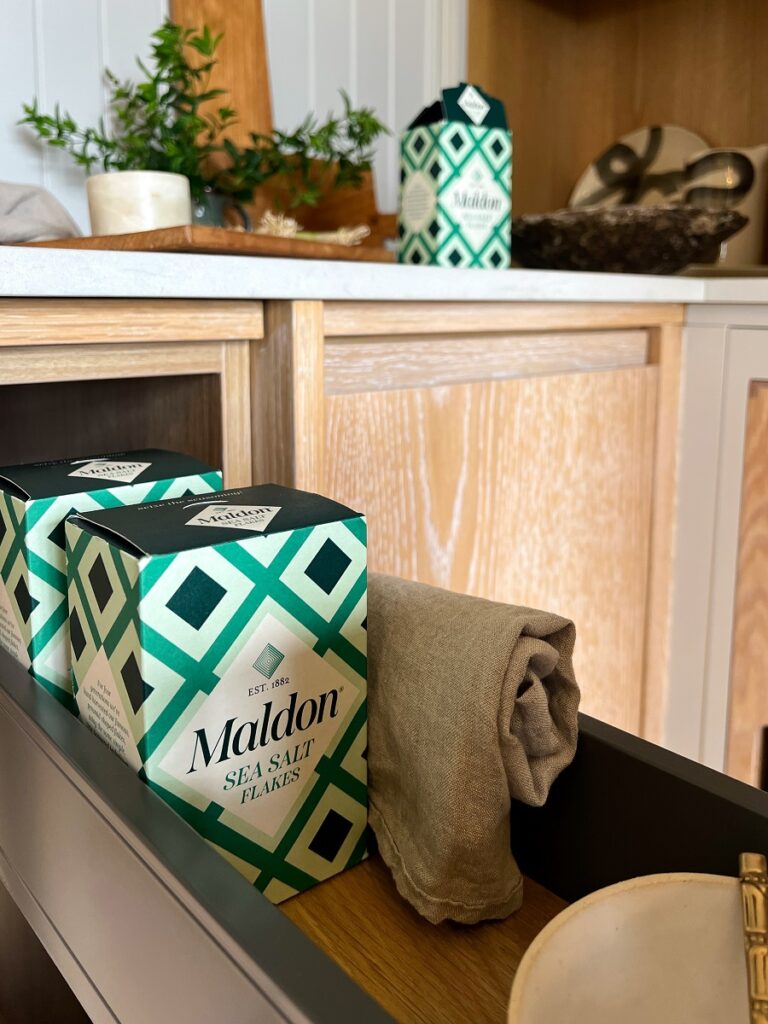
It might be a secret spice drawer, a mirrored bar cabinet, a built-in coffee nook, or even a dedicated drawer for your favourite salt! Some of our most-loved kitchens include ingenious personal touches that feel indulgent and a little bit playful.
Bespoke design makes room for these moments. So whether your dream feature is a breakfast pantry, a wine fridge disguised as a dresser, or a pull-out table for rolling pastry – let’s build it in!
A bespoke pull-out drawer just for your Maldon Salt? Why not?… Image: Naked Kitchens
Naked Kitchens make beautiful, bespoke, bomb-proof kitchens which, thanks to their unique combination of British craftsmanship and cutting-edge automation, don’t cost the earth. They can custom-make the cook’s kitchen you dream about: any size, any space, any design; and built for life.
Extracted from The Farm Table by Julius Roberts (Ebury Press, £27) Photography by Elena Heatherwick
In this month’s cookbook club series with Penguin Books, we grab wellington boots and head over to the farm as we get to know more about Julius Roberts and the release of his debut cookbook, The Farm Table.
Julius Roberts is a first-generation farmer and restaurant trained chef, who lives and runs his own family smallholding in Dorset. His mission is to become self-sufficient, whilst cultivating the finest, freshest ingredients and use them within his cooking to make the very best foods.
The journey first began when Julius started working at Noble Rot, where for 8 months he learnt everything you could possibly know about cooking. It is here that Julius found a respect for quality ingredients and how they can completely transform any dishes when used. Soaking up all the knowledge and skills, Julius left the chef industry to begin a adventure into self-sufficiency, where he started a smallholding in Dorset and is now fully fledged along with the many animals he keeps.
It is through Julius’ appreciation for quality, fresh ingredients on the farm that’s allowed him to create his debut cookbook: The Farm Table. Utterly heart-warming and comforting, the recipes in the book are organised by season, cooking and eating your way to the good life with simple, fuss-free dishes.
The book begins with winter, with recipes including roast pumpkin and a hearty sausage strew. Spring introduces refreshing dishes of baked fish and herbs, and a roasted chicken, paired with lemon, fennel and potatoes. As things start to get warmer, Summer brings a colourful plate of courgette pasta and a deliciously sweet apricot sponge. Finishing with Autumn, you are greeted with warming dishes of smoked haddock and baked rarebit.
The passion about seasonality and quality ingredients runs deep throughout the cookbook, where unfussy home cooking is brought to it’s very best.
Extracted from The Farm Table by Julius Roberts (Ebury Press, £27) Photography by Elena Heatherwick
In Conversation with Julius Roberts…
Julius, HUGE congratulations on the launch of your book! What inspired you to write a cookbook set over the course of a year on the farm?
Thank you! The book is set across a year because I really wanted to emphasise the importance of seasonality. The flow of the seasons and weather entirely dictate my day to day life and inspire the food I’m eating. If it’s freezing and miserable, I cook something nourishing and comforting, in the fierce heat of summer on a day of hay making, I’ll make something light and refreshing. So in a world where we’re getting less and less connected to the natural world, I thought setting the food in the seasons and really telling that story of a year on the farm would help people understand why we eat what we do when, and encourage them to reconnect to mother nature via the food on their plate.
Out of all the seasonal chapters within the book, what season is your favourite to cook in?
While I’m very much a sun lover, I think it’s in the colder months that I do my best cooking. When the weather begins to really take its toll, you need the nourishment and warmth that a stew or pie can bring. Wet, cold and rosy cheeked after a day of sheep husbandry in the elements, is there a better feeling than coming back to the warmth of a fire with a brothy stew gently simmering on the stove and wafting through the house. The autumn and winter chapters have some staggeringly delicious cooking.
Extracted from The Farm Table by Julius Roberts (Ebury Press, £27) Photography by Elena Heatherwick
Would you say your past skills and experience as a restaurant trained chef has helped you in becoming a first-generation farmer?
They’re very different worlds, but I think my appreciation for quality ingredients and the seasons started in the restaurant and that fuelled my journey into farming. The skills and techniques I learnt during my time in restaurants also equipped me with know-how to make the most of, appreciate and take utter joy in the incredible produce we grow on the farm.
What would be your top tips for someone wanting to get into farming?
Just go for it. I have a favourite quote. You don’t have to be great to start, but you do have to start to be great. I jumped in head first at the deep end with no knowledge of farming whatsoever. Bought pigs, chickens, goats and dug a veg patch with very little understanding of what to do next. My journey has been one of many failures, learning through tough knocks and hard won lessons. And personally, I find learning by doing an utter joy, it’s always the hardest failures that teach you the most.
Tell us Julius, what does a typical day in the life look like for you?
That varies massively from season to season. In Spring, my focus is on lambing, I’m out checking the sheep late into the night with a headtorch and up early to be there for any Ewes that have trouble giving birth, any spare time I’m planting seeds in the greenhouse and getting the veg patch ready for a busy growing season ahead! Summer is much more relaxed and I get to enjoy the hard work that went on in spring, the veg patch is exploding with a bounty of produce and the fields are tall meadows rich with wildflower and alive with the sound of calling lambs and kids. We make a lot of hay which is a big job, but generally summer is a pretty peaceful season on our smallholding. Autumn is a busy time, where we make the most of the growing weather before the cold dark, days of winter begin. I spend a lot of time pickling and preserving, making jams, sauces and all sorts. We have a gazillion apple trees and take wheelbarrows of apples to the animals, who we rotate a lot through the fields at this time to maximise the last months of good grass. Then winter is a much slower period, it’s when my animals need me most and I spend a lot of time taking hay and feed to them each day, but other than that it’s a time of hibernation and very good cooking.
Your ultimate comfort-food dish?!
I really love a chicken pie. I gently poach a whole really good quality chicken, then break it down and combine it with slow cooked veg and smoked bacon. Make a creamy sauce from the broth with mustard and tarragon, then bake the whole thing in a flaky buttery crust studded with fennel seeds and salt. Utter heaven. If I never need help on job that none of use love, like cleaning out the chicken coop or mucking out a barn, this is what I make my brothers to persuade them.
Name three things in the kitchen that you simply can’t live without!
A really good sharp knife, lemons and proper salt…
Slow-Roast Crispy Pork Belly Recipe
Extracted from The Farm Table by Julius Roberts (Ebury Press, £27) Photography by Elena Heatherwick
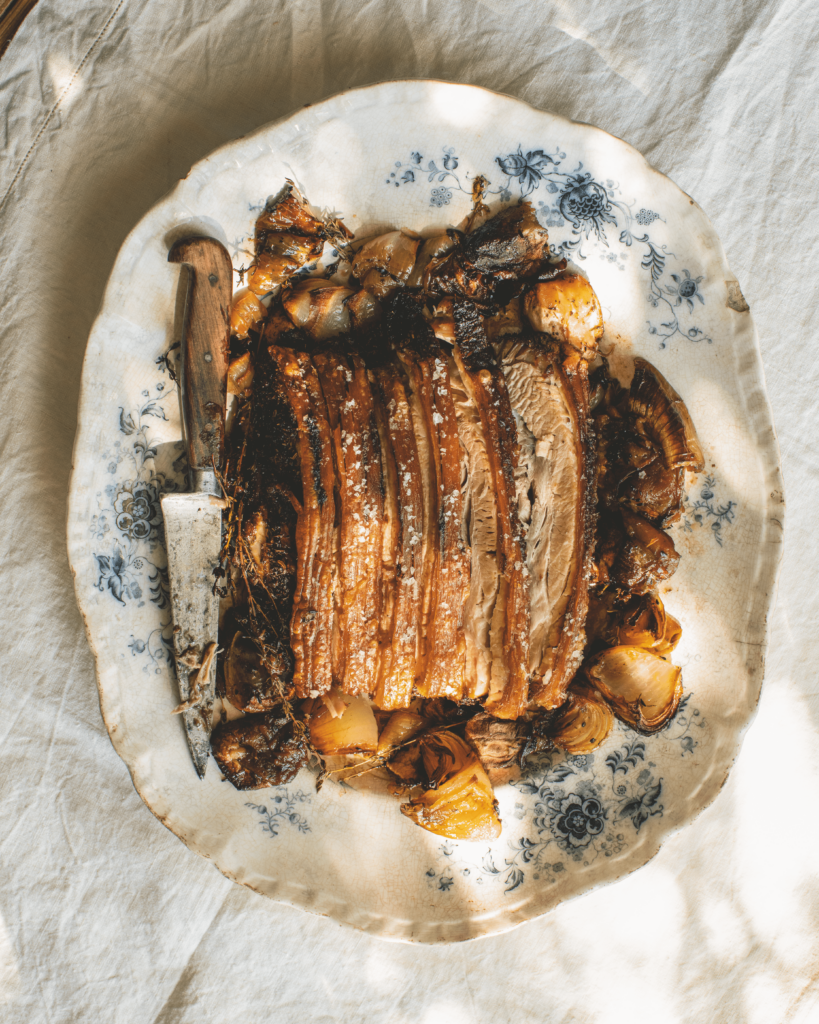
A slow-roasted, crispy-skinned pork belly is one of the finest mouthfuls there is. Rich in flavour with a melt-in-the-mouth texture and crunchy crackling, it is a truly exceptional roast. Here are the tools to achieve beautifully crisp crackling and the juiciest meat – you need to start the recipe the night before, but it is the drying overnight in the fridge that achieves that heavenly salty crunch.
Julius loves this dish with a generous spoon of mustard mash and some lemony purple sprouting broccoli, but you can enjoy with any of your favourite sides.
Serves: 6 people
Ingredients:
1.5kg pork belly, skin on
2-3 cooking apples
3 large brown onions
A few sprigs of fresh thyme
A glass of cider or white wine
For the marinade:
1 1/2 tbsp sea salt
1 tbsp fennel seeds
1 tbsp dried oregano
1 tbsp dried thyme
Method:
Place the pork on a wire rack in the sink. Boil a full kettle, then pour the boiling water over the pork skin – this scalds the pork and tightens the skin, which helps create amazing crackling.
Pat dry with a tea towel, then with a craft knife, or a similarly sharp paring knife or razor, score the pork skin from edge to edge in line 1cm apart. Don’t be tempted to do diagonals, as this causes the crackling to break when carving. The aim here is to carefully score the skin down to the fat below, but do not go through to the meat, otherwise liquid will escape from the meat when cooking and ruin the crispness of the crackling. It is surprisingly tricky scoring the skin well without piercing through to the meat, so take your time. You can usually ask your butcher to do this for you,
In a pestle and mortar, roughly bash the ingredients for the marinade together, then rub this all over the underside and sides of the pork, but leave the skin unsalted. Make sure the skin is properly dry, then place on a large plate or tray in the fridge overnight, with room for the pork to breathe. This will dry out the skin ahead of cooking the next day.
The next day, remove the pork from the fridge and preheat your oven to 240c Fan – as high as it’ll go, essentially. Place the pork on a baking tray lined with baking parchment and pat the skin dry one last time before generously seasoning with flaky sea salt. You want to really massage it into all those nooks and crannies created by the scoring.
Put the tray in the middle of your oven and roast for 24 minutes – 1 hour, until the skin is puffed and crackling, but keep a careful eye, rotating the tray if needs be and ensuring that it doesn’t burn. Remove from the oven and turn the heat right down to 160C. Fan.
Peel the apples and cut into quarters, then remove the cores. Halve the onions, remove the skins and again cut into quarters or even eighths. Lift up the pork and evenly spread the apples, onions and thyme sprigs in the tray, season well and stir through the juices, then pour in the cider and place the pork back on top. Put the tray back in the oven at 160C Fan for 2 1/2 hours, by which time the pork should be supremely tender, the skin crisp and the apple and onion molten and tender.
Turn the oven off, open the door and leave the pork in there to stay warm while it rests for 15 minutes. Spend this time getting your sides piping hot. Then remove the pork, slice and serve with lots of the lovely apple and onion.
Want to create a recipe from this book?!
Extracted from The Farm Table by Julius Roberts (Ebury Press, £27) Photography by Elena Heatherwick
You can find where to purchase Julius’ NEW cookbook here and start whipping up fuss-free, comforting dishes for your friends and family.
Make sure you have your Maldon Salt ready for these recipes! If you are running out, please feel free to browse on our Where to Buy Page to find your nearest store in which stocks our beloved Maldon Salt.
Lastly, we LOVE seeing your creations – please tag us on Instagram using the #maldonsalt so we can share your own take on Julius’ recipes!
This article will be exploring all things kimchi and understanding the fermentation process behind it.
We first delve into what kimchi is and the history behind the dish, before looking into how you can serve it with different dishes.
After that, we take a look at the science of kimchi, understanding the fermentation process involved to make the dish and the chemical processes that occur. With belly’s sure to be rumbling, we finish off by catching up with the talented Chef Judy Joo, where we share her incredibly tasty pogi kimchi recipe, (cabbage kimchi), and demonstrate her methods of making the much-loved dish.
What is kimchi?
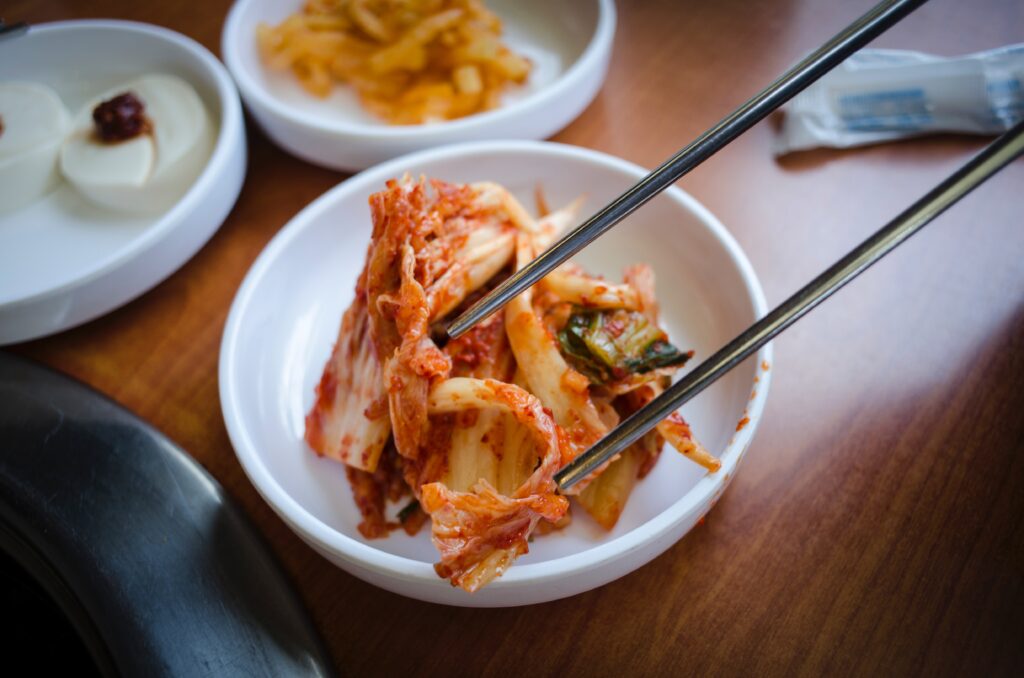
Kimchi is a traditional, fermented vegetable condiment for many Korean households, and has been for generations. The original name for kimchi was ‘chimchae’, which translates to ‘salted vegetables’. The origin of the dish began over 3,000 years ago, where Korean ancestors salted and fermented their vegetables to keep during the cold winter months, obtaining a balance between health and nutrition.
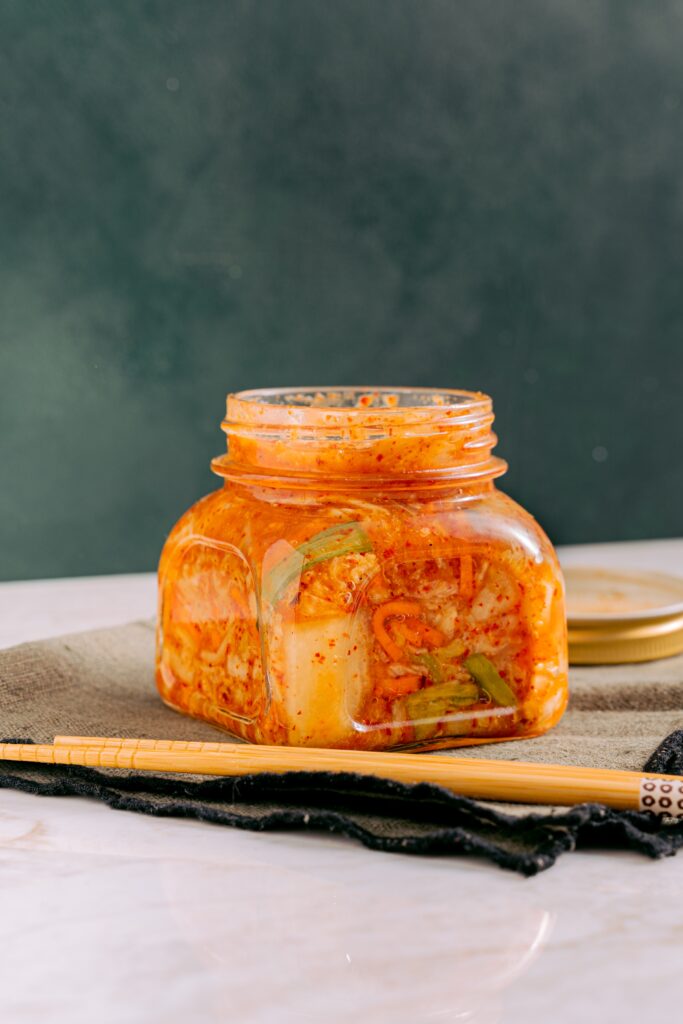
The dish has a complex flavour profile comprising of vegetables, such as napa cabbage, and the unique paste that you make from Korean red pepper powder (gochujangyong gochugaru), garlic, ginger, chilli, salt and fish sauce. This leaves a strikingly rich, red colour that has become kimchi’s signature.
You then slather the paste into the vegetables to make the kimchi. Although cabbage is the most popular vegetable to use, you can also include carrots, radishes and scallions which are all frequently used, depending on the region and season in which they are produced.
The taste of the mixture, once pickled and fermented, can vary depending on the ingredients used, but the dish generally has a spicy, sour and almost tangy taste to it. Generally, the longer you let the paste ferment in the fridge, the flavour will get deeper and intense.
Kimchi uses
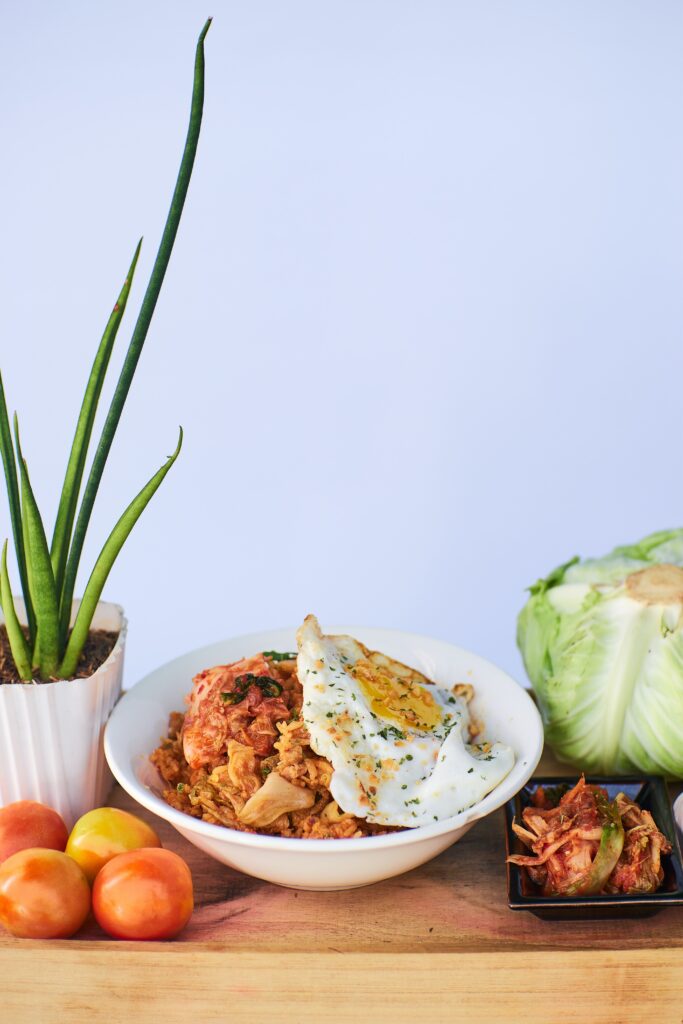
In Korean culture, kimchi can be served with every meal. For breakfast, it is usually paired with rice. Kimchi bokkeumbap (fried rice) is one of the post popular ways to enjoy kimchi in Korea.
The options are endless when serving kimchi for lunch and dinner, but kimchi jjigae (kimchi stew) is a staple in Korea. It’s a combination of kimchi, tofu and juicy pork, with each ingredients slowly melting in your mouth to create the ultimate flavour sensation.
The process of making kimchi involves brining (salting) the vegetable mix to draw out the water content. This helps to preserve the ingredients and help the seasonings to penetrate and seep into the food over time. We recommend using Maldon sea salt flakes to provide the ideal concentration, which is a range between 2-5% to create the perfect kimchi.
Organic lactic acid, produced by the bacteria during fermentation of the vegetables, creates the optimum PH of 4.2 for kimchi to obtain it’s delicious and unique flavour that we all know and love.
The process can only occur when a salty and oxygen-free environment is successful. To put it simply, mix vegetables and salt together and put them in a air-tight container/jar.
The fermentation process of kimchi is considerably short in comparison to other fermented-based dishes such as sauerkraut. Kimchi can easily ferment at room temperature for 2-3 days, whereas sauerkraut would need to ferment for about 3-4 weeks!
Chef Judy Joo
Judy Joo is a talented Korean-American chef, restaurateur and author of two best-selling cookery books, as well as being featured in Forbes Travel Guide, National Geographic and The Guardian. Considered as being the leading expert in Korean cooking for the West, Judy showcases Korea’s cuisine in many distinctive and vibrant flavours, sharing her heritage throughout the dishes she creates.
From moving to London, Judy has shared her talent and skillset in an impressive selection of restaurants, including Restaurant Gordon Ramsay, Claridge’s and Boxwood Café. Today, she is admired by many for battling her way through the food industry and encouraging people to live outside of their comfort zone.
Cabbage Kimchi Recipe (Pogi Kimchi)
Judy reassures us that although kimchi may look daunting, the recipe is very straightforward! You only need to have one/two large bowls for the brining of the cabbage and large container to ferment it in. She does recommend that you wear plastic or latex gloves when smearing the paste onto the cabbage leaves to avoid them feeling a little tingly and potentially staining your hands (only temporally!).
Serves: 4.5 litres (8 pints)
Ingredients:
2 litres (3 1⁄2 pints) warm water
225 g (8 oz) coarse sea salt (we recommend Maldon Salt)
1 very large Korean cabbage or several heads Chinese cabbage (2.2–2.7 kg/5–6 lb total), bottom(s) trimmed, wilted and tough outer leaves discarded and rinsed well
In a large bowl, stir together the warm water and 115 g (4 oz) of the salt until the salt has dissolved; let the salted water cool. Meanwhile, partially cut the cabbage(s) in half lengthways, starting from the root end and cutting about halfway to the top. Using your hands, pull the cabbage(s) apart to split in half completely. Repeat so that each half is halved in the same way, which keeps the leaves intact and whole.
Loosen the leaves of each wedge so that they are easy to spread. Sprinkle the remaining 115 g (4 oz) salt over and between all the leaves, salting the core area more heavily. Put the cabbage into a large bowl (use two if they don’t fit) cut-side up. Pour the cooled salted water over the cabbage, then pour enough cold water into the bowl to cover the cabbage; don’t overfill the bowl, as some liquid will be drawn out of the cabbage. Weigh down the cabbage with a plate so the wedges are completely immersed. Leave at room temperature for 6–8 hours, flipping the wedges halfway through.
Rinse the wedges well under cold running water and gently squeeze out any excess moisture. Put the wedges, cut-side down, in a colander and leave to drain for at least 30 minutes.
Meanwhile, in a small saucepan, combine the onions, mushrooms, anchovies, spring onions, the 8 crushed garlic cloves and the kelp and bring to the boil over a high heat. Reduce the heat to maintain a simmer for 20 minutes. Strain the liquid, discarding the solids and leave the anchovy stock to cool completely.
When the stock has cooled, in a food processor, combine the remaining garlic cloves, chilli flakes, fish sauce, salted shrimp, sugar and ginger and process until smooth. Add enough of the stock to make a smooth paste, about 475 ml (16 fl oz) total. Discard any remaining stock. Transfer the spice paste to a large bowl and stir in the carrots, spring onions and radish.
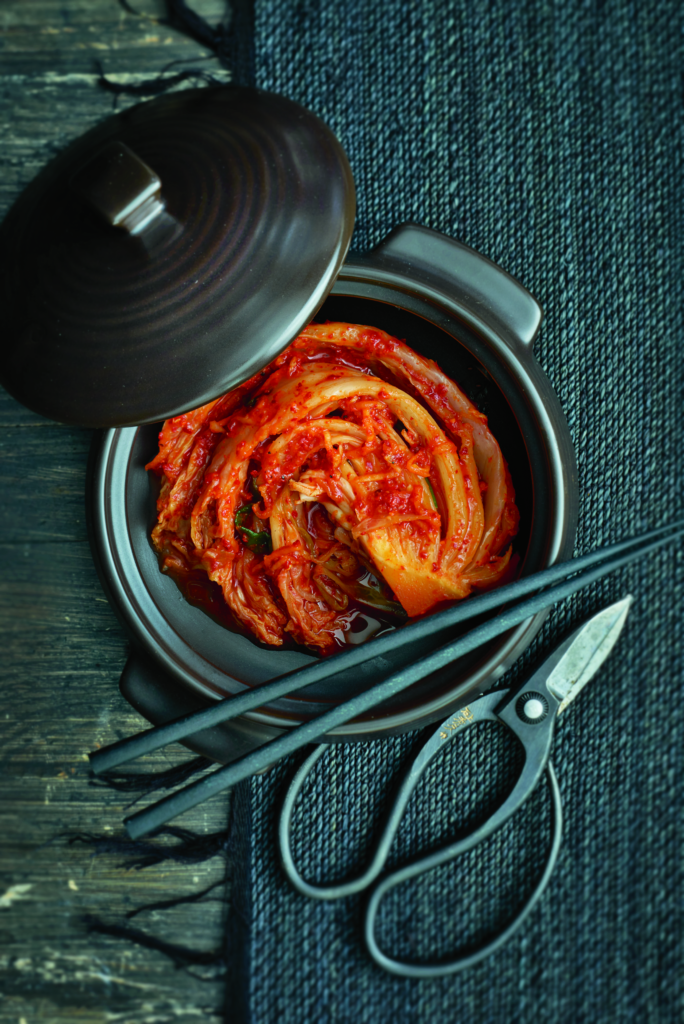
Rub the spice paste all over the cabbage wedges and between each leaf. Pull the outermost leaf of each wedge tightly over the rest of the wedge, forming a tidy parcel. Pack the wedges into one or more glass or other non-reactive containers with a tight-fitting lid (see Tip, below). Press a piece of clingfilm directly on the surface of the kimchi, then cover. The kimchi can be eaten at this young stage or after it sits at room temperature and starts to get sour and ‘bubble’, about 2–3 days. Store the kimchi in the fridge, where it will continue to ferment at a slower pace. I like to age mine at least 2 weeks, but it really is up to preference. Cut the kimchi before serving.
This article has explored the unique history of kimchi and understanding the fermentation process behind it. Judy Joo’s tasty cabbage kimchi is a perfect example of how straightforward the dish is to make, with her recommendations on how to store the recipe before serving.
Make sure you have your Maldon Salt ready when making kimchi! If you are running out, please feel free to browse on our Where to Buy Page to find your nearest store in which stocks our beloved Maldon Salt.
Lastly, we LOVE seeing your creations – please tag us on Instagram using the #maldonsalt so we can share your own kimchi creations!
What could be more warming than a humble slice of apple crumble?
This recipe is made by @mushypeaz, where a generous glug of Graza “Sizzle” Extra Virgin Olive Oil is used to incorporate the dry ingredients and create that crumble-like texture that we all know and love. Plus, a good EVOO like “Sizzle” adds a wonderful, nuanced flavour to the baked dish, keeping the ‘crumb’ deliciously moist and not dry.
For a little extra crunch and flavour, add a pinch of Maldon Salt. The sea salt flakes gives balance to the dish, elevating the sweetness and counteracting the bitter tones.
When looking for a final topping, add a swirl of Graza “Drizzle” Extra Virgin Olive Oil to your ice cream scope. The EVOO not only allows the ice cream to hold a perfect silky and smooth texture, but also adds depth to the dish, creating a complex flavour profile.
Here is how to make the Olive Oil Apple Crumble…
Peel 1½ pound apples and slice thinly.
Preheat your oven to 350 F.
In a large bowl, mix apples, ¼ cup brown sugar, 1 tbsp flour, 1 tsp vanilla extract, a pinch of cinnamon, and a pinch of salt until well combined.
Add the apple mix to a 2 quart baking dish.
To make the crumble, thoroughly mix 1¼ cup flour, ⅔ cup brown sugar, ¼ cup pecans or walnuts, 1¼ tsp baking powder, and 1 tsp kosher salt in a medium bowl.
Squeeze in ½ cup of Sizzle and mix gently until dry ingredients are just incorporated. Make sure not to over-mix to maintain big clumps of crumble!
Evenly distribute crumble mixture over apples and dust with a tbsp or so of granulated or turbinado sugar.
Bake for 50-60 minutes until crumble is golden brown and filling is bubbling. Let cool before serving if you can!
Enjoy à la mode with a scoop of ice cream, a big swirl of Drizzle, and a pinch of Maldon Salt.
Where Can You Buy Graza “Sizzle” and “Drizzle” Extra Virgin Olive Oil?
You can purchase Graza’s “Sizzle” and “Drizzle” EVOO directly from their website. You have the option to buy as a one-time purchase, or subscribe & save to have a frequent delivery of EVOO at a lower price – what more could you want!
“Sizzle” is 100% Extra Virgin cooking oil. It’s made from peak season olives that yield a more mellow flavour. Use it every day, in every way.
“Drizzle” is 100% Extra Virgin finishing oil. It’s made from olives that are picked early, when flavour is bold and antioxidants are highest.
This is a super easy dessert recipes that takes on the classic cookie cake. With a serving size for ten people, make sure to grab every spoon that you have in your kitchen and dig in! The perfect communal dessert to share amongst friends and family.
This recipe is made using Graza “Drizzle” Extra Virgin Olive Oil, where EVOO is generously drizzled over the ice cream and cookie base. This helps the ice cream to keep it’s deliciously creamy and smooth texture, whilst adding the subtle flavour notes of olive and pepperiness to the dish.
When topping your ice cream, make sure to add a good pinch of Maldon Salt. This will enhance the sweetness from the cream and counteract the bitter notes from the cacao nibs in the cookie dough.
While still warm, use a spoon or ice cream scoop to remove the center of the *Big Cookie,* turning it into a BIG COOKIE DOUGHNUT. “Save” the part you’ve removed as a chef’s treat!
Squeeze oodles of Drizzle over the ice cream and cookie.
Top with a generous sprinkling of flaky salt (a necessity!) and any other of your favourite ice cream toppings. When in season, we love fresh strawberries and blueberries.
Gather 10 of your favourite people, give them each a spoon and dig in! Enjoy!
Where Can You Buy Graza “Drizzle” Extra Virgin Olive Oil?
You can purchase Graza’s “Drizzle” directly from their website. You have the option to buy as a one-time purchase, or subscribe & save to have a frequent delivery of EVOO at a lower price – what more could you want!
“Drizzle” is 100% Extra Virgin finishing oil. It’s made from olives that are picked early, when flavour is bold and antioxidants are highest.